The Push 2 is a second-generation MIDI controller by Ableton, fashioned after popular drum machines of the ’90s, meant to be an improvement on Push 1. Ableton took what worked from Push 1, and improved upon it, adding new slicker features, removing redundant control triggers, and combining others increasing the utility of Push 2.
Recommended Read: Best Ableton Push Alternatives
Upon my first use, from unboxing to the completion of a session, I felt the difference quite evidently. I touch on what is new in the overview and features session and show you one main addition that I thought took the Push controllers beyond composition and live performance.
I will begin of course, with an unboxing before giving you a feature overview, and then use the feature that I found particularly interesting to me, to provide a demonstration of the Push 2 in use. I will give you my final thoughts and verdict on this device after. For a more updated version, check out my review on the Push 3.
Let us begin!
Unboxing
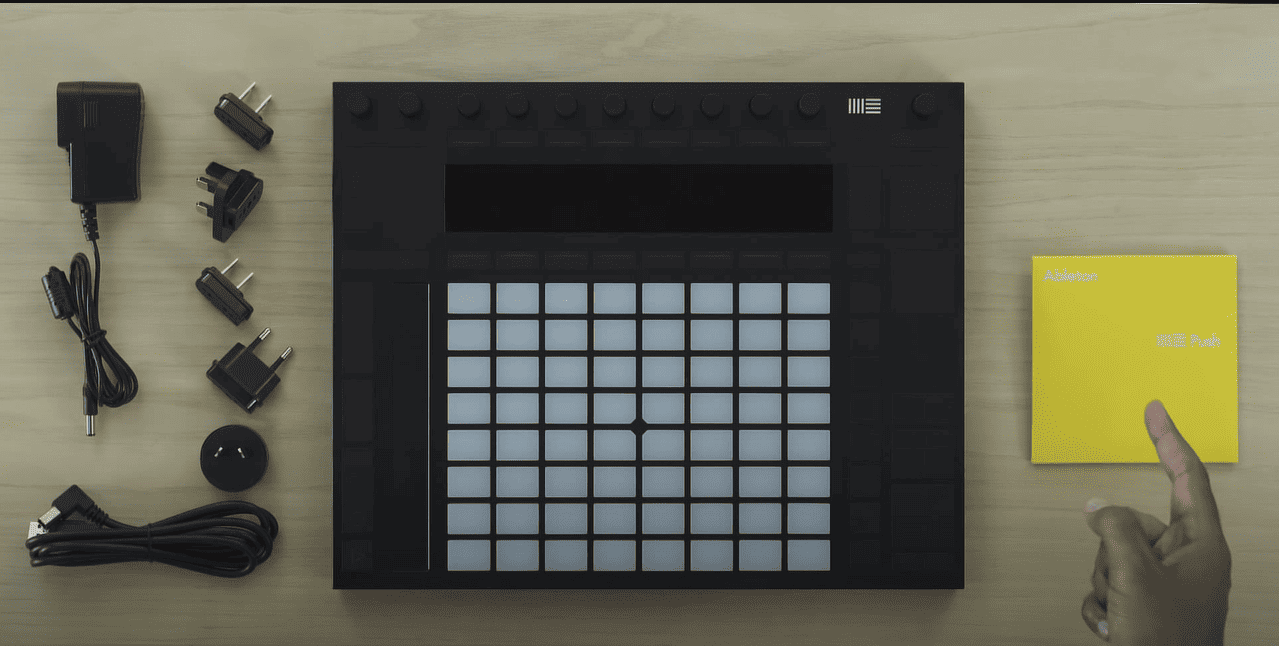
Once you have unwrapped your Push device and laid down all the elements of the box on your workbench, you will see a power cable, 5 different regional adapters, Push 2, a USB connector cable, and an envelope containing the Push 2 user manual.
Setup
Setting up Push 2 works is very similar to Push 1 where you can simply connect it to your computer without drivers for Ableton to read the device. Push 2 can work without the need for a power supply, using the power from your computer through the USB connection, but for more vibrant and dynamic colours on the controls and the display, you will need to connect it to a power supply. To correctly set Push 2 up you will need to:
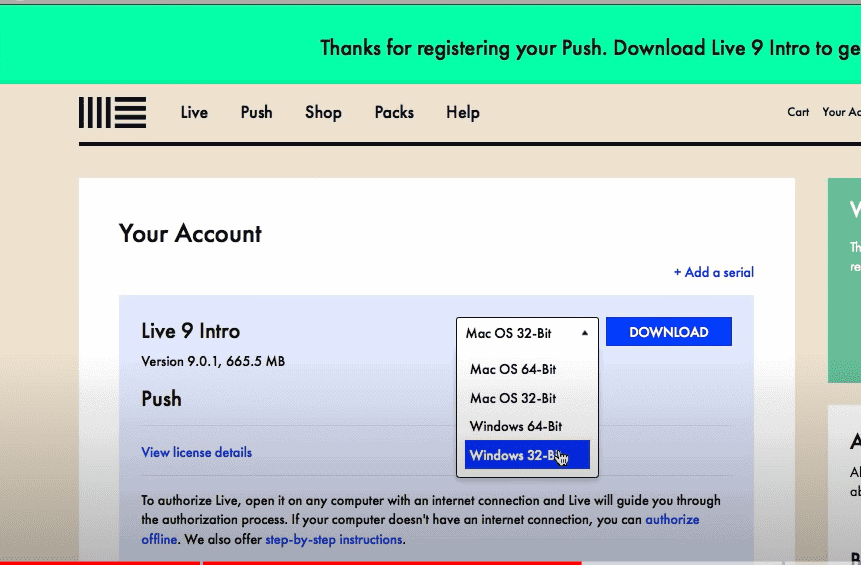
Step 1: Go to the official Ableton website, and log in/sign-up to your Ableton account
Step 2: you will be requested to input your new serial number which is on the cover of the Ableton Push 2 manual.
Step 3: Ableton will then guide you through buying and activating the latest version of Ableton Live software
Features Overview
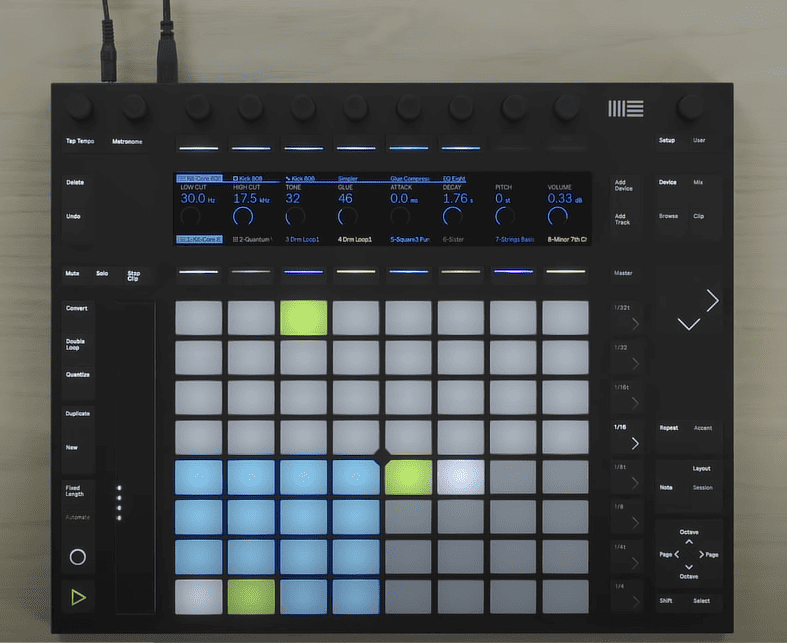
If you were a Push 1 user, you will notice that physically, the differences between Push 1 and 2 are pretty evident. The Push 2 is slightly bigger and slimmer, with a bigger user interface display. You will also notice that some button controls are rearranged, where in some instances some controls that were horizontally arranged are now being vertically arranged, some being moved from the right side to the left or vice versa, others moved up or down, and others have been replaced with new controls that add new features or combine other controls into 1, my favourite feature being the new and improved display being better than the plain orange and black display of the Push 1.
When you touch the drum pads and turn the control knobs, you will notice the smoothness of the controls, the pads feeling smoother to the press, and the knobs turning very smoothly. This adds to the new slick design.
Here is a change log of what is new in Push 2:
- Different colour schemes in the drum and control pads
- Coloured display screen.
- A larger display screen shows more control parameters.
- Track and group colouration display
- Mix button control trigger and mix view.
- More advanced sample workflow options that allow you the in-depth sample editing controls available in Ableton’s Simpler
- 64 pad mode where you can use all 64 drum pads to access more drum sounds.

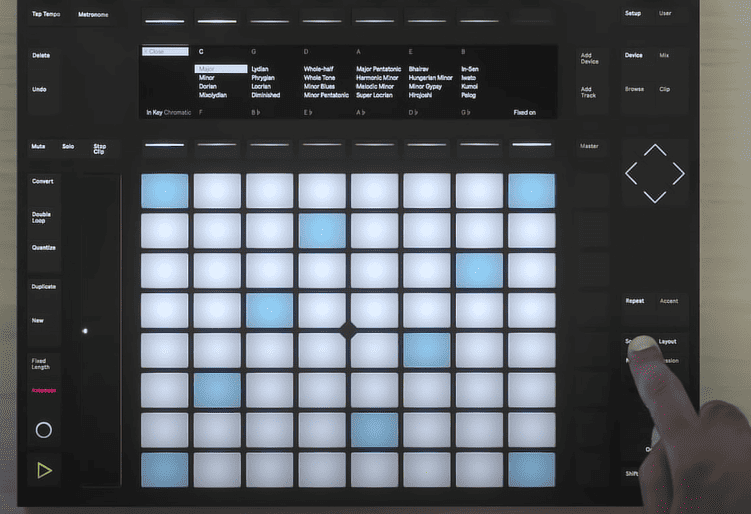
- The scale button allows you to change the scale of the instrument you are playing, and also seamlessly affect the octave of your notes with the new octave control buttons
The mix control and trigger button is my new favourite addition to Push 2. It allows you to mix your session through Push 2, and I will be using this function to demonstrate Push 2 in use.
Push 2 Demonstration
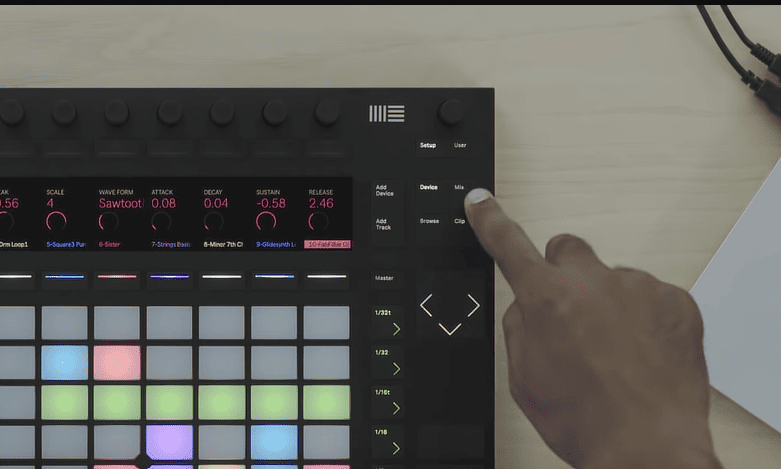
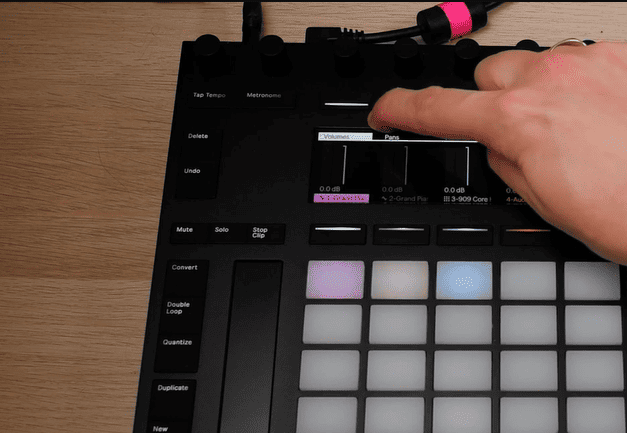
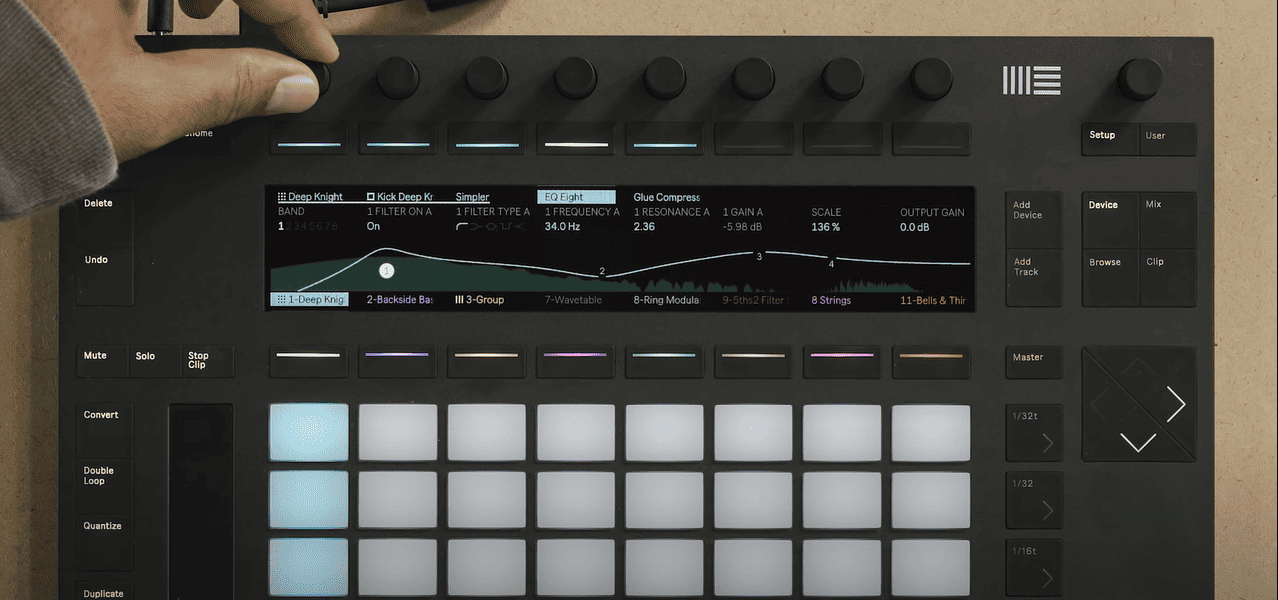
My favourite feature with Push 2 has quickly become the mixing ability. This is because of the new display which allows for a more interactive mixing mode, as you can see above. Using this new display feature, let me demonstrate how you can mix a track on Push 2:
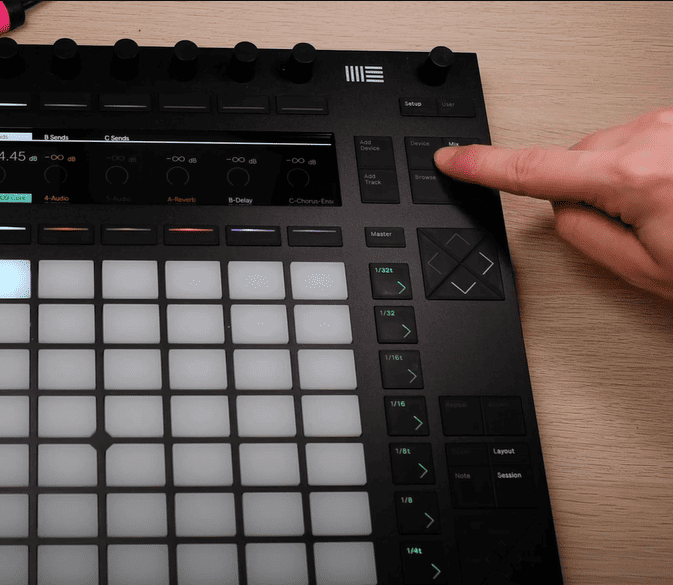
Step 1: go to mix view by pressing the Mix button on the top right of your device.
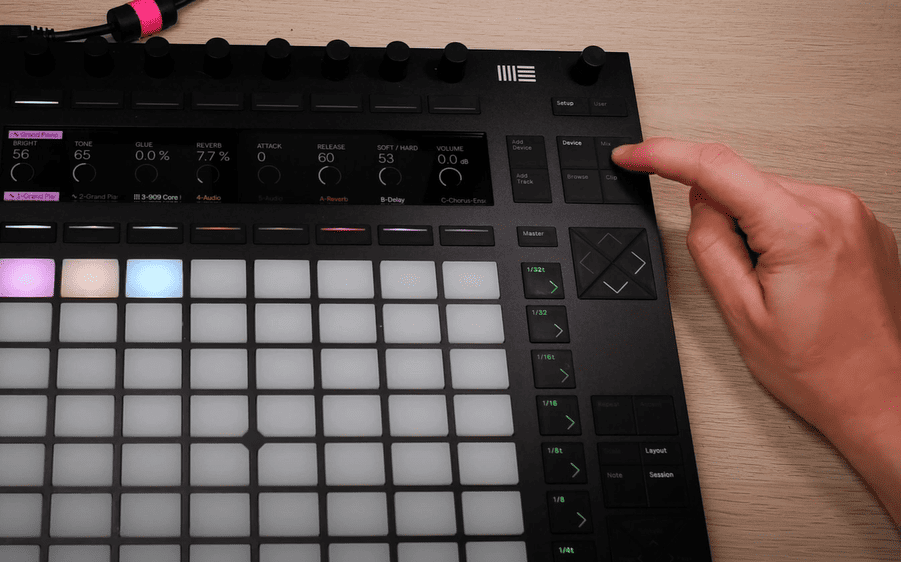
The first thing you will see in this menu is the volume, sends and pan controls that can be accessed by the button above them. You can now use the knobs above these buttons to control specific parameters of these basic mix controls.
Step 2: Press the device button
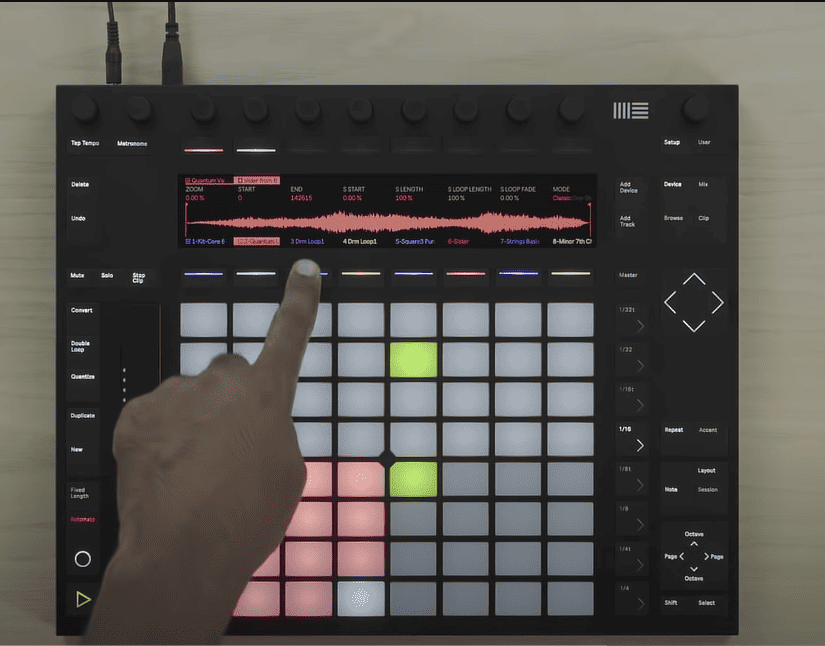
Step 3: Select the track you want to apply an effect on.
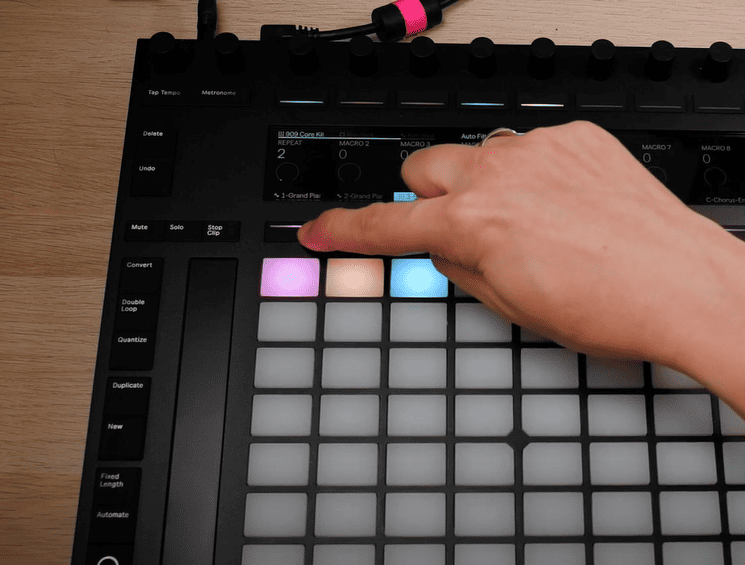
If you already have effects loaded on your track, select the last effect on your track for the next step
Step 4: Select the Add Device button to open your browser from where you can add an effect, use the knob at the top to scroll.
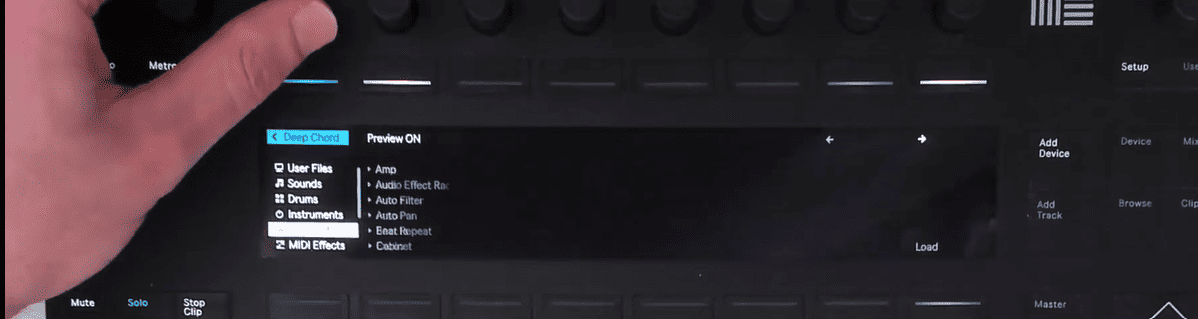
Step 5: load your effect by pressing the load button underneath the display.
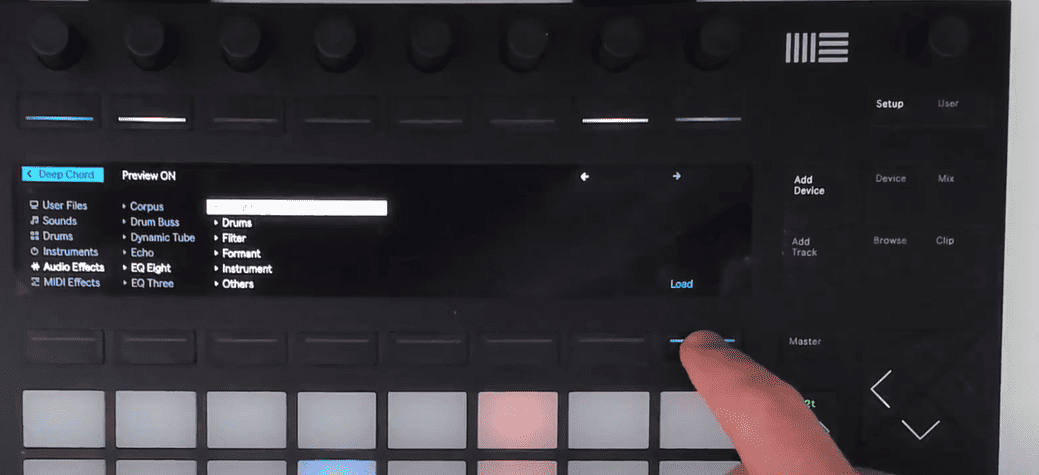
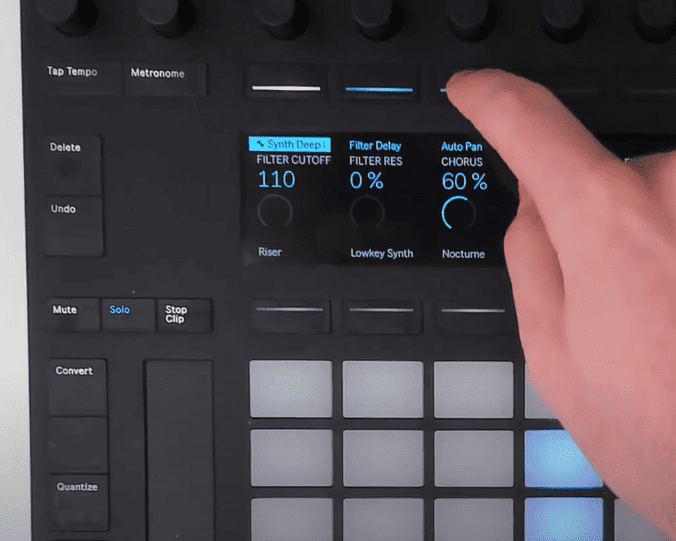
Step 6: Now use the knobs above each parameter to control them
This process works for any effect you load into your track.

This visualization of the new and improved is my favourite feature of Push 2. This is because it allows you to see exactly what you are doing in your session, tracks, groups, and effects. I love this new addition, especially as a producer and mixing engineer. This visualisation adds to the engagement factor beyond composition and live performances.
Final Thoughts and Verdict
After my overview and demonstration, you can see that Push 2 is a step above Push 1 at nearly every function. Push 2 massively improves what 1 accomplished all while adding new utility functions. It is more advanced, but as I have mentioned, the visualization of the user display screen does more than any additional controls could in my opinion.
Being able to see what you are doing and affecting your sound enhances the production process. If you want a more comprehensive comparison between Push 1 and Push 2, stay tuned for this and my upcoming review of the newly released third-generation Push 3. II cannot recommend Push 2 enough to any DJ, producer or music technology engineer. Have fun with it!
- How to Use Ableton Live’s Arpeggiator? - September 18, 2023
- How to Use the Piano Roll in Ableton Live + Shortcuts - September 18, 2023
- Ableton Arrangement View (Optimization & Usage) - September 16, 2023


