There are only two windows in Live each with its use cases – the Session view which is the mixer view, and the Arrangement view which is simply the session view but laid out horizontally. All the channel strip controls remain the same. The difference between these two views is that, in the session view, your clips are aligned vertically, and will play in a loop if you choose this or can be triggered to play the clips in a specific order between clips.
The session view is perfect for Live performance, as it suits what Live originally designed for creating and playing back loops. It is also excellent for demonstrations and educational purposes due to its simplistic, and performance-oriented layout. The session view, however, is limited when it comes to creating complex automation, complex clip editing and arrangement. This is where the arrangement view comes in. The name of this view tells you all about the arrangement view. It is perfect for song arrangements, sound design and sound effects for video production, creating parameter automation and more.
In this tutorial, I will show you how to use the arrangement view, tips and tricks, shortcuts, and optimization techniques that you can use to improve your workflow on Live. The best place to start is how to switch between session and arrangement views.
Let us begin!
Opening Arrangement View
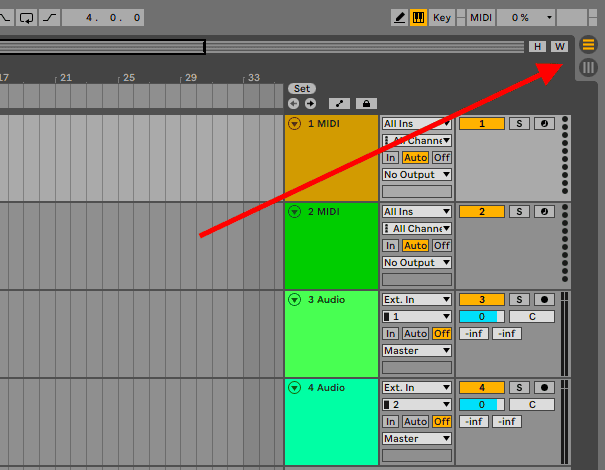
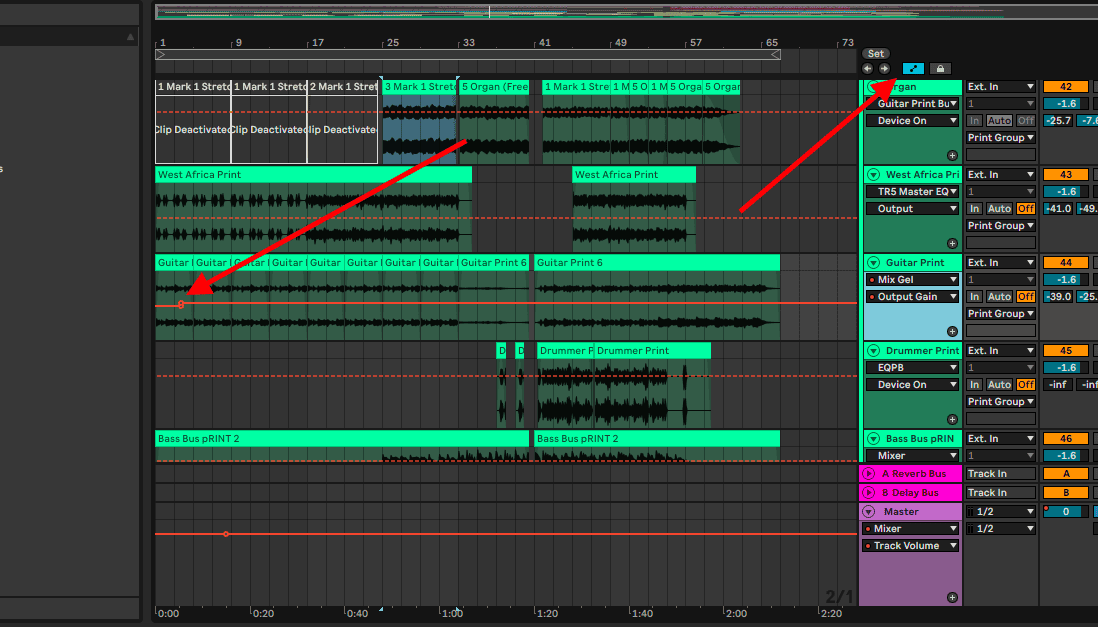
The only way I use and have never stopped using to switch between both views is pressing the Tab key on my keyboard for quickly switch between both views. You can also use the view switch toggle at the top right corner (appropriately labelled). The session view is indicated by three vertical lines to represent the channel strips, and the arrangement view represented by three horizontal lines to signify the arrangement of the clips on your tracks.
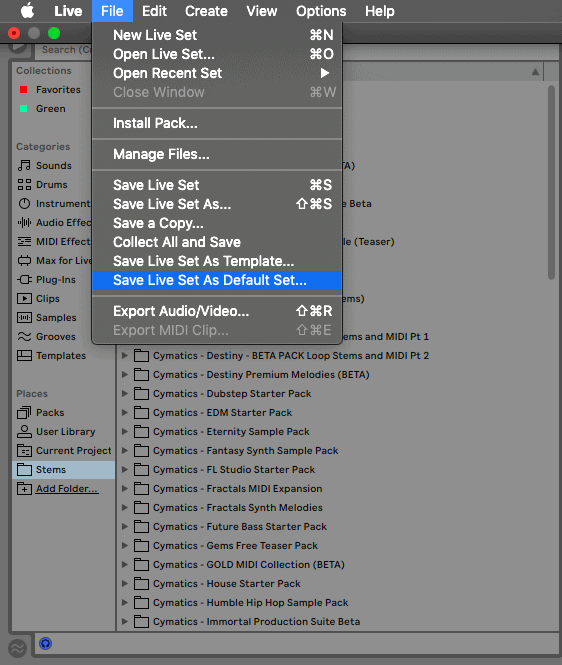
If you want to set Live to always open in the arrangement view, simply go to the arrangement view, and save the live set as the default set, or if you have a production formula when it comes to track types and track numbers, you can save your set as a template that you can use every time you are conducting a similar session, for quick opening and familiarity.
Importing Clips
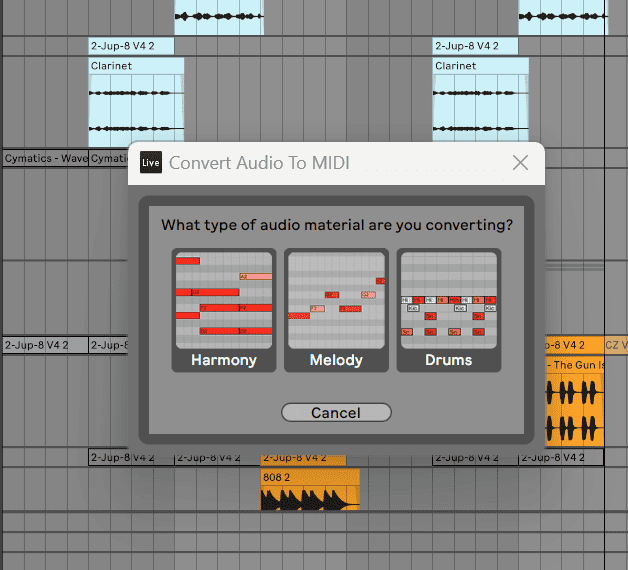
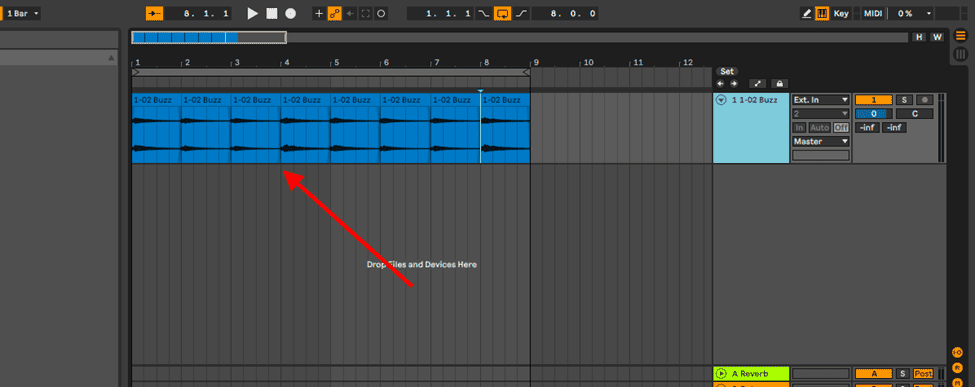
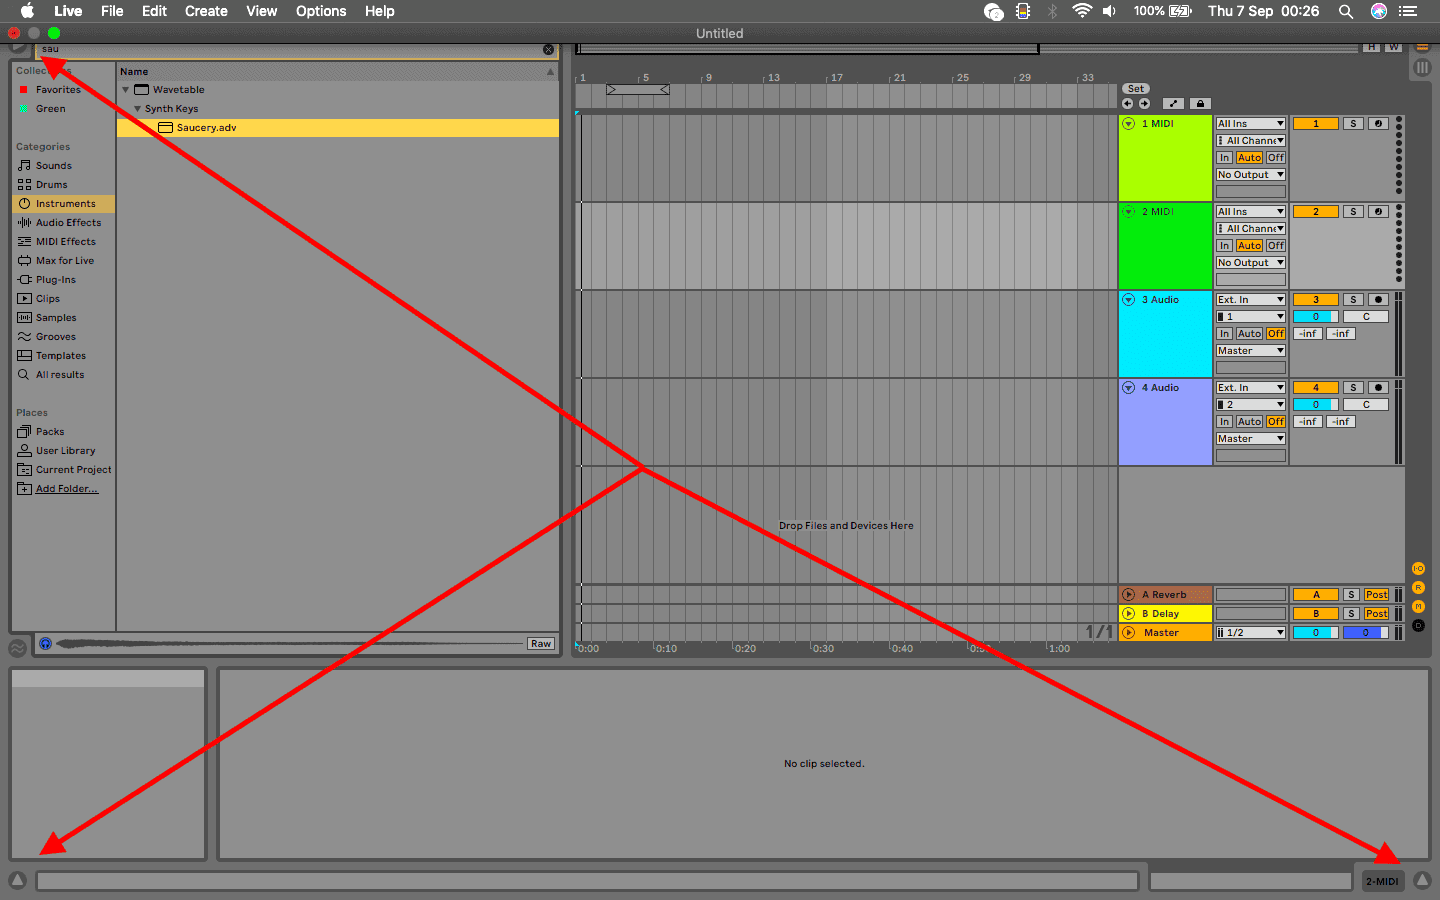
You can import audio and MDI clips from a folder on your computer by simply dragging and dropping them into an appropriate track (audio or MIDI tracks) if you drag and drop an audio clip into a MIDI track with a loaded instrument, Live will ask you whether to convert this audio clips into MIDI, from which you can choose the decoding algorithm type you want Live to decode your audio clip.
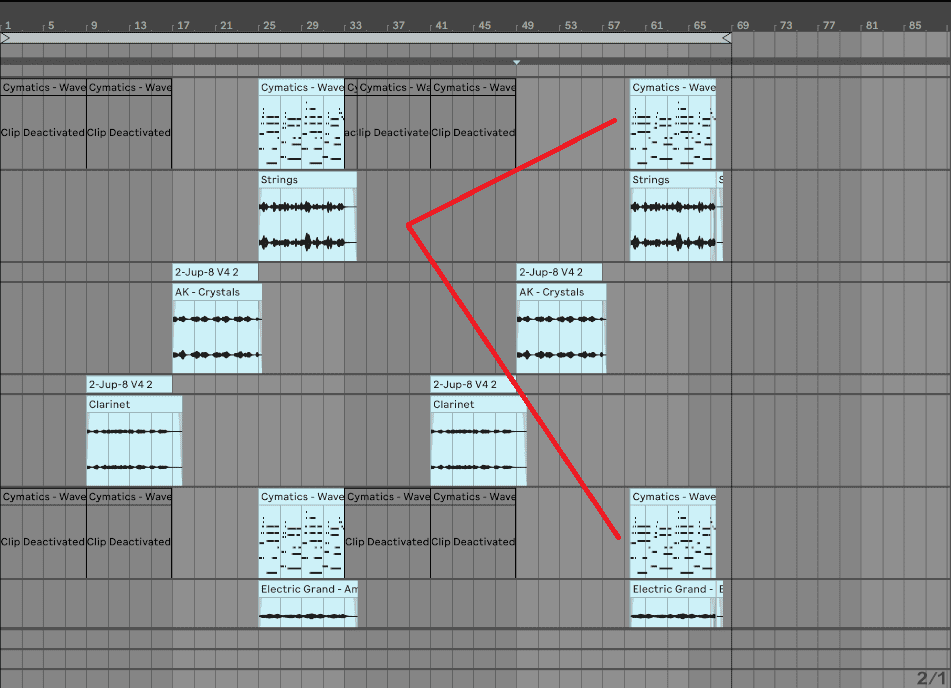
When transferring clips between the session and arrangement view, you can do this by selecting the clip or multiple clips by holding down ctrl on Windows or cmd on MacOS. Select the clip(s) using the left mouse button and hold, and then press the tab button on your keyboard to switch to the arrangement view and drop your clips on the corresponding tracks.
You can also copy MIDI clips by cutting and pasting them into other MIDI clips, or by selecting your clip(s), and holding down ctrl on Windows or cmd on MacOS dropping the clip(s), and then releasing the held key. If you don’t hold down cmd or ctrl, you will move the clip(s) instead of copying them over. I use this coping technique to create, harmonic and melodic layers in my productions.
If you want to know more about importing clips, I cover how to import and export MIDI clips, and audio (MP3 specifically, but the techniques I discuss here are useable with all types of audio clips), and I also provide a troubleshooting tutorial when Live cannot read your imported or video files.
Editing Clips
There are many ways you can edit your clips in the arrangement view. You can cut your audio clips into smaller segments for further editing like reversing your clip or consolidating short clips into longer ones, and when you open your clip your clip editor view, you can change which algorithm Live is using to read your clip, change the pitch of your clip, double or half your clip playback speed among others, but these are the major clip editing techniques you can use in this. Let me discuss them.
Chopping Samples
You can split your clips by first highlighting the length of the clip you want to split, or clicking at a point in the clip, and then pressing ctrl + E on Windows, or cmd + E on MacOS. This technique is especially useful when chopping samples and in arrangement modulation. Check out this tutorial If sampling is a technique you want to learn for your productions.
Consolidating Clips
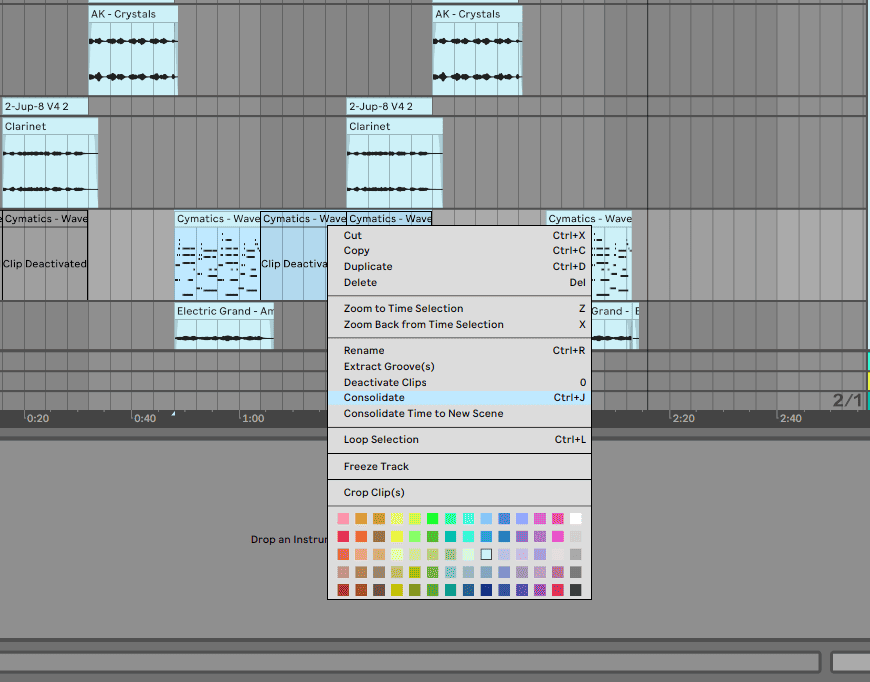
You can also combine shorter clips into one long clip by selecting your short clips, and pressing Cmd + J on MacOS, or Ctrl + J on Windows, or highlighting your desired clips, right-clicking on them with your mouse, and selecting consolidate. This technique is especially useful in creating a neat session and preventing a visual overload. If you want to know more, check out my tutorial on consolidating clips in Ableton.
Reversing Clips
This is a niche technique you will not always use, but I find utility in this technique when creating risers from my audio clips to signal to the listener that a transition between song parts is about to happen or create interesting sounds and sound designs. You can reverse audio clips using the piano roll, or Live’s native sample editors.
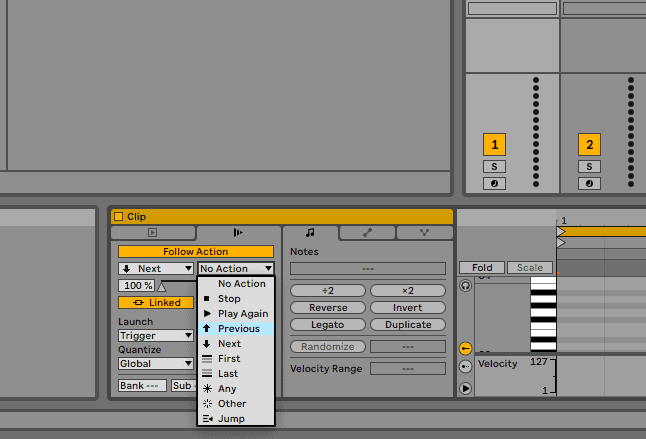
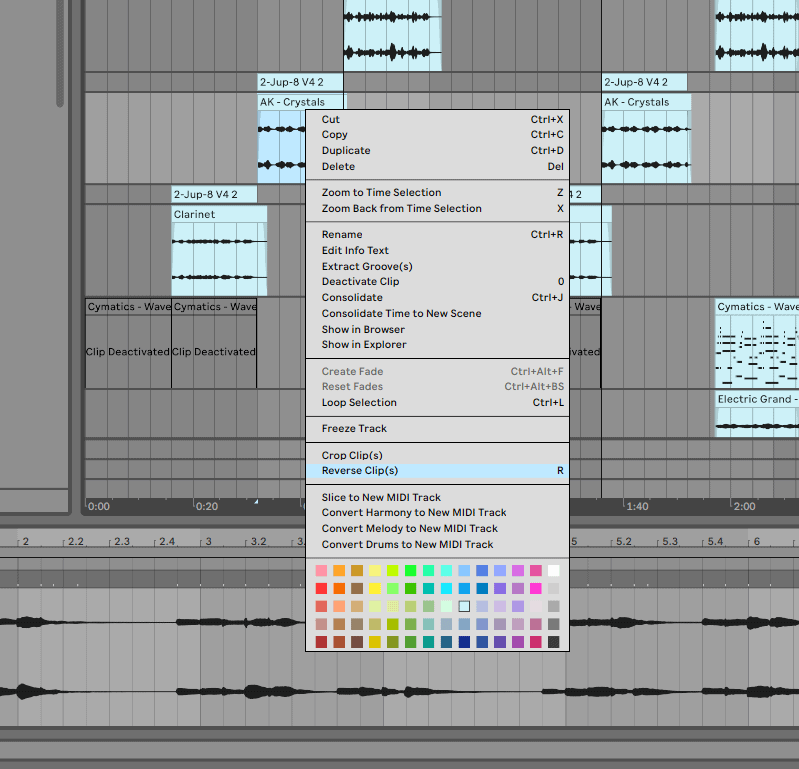
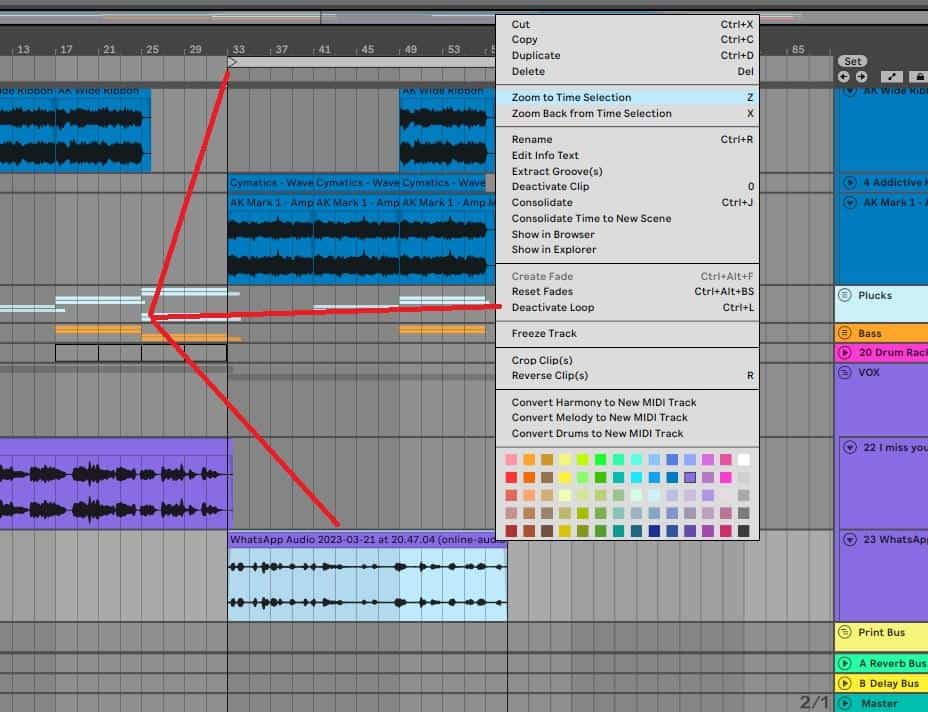
You can reverse audio clips in the arrangement view by selecting your desired clip, right-clicking on it, and selecting reverse clip(s), or simply using pressing the R button on your keyboard as a shortcut.
Creating Automation
Creating automations on Live is so easy, and can be used to create dynamism in your productions. With Live, any parameter on your track that is selectable can be automated, even selectable parameter controls on Live’s native instruments and effects and even crazier, any parameter control on 3rd party plugins! Once you have selected the parameter you want to automate, enable the automation view toggle, and start creating automations.
I have done many tutorials regarding automation, too many to link here, but click around, and you will find a tutorial for any question you may have on this topic!
You may notice that I have not discussed automation, and reversing of MIDI clips. This is because this subject will require me to delve deeper into Live’s piano roll. This is a topic I will cover in the next few weeks, so stay tuned!
Looping
You can keep your session in the loop in the arrangement view. This technique I useful when mixing to see how different sounds are gelling together, how your transition sounds, or listening to your favourite part of your track back. Do this by selecting your clips for the length of your loop, right-clicking on them, and selecting the loop selection option, or by using the shortcut, Ctrl + L on Windows, or Cmd + L on MacOS. This will create a loop section which can be adjusted by the loop length parameters at the top of your screen.
Optimizing the Arrangement View
There are numerous techniques that I use to optimize my workflow and subsequently, my productivity when using the arrangement view. All of these techniques but one is more about sorting out the appearance of your session, to help you compartmentalize an otherwise messy, visually overloading session. Let me give you some of my optimization tips that you can incorporate into your workflow:
Grouping
I always group my tracks, not by the MIDI or audio categorization, but by the sonic qualities. This grouping helps me mix sounds and instruments that occupy the same frequency range. In one group, you can apply an equalizer or compressor that affects all tracks in the group, which you would otherwise apply separately, taking up more processing power from your computer that you could use elsewhere.
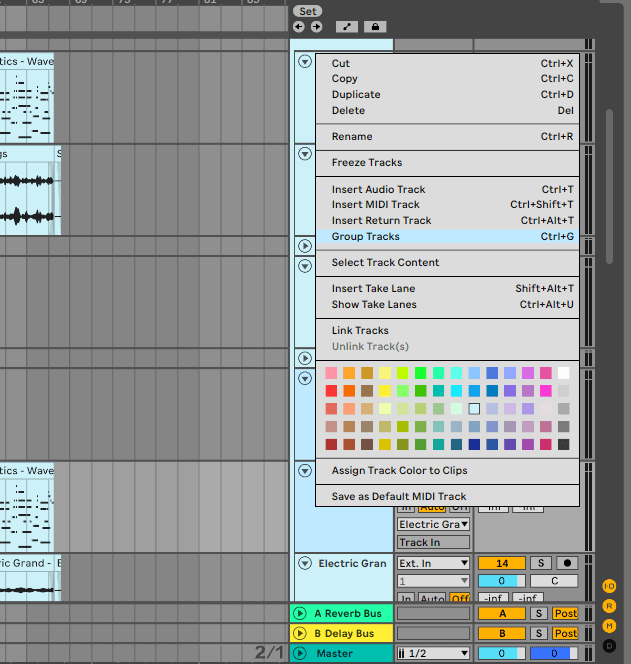
Group your tracks in this view by selecting the desired tracks, right-clicking on the selected tracks, and selecting group. You can also use the shortcut, cmd + G on MacOS, or ctrl G on Windows.
Track Colour
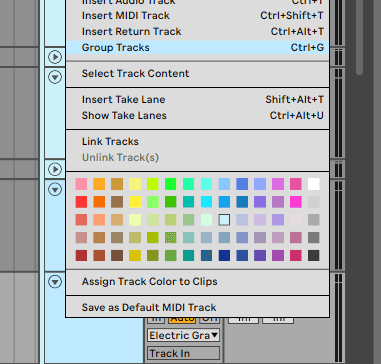
This is another optimization trick that I use, just to keep my arrangement view neat and visually simple. Colour coding your tracks helps you know which tracks are which, if you colour code track groups, it lets you distinguish which tracks are drums, pianos and synths, arpeggiators and sequencers, bass sounds, or sound effects. Do this by selecting the track(s) you want to colour code and right-click. The colours in the colour pallet in the edit tab that opens up.
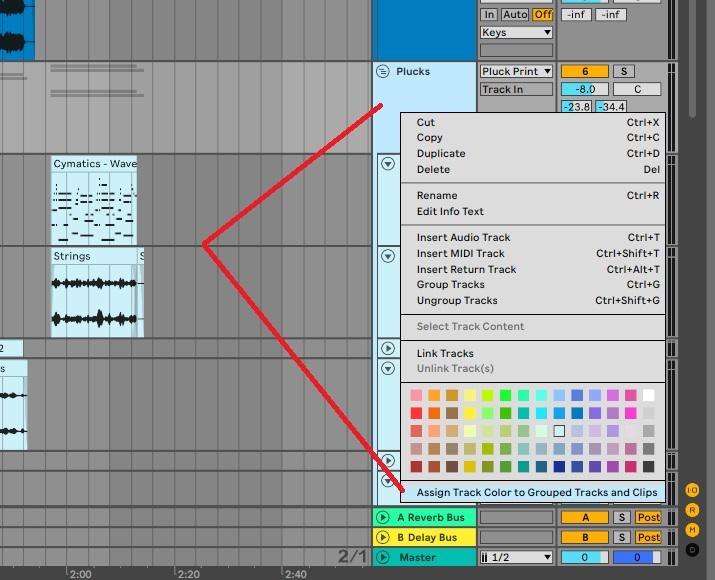
You can colour code grouped tracks and clips all at once by expanding the group, right-clicking on the group track and selecting, and assigning colour to tracks and clips.
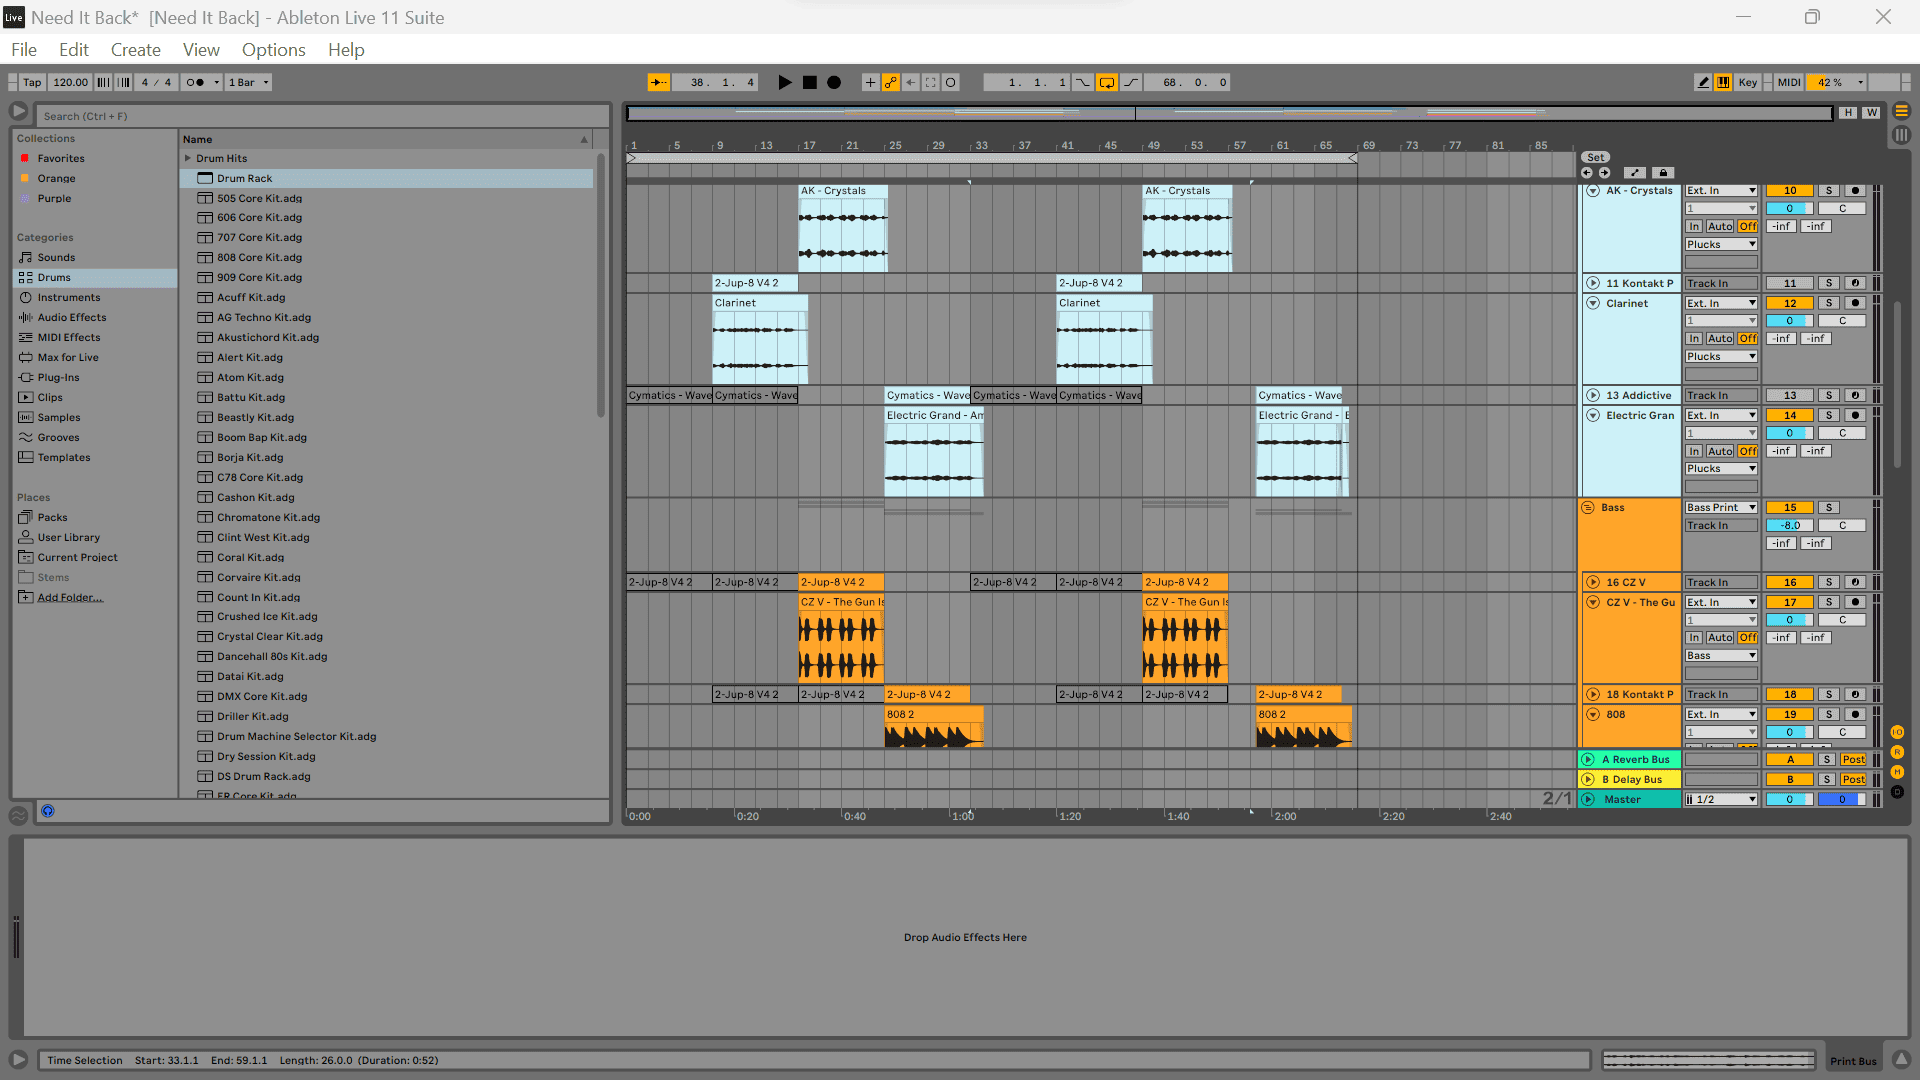
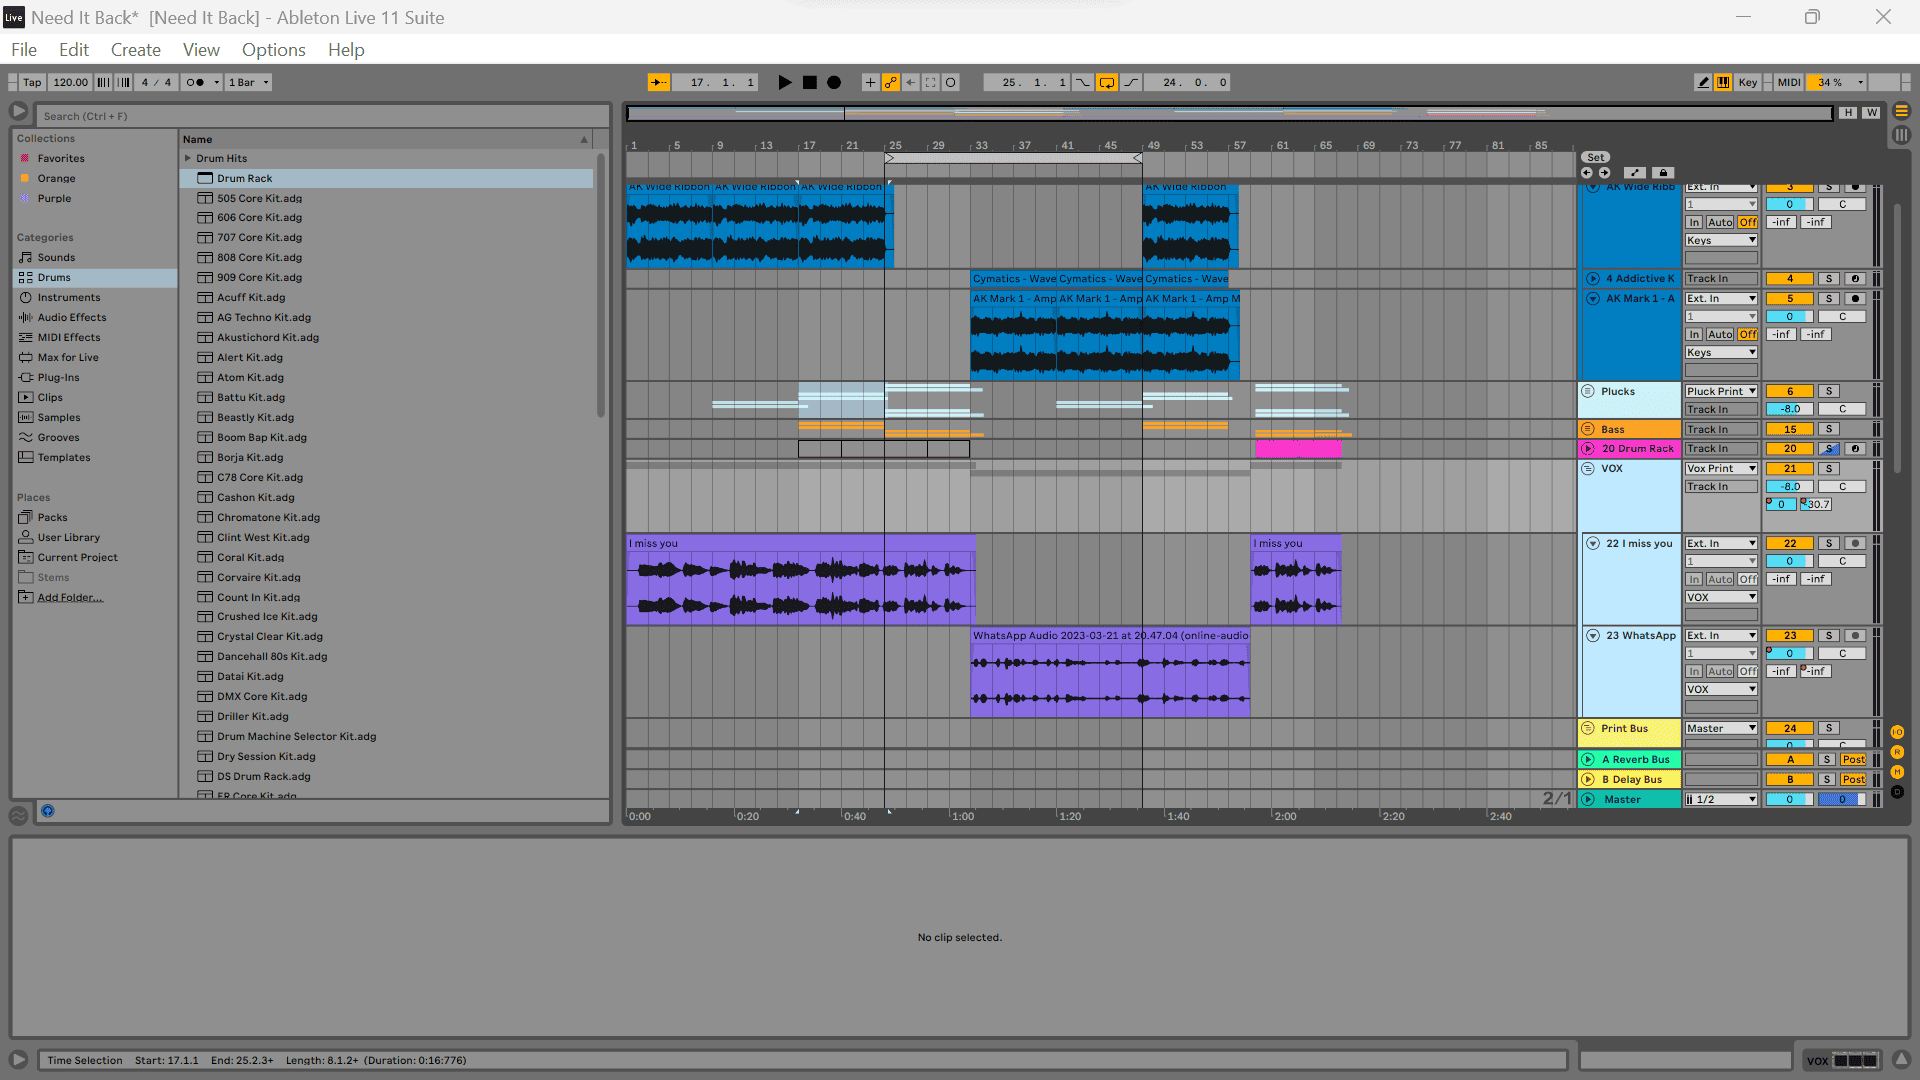
Look at this clean session! Collaborators will now have an easy way to know what is what when they receive this session.
Collapsing Tabs
You can create more space for your arrangement view by collapsing the clip editor, the info view, or the Live browser by using the collapse/expand toggle.
Final Thoughts
I am not exaggerating when I say that there are nearly an infinite number of things you can do in the arrangement view that if I were to cover them all, we would be here all day. I have discussed the ones that I use most frequently in my productions, for relevancy. If there is something that you never knew or thought about that you have seen in this tutorial, please do not hesitate to incorporate it into your workflow, but most importantly, have fun while you are at it!
- How to Use Ableton Live’s Arpeggiator? - September 18, 2023
- How to Use the Piano Roll in Ableton Live + Shortcuts - September 18, 2023
- Ableton Arrangement View (Optimization & Usage) - September 16, 2023

")


)