In audio production, sampling is when you use bits and pieces of previously recorded audio in your production. Resampling usually comes after sampling. I shall structure this tutorial similarly, by first showing you how to go about sampling in Ableton Live, and then how you can resample your audio.
How to Sample in Ableton
There are two main techniques you can use to sample audio in Ableton, both with their own benefits, shortcomings and use cases.
- Sampling with Audio: this is the simplest technique you can use to sample in Ableton. The primary use of this technique is in audio production.
- Sampling with Midi: this technique is multifaceted and best for both production and performance. You shall see through this tutorial that you can use both of Ableton’s sample editors and the drum rack to sample in Midi.
Recommended Read: Best Free Sample Packs for Ableton Live
Sampling with Audio
This mode of sampling is best for audio production, as you can easily chop your sample, edit, warp and arrange it in the arrangement view. This technique would allow you to play your sample on your Midi controller, but you can in turn use longer samples, as well as match your sample to your session.
For this section, I shall demonstrate sampling with audio using the song Billie’s Bounce by Charlie Parker and Miles Davis.
How to Sample in Audio
Step 1:
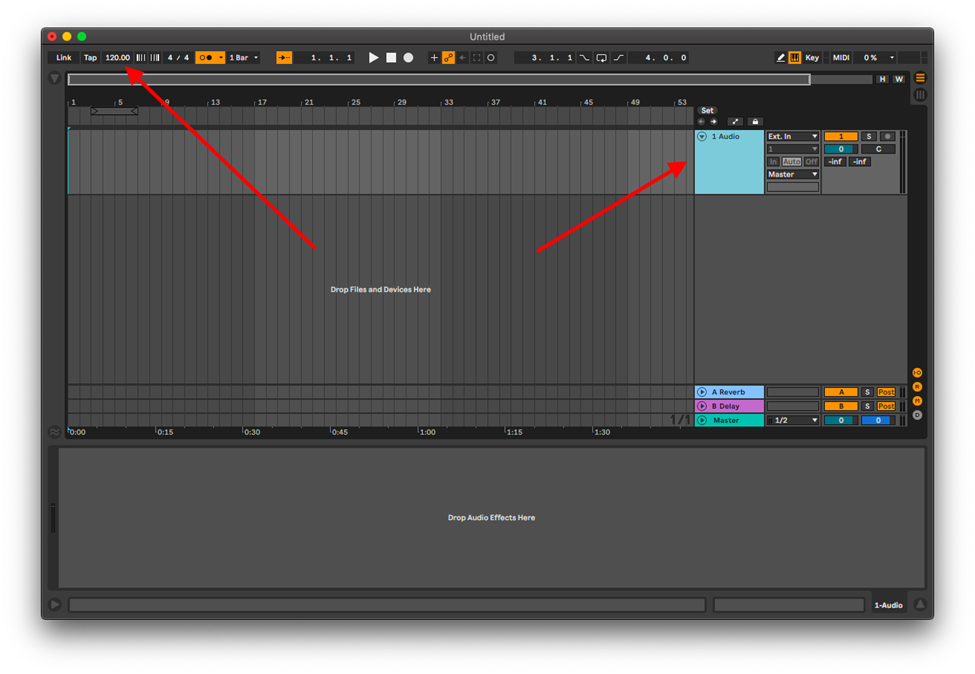
Create a new session, set your tempo, and create a new audio track (cmd + t or ctrl +t).
Step 2:
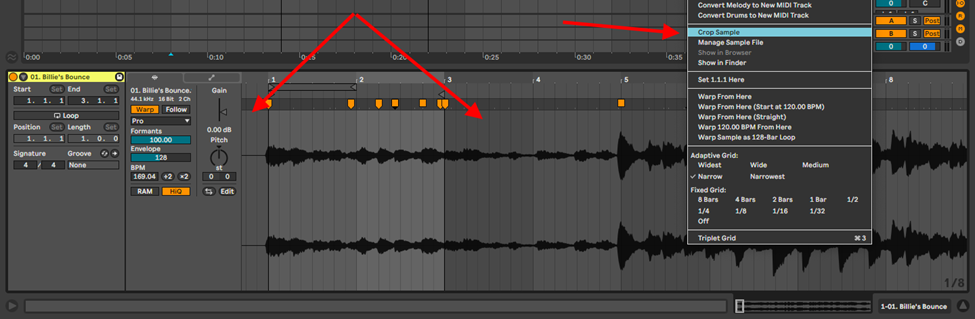
Drag and drop your sample into the audio track, and identify the portion of the sample you wish to use. Crop this portion by clicking Cmd + E or Ctrl + E.
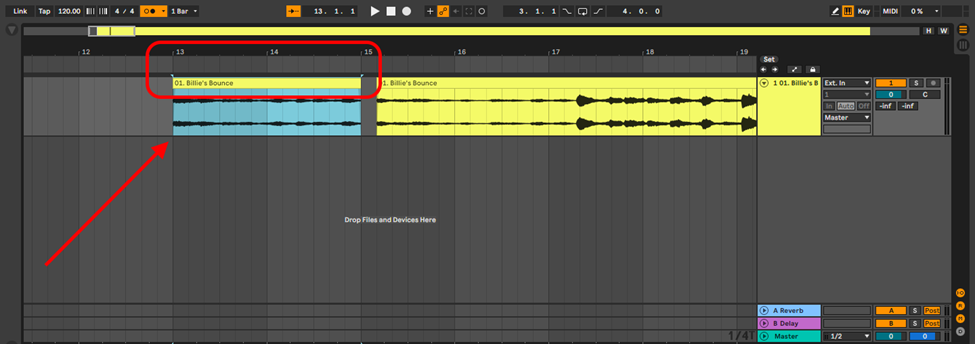
Note: I highly recommend that you ensure the sample can play from beginning to end fitting perfectly in regular intervals/bars
Step 3:
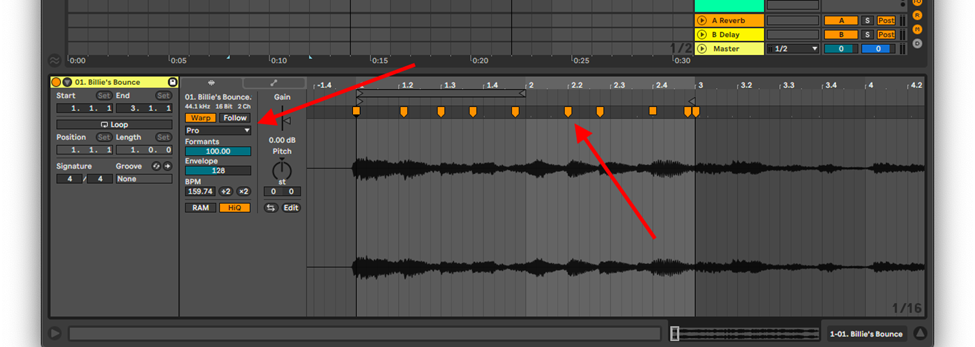
Depending on the sample type (rhythmic, melodic, harmonic or a song section) select the best warping algorithm and add markers to your sample to quantize transients or bars to the grid.
For more information on warping algorithms and their utility check out the Ableton Sample Editor tutorial.
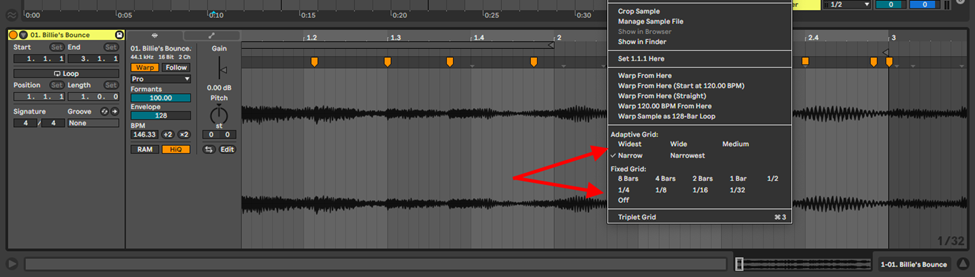
Note: When you import your sample into Ableton, Ableton’s algorithm will automatically add warp markers for you. In most cases you will find that your warp markers are not snapped to the grid or are not correctly placed on the transients. You can correct the markers placement on the grid by using the quantize shortcut, Cmd + U or Ctrl + U. Sometimes this process may also be imperfect, and require you to manually edit the marker placement. You can increase the accuracy of your marker placement and snapping by reducing your grid size
Step 4:
Crop your sample. If you extracted your sample from a larger audio file, you can avoid mistakenly extending the sample length during arrangement
Step 5:
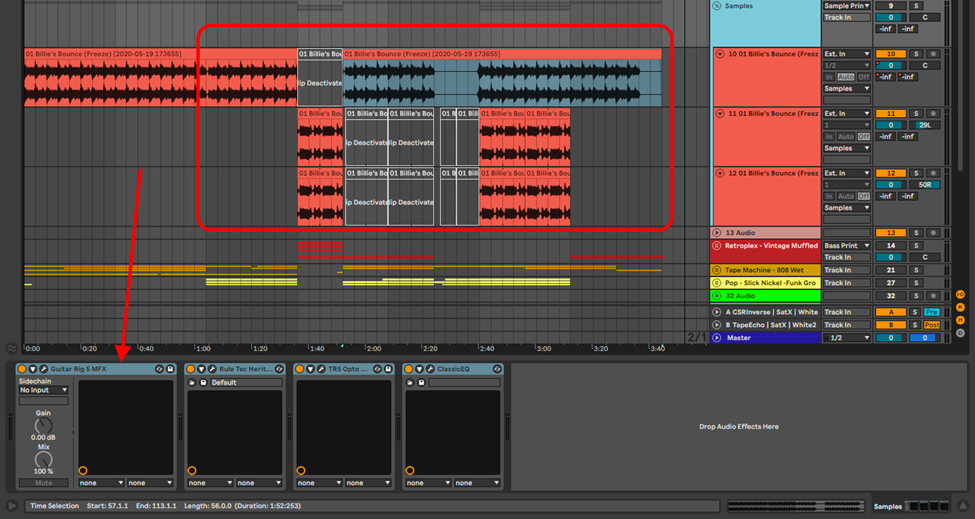
Finally, arrange your sample, add effects and mix it into your song. Do not hesitate to use multiple samples to create distinct bridge, chorus and verse sections.
Recommended Read: How to Retrieve & Activate Offline Samples in Ableton
Sampling with MIDI
Sampling with MIDI is the most fun, coolest and most engaging way to sample on Ableton. This technique will allow you a greater range to produce and perform using your MIDI controller as well as a much greater interaction with your samples.
Drum Rack
When you go to music production pages on social media, you will see several beatmakers making and performing their beats live using Drum Pads. They normally do this by mapping their samples on Ableton’s drum rack. Just as the name suggests, this instrument is primarily geared to handle drum samples. You can take this technique further, and map melodic and harmonic samples in conjunction with your drum samples. There are two ways you can go about sampling using the drum rack.
Drag and Drop
Step 1
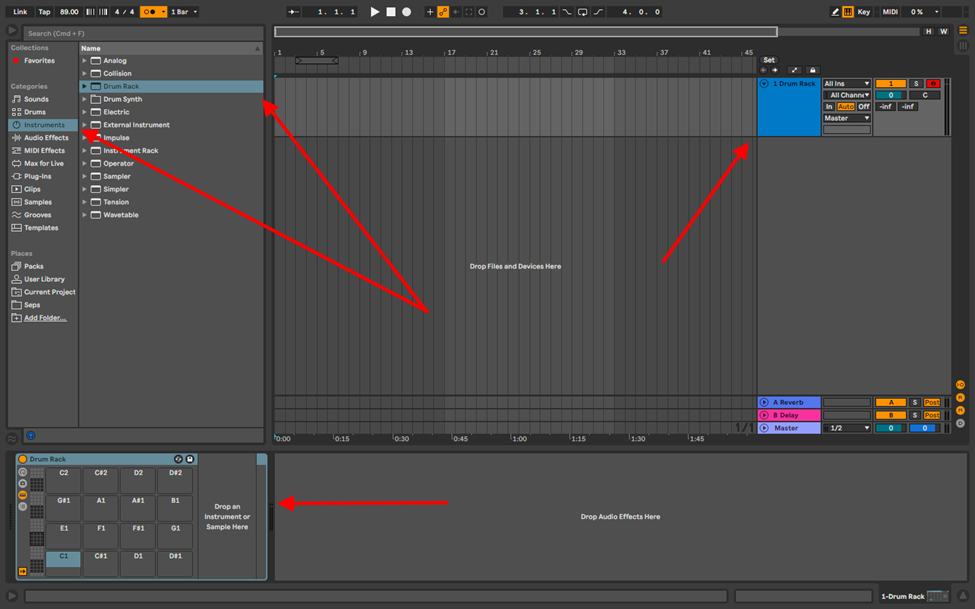
Set your BPM, create a MIDI track and open the Drum Rack on this track (the Drum Rack can be found in the instruments or drums folders in the browser)
Step 2
Drag and drop your samples into the drum pads in any order you prefer, crop the samples and choose how your samples behave when you play them by either trigger, or gate.
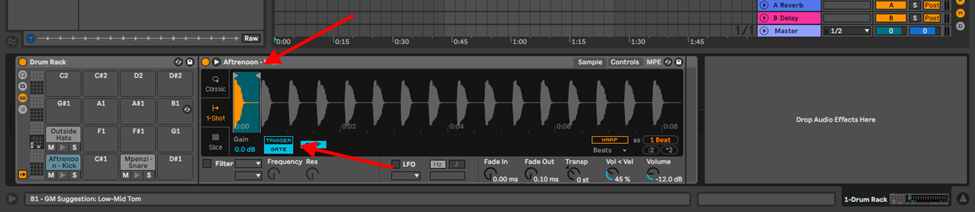
Trigger – this allows the sample to play the full length of the sample
Gate – the sample will play as long as you hold down a key on your MIDI controller.
Slice to New MIDI Track
This method of sampling on the drum rack naturally follows the steps I have provided when sampling with audio until step 4.
Step 1
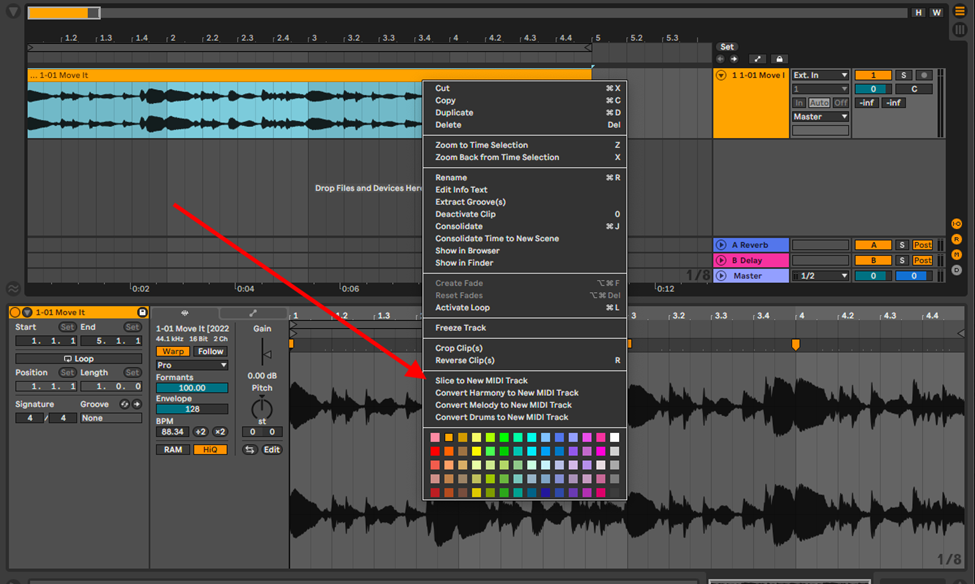
Once you have cropped your sample, right-click on the sample, and select, Slice to new MIDI track.
Step 2
Choose how you would like Ableton to chop your samples. You will find that the different algorithms function better depending on the sample type and length.
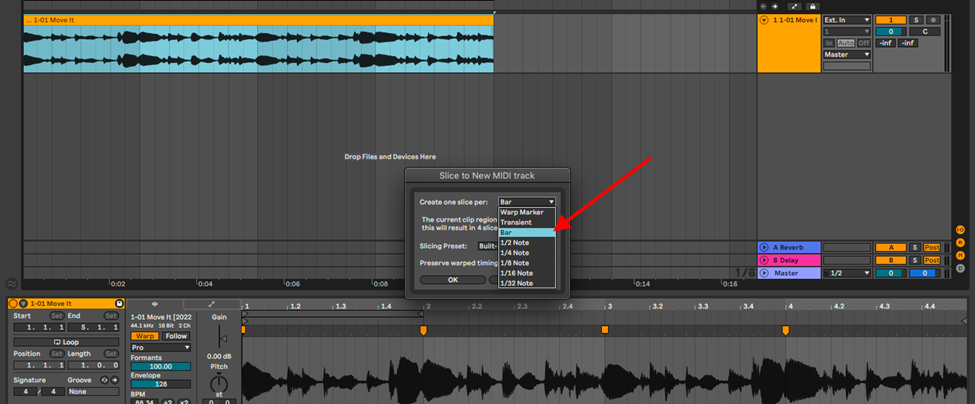
This then crops your sample by bar, transient, warp marker etc. into the drum rack. Depending on how well you quantized your sample to the grid, you will not have to adjust the length of your chopped samples in the drum rack.
Step 3
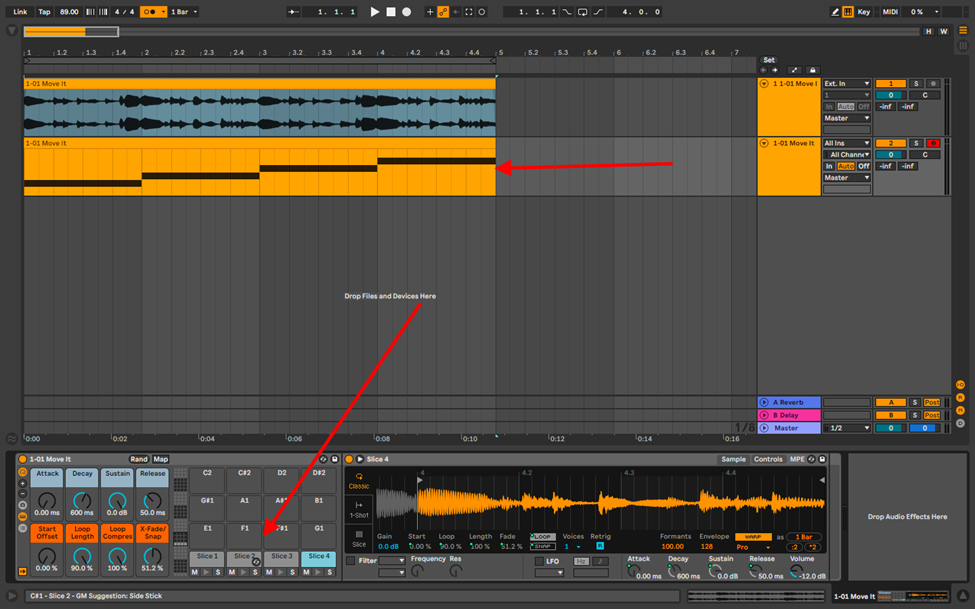
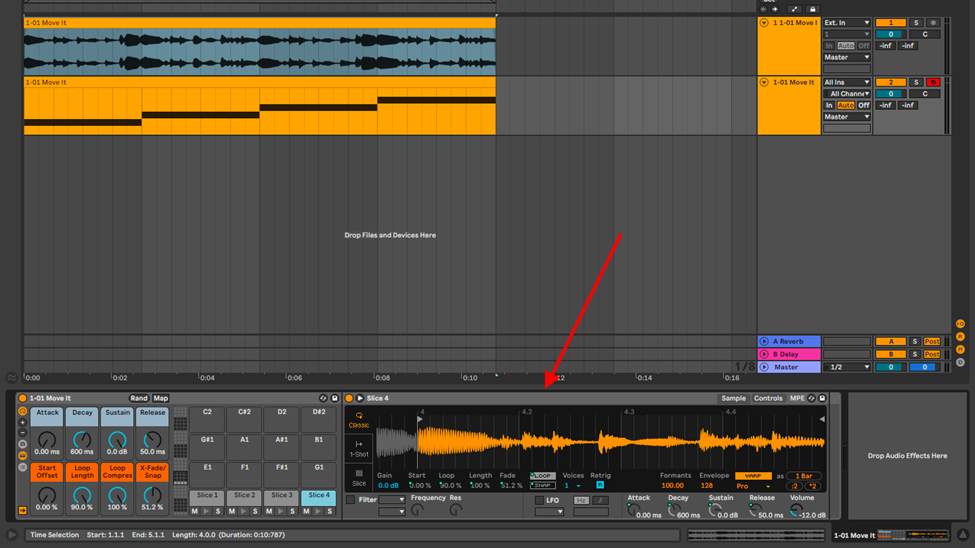
These slices will be mapped on your MIDI controller and are now playable. Ableton will create a new MIDI clip also mapping the sample’s chops, but from here on out, you can arrange the chops to your liking
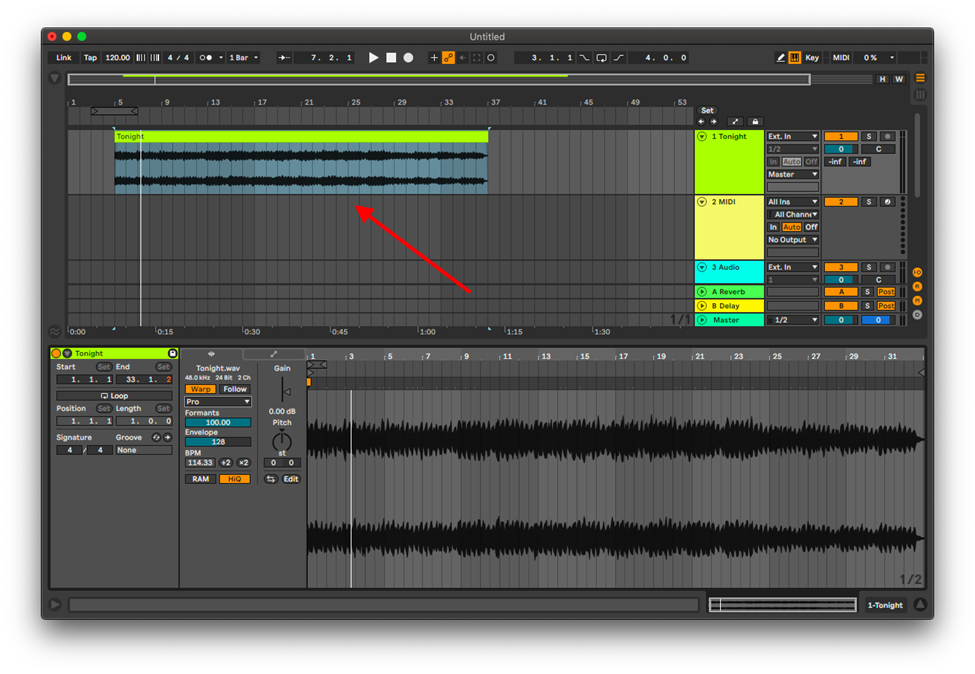
Simpler
If you have been paying attention through this, you will have seen Simpler by now.
Simpler is Ableton’s premier sample editor. It will allow you to edit, chop, transpose and even make your sample an instrument through its 3 modes of use. Here is how you sample on Simper:
Step 1
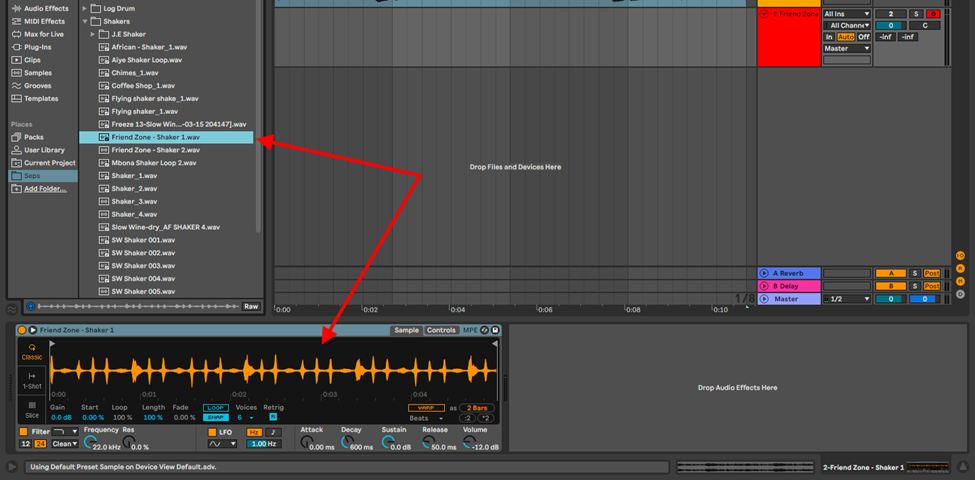
Load you sample on Simpler by either:
- Creating a MIDI track and dragging and dropping your sample
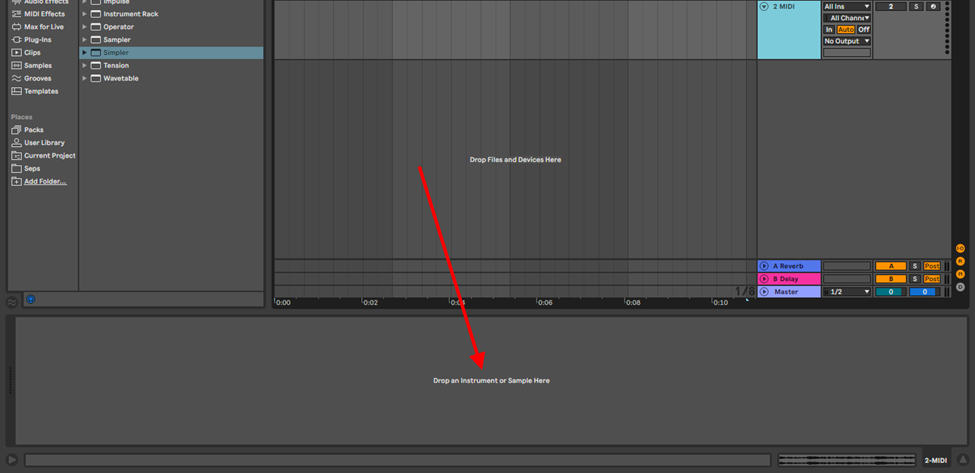
- Opening Simpler from your instrument folder and then dragging and dropping your sample into simpler
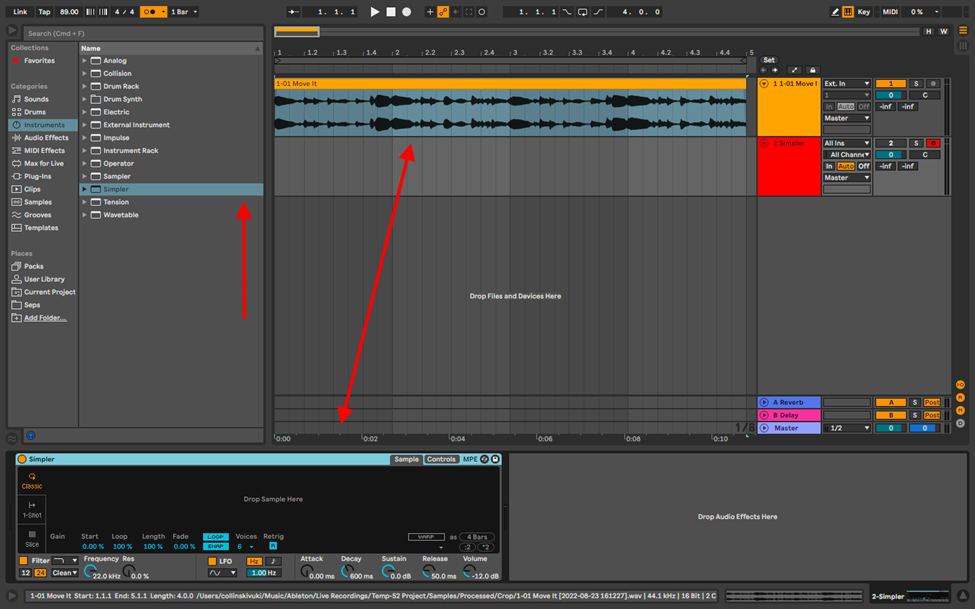
- Or simply double clicking on your sample from your sample pack
Step 2
Choose which mode you would like to Perform your sample:
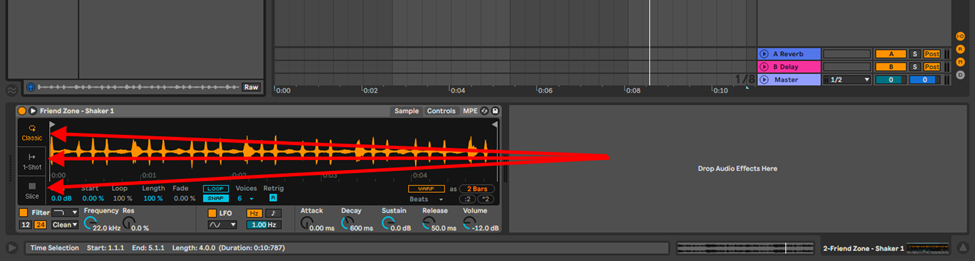
- Classic mode – this mode turns your sample into an instrument allowing you to play the sample as a harmonic instrument (chords)
- 1-shot mode – this allows you to make your sample an instrument just as the classic mode, but only plays one note at a time. Ideal for drums and melodies
- Slice mode – this mode is especially useful for performance. Chopping your sample into playable bits and mapping these chops to your MIDI controller
For more information about Simper’s functions, check out the Ableton Sample Editor Tutorial
Sampler
Sampler is Simper’s more sophisticated bigger brother. Just as Simpler, it can be found in the instruments folder. In the Drop down menu, you will see Ableton has provided you with stock presets and templates for you to use.
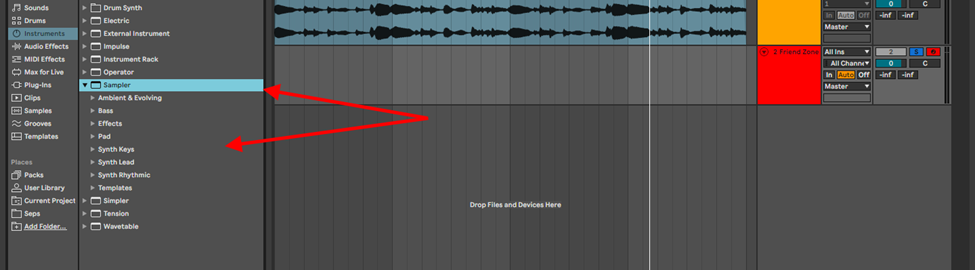
Sampler is fantastic for sound design for production and performance, due to its multisampling ability. It allows you to load different samples and map them to your MIDI controller. This is how you sample on Sampler:
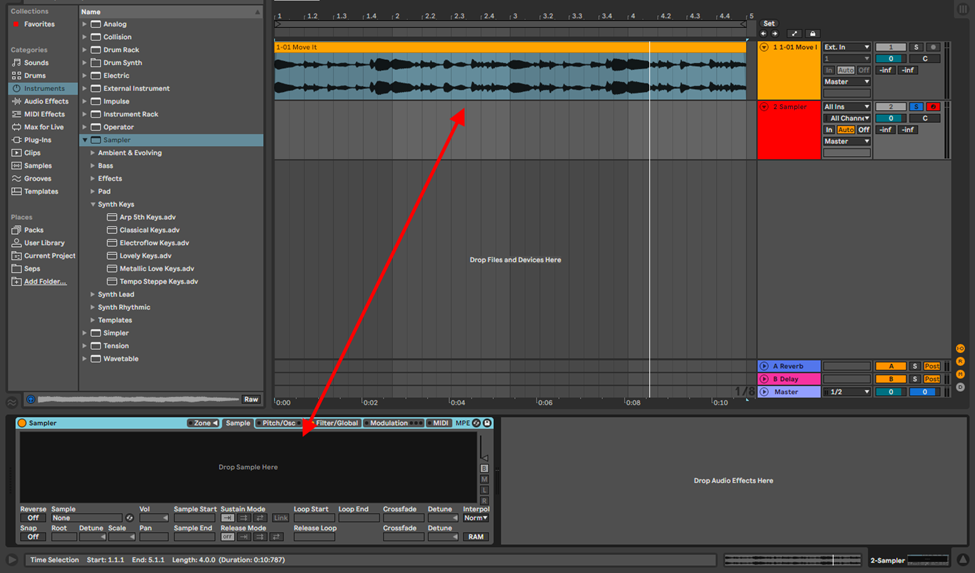
Step 1
Open sample and drag and drop your sample into Sampler.
Step 2
Crop, chop and edit your Sample as you like using tools afforded to you in sample. (Pitch & Osc controls, LFO & Filter controls, modulation, and various other controls on all the different views of Sampler
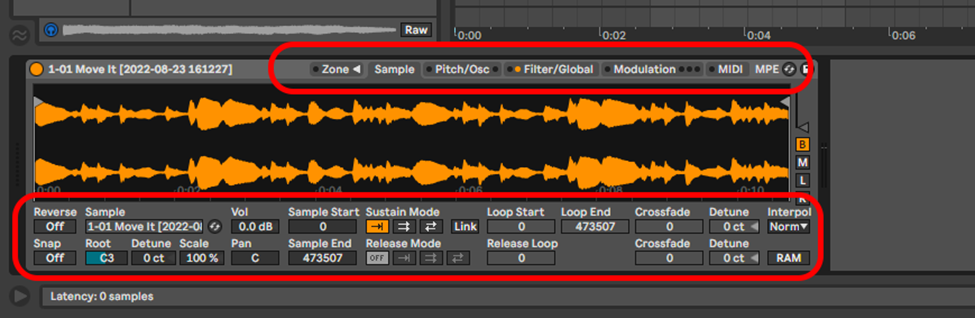
For a more detailed breakdown on the different functions of Sample check out the Ableton Sample Editor Tutorial
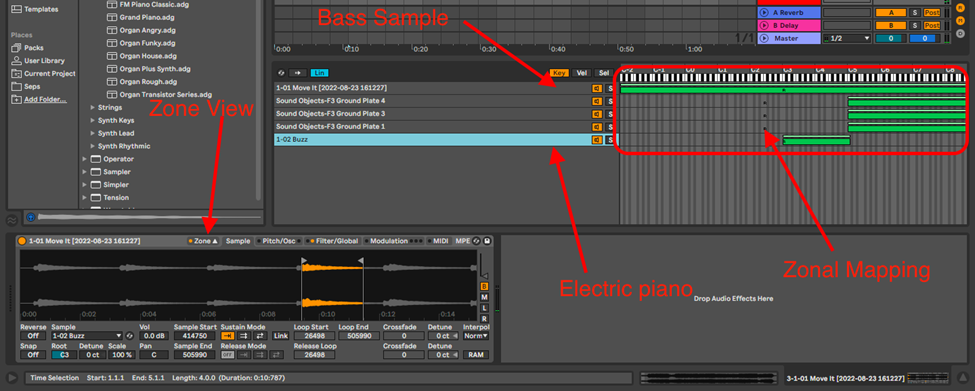
Step 3
Import as many samples as you would like to use and map them on your MIDI controller, effectively splitting your MIDI to different zones in the zone view. This makes it so that the sample mapped to that zone plays when you play a certain region on the keyboard. You can, of course, overlay samples.
How to Resample in Ableton
Resampling is essentially the reworking, reusing or reediting a sample you are working on. This step generally comes after sampling. Why would one resample? A couple of reasons:
- To add effects or manipulate your sample, while still retaining the original sample
- To save on CPU use when using lots of effects or CPU heavy effects
There are 5 main ways to go about resampling your audio:
Drag and Drop or Copy and Paste Technique
This technique is very simple. However, this technique does not copy the effects over to the new track.
Step 1:
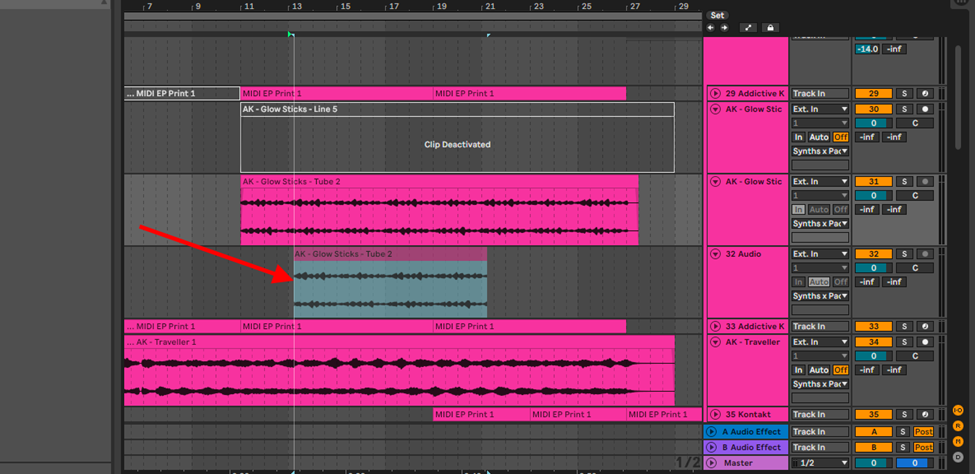
Create a new audio track and highlight the sample or sample section
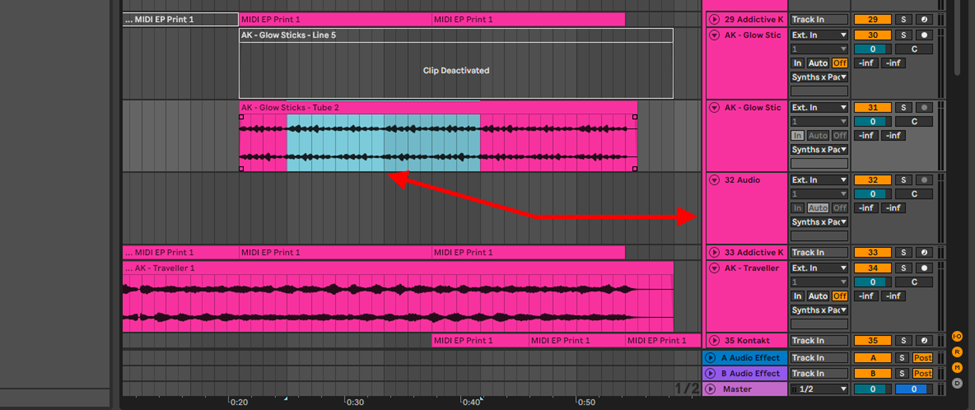
Step 2:
Copy and paste the highlighted section on your screen (cmd + c or ctrl + c and cmd + v or ctrl + v) or hold down the alt key and drag your sample down to the new audio track. You can now effect and edit this new sample with your original sample safe from irreversible changes.
Resampling via Recording (Printing)
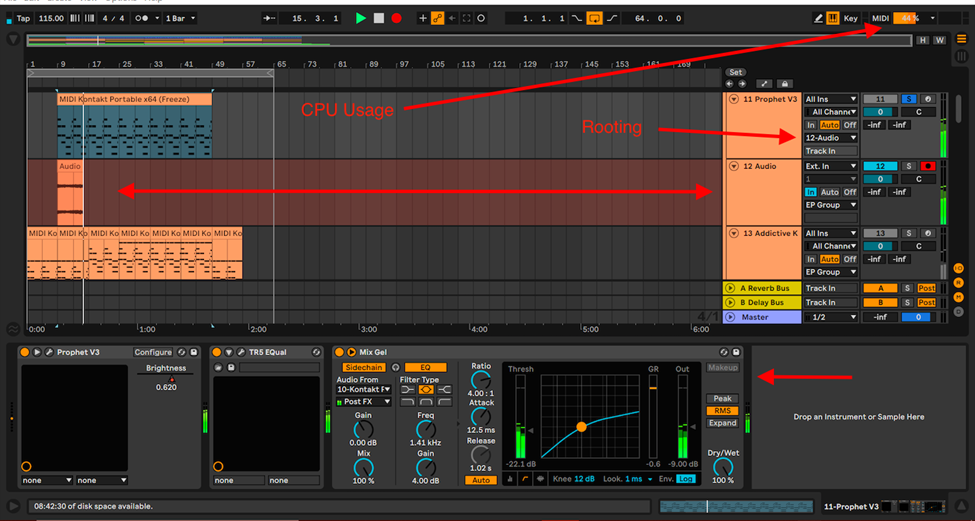
This technique primarily helps you when trying to save on CPU usage. I find myself resampling this way when working with heavy instruments, or when the effects I am using are CPU intensive.
Step 1:
Create a new audio track and root your sample or MIDI track to this audio track.
Step 2:
Record your sample to this new audio track.
Resample Track
This is Ableton’s primary resampling technique. It is perfect for layering your samples once you have a good mix going. This is how you go about resampling with a resample track:
Step 1:
Create an audio track, select External Input (Ext. In), and select resample
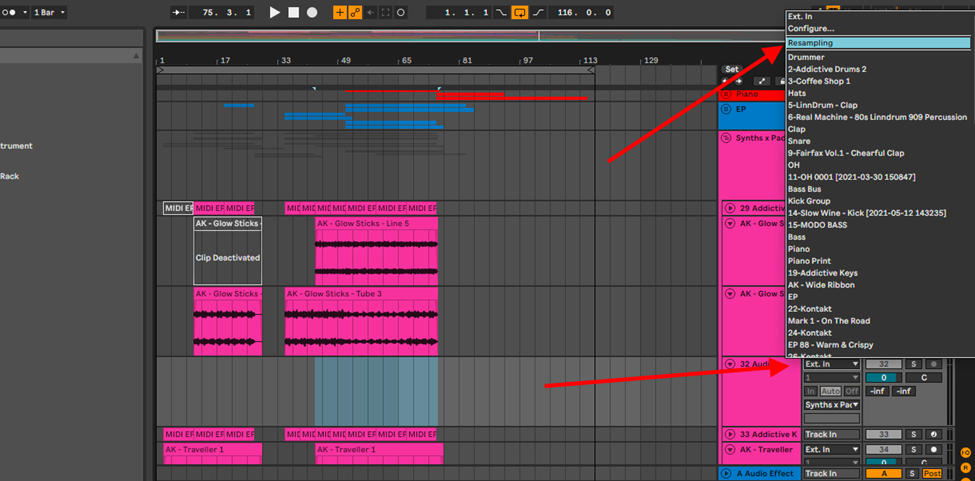
Step 2:
Record.
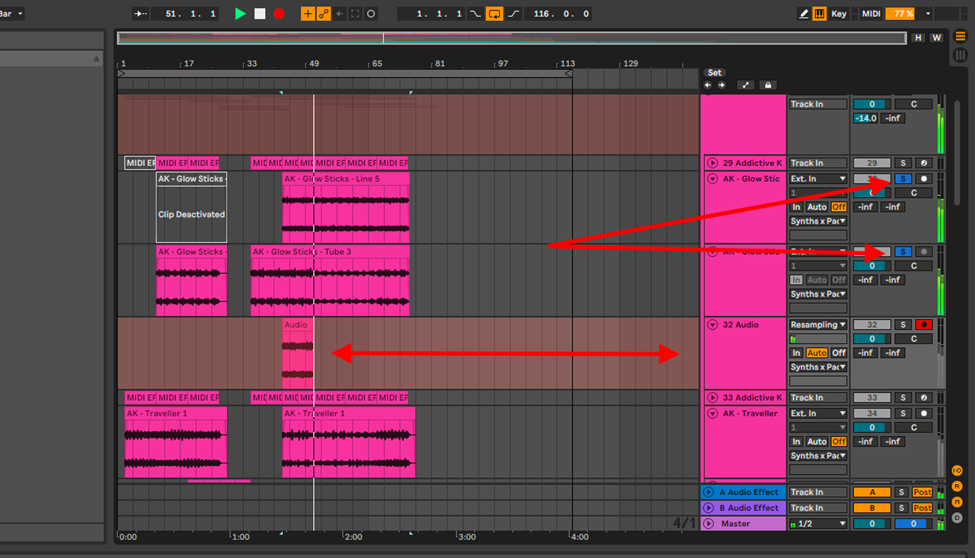
Note: when you resample this way, the sound coming in is from the master bus. Therefore, solo only the tracks you wish to resample. Watch out for your sends, reverbs and delays. Note further that, you can directly route your sample tracks to the resampling track, but you will get the same results, only now, you won’t hear any playback while recording.
Export Method
This technique is best for remote file sharing. You may find that you are co-producing with a peer remotely, and both parties have a specific set of skills. You can export your sample, send it, or move this sample to another, better fitting project.
Step 1:
Highlight your sample, and export it from Ableton.

Step 2:
Import this sample into your project, or a new project entirely.
Note: Be mindful of any effects you may have loaded on the track, on the master bus, and sends tracks
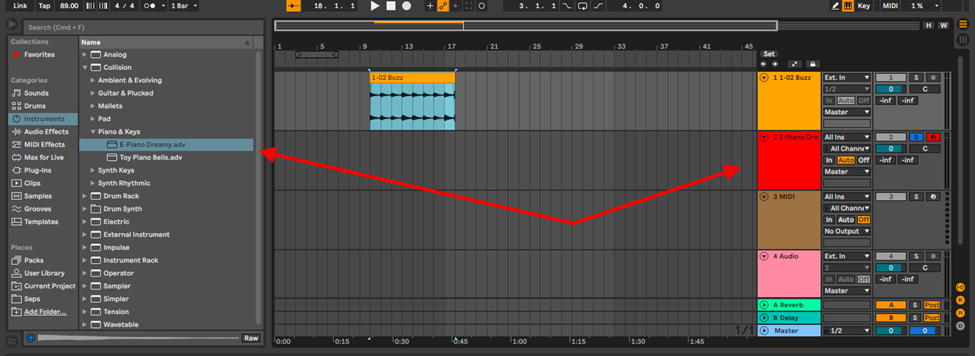
Convert to MIDI
This is by far my favorite way to resample when producing. You can extract notation from drum grooves, melodies and harmonies from your sample, and set another instrument to play this notation. Helpful when you cannot get the exact key, key changes or modulations of your sample. This is how can go about it:
Step 1:
Once you have your sample loaded, create a new MIDI track and load the instrument you would like to resample with.
Step 2:
Depending on the type of sample, choose how ableton will treat the audio when converting.
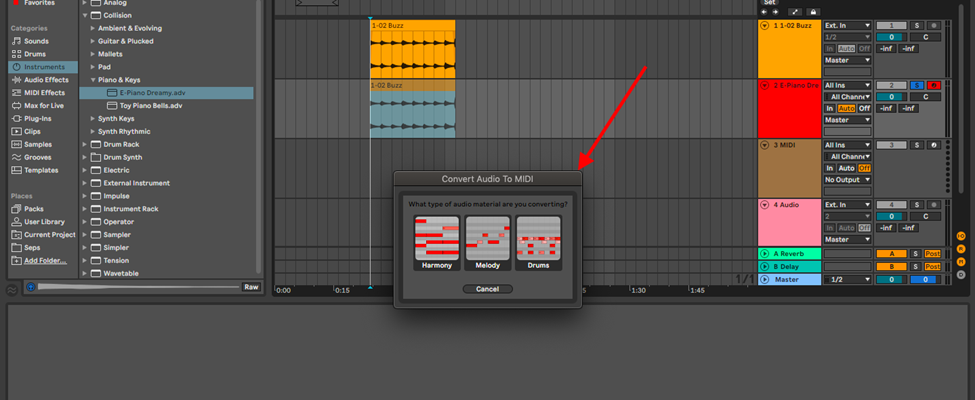
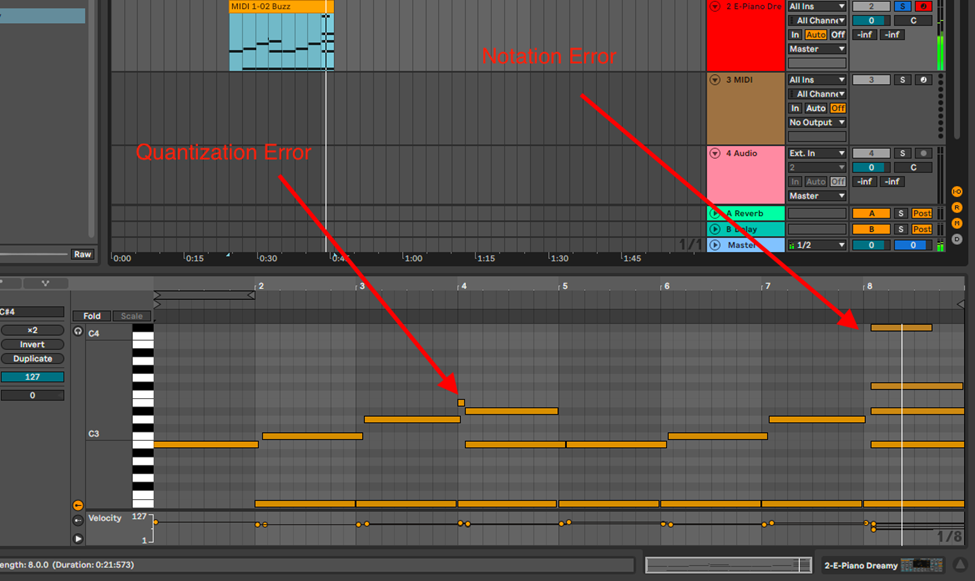
Note: This process is not always perfect, and may require some music theory knowledge for melodic and harmonic samples, and in some cases, for you to quantize the notes to your grid.
Conclusion
Sampling goes beyond a production and performance technique, it is an artform. There are many techniques to sample in Ableton. From simplistic sampling with audio to the more dynamic sampling with MIDI. Resampling pushes this skill further. It allows you to affect your sample, and in some way get into sound design. Explore the case uses of the techniques I have demonstrated, and create your customized workflow for your productions and performances. Have fun!
- How to Use Ableton Live’s Arpeggiator? - September 18, 2023
- How to Use the Piano Roll in Ableton Live + Shortcuts - September 18, 2023
- Ableton Arrangement View (Optimization & Usage) - September 16, 2023


