Consolidating is the process of merging several clips into one. With the same reasoning, you can also consolidate tracks, however, for tracks, this is done by grouping so that their outputs are linked. Consolidating clips is largely an arrangement tool that helps keep your tracks neat. It is designed to optimize mixing, but grouping similar sounding tracks for glueing a mix down:
Recommended Read: Encoding Formats, Import & Export MP3s, Stems, and Export Settings
Consolidating Clips
There are 3 main ways to consolidate MIDI and audio clips. You can use the consolidate function, freezing & flattening the track, or by the crude means of recording your clips into a new track. This is how you consolidate with the consolidate function in Ableton:
Consolidate Function
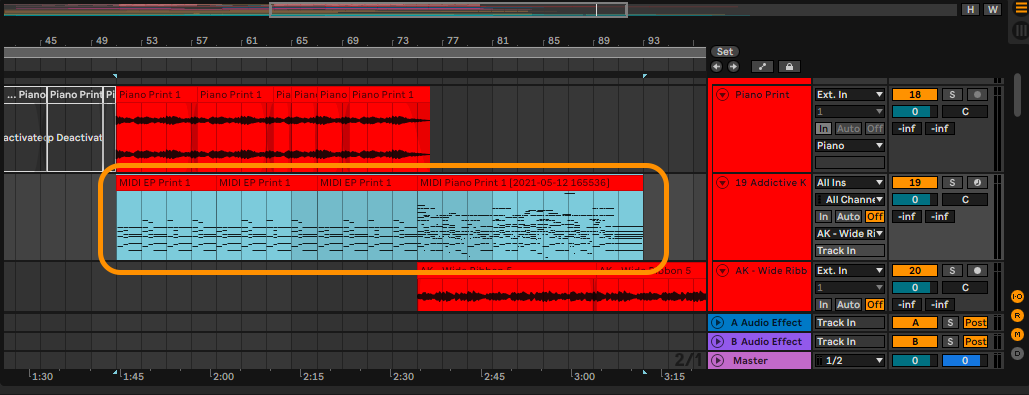
Step 1: highlight the audio/MIDI clips that you wish to consolidate
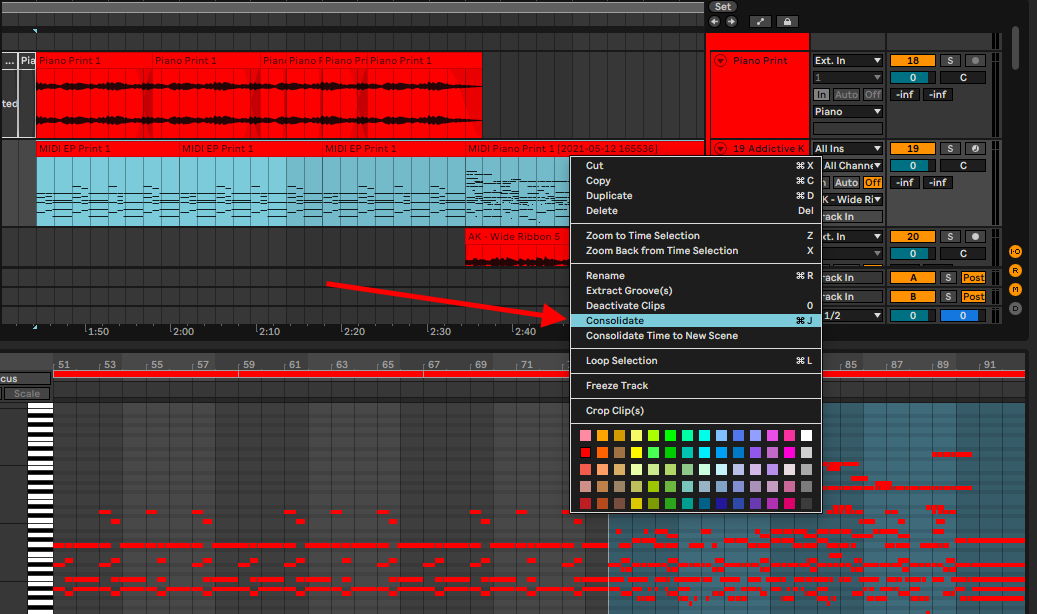
Step 2: Consolidate by right-clicking and selecting consolidate (Cmd + J on Mac or Ctrl + J on Windows)

Your audio/MIDI clips will now be merged
Recommended Read: Dither Options & Bitcrusher in Ableton
Freezing & Flattening
Freezing means that you temporarily commit all CPU-intensive actions to your track, saving all effects and automations as audio. Once you flatten your track, all the clips in the track merge. When you flatten MIDI tracks, they get converted to audio tracks. This is how you consolidate with this technique:
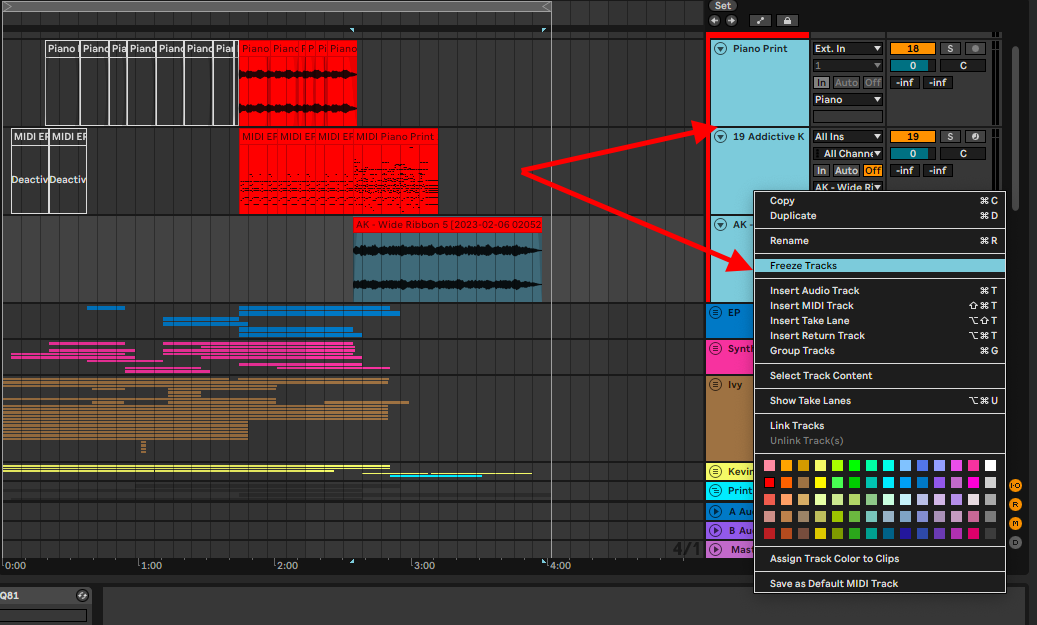
Step 1: Select your track(s), right-click and select freeze
Step 2: commit to flattening your tracks
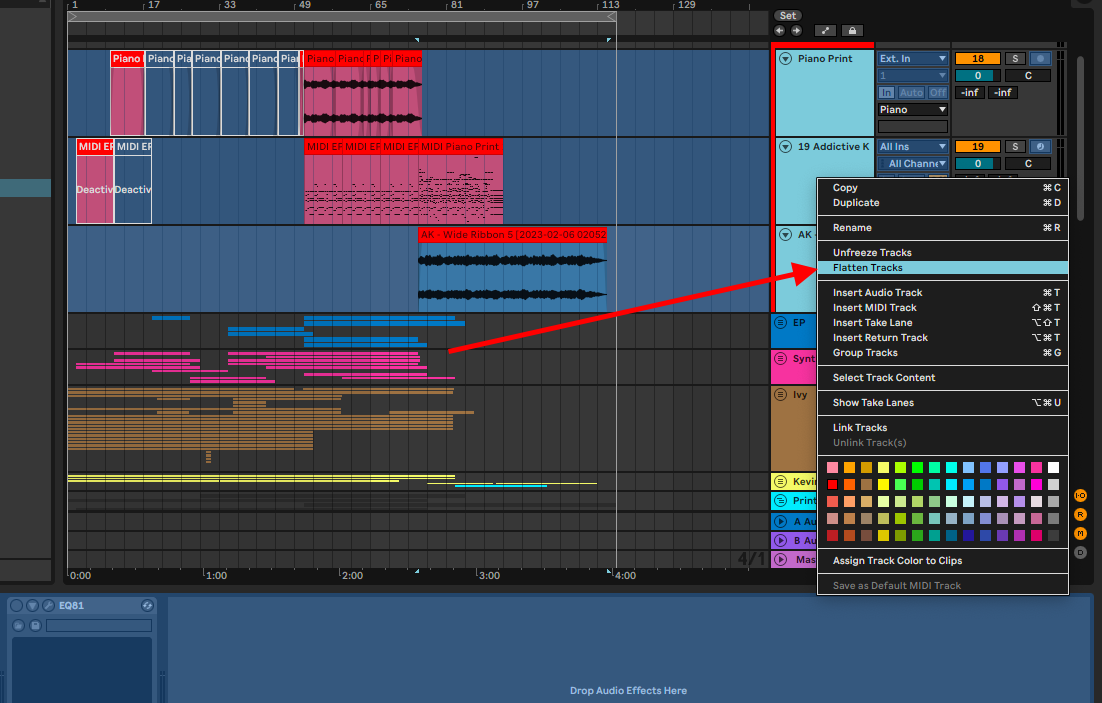
Note: Be careful! all your audio effects (compression, EQ etc.) and automation will be committed after you flatten your track, and will no longer be adjustable.
Recording (Printing)
This method is long, but you can preserve the original clips for editing later.
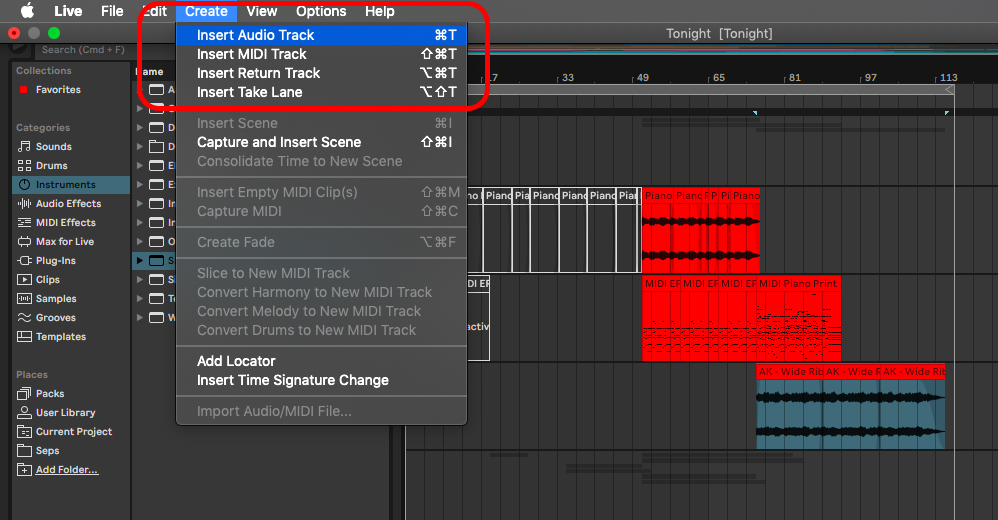
Step 1: Depending on whether you want to consolidate audio/MIDI, create a new and appropriate track
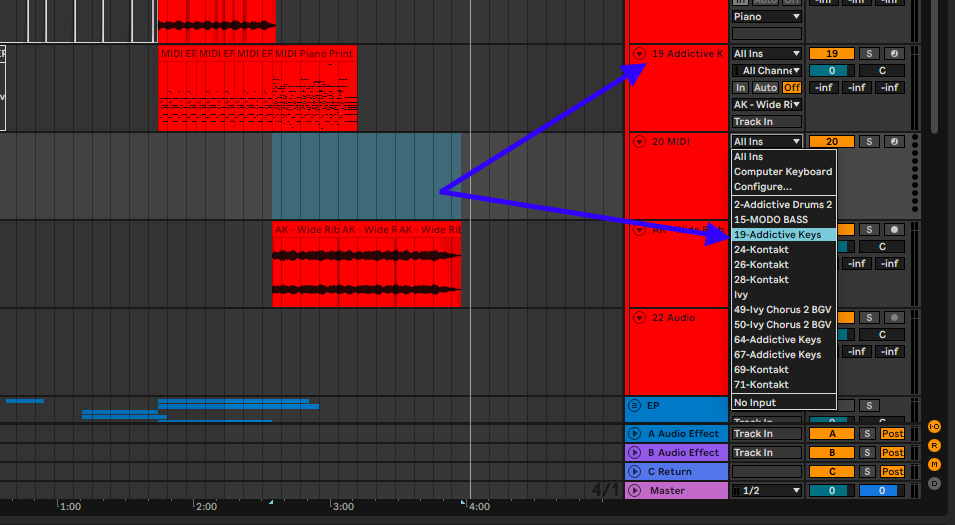
Step 2: set your track’s output to this new track
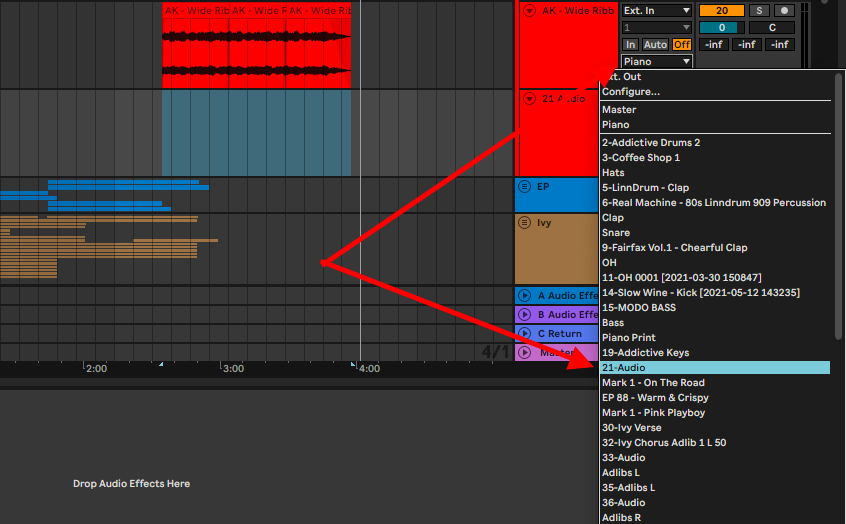
For MIDI tracks, this process is the opposite, where you need to set the input of your MIDI track instead
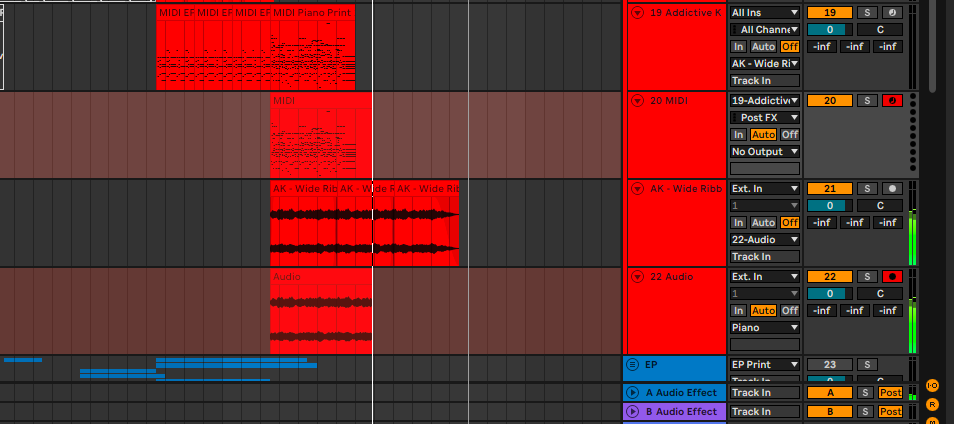
Step 3: Record
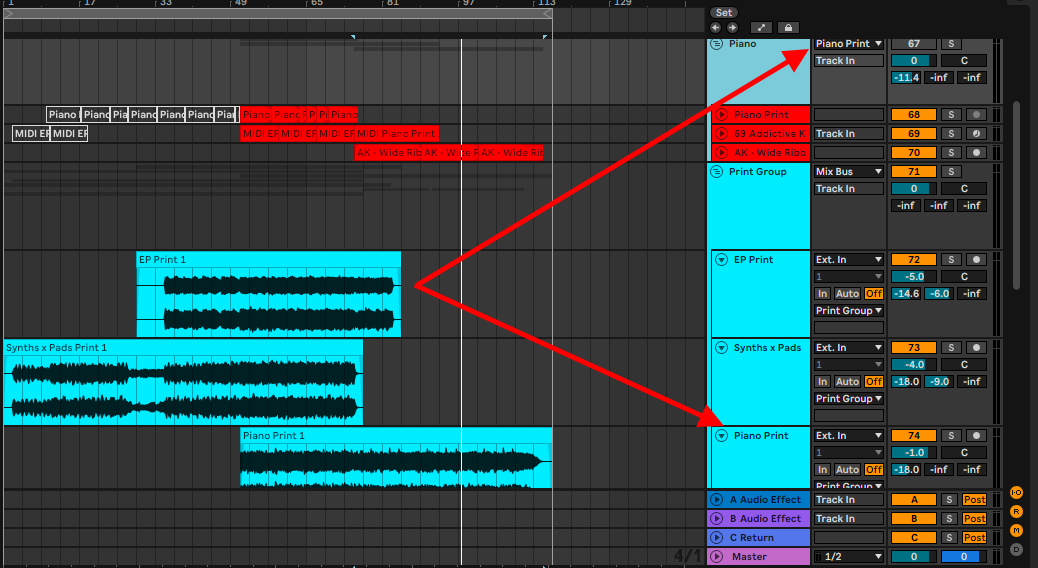
Pro tip! I use this method to preserve my MIDI clips instead of freezing them, so I can switch off my plug-ins to save on CPU usage. I also use this technique after grouping my tracks and mixing them (pianos, drums, basses, pads etc). I ‘print’ each group, so that I can mix each group in relation to others
Consolidating Tracks
This technique puts all your tracks into a single group. The selected tracks have their outputs sent to the group track. This is best for grouping similar-sounding tracks for an overall group mixdown. This is how you do it:
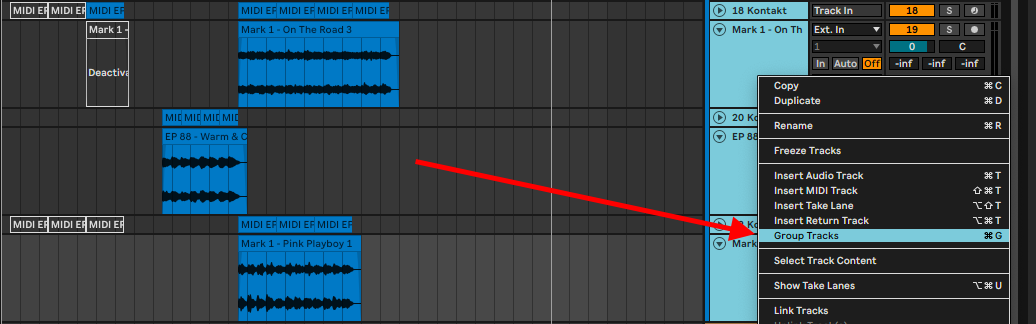
Step 1: Select the tracks you want to consolidate

Step 2: Right-click and select Group Tracks (Cmd + G on Mac or Ctrl + G on Windows)
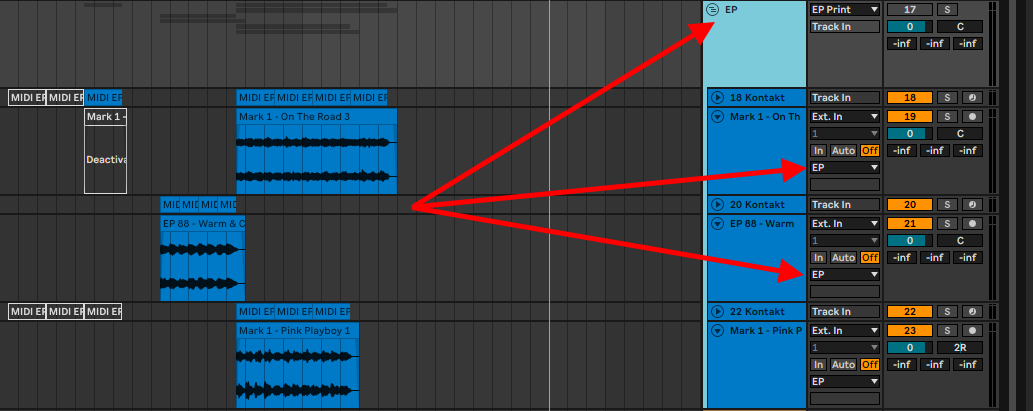
You will now see all your tracks grouped and their output set to the group track. You can also change the output if you like. You can also rename the group track appropriately (Cmd + R on Mac or Ctrl + R on windows, or simply right-click on the track, and select rename)
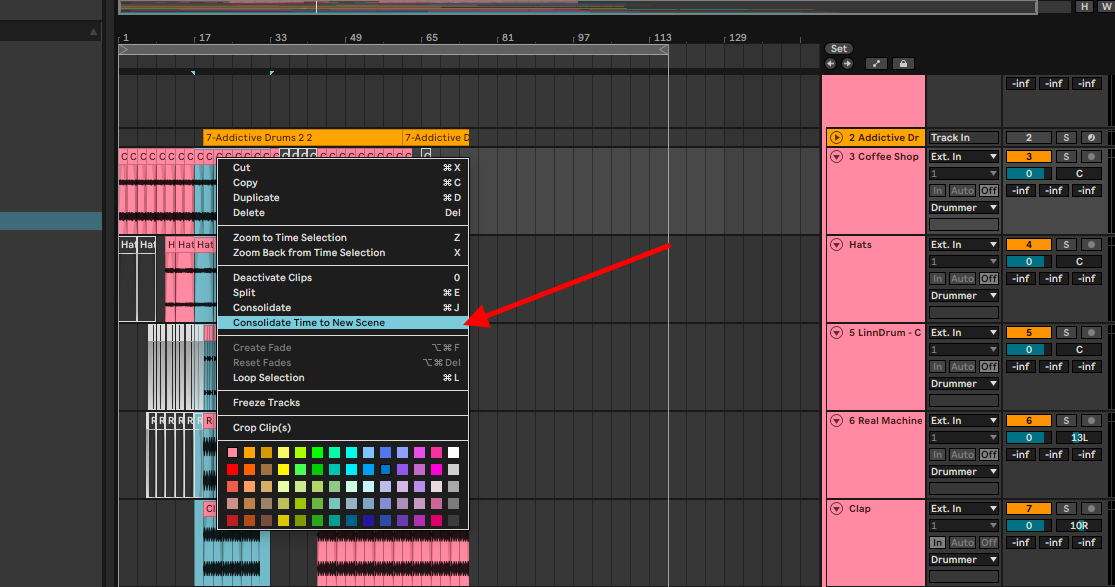
Consolidate Time to New Scene
Consolidating time to a new scene means that you can select any length of your arrangement in your arrangement view, and consolidate this length to scenes in your mix view easily. This is perfect for performances and creating loops. This is how you do it:
Step 1: Select your preferred loop length
You do not have to select this length on all tracks, you can do it only using 1 track
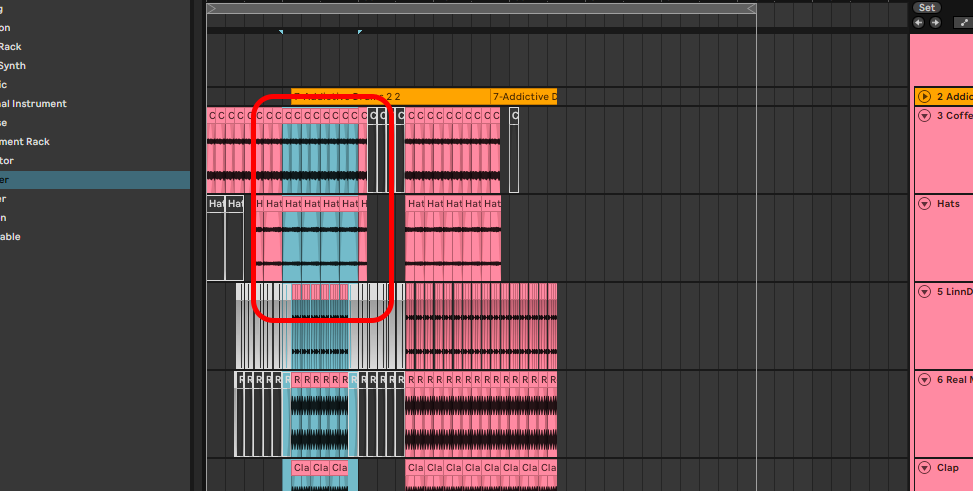
Step 2: right click on the clips in this range or any clip you would like, and select Consolidate to New Scene.
Now every clip in this time range is going to snap into a scene in your mix.
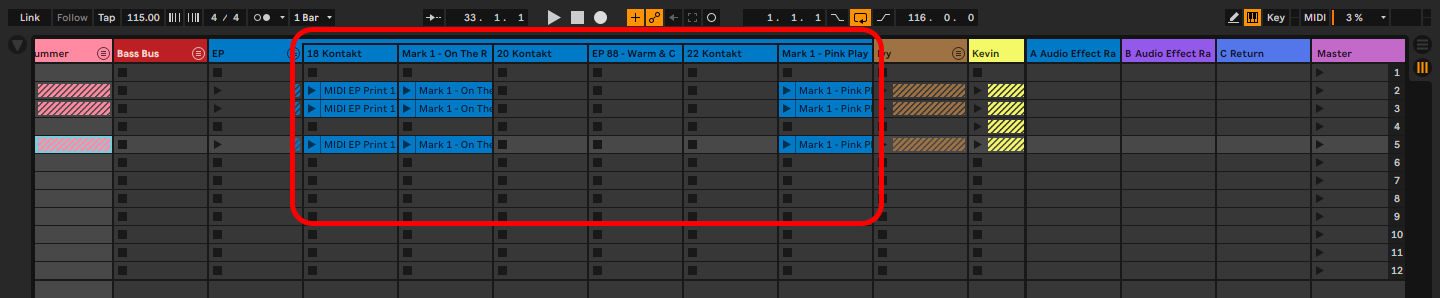
In my example, I have done this a couple of times to create different scenes.

Final Thoughts
there are many different techniques to consolidate in Ableton. Each technique has its use case suitable for production, performance, arrangement, session organization, and mixing and mastering. I have covered the different ways you can consolidate in Ableton and their use cases, and instances where I choose to use one instead of the other. Now use these techniques for your productions and performances, and have fun!
- How to Use Ableton Live’s Arpeggiator? - September 18, 2023
- How to Use the Piano Roll in Ableton Live + Shortcuts - September 18, 2023
- Ableton Arrangement View (Optimization & Usage) - September 16, 2023
")

![Pitch Correction in Ableton [Complete Guide]](https://ProRec.com/wp-content/uploads/2023/04/change-pitch-by-using-the-detune-function-in-ablet-180x180.png "Pitch Correction in Ableton [Complete Guide]")
