Sampling is reusing or repurposing a section of an audio recording for a sound production or performance. These portions are created by identifying a section of the recording that you want to use (sample), and then sniping and slicing this portion into usable bits (chopping). Sampling is commonly used by beatmakers to make their music interesting, unique and memorable across all genres of popular music.
Recommended Read: How to Sample and Resample in Ableton Live
Techniques for Chopping Samples in Ableton Live
There are primarily 4 techniques for chopping samples in Ableton. They can be categorized by their utility (Performance/Production) or a hybrid approach using both.
Drag and Drop Technique – The easiest and the most straightforward sample chopping technique. Primarily used when looking for a quick fix.
Simpler – The primary sample editor in Ableton. Because of its simplicity and speed, the Simpler technique can be hybridized as a production and performance tool.
Drum Rack – Ableton’s second primary sample edit and performance tool. You will find that this technique truly shines in a live performance situation.
Gated Chopping – the more complex of the 4 sample chopping techniques. This complexity will allow you to chop more than one sample or sample type at a time.
For this tutorial, I will be using the song Buzz by Ben Allison.
Recommended Read: Best Free Sample Packs for Ableton Live
The Drag and Drop Technique
This is the simplest way to chop samples. It does not require any particularly specialized skills or the use of any native Ableton sample editors. It is centered more around production than performance, as its ‘start, stop and review’ nature does not necessarily allow you the fluidity in sample chopping as the latter 2 techniques. However, I shall provide you a tip at the end of this segment on how you can use this technique as a performance tool.
This is how you go about chopping samples using the drag and drop technique:
Step 1:
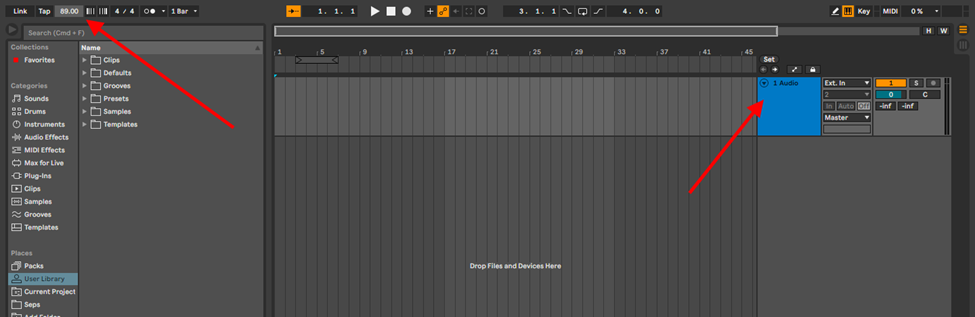
Depending on the genre and style, set your BPM and Create an audio track ( Cmd + T or Ctrl + T)
Step 2:
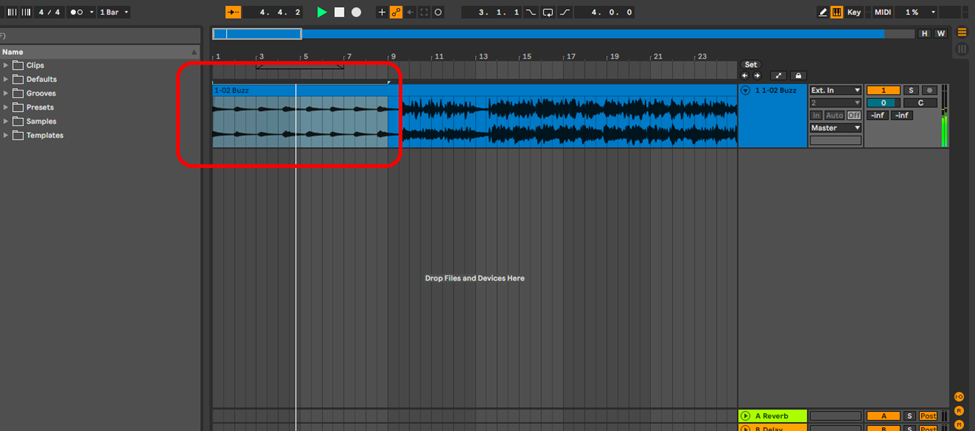
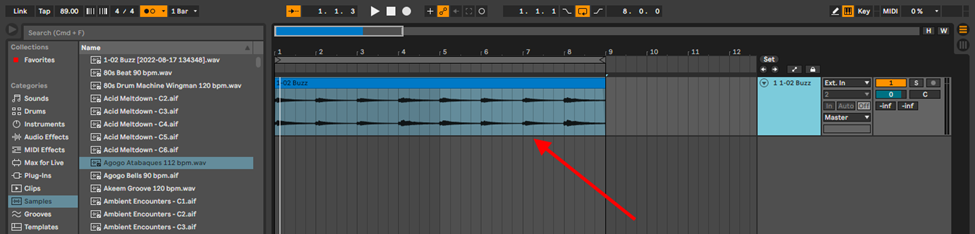
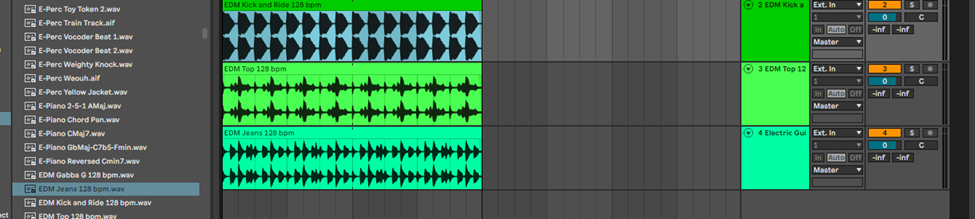
Import your sample and identify the section you would like to sample.
Step 3:
Depending on the type of sample type choose the appropriate warp algorithm that suits the audio file you are working with for good quality warp fidelity.
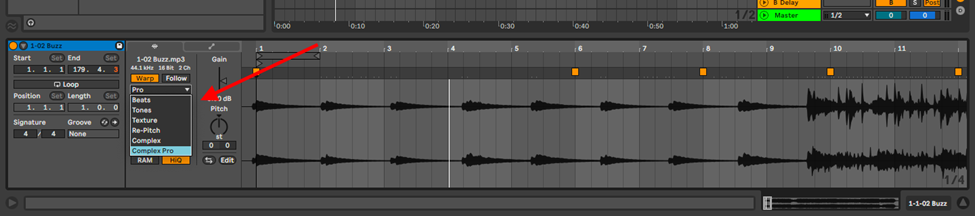
If you want a breakdown on these warp, algorithms please check out the Ableton Sample Editor Tutorial
Step 4:
Insert warp markers and snap to grid (quantize). When you import audio into Ableton, the algorithm will create markers along the sample. This feature is not always perfect, and may require you to add these markers and snap them to the grid manually.

After you create markers, you can easily quantize the sample by using the shortcut, Cmd + U or Ctrl + U on Windows
Step 5:
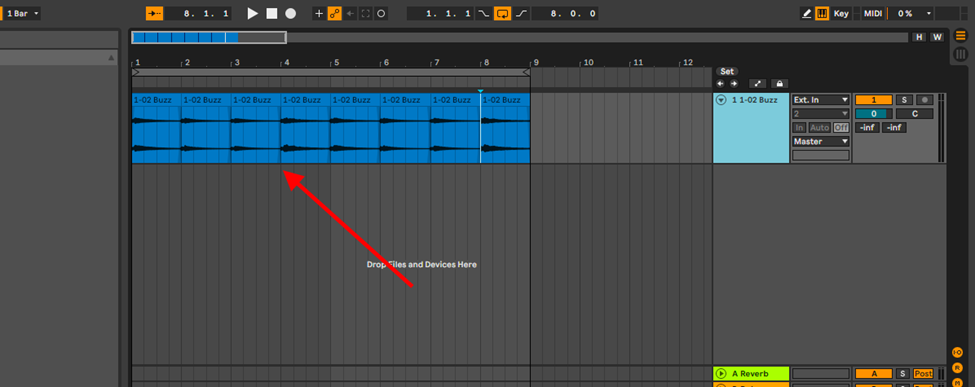
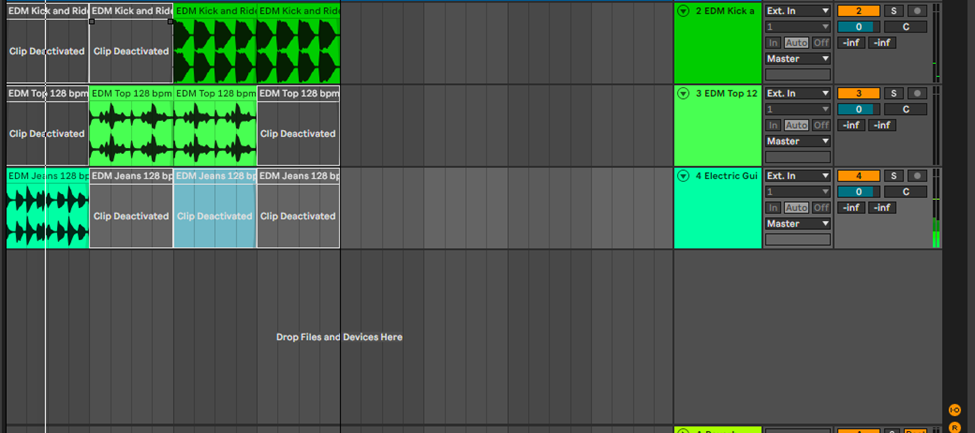
Arrange. Chop the sample in the audio track and arrange the chops to your liking
Tip:
You can make the sample playable on your computer keyboard, MIDI controller drum machine by:
Step 1:
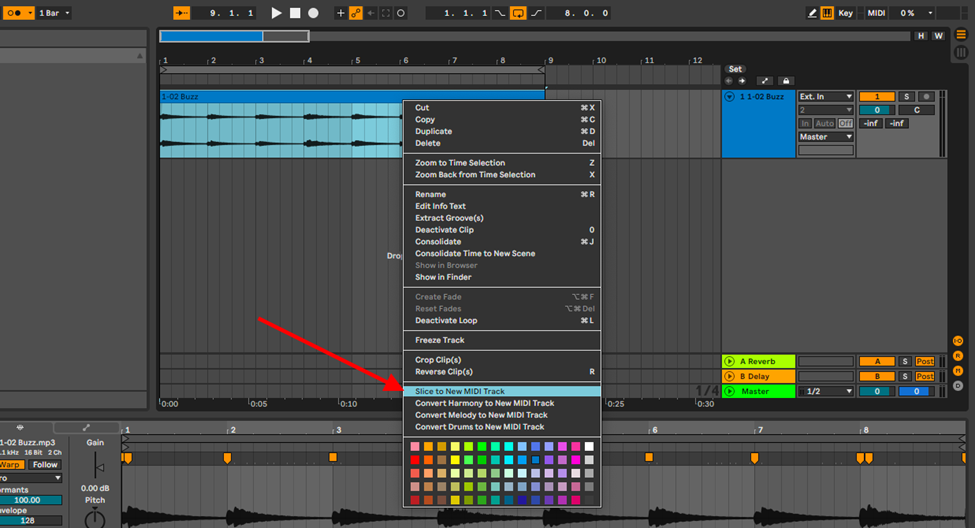
Right click on your mouse on the highlighted sample and select, Slice to new Midi Track.
Step 2:
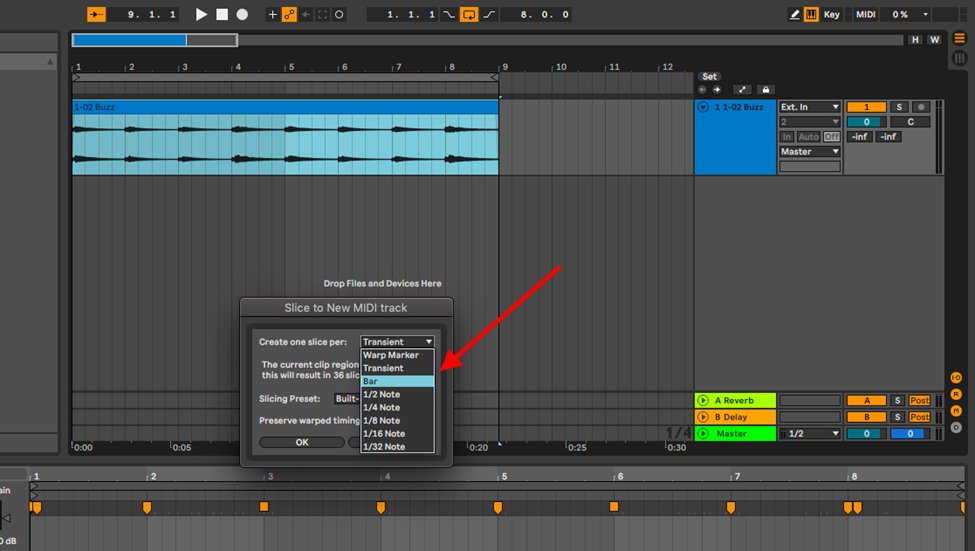
Choose how you want Ableton to slice the sample into the Midi track.
Step 3:
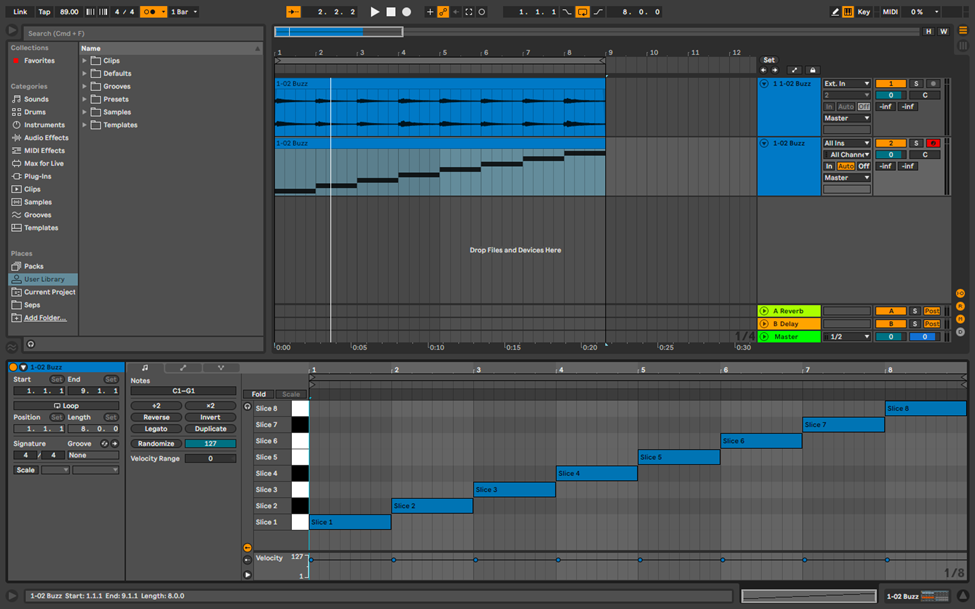
Customize the Midi arrangement to your preference by either manually drawing the notes, or playing the slices out on your Midi controller or computer keyboard and recording this arrangement.
Simpler
Simpler is Ableton’s primary sample editor. This is the second production based technique of sample chopping. Simpler’s design, functions and algorithms are created to make sample editing simple for you. I shall be going through these 3 categories step by step to demonstrate how you can go about chopping samples on Simpler.
Recommended Read: How to Retrieve & Activate Offline Samples in Ableton
This is how you go about chopping samples on simpler:
Step 1:
Open Simpler from either Ableton’s instruments folder or by creating a MIDI track, then drag and drop the sample manually into the Midi track.
Step 2:
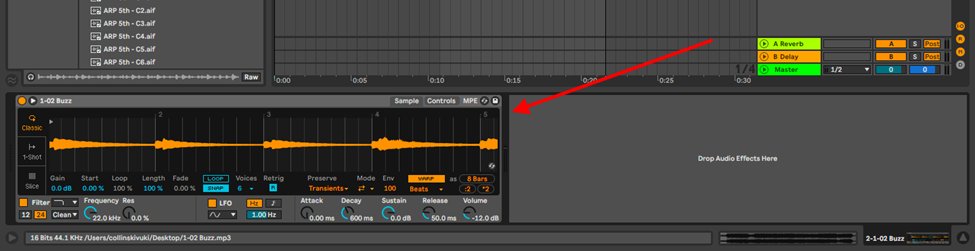
Go to the Slice View.

This view chops the sample into different playable sections by choosing any of the chopping algorithms under; Slice By, to suit your sample type. This can be transient – best for rhythmic/percussive samples, beats – best for melodic samples, regions – best for harmonic samples and chords, or you can choose to manually slice the sample. These chops are automatically mapped to your Midi controller.

Once you make your chops, and once they are mapped correctly on your Midi controller, you can play one chop at a time, or multiple chops at the same time creating chords, and further still, you can control how the chops behave when you play them back through the playback functions.

Note:
In some instances, you may need to quantize the sample before-hand. For more details on how Simpler works, please check out, Ableton Sample Editor Tutorial.
Drum Rack
This Ableton’s primary and hybridized performance and production based sample editor. You can choose to chop samples, record and arrange them in your mix or simply, record the chopped samples and loop them for your live performance, and play other instruments as you go. This is how you chop samples on the drum rack
Step 1:
Import your sample into an audio track.
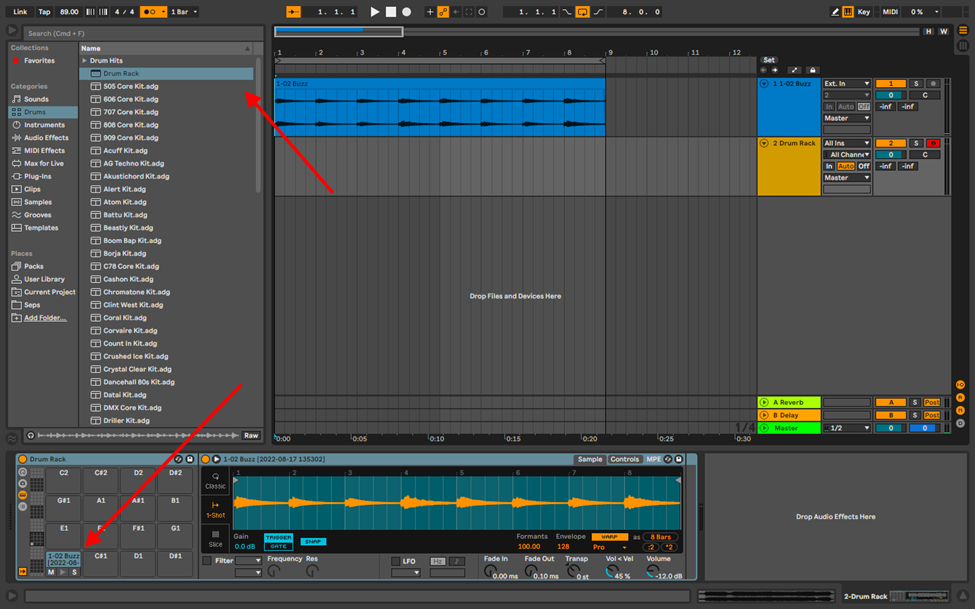
Step 2:
Create a Midi track, open Drum Rack from the Ableton Drums folder, and drag and drop your sample into the drum rack. This maps the sample into your Midi controller, drum pad, or your computer keyboard.
Step 3:
Open your chain functions (this allows you to control the gain, pan, and mute/solo functions of your sample), then click on the I/O function.
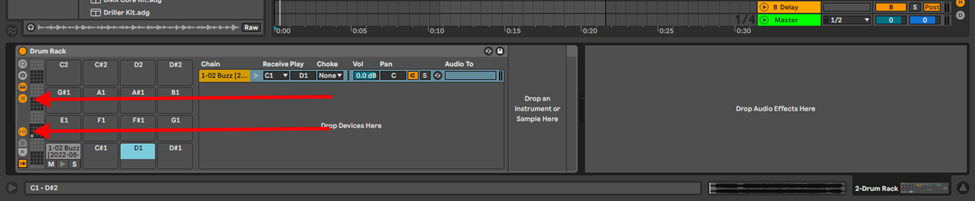
Step 4:
Set your preferred number of choke points. In this case, I have set the chop by region algorithm for this melodic sample, the different algorithms work best for certain types of samples

Step 5:
Copy and paste the sample to as many notes as you prefer then crop your samples on each note.


This function allows you to split your sample into however many regions/beats you want, and map them on the drum rack. Once mapped, whichever key you play, will stop the previous region and play the region mapped on the note you play.
Tip:
You can select the more in-depth view to edit each individual sample region and then map your controls such as fade-in and out, transpose or volume to your macro controls.
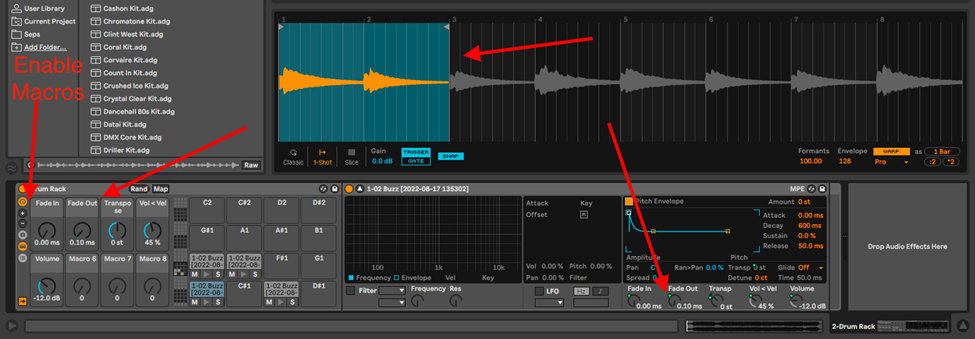
These macros are controllable by the knobs on your midi controller.
Gated Chops
Gating, quite simply, is the dynamic use of one sound or instrument to trigger another to start or stop playing; this can be done manually by chopping the samples yourself, or by the use of a gate compressor. This technique of sample chopping is hyper-specialized and is almost particular to drum loops. If you have multiple sample loops, you can mix and match them using another sample or instrument to trigger a specific region of the sample to create your own unique hybrid sample loop. I shall demonstrate how you can manually gate, and how you can use a gate compressor to chop samples.
Manual Gating
This production version of gate sample chopping is crude, but effective. It is not as complicated as the latter more performance oriented gating technique where you employ the use of a gate compressor, it is more akin to the first technique in this tutorial,the Drag and Drop technique where you manually chop and arrange samples. This is how you can go about manually gating samples:
Step 1:
Identify 2 or more samplers.
Step 2:
Chop them bar by bar (Windows – Ctrl + E, IOS – Cmd + E), and mute any region to your liking (Windows – 0, IOS – 0)
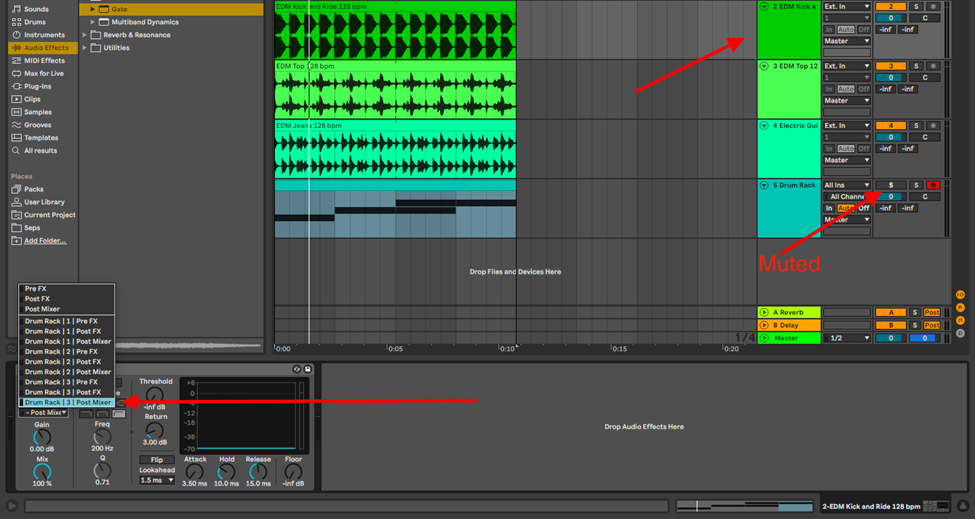
Sample Chopping with a Gate Compressor Part 1
This mode of gating is much more advanced than manual sample gating. For this demonstration, I shall use Ableton’s gate compressor. This is how you would go about gating samples using an instrument.
Step 1:
Load an instrument on a midi track.
Step 2:
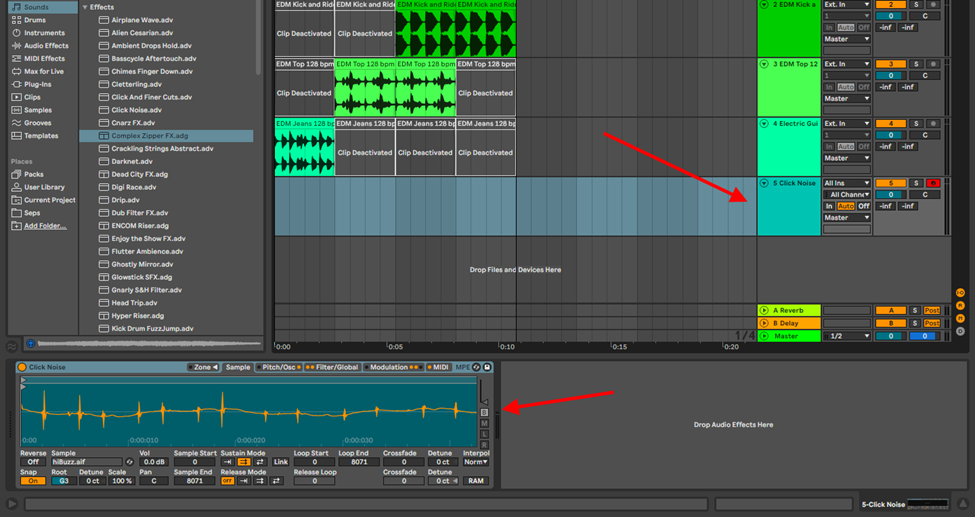
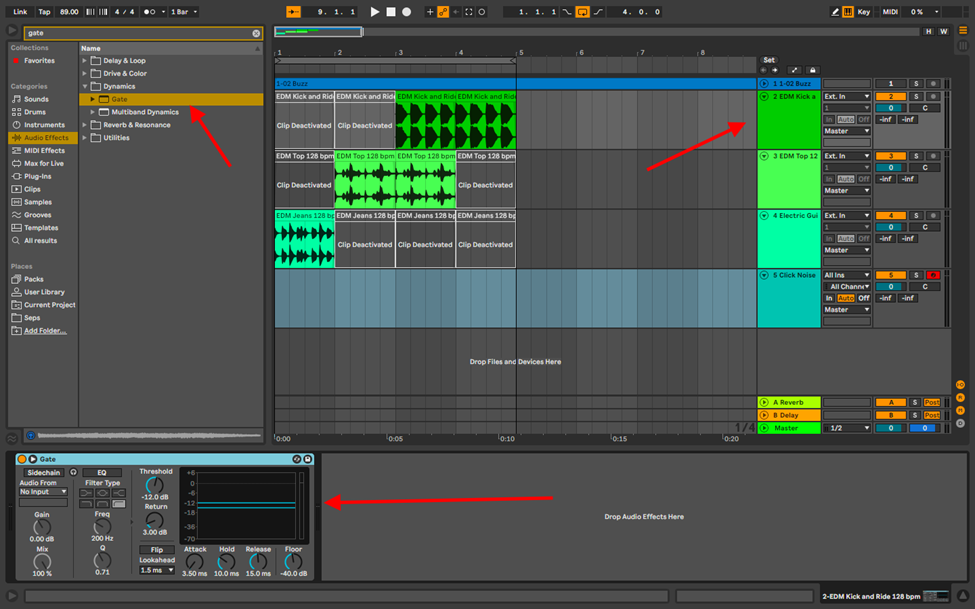
Put a gate on your sample track.
Step 3:
Sidechain the gate to the midi track and add notation to the midi clip
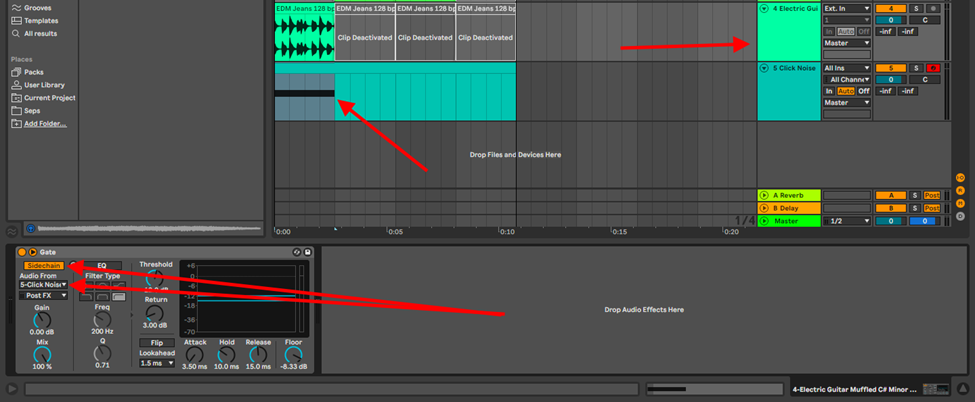
The sample will only play as long as the midi track notation is playing
Tip:
You can prevent the sample chop and the instrument playing at the same time by simply muting the instrument.
Sample Chopping with a Gate Compressor Part 2
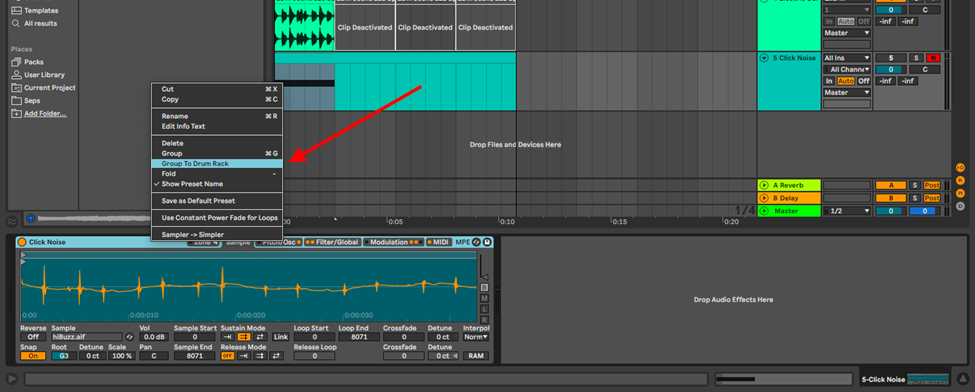
You can take this a step further by grouping your instrument into a drum rack.
Step 1:
Group instrument into a drum rack. Right click on the instrument and select Group to Drum Rack
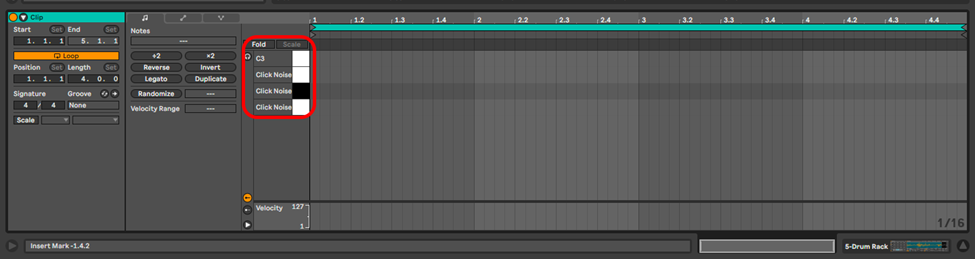
Step 2:
Depending on how many samples you are working with, map this instrument into a matching number of notes. In this demonstration, I am using 3 samples, and therefore, I shall map the instrument into 3 notes on the drum rack.

These clip lanes can be seen in the piano roll view
Step 3:
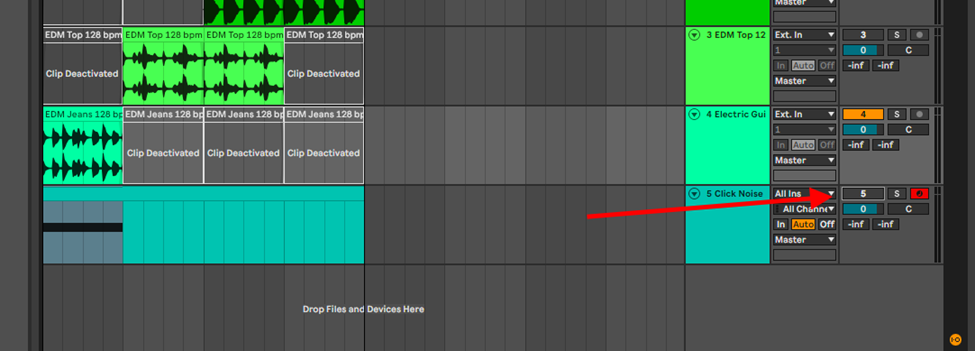
Put a gate on each sample track and specify where the gate shall be activated from by the sidechain function
Tip:
You can use this sample chopping technique for more than just drums.
Conclusion
Sampling is an artform and anything can be sampled. In this tutorial, I have demonstrated four techniques you can use to chop samples for a more interesting and unique beat. Depending on the situation, you can use any one of these techniques, or even in combination with each other to make music. Why stop at beat making? You can push this artform further and use it in your performance either live and improvised, or prepared beforehand. Have fun!
- How to Use Ableton Live’s Arpeggiator? - September 18, 2023
- How to Use the Piano Roll in Ableton Live + Shortcuts - September 18, 2023
- Ableton Arrangement View (Optimization & Usage) - September 16, 2023


