In this guide, I will provide a comparison of all the Push devices that I have reviewed in my previous guides. I will track the development of the Push devices over the years and show you the changes that came along with each release; I will over these devices chronologically, I. e. Push 1 v Push 2 and Push 2 v Push 3 to provide this comparison effectively.
Recommended: Best Ableton Push Alternatives
I will do a side-by-side comparison of the devices, comparing physical features, their connectivity with your computer and Live, and their utility in action. This will help track the evolution of these devices, and what has changed, added, or been removed over time. This guide will be useful to you as a producer, beatmaker and performer when making buying decisions. Let us get cracking!
Push 1 v Push 2
The Push devices were developed and designed just as similar to MIDI controllers that came before them in their nature. What all Push devices have in common is that they are simply designed around a display screen, soft pads for performance and control, knobs and a touch slider, they only seem to vary with their button and controls, placements, display screen, colour schemes, and the addition or removal of specific controls. Let us have a look at the physical differences.
Physical Differences and Similarities
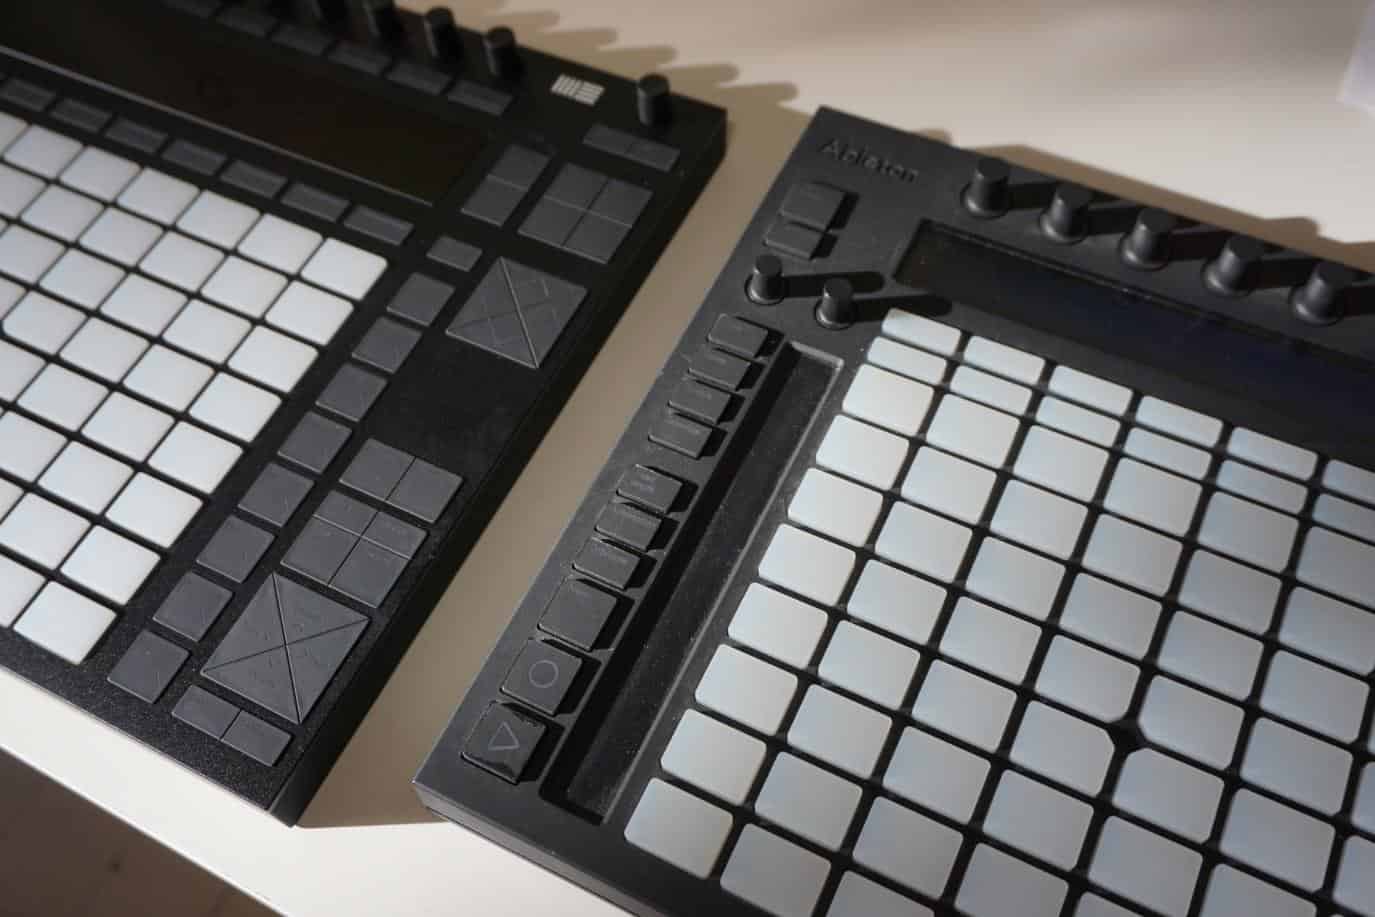
- When you unbox your Push 1 and Push 2 devices, you will notice that the Push 2 is just slightly larger and heavier than the Push 1 device.
- Both have a 64 soft-pad performance section but with slight changes in controls where some have been added, removed, replaced, combined or moved around between devices.
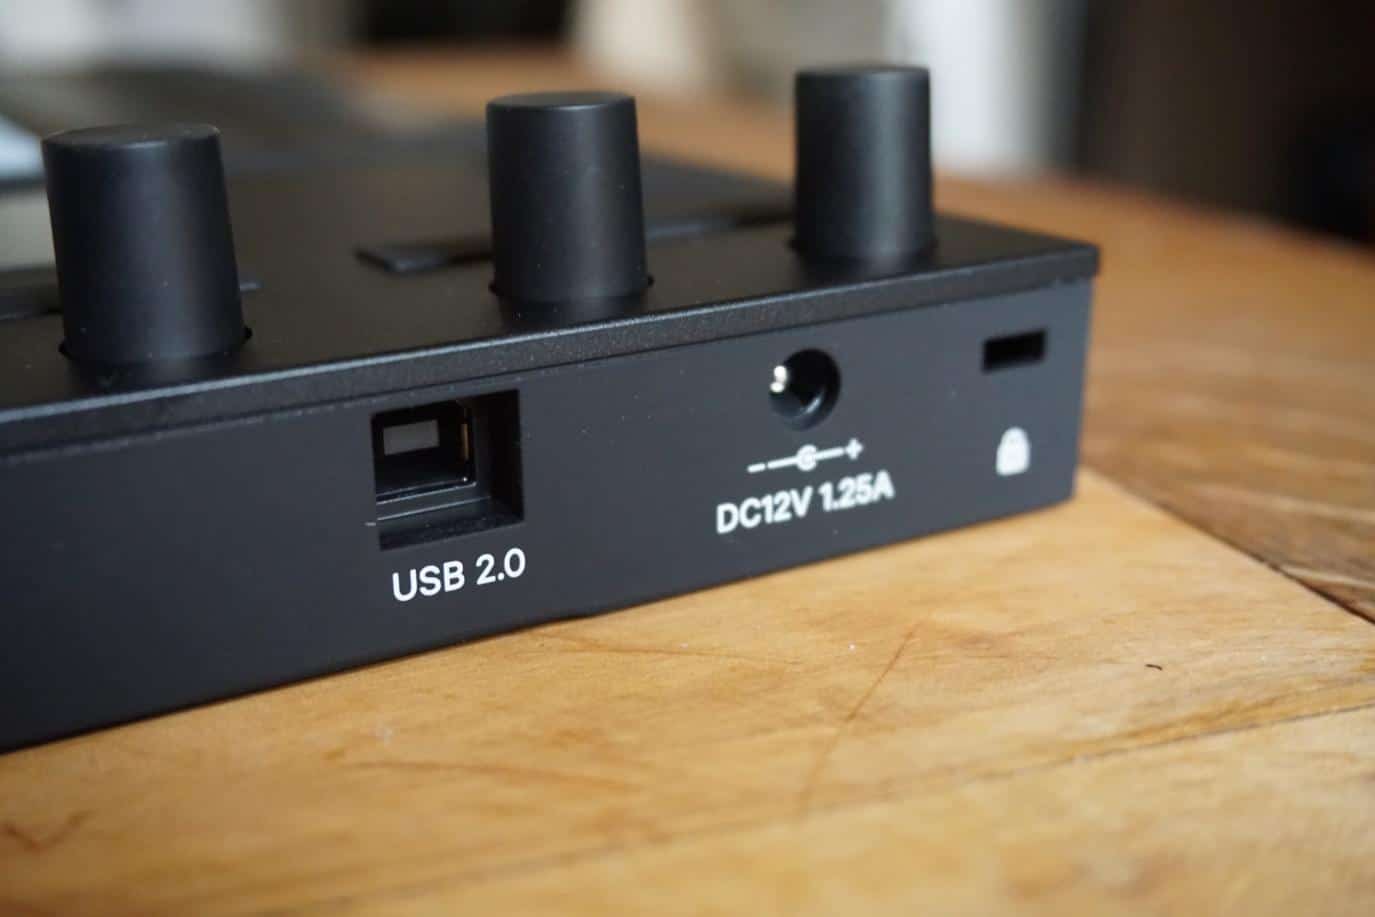
- Both have a USB B connector to connect to your computer and a power supply connector.
- You will also notice when you lay the devices side-by-side the Push 1 stands a little bit taller than the Push 2, with its buttons and soft pads standing slightly higher from the device’s chaise.
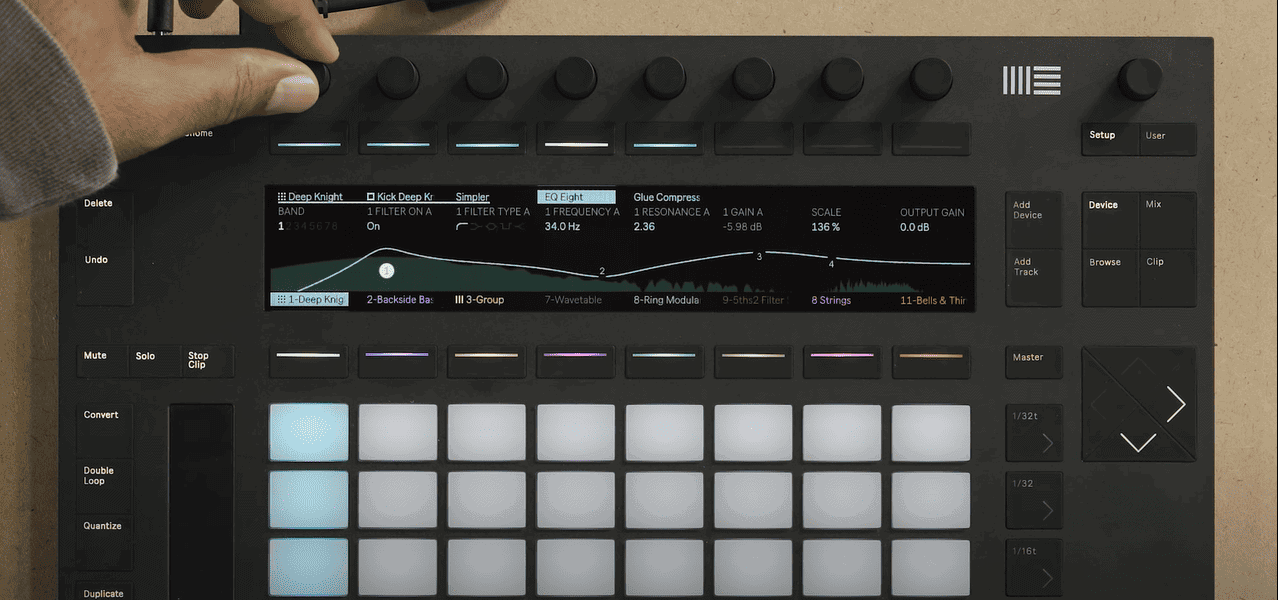
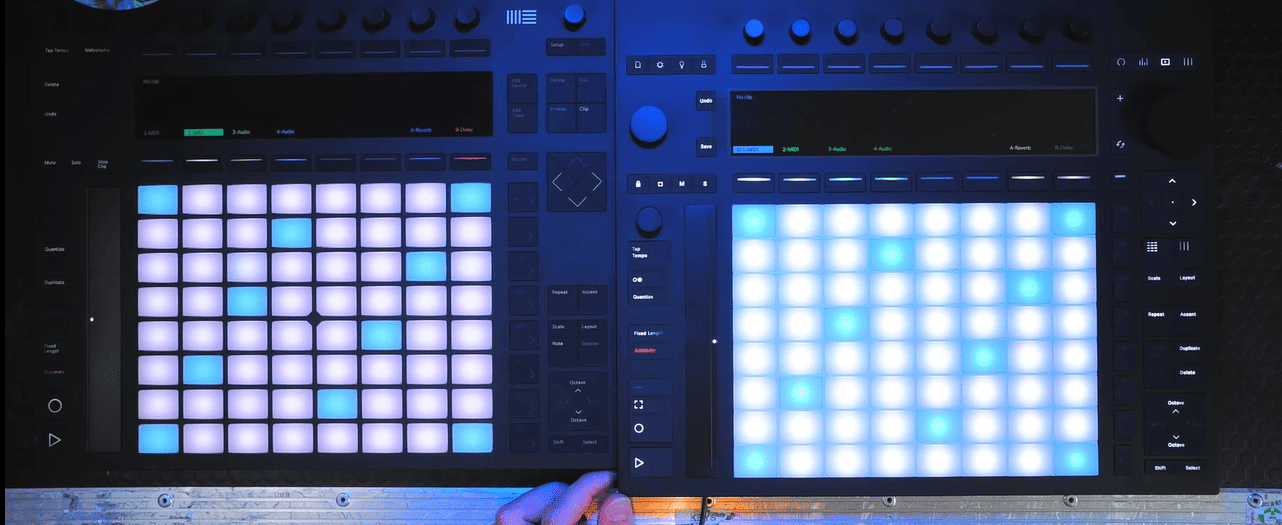
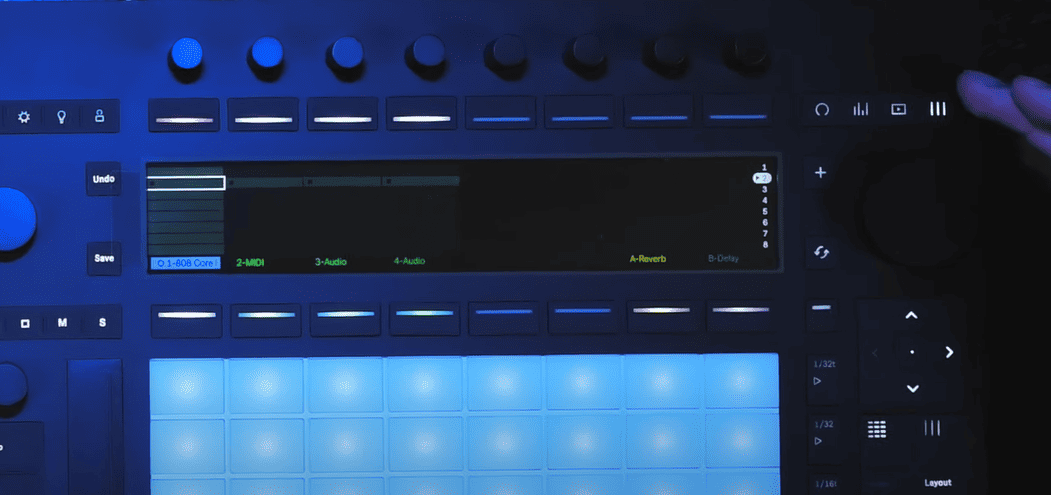
- The most significant difference when you connect your Push devices is that the Push 2 has a coloured and graphical display that will change colour to match the colour of the track you have currently armed in Live, moving away the Push 1’s dull black and orange display.
Device Connectivity
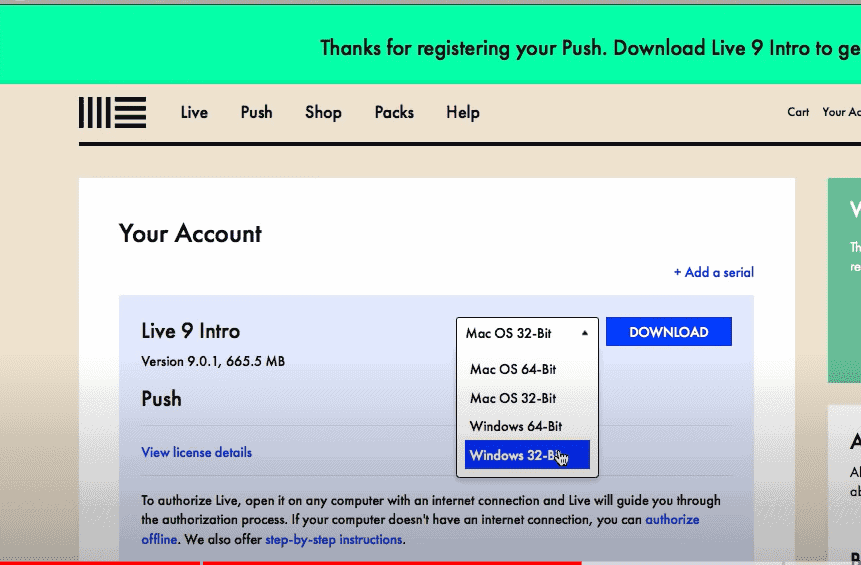
Both devices function similarly when it comes to connectivity to your computer and live. They both connect via a UDB B to a USB A cable. Once you have connected the devices to your computer, you will need to register your device using the Ableton website and log into your Ableton account to download, install and activate the latest version of Live.
Both devices are simply plug-and-play if you have Live installed and activated in your computer, and do not need drivers to use them.
Utility
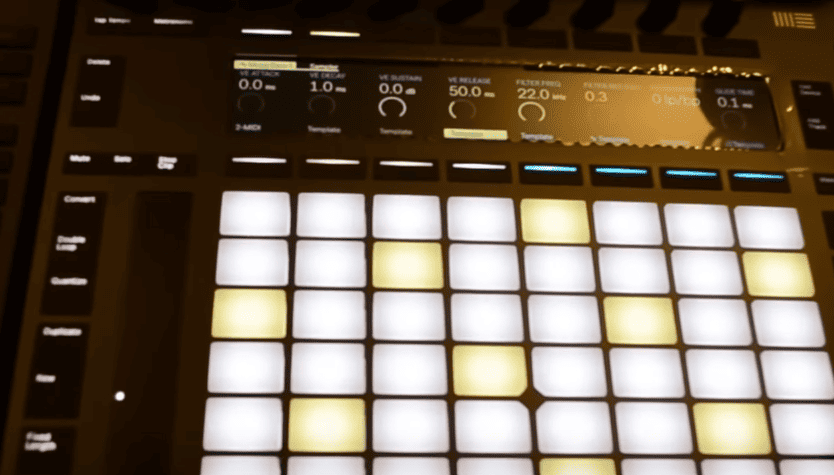
I have found that both devices function very similarly when it comes to creating a track, editing audio effects control parameters, recording, opening, and scrolling through your browser. The big plus that comes with the Push 2 device is the dynamic display screen. This dynamic screen allows you to visualize the control parameters and audio effects units that you have loaded on your track. This greatly helps with creativity, especially because you can vividly see what you are doing on your tracks as you would on Live.
Final Verdict
Ableton did an excellent job building upon what worked on the Push 1 device. The compactness and slickness of the Push 2, the vivid display and the flatter, heavier and larger build quality draw me more to the Push 2 device over the Push 1. Push 2 also removes many of the extra controls in Push 1 by combining many controls. This alleviates the sensory overload you might get as a user from too many controls at the tip of your fingers. A better selection to go with in my opinion is Push 2!
Push 2 v Push 3
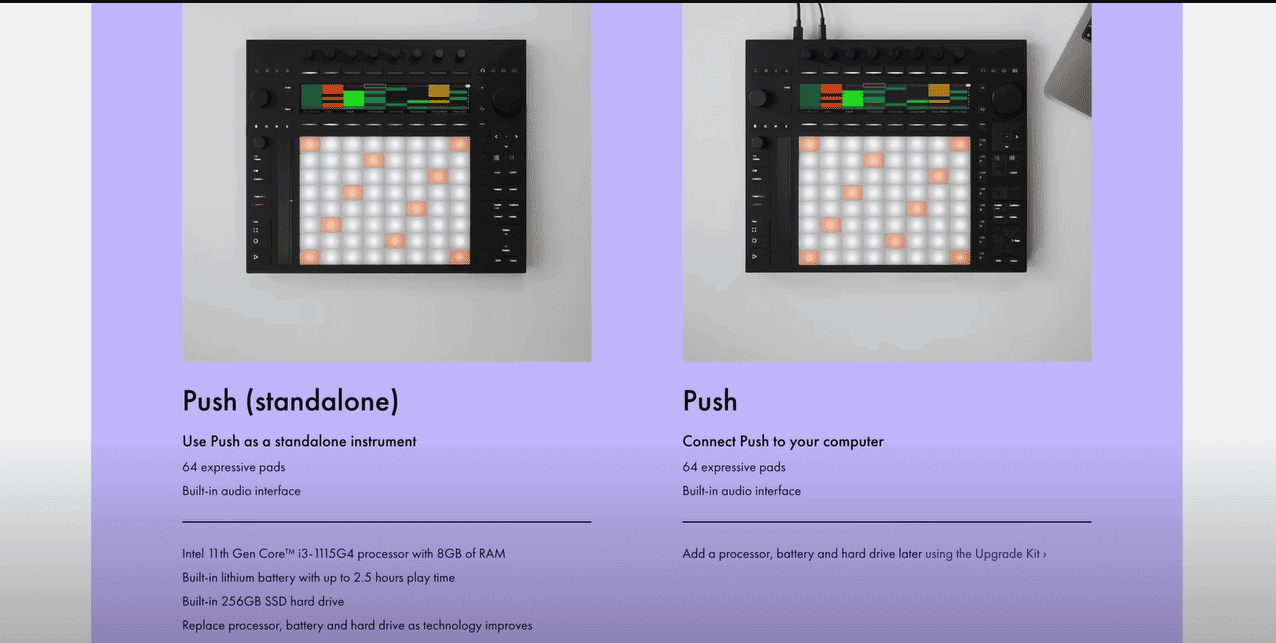
When it comes to comparing the Push 3 and the Push 2 units, the differences in utility and to a large extent, the connectivity to other devices and your computer might be a bit stark. This is because Push 3 took eight years of development before the final release (2015 – 2023). The years are taken for the development phase up to release to focus on technological leaps. The best comparison may come from other MIDI controllers that can do what the Push 3 can do. This is because there are 2 variations to the Push 3, standalone (can run without the need to connect to a computer or live) and the standard variation.
Physical Differences
- The Push 3 device is of course slightly larger and heavier than the Push 2, just as the Push 2 was compared to the Push 1
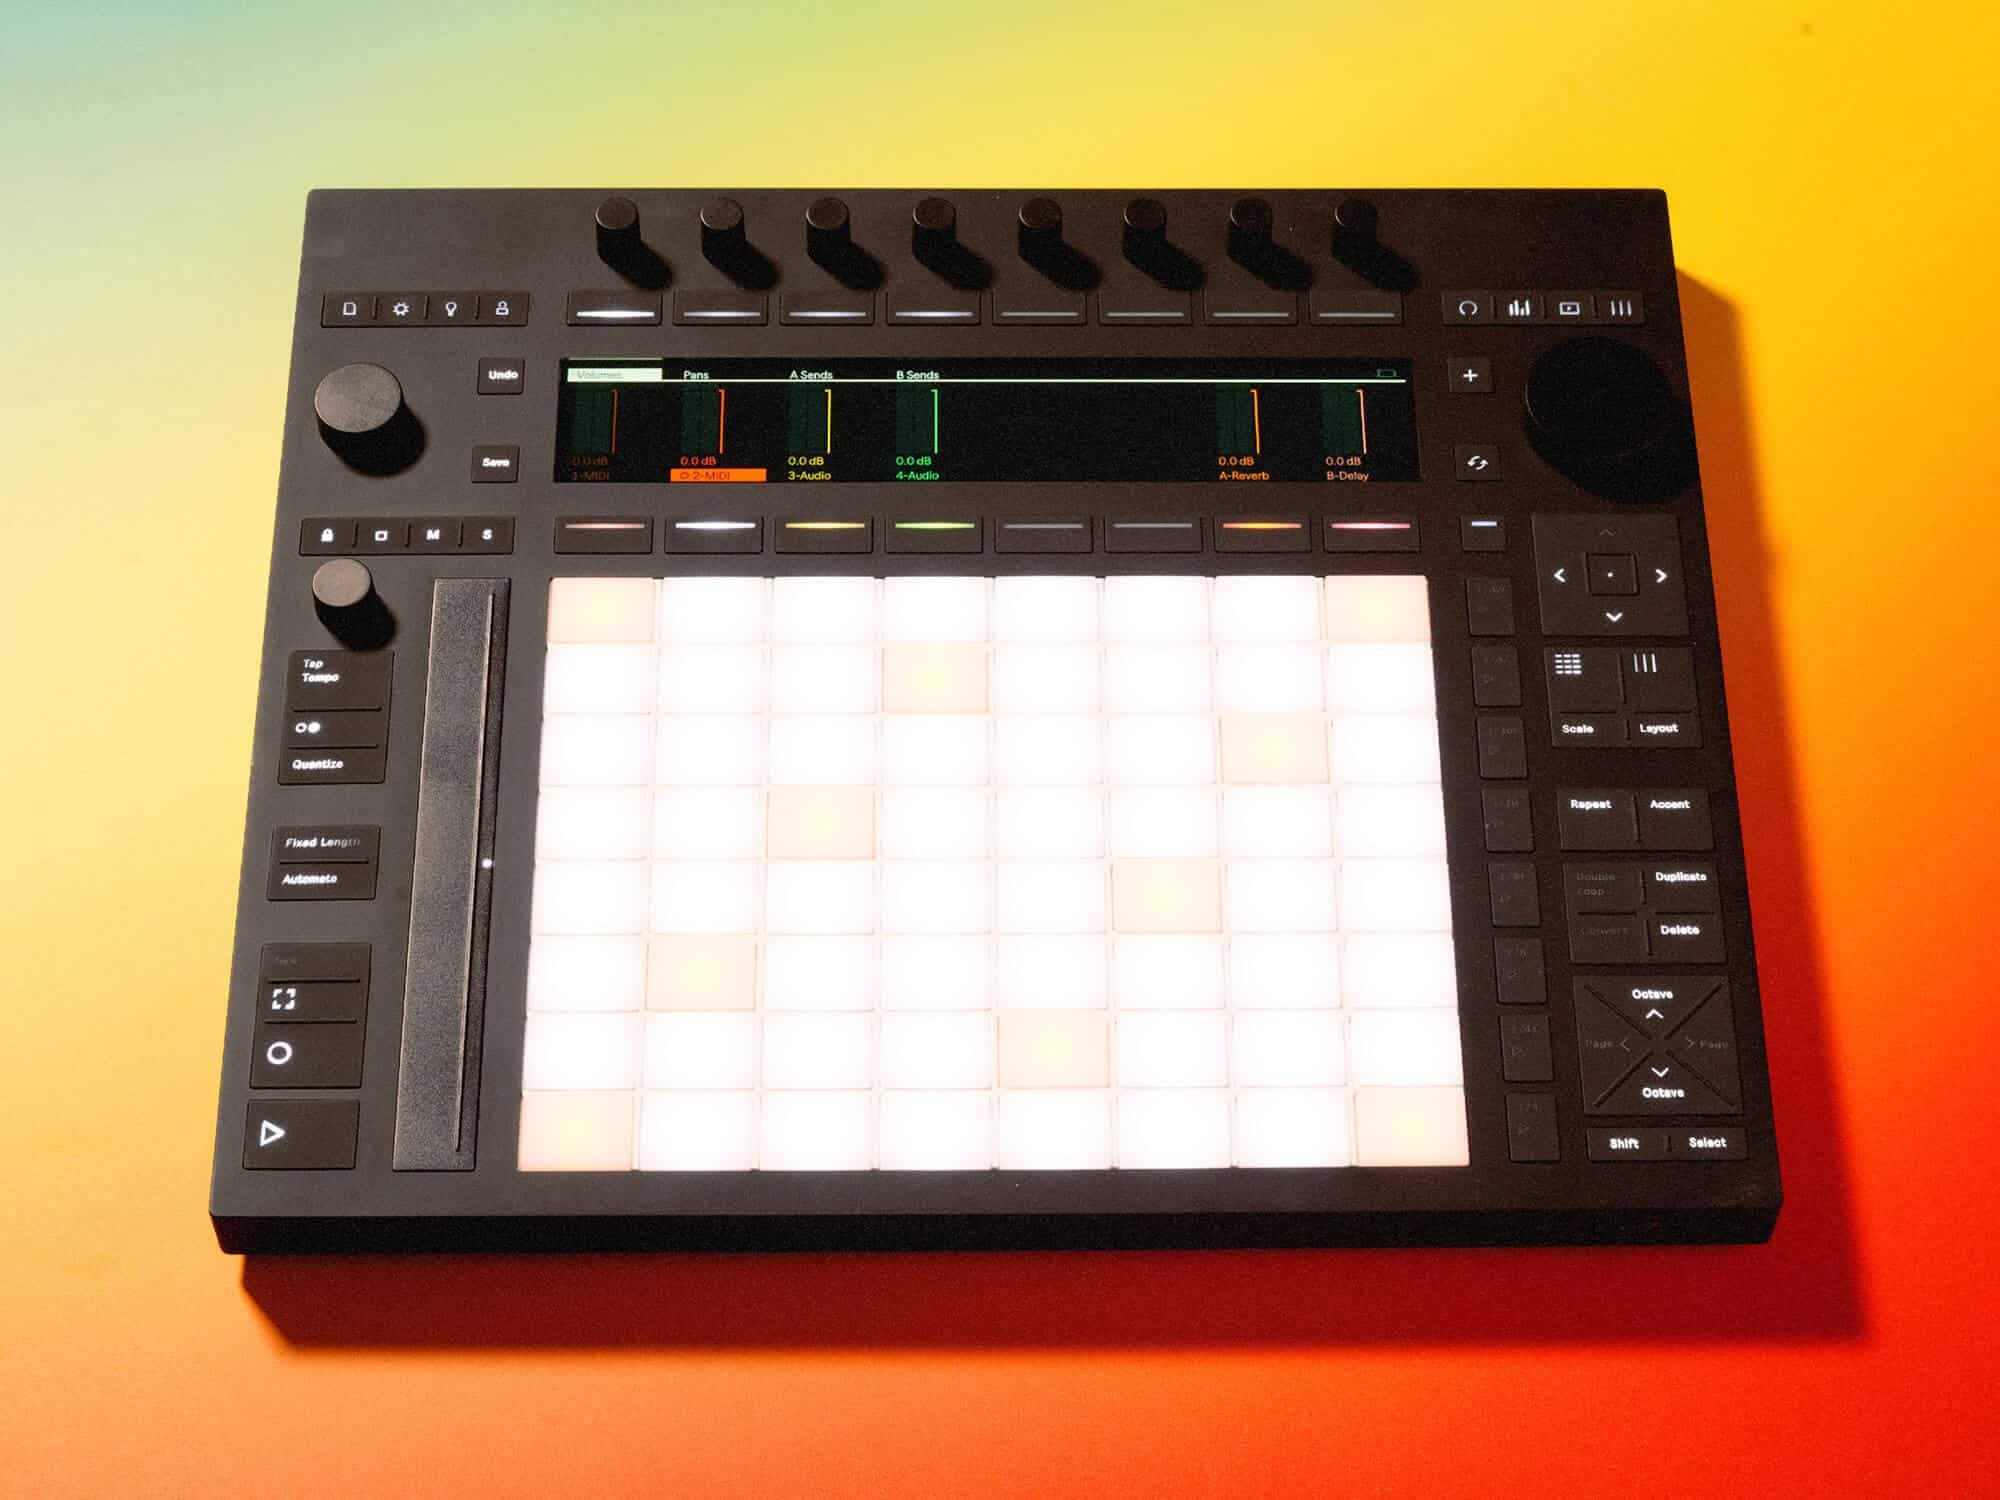
- The controls are the same visually, as the Push 3 is simply a dynamic display, with 64 performance soft pads, buttons and turning knobs
- The soft knobs are connected physically and in circuitry. The reason behind this is something I will cover in the utility section, so stay posted!
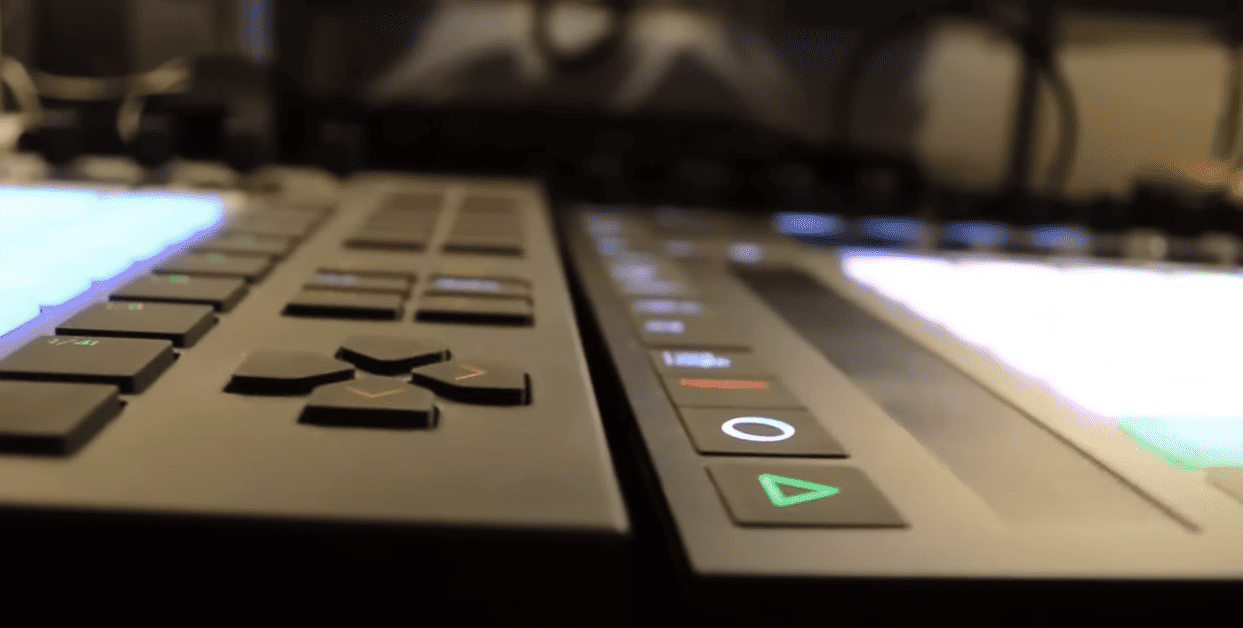
- Some control buttons that were once named on the Push 2 have now been replaced by symbols that may need you to be intuitive to know which control does what.
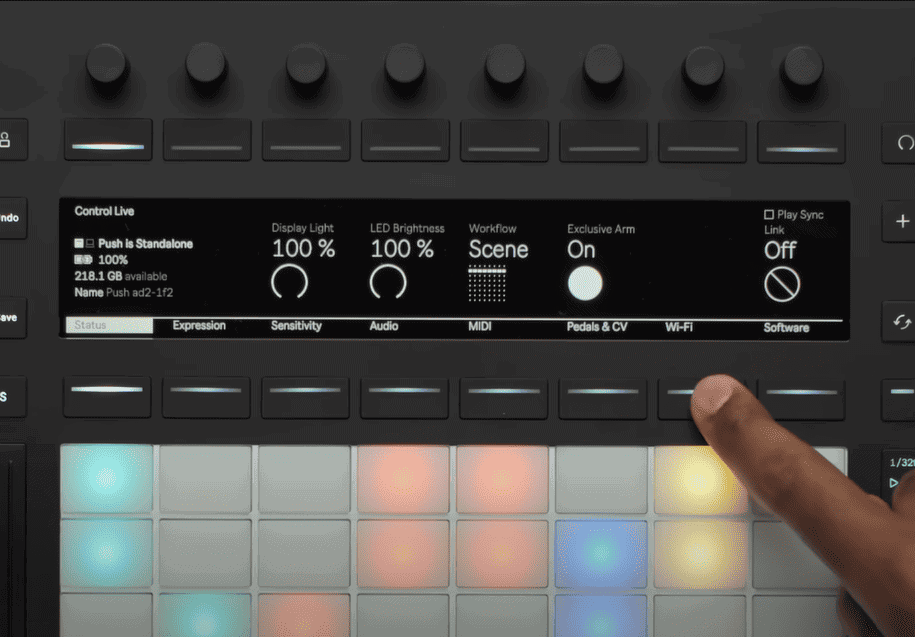
- The brand new audio interface to the Push devices is pioneered by Push 3. This allows you to use push as a standalone recording (both audio and MIDI) and playback device.
Connectivity
- Push has made a leap from the USB B to USB A connectors, to a USB C standard connector
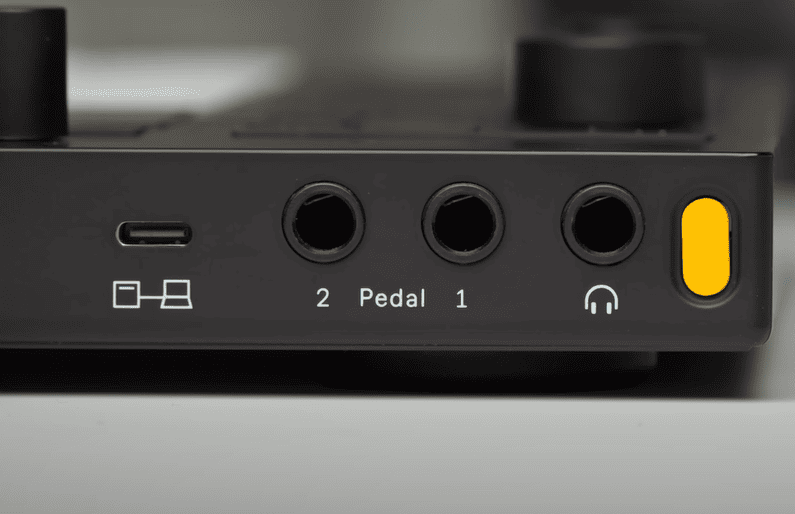
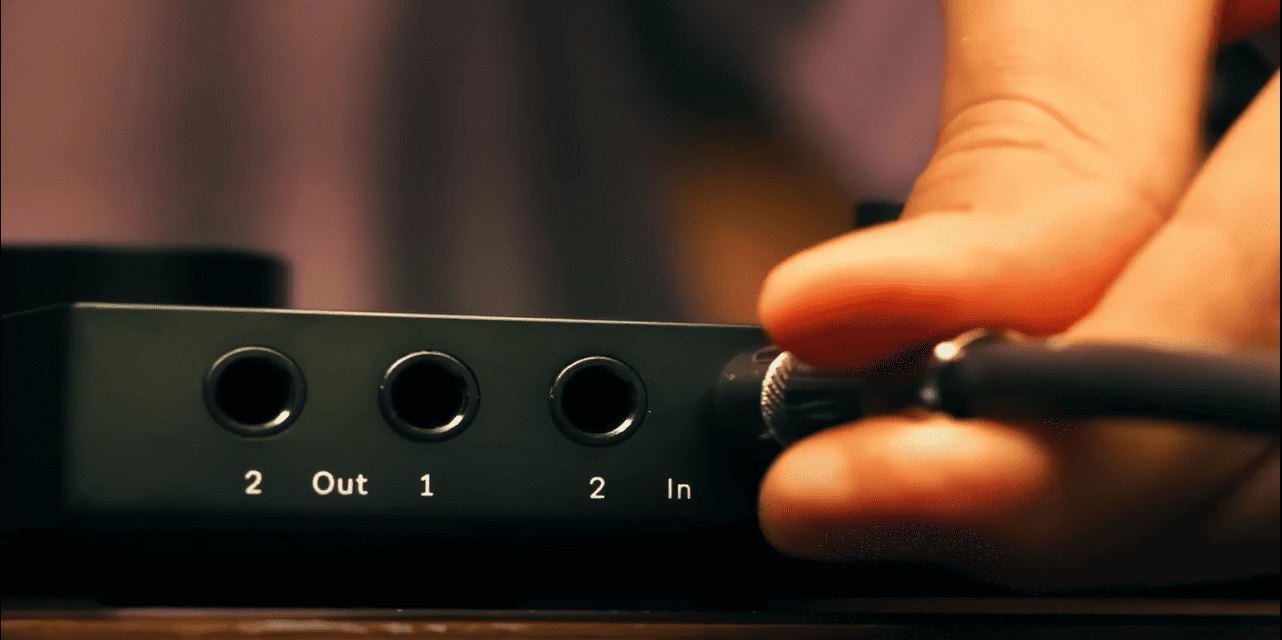
- Push 3 has its in-built audio interface. What this means is that you can now access 2 stereo inputs for audio recording and 2 stereo outputs for playback, one MIDI in and out connection, 2 pedal controls for performance augmentation units, and an ADAT in/out connection to synchronize with other audio interfaces in your studio
- Push 3 also allows for the connection to a Wi-Fi network for easy file transfer between your computer, and to access libraries from the Ableton website.
Utility
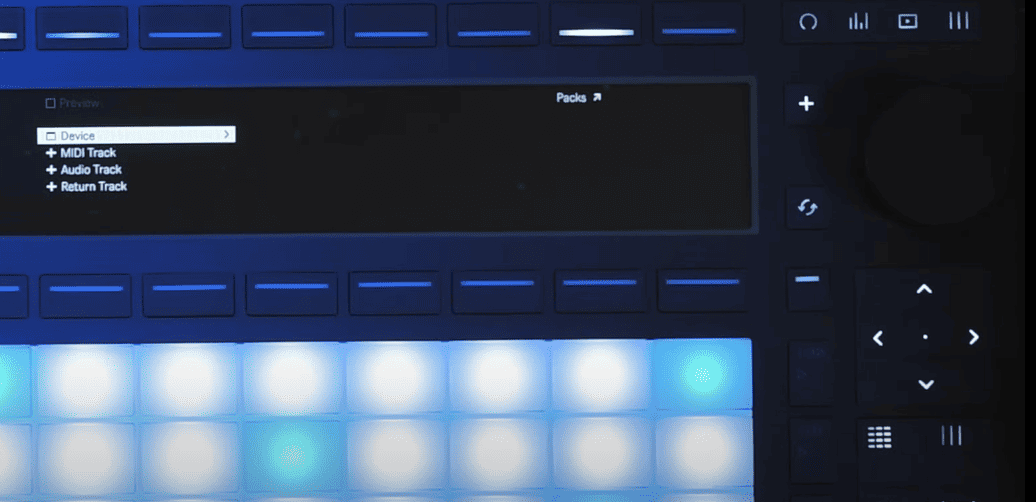
- Loading tracks and instruments work the same as it did on Push 2, only this time the button labels are replaced with symbols, instead of words, but the loading process is much clearer in my opinion.
- The MPE feature is the most exciting new feature on the Push 3 device because MPE (MIDI Polyphonic Expression) allows you to control multiple instrument parameters simultaneously depending on how you press the notes on your MPE-capable MIDI controller. With MPE you can change these individual values for every note in real-time: Pitch Bend (horizontal movement) and Slide (vertical movement).
- The ability to switch between clip/notation mode and see this visually through the display screen is especially useful in a live performance. This makes it very easy to switch between tracks and clips within those tracks.
- The inbuilt audio interface is another massive leap for the Push devices that is exclusive to the Push 3. You can now use your Push 3 device as a recording and playback device. You can also link other MIDI devices via the audio interface to synchronize your instruments.
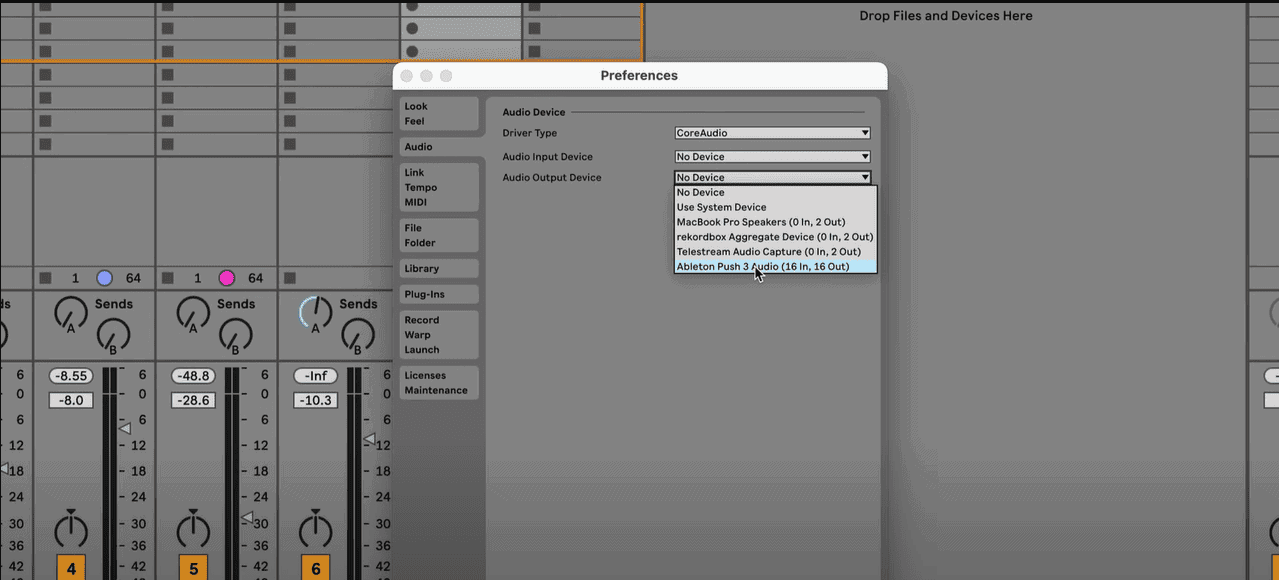
- You can use Push 3 as an audio device as a listening device for live using the audio interface and using it as an audio output device.
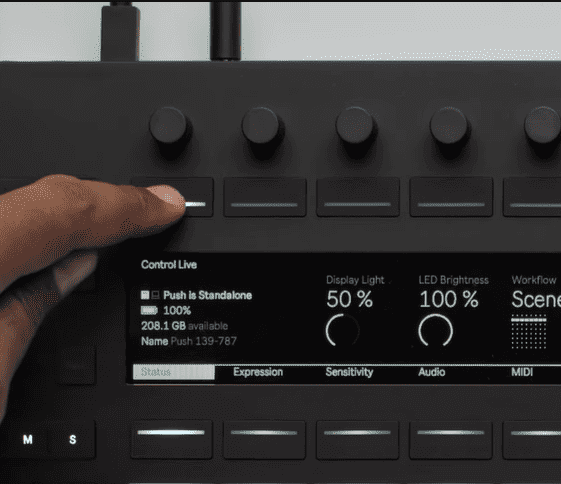
- You can now use Push as a standalone recording playback device with the new in-built audio interface, and switching between standalone and ‘connected’ modes is done all by the click of a button.
- You can connect and send files between your computer and the Push 3 unit wirelessly or through the USB-C connection. This is especially useful for on-the-go sessions and performances.
Final Verdict
The differences between the Push 2 and the Push 3 are so stark, if both devices did not appear similar in design physically or made by the same manufacturer, and were going to this guide blind, you would think that I am talking about a different device altogether. It took Ableton 8 years of research and development to manufacture this device and the difference shows. I would recommend the Push 3 over the Push 2 even in the connected mode due to the massive leap in utility that the Push 3 provides!
Final Thoughts
The Push devices are fashioned after Live’s principles, which are, simplicity, innovation and speed. Ableton has gradually built upon what works on the Push devices since the development of Push 1. With the release of the Push 3 unit, some critiques mention that the standalone technology is not new and has been a feature since older devices like the Akai MPC 2000 of 1997, but if anything sets the latest Push 3 unit, is the MPE highly responsive feature and its seamless connectivity with Live and the Ableton website, to make all you need to work with the Push 3, an internet connection.
I also do have reservations about the Push devices. The Push 3 device now allows you to view the session mode as you would on Live, which will enhance your performance, composition, and mixing, but the lack of an arrangement view is a feature that would make Push devices truly standalone. Nevertheless, the release of the Push 3 building upon the previous Push devices is truly game-changing. This device is meant to be the centrepiece of your sessions, and I am excited for what the future holds, and so should you. Have Fun!
- How to Use Ableton Live’s Arpeggiator? - September 18, 2023
- How to Use the Piano Roll in Ableton Live + Shortcuts - September 18, 2023
- Ableton Arrangement View (Optimization & Usage) - September 16, 2023


