When I was just starting out with music production, I got a small interface, an SM57, and a pretty basic laptop. I had to figure out how to set everything up. Almost instantly I ran into crackling (the red flashing of the Transport bar), severe lagging, and even the occasional REAPER freeze when I was trying to monitor myself through REAPER. Problems that I didn’t know how to solve at the time. These are issues that come up often, so I thought I’d write about it since many of you will come across something similar sooner rather than later.
Why is REAPER Crackling During Playback?
Well, the basic answer to this question is that you’re overloading your system!
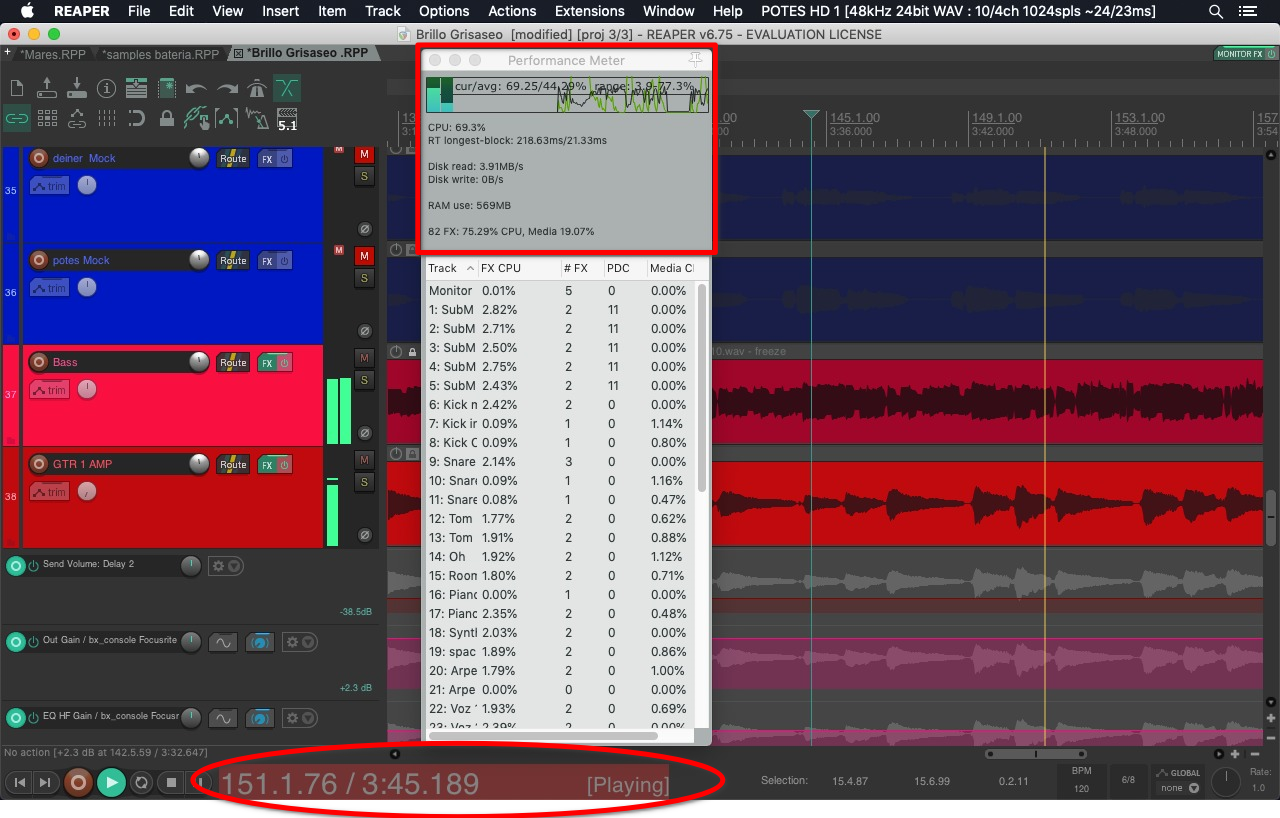
Your Audio buffer is like a train that moves the audio from your PC/Mac to your interface and vice versa. It allows the interface to play the audio back to the outside world, or your machine to record and save it on your drive. Crackling happens when the audio buffer is trying to process too much ‘audio information’ for each Buffer cycle, which results in part of it being sent ‘empty’ to your interface. This is what causes weird glitches in your audio.
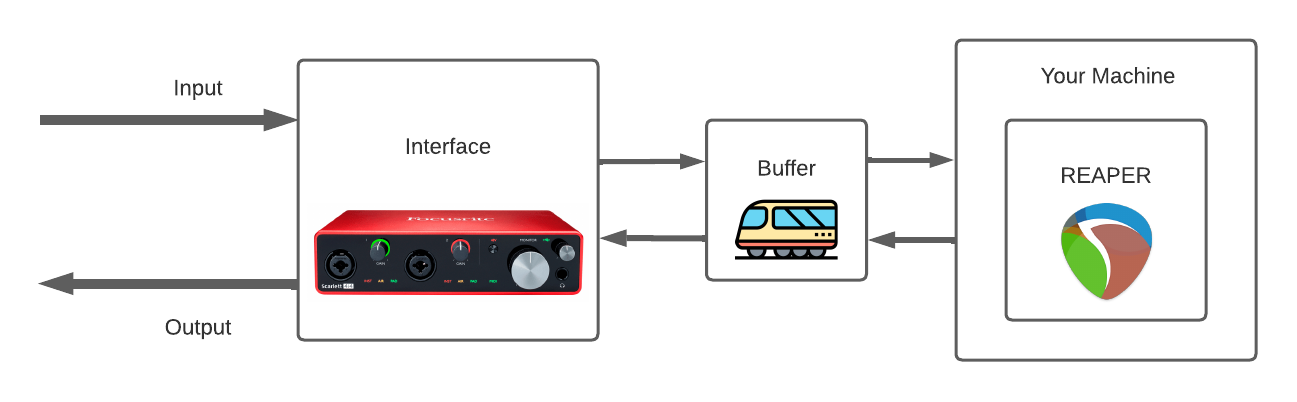
If REAPER starts to freeze or lag, it means that your machine is getting absolutely KO’d by the amount of information it has to store and process. If you want to know more about how the audio Buffer size works, check out this article.
How Can I Solve Crackling?
In order to resolve crackling, you need to reduce the CPU load so your machine is able to process information and fill the Audio buffer. There are a few ways you can accomplish this, so let’s go through them one by one.
Raising Your Buffer Size
Using a larger Buffer size is like increasing the size of the trains that transport your audio. By doing this, your system doesn’t have to send as many trains to transport the same amount of information and your CPU has more time to fill each train.
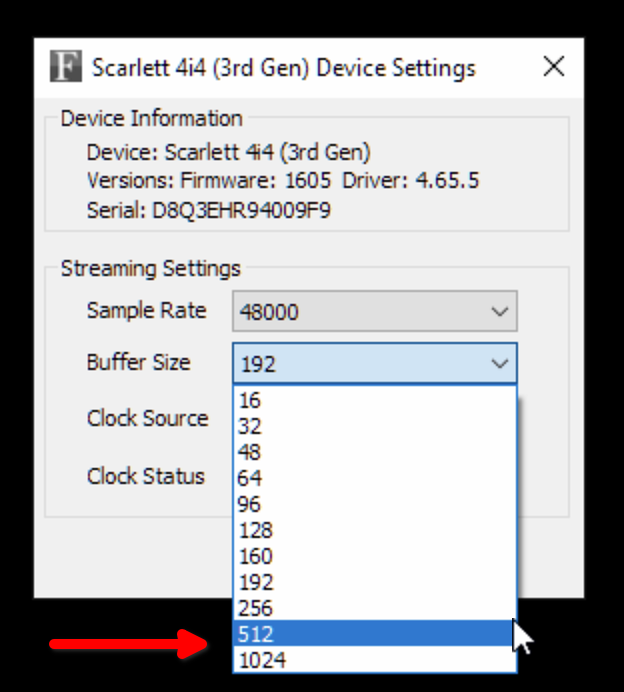
However, as the Buffer size gets larger so does the time between each train. This will increase the latency of your system. This an excellent solution for processing audio but an awful one for live monitoring. If you need to monitor yourself live through REAPER, the solutions discussed next are a better fit.
Disabling FX or Mute Tracks
The next troubleshooting step involves reducing the CPU usage by disabling plug-ins or muting tracks.
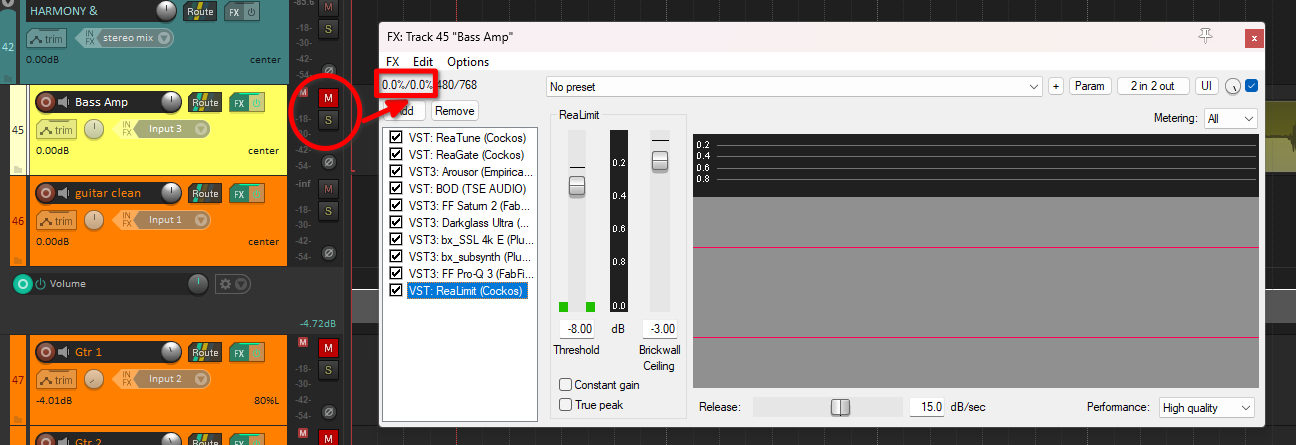
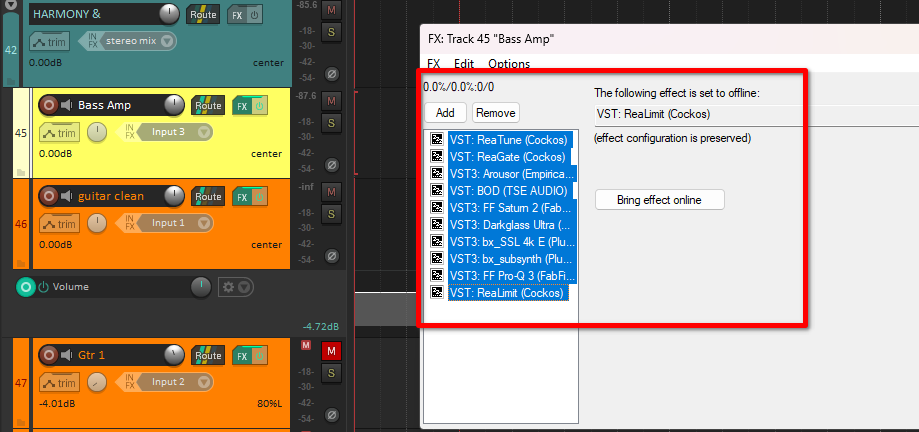
To disable a plug-in in REAPER, right click it in the FX chain and select the option Toggle selected FX offline. This will not only zero out the CPU usage, but also drastically reduce the RAM usage.
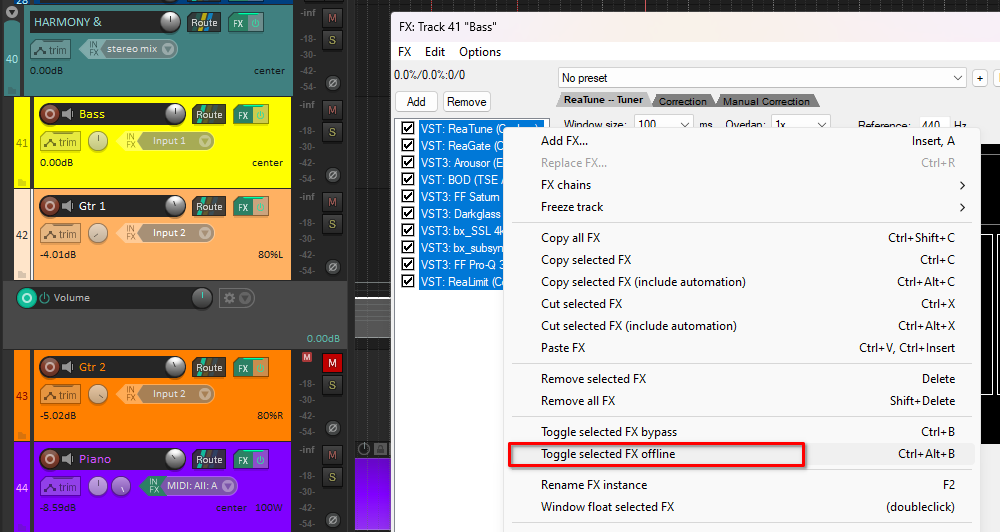
This is especially useful for virtual instruments that fill up your RAM completely and become the culprit behind some of the most severe REAPER freezes.
Rendering and Freezing Tracks
If for some reason disabling plug-ins or muting tracks is not an option, then it is time that you look into Rendering. This is important if you absolutely need that virtual instrument for your recording, or if you’re ready to commit to certain processing.
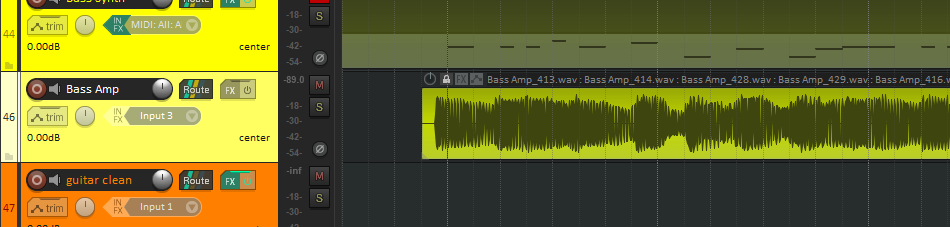
Freezing allows you to apply the FX chain of your tracks in place, updating the current track items and safely removing the FX that are frozen. This is useful if you constantly have to go back and change things quickly. Simply Unfreeze the track, make the changes, and Freeze it back again!
Note: Be careful! cleaning your Project directory while having frozen tracks can erase the original files.

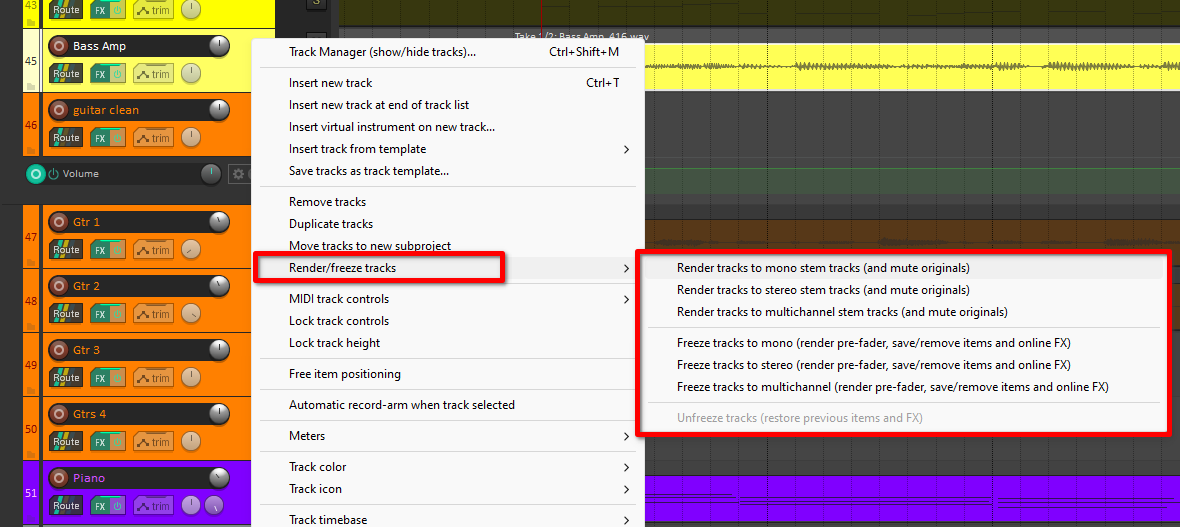
Rendering creates a new track with the pre-fader output of the current track, keeping your fader, panning and sends in place. It is useful if you want to keep the original track, either to apply new processing or to keep different versions. I personally prefer this option over freezing.
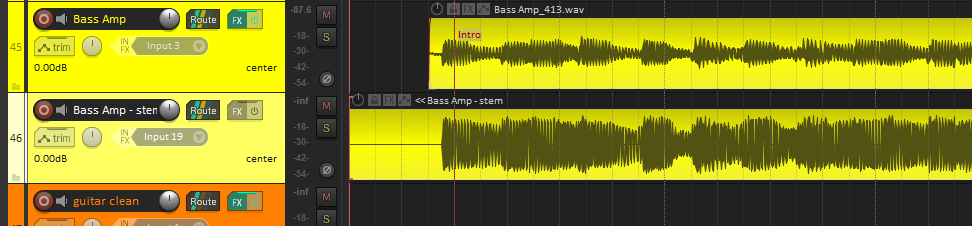
Both options are available by right-clicking the track(s) that you want to render and selecting the option that suits you better in the Render/freeze tracks section.
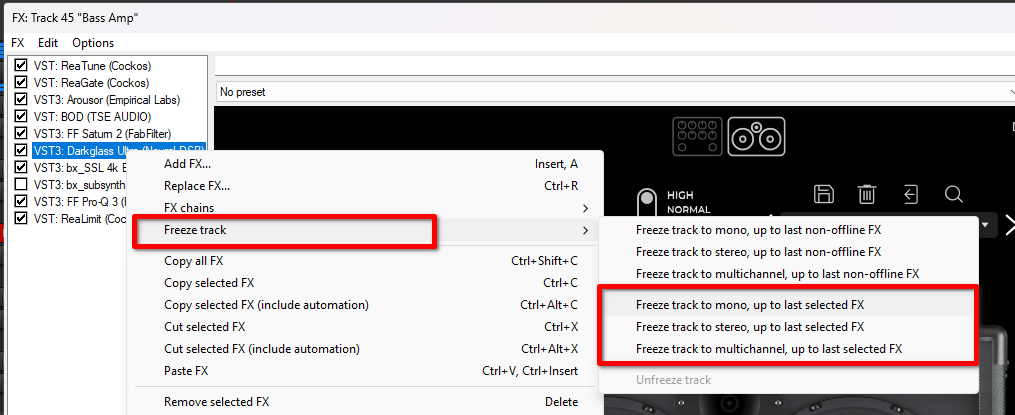
You can also Freeze only up to a certain plug-in by right-clicking the last plug-in ( the one you want to render) in the FX chain and selecting the option Freeze track, up to last selected FX.
Consider Upgrading Your Machine
REAPER is one of the lightest DAWs out there, and I have found that I can consistently do about 1.5x to 2x times what I can do in most other DAWs before overloading my machine. So for my personal use, I have never had to consider upgrading my machine. If your use case is a lot more hardcore, then may just have to bite the bullet and upgrade to something more powerful that is better suited to your workflow.
While it might be a big upfront investment, if you go for the right hardware, it will translate into having updated software, better compatibility, better performance, and higher efficiency. In other words, an all around more comfortable experience.
Conclusion
This is a compilation of the techniques that I’ve found along the way to better manage the resources that REAPER uses at any given time. My hope is that this article helped troubleshoot your system for a smoother production experience. Feel free to check out more of my writings in the REAPER section. Happy producing!

- Mixing in REAPER [ULTIMATE Guide!] - September 18, 2023
- How to Record in REAPER (Guitar & Vocals) - August 2, 2023
- Writing MIDI Drums in REAPER - July 3, 2023
")

")
