In this day and age, MIDI drums have become ever-present in music production regardless of genre. Even though some music styles like EDM and Rap are pretty reliant on MIDI instruments, this tool has managed to find itself a place in other areas like Rock, Metal, and even Jazz. Either to create mock-ups, enhance the sound, or even fuse new electronic sounds with acoustic instruments. Thus, writing MIDI drums has become indispensable for modern music production.
In a previous article, I covered how to set up and use the REAPER MIDI Editor, and on top of that, I like to add a few tweaks to my MIDI setup for working on MIDI drums. So, I wanted to go ahead cover that in this article!
Basic Setup
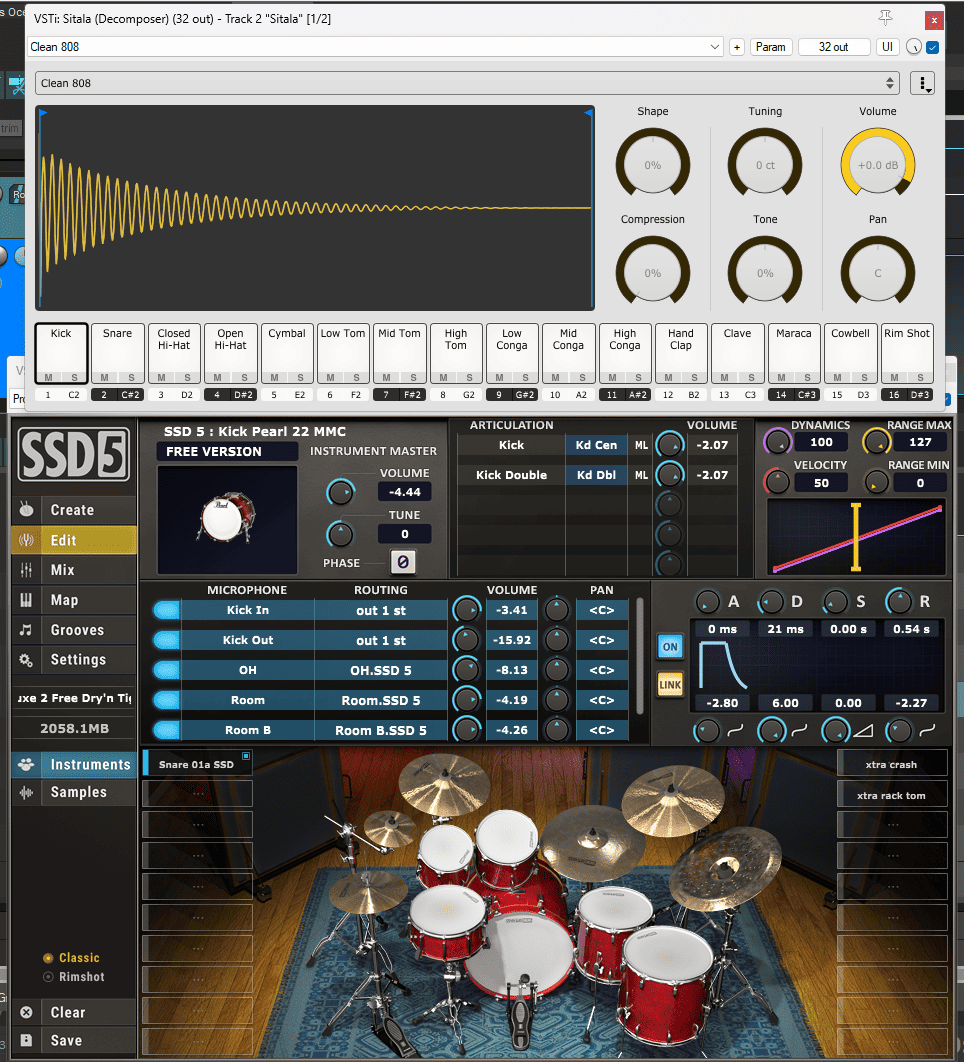
Let’s start by loading a drum Virtual instrument in a new track. Today, I’m going to use Sitala 1.0 by Decomposer and SSD 5.5 Free by Slate. Both are pretty complete and functional VSTi and are available for free.
If the Virtual instrument is capable of it, REAPER may present you with a prompt to automatically load and route the plug-in in ‘Multi-out’ mode. I will decline it for now and cover it in a section later in this article.
Next, is creating a new MIDI item and opening it. Aside from the customization I showed in the MIDI Editor article, let me show you a few configuration tweaks aimed especially at writing drums in REAPER.
Using Triangular or Diamond Notes
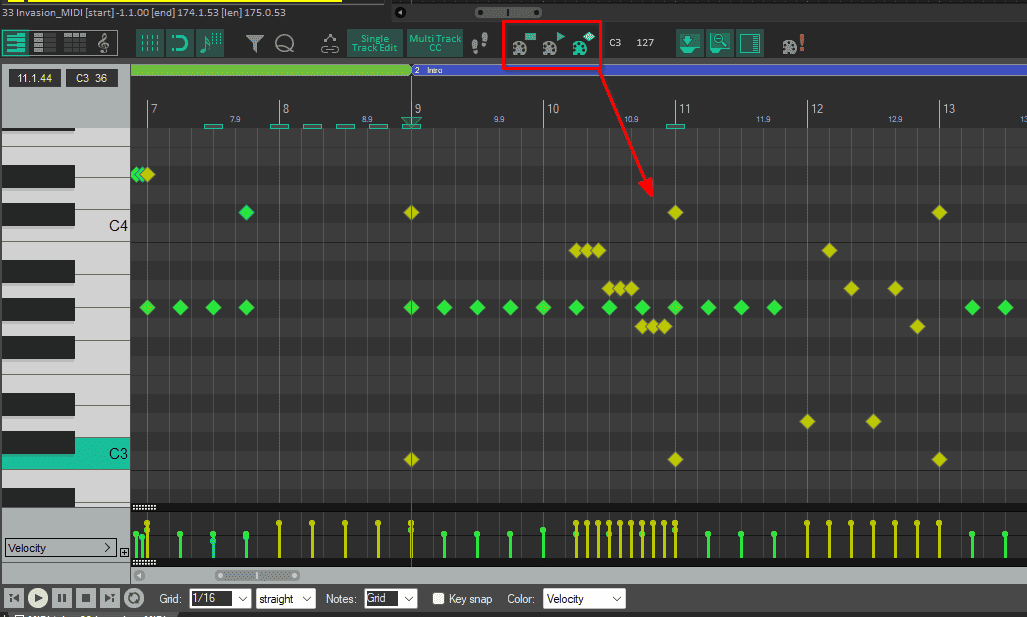
The first step is to change the default note shape from rectangular to Triangular or Diamond, so that you don’t have to worry about note length. To do this use the buttons on the MIDI toolbar, or right click just above the piano roll and navigate to View > Piano roll notes > Diamonds (drum mode).
Rename Notes
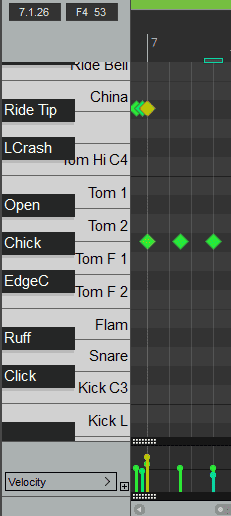
Not all drum virtual instruments have the same drum mapping, so it’s usually a good idea to name the notes on the piano roll according to the drum mapping of the plug-in. You can do this by Double-right-clicking on any note of the piano roll. The naming will stick to all of the MIDI items in the same track.
Still, most drum virtual instruments allow you to save and load custom drum maps, So I recommend you stick to one and set up the rest of your virtual instruments to the same one. In my case, I prefer to use the General Midi Drum Map.
Hide Unnamed and Unused Notes
Naming your notes in the piano roll may be enough for most, it certainly is for me. But some people may prefer hiding the notes they won’t use altogether.
For this to work you will need to change the ‘Piano roll view’ to ‘Named notes view’ in the MIDI toolbar.
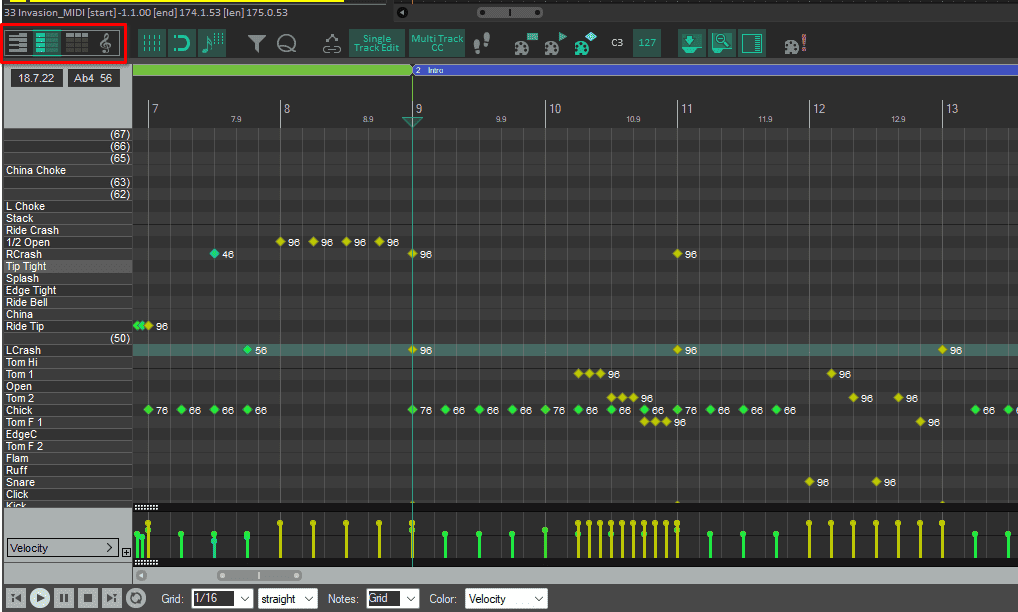
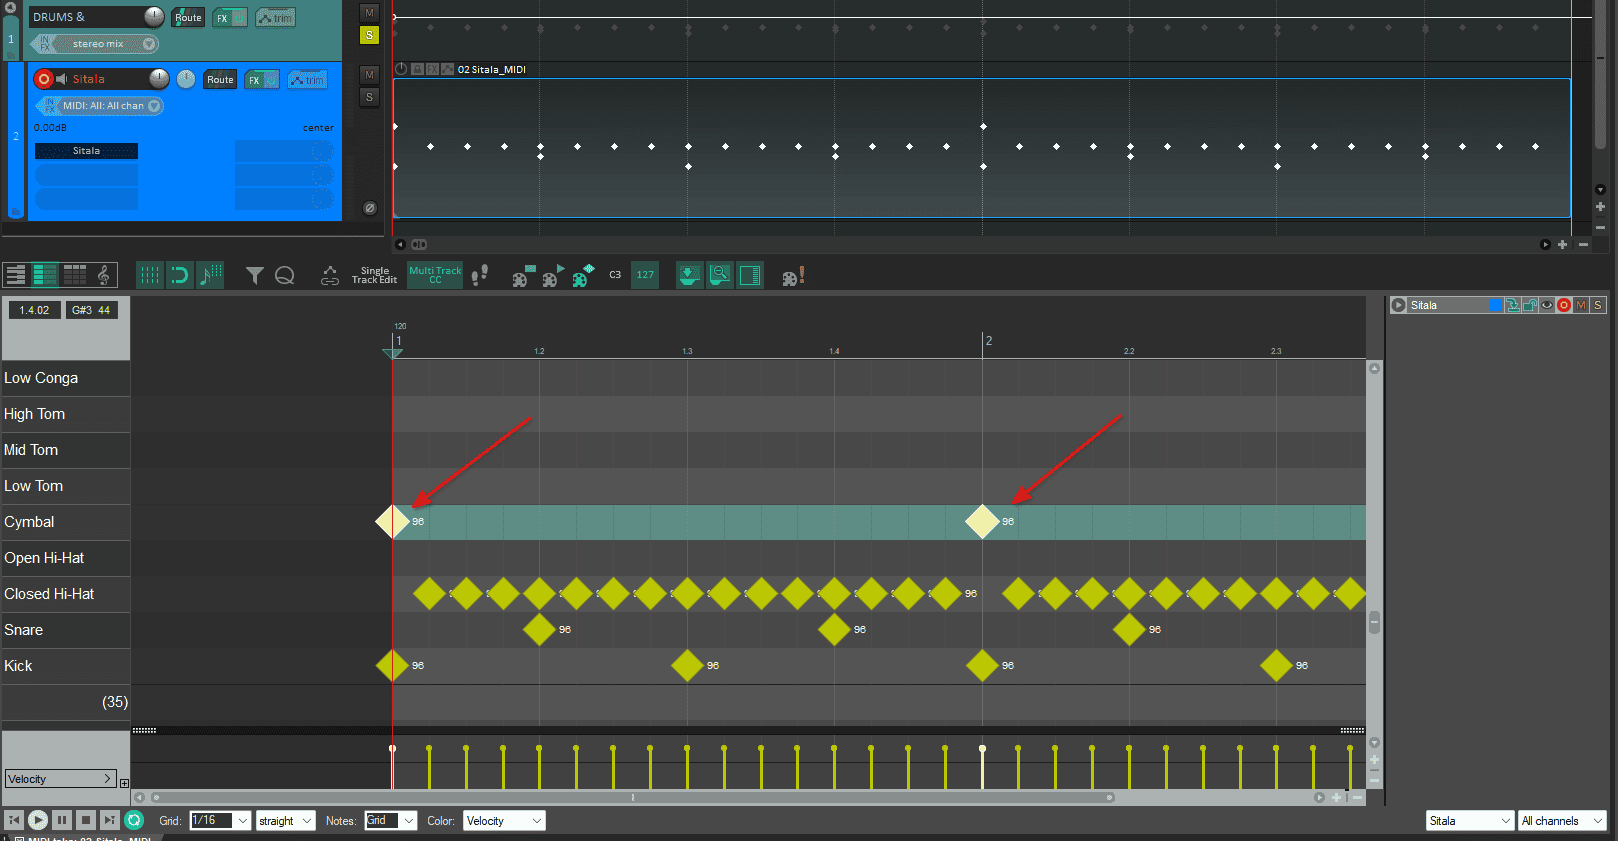
Then, open the MIDI action list using ?, search the action ‘View: Hide unused and unnamed note rows’, and activate it. You will be left with something like this.
Rearrange Notes
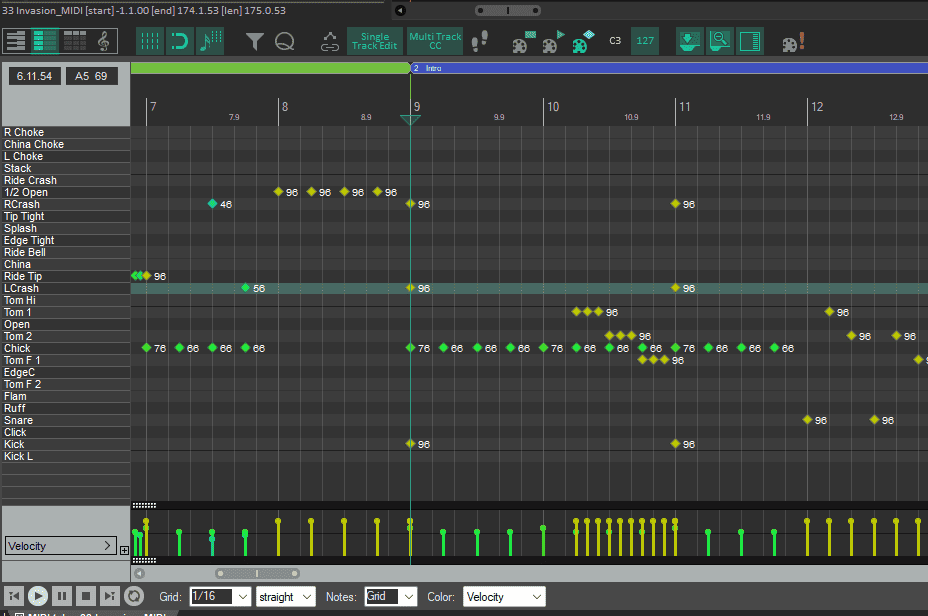
Using the ‘Named notes view’ also allows you to rearrange the order of the notes. For example, you may want to keep all the similar elements beside one another. Also, you may like to have your Kick and Snare on the top instead of the bottom of the rest of the parts of the kit.

To do this, hold Ctrl on Windows and Cmd on Mac while dragging the note in the list up or down.
Drawing Notes With a Mouse
Once you have your drum kit loaded and your MIDI editor set up, It’s time to work!
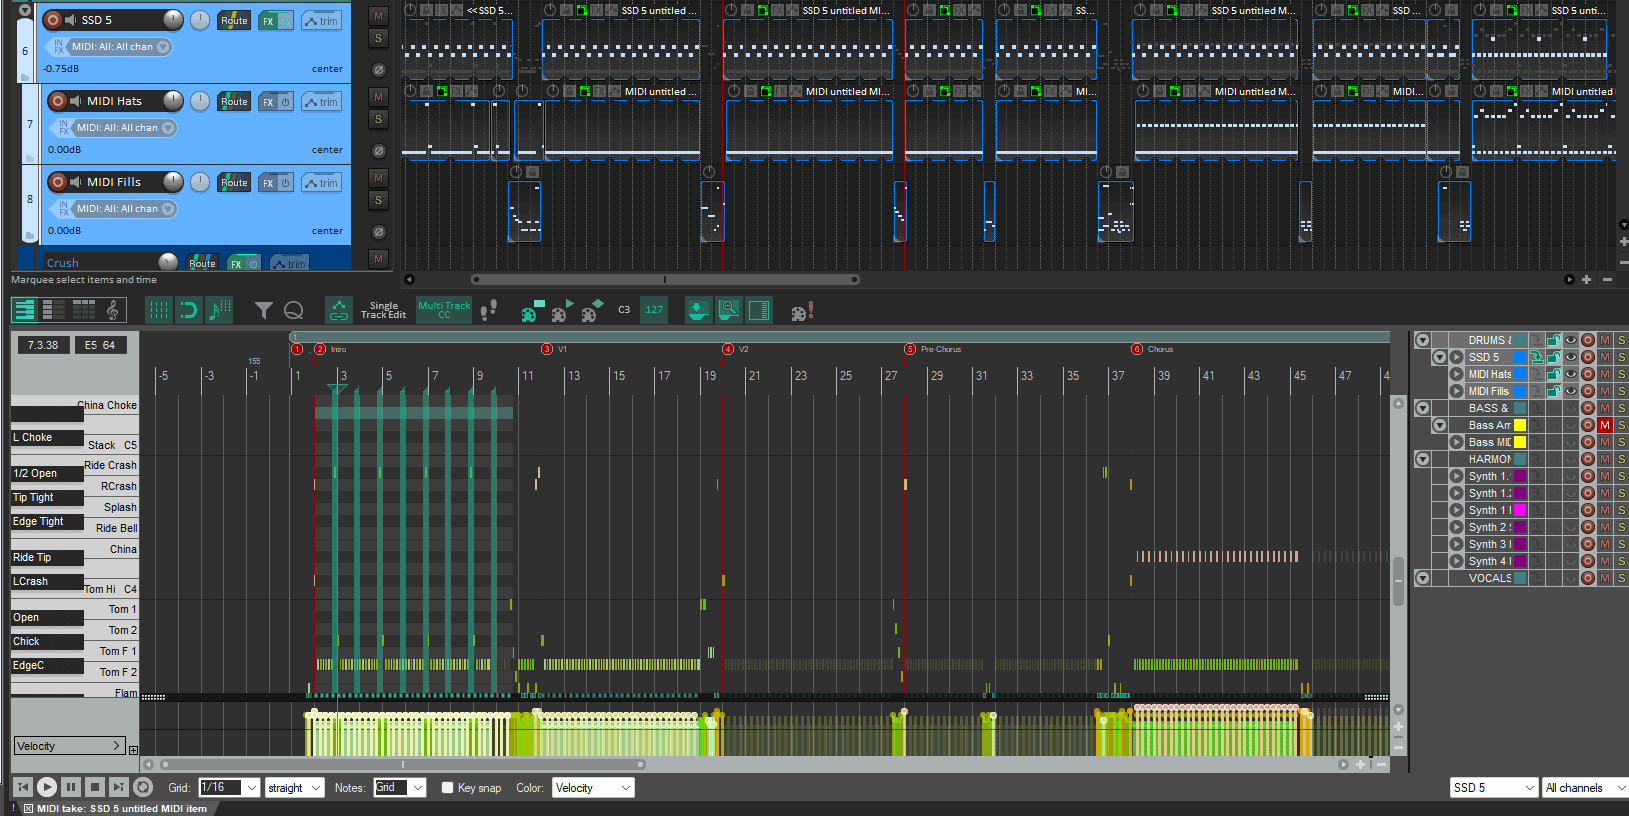
For drawing or ‘Painting’ notes, I like to keep all the MIDI in one track, usually the same where the Virtual instrument is loaded. That makes it easier to edit all the drum parts, loop sections, and control all the MIDI CC lanes for expression.

I usually start writing the Kick and Snare pattern, which is going to give the drum part a foundation. Double-click on the background instead of dragging your mouse to add notes.
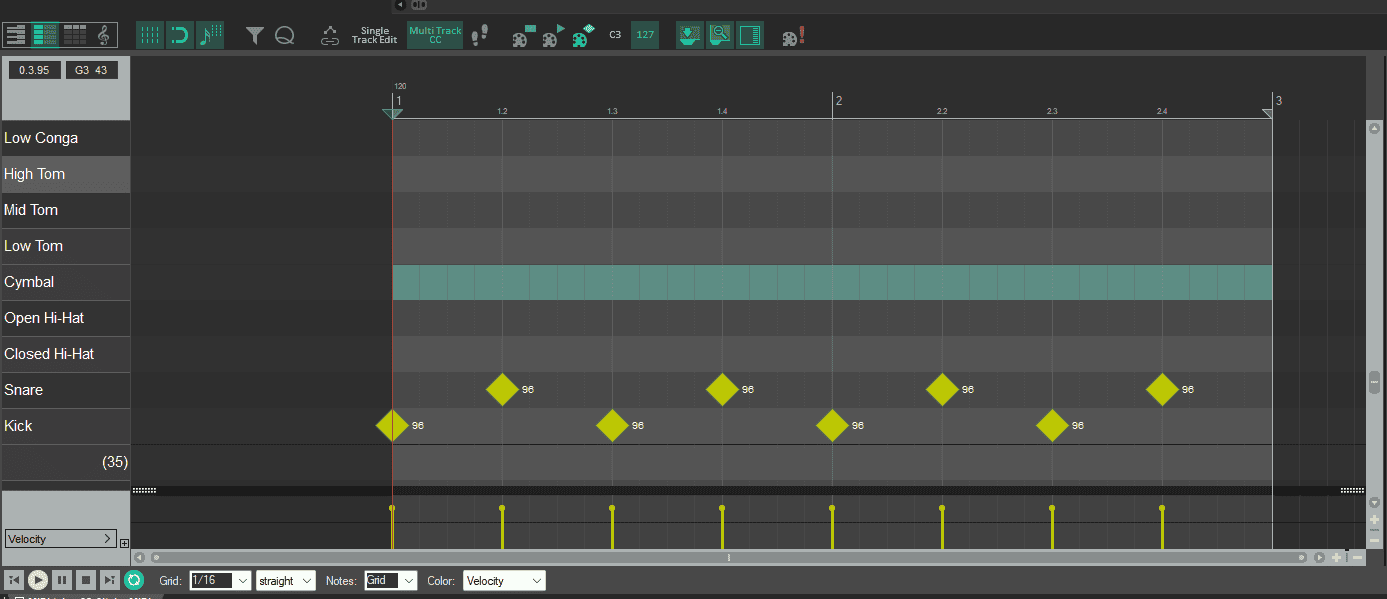
For most Cymbal parts, there’s an awesome shortcut. Set the grid to the pulse (1/8th or 16/th), then hold Ctrl+Alt on Windows or Cmd+Opt on Mac and drag along the Cymbal of choice.

Even if you want to add a few embellishments to the Cymbal pulse, you can erase notes using the Alt modifier and add more if you feel that you need them.
Next are the other Cymbal sounds and accents. Crashes, chinas, or even other electronic samples. These are up to you, each person likes to accent differently. A great rule of thumb for starting is accenting the first beat of each new section.
Recording With a MIDI Keyboard
If you prefer recording your performances, here are a few ways you can do it.
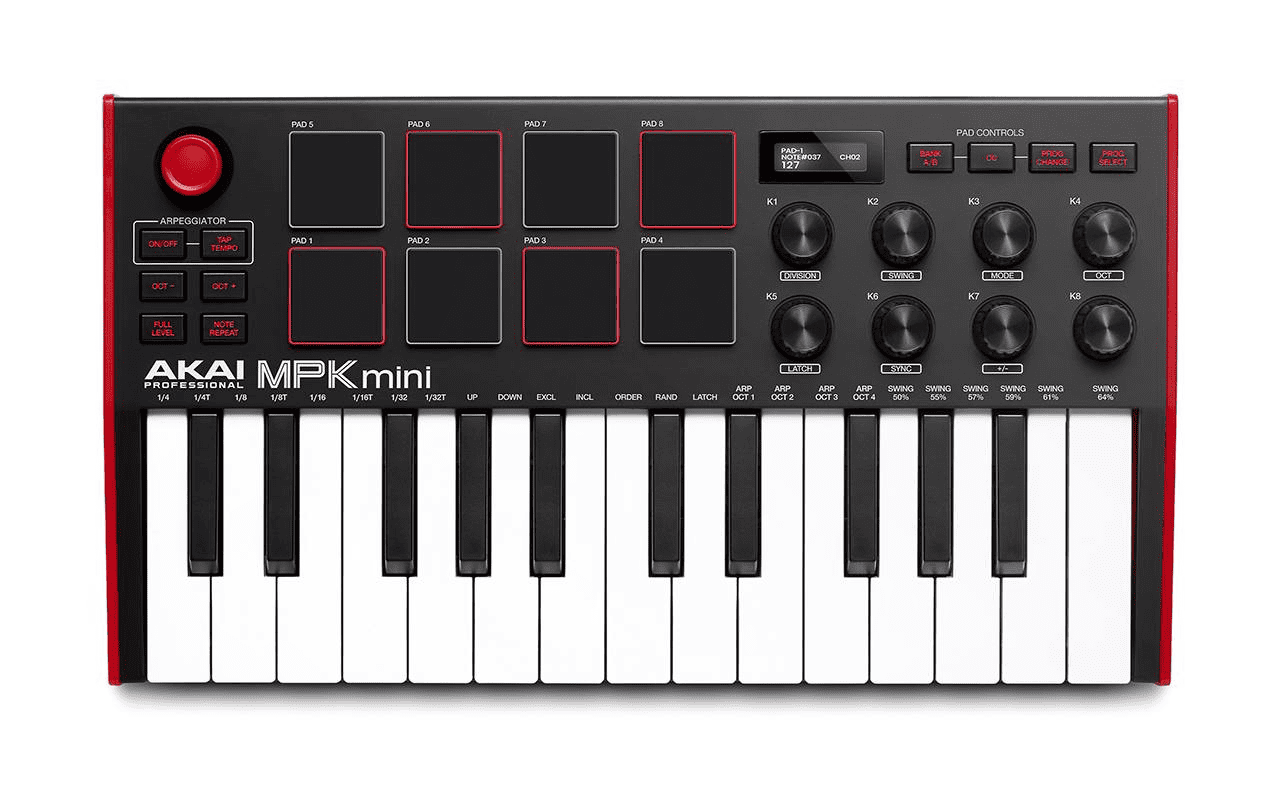
First, connect your MIDI device to REAPER and set it up for recording. For most devices, be it keyboards, pads, or electronic drumkits’ the initial set up is very similar.
Then, make sure that your MIDI device is correctly mapped to your virtual instrument.
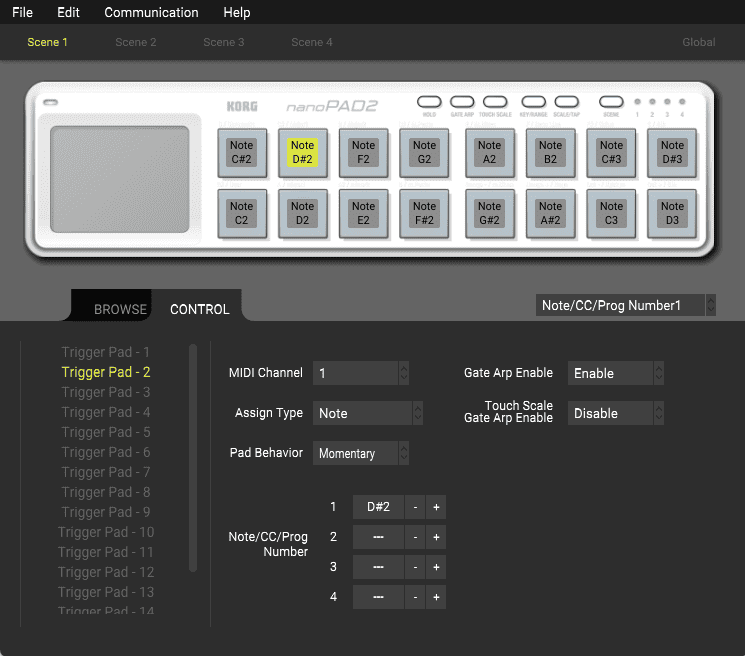
If you already have a drum map that you use for ‘painting notes’, most of these MIDI devices can be reprogrammed so that you don’t have to change the mapping on your Virtual instrument. Check the manual on how to do that.
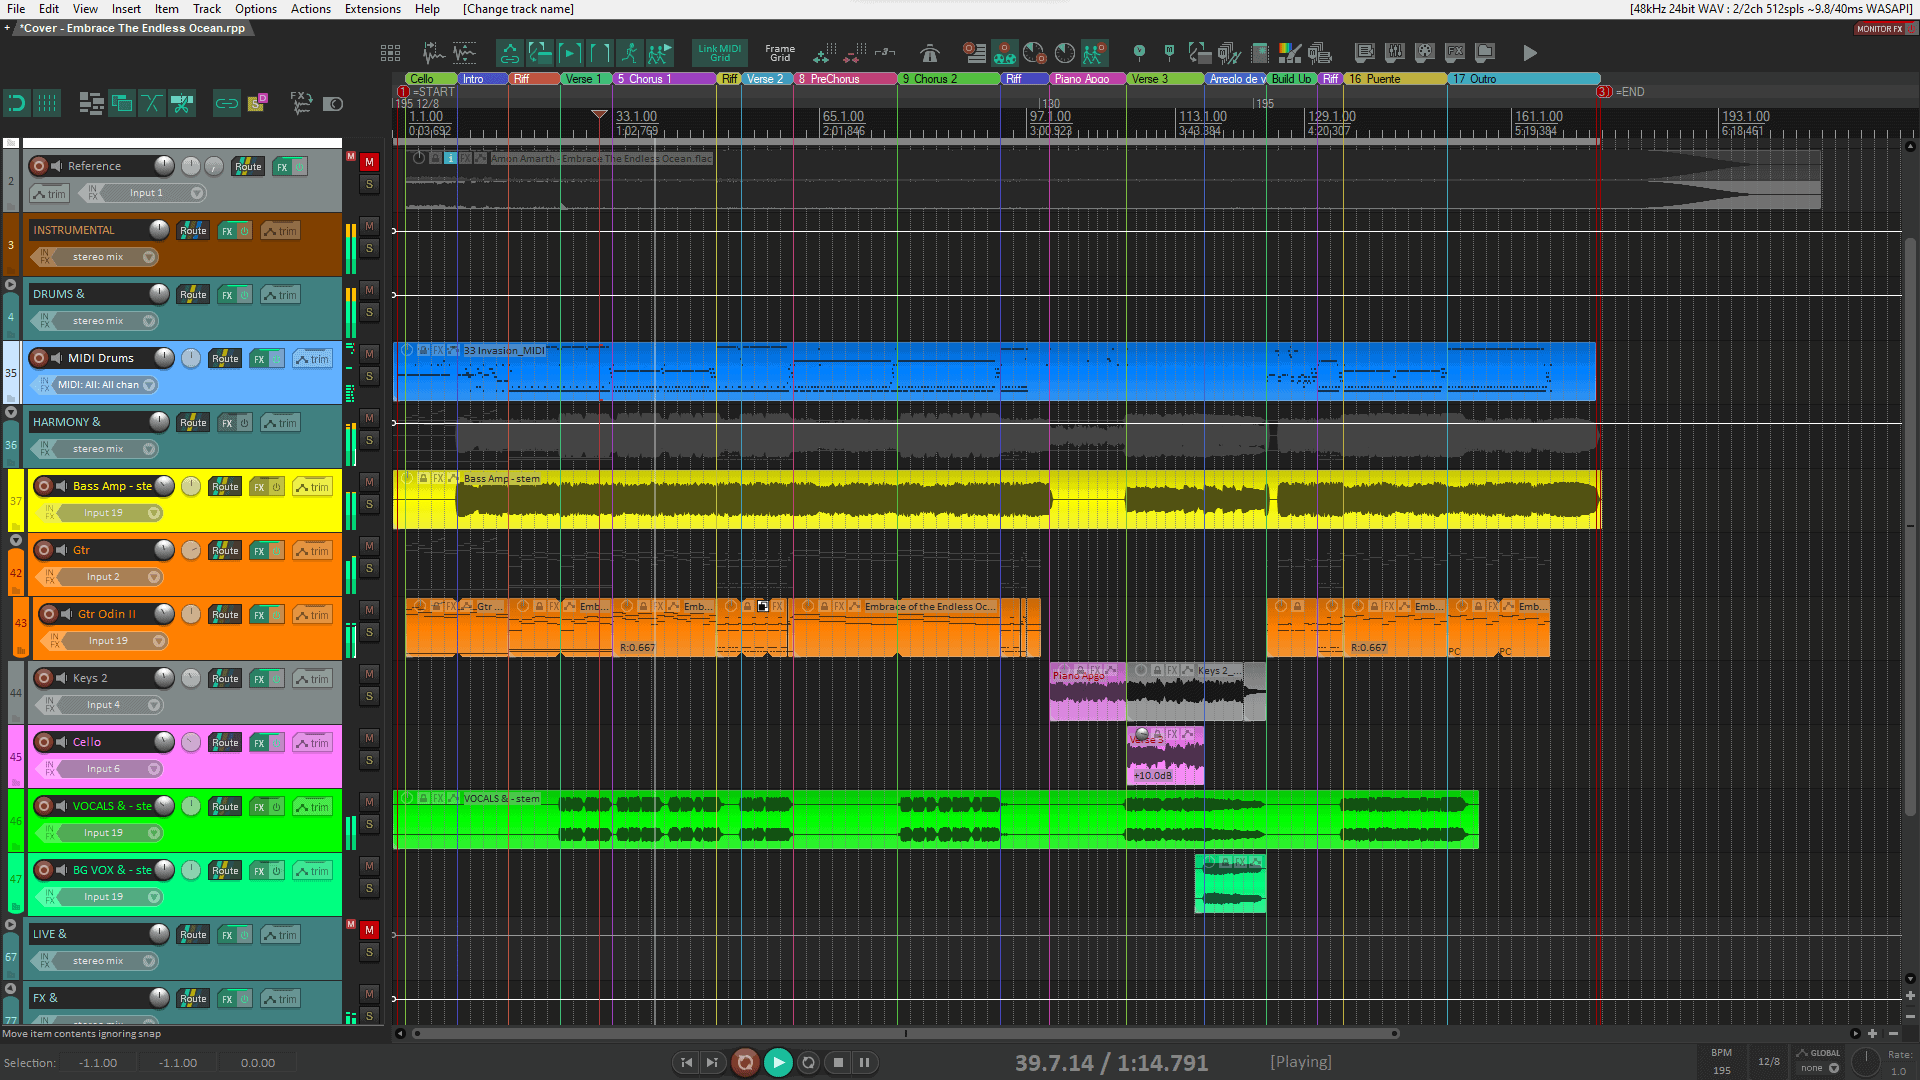
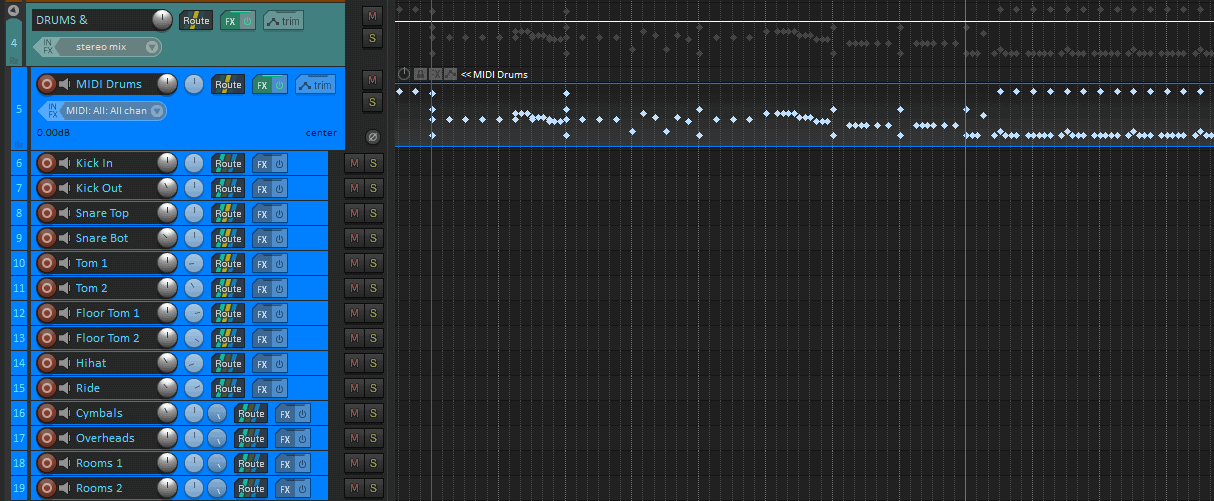
Using Multiple MIDI Tracks
The workflow I like the most is using different tracks for each group of sections of the Drums, something like this:
This means that I load the same Note names (drum map) to each track’s MIDI and that each track has to be set up with the same MIDI input, but there are a few benefits.
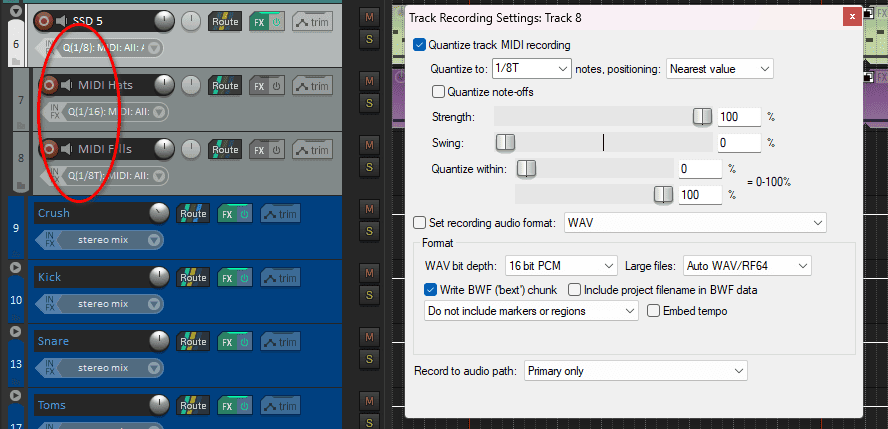
You can set up each track to a different MIDI input quantize.
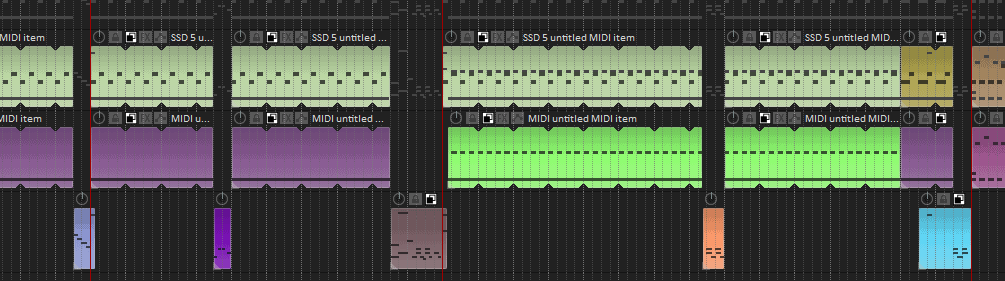
Also, you can loop element groups differently. For example, you can loop the same Kick and Snare pattern of the Chorus to the Bridge of the song, but using a completely different Cymbal pattern.
Overdubbing on One Track
If you prefer overdubbing your performances, you can set up only one track and input. Then, right-click the Rec Arm button and select Record: MIDI Overdub/replace > Record: MIDI Overdub.
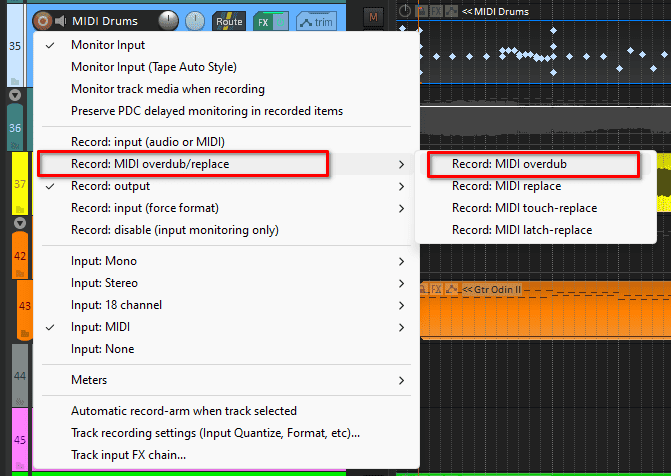
This may lead you to a faster recording workflow, as you don’t have to change the Rec Arm between different tracks constantly, so it works wonders if you’re not planning to loop anything but play the whole song instead.

Multi-Out Drums Instruments
If you’re working with a mixing engineer, they are probably going to ask for an audio multitrack of your drums. And even if you’re the one mixing your own productions, it’s probably a good idea to process each element of the drums separately using the tools you have available in REAPER rather than limiting yourself to the processing that is included inside the plug-in.
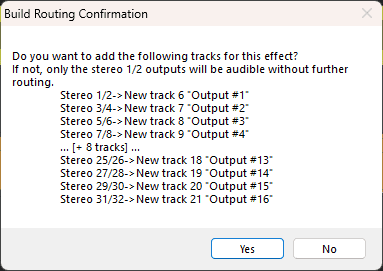
So it’s time to address that prompt I talked about earlier. If the Plug-in is ‘Multi-out’ capable, REAPER will ask if you want to load it that way unless you change that behavior in your Preferences.

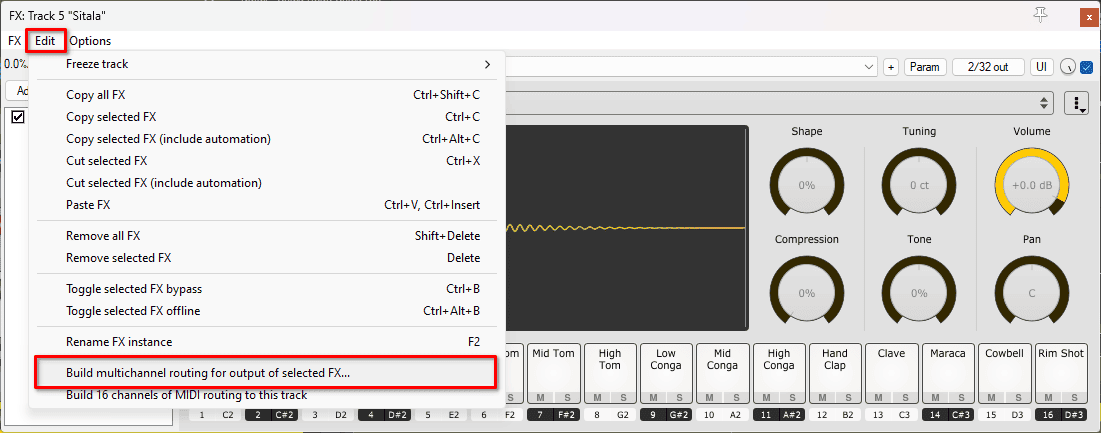
If the Automatic prompt does not appear, you can trigger that same behavior by going to the upper left corner of the FX Chain with the plug-in loaded and opening the Edit menu, and then clicking on the option ‘Build multi-channel routing for output of selected FX’.
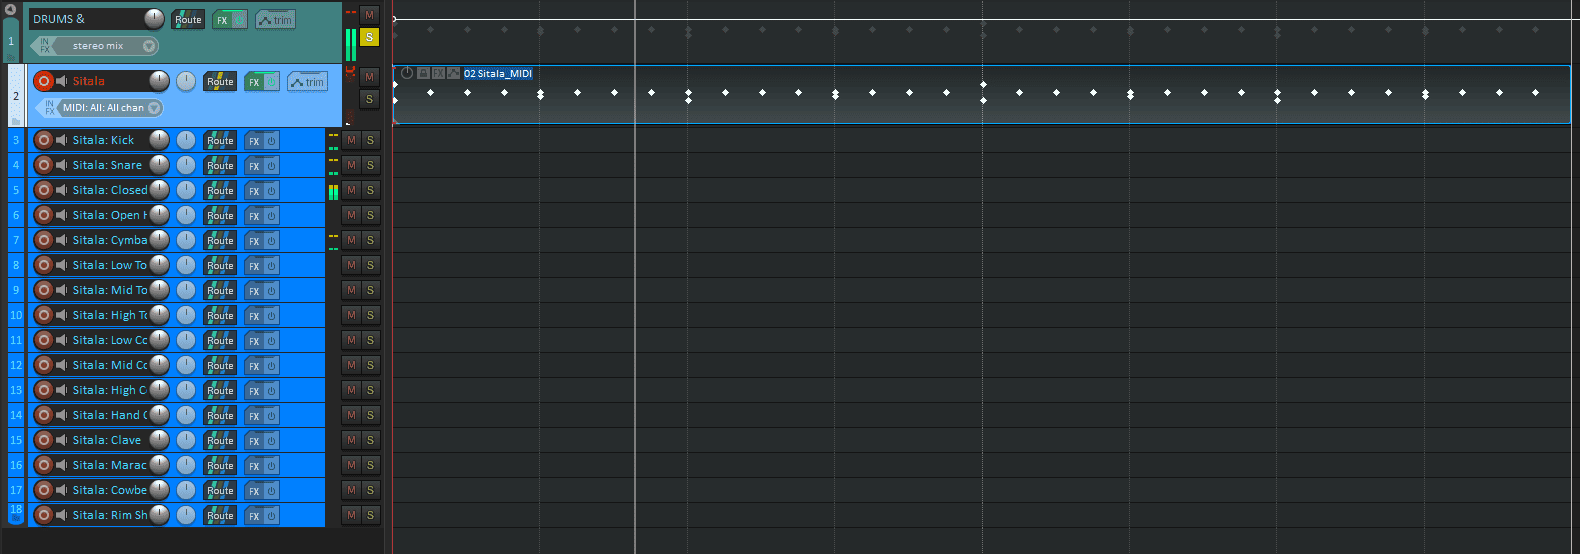
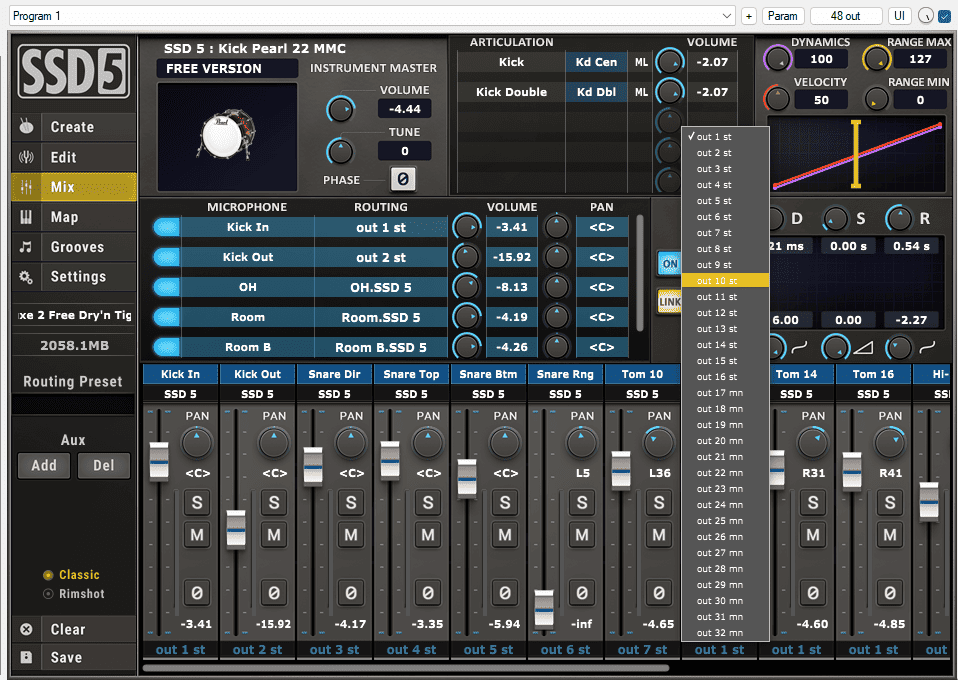
Each multi-out capable plugin has a certain amount of output channels, so REAPER will create tracks for each of those outputs. Some instruments like Sitala change their outputs automatically to match the REAPER multi-out routing
On other instruments like SSD 5, you have to manually set up the Plug-in outputs, that will depend on the plug-in you’re using, so you may want to check your manual.
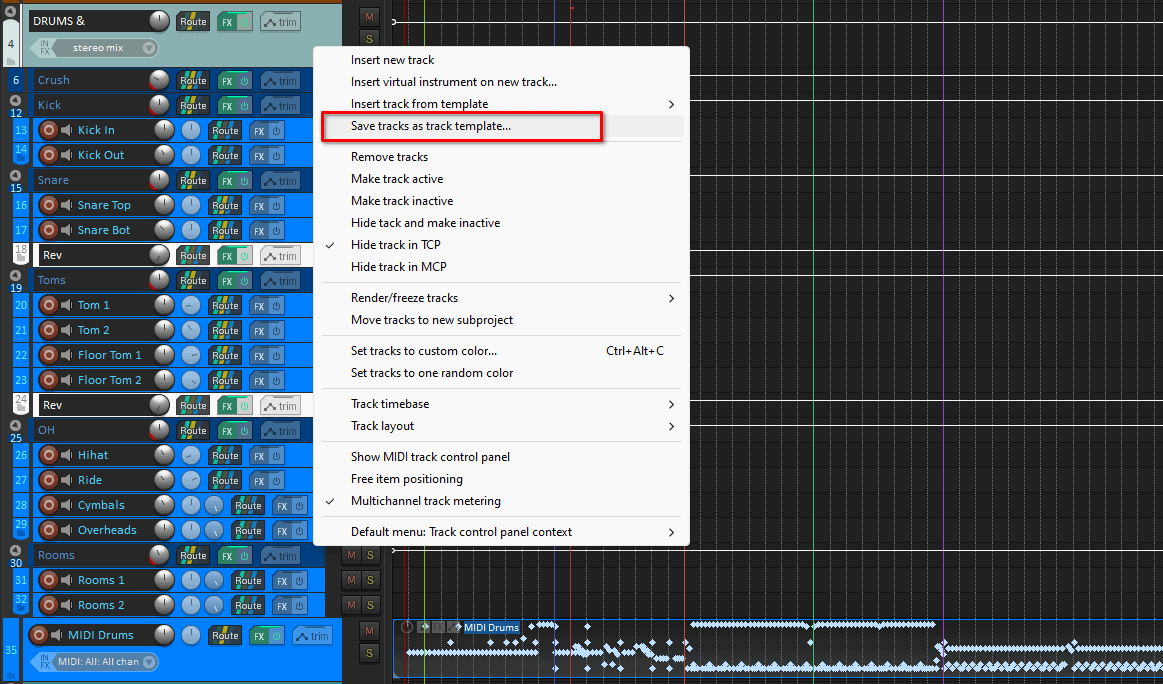
Once every plugin channel is paired to a REAPER track, name them accordingly, erase the unused ones to avoid confusion, and put them all inside a folder track.
I know that at first sight, this can be quite a tedious process, but I would strongly recommend you do this only once per instrument. Then, add these tracks to your production template or save this setup as a track template by right click on the track and then on ’Save tracks as track template’
Conclusion
Creating MIDI drums Is an integral part of modern music production, but creating an organized workflow and taking advantage of the REAPER features can help you supercharge your productions. It will also make it easier to get consistent and quality results that suit your music best. I dare you to experiment with your workflow and happy drumming!

- Mixing in REAPER [ULTIMATE Guide!] - September 18, 2023
- How to Record in REAPER (Guitar & Vocals) - August 2, 2023
- Writing MIDI Drums in REAPER - July 3, 2023

")

 Tempo in REAPER + BPM Settings")