I’ve tried working with MIDI on different DAWs and never felt more comfortable than working on REAPER. I know this can be considered a controversial take regarding MIDI recording and editing, but humor me on this one.
REAPER’s MIDI Editor has a pretty terrible default configuration, especially for those projects that have a lot of MIDI items. However, the massive benefit of using REAPER is that you can customize anything and adapt it to your workflow. I find that this is the most significant axiom of the REAPER workflow, to start using it and learning how to customize it along the way.
So in this article, I’ll show you how to use the REAPER MIDI Editor and how to customize it just enough so that your experience using it is not absolute hell. It will involve modifying Preferences, assigning a few keyboard shortcuts, and adding a couple of toolbar buttons.
Quick Setup
The most annoying behavior of the REAPER MIDI Editor is that it opens each MIDI item on its own editor window. In a project with a lot of virtual instruments, you can end up having dozens of MIDI items on just one track, and up to hundreds taking all of the tracks into consideration. You’d probably want to pull your hair out!
Plus, you’d have to open each MIDI item by going back to the Arrange window and double-clicking each item. So, let me share a few tweaks and recommendations for the MIDI Editor tab inside the Preferences window. Use Ctrl+P on Windows or Cmd+, on Mac to open it.
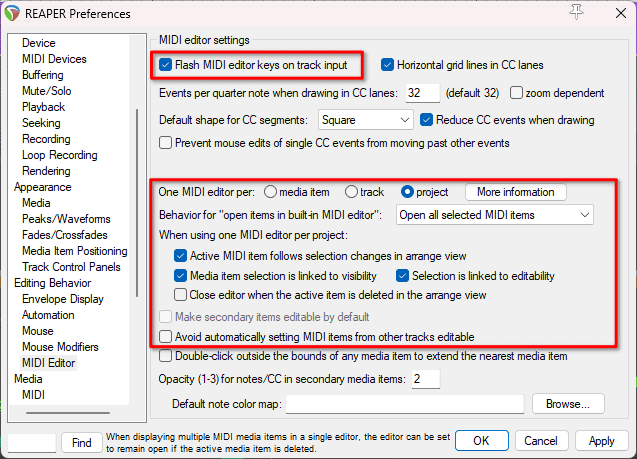
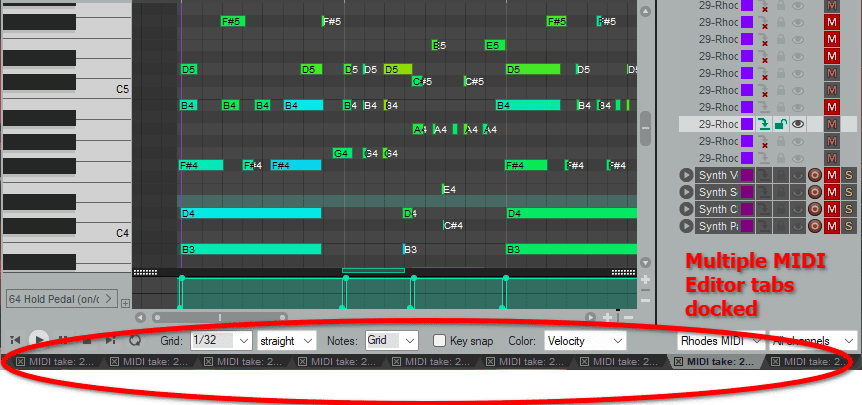
In essence, these options make it so that all the MIDI items in your project, open in only one MIDI Editor window. You control which MIDI items are visible and active (editable) at a time by selecting them.
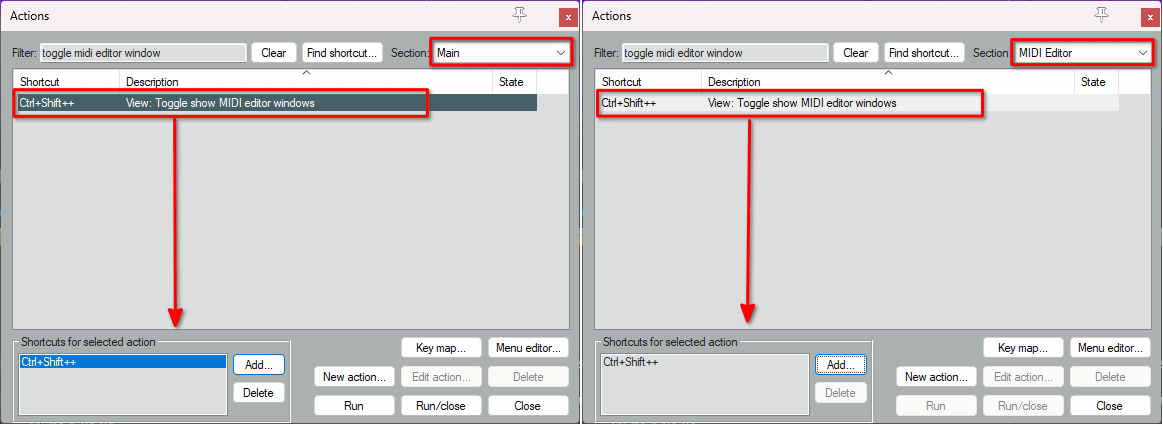
Next, assign a shortcut to the action ‘View: Toggle show MIDI editor windows’ both in the MIDI Editor shortcut list and on the Main action list.
Lastly, I recommend creating a couple of toolbar buttons in the MIDI Editor window for the next actions. To edit it, right-click the MIDI Editor toolbar and select the option ‘Edit toolbar…’.
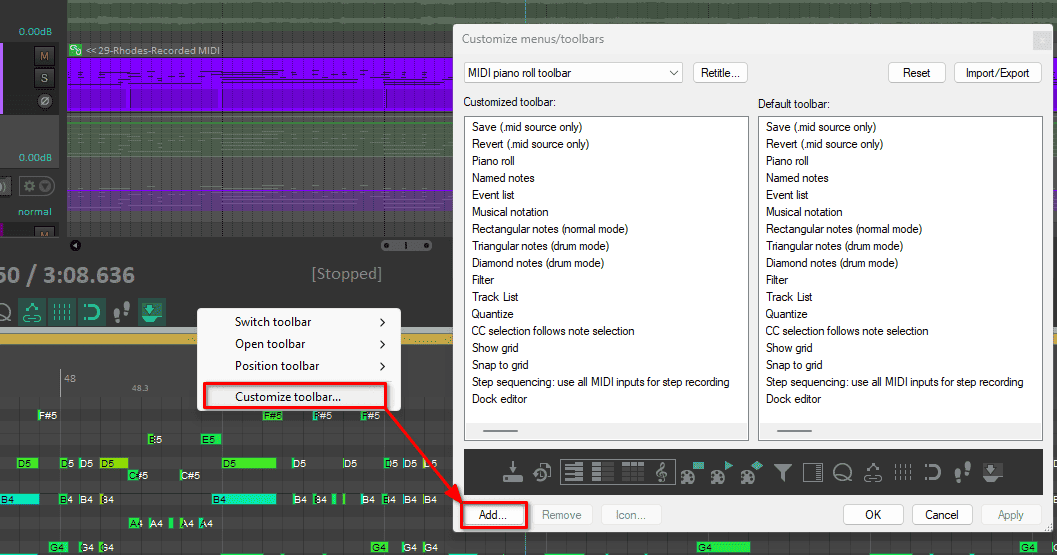
‘Options: Draw and edit CC events on all tracks’
And ‘Timebase: Toggle sync to arrange view’.
The MIDI Editor toolbar would look something like this

Creating & Editing MIDI
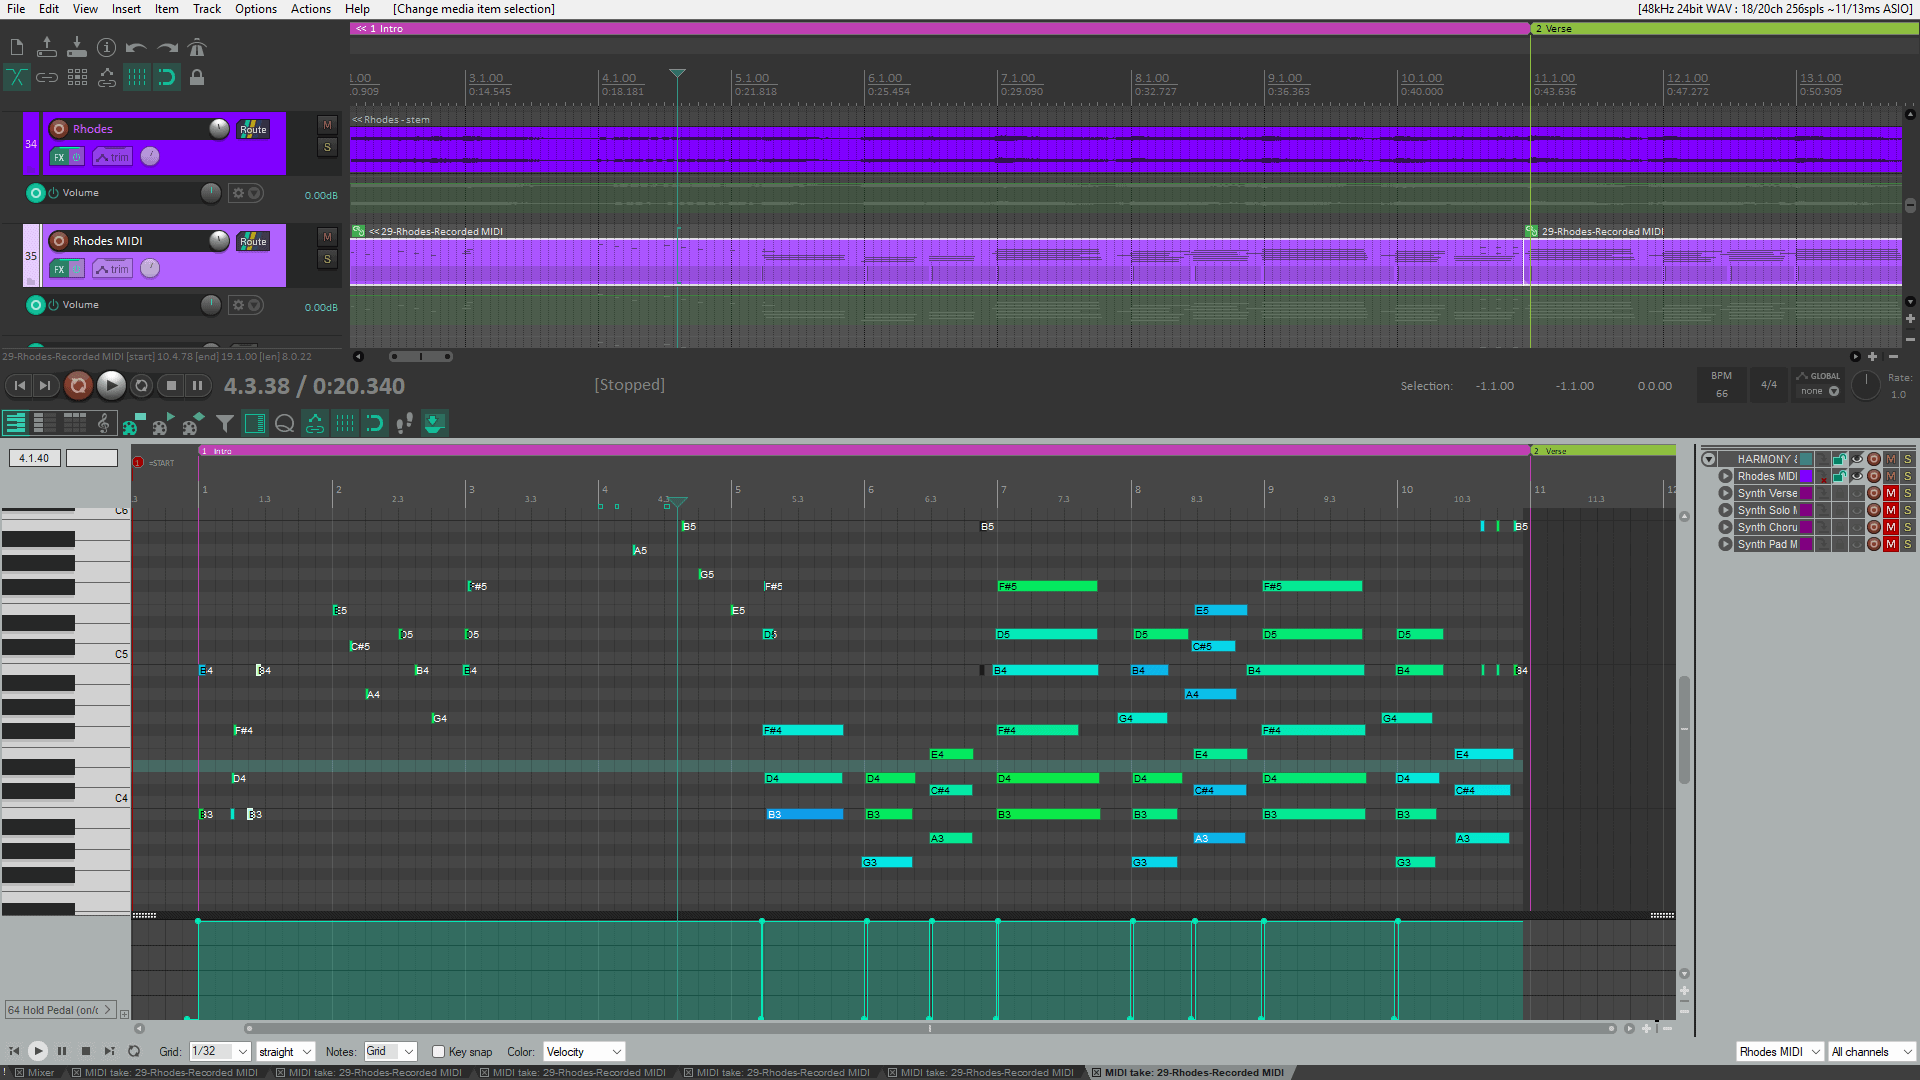
Time to work with MIDI! You can create new MIDI items by creating a new track and dragging along the Arrange while holding Ctrl+Alt on Windows or Cmd+Opt on Mac. Then, double-click the item to open it in the MIDI Editor window. From here on, you can select the items on the Arranage window and use the shortcut you assigned to toggle the MIDI Editor view.

Dragging with your left click over the background lets you draw notes. If you hold Shift while doing it, you will ignore the grid temporarily. And, by holding Alt on Windows or Opt on Mac, you will erase the notes under the mouse cursor.
You can move notes by dragging them. Copy(Ctrl+C / Cmd+C) and paste(Ctrl+V / Cmd+V). And change the length of individual MIDI notes by dragging either edge of a note.

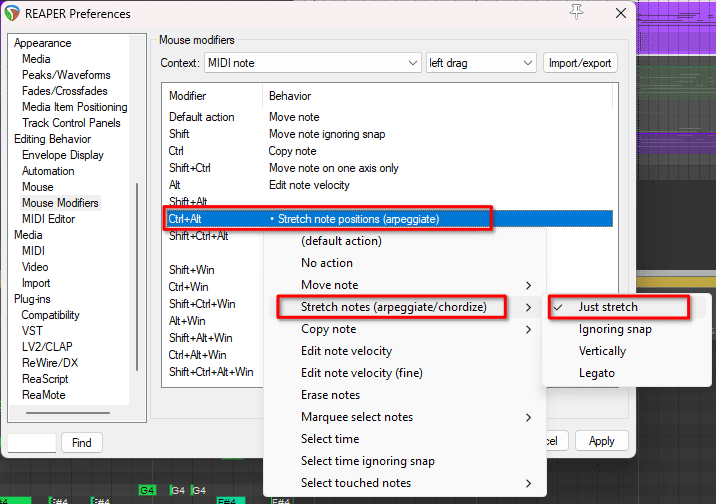
You can also stretch a section of a performance. Drag the right click of the mouse to marquee select notes. Then, press Alt or Opt while you drag on the edge of any note in the performance, and add Shift to ignore the grid once again.

I’m sure that you have realized by now that in REAPER, it’s not common to use toolbars that change your mouse tool functionality. Instead, the focus is on using mouse modifiers that change how it interacts with the elements on the screen contextually. As such, knowing which they are and how to edit them are the meat and potatoes of your editing experience.
You can find the Mouse modifiers as a tab inside your REAPER Preferences window.
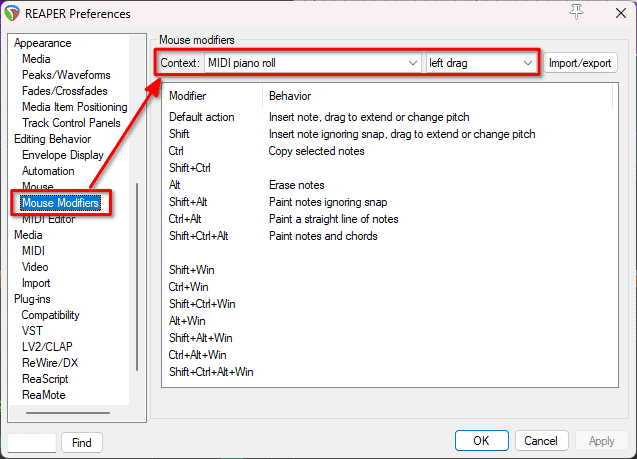
Select how each mouse action behaves in any context here.
Batch Note Processing
There are a few ways to simplify your workflow and edit various MIDI note properties at a time, or dynamically.
Note/Event Properties
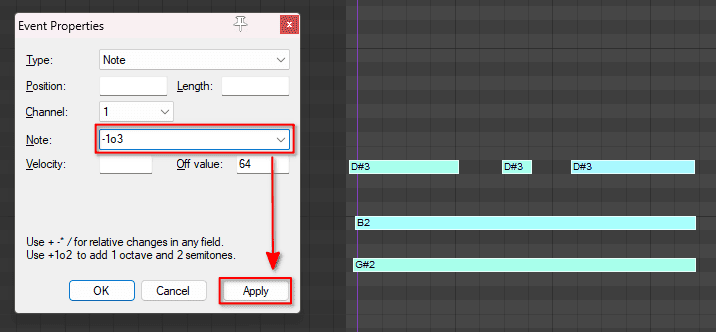
This is one of my favorite features. You can select a bunch of notes and press Ctrl+F2 on Windows or Cmd+F2 on Mac. This will open a dialog with the note or event properties.
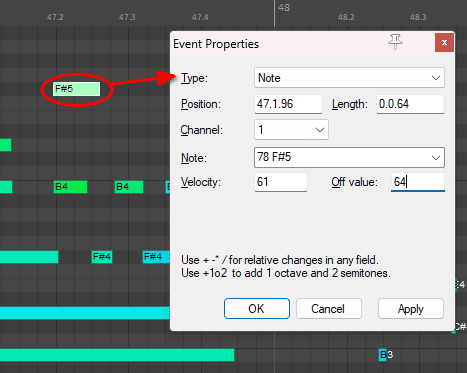
Inside this dialog, not only you can type hard values into each of the fields, but you can also make relative changes by typing them as math operations (+, –, *, /). For example, typing +10 on the Velocity value adds 10 velocity points to all the selected notes. Typing *2 instead, duplicates the velocity.
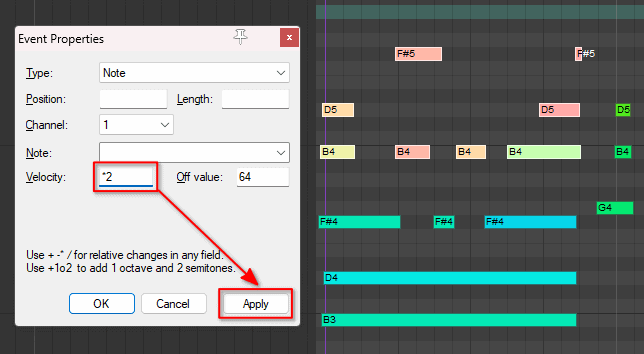
The note value can be modified by notes and octaves. For example, -1o3 transposes the notes one octave and three semitones down.
Quantize
Quantizing allows you to tidy up a MIDI performance section in terms of time by moving the notes to the closest grid line. You can open the quantize dialog by using the button on the toolbar or using the shortcut Q.
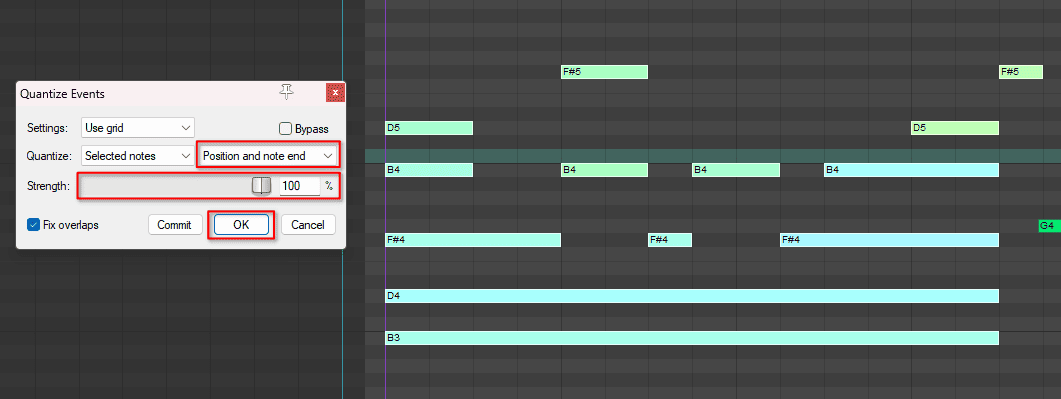
The basics boil down to selecting if you want to quantize only the note positions only or include the end position, and setting up the slider to how close you want your notes to the grid.
I encourage you to dive deeper into the quantizing capabilities of REAPER both in audio and MIDI editing.
Humanize
The humanize feature randomizes the position and/or velocities of a selection of notes. It works wonders when you just created a MIDI part using your mouse only, instead of recording a performance using a MIDI keyboard or the internal Virtual MIDI keyboard.
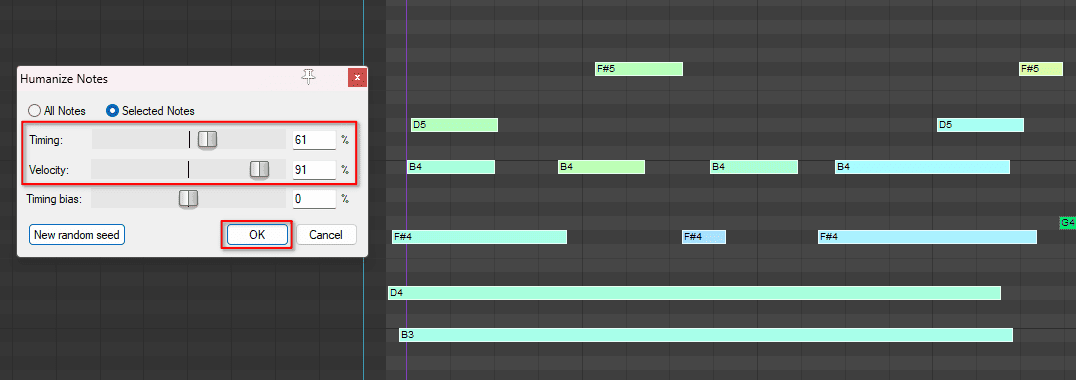
To humanize a selection of notes, hit H and the Humanize Notes dialog. The sliders represent the maximum amount of deviation that a value can have. This means that, as you set the slider closer to 100%, you’ll end up with a ‘looser’ or more chaotic feel. Timing bias slightly moves the tendency of the notes
Conclusion
REAPER has a lot of tools for editing MIDI, and many more workflows depending on the preferences, toolbars, shortcuts, and mouse modifiers. I believe that if you come from other DAWs, you can recreate the workflow you had for the most part, if not completely, and if you don’t, you’ll begin exploring and customizing REAPER to fit your needs and how you think it should work. These are just my recommendations, and I hope these were helpful to improve your MIDI editing workflow. Happy editing!

- Mixing in REAPER [ULTIMATE Guide!] - September 18, 2023
- How to Record in REAPER (Guitar & Vocals) - August 2, 2023
- Writing MIDI Drums in REAPER - July 3, 2023
![REAPER Metronome and Click Track Setup [FULL GUIDE]](https://ProRec.com/wp-content/uploads/2022/12/word-image-3592-3-180x180.png "REAPER Metronome and Click Track Setup [FULL GUIDE]")

")
![Mixing in REAPER [ULTIMATE Guide!]](https://ProRec.com/wp-content/uploads/2023/09/mixing-in-reaper-180x180.png "Mixing in REAPER [ULTIMATE Guide!]")
)