Sample clips in Ableton may be deactivated for two main reasons. Either the samples are simply muted, or your clips are offline. Muted samples are easy to fix but with the latter, this issue is much more severe and as I said at the conclusion of my tutorial on dealing with offline samples in ableton, depending on the stakes this could cost you your job.
Let me break this down:
- Muted clips: this issue usually occurs by accident, or by forgetting or not knowing how to unmute your clips. Muted samples can be fixed with a quick shortcut. This is how muted sample clips look:
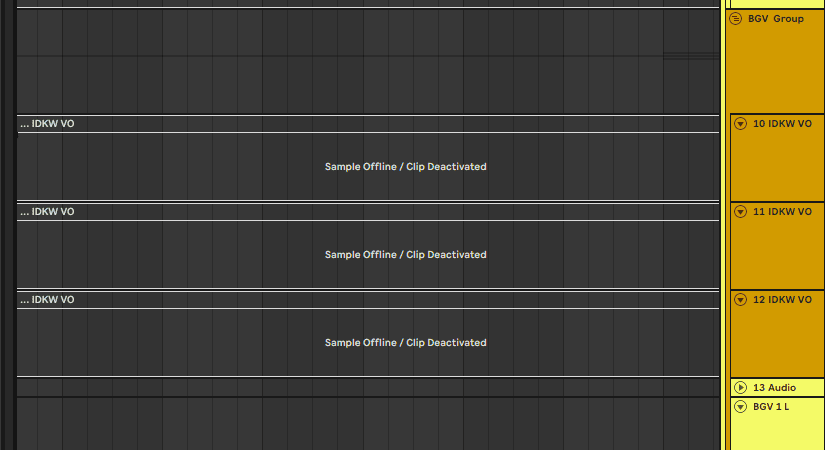
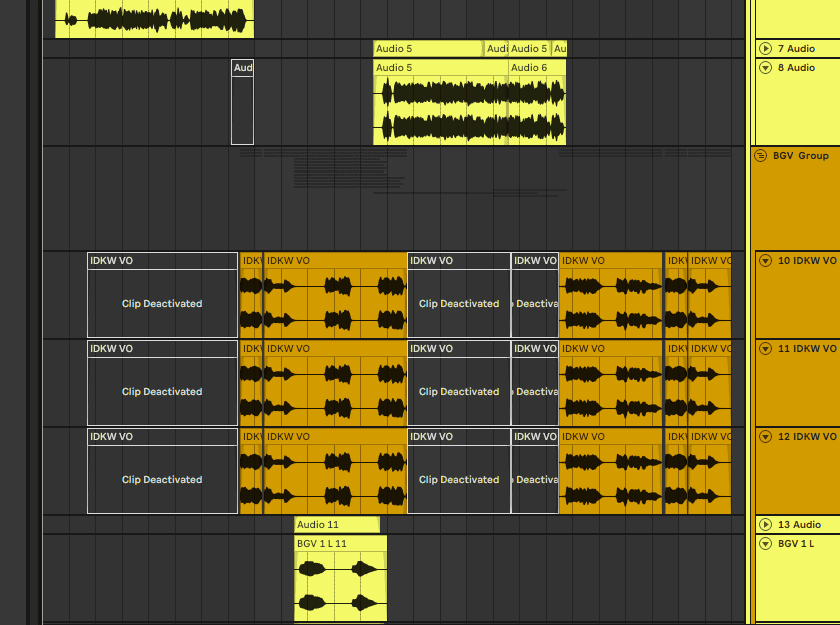
- Offline clips: Not only do these samples get deactivated, but they can also not be found by Ableton. This issue is more severe but can be resolved with four main techniques. This is how offline sample clips look:
Keep in mind that, in this tutorial, I will use the words ‘samples’ or ‘clips’ interchangeably. Let us begin.
Muted Clips
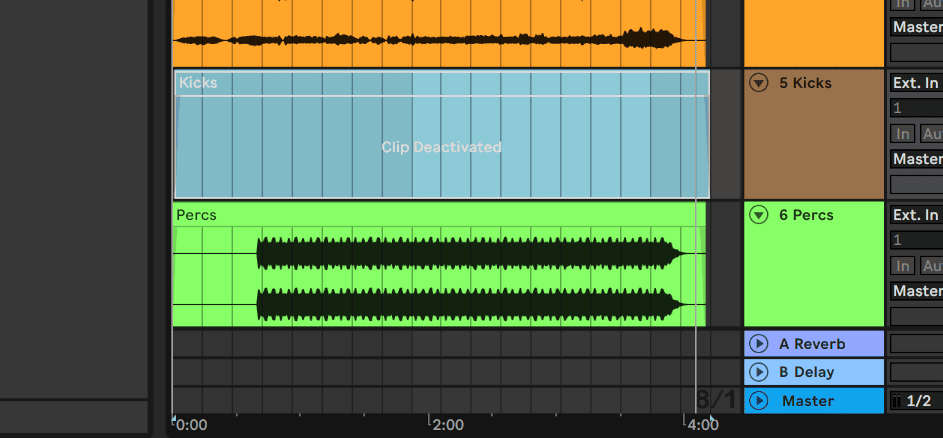
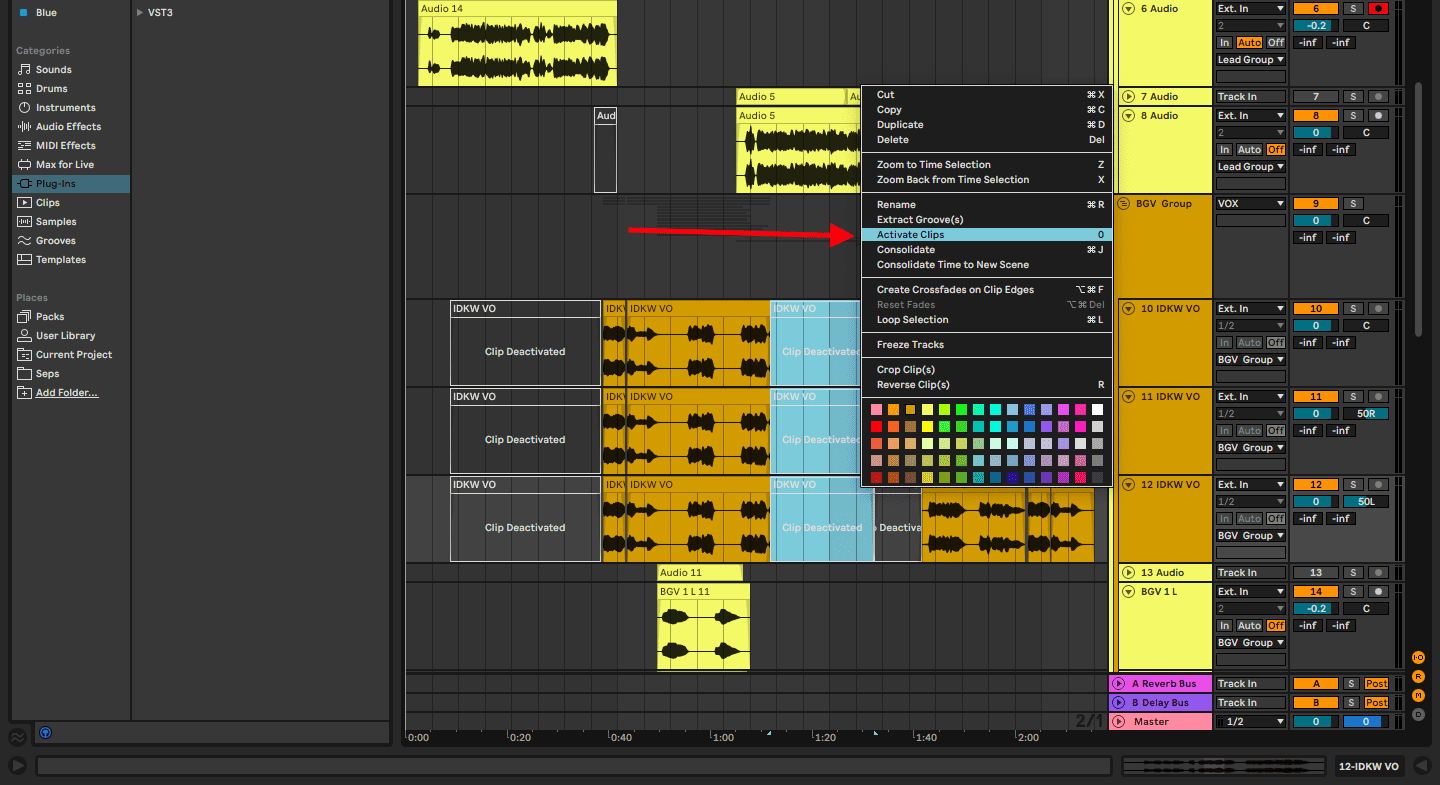
Muted clips are very easily fixed, and this fix applies to both audio and MIDI clips. Once you have mastered how to disable or re-enable clips using this technique, you will find that your arrangement process will be enhanced. You will be muting and unmuting your samples to get a before and after, to see which clips work well in your song segments. Here is an example of where I deactivated clips to enhance my production:
Step 1: identify your muted clip and right-click on it to open the clip edit tools menu
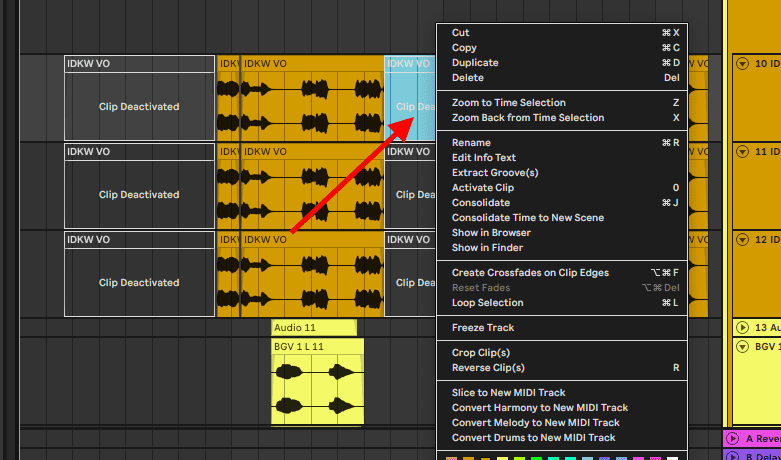
Step 2: Select ‘activate clip’
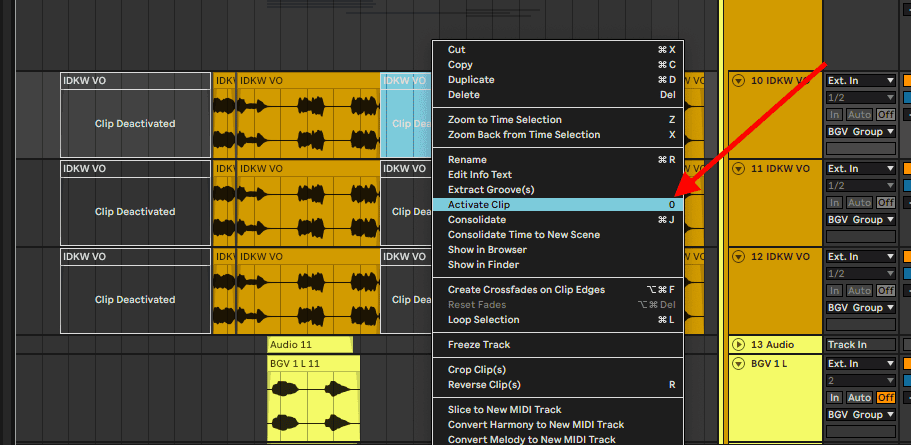
You can also use the shortcut ‘Num 0’ on both MacBook and Windows to disable or re-enable your sample clips quickly. Using this technique, you can highlight multiple samples and repeat the process.
Offline Clips
Offline clips are a different case as they are much more complicated to resolve, and only deal with audio samples. There are four techniques to resolve this issue:
- Dragging and dropping your samples – you will need to first know where your samples are located, identify the correct sample, and then drag and drop them into your session.
- Automatic Search – with this technique, Ableton will scan your computer to locate your missing samples.
- Select and Search Folder – just as the first technique will require you to know where your samples are located. You will now need to select this folder in Ableton and proceed to search.
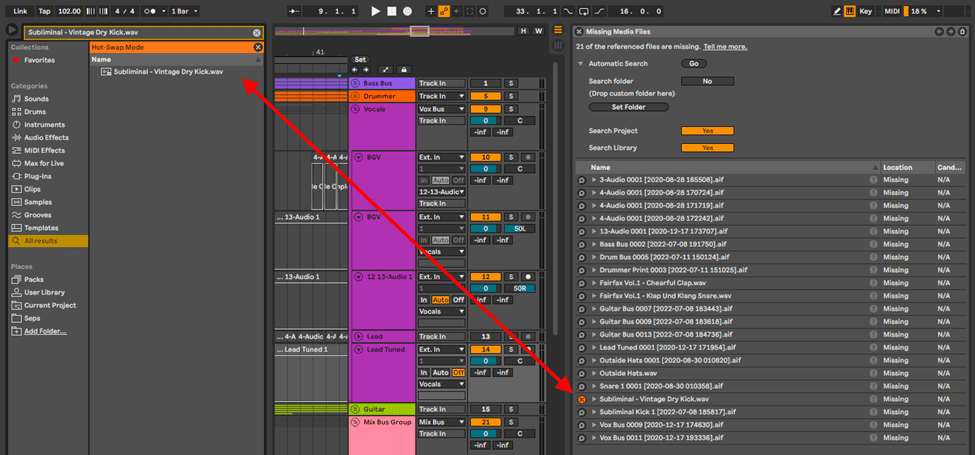
- Hot-Swap Mode – this function helps resolve disabled samples one at a time. This technique when activated, Ableton will open your sample folder from which you can choose the correct sample to replace the disabled/offline sample.
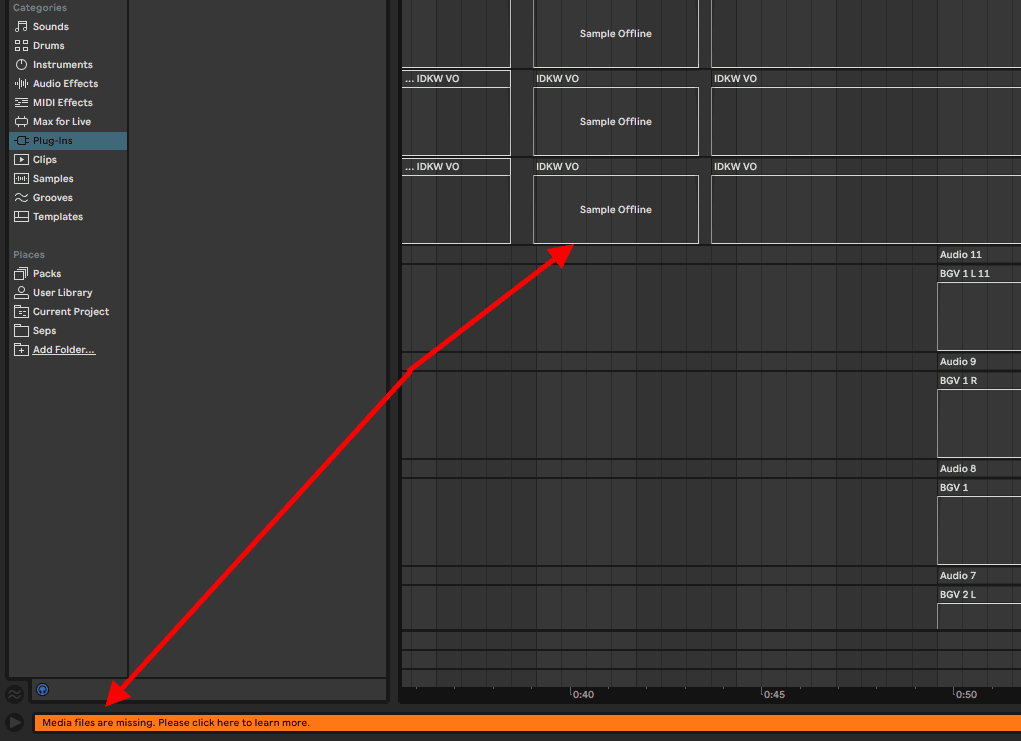
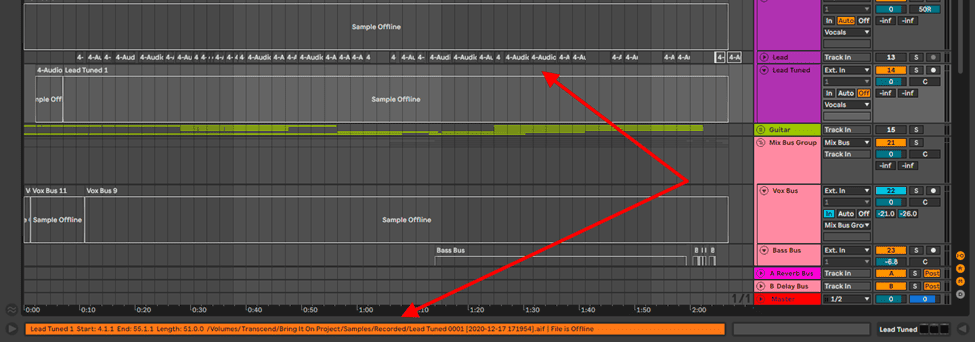
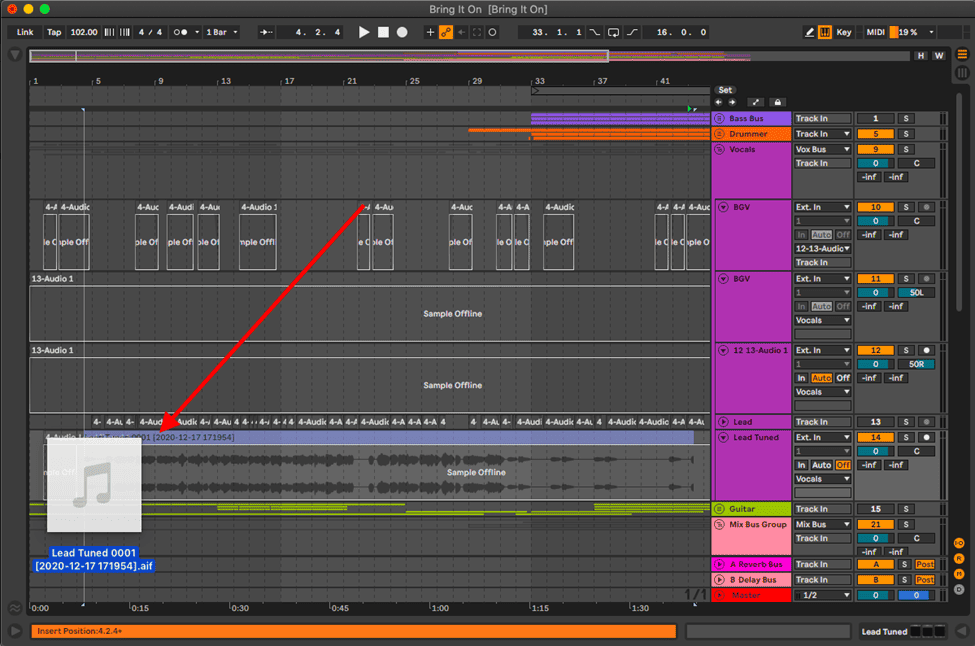
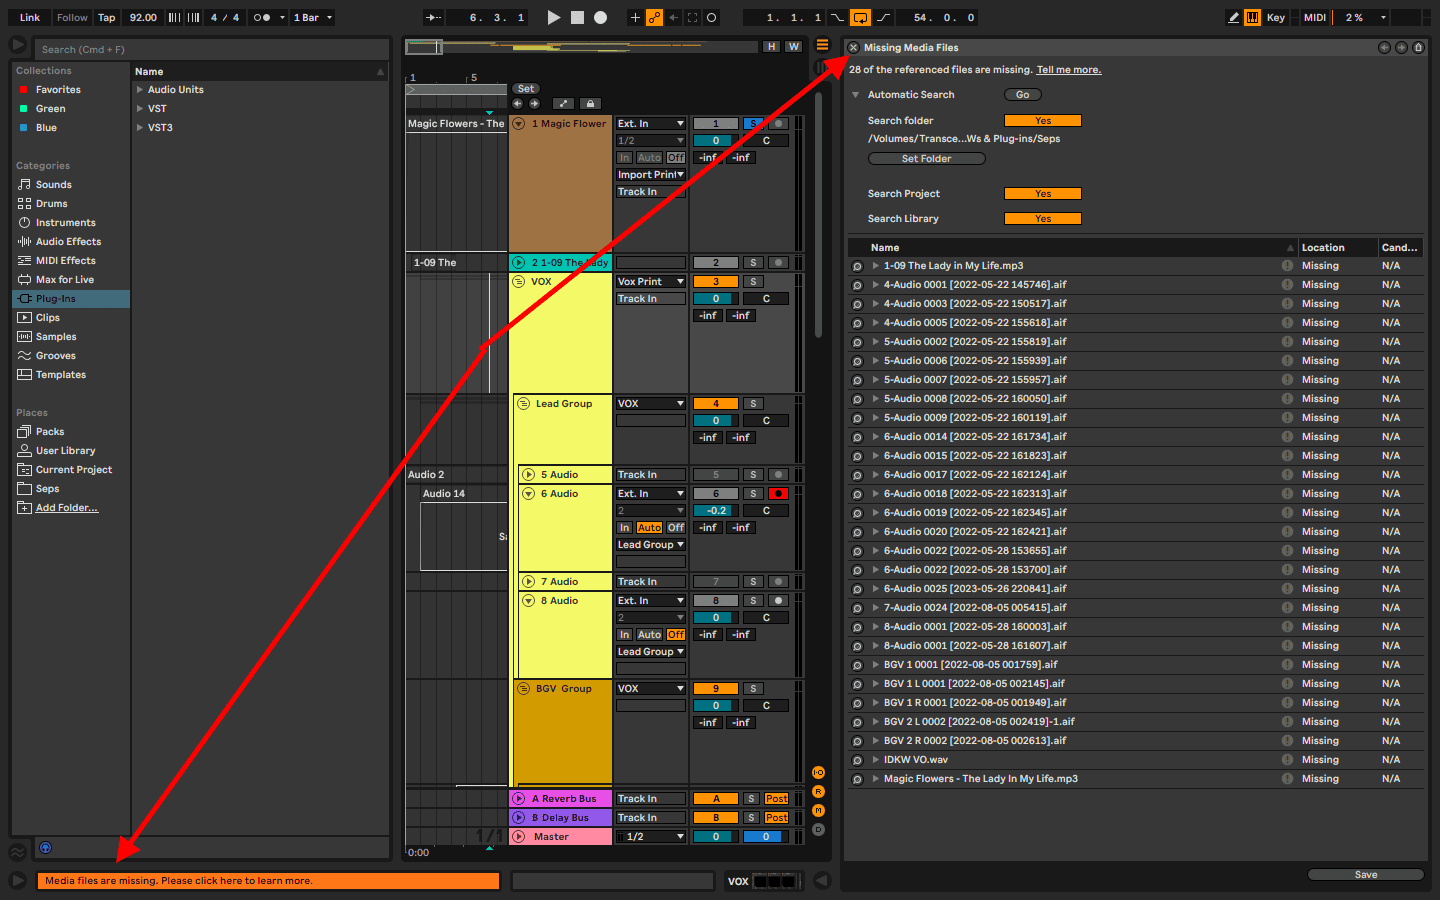
Ableton lets you know if a sample is offline, from the moment you open your session in the arrangement view and the status bar at the bottom of your session.
Dragging and dropping your samples
Step 1: Identify the missing sample and select it. This in most cases will show the location of your sample in your sample bar. If Ableton does not reveal the location of your sample, you may need to conduct a manual search on your computer.
Step 2: once you have located your sample clip on your computer, drag and drop it into your session
Automatic Search
This technique is the easiest way to resolve disabled sample clips in Ableton. This is how you do it:
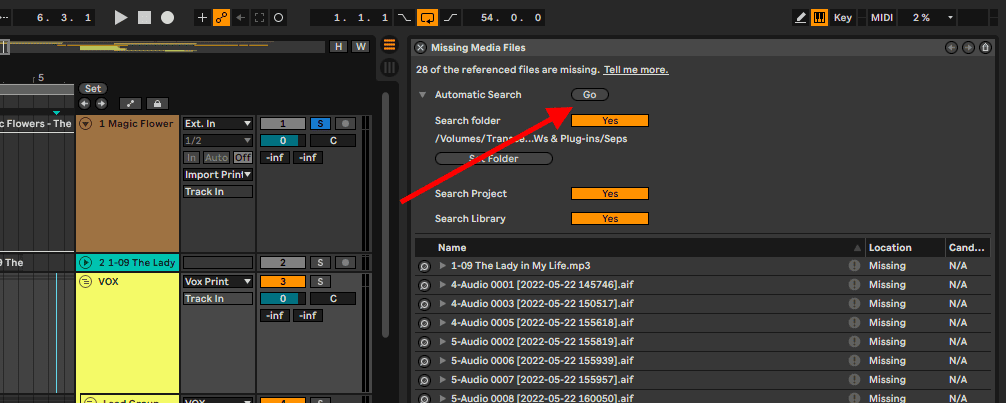
Step 1: Click the status bar to open your ‘Missing Media Files’ tab to show all your offline or disabled samples.

Step 2: Select the Automatic search and select ‘Go.’
Select and Search Folder
This technique should come if the Automatic search technique does not work. This may occur if your session is saved on your computer, and your clips are on a hard drive for example. This is how you execute this technique:
Step 1: Click the status bar to open your ‘Missing Media Files’ tab to show all your offline or disabled samples.
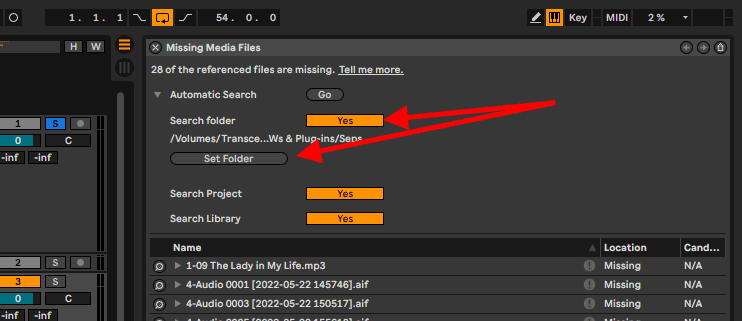
Step 2: enable Ableton to search for a specific folder and choose the correct folder.
Step 3: Select ‘Go’

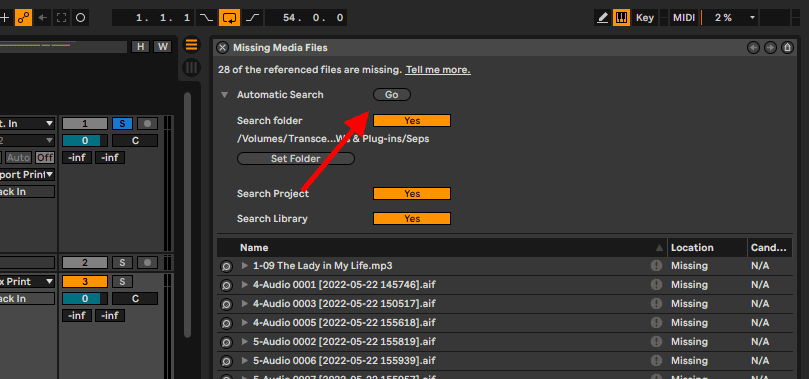
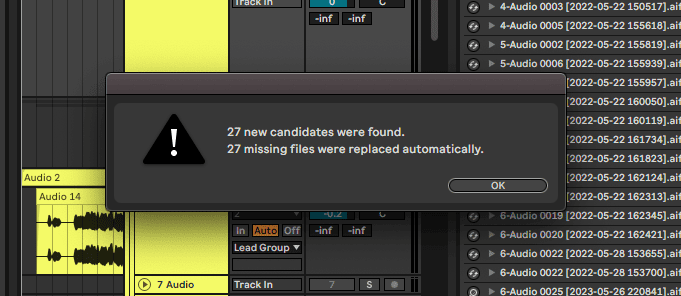
Once these first three techniques are completed and the issue is resolved, this is the message you will get:
Hot-Swap Mode
Step 1: just as in the previous techniques, select the status bar to open the ‘Missing Media Files’ tab
Step 2: click on the search icon in the ‘Missing Media Files’ tab
Step 3: Ableton will find the folder where this sample is located and the sample
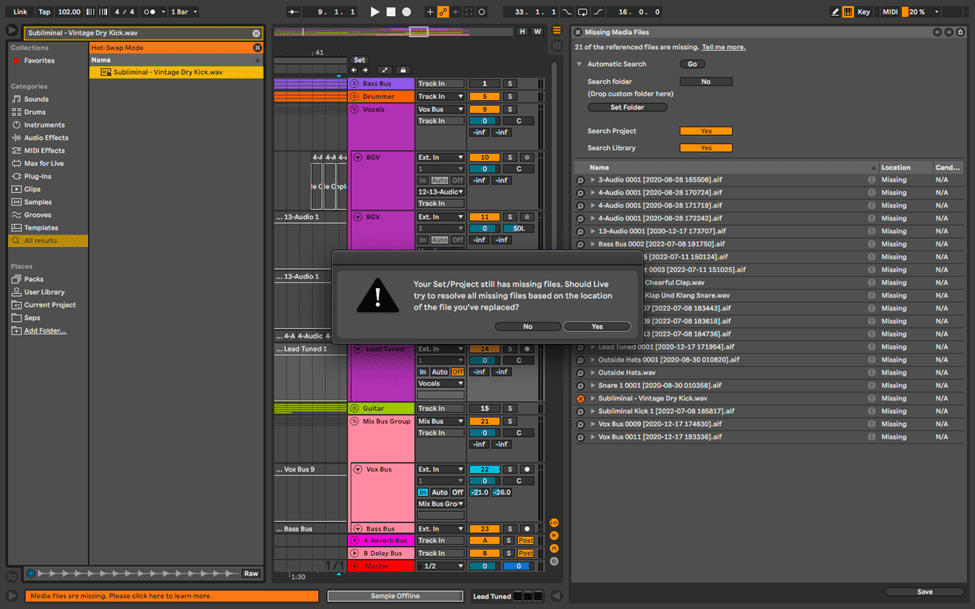
Ableton will ask if you want to resolve all disabled/offline files using this folder.
Final Thoughts
When it comes to muted clips, the resolving technique is fast and creative if mastered. It only takes one step or one shortcut. The second technique dealing with offline samples is of course much more complicated and with many more techniques to resolve this issue. With this technique, I suggest that you execute these steps respectively as to how I have structured them in this tutorial. See what fits your use cases, and have fun!
- How to Use Ableton Live’s Arpeggiator? - September 18, 2023
- How to Use the Piano Roll in Ableton Live + Shortcuts - September 18, 2023
- Ableton Arrangement View (Optimization & Usage) - September 16, 2023

![Ableton Could not Decode Video File [FIXED]](https://ProRec.com/wp-content/uploads/2023/08/haali-media-splitter-180x180.png "Ableton Could not Decode Video File [FIXED]")

