With Ableton, there are 2 ways you will generally deal with samples. Either through the versatile MIDI format, or the audio format. You can find out various ways to Sample and Resample in Ableton in the linked article. Offline samples can make or break your projects and live performances, and depending on the stakes, you could lose your job, so tread carefully!
What are Offline Samples in Ableton?
Having offline samples generally means that Ableton cannot find your live session’s audio files. This can happen for a myriad of reasons, but do not worry there are several ways we shall go through in this tutorial to retrieve your samples, as well as steps you can take to mitigate this from happening in the future.
Recommended Read: Best Free Sample Packs for Ableton Live
When you see that your samples are offline, this will always refer to your audio sample, as MIDI samples are for some reason always automatically saved by Ableton, or rather easily retrievable by Ableton. Your audio samples are usually more bulk and require a root path by Ableton’s algorithm to identify their location on your computer.
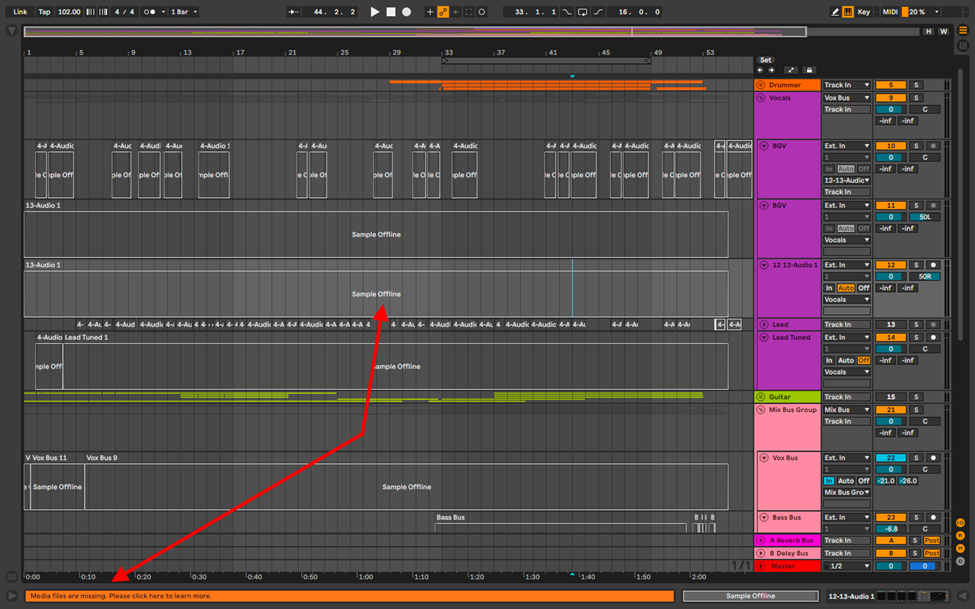
When you have samples offline, you will see that Ableton will indicate this on the audio track of the missing sample, as well as the info bar at the bottom of the arrangement view, right below the audio effects rack.
There are 3 main ways you shall be using to retrieve your offline samples, as well as 3 ways you can avoid having your samples go missing, I. E. being offline.
Ways to Retrieve Offline Samples in Ableton
You can retrieve your samples by either:
- Dragging and dropping your samples – this will require you to know where your samples are located
- Automatic Search – Ableton can locate your samples on your device and making this problem-solving so easy, you will need to only click one button to solve this issue
- Select and Search Folder – this option, just as the first will require you know where your samples are located for Ableton to know where to locate your samples, and retrieve them for you.
- Hot-Swap Mode – this function helps you resolve you offline samples one at a time, given you have not renamed your samples.
Drag & Drop
This is a more cumbersome but straightforward way to resolve your offline sample issue. This is how you go about resolving offline samples using this method.
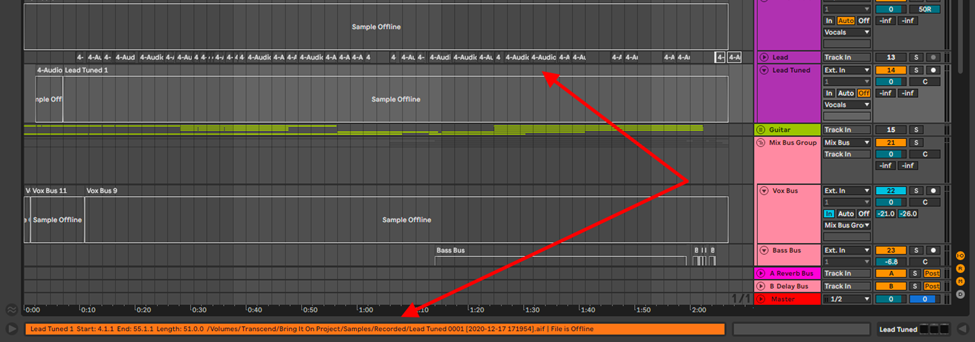
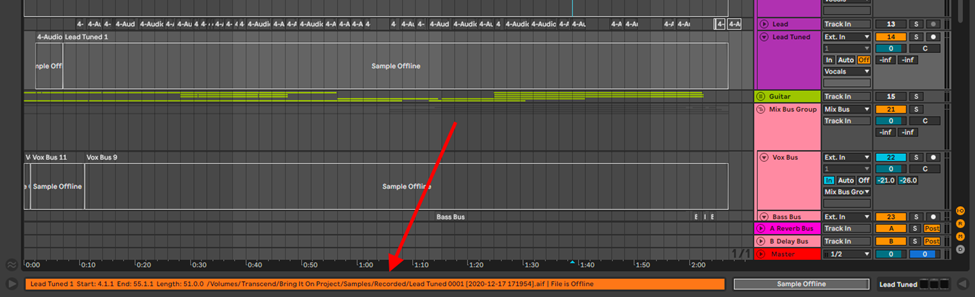
Step 1:
Hover you mouse cursor above the header of the missing sample. This will bring information about the sample. This information will be about the start and end of the sample (length), the sample’s audio format (Wav., AIF, mp3 etc.) and most importantly, the location of the sample or where Ableton had the sample last from.
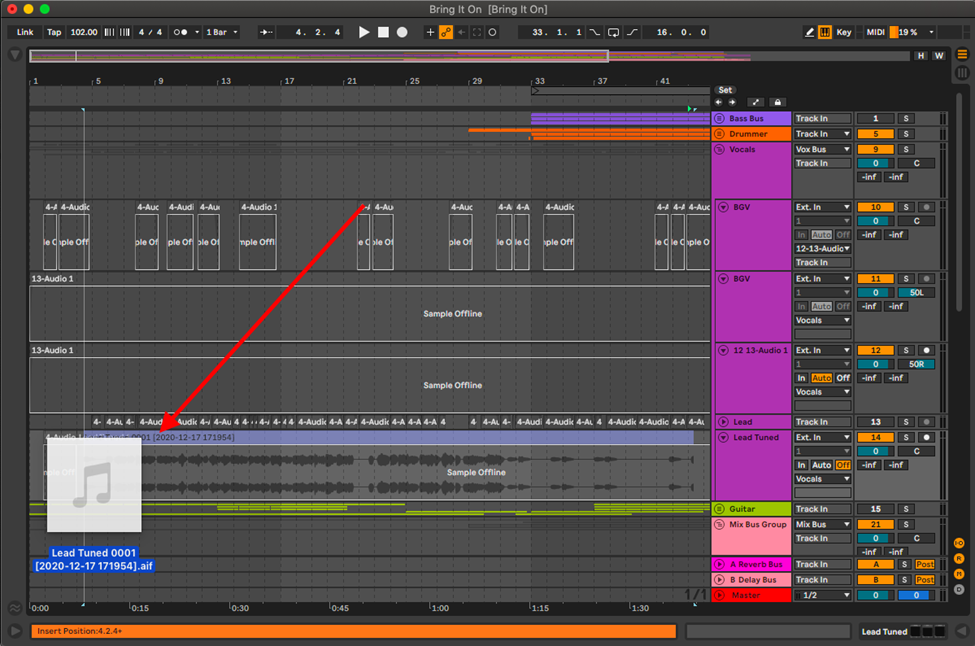
Step 2:
Now go to where the sample is located, and drag and drop it into Ableton
Note:
Remember to consider the different warp algorithms when importing audio into Ableton, as well as the length of the sample. For the different audio warp algorithms check out my break down of these algorithms, as well as their case uses in the article Ableton Sample Editor Tutorial.
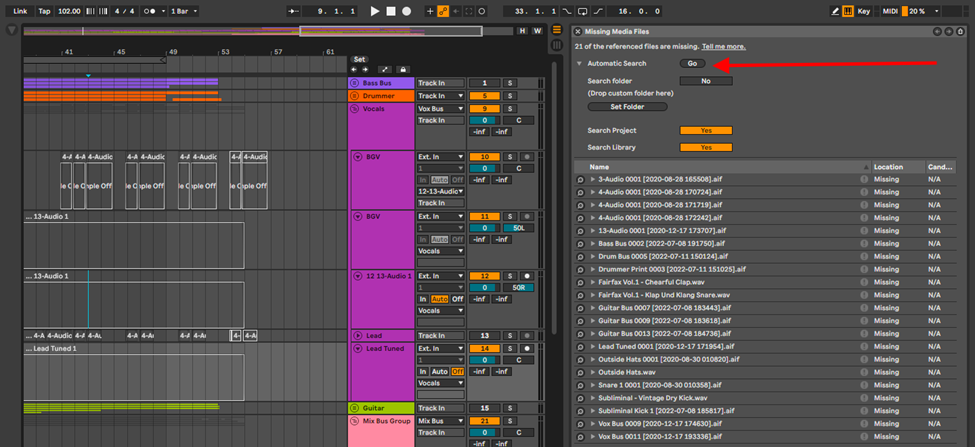
Automatic Search
This is the easiest and fastest way to resolve your offline samples issue. With this technique, Ableton will search your computer for the missing samples. This is how you go about it.
Step 1:
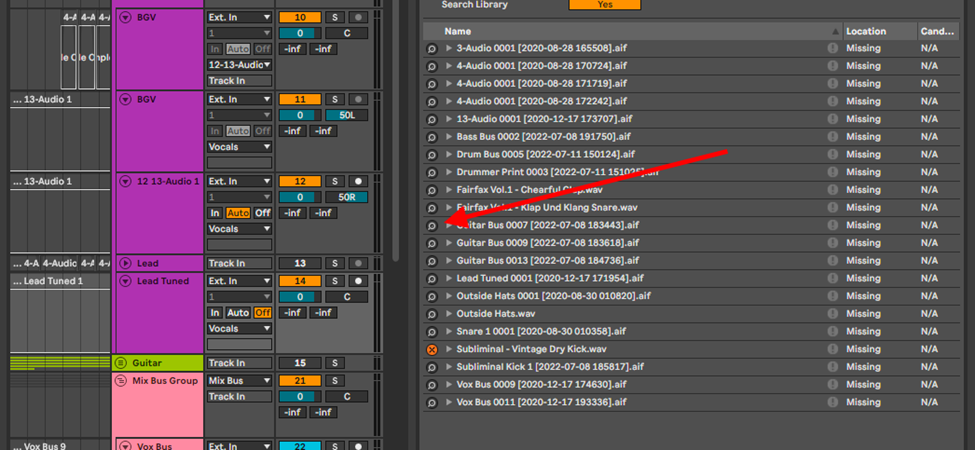
The information bar bellow your effects rack will notify you that there are missing samples. When you click on this info bar, it will open the Missing Media Files browser.
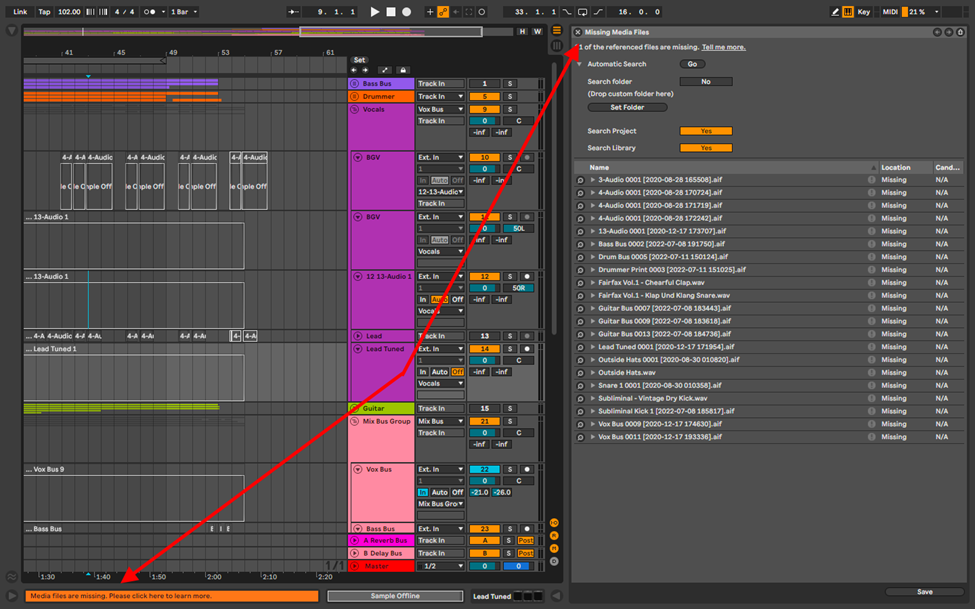
This browser will highlight the number of missing files, as well as options to help you resolve this issue
Step 2:
Select the Automatic Search option, and select Go. This will prompt Ableton to search your computer and resolve the offline samples issue.
Select and Search Folder
When you select the Automatic Search option, it may not be able to find your offline samples. This may be because, your samples are stored on an external device (hard drive etc.) this is how you go about it.
Recommended Read: How to Chop Samples in Ableton Live
Step 1:
In the first technique, I detail that, if you hover above the title of the missing sample, you will find where the sample is located.
Step 2:
Go to the missing media files browser by clicking on the info bar, then select, Select Folder.
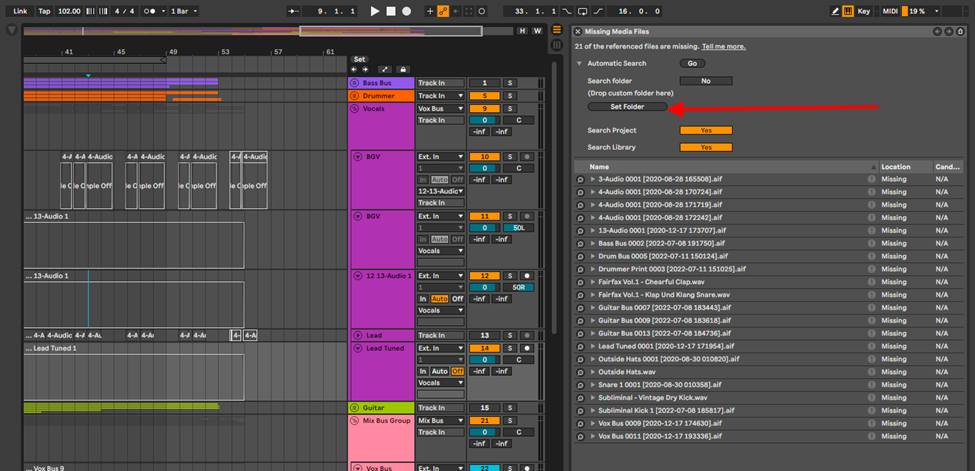
This will open a browser where you can choose the folder there the offline samples are.
Step 3:
Choose the folder, and click open.
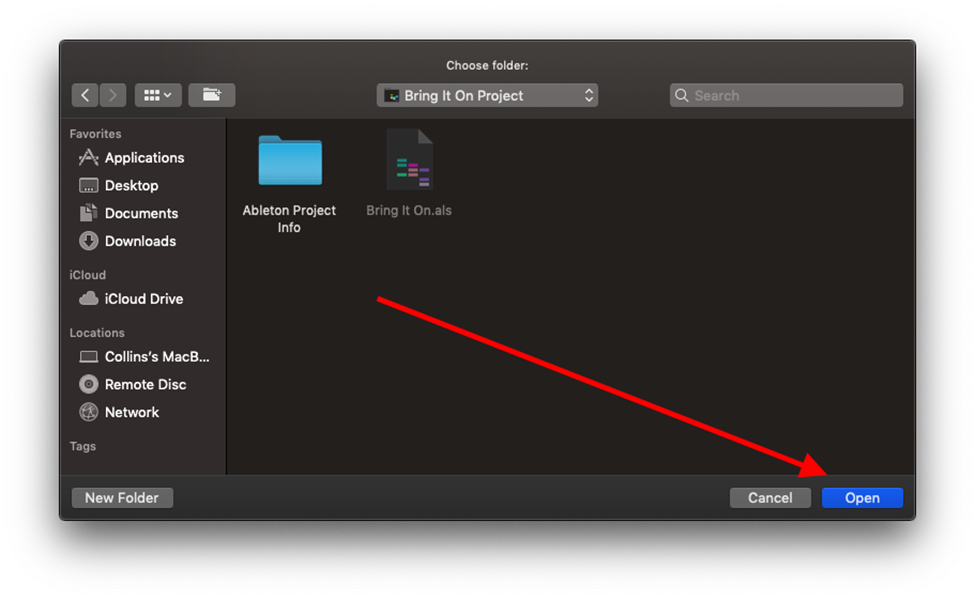
Step 4:
Now press go in the missing media files browser, and this should resolve your issue.
Hot-Swap Mode
This is the most rigid way to resolve your offline samples issue. This is how you go about this technique.
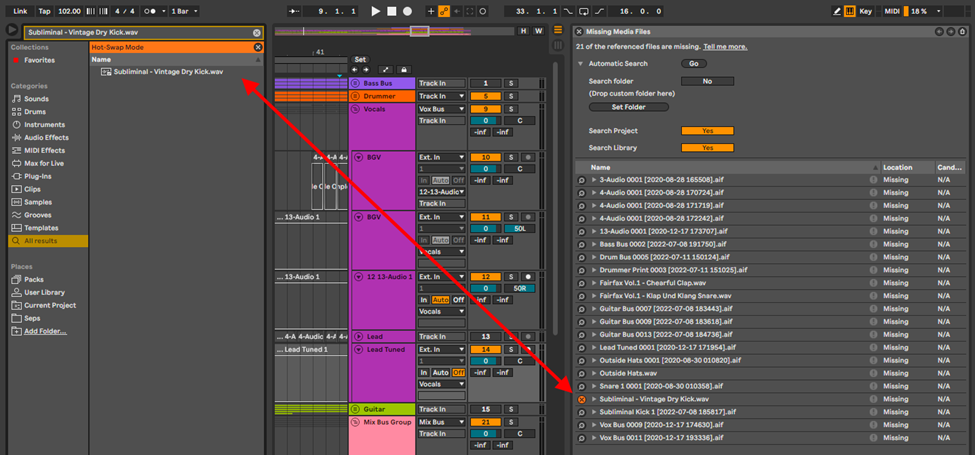
Step 1:
Go to your Missing Media Files browser, and select on the magnifying glass icon next to your offline sample.
Ableton will search your computer for samples similarly named, and provide you with the option to swap the missing sample with the one on your device.
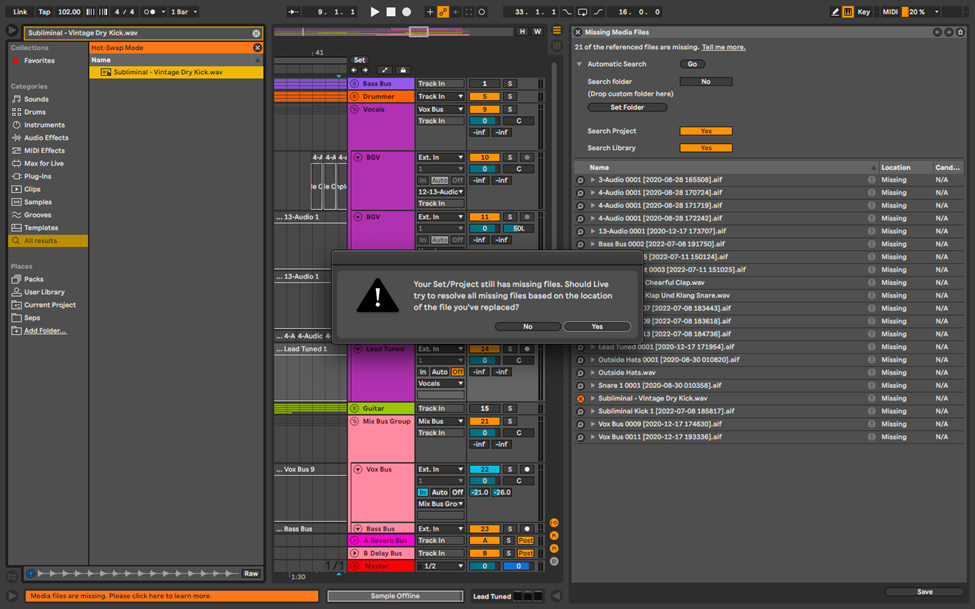
Step 2:
When you select the sample, Ableton will ask you if you want Ableton to search the folder where the swap sample is to resolve the rest of your offline samples. Depending on the case of sample location, you can choose yes or no.
The loss of samples during a production or right before a live set could make your heart sink. In a high pressure environment such as a live show, not being able to perform, or produce a live set for an artist could cost you your job. During production when working with instrumentalists and artists, loosing samples could cost you money rebooking the performers or even make your performers lose confidence in you. It is therefore imperative that you ensure that your samples are always in you session folder at all times, and I shall show you how to mitigate offline samples.
Preventing Samples from going Offline in Ableton
There are also 3 ways you can go about to prevent finding your sample going offline and making your life easier in future for your productions and live performance. These are;
- Save and Back up – develop and “heathy” obsession with saving your project every 5 minutes or so during recording
- Collect all and Save – this is step you should take to make sure your project files are well managed and kept together in one place especially when working with multiple devices
- Optimize Mac Storage – this is a MacBook specific issue, but will go a long way to save you so many issues with your live performance, or when file sharing between devises.
Save and Back-up
Develop a habit of saving your session every couple of minutes by pressing Cmd + S on Mac, or Ctrl + S on windows. Also, have a trusty hard drive handy to back up your sessions on after you are done so that, in case your laptop crashes or is lost, you will still have your projects. Take this a step further and back up your projects on a cloud storage. You will find a myriad of online cloud storages on the internet.
Collect all and Save
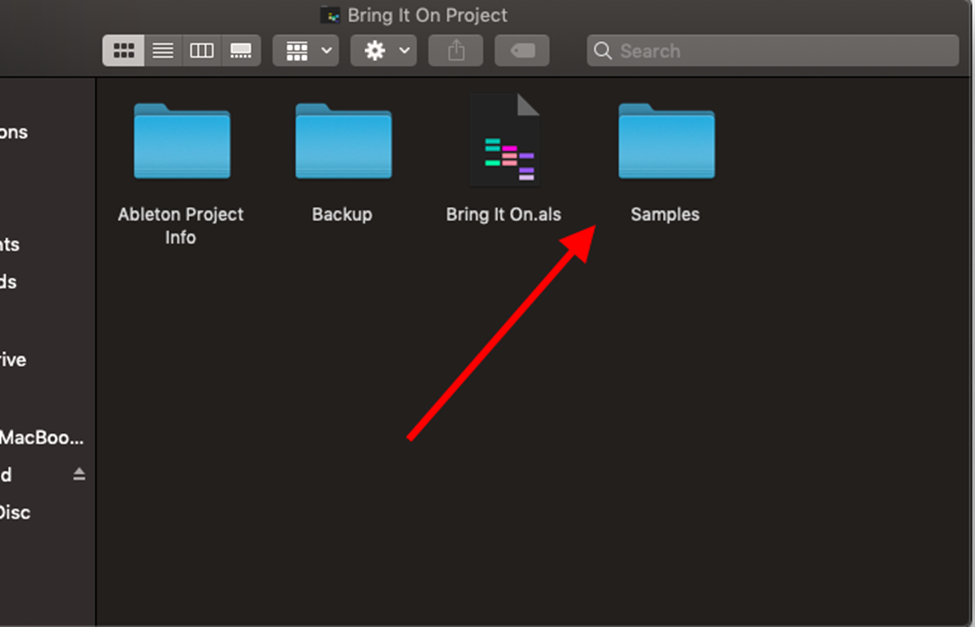
This is how Ableton collect all your samples into your session folder. Some DAWs will ask you if you want to save your audio samples in the session folder on import. This is how you can go about collecting all your samples into your session folder.
Step 1:
When you create and save a project, Ableton does not save your samples unless the samples are recorded or processed in Ableton, saved in the samples folder in your session folder.
Step 2:
Select the File option at the top of your screen on Windows or Mac, and select, collect all and save.

This collects all your samples and store them in the sample folder, ensuring your samples will always be in your project folder and not likely to ever go offline.
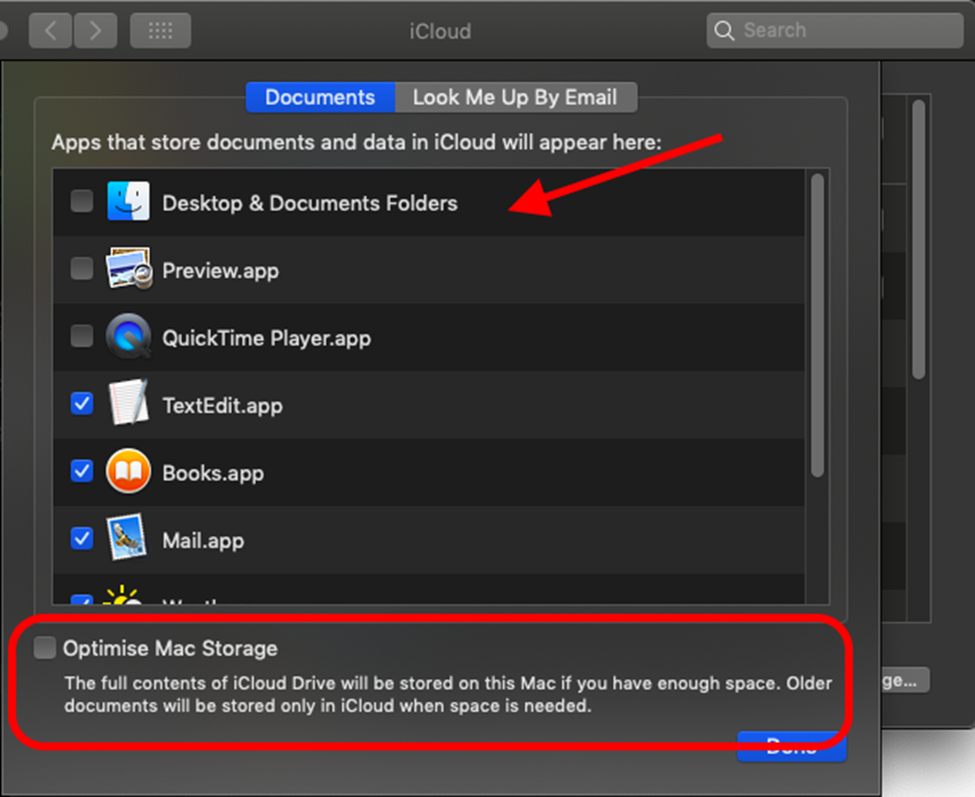
Optimize Mac Storage
This solution is exclusive to MacBook users. Apple has made the automatic back-up feature for their devices in order to save on space. Mac will use your iCloud to back up files that have not been used or opened for a certain period of time to keep your storage space high. Unfortunately, this will also back up your samples. If you transfer your session files without first downloading these files back onto your computer, you risk having your samples offline when you move your files to another computer. This is how you can turn off, or manage this feature.
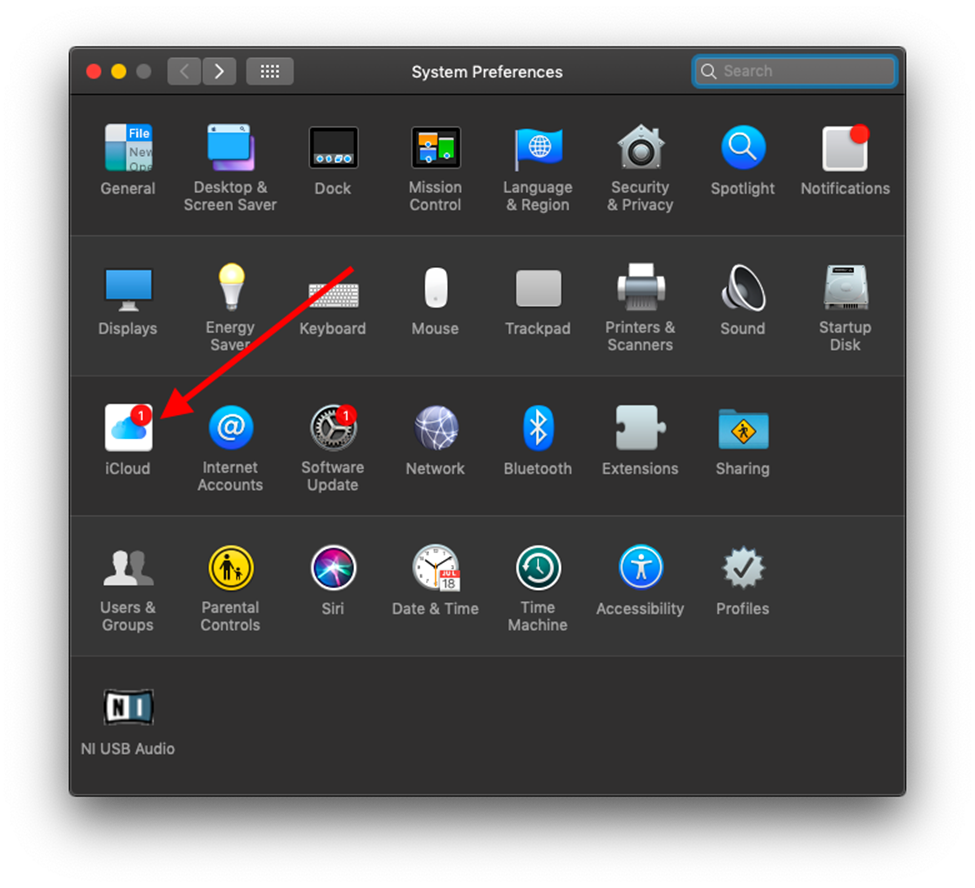
Step 1:
Open your system preferences and select iCloud.
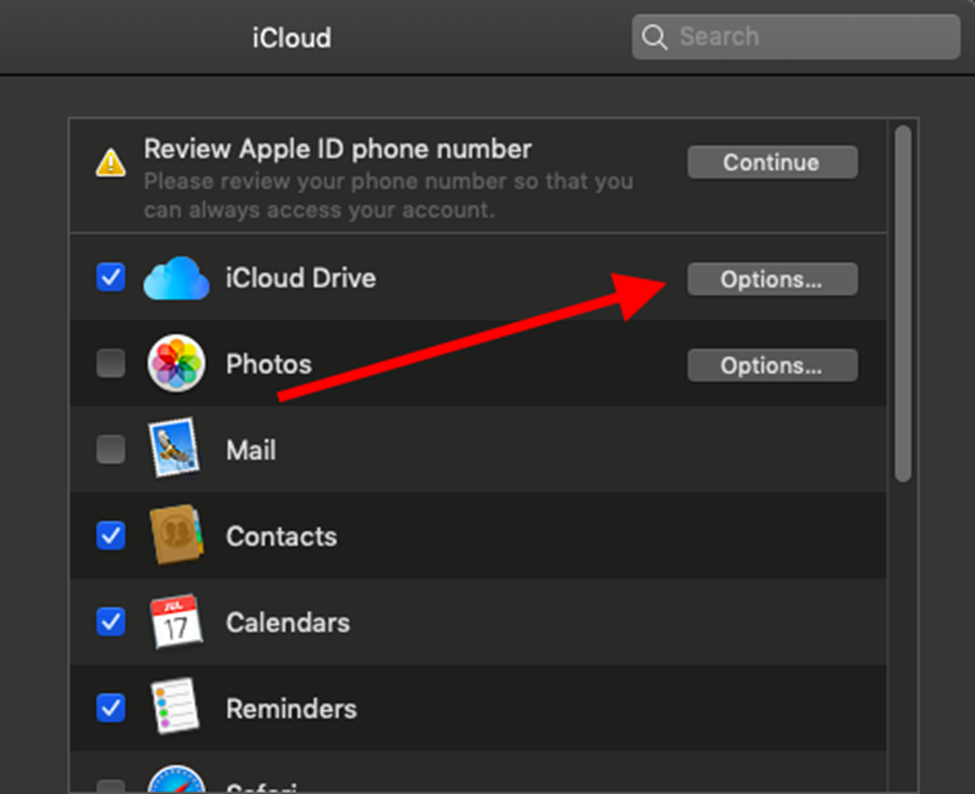
Step 2:
Then select iCloud options.
Step 3:
Choose which folders and files you want to back up or even, outright switch this feature off if it provides you no utility
Conclusion
In any profession, it is good practice to keep all your files and folders organized for easy access and to prevent damaging losses. Ableton is a tool of trade among musician, producers, editors and performers and has various ways to manage and save your files, as well as recover your missing or misplaced files. I have provided in this tutorial, techniques you can use to retrieve missing offline samples as well as techniques you can use to prevent loosing you samples in future. Have fun!
- How to Use Ableton Live’s Arpeggiator? - September 18, 2023
- How to Use the Piano Roll in Ableton Live + Shortcuts - September 18, 2023
- Ableton Arrangement View (Optimization & Usage) - September 16, 2023


![Ableton No Sound (Monitors & Headphones) [FIXED]](https://ProRec.com/wp-content/uploads/2023/05/greyed-out-muted-tracks-ableton-180x180.png "Ableton No Sound (Monitors & Headphones) [FIXED]")
![Ableton Won’t Open [FIXED]](https://ProRec.com/wp-content/uploads/2023/08/ableton-live-installation-180x180.png "Ableton Won’t Open [FIXED]")