Sample rate and buffer length will greatly determine the quality of your audio, both during playback and also when exported. Understanding how the two work, how to set them up, and how to use them is vital for any profession in the audio field. Apart from quality, sample rate and buffer length largely influence your production experience. Set them too high and your computer might start lagging, or in extreme cases, even straight out crash.
In this article, we’re going to go over what sample rate and buffer length are, their implications and applications to audio, and how to use the two to our benefit.
Sample Rate
Sample rate refers to the number of samples taken per second of the waveform. It is normally represented in Hertz (Hz). During recording, the audio signal coming from your mic is analog and is converted to a digital signal to be stored as data on your computer. During conversion, your interface takes thousands of snapshots (photos) per second of the waveform and combines them to create an audio recording. These snapshots are what we refer to as samples.
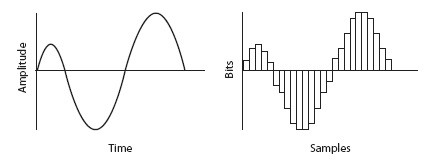
The image on the left represents an analog audio wave while the right image is a representation of the same audio wave in digital format. The analog signal is digitized by turning it into binary code made up of ones and zeros. During conversion, the amplitudes of the samples taken may be rounded off to fit into the code. This leads to some information being lost as the analog signal is digitized. Increasing the sample rate increases the number of samples taken thus reducing the amount of information lost.
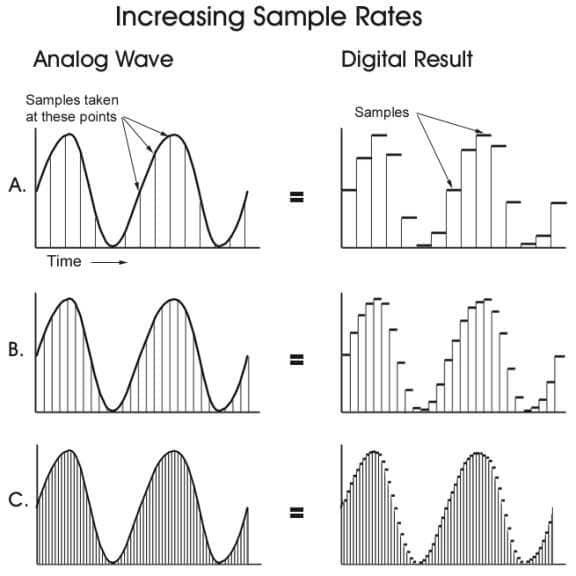
The amount of the original analog signal lost during the conversion creates an error in the digital waveform.
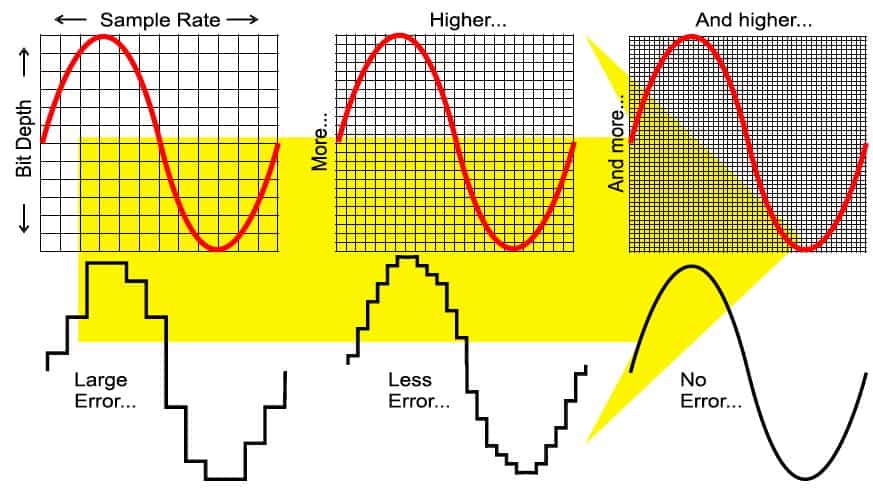
The lower the sample rate the larger the error and the lower the quality. The higher the sample rate, the more information is captured thus reducing the error which creates a more accurate digital reproduction of the recorded audio in comparison to the original audio. The file created is of a higher quality, but also larger in size.
On the question of what sample rate to use, your best bet would be 44.1 kHz or 48 kHz. These are the two most commonly used sample rates in the audio world. 44.1 kHz is CD quality and is fit for streaming platforms and consumer audio. 48 kHz is the preference in audio for film since it offers a more accurate recording of the original sound source and also allows for more dynamic range. Although these are the industry standard, always be sure to inquire what would be the most preferred sample rate for delivery.
Note: The sample rate should always be the first thing to set before starting a project. If FL Studio’s sample rate is set to 44.1 kHz and you play a 48 kHz audio file, FL will read the samples slower resulting in the audio sounding slightly lowered in pitch and slowed down. If you’re working with audio files, set the sample rate of FL to the sample rate of the audio files before you import them.
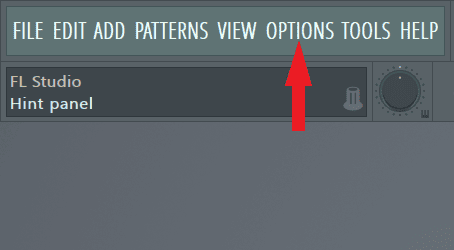
To set the sample rate.
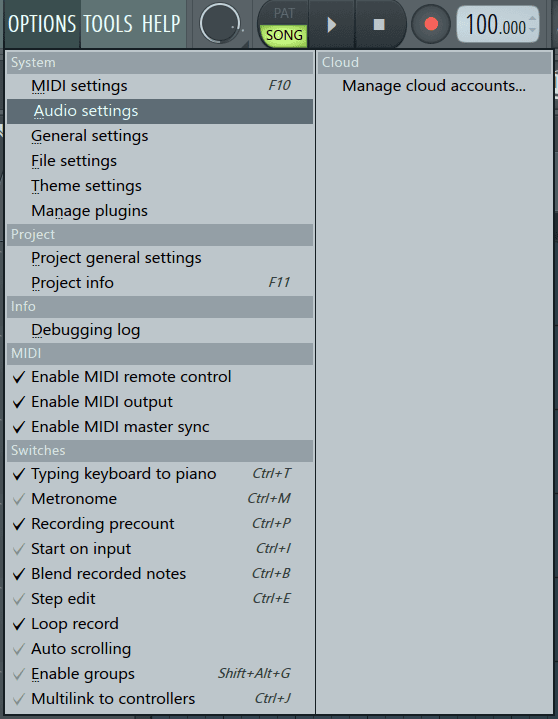
Step 1: Go to ‘Options’ in the main toolbar.
Step 2: Select ‘Audio settings’.
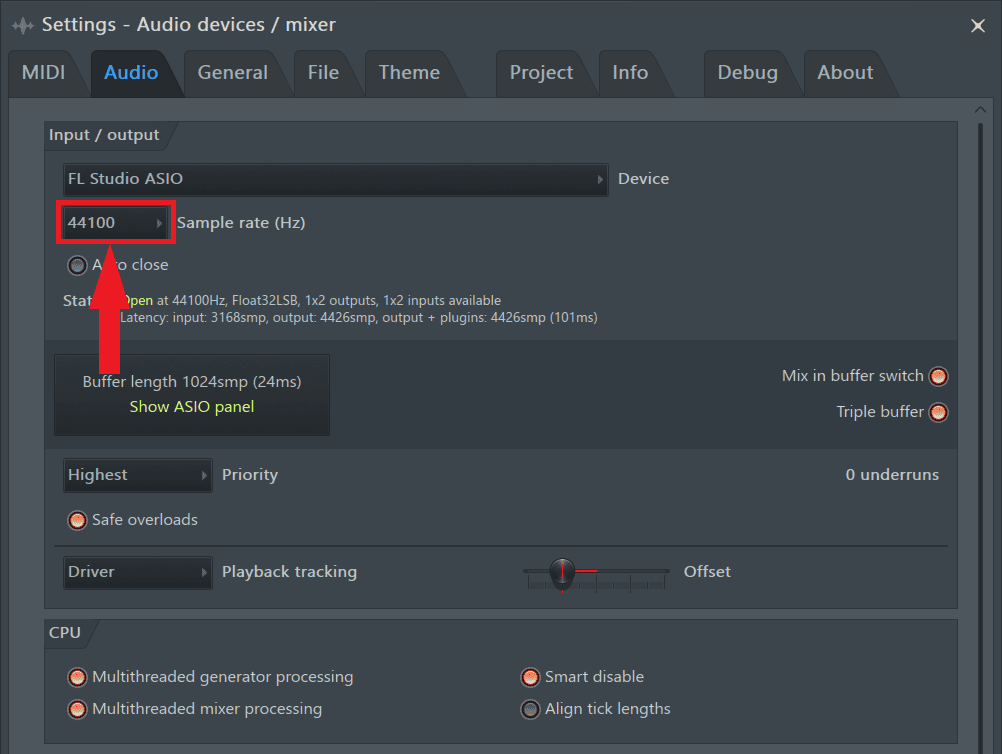
Step 3: On the audio settings page, click on the dialogue box next to ‘Sample rate’.
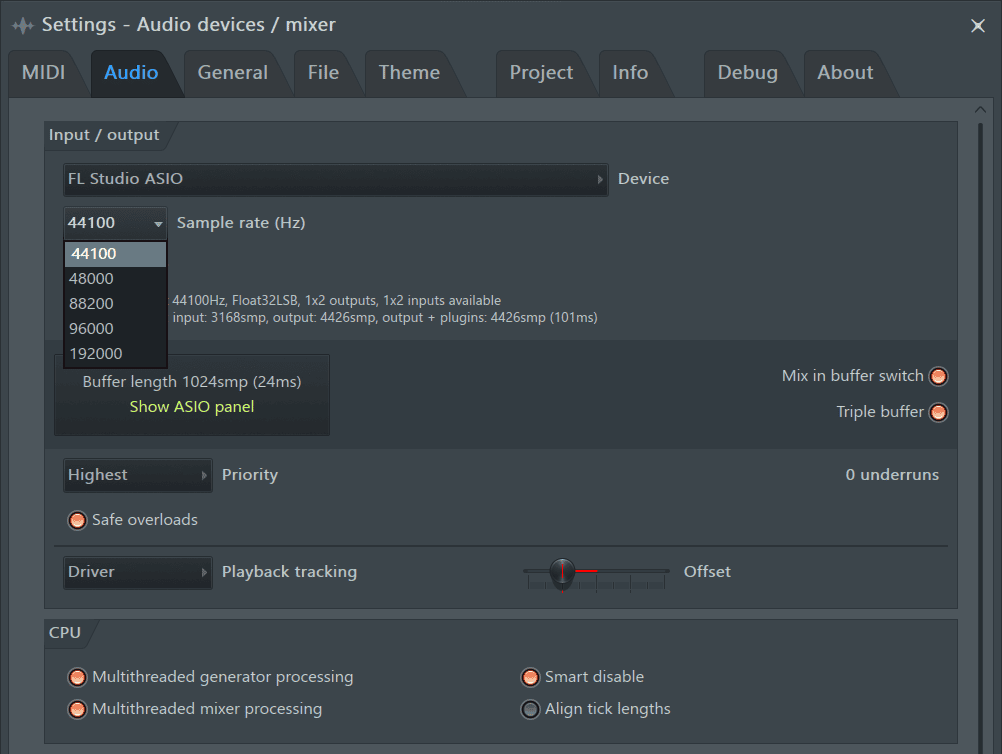
Step 4: Select a sample rate from the listed options.
Buffer Length
Buffer length is the amount of time your computer is allowed to take to process the audio signal of your sound card or audio interface. The buffer length can also be defined using samples as the number of samples taken by your computer to process the audio signal of your sound card or audio interface. This makes the buffer length be represented as both samples and time in milliseconds. The milliseconds will vary depending on the sample rate used. Common denominations of buffer lengths are 64smp, 128smp, 256smp, 512smp, 1024smp, 2048smp, and 4096smp.
The buffer determines the maximum time your computer can take to process an analog audio signal coming in from your audio interface, convert it to digital, run it through the processing applied in your computer, convert it back to an analog signal, send it back to the audio interface, and then out through the outputs. The longer the buffer length, the more time taken by your computer to process the audio, lightening the load on the CPU.
Setting the buffer length will be entirely dependent on the current task at hand. It is not uncommon to find yourself switching back and forth between different buffer lengths as you progress in your project. When tracking, we want to avoid latency so the buffer length should be set to the lowest possible value your computer can handle. A buffer length of 128smp or 256smp will suffice. This ensures that the timing of the recorded audio files lines up as close as possible to their live performances and avoids any audible latency.
When mixing, however, a longer buffer length is ideal as latency is not an issue since we are already done recording. A longer buffer allows the computer to take more time to process the audio before it relays it which is advantageous when you’ve got multiple effect chains running across different mixer tracks. A buffer length of 1024 is preferred when mixing. This reduces the stress on your CPU and frees up more processing power to be utilized elsewhere. As you continue mixing, you may start experiencing crackling audio, increase the buffer length even higher as a fix.
To set the buffer length:
Step 1: Go to Options>Audio settings.

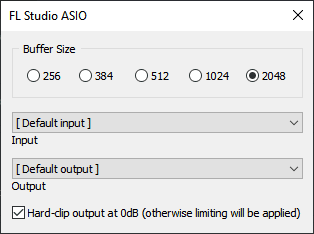
Step 2: Click on the area marked below to show the ASIO panel.
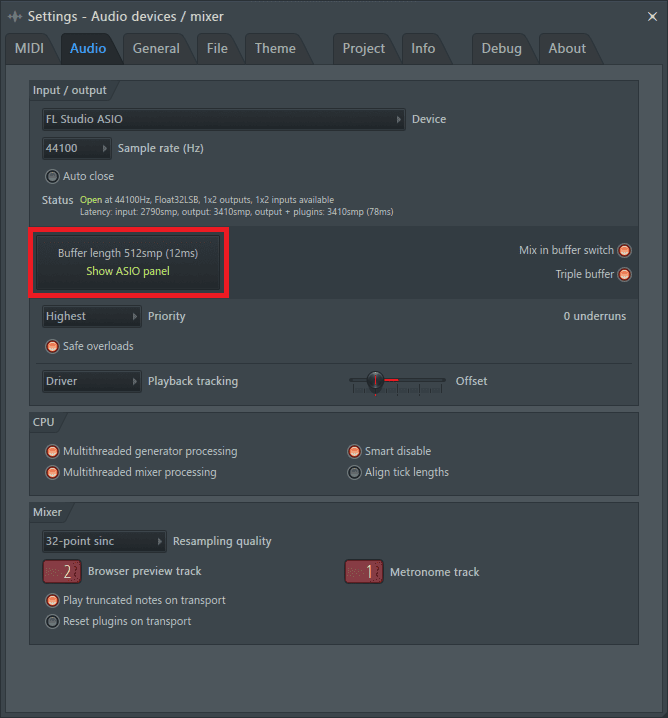
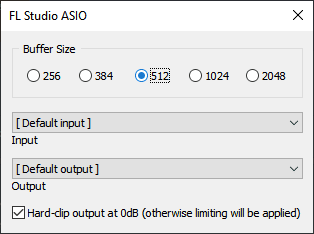
Step 3: Once opened, the available buffer lengths will be displayed on the panel. Select your preferred buffer length from the options.
Conclusion
The sample rate to use will largely be determined by the final intended use of the audio, however, when it comes to buffer length, a lot of variables come into play. Apart from what we’ve discussed, setting the correct buffer length will also be determined by your computer’s specs so make sure to stay within its limits. As always, have fun creating.

- How to Add Drum Kits to FL Studio - September 18, 2023
- Best Free Drum Kits for FL Studio - September 18, 2023
- How to Create Drum Patterns & Loops in FL Studio - September 12, 2023

![FL Studio MIDI Keyboard Not Working [FIXED]](https://ProRec.com/wp-content/uploads/2023/07/midi-in-and-out-connections-180x180.png "FL Studio MIDI Keyboard Not Working [FIXED]")

