In recent years with the rise of song remixes, extracting vocals has become a staple in the music production community. The ability to extract the individual elements of a track paired with producers’ ever-growing creativity has given us new ways to listen to, study, sample, and reference our favorite songs. Extracting vocals allows us to reimagine songs on our own terms and in our own style.
In this article, we’re going to go over how to extract/isolate vocals and how to remove the vocals from a song.
How to Extract vocals
Let’s start with extracting the vocals from a song through phase cancellation. This phenomenon occurs when we have two copies of the exact same audio playing at the same time and are completely in sync. If the polarity of one of the audios is flipped, then the waves, since they are identical, will cancel each other out and no sound will be produced.
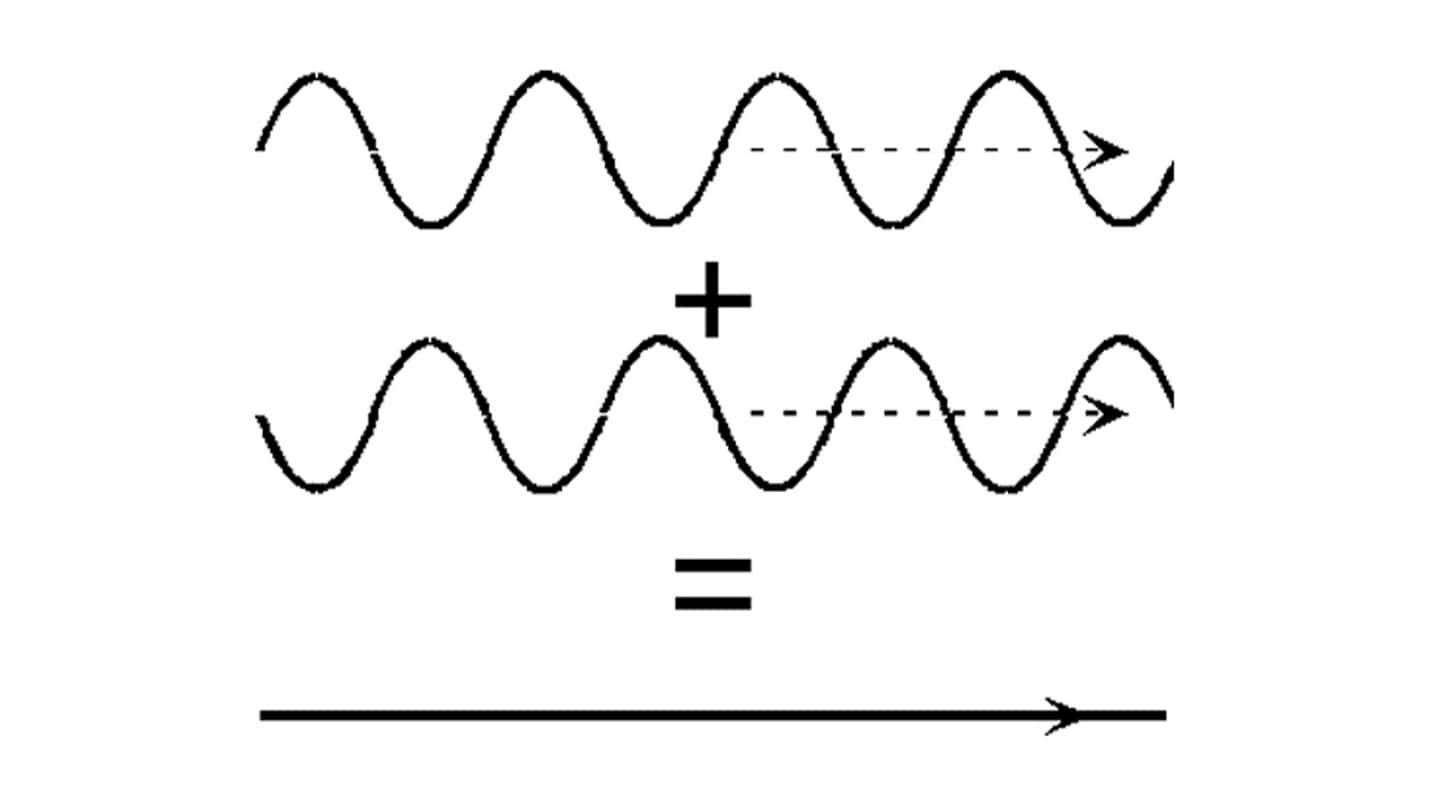
If the two audio files are exactly the same and are completely in sync, then there will be pin-drop silence. If the two audio files share similar qualities but are different in any way, shape, or form then the difference between the two audio files is what will play. This logic is what we’ll be using to extract the vocals which will be the difference created when the instrumental’s polarity is flipped and the instrumental cancels itself out in the song.
The two files you will require for this process are the song you want to extract the vocals from and the instrumental version of the song. The closer the instrumental is to the song the better the results. If you could get the official instrumental, then you hit the jackpot. The two audio files should also be of high quality and should both be precisely the same quality. Since access to the wav files and stems is limited to the creators of the song and we can only get the songs online, mp3 files will do here. For the highest quality, both files should be at the highest bitrate of 320kbps.
Now, let’s go over how to extract vocals in FL Studio.
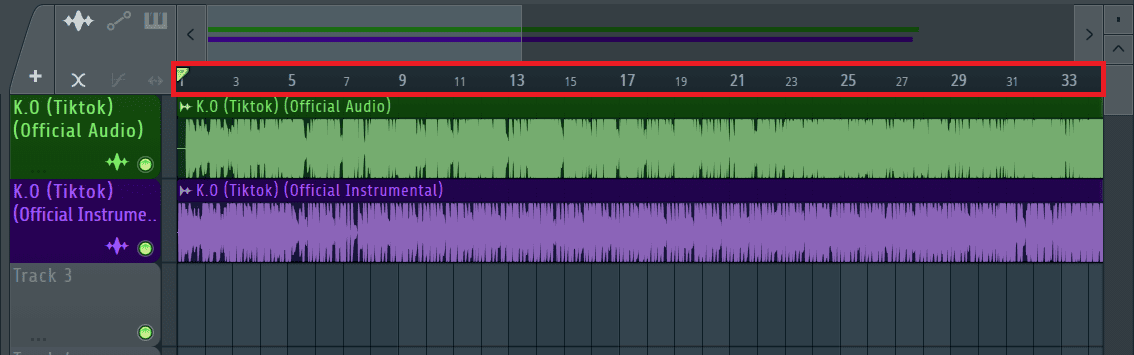
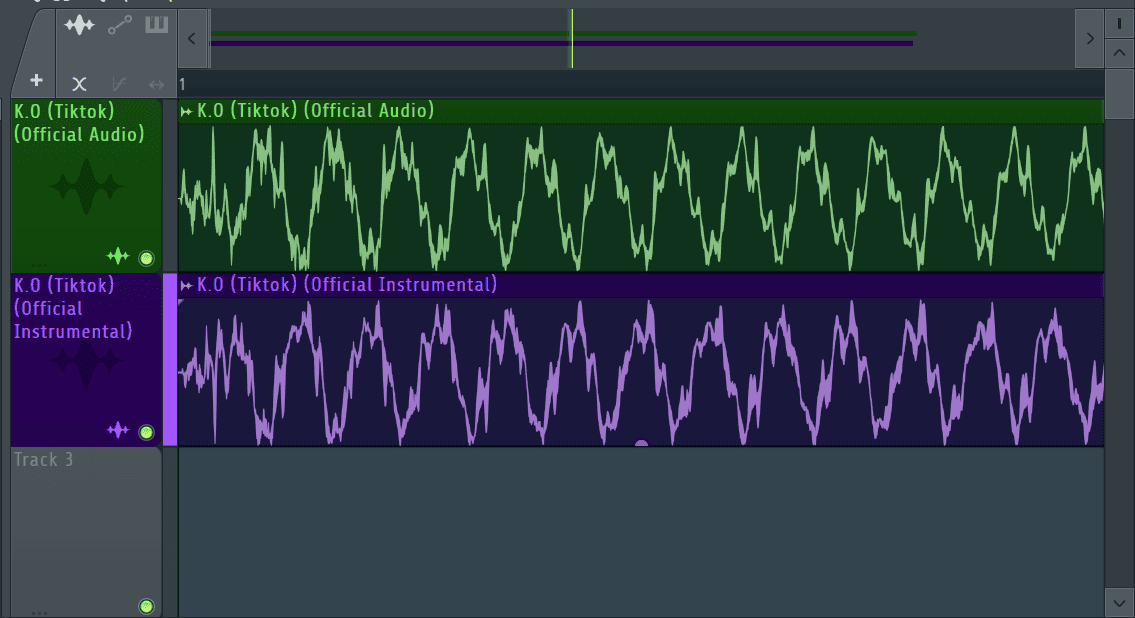
Step 1: Drag and drop both files onto the playlist.

Step 2: Match the two audio to be in phase. The two audios need to be perfectly in sync in order for full phase cancellation to occur. Here you’ll have to zoom in and do it manually. Zoom in by hovering the mouse cursor over the marked area below and scrolling using your mouse wheel.
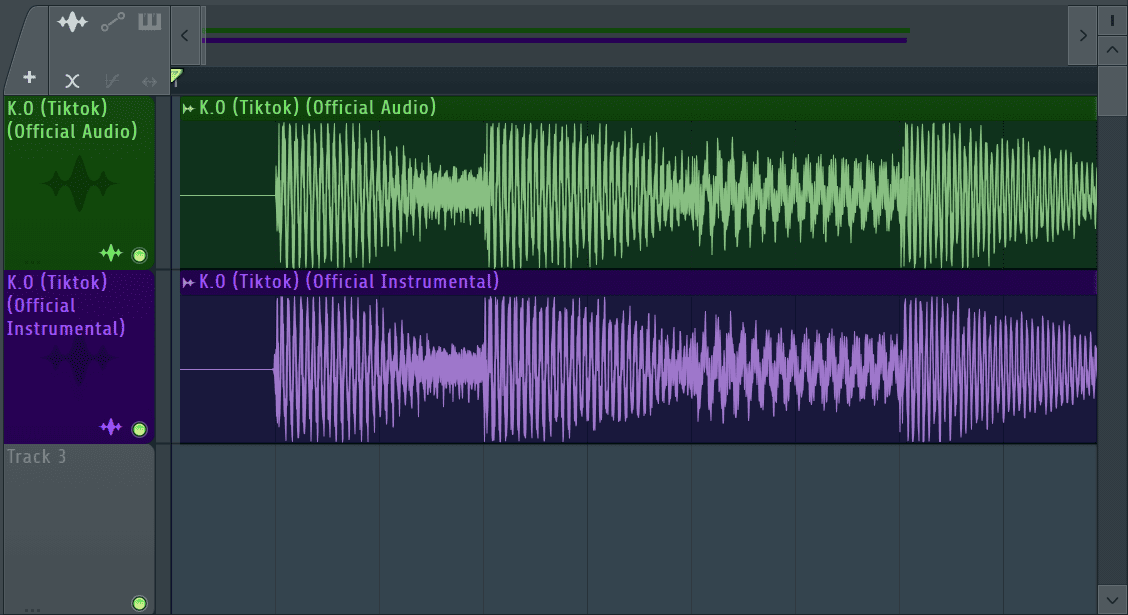
Nudge the two back and forth until they are perfectly in sync.
Step 3: Now since the two audios are perfectly synced, the next thing is to flip the polarity of one of the audios. Do this by double-clicking on one of the audio samples to view its sample settings.
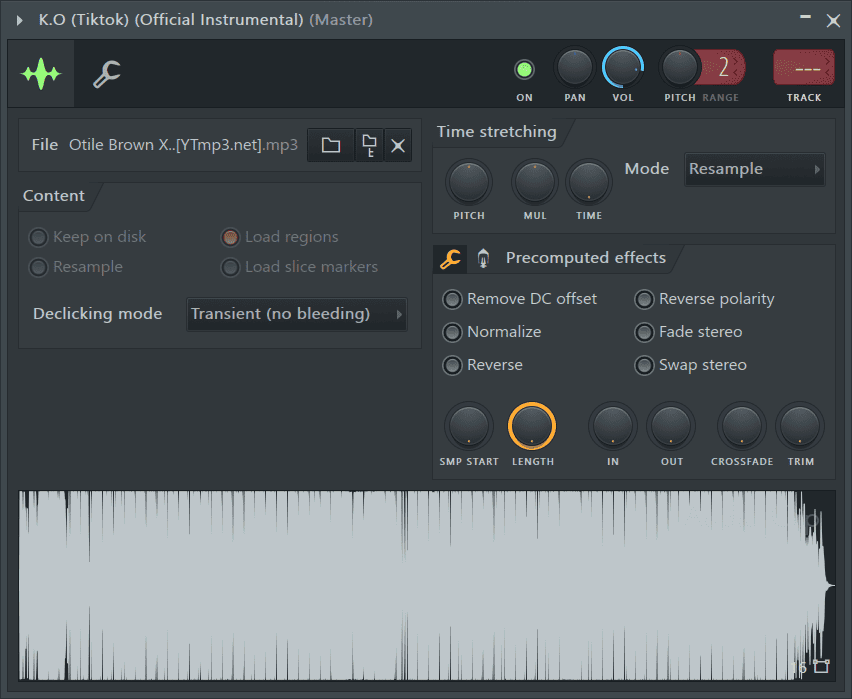
Step 4: Under ‘Precomputed effects’ turn on ‘Reverse polarity’ by clicking on the button next to it. It will turn red when activated.
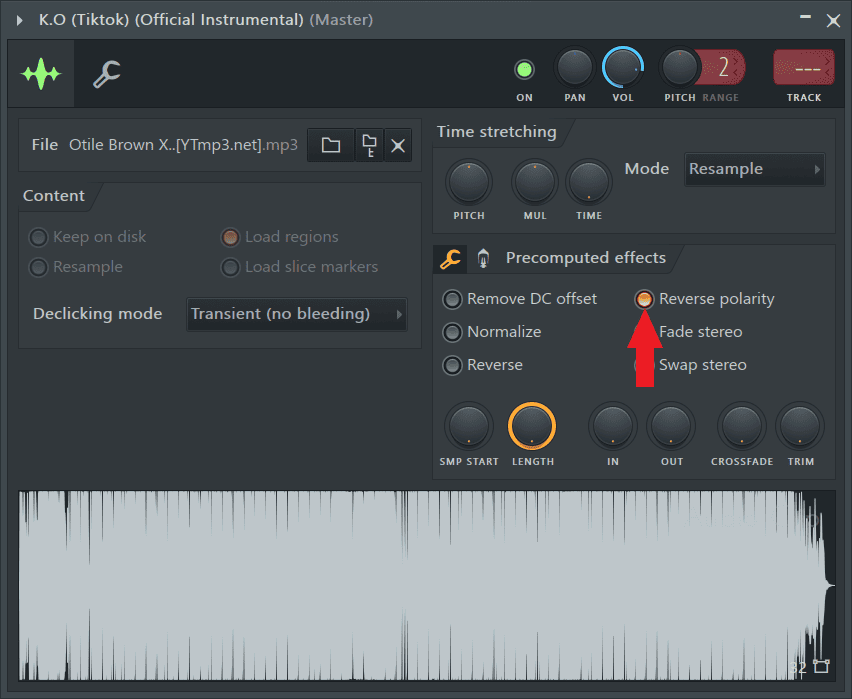
This will flip the audio’s polarity 180 degrees making it cancel out the instrumental in the song leaving us with the difference between the two audios which are the vocals.
How to Remove Vocals
Removing vocals from a song comes in handy for live performances and karaoke where the performance version of the song cannot be found. A disclaimer though, the resulting instrumental will not be the best quality or sound the best so this should be used as a last resort. Always make sure you have the performance version of your song ready and well-mixed before hitting the stage. You’ll need three mixer tracks, one for the song (the input track) and two to work on.
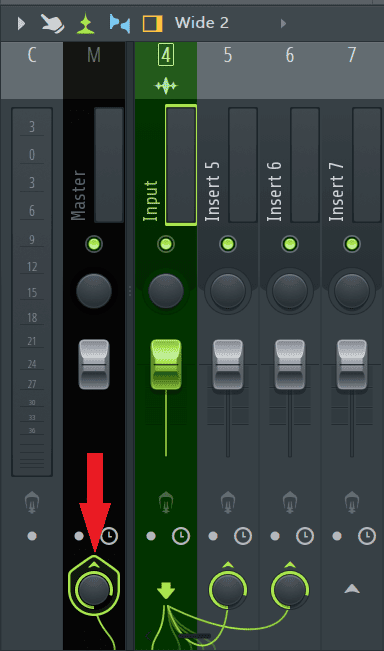
Step 1: Route the input track to insert 5. While the input mixer track is selected, click on the arrow located at the bottom of insert 5 to route the input track to insert 5.
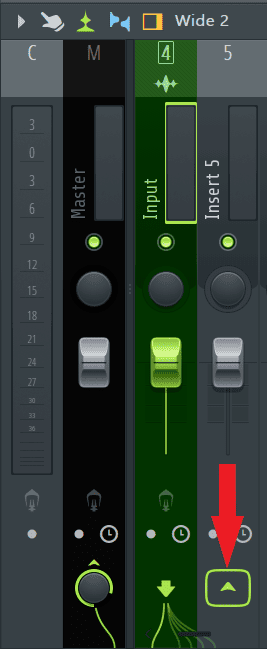
Step 2: Repeat the process and route the input track to another mixer track.
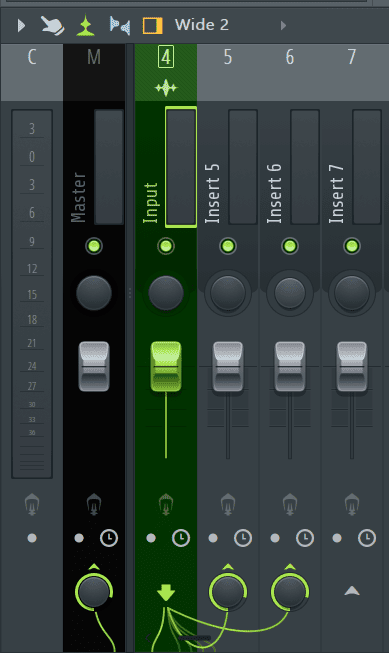
Step 3: Unroute the input track from the master by clicking on the arrow located at the bottom of the master.
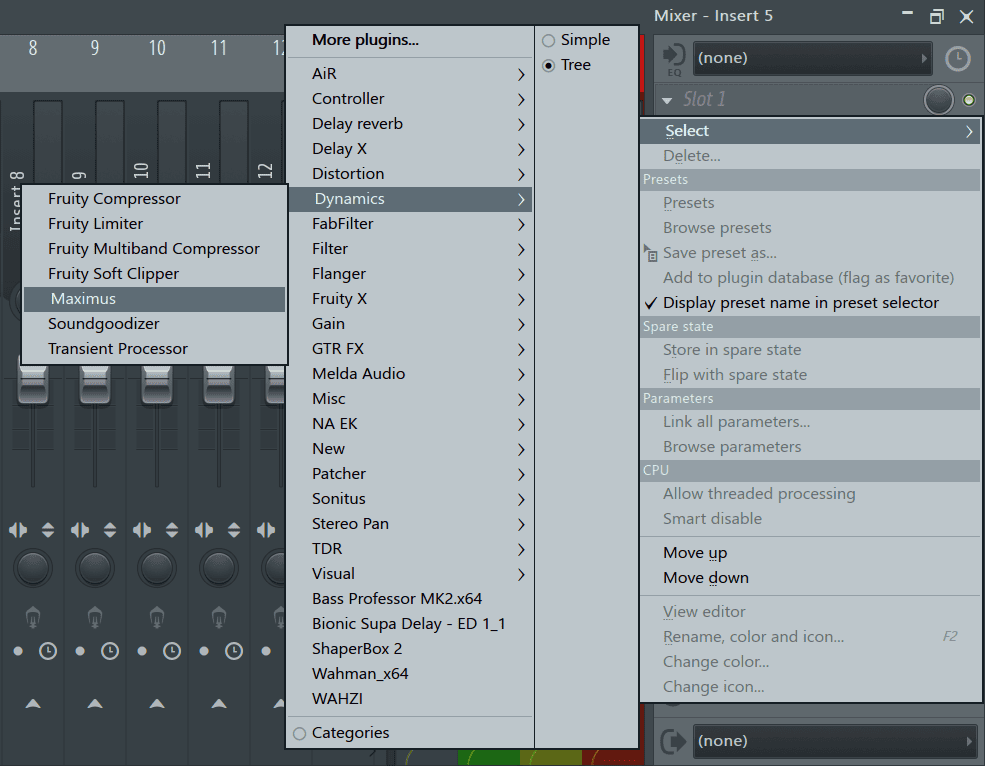
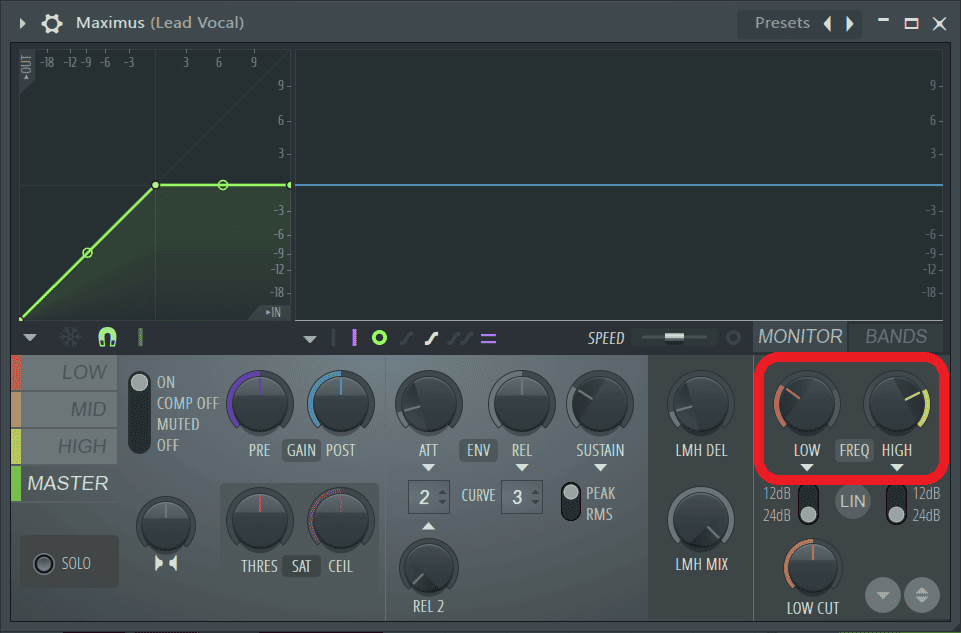
Step 4: I’ll load Maximus and use it to solo the mid frequencies since this is where the vocals are prominent. On Insert 5, I’ll click on an empty effect slot and go to Dynamics>Maximus.
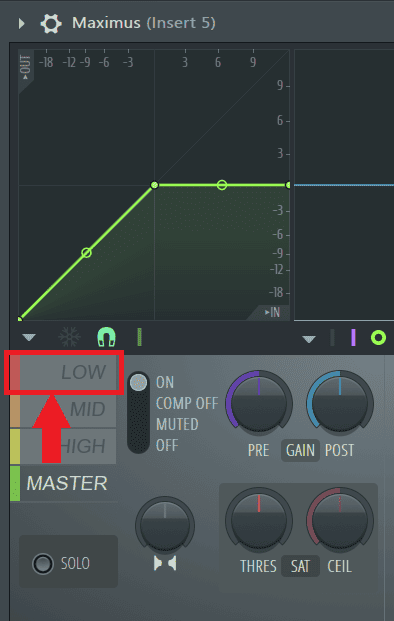
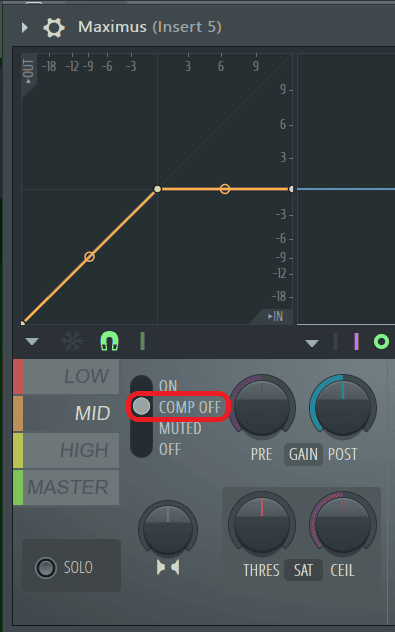
Step 5: Once it is loaded, click on the ‘Low’ band selector shown below to view the settings for the low band.
Step 6: On the low band, switch to ‘Muted’ to mute it.
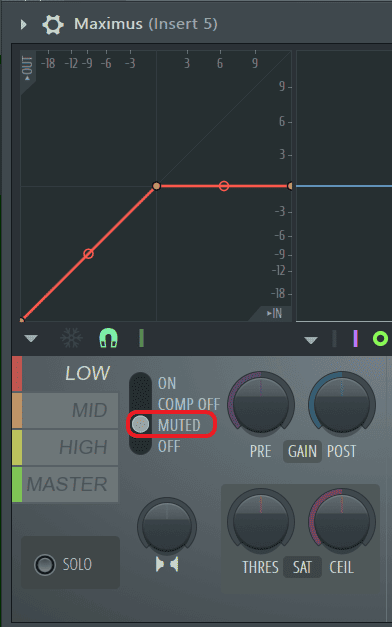
Repeat the process and mute the high band too.
Step 7: Go back to the mid band and turn the switch to ‘COMP OFF’ to turn off compression since we don’t need it.
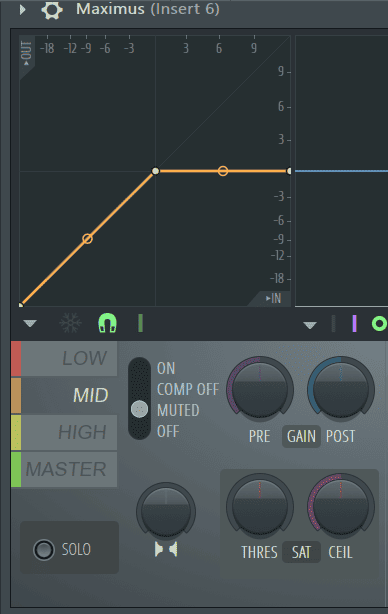
Step 8: On Insert 6, we’ll need to do the inverse, mute the mid band and turn off compression for the low and high bands.
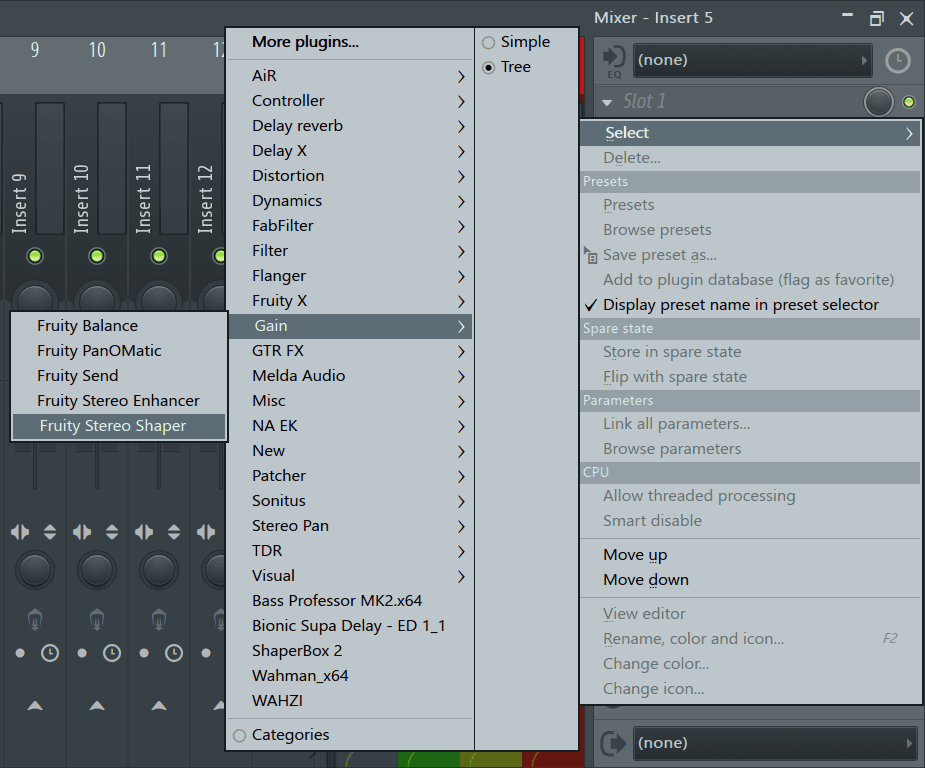
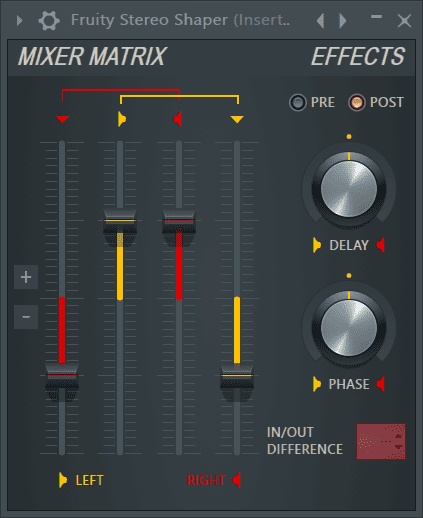
Step 9: Next, I’ll need some phase cancellation. This process works by adding the right channel into the left, but with the phase inverted. The information panned to the center, since it is equal in both channels, will be cancelled out, therefore, removing any information panned to the center. For this, I’ll be using Fruity Stereo Shaper. To do this, I’ll go back to Insert 5, click on another empty effect slot, and go to Gain>Fruity Stereo Shaper.
Step 10: In Fruity Stereo Shaper, turn down the right into left and the left into right faders (shown below) until they’re at -1.
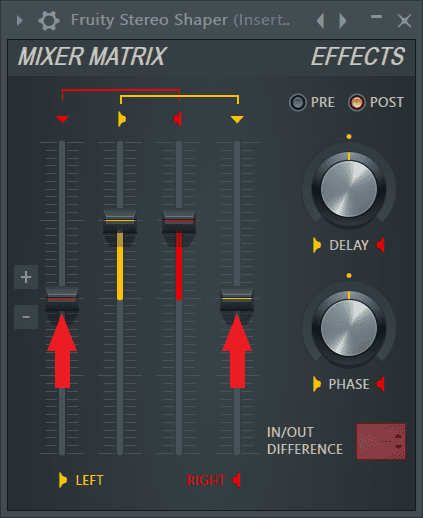
It will now look like this.
Step 11: You can tweak the crossover points on the various instances of Maximus to get a better-sounding result. However, make sure that the crossover frequencies are exactly the same on both instances of Maximus to avoid issues with build-up and phasing.
Conclusion
If you want even better results, there are plenty of plug-ins whose sole purpose is to extract vocals and other elements of the beat and stem them out like Izotope’s RX8 and even online alternatives. Until next time, have fun creating!

- How to Add Drum Kits to FL Studio - September 18, 2023
- Best Free Drum Kits for FL Studio - September 18, 2023
- How to Create Drum Patterns & Loops in FL Studio - September 12, 2023


![FL Studio Tempo Changes When I Press Play [FIXED]](https://ProRec.com/wp-content/uploads/2023/01/word-image-3806-1-180x180.png "FL Studio Tempo Changes When I Press Play [FIXED]")