One of the features that made FL Studio’s piano roll revolutionary was the implementation of ghost notes. They made it so easy to keep track of all the note information on the piano roll that once you get used to them, it will be hard to do a project again without them. Ghost notes became so influential that almost all other major DAWs found a way to implement them in their own piano rolls.
Let’s look at what ghost notes are, how to activate them, and how to use them to your advantage.
What are Ghost Notes?
Ghost notes are the MIDI notes that appear in the background on the piano roll. They are made up of all the notes used in each channel/VST instrument that appears on the same pattern. The ghost notes are highlighted in red below.
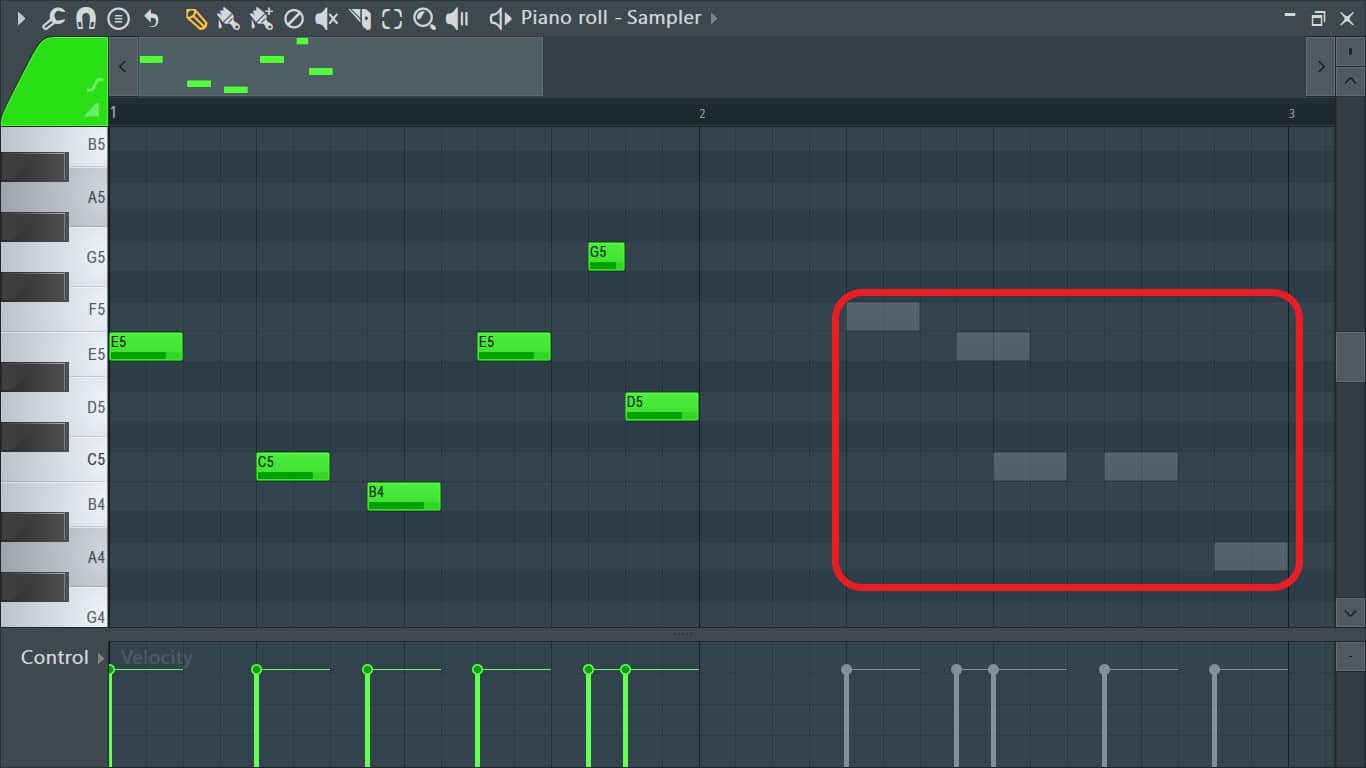
They look like white translucent notes in the background.
Let’s take a look at another example in order to better understand how they come about.
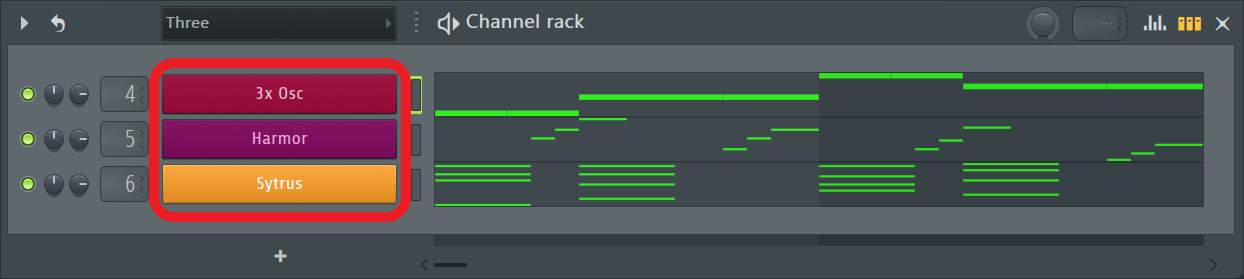
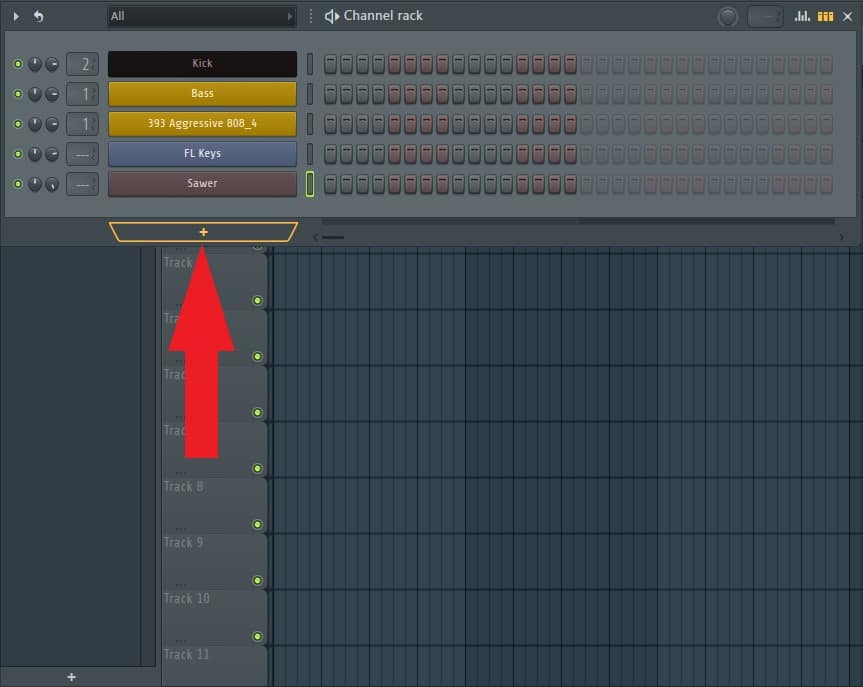
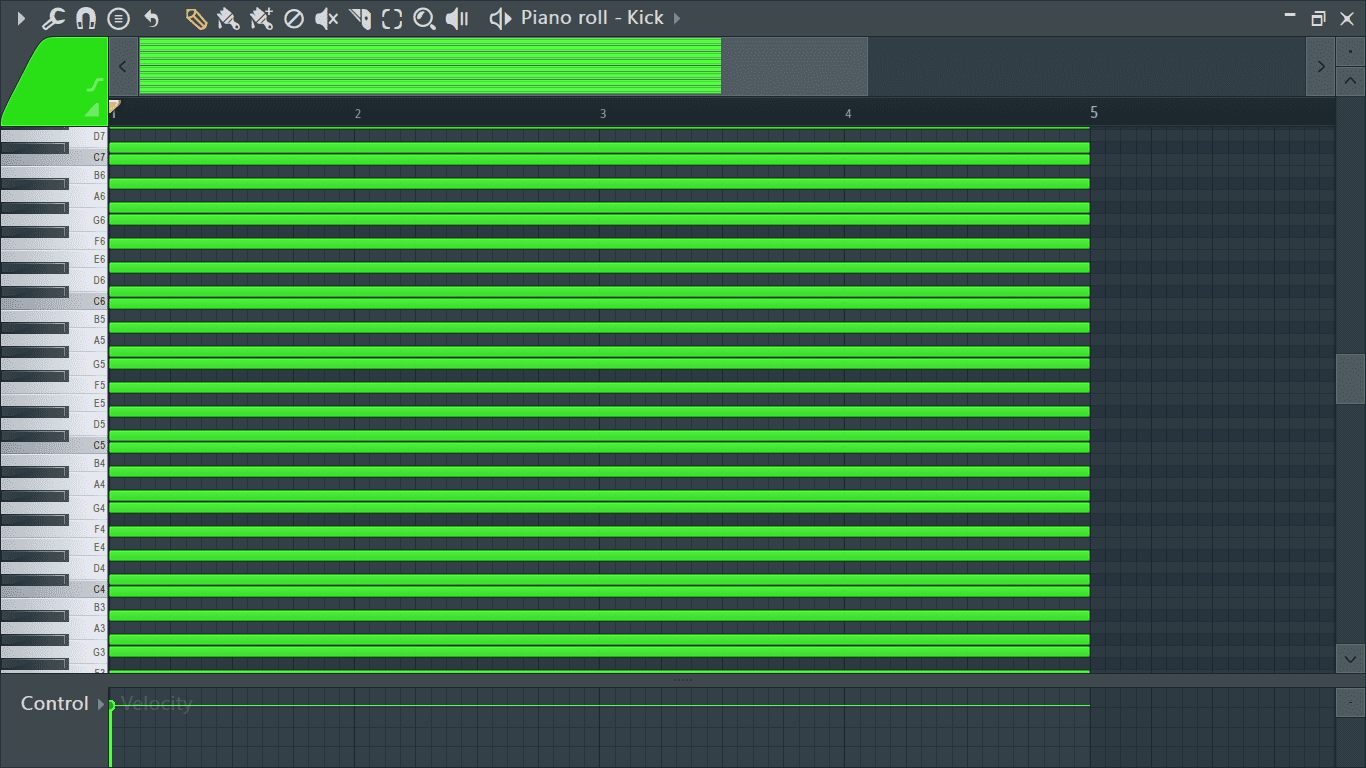
Below is the channel rack for a project I’m working on.

It contains three channels, 3x Osc, Harmor, and Sytrus.
The boxes highlighted in red below are the channels and the names they bear are of either the plug-in/VST instruments themselves or the preset they are currently on.
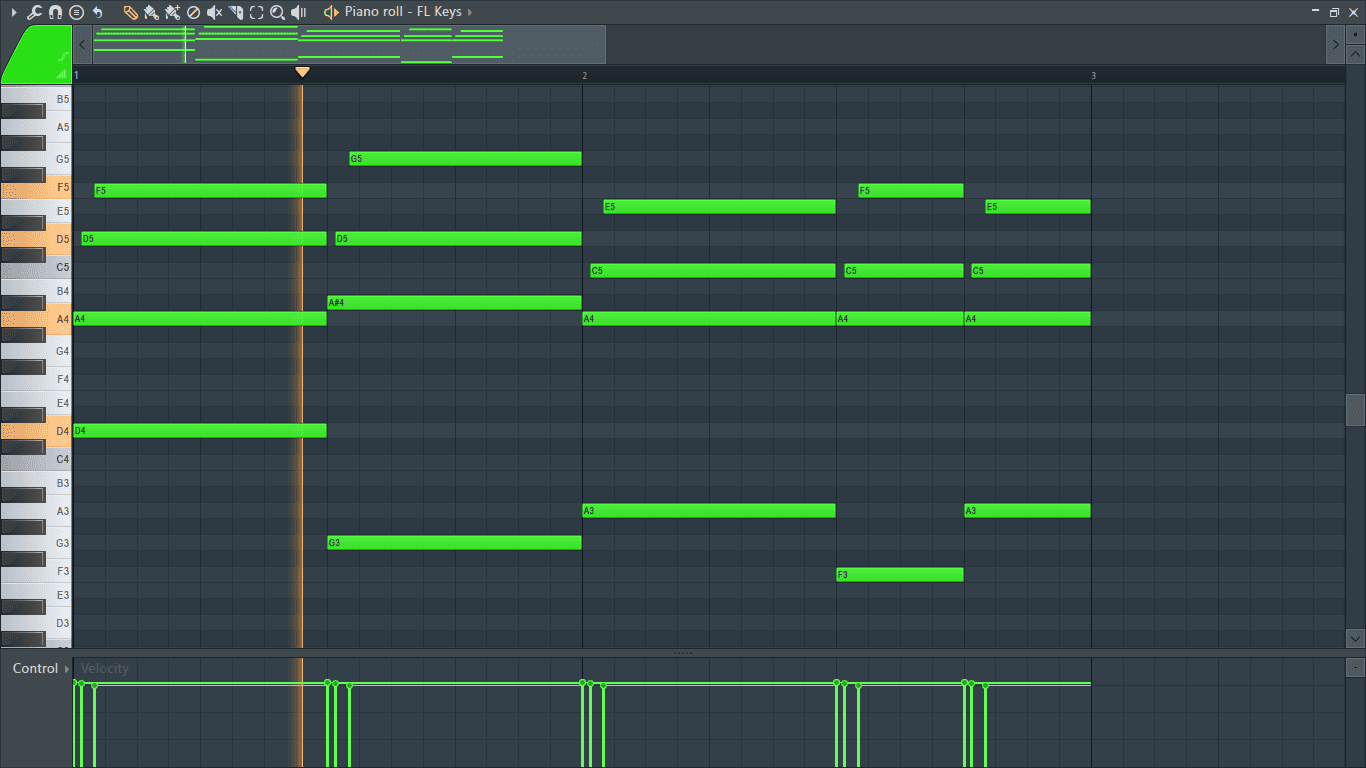
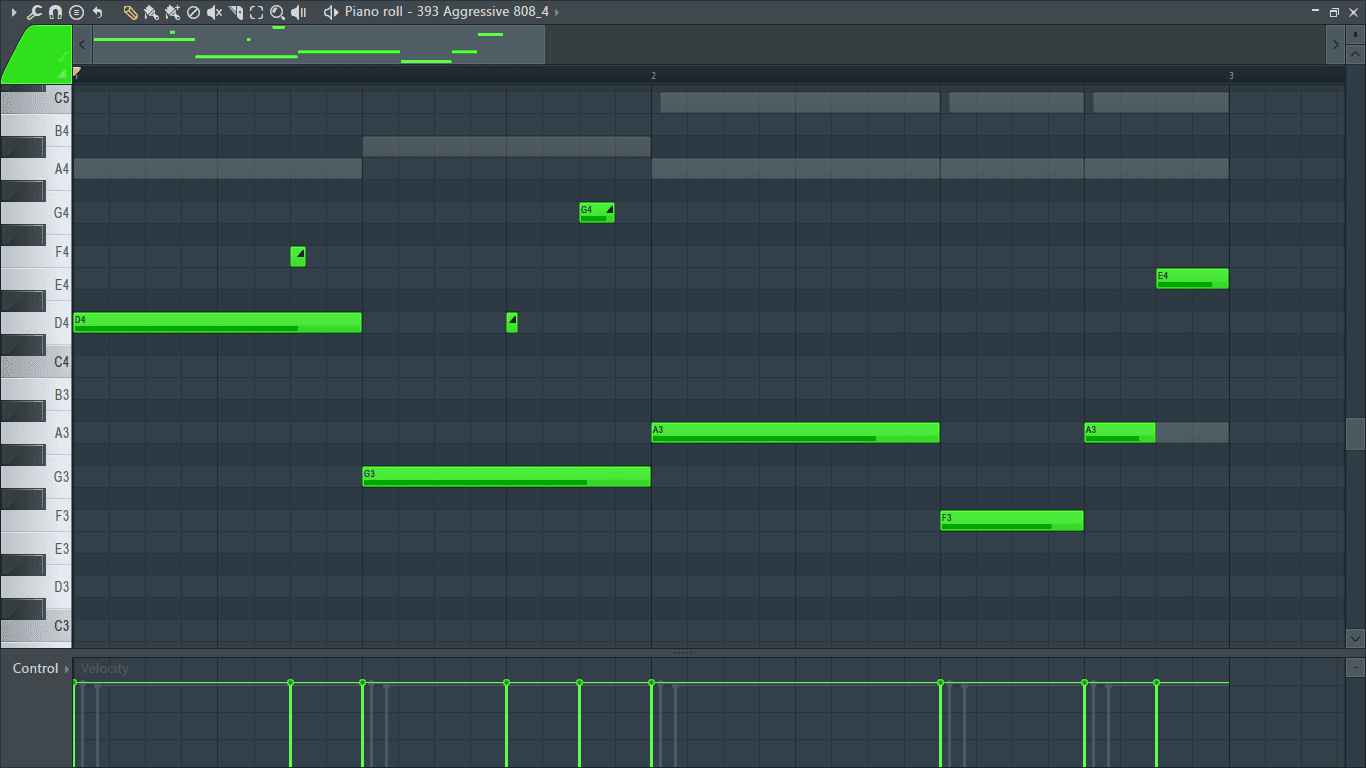
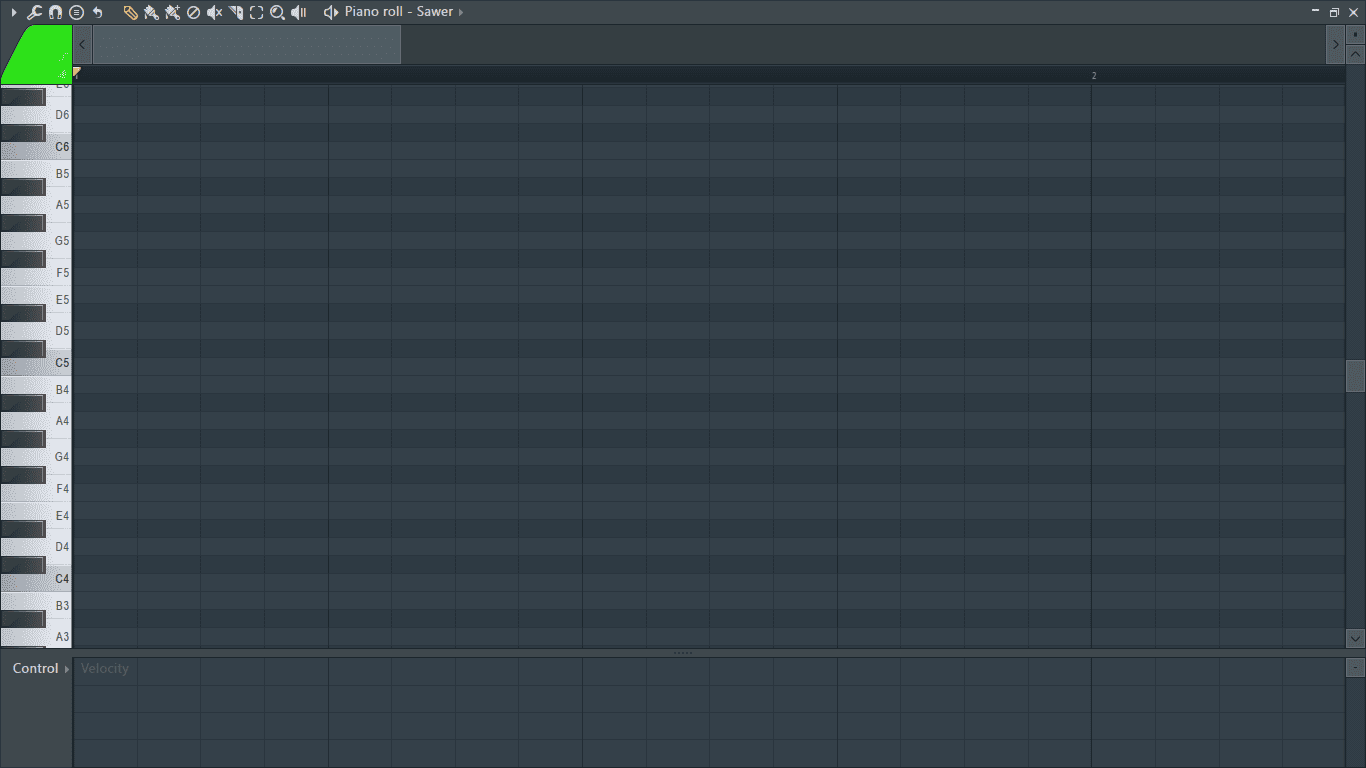
Each channel has its own piano roll window, however, you can only open one instance of piano roll at a time. Let’s go to Harmor’s piano roll.
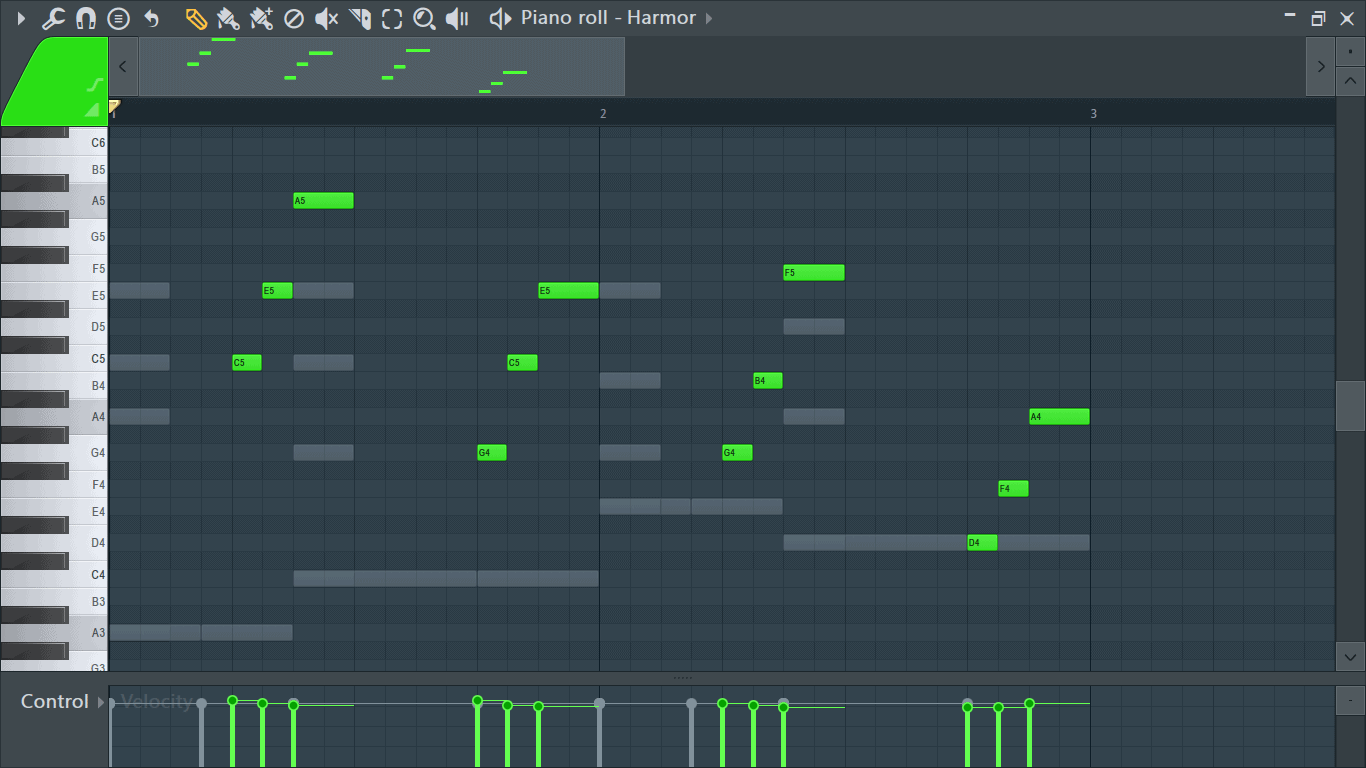
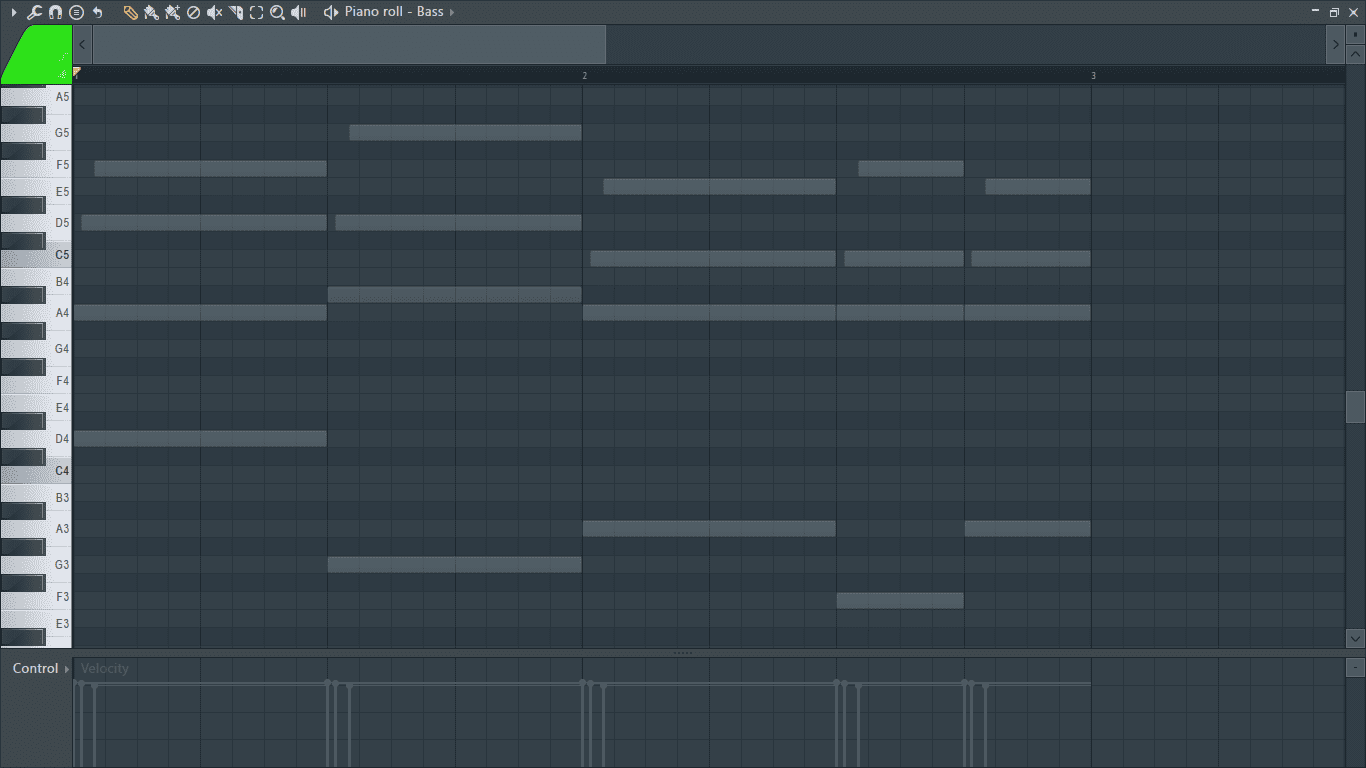
The green notes are the notes that appear on Harmor’s piano roll. (The color of the notes might be different for you.) The other notes that are not green in color that appear to be in the background are the notes contained in the piano rolls of 3x Osc and Sytrus. These are the ghost notes.
Ghost notes are made up of the notes found in other plug-ins/VST instruments’ piano rolls that you’re not currently on.
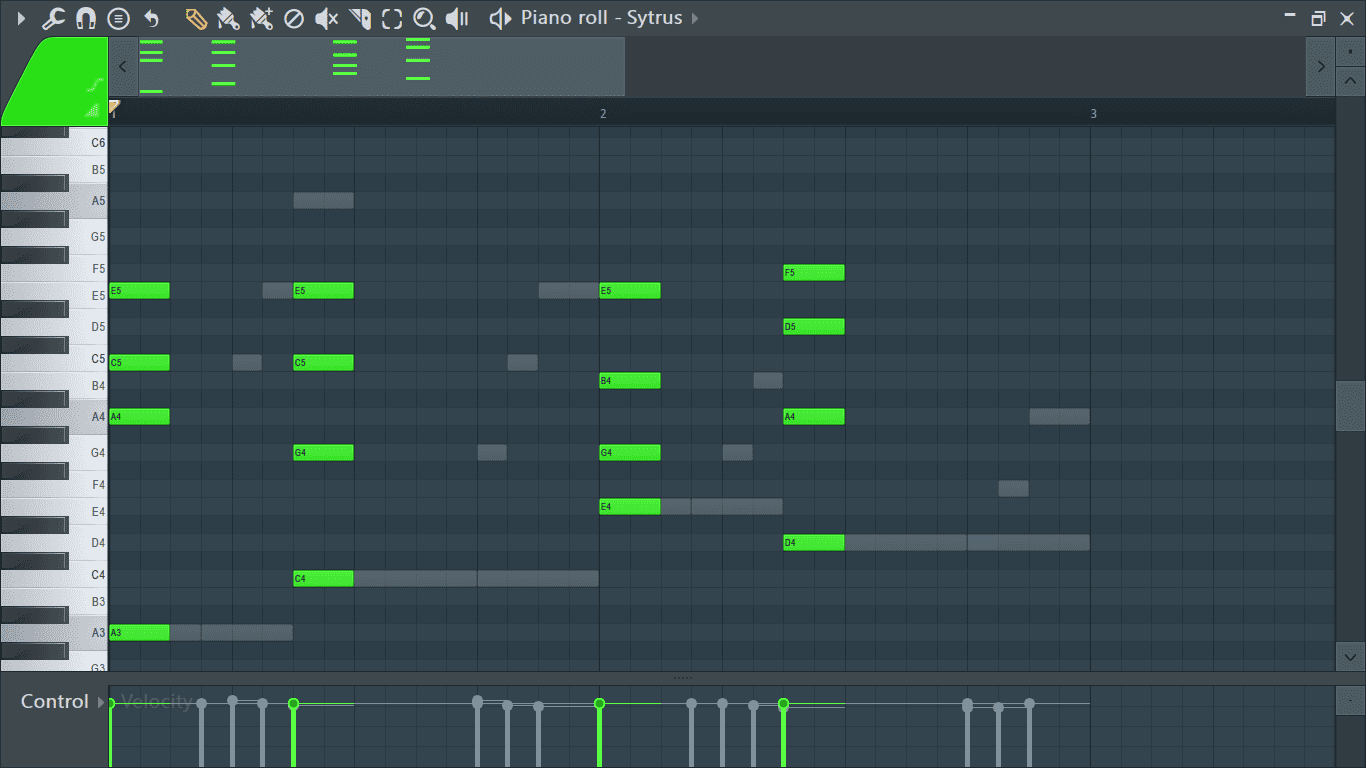
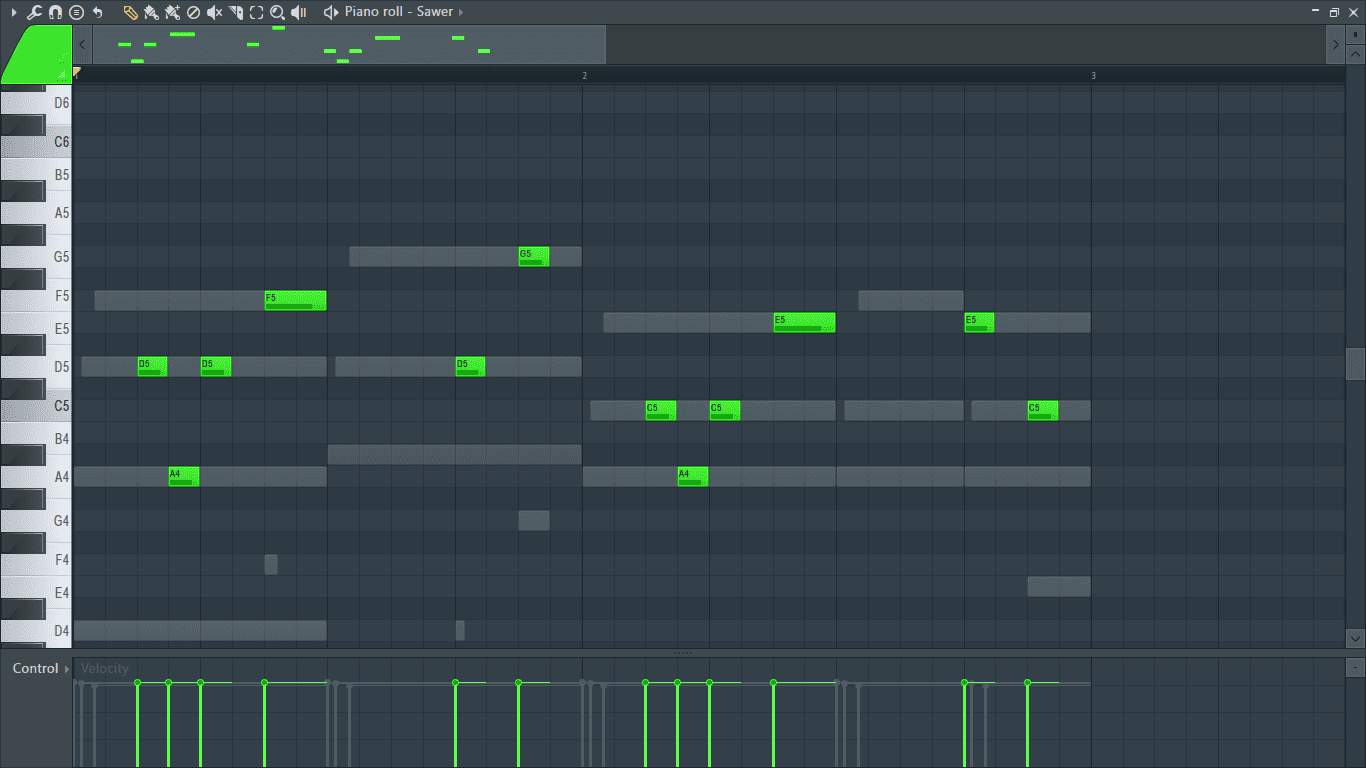
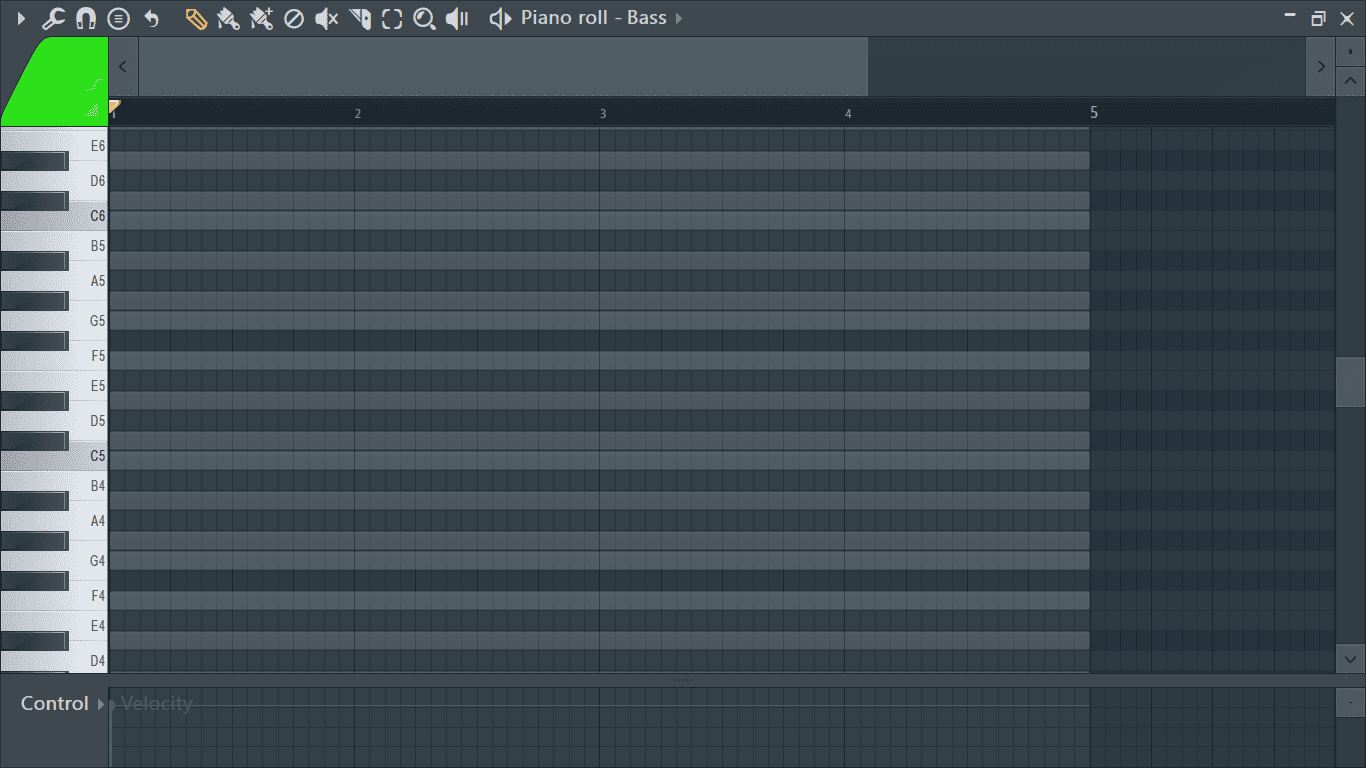
If I switch over to Sytrus’ piano roll, then the ghost notes will be made up of notes found on the piano rolls of Harmor and 3x Osc.
How to turn on Ghost Notes
Now that we know what ghost notes are, let’s look at how to turn them on. How you turn on ghost notes will depend on which FL Studio version you’re using.
Step 1: Open the piano roll by clicking on the piano roll icon on the toolbar or by using its shortcut, F7.
Step 2: Next, click on the triangular arrow on the top left corner of the piano roll to open a drop down menu containing the piano roll main menu.
Step 3: For versions before 20.8.1.2177, once the piano roll’s main menu is opened, scroll to ‘Helpers’. This is where you will find the ghost notes options.
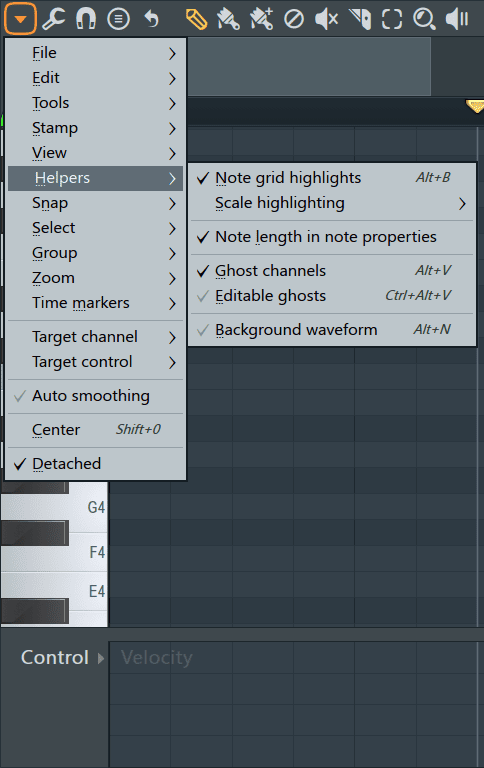
Turn them on by ensuring there is a tick before the word ‘Ghost notes’ and vice versa to turn them off. You can also use the shortcut, Alt + V.
For versions later than version 20.8.1.2177, the ‘Helpers’ sub-menu will be found under ‘View’.
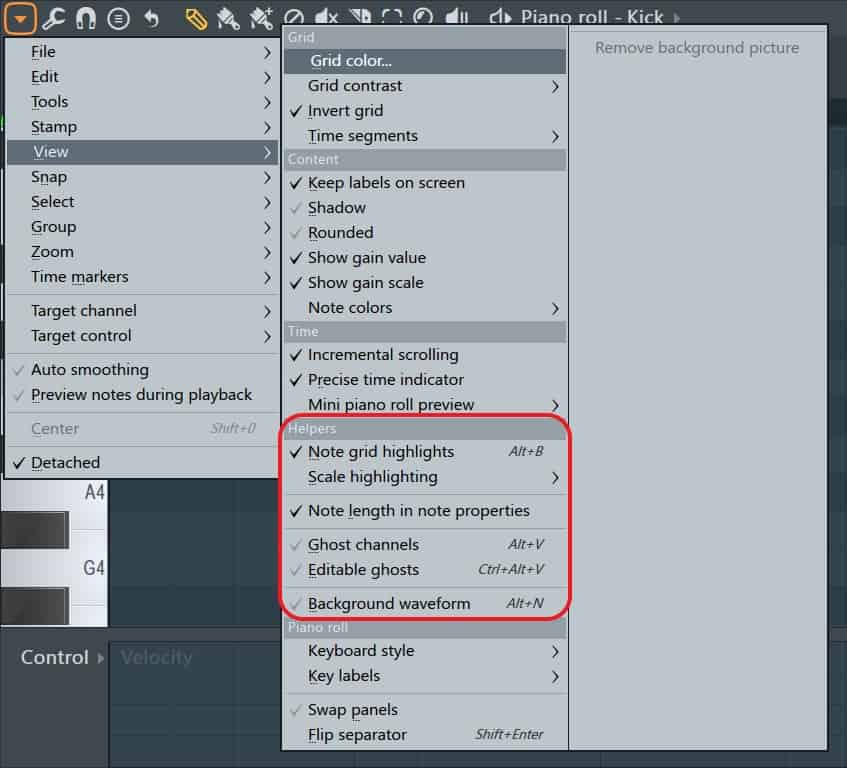
By default, you cannot interact or edit ghost notes unless you open the piano roll window they are on. Turn on ‘Editable ghost’ to be able to edit the ghost notes.
Tip: Double click on a ghost note to switch over to its piano roll window.
How to use Ghost Notes
Ghost notes helped me save time when producing and made it easier to come up with melodies and basslines. Let’s see how they can improve your workflow.
Example 1: I have a chord progression going which I want to add a bassline to.
I want to use a drone synth bass so I need a simple pattern. With ghost notes activated, when I switch over to the bass channel’s piano roll, I can see the notes used in the chord progression.
This makes it easier since I can just place notes where the bass notes of the chords are and create a bassline. Here’s what I came up with after following the chords’ bass notes and adding a few more notes to make it interesting.
Example 2: You can also use this to create melodies and counter melodies. I’ll use the chords as ghost notes to create a melody following the chord progression.
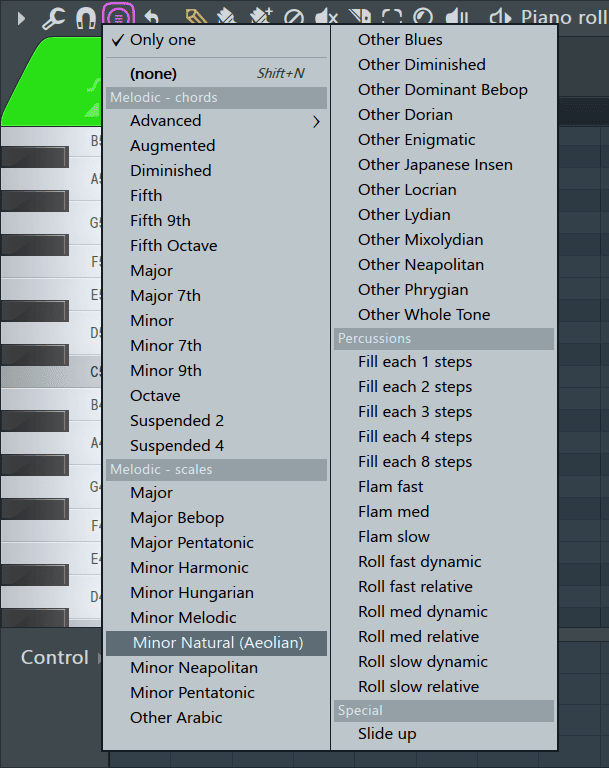
Example 3: You can also use ghost notes to learn scales and other elements of music theory.
Step 1: Open an empty sampler channel by clicking on the plus button located at the bottom of the channel rack.
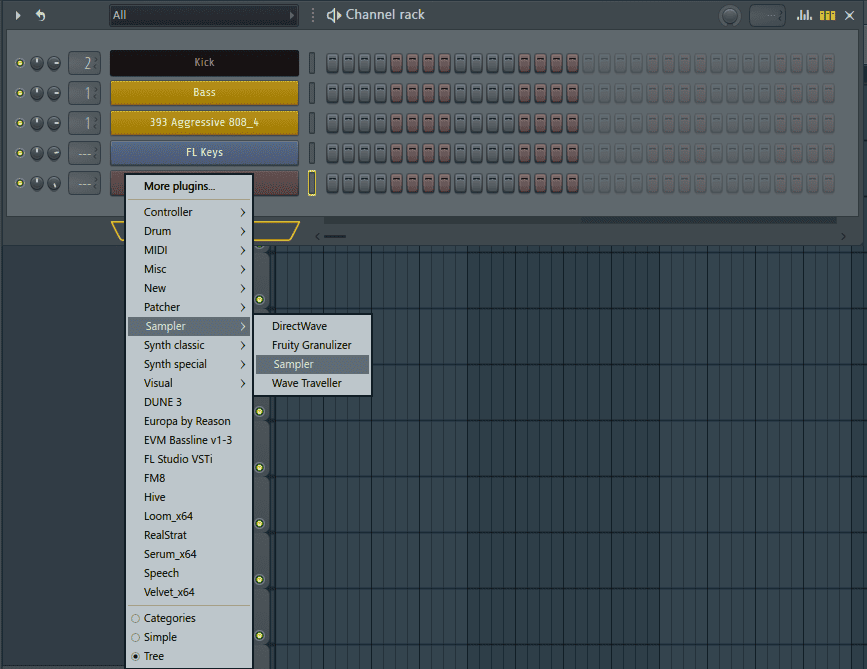
Step 2: Go to Sampler> Sampler to load an empty sampler channel to the channel rack.
Step 3: Once the sampler is loaded, go to its piano roll by pressing F7.
Step 4: Next, click on the stamp icon shown below.
This will open a menu containing different chords and scales available in FL Studio.
Step 5: Select your preferred scale from the options available. In my case, I’ll select Natural minor (Aeolian).
Once you do this, the notes that make up the natural minor scale will be ready to be applied in the piano roll.
Step 6: Next, you’ll need to pick the key or the root note of the scale. In my case, it is F. I’ll click on F4 and the scale will be posted into the piano roll.
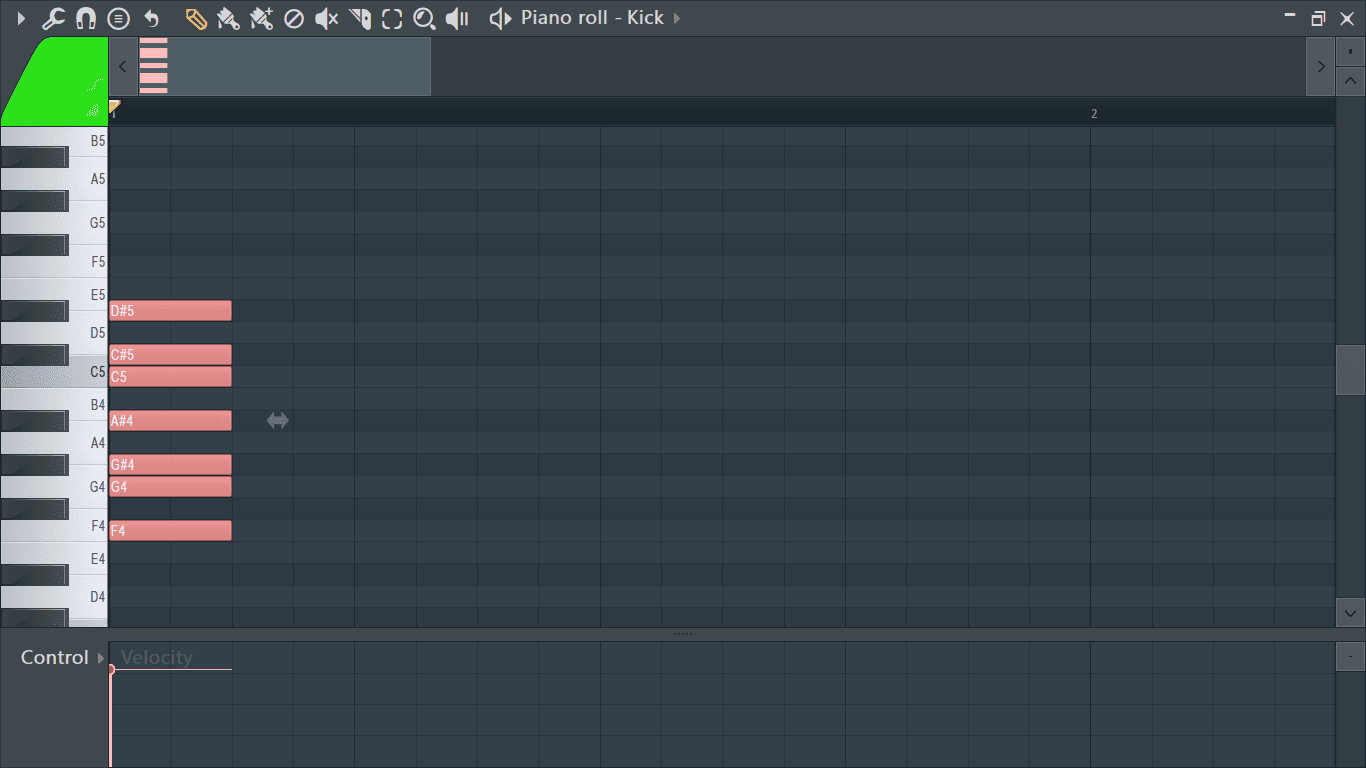
Step 7: Now I’m going to make them more visible as ghost notes by elongating them and duplicating them so that they cover the octaves that I’ll be using.
Click and drag on the end of a note to make it longer. I’ll stretch them out to cover 4 bars.
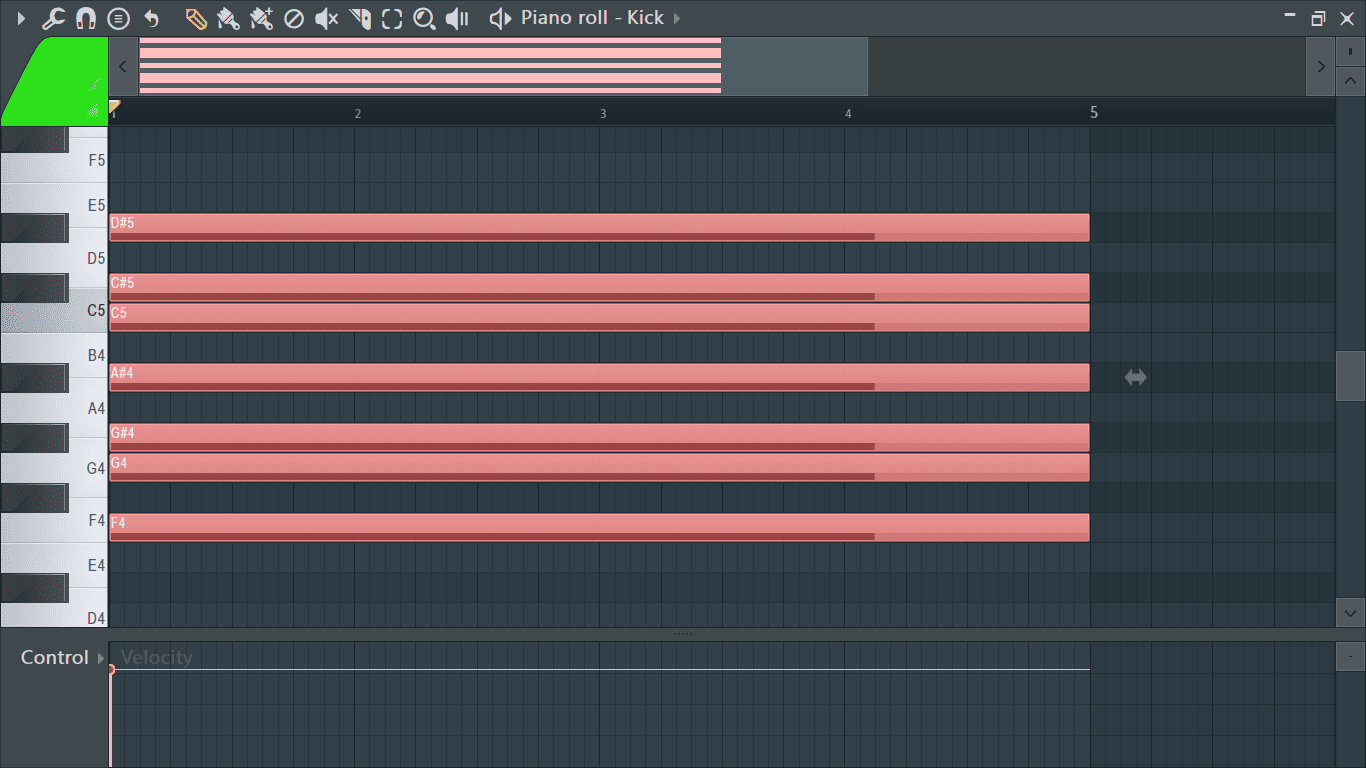
Next, I’ll duplicate them multiple times across the piano roll.
Now when I move to another channel, they’ll be seen as ghost notes in the background.
Final Thoughts
These are just a few ways I use ghost notes to optimize my workflow. Put them to the test and find out how they could work for you. As always, have fun experimenting!

- How to Add Drum Kits to FL Studio - September 18, 2023
- Best Free Drum Kits for FL Studio - September 18, 2023
- How to Create Drum Patterns & Loops in FL Studio - September 12, 2023

![FL Studio Slide Notes Not Working [FIXED]](https://ProRec.com/wp-content/uploads/2023/06/slide-note-and-normal-note-side-by-side-labeled-fl-180x180.jpeg "FL Studio Slide Notes Not Working [FIXED]")

