Recording vocals is a vital part of the music creation process and is a skill that every producer looking to put out industry-standard mixes should have. Although FL Studio has been a game changer in all aspects of music production, there is still a lot of controversy in terms of recording vocals in the DAW.
In this article, we’re going to get into how to set up for recording and how to record vocals in FL Studio to ensure the vocals recorded are just as high quality as vocals recorded in other DAWs.
Preparing to Record
Before you start recording, there are a couple of things you’ll need to set up in preparation.
Chose the Correct ASIO Driver
First, make sure that FL Studio is using the correct drivers required for your audio interface or sound card. To do this:
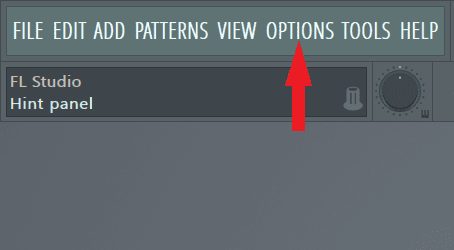
Step 1: Go to ‘Options’ on the main toolbar.
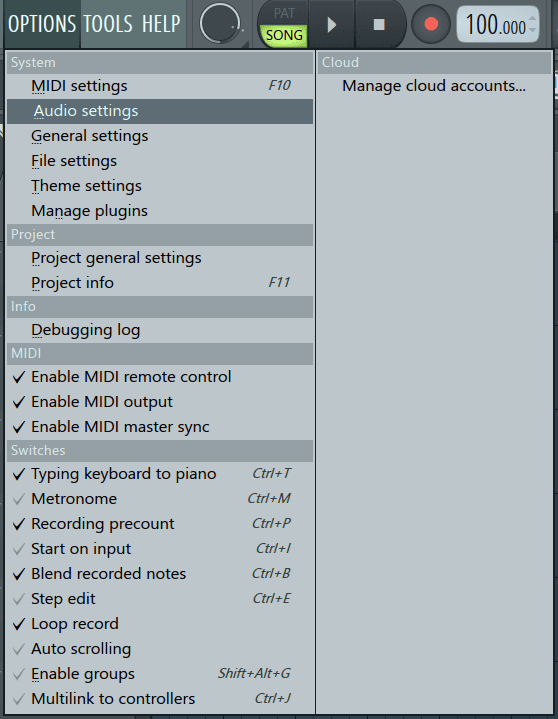
Step 2: From the drop-down menu, select ‘Audio settings’.
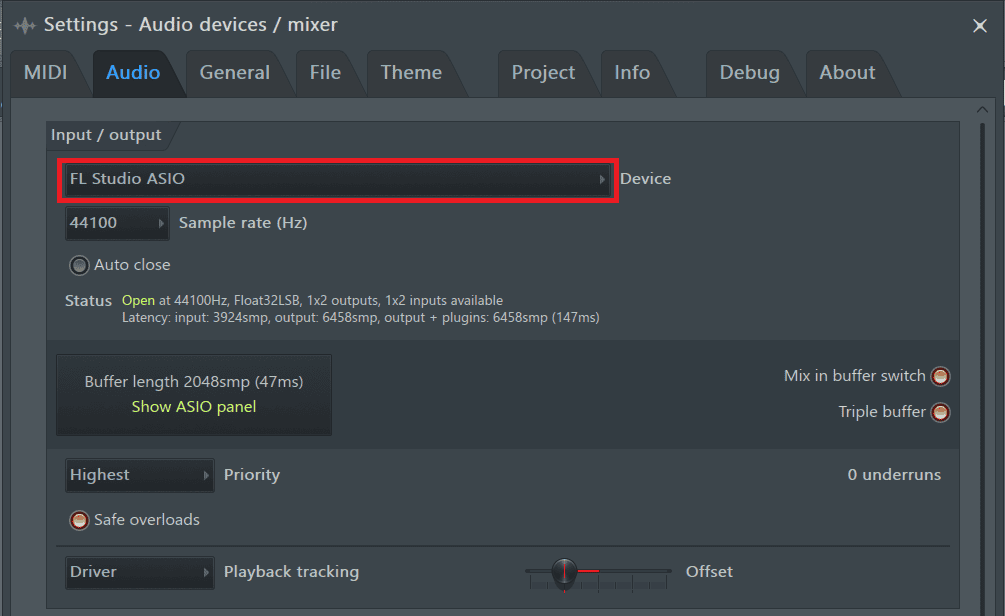
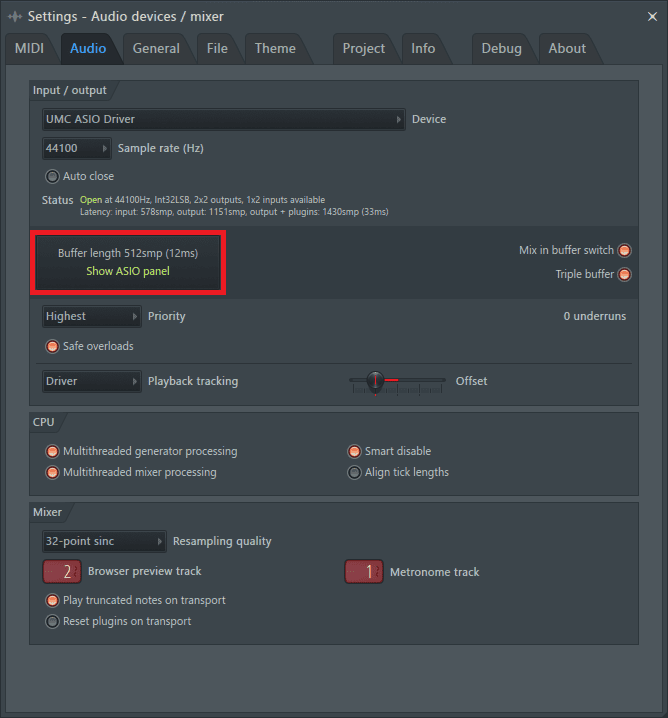
Step 3: On the audio settings page, change the audio device by clicking on the area marked below.
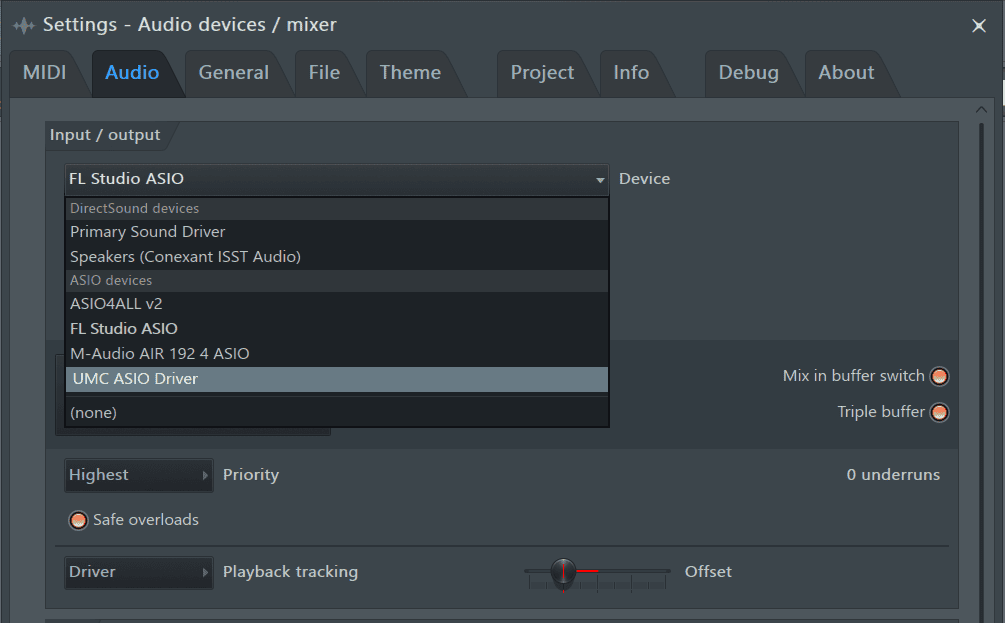
This will show you a list of the various audio drivers installed on your computer. Chose the driver of the device you want to record from. The audio device you chose should correspond with your audio interface or sound card. In my case, it’s the ‘UMC ASIO Driver’.
Step 4: While still in the audio settings, you’ll need to set the buffer length. For recording, set the buffer length as short as your computer can handle without experiencing cracks and pops in the audio. The shorter the buffer length the higher the stress on your CPU so be cautious when changing this setting. In case of crackling audio, increase the buffer length until it stops. Change the buffer length by clicking on the marked region below.
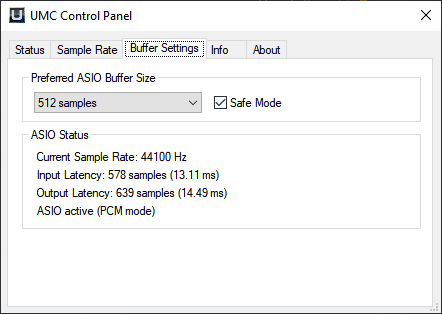
Step 5: From the window that pops up, locate the ‘Buffer Settings’
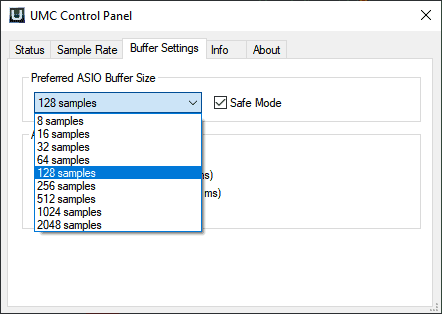
Step 6: For accurate recording and monitoring, set the buffer length to 128 samples to avoid latency. You can try going even lower if your computer can handle it.
Setting Up a Recording Track
Next, you’ll have to set up the mixer track we will use for recording. There are two ways to set up a recording track in FL Studio, but the end result will be the same.
Method One
Step 1: Open the mixer by clicking on its icon or by pressing F9.
Step 2: Select an empty mixer track by clicking on it. For this illustration, I’ll select ‘Insert 14’.
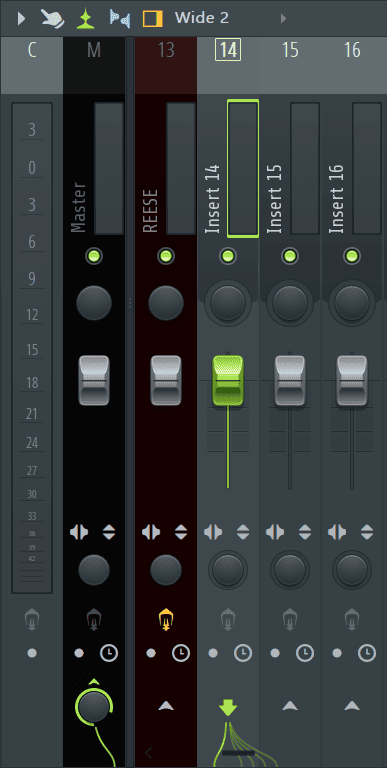
Step 3: While the mixer track is still selected, I’ll right-click on it and select ‘Assign to new Audio track(s)’.
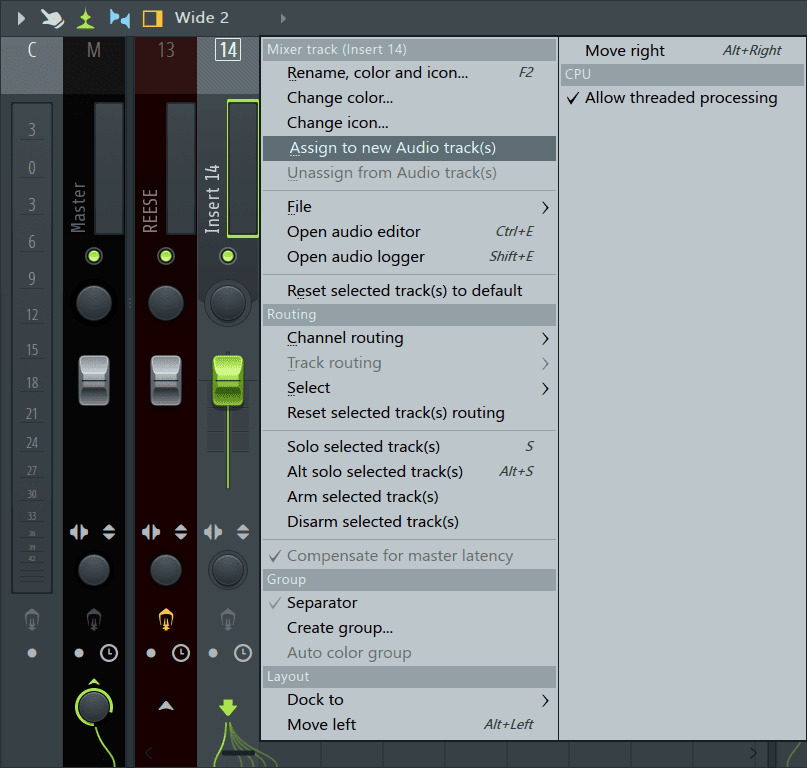
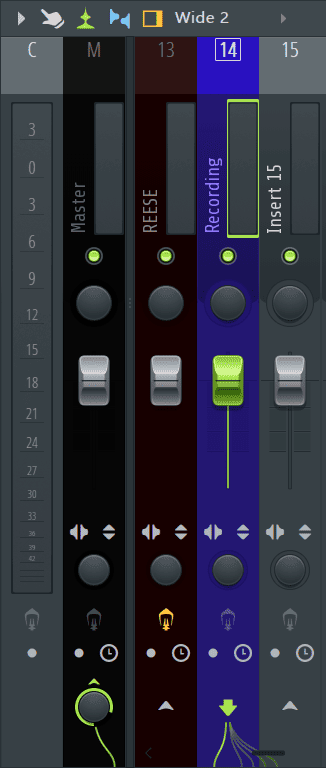
To keep things organized, I’ll rename Insert 14 to ‘Recording’ and change its color by pressing F2 while it is still selected.

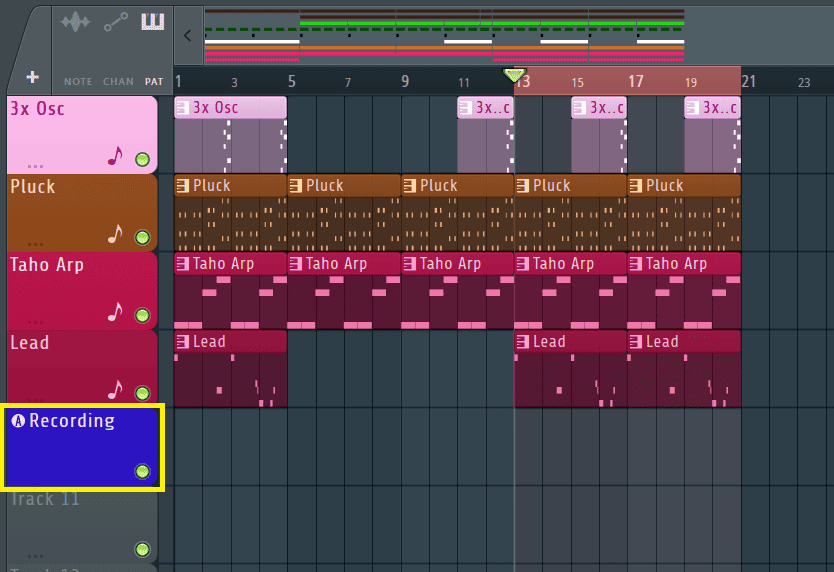
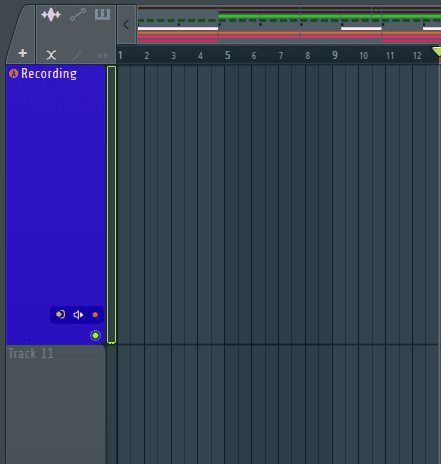
Step 4: You’ll notice that a new audio track labeled ‘Recording’ has been added on the next available track in the playlist.
Method Two
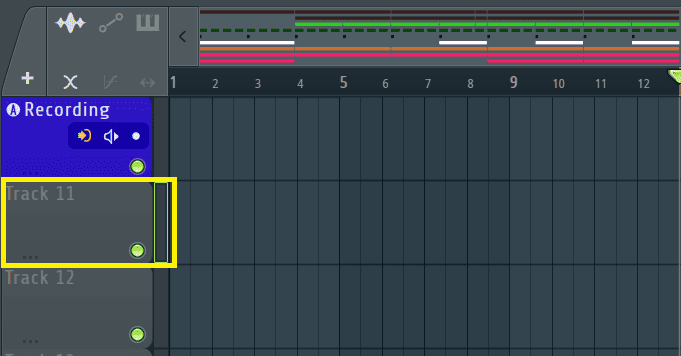
Step 1: Open the playlist by clicking on its icon or by pressing F5.
Step 2: Right click on the header of the track to be used for recording. In my case, it’s ‘Track 11’ so I’ll click on its header. The track header is the region enclosed in the yellow markings below.
Step 3: From the pop-up menu, go to Track mode>Audio track and select an unused mixer track from the list provided. I’ll select the next unused mixer track which is ‘Insert 15’.
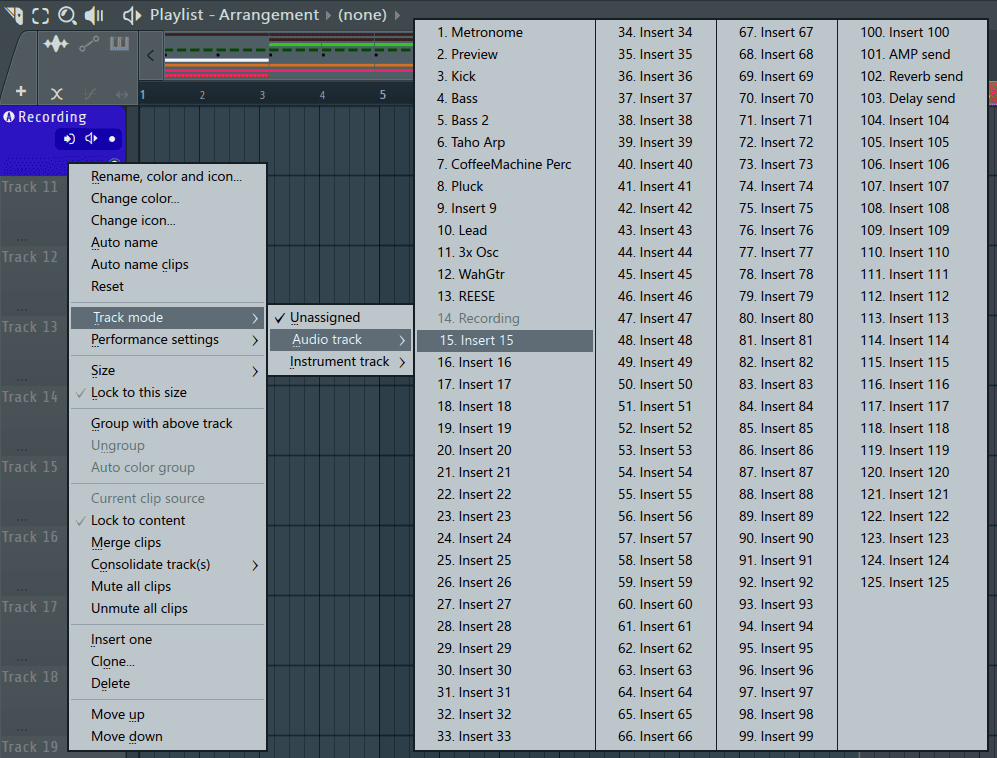
The playlist track will be linked to the mixer track just like it was in method one.

Selecting an Input
Once the two tracks are linked, we’ll need to tell the mixer which input it should record audio from.
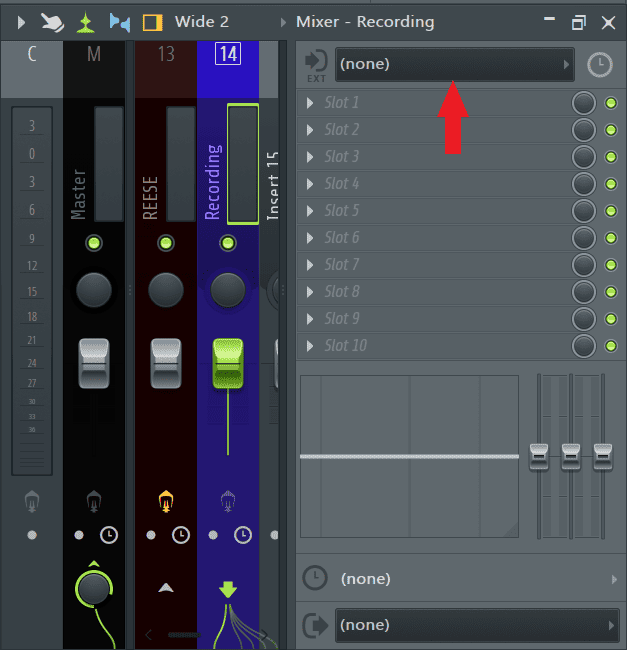
Step 1: Open the mixer and select the recording track you set up. In my case, I’ll select the ‘Recording’ track by simply clicking on it.
Step 2: With the track selected, click on the marked area below to see the audio interface’s inputs.
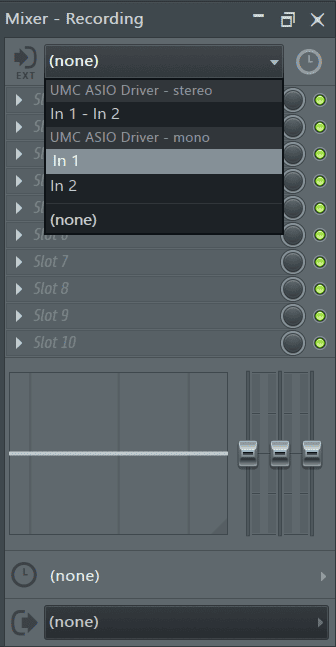
Step 3: Select the input your microphone is plugged in to.
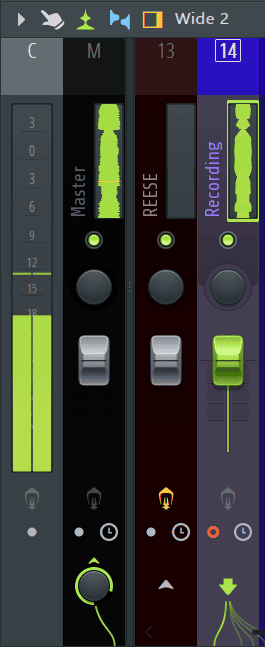
Alternatively, you can select an input by clicking on the icon shown below.
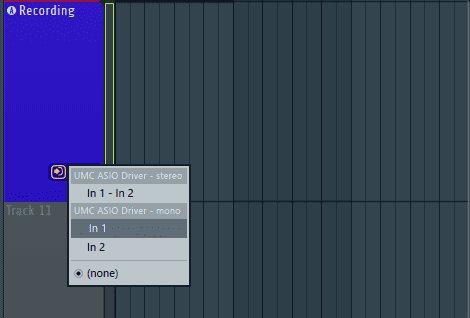
Once you select an input, the track should look like this now.
Setting the Level
Once the mic is turned on and we’re getting audio from the mic into FL, we’ll need to set the level at which we’re going to record at. This is crucial in attaining vocals with a low noise floor and minimum distortion for a cleaner mix. To get a healthy level when recording vocals, set the level to peak between -18dB to -12dB. Set the level by adjusting the preamp gain on your audio interface.
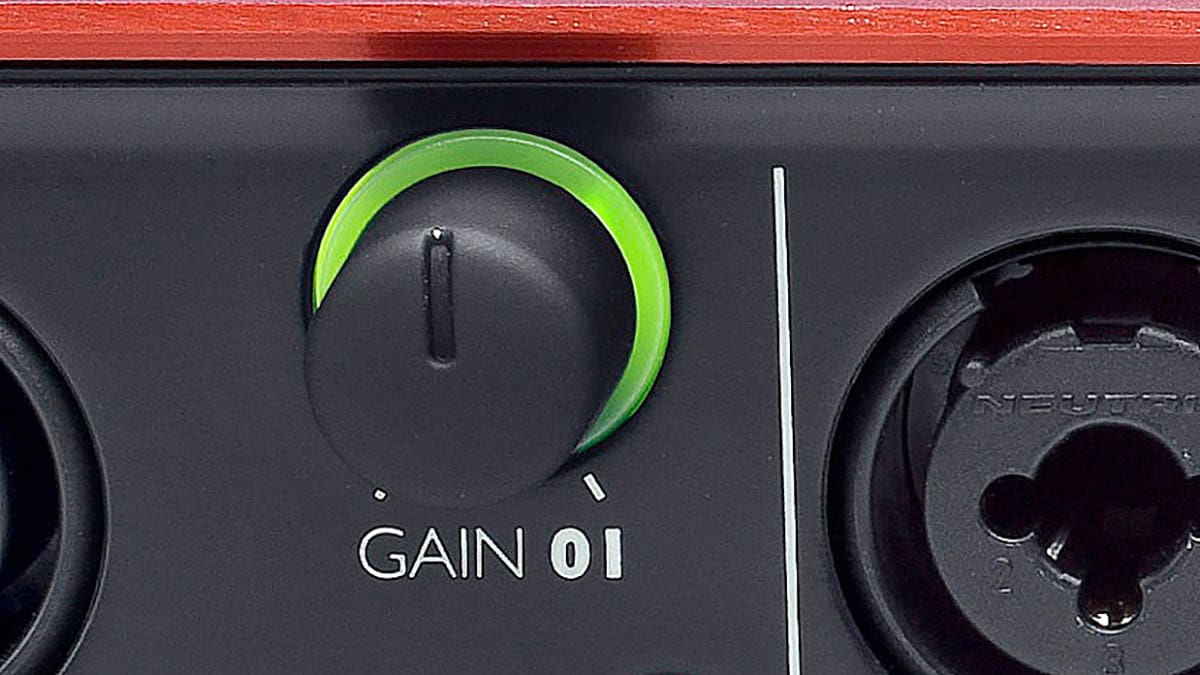
I’ll set the preamp gain for the meter to peak at around -12dB when the artist is at their loudest.
Now you’re finally set to start recording.
Recording Vocals
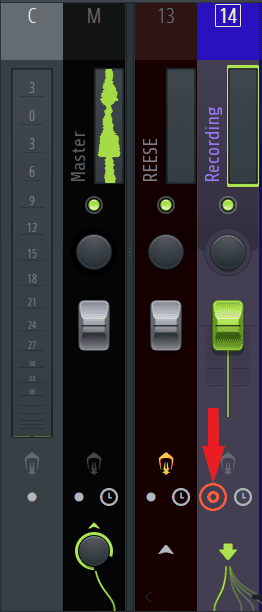
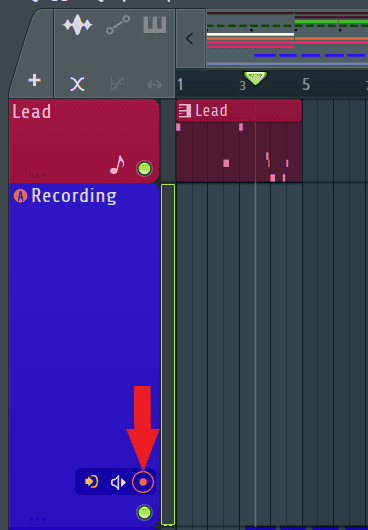
Step 1: Once you’re ready to start recording, always make sure to arm the recording track by clicking on either of the icons shown below. The icons will turn red when armed and stay so until the track is disarmed by clicking on the icons again.
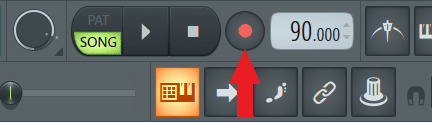
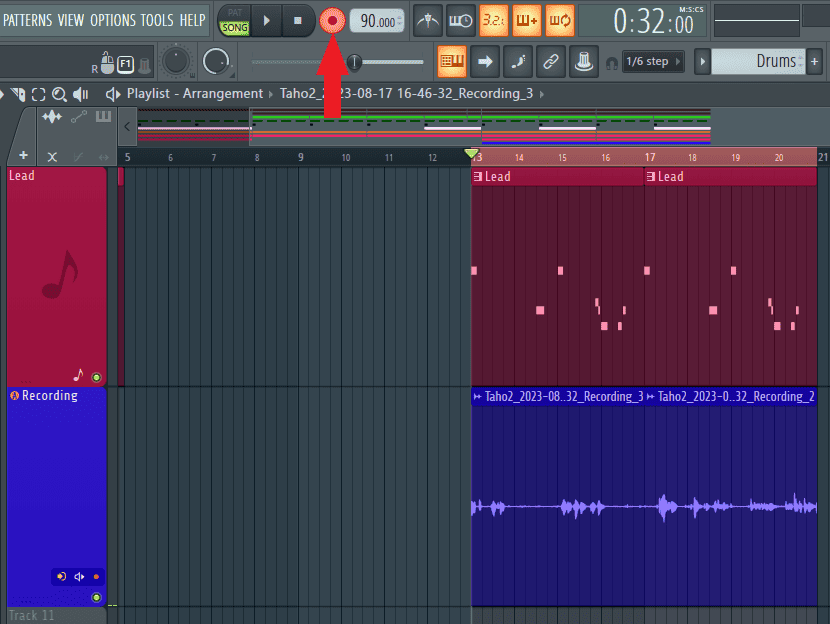
Step 2: Click on the record button located on the main toolbar.
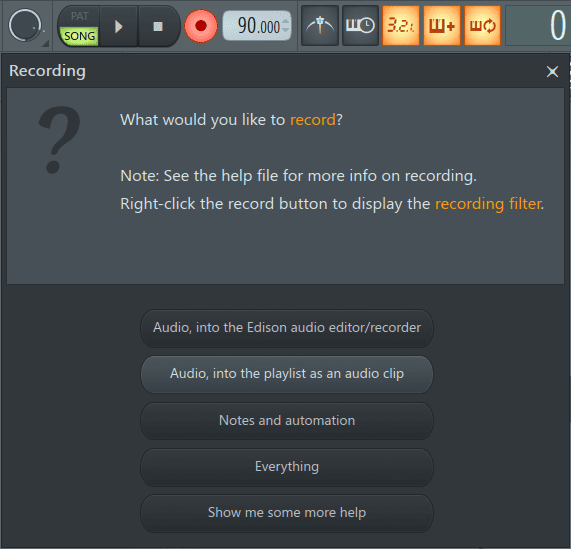
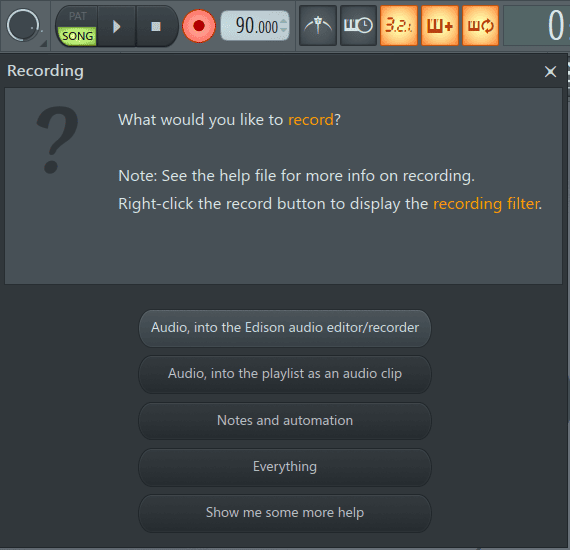
Step 3: A window will pop up asking what you would like to record. Here there are two ways to record.
Recording to the Playlist
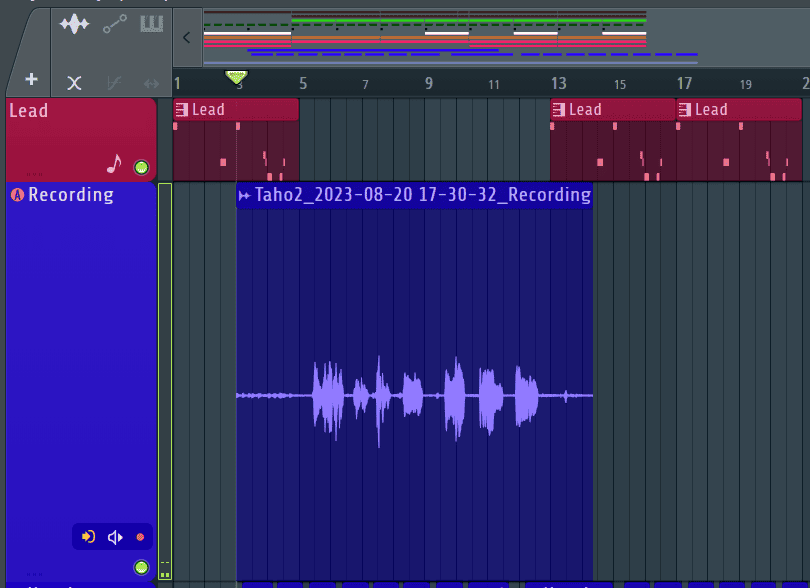
Select ‘Audio, into the playlist as an audio clip’.
It will start recording as soon as you click on it.
Click on the record button again to turn off recording.
Recording in Edison
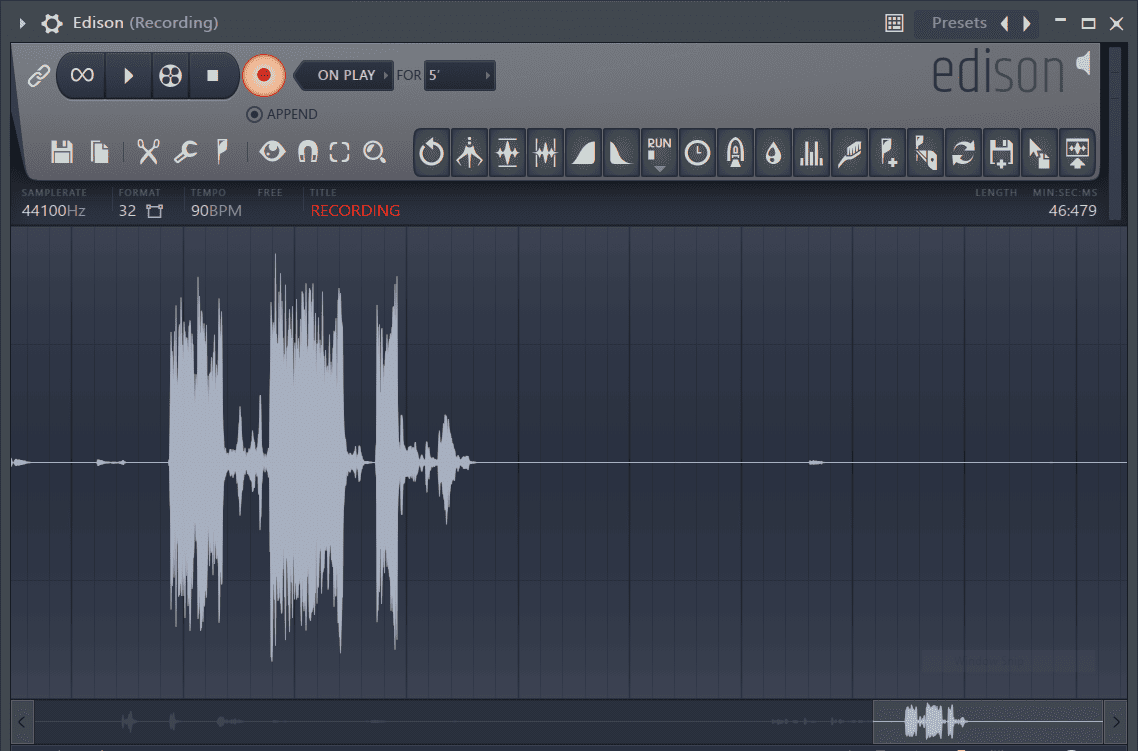
Once you click on the record button, you can alternatively record the audio into Edison instead of the playlist by selecting ‘Audio, into Edison audio editor/recorder’.
Immediately you select the option, an instance of Edison will be added to the currently selected mixer track and will start recording.
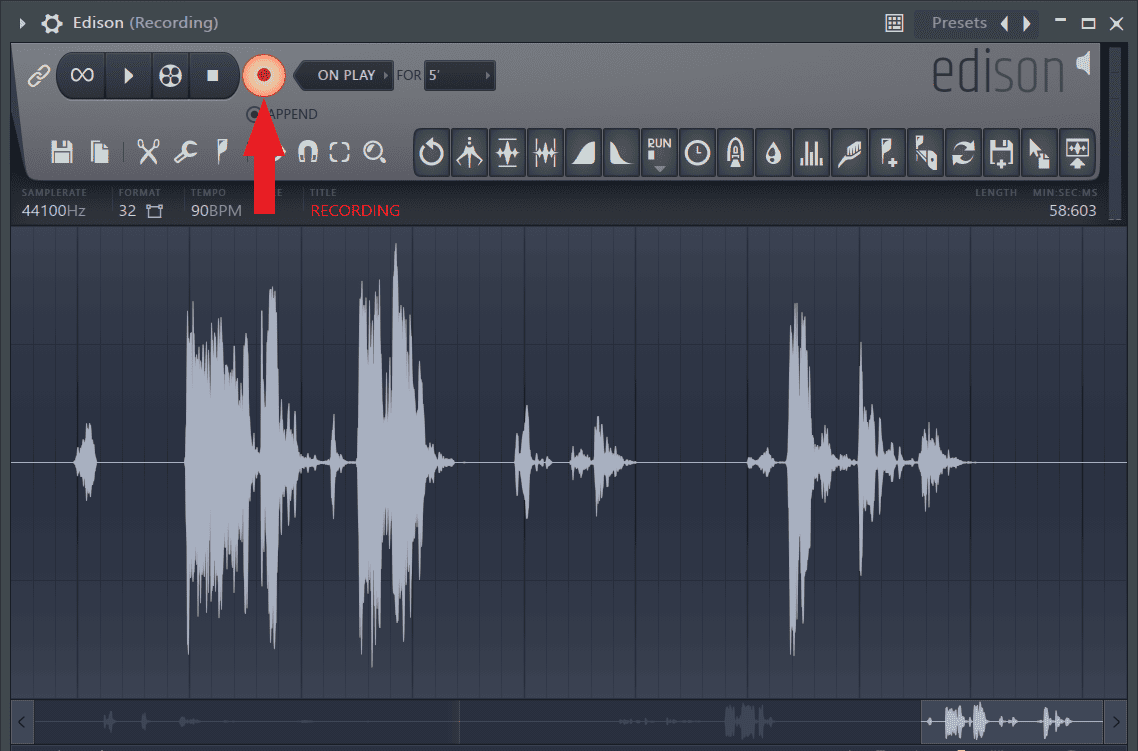
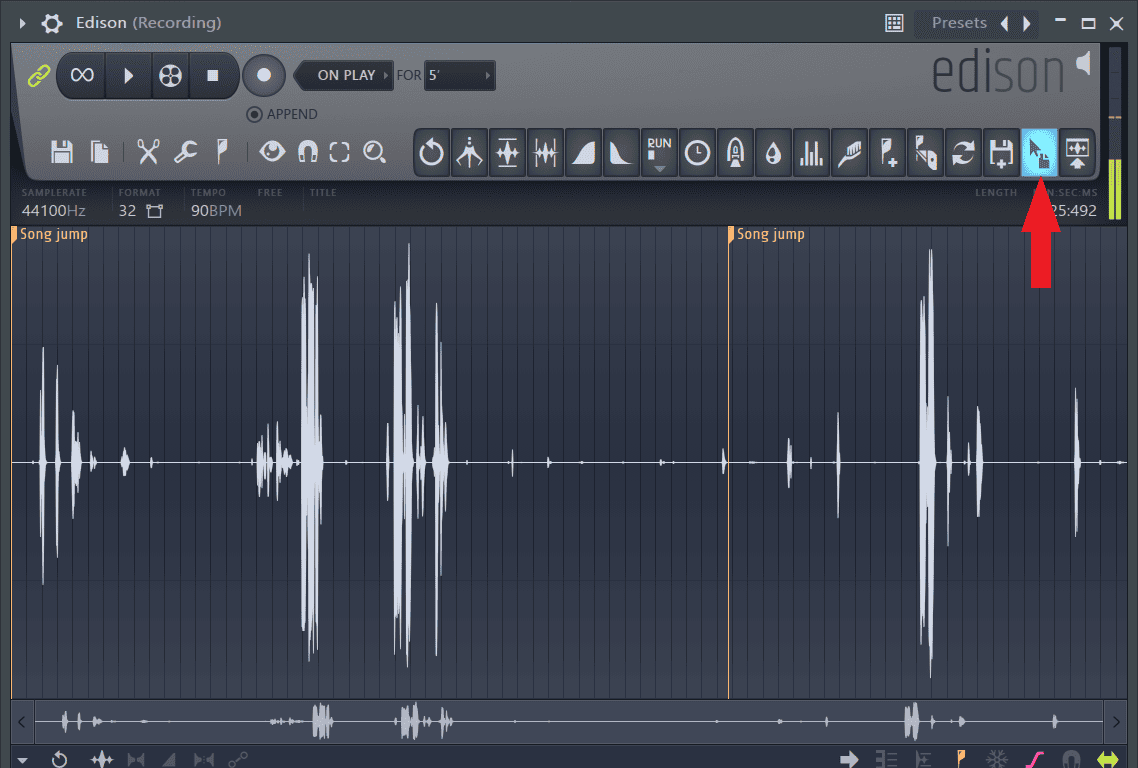
To stop recording, click on Edison’s record button.
To drag the audio from Edison and drop it on the playlist, click on the icon shown below.
Conclusion
Always make sure the audio coming from the mic is as clean as possible, otherwise, you will spend most of your time mixing trying to fix those issues. I hope this article helped you better understand how to record vocals in FL Studio. Have fun recording!

- How to Add Drum Kits to FL Studio - September 18, 2023
- Best Free Drum Kits for FL Studio - September 18, 2023
- How to Create Drum Patterns & Loops in FL Studio - September 12, 2023


