In this tutorial, I provide you with solutions that will help you fix the MIDI interface to Live recognition issues and MIDI recording issues. MIDI keyboards and controllers are generally the same type, being that they allow you to play and perform using virtual instruments and plug-ins with the latter having a more expansive effects control ability. These techniques will help you resolve these issues and mitigate future bumps in the future to prevent you from slowing down or completely stopping in the middle of a performance or recording session.
3 main causes may lead to recording and recognition issues that I will cover in this tutorial:
- Hardware: these causes are by far the easiest issues to resolve and this should be the first step you should take during device and session setup even before you run into recognition and recording issues
- Software: these issues are a little bit more complex but do not worry, I will walk you through a step-by-step troubleshooting guide to resolve MIDI controller troubles.
- Recording: the troubleshooting issues here come after all the above techniques are completed. It is straightforward to mitigate and remedy recording issues once the previous two steps are completed.
Let us get cracking!
Hardware
To be fair, this technique needs you to have an intimate knowledge of your studio environment. I would recommend that before you proceed with this technique, you first ensure that you can hear playback from your computer and Live through your speakers or headset, as it could simply be a playback issue. Make sure your audio in/out routings are correctly connected. If you have, then this is what you need to do:
- Make sure your MIDI device’s and computer’s connectors are firmly connected or mounted between both devices. So many times I realise after minutes of sheer frustration that it was a simple connector issue that had been the root of all my recognition and recording issues
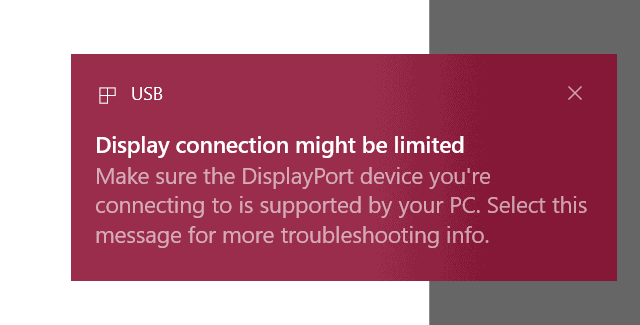
- Make sure that the connection to your computer is supported, especially with some Windows computers and Thunderbolt or USB C connectors. You may need to switch between ports on your computer or, altogether restart your computer if this is the case
You can see that the hardware technique is mostly simple ‘housekeeping’ measures and precautions that you need to take when resolving connectivity and recording issues. Be vigilant in your setup.
Software
This is going to be your ‘meat and potatoes’ of recognition and recording issues. This technique requires you to be patient, careful, vigilant, have an intimate knowledge of how Live works, and have some computer knowledge to resolve these issues. Let me guide you from beginning to end on addressing these issues.
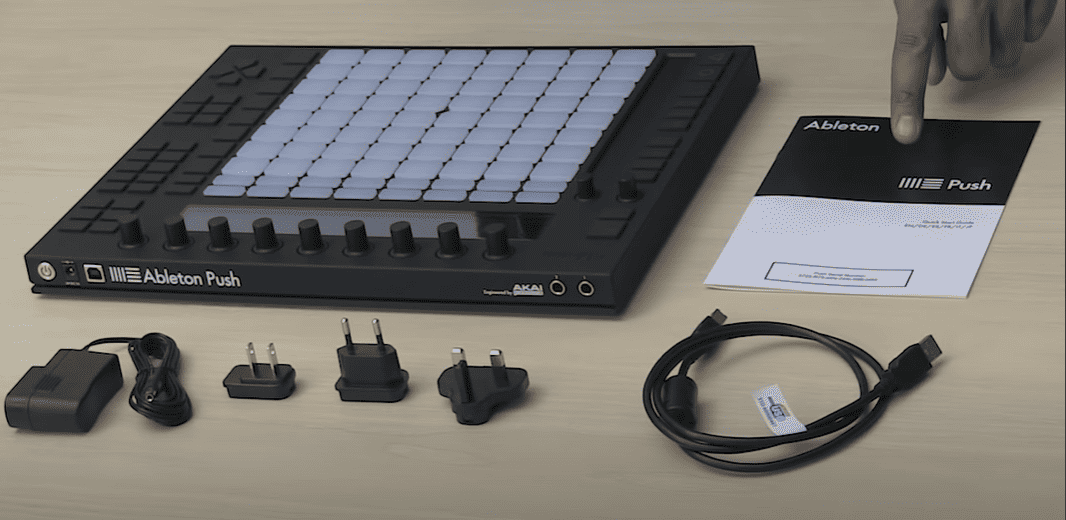
- When you purchase your MIDI device, make sure you read the guide that comes inside the package or go to the manufacturer’s website to see what it is you may have missed during the device setup
- Most MIDI devices are simply plug-and-play, but some require you to install device drivers from the manufacturer’s website, or an online registration before Live can recognize your device.
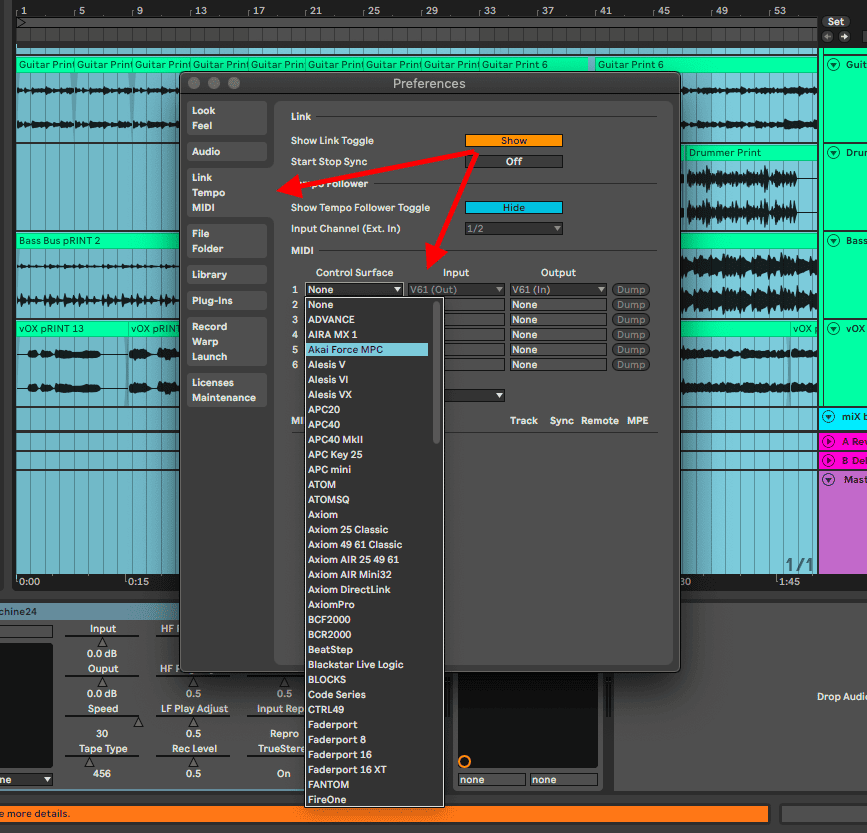
- Some MIDI devices are supported by Live, while other 3rd party devices are not. You may need to select your MIDI device in your Ableton preferences, under the MIDI tab.
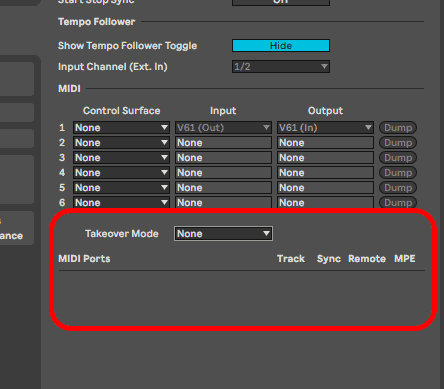
- In some cases, you may have multiple MIDI devices connected, and you will need to make sure that they are all activated for input or output use cases. You will see this on/off control below the MIDI selection tab.
Recording
This troubleshooting technique is mainly to address MIDI devices not recording into Live. This technique is the last one in this guide because you will need to complete the previous techniques to successfully execute this technique because your MIDI device needs to be first recognized on Live. Once the setup and device recognition is achieved, you can move on to this technique. Let me show you how to execute this technique.
- Once you have your device is loaded, recognized and ready, make sure to arm your MIDI track
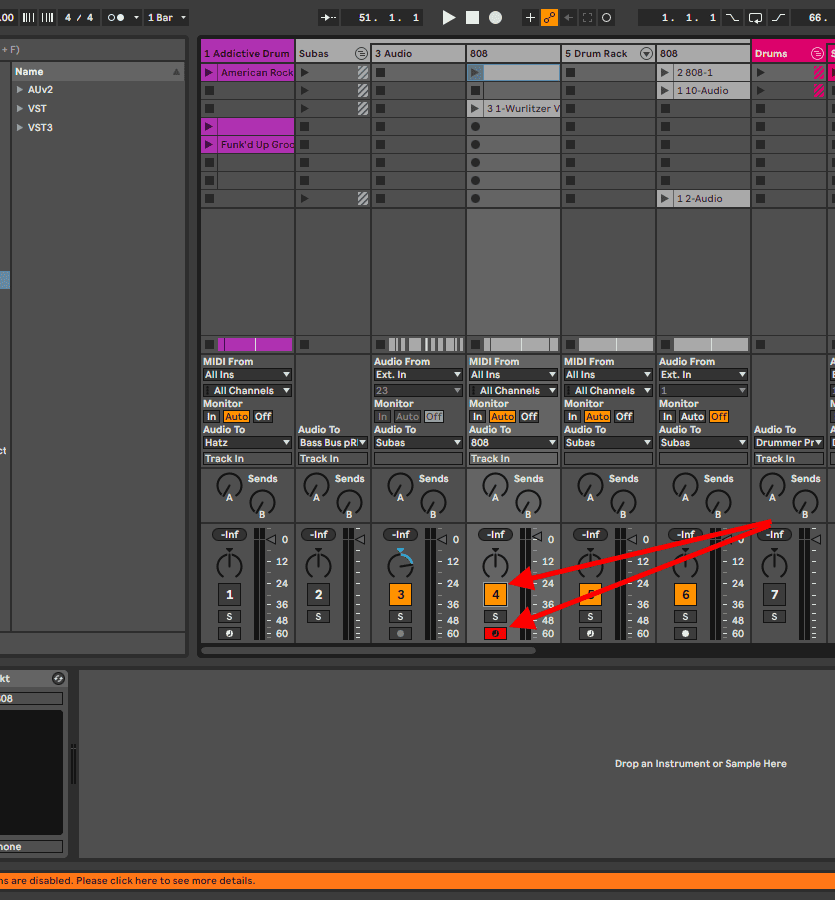
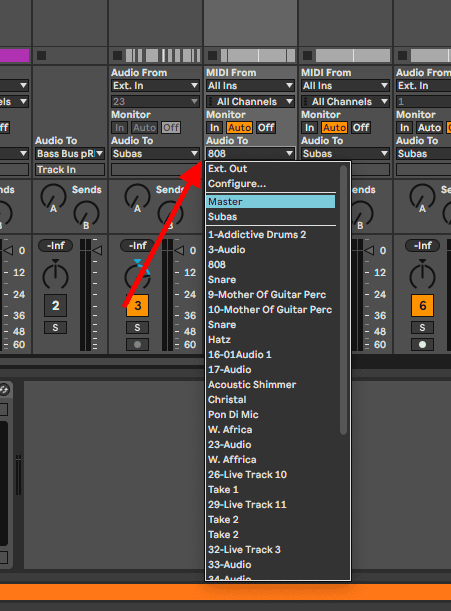
- Make sure your track’s audio output is correctly routed
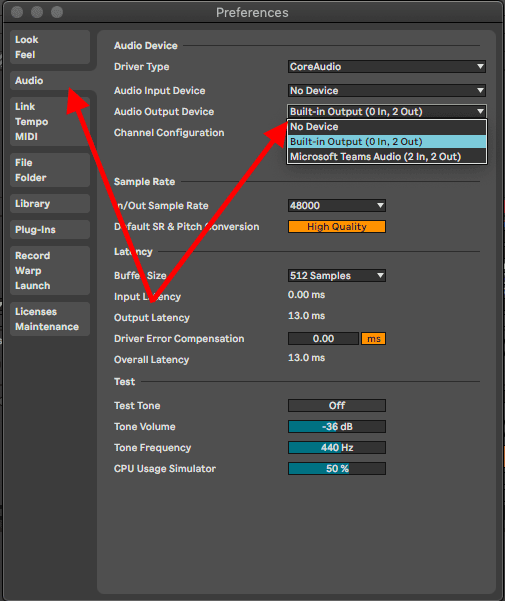
- In some instances, your MIDI device can act as not only a MIDI input device but as an audio recording and playback device, especially when they have an audio interface built into them, like the Ableton Push 3, or Maschine MK3. Make sure you correctly set up your MIDI device as an audio input or output device to match your use case, in the Ableton preferences, under the audio tab, and repeat the last two steps.
Final Thoughts
I recommend that you use these techniques in succession when it comes to solving recognition and recognition issues. Make sure your studio setup is done correctly, if you are working with a new MIDI device, make sure you follow the software resolution technique to the tee. Once this technique is completed, make sure you load your MIDI devices correctly, arm your tracks and record.
Be sure to recognize if your MIDI device has a built-in audio interface so that when you are using it to record audio or for audio playback, you follow the recording technique to use it correctly. See what you need for your troubleshooting use case, and apply, and most importantly, have fun!
- How to Use Ableton Live’s Arpeggiator? - September 18, 2023
- How to Use the Piano Roll in Ableton Live + Shortcuts - September 18, 2023
- Ableton Arrangement View (Optimization & Usage) - September 16, 2023

![Pitch Correction in Ableton [Complete Guide]](https://ProRec.com/wp-content/uploads/2023/04/change-pitch-by-using-the-detune-function-in-ablet-180x180.png "Pitch Correction in Ableton [Complete Guide]")


 [FIXED])