One of the preferred ways of editing audio in any DAW is by stretching. Digital audio stretching and Pitch shifting is one of the most complex features to implement correctly in audio editing, but it’s also one of the best advancements in audio technology in my opinion. Most DAWs have different algorithms incorporated for different use cases.
Recommended Read: Change Tempo in REAPER without Stretching (Timebase)
For this article I’ll be showing a lot of shortcuts and mouse modifiers, so, I will write them as they work for Windows, and if you happen to be using a mac, remember this conversions.
Shift => Shift ⇧
Ctrl => Cmd⌘
Alt => Opt ⌥
Windows key => Ctrl⌃
Having that layed out, let’s check what tools REAPER has incorporated for Time stretching.
Pitch Shift Mode
First, you must know that any Time stretching you apply introduces artifacts in the audio, sometimes it’s more noticeable than others, and that depends on the algorithm, the source file, and the amount of mangling you do to your audio.
Recommended Read: Speed Up and Slow Down Tracks in REAPER
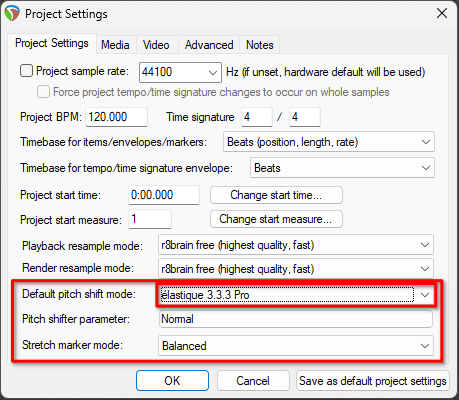
You can change the Pitch shift mode on a project basis at the project settings.
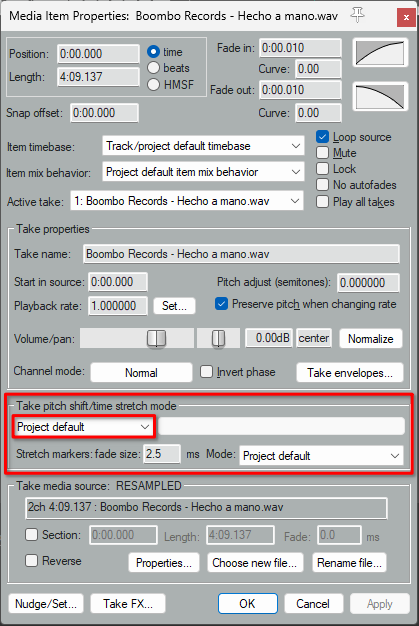
And on an item basis at the item properties, this setting can’t be set to tracks.
REAPER currently supports 5 different time stretching and pitch shifting algorithms:
- Soundtouch
- Simple windowed
- élastique (Efficient, Pro, and Soloist)
- Rubber band library
- Rrrreeeaaa
In my experience, élastique pro is a very good allrounder, while élastique soloist works best for monophonic sources, and if you want to create pads from stretched out sources, try Rrreeeaaa. Still, make sure to try them and use the one you hear is the most appropriate for the job.
Recommended Read: REAPER Metronome and Click Track Setup [FULL GUIDE]
Changing Playrate
Individual Items
The first form you can find of time stretching in REAPER is stretching a whole item. By default, this can be done by dragging the edges of any item while holding Alt.
This method snaps the item edges to the grid, if you want to override this, use Shift+Alt.

And if you want to ignore item or track grouping, add the Ctrl modifier to any of the previous two.
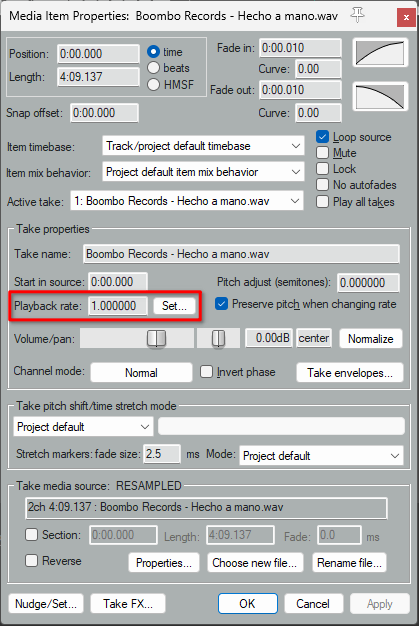
Another method is changing the items Playrate in the item properties. Double click the item or select the item and press F2.
Razor Edits
Razor edits work slightly differently. They are selection regions that allow you to edit portions of your project while not being bound by the edges of items, regions or time selection. To illustrate the utility of razor edits, I will set an example.
Recommended Read: Change (Increase & Decrease) Tempo in REAPER + BPM Settings
Let’s say that you just edited a radio commercial V.O. the cuts are all in place, you just need it to be a little bit faster. Thus you select the items, set the items to élastique soloist and try to shrink them.
But this shrinks each item independently while maintaining position in the timeline. Let’s create a Razor edit instead by holding Alt and dragging the right click across the items.
Then you can use the same shortcuts I showed you in the previous section to manipulate the Razor edit. In this case, hold Alt+Shift and drag the edge of the Razor edit.
Recommended Read: Creating Tempo Maps in REAPER
Stretch Markers
Stretch markers are where audio stretching gets really interesting. These allow you to modify the playrate of different portions of an item, and even create playrate ramps.
To create a Stretch marker hold Ctrl+Alt and click the item on the spot you want to add the Stretch marker to.
Or you can place the cursor and select the item and use the default shortcut Shift+W.
Now that the marker is created, it’s fun time! grab the marker and move it from side to side to stretch one side of the item and shrink the other. REAPER will create another two stretch markers at the edges of the item.

And let’s check some more modifiers for moving stretch markers.
Shift allows you to ignore snapping to the grid.
Alt will keep the Stretch marker in place while sliding the content behind it.
Shift+Alt will move the surrounding stretch markers or item edges to accommodate the marker you’re moving.
And Shift+Ctrl+Alt will move the surrounding markers while ignoring snap

Now, if you want to use Razor edit stretching inside items, it can also create stretch markers, and it follows all the Razor edit stretching modifiers.

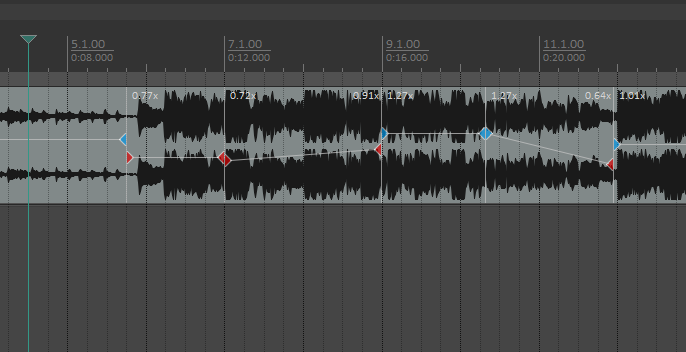
Next, check this! you can also move the Stretch marker rate, this is done by dragging up or down just to the side of the stretch marker. This unlocks some asymmetrical and powerful stretch marker editing.
And here are some useful mouse modifiers.
Shift will keep all the item markers and move the contents inside the section your editing shift around itself to fit.
Ctrl keeps all the markers positions and moves the item contents.

Alt will change the rate at both sides of the Stretch marker you’re moving.
These Stretch markers used correctly in conjunction with the appropriate Time stretch mode for the source and use, can supercharge your editing up to allow you to create absolutely wild effects.
Some of the things you can accomplish with stretch markers is aligning double tracked rhythm guitar DIs or multiple channels of background vocals to tighten up the sound. You can disable the preserve pitch when changing rate property and create a vocal or bass pitch drop. Or even create lush open ambient pad sounds stretching a piano or guitar using the Rrreeeaaa algorythm.
Shortcut Summary*
Alt + Drag edge of item – Change item playrate and duration.
Shift overrides snap
Ctrl ignores track editing or item grouping
Alt + Drag on the timeline or top of items – Draw a Razor edit
Shift + W – Place stretch marker at edit cursor
Ctrl + Alt + Click on the Item – Create Stretch markers under mouse cursor.
*Remember that if you’re working on mac, use Cmd⌘ instead of Ctrl, and Opt⌥ instead of Alt
Conclusion
Audio stretching and stretch markers are a really helpful feature, from slight transparent editing, up to wild effects using pitch and stretching. Why not give them a go whenever you can? who knows what sounds or tools you may find in the way. Certainly stretch markers are a big part of my workflow and make my editing much much faster. I tend to end up with quite a few of them in most projects even if the focal point of the project is not editing, I hope you also find this information useful. Have fun!

- Mixing in REAPER [ULTIMATE Guide!] - September 18, 2023
- How to Record in REAPER (Guitar & Vocals) - August 2, 2023
- Writing MIDI Drums in REAPER - July 3, 2023
")


)