A stem is a collection of audio/MIDI clips of a certain length that make up a track in your session. You will find yourself exporting stems mostly when you are co-producing with a fellow producer, instrumentalist, or vocalist, and sending stems back and forth to build upon ideas. There are different ways to export stems, and I will demonstrate them to you in this tutorial. If you are new to this, go ahead and check out my articles on the best export settings, as well as the encoding formats in Ableton.
Recommended Read: Import & Export MP3s, Dithering and Bitcrusher in Ableton
You can export stems for both audio and MIDI using the following three methods:
Exporting MIDI Stems
MIDI tracks make for the simplest and quickest stems to export, since there is only one way to do so in Ableton. The downside is that you can only export one MIDI clip in a track at a time. Here is how you do it:
Step 1: Select your MIDI clip and right-click
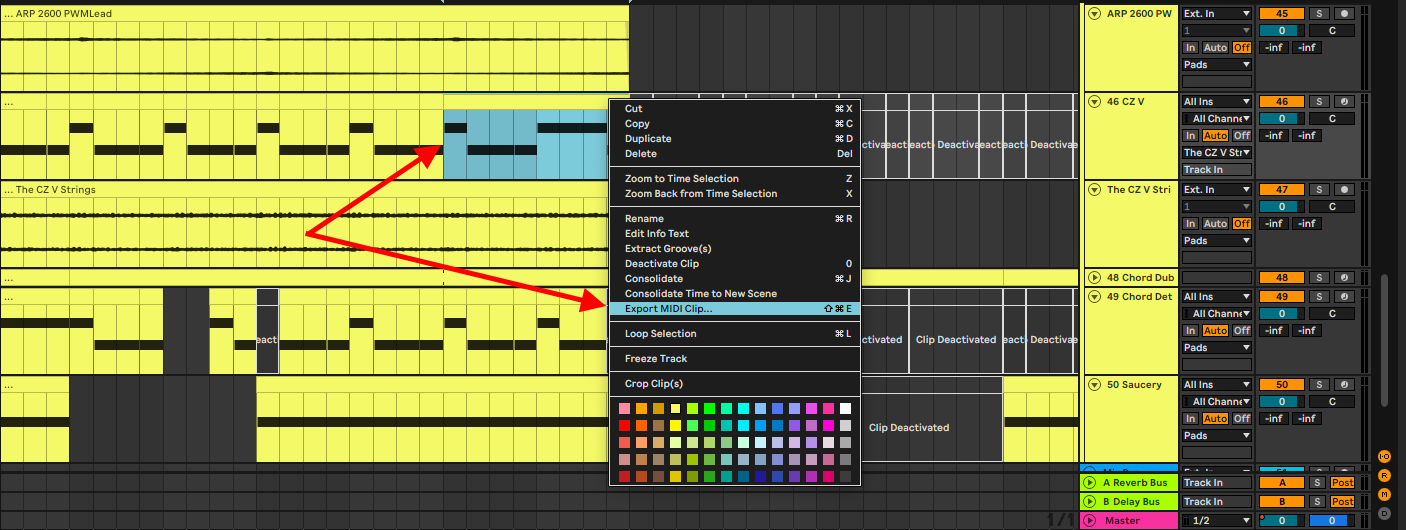
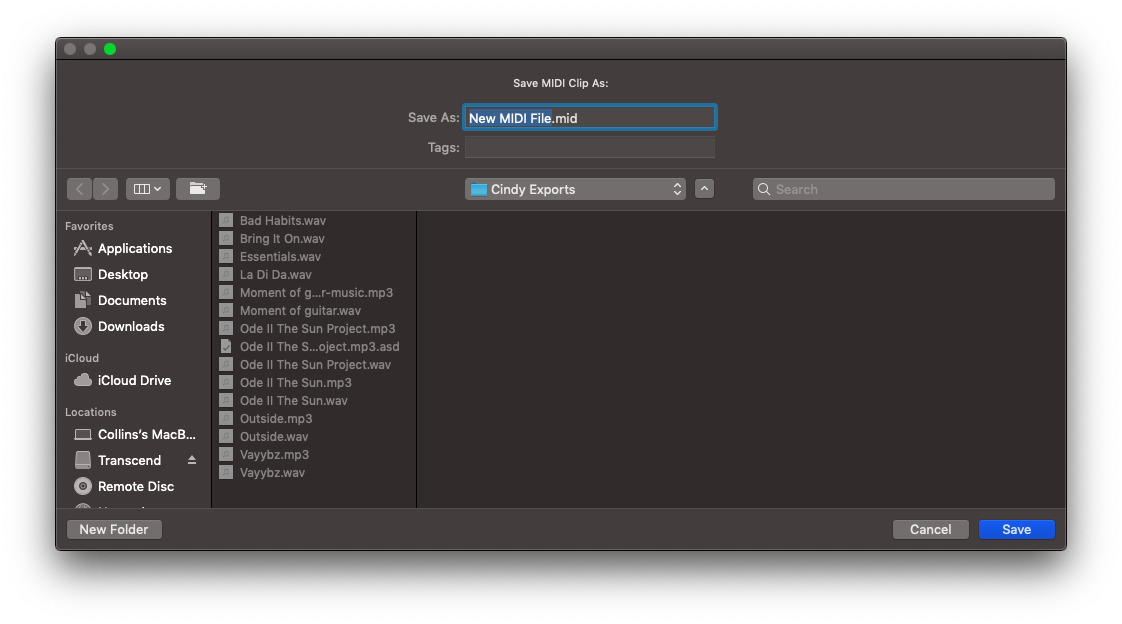
Step 2: Export MIDI clip (Cmd + Shift + E on Mac or Ctrl + Shift + E on Windows) and select your save location
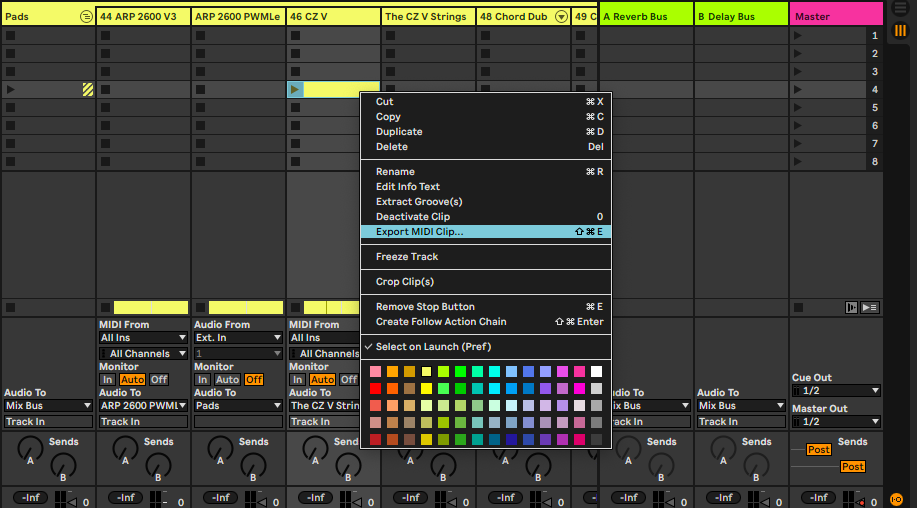
You can also export MIDI stems from the mix view
Note! If you want to export MIDI clips for the length of your arrangement, you need to consolidate and repeat steps one and two. You can do this by highlighting your clips in the track and right-clicking, and selecting consolidate (Cmd + J on Mac or Ctrl + J on Windows)
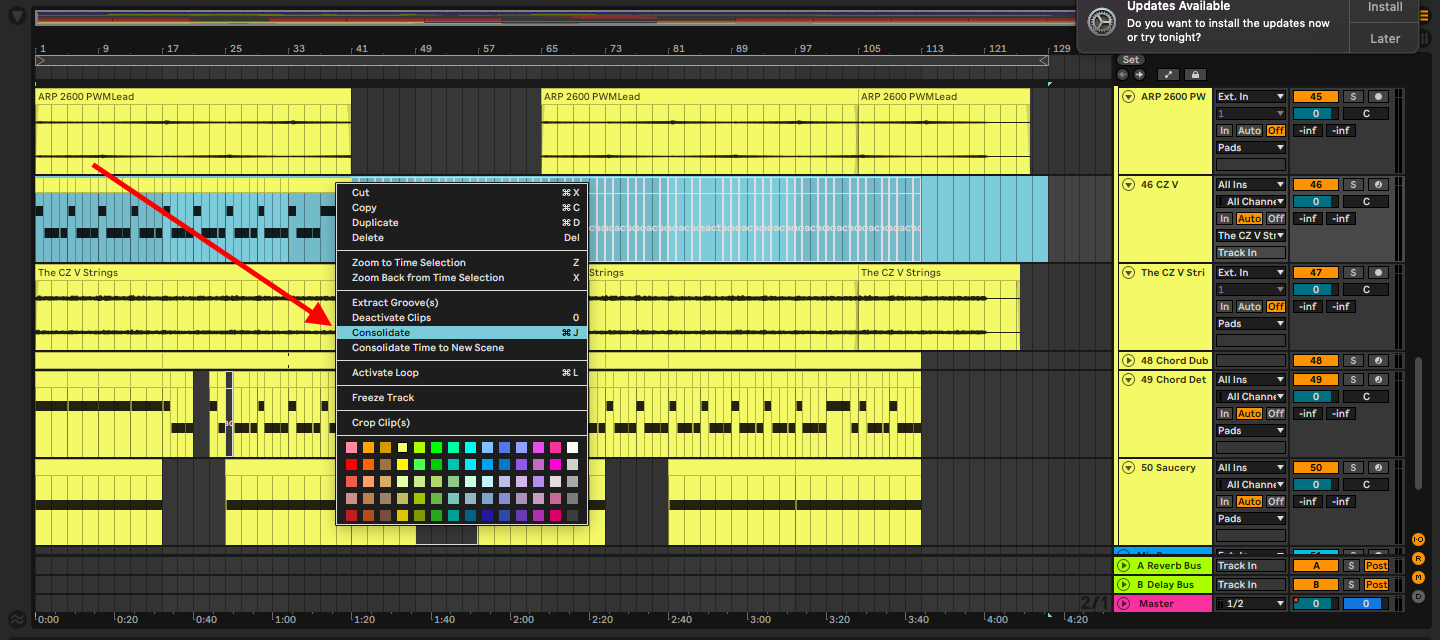
Now repeat the MIDI stems export steps

Exporting Audio Stems
When it comes to exporting audio stems, there are 4 different ways to get the job done. Here’s how you do it:
Show in Finder
This technique will reveal the location of your stem, and now you can copy it into your stems folder.
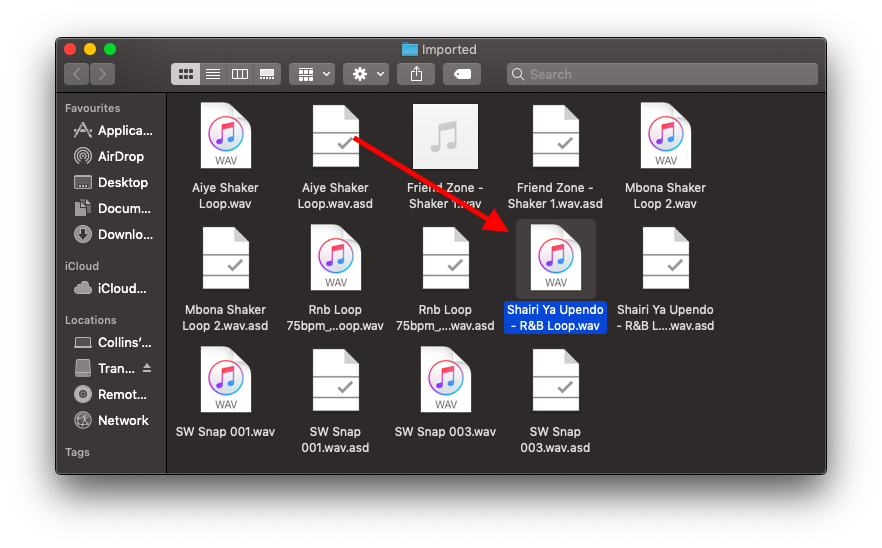
Step 1: highlight and right-click on your stem, and select Show in Finder
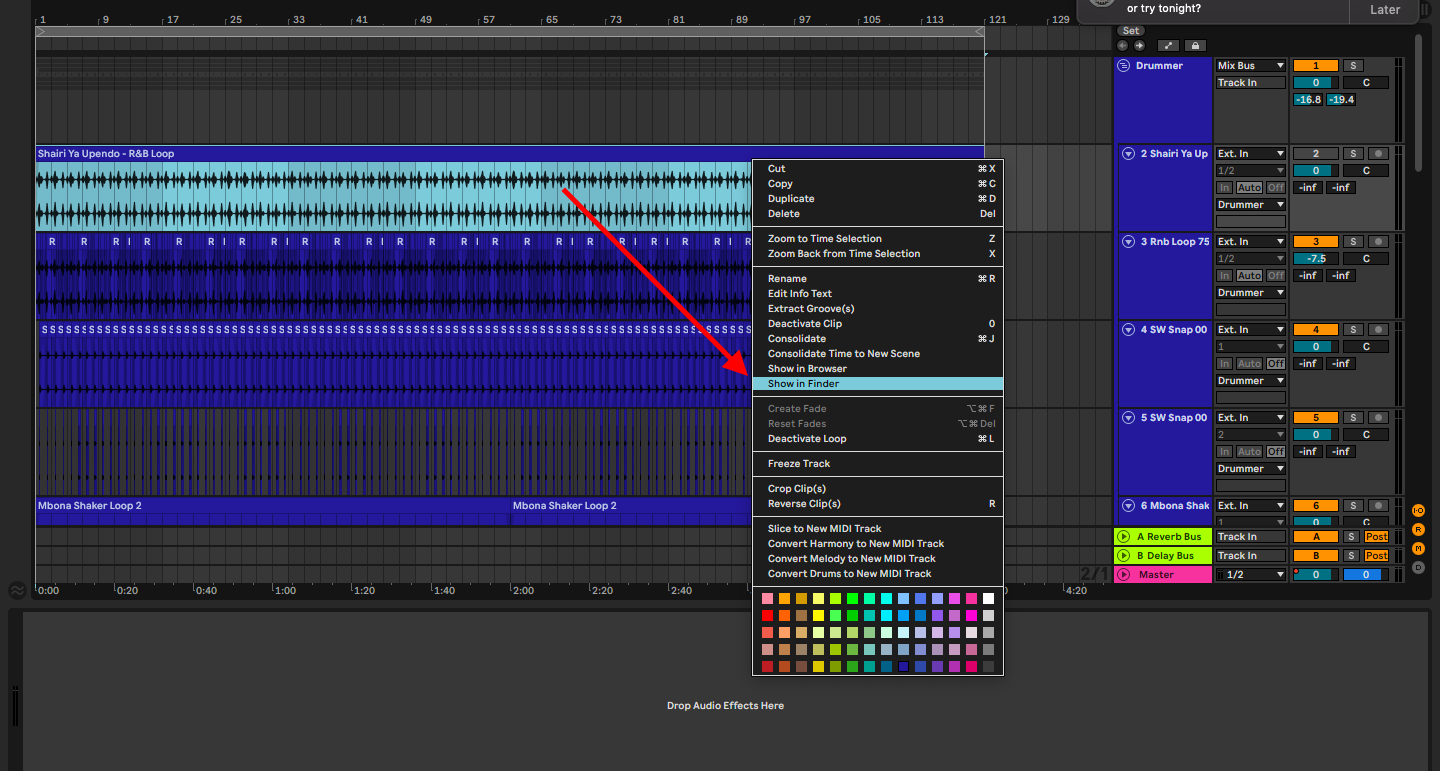
Step 2: This will reveal the location of our stem. From here you can move/copy your stem to your stem folder
Note! You will only be able to do this for one audio clip at a time.
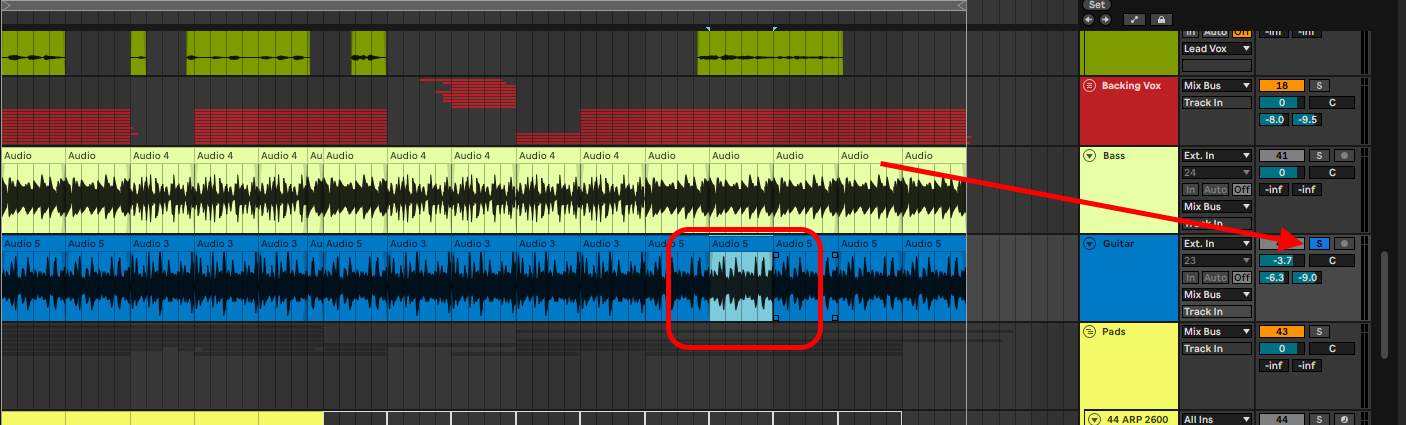
Export Individual Stems
This technique exports individual tracks, one at a time. This method is precise, as it exports your chosen track but involves a few extra steps for execution. Here is how you do this:
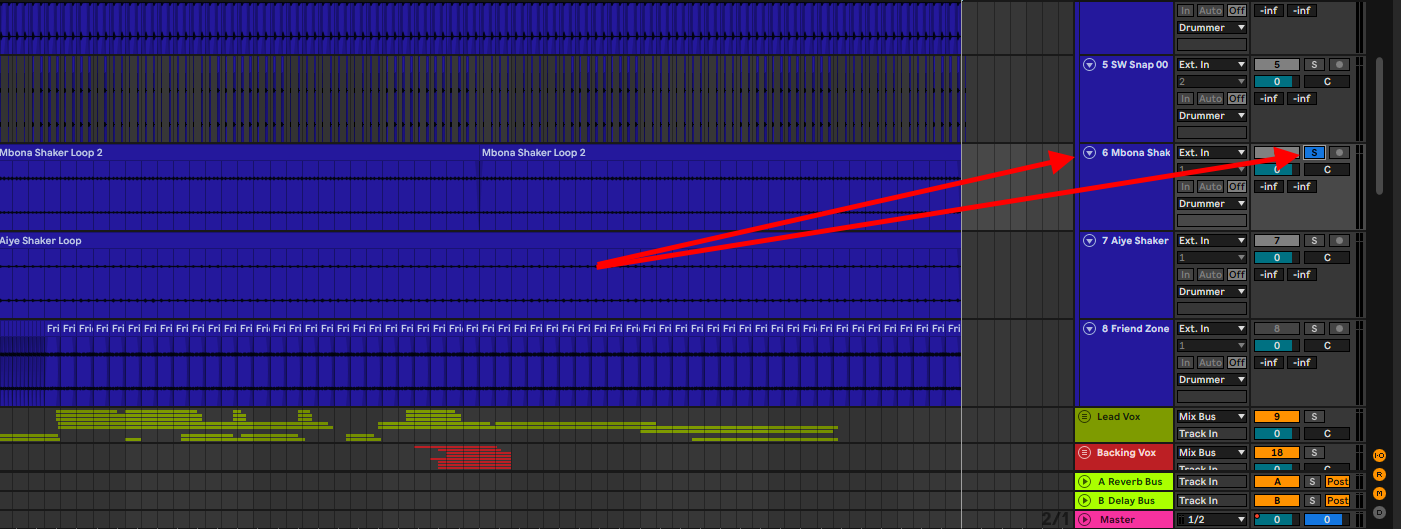
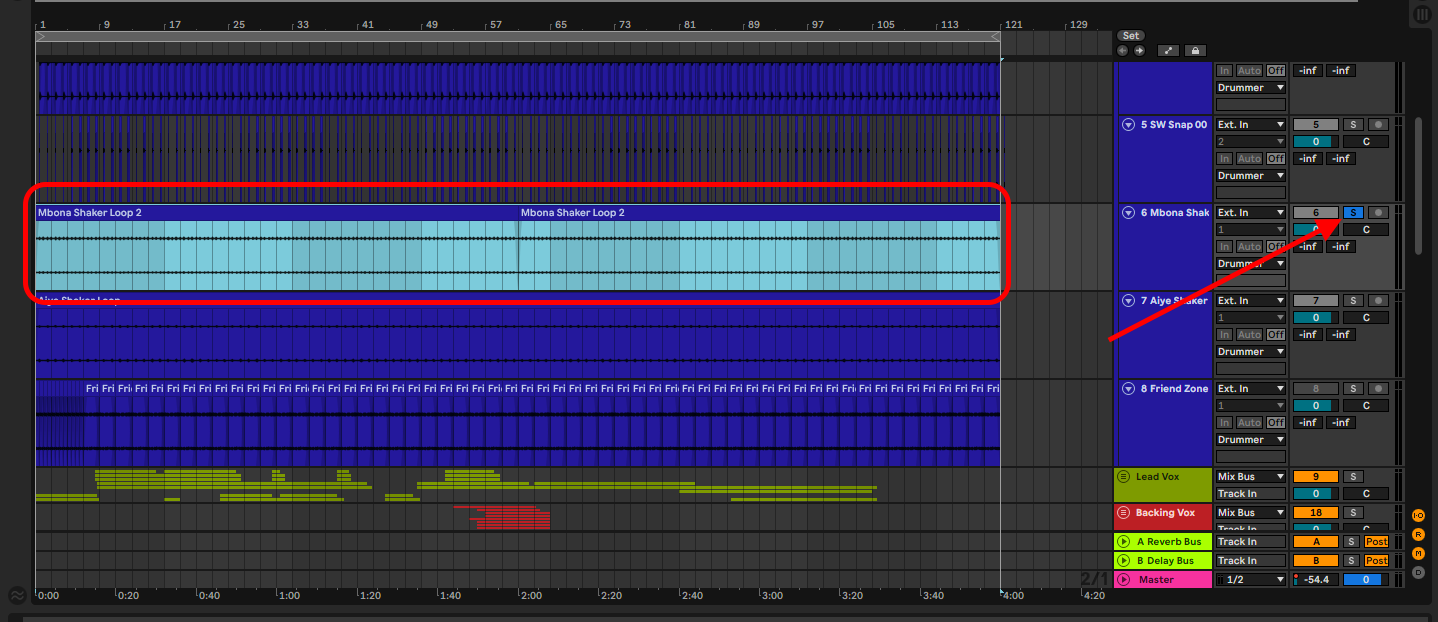
Step 1: Choose your track and solo it
Step 2: Open the export menu ( Cmd + Shift + R on Mac or Ctrl + Shift + R on Windows) and select your parameters
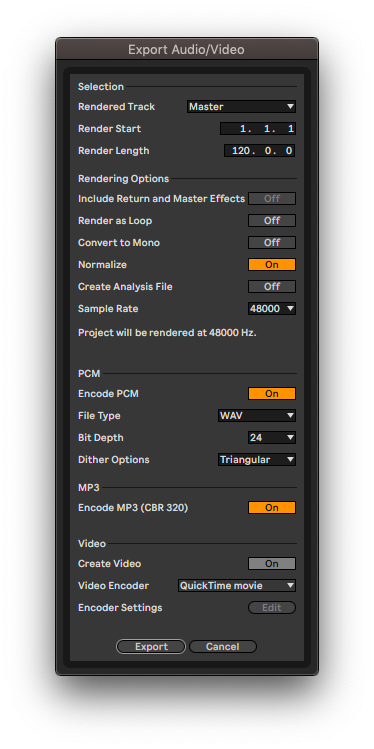
Note! In this method, you can export a specific track of your choice in the ‘render track’ dropdown menu
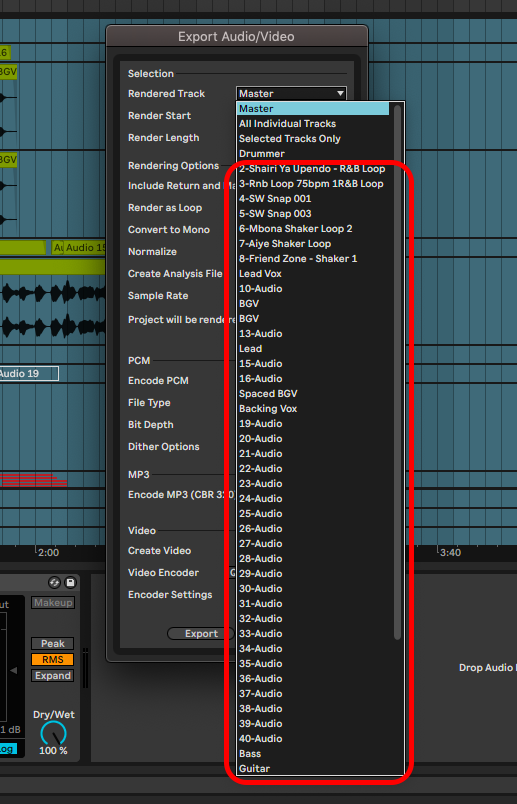
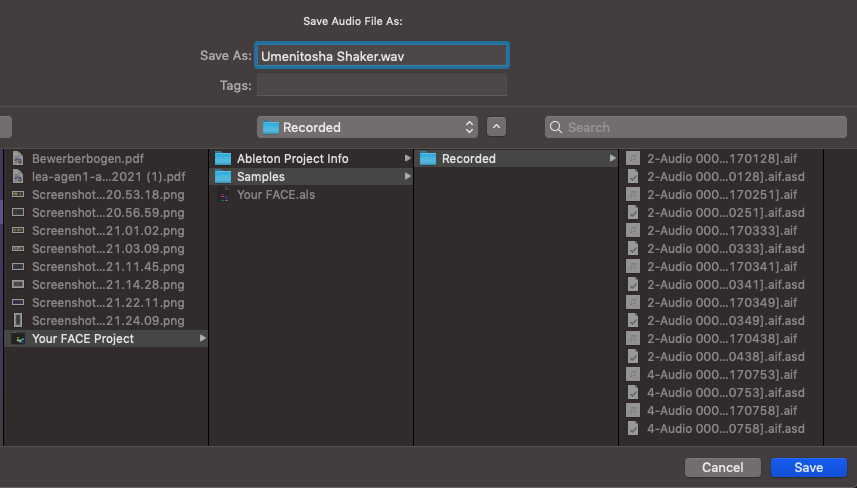
Step 3: Select your stems folder, and appropriately name your stem
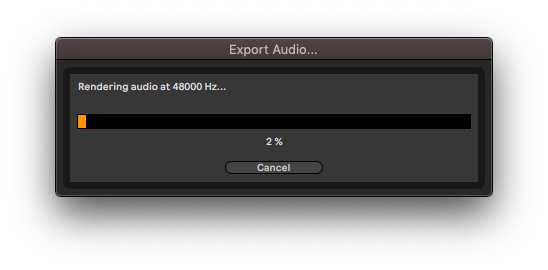
Step 4: Export
Caution! You will need to solo your stem and highlight your stem length to accurately export your stem
Render as Loop
This method is very similar to the ‘export individual stems’ but is better suited for loops. If you have a good guitar loop that you would like to send out to another producer or instrumentalist, to compose around for example, then this technique is best. This is how you do it:
Step 1: Select an equal length of a clip to your time signature and solo the track(s) as needed
Step 2: Open Ableton’s export menu and select ‘Render as Loop’
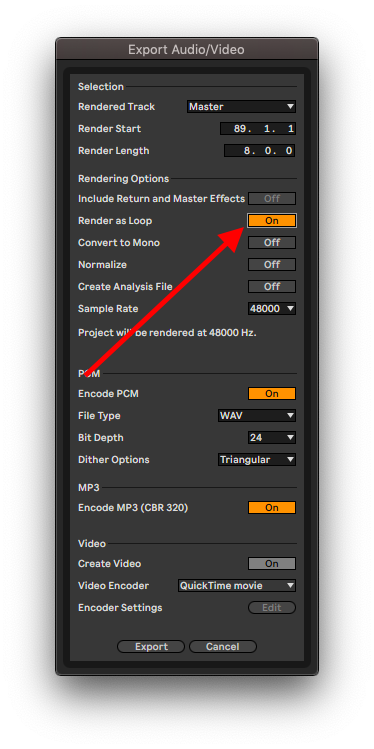
Step 3: Export
Export Multiple Stems
This technique is the best for bulk stem export. It exports all your selected stems into your stem folder unintuitively. This is how you do it:
Step 1: Select your stems (select your tracks that contain the stems as you hold down Ctrl on Windows or Cmd on Mac)
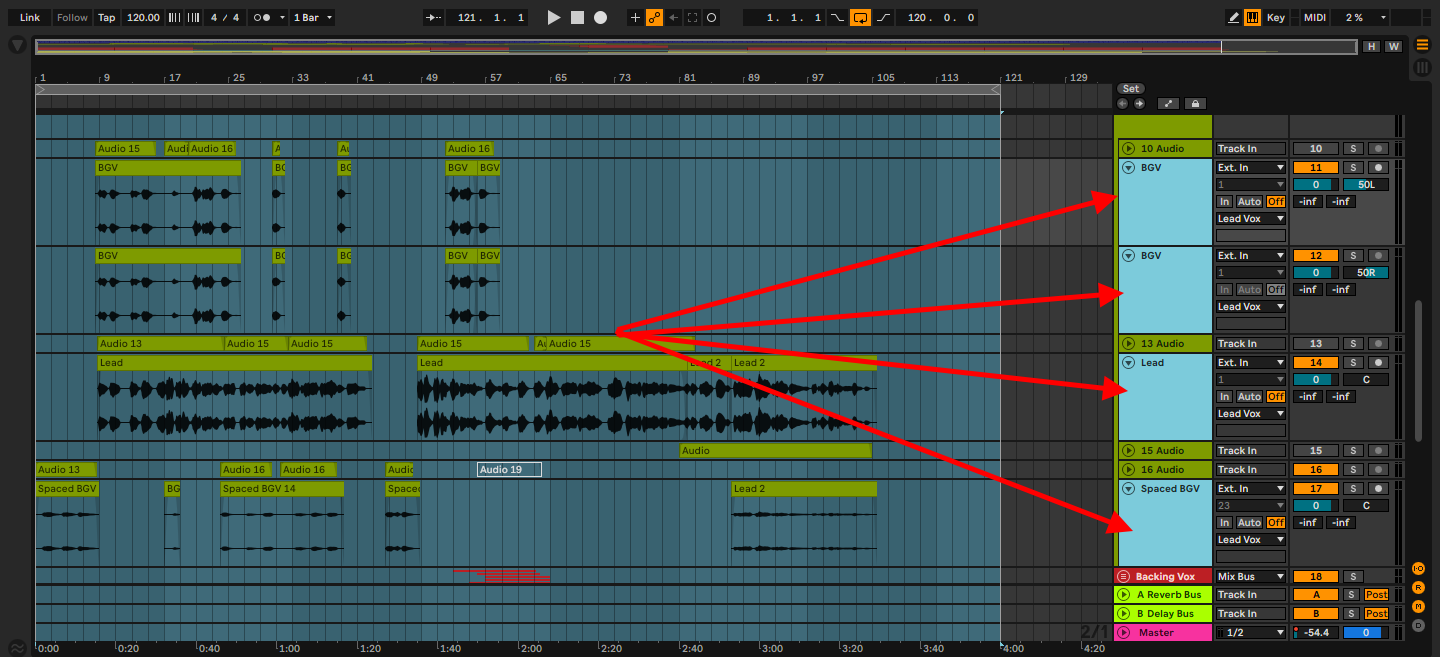
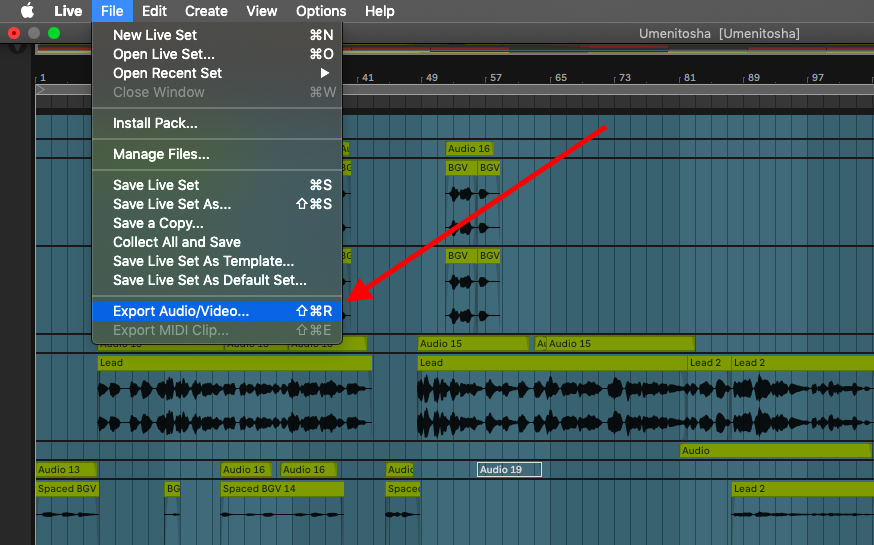
Step 2: Open Export Menu
Step 3: Export the selected tracks containing stems. In the ‘render track’ drop-down menu, choose, Selected Track Only
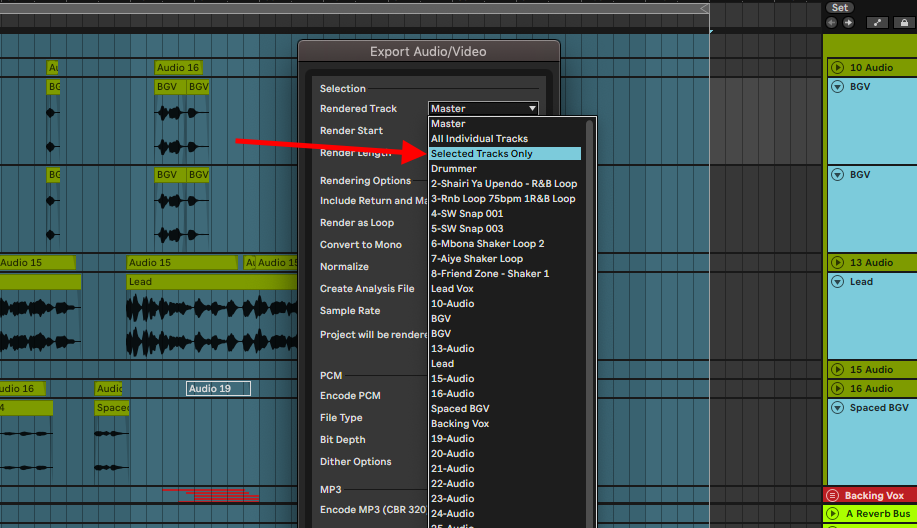
Step 4: Export
Final Thoughts
Exporting stems is extremely useful when it comes to collaborative music production. Exporting MIDI stems and rendering loop stems is more skewed to the early stages of composition and production, the other techniques come in from the mid-production to the audio mixing stages. This is not a rule, however, as audio production is a creative process and collaboration is key. When it comes to exporting stems, be accurate and deliberate with how you do it. Have fun!
- How to Use Ableton Live’s Arpeggiator? - September 18, 2023
- How to Use the Piano Roll in Ableton Live + Shortcuts - September 18, 2023
- Ableton Arrangement View (Optimization & Usage) - September 16, 2023


