FL Studio’s piano roll has been at the forefront of DAW innovation and is one of the reasons why it is one of the most used DAWs among music producers. The piano roll is where you will create, edit and manipulate MIDI notes and note information in FL Studio. It offers a neat and easy to use interface that leads to a quick, efficient focus based workflow. In order to properly master FL Studio and produce high quality tracks in the shortest amount of time, it is trivial to learn how to use the piano roll as it will be one of the places you will spend most of your time.
How to open the Piano Roll
To open and close the piano roll, simply press F7 on your keyboard or click on the piano roll icon located in the toolbar.
Alternatively, if there are already some notes on a channel’s piano roll, you can access the channel’s piano roll directly by clicking on the mini piano roll view in the channel rack shown below.
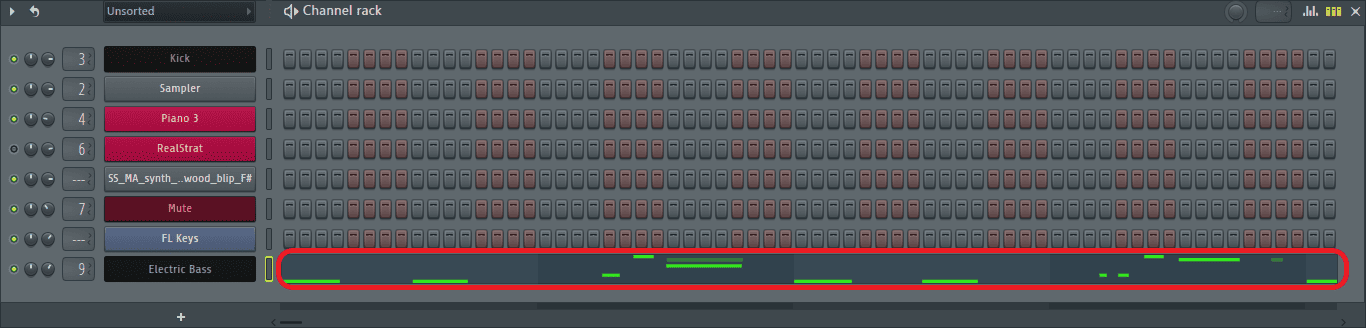
Each channel in the channel rack has its own unique piano roll window, however, only one instance of the piano roll can be opened at a time. The piano roll window looks like this.

Getting Familiar with the Piano Roll
Before we go over the piano roll’s various elements and tools, let’s first get acquainted with its user interface.
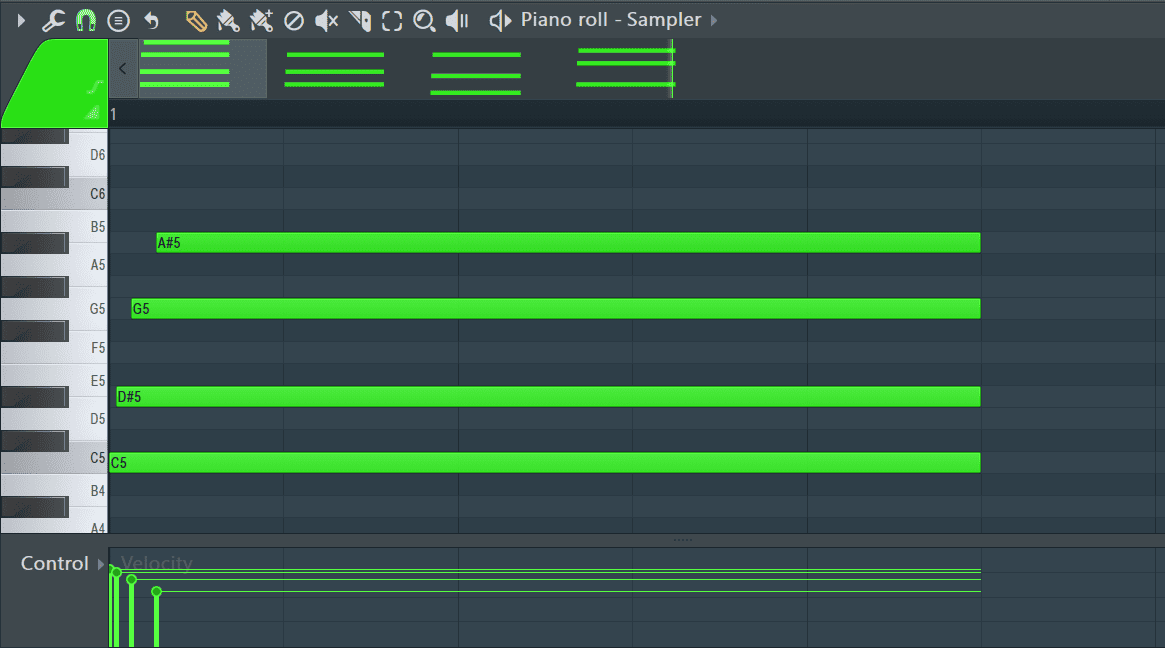
The segmented area marked below is the piano roll’s grid. This is where notes are placed.
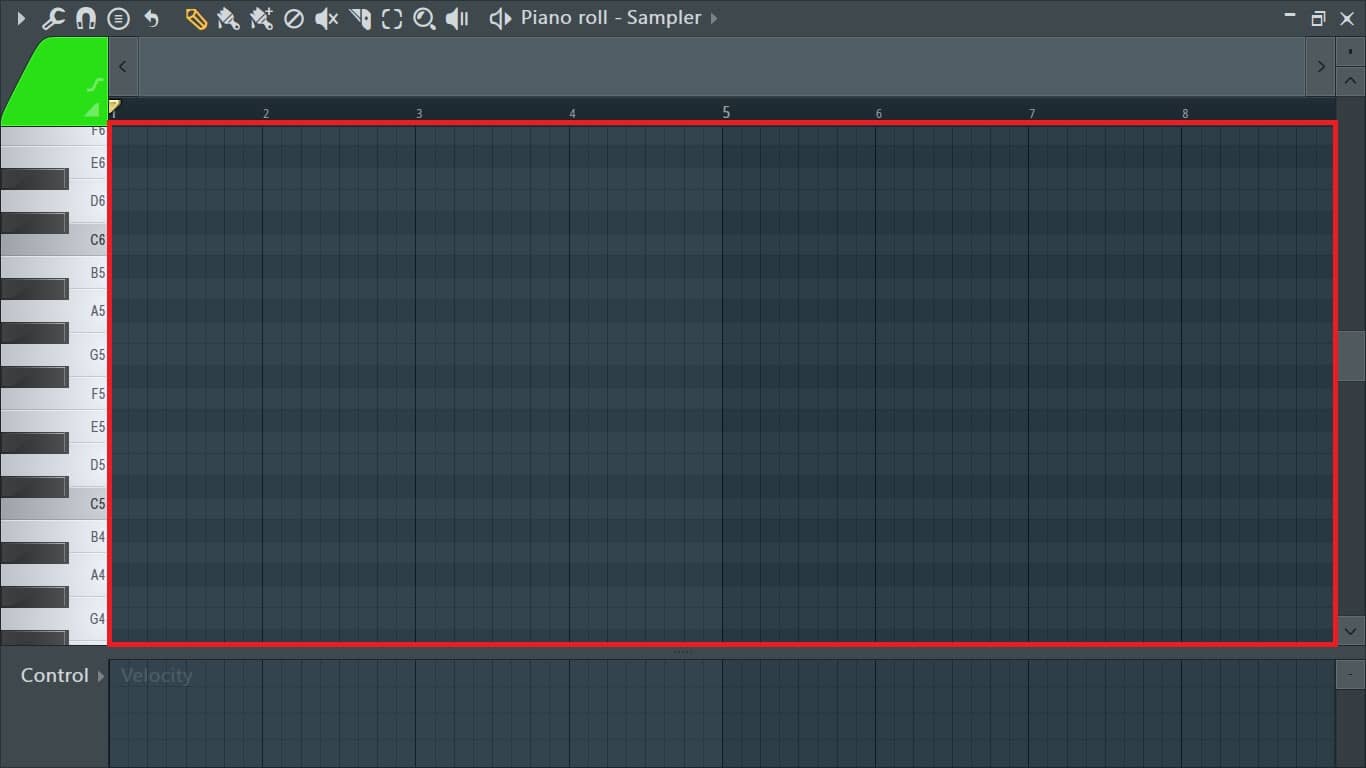
A keyboard-style layout is present on the vertical axis representing the different musical notes and their pitches.
The rows going from left to right on the piano roll represent the musical note from which they start at. Placing a note on one of the rows is equivalent to striking the key from which it begins.
The vertical axis marked with numbers represents the time. By default, a number is placed at the beginning of each bar.
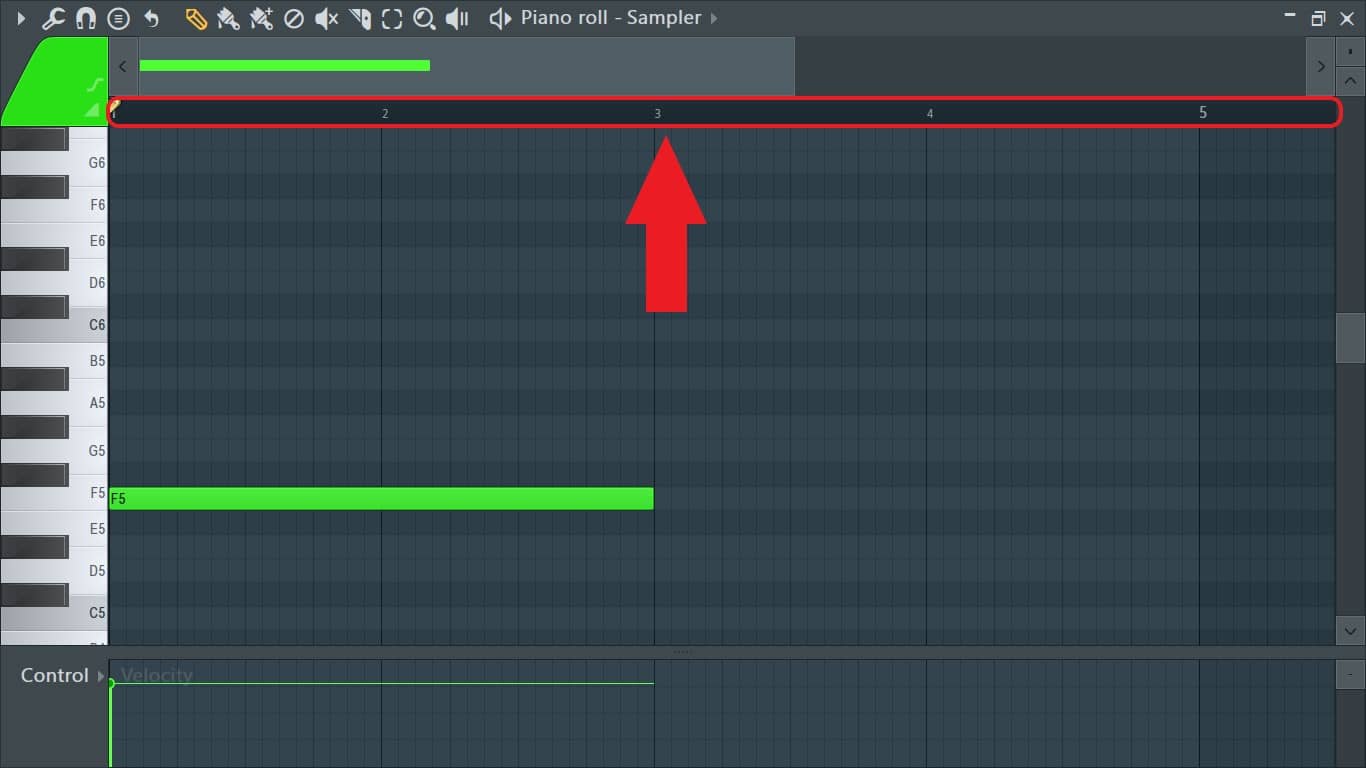
You can zoom in and out of the piano roll horizontally by hovering the mouse cursor over the marked area above and scrolling using the mouse wheel.
Alternatively, you can zoom in and out horizontally by dragging either ends of the horizontal scroll located directly above it.
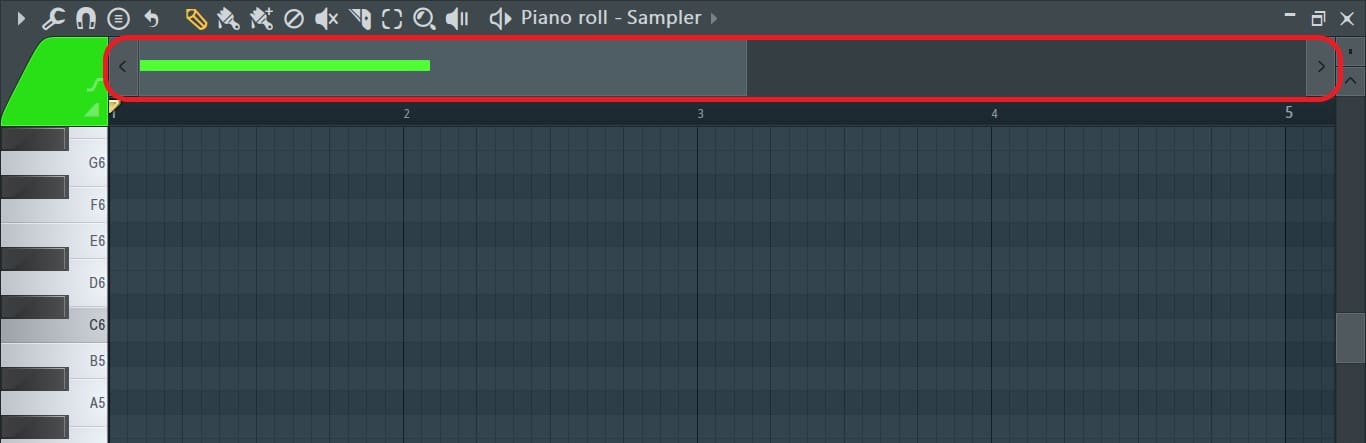
The horizontal scroll is also responsible for moving left and right in the piano roll grid. Navigate the extent of your playlist by hovering your mouse cursor over the horizontal scroll and scrolling with the mouse wheel.
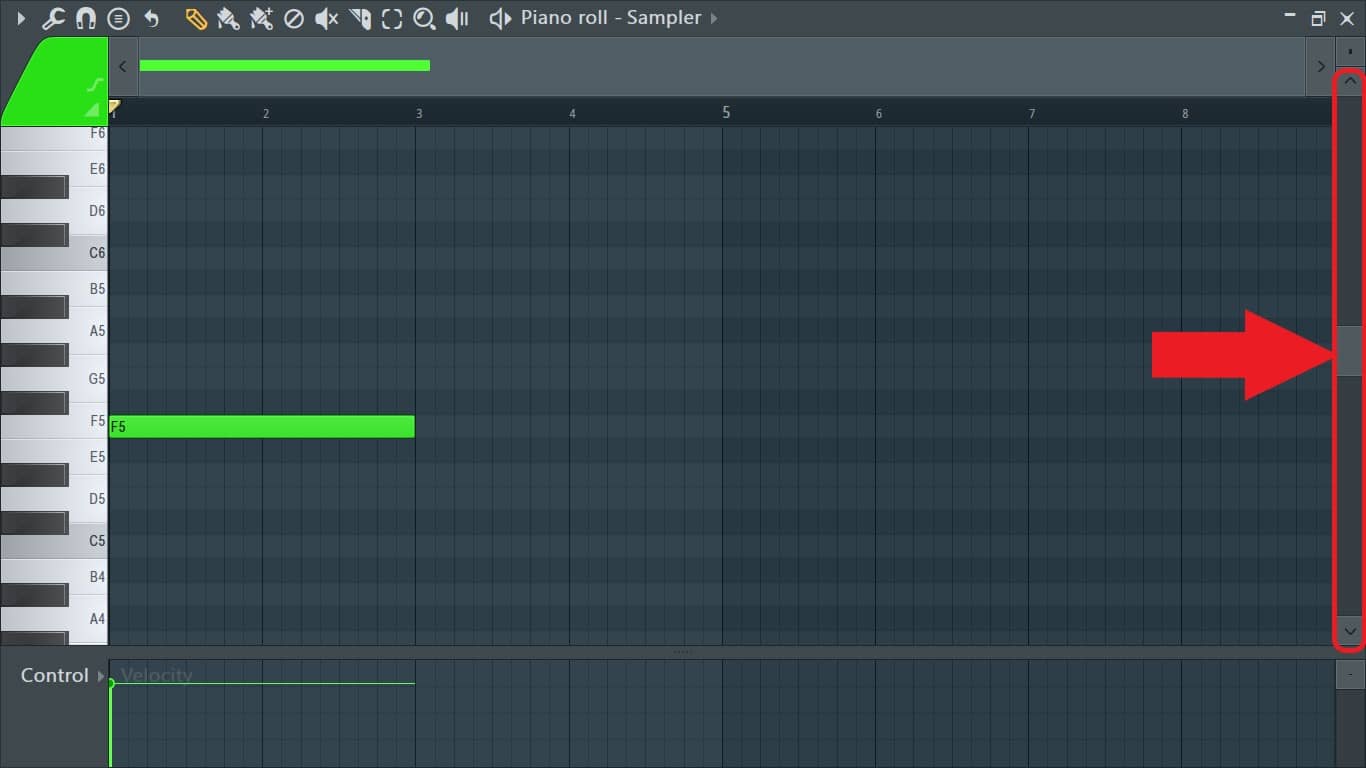
To move up and down in the piano roll, just scroll up and down on your mouse wheel or use the vertical scroll located on the right edge of the piano roll.
The vertical zoom is located right above the vertical scroll and just below the close window button located at the top right corner of the piano roll. Hover your mouse cursor over the vertical zoom and scroll using the mouse wheel or click and drag to increase or decrease the visual size of notes in the piano roll.
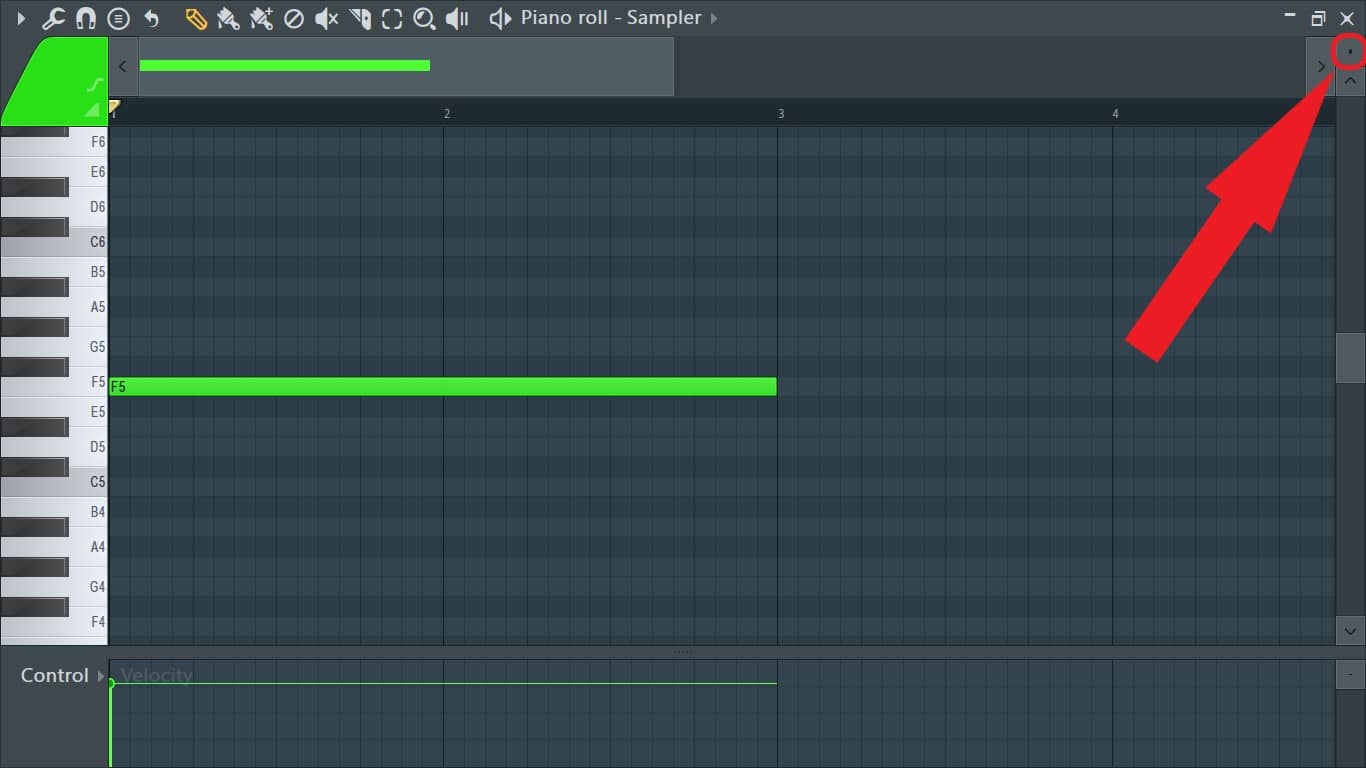
Smaller sized notes will allow you to see more note information.
Bigger notes will be more zoomed in and fewer notes will be seen.
How to Add Notes to the Piano Roll
The piano roll is used to create melodies, chords, chord progressions, drums, basslines, and many more, but before doing this, we first have to start by adding notes to the piano roll. There are two ways to add notes to the piano roll, either by manually drawing in the notes or by recording in the notes from your MIDI controller or typing keyboard.
How to Record Notes into The Piano Roll
To record notes into the piano roll, press the record button in the toolbar. (It will turn red once activated.)
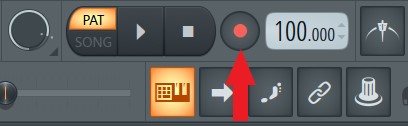
From the window that pops up select ‘Notes and automation’ from the options.

Now you’re set to record in any notes you trigger from your MIDI controller.
How to Manually Add in Notes to the Piano Roll
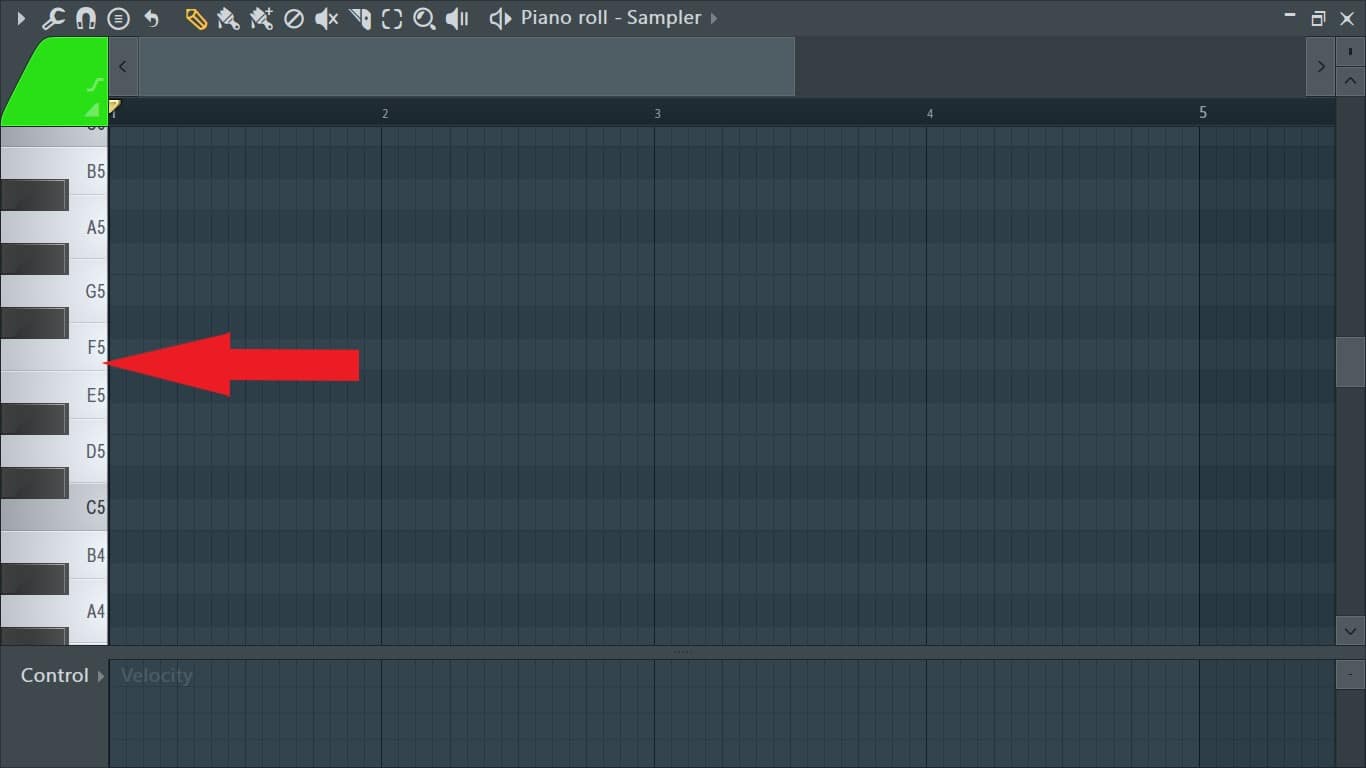
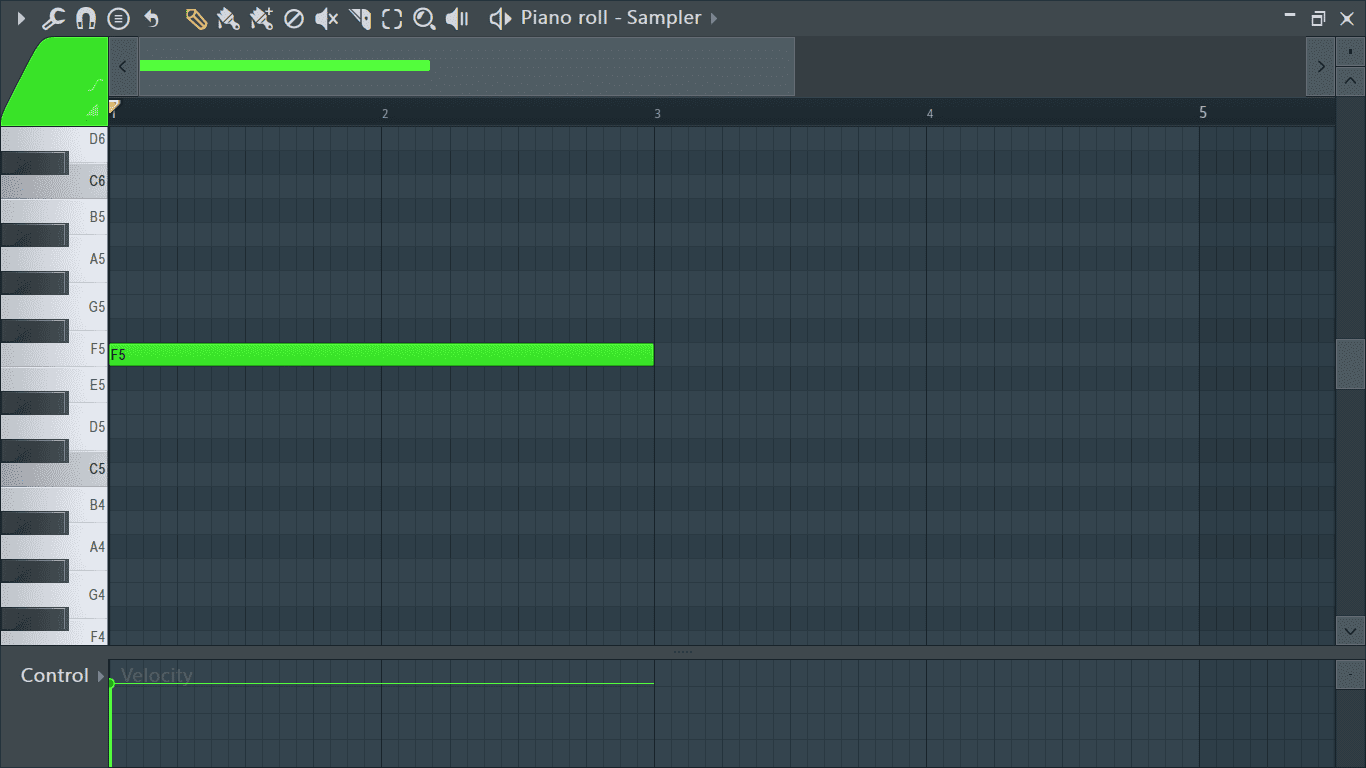
One of the features that makes FL Studio’s piano roll so easy to use is the straight-forward style of the piano roll. To draw in a note, just place your mouse cursor anywhere on the piano roll, left click, and boom, a note is added. To delete a note, just right click on it.
You can also add multiple notes and sequence them to create melodies.

The Piano Roll Toolbar
Now that we’re familiar with adding notes to and navigating the piano roll, let’s look at the tools we will be using to create, edit, and manipulate the notes and their note properties.
These tools can be found on the toolbar at the top of the piano roll.

Click on the icons to switch between the different tools.
The Piano Roll Main Menu
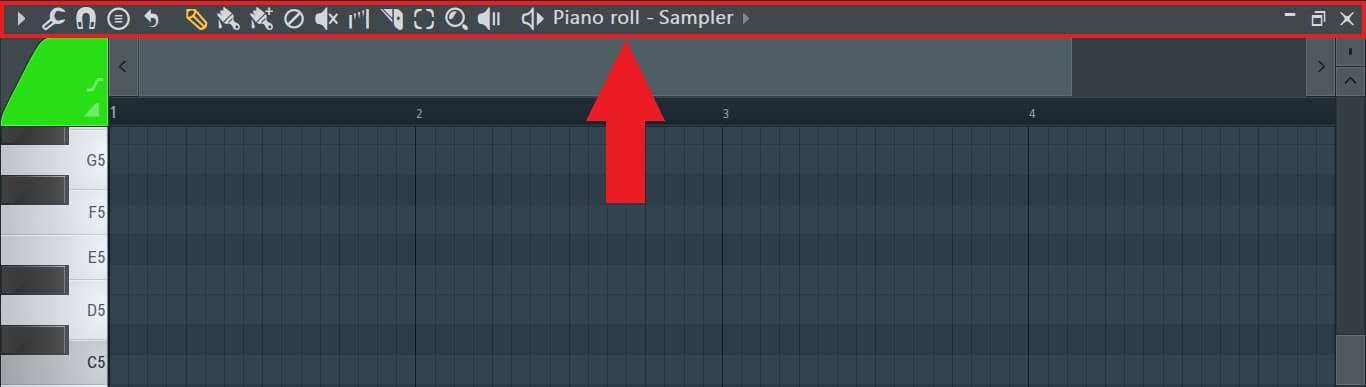
Piano roll options can be accessed by clicking on the arrow at the top left corner of the piano roll.
The drop down menu opened contains the main settings for the piano roll.
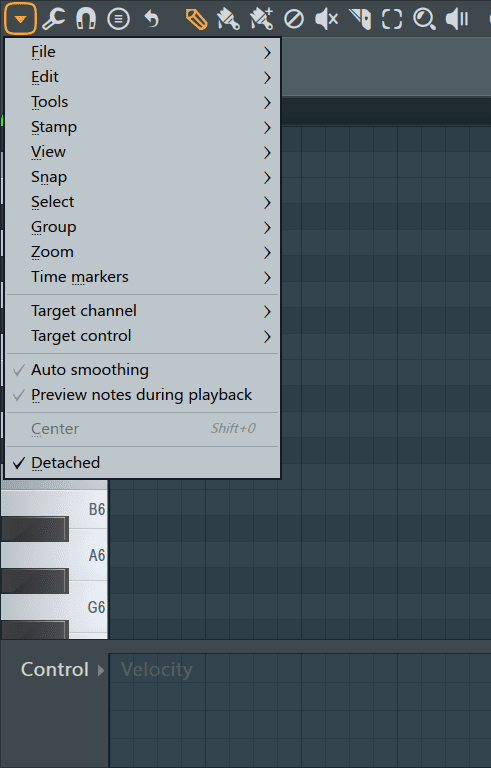
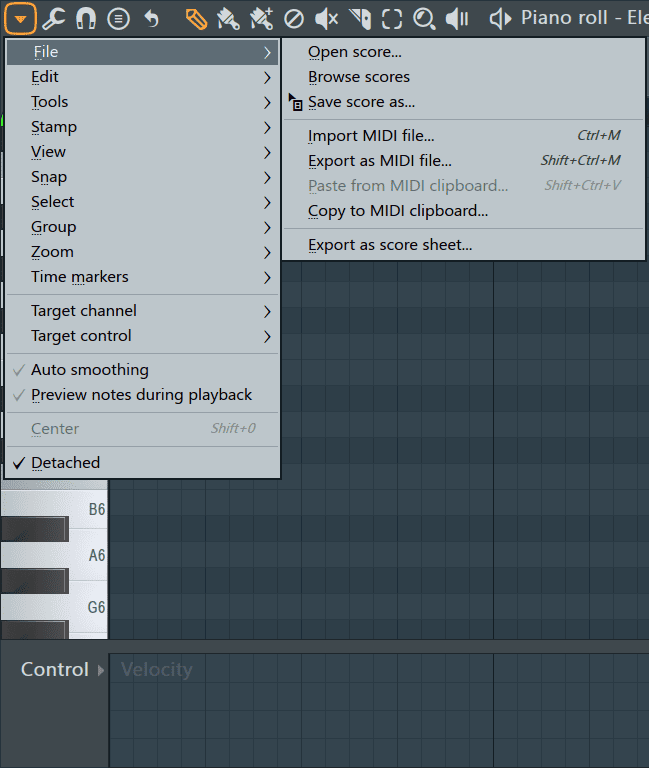
The ‘File’ sub-menu allows us to copy, save, load, import, and export scores and MIDI files.
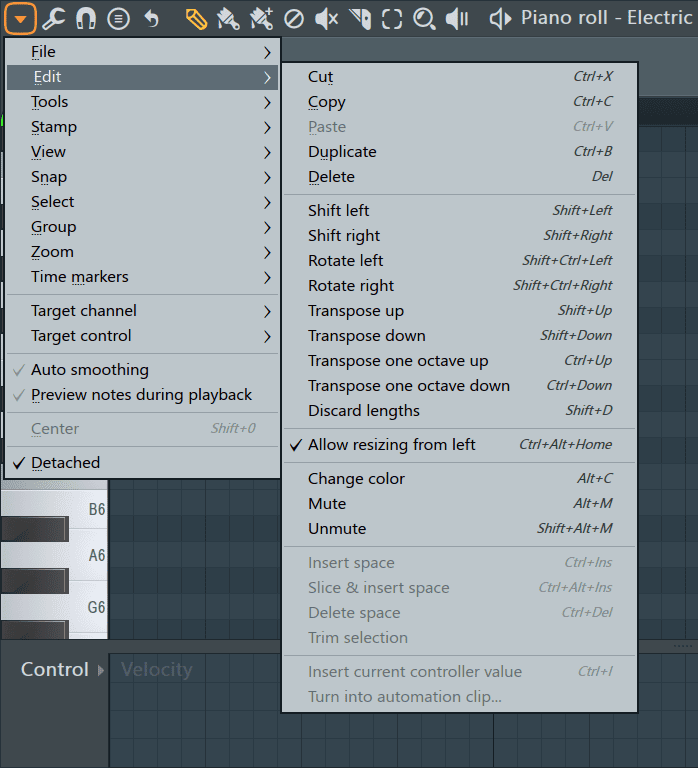
‘Edit’ contains different editing options for notes and other information on the piano roll including their shortcuts.
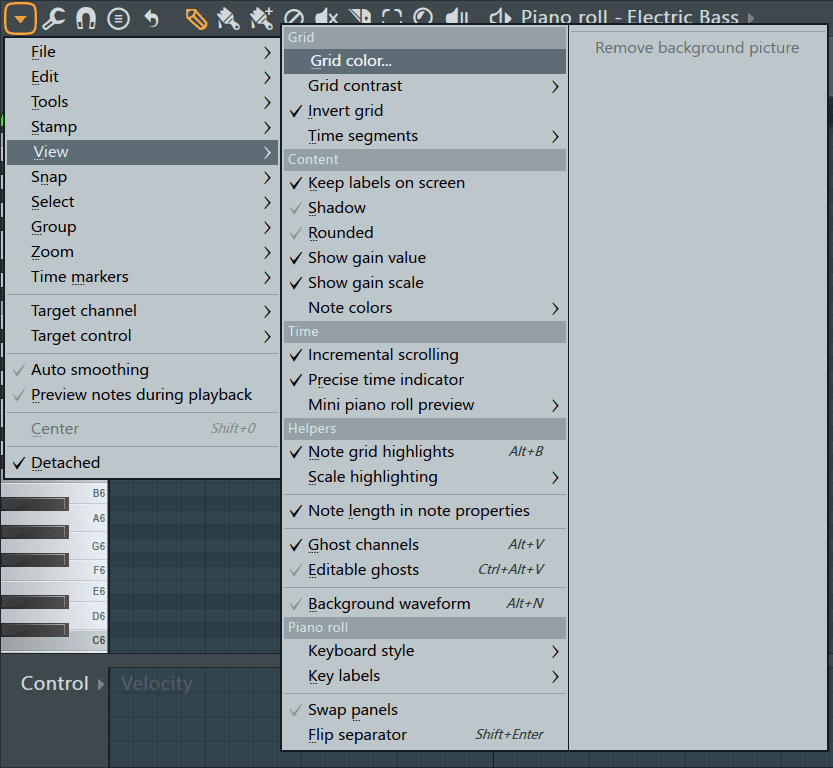
The ‘View’ sub-menu contains different visual settings regarding elements of the piano roll ranging from note colors, ghost notes, scale highlighting and many more.
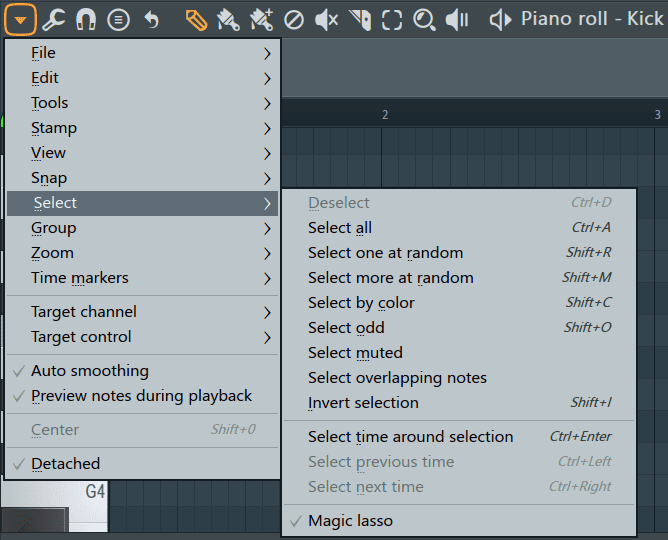
The ‘Select’ sub-menu offers different options regarding selection of elements in the piano roll.
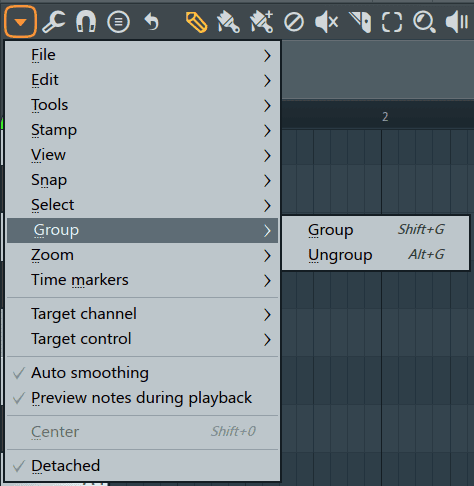
Group allows us to group or ungroup notes in the piano roll. This is great for when you want notes to share the same properties or to act as a unit.
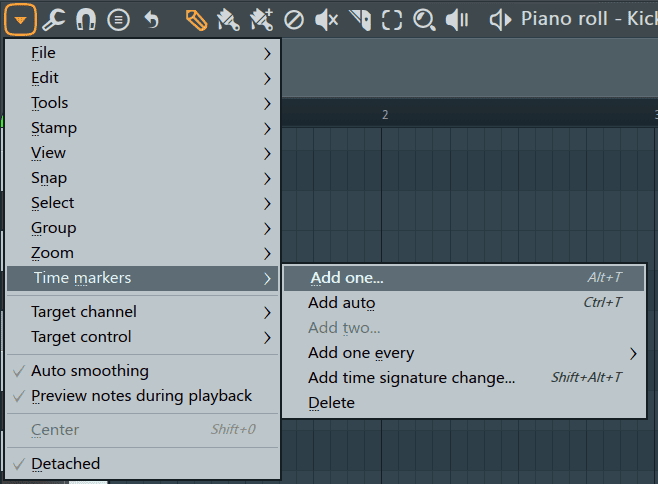
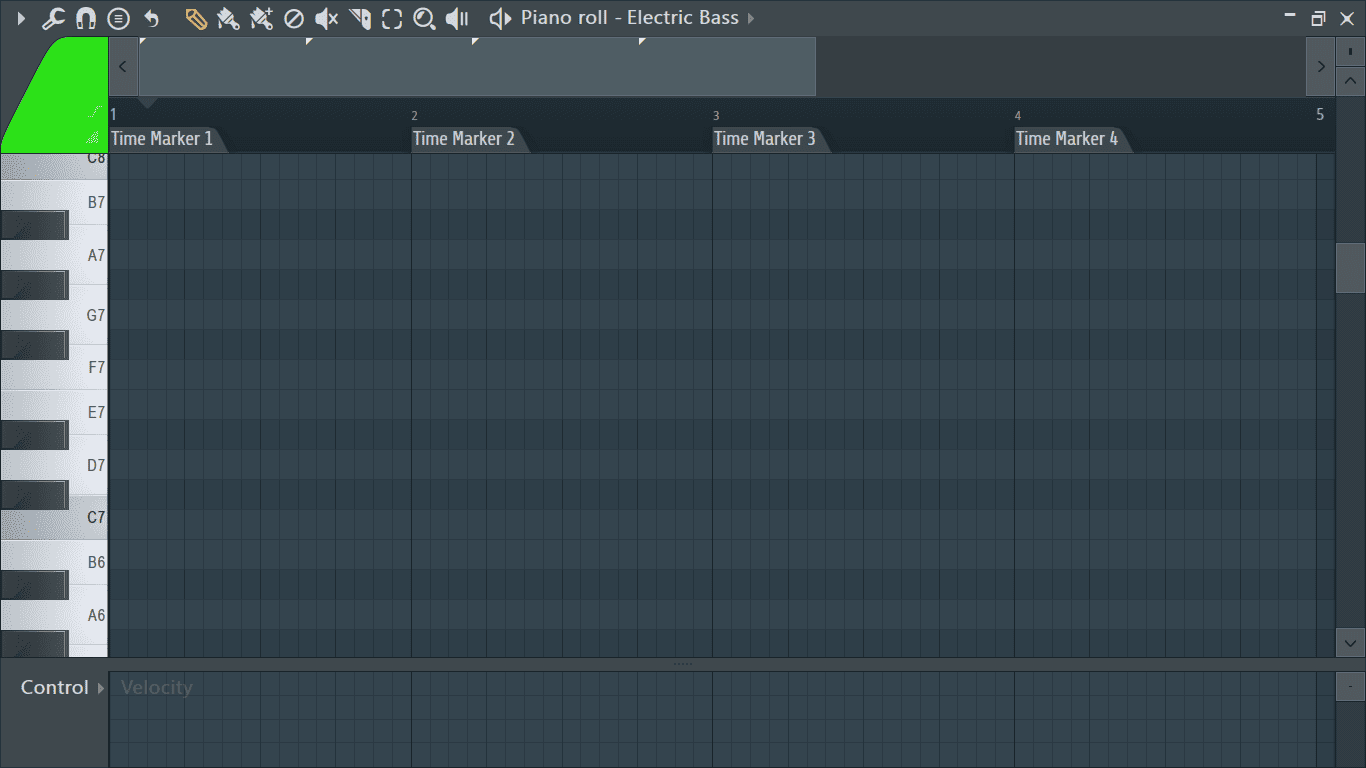
We can add and delete time markers in the piano roll from the ‘Time Markers’ section.
Here are how time markers look in the playlist. They are great for keeping your work organized and very helpful when creating arrangements.
Note: The piano roll options not discussed in this section are present in the next sections.
Piano Roll Tools
Next to the arrow for the piano roll man menu, is a wrench-like icon that opens the piano roll tools. This contains about 18 different tools for manipulating MIDI notes.
These tools are also found in the piano roll options under ‘Tools’.
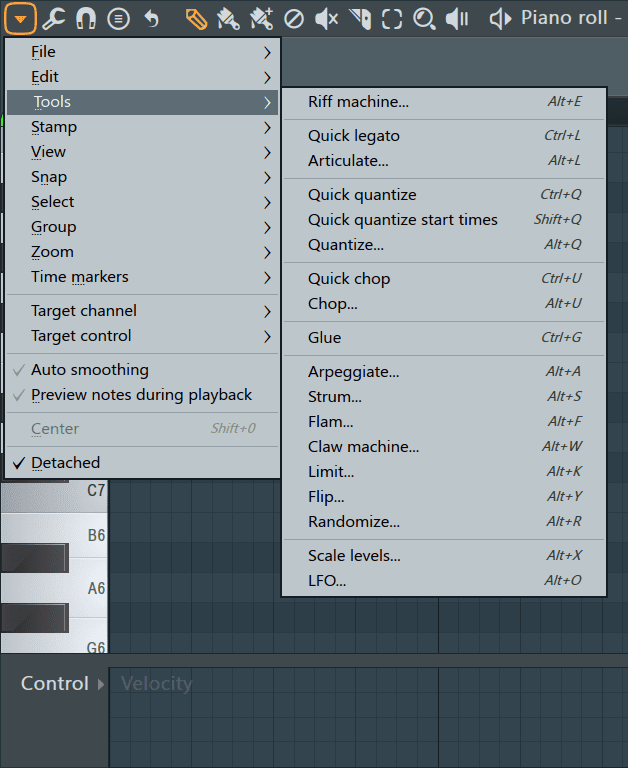
Riff Machine
The riff machine is a great way to drum up inspiration as it can create melodies, chord progressions, and arpeggios from the existing score on the piano roll or comes up with an entirely new score. The best way to understand this tool is load it and play around with the different steps and settings.
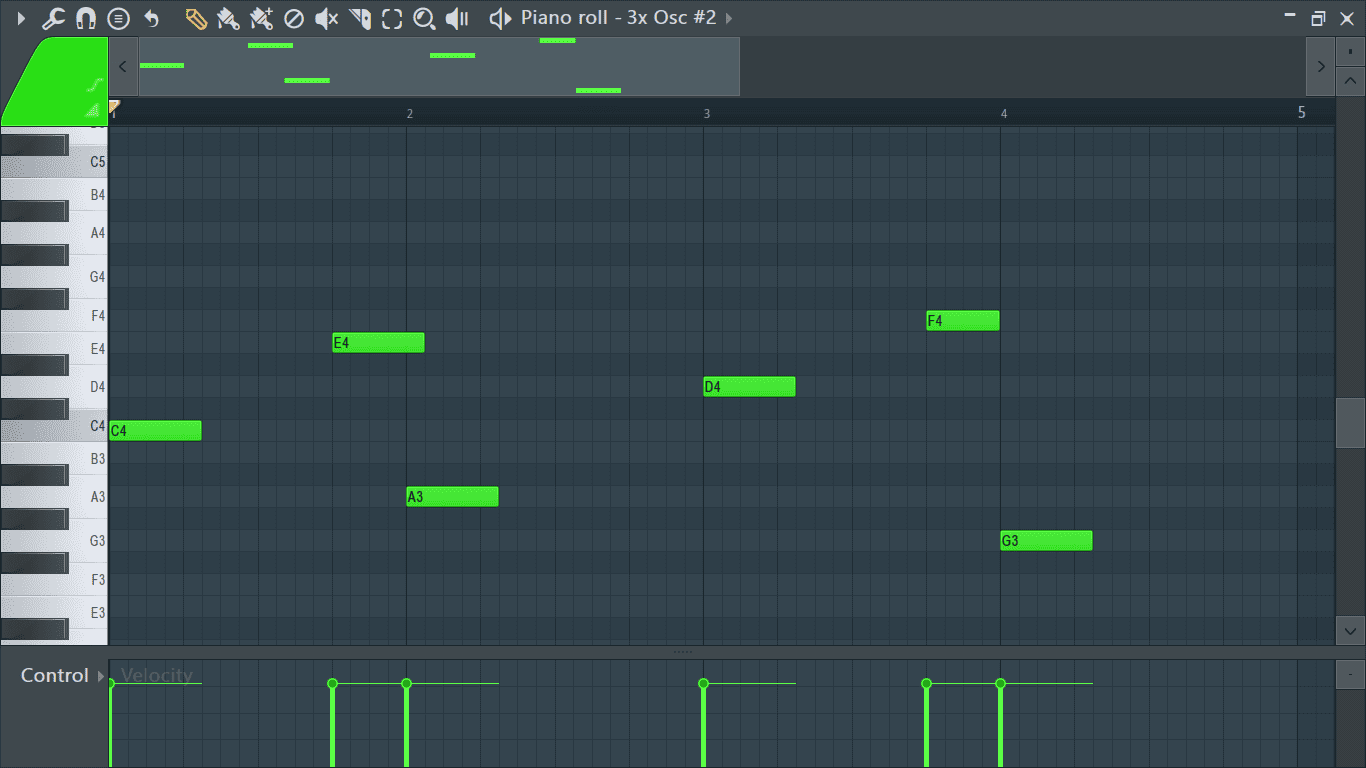
Quick Legato
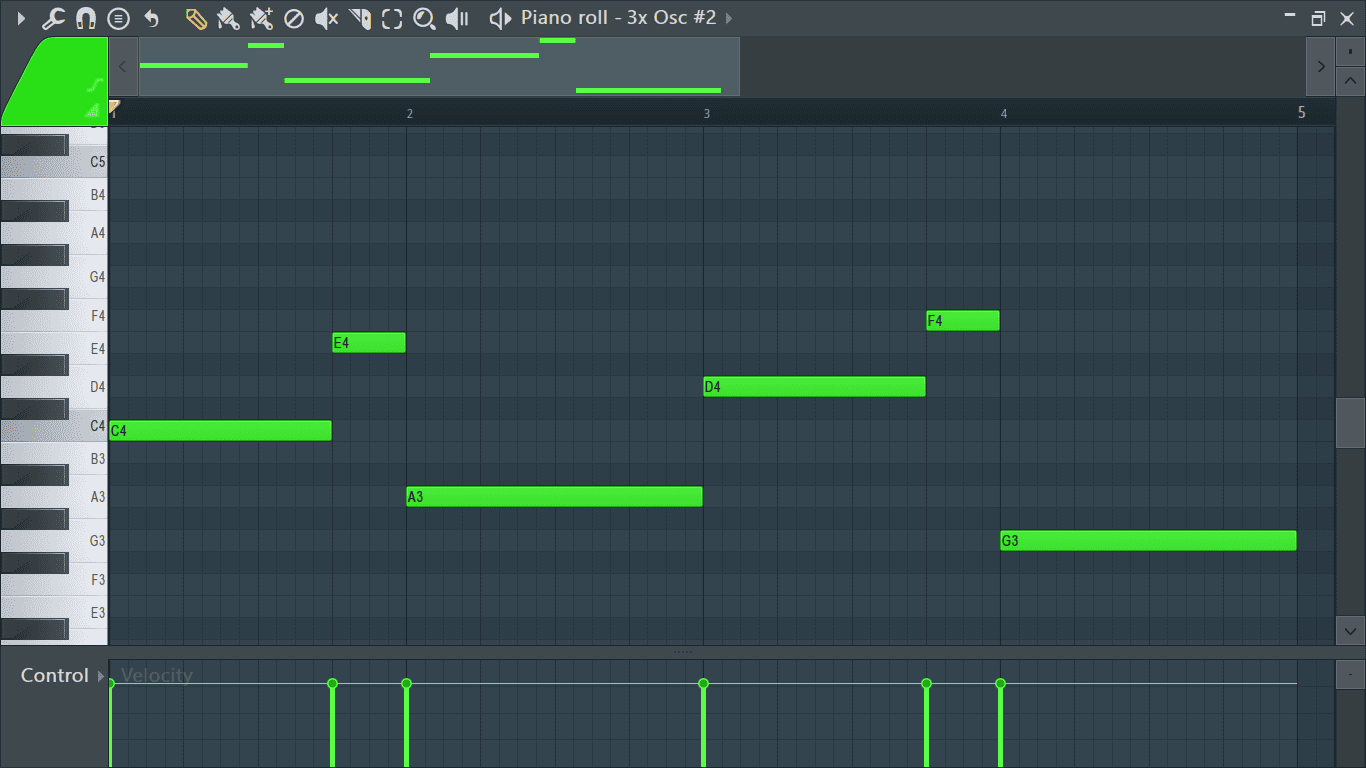
Legato lightly translates to ‘no space between notes’, so when engaged, it lengthens or shortens notes to end just before the next note begins.
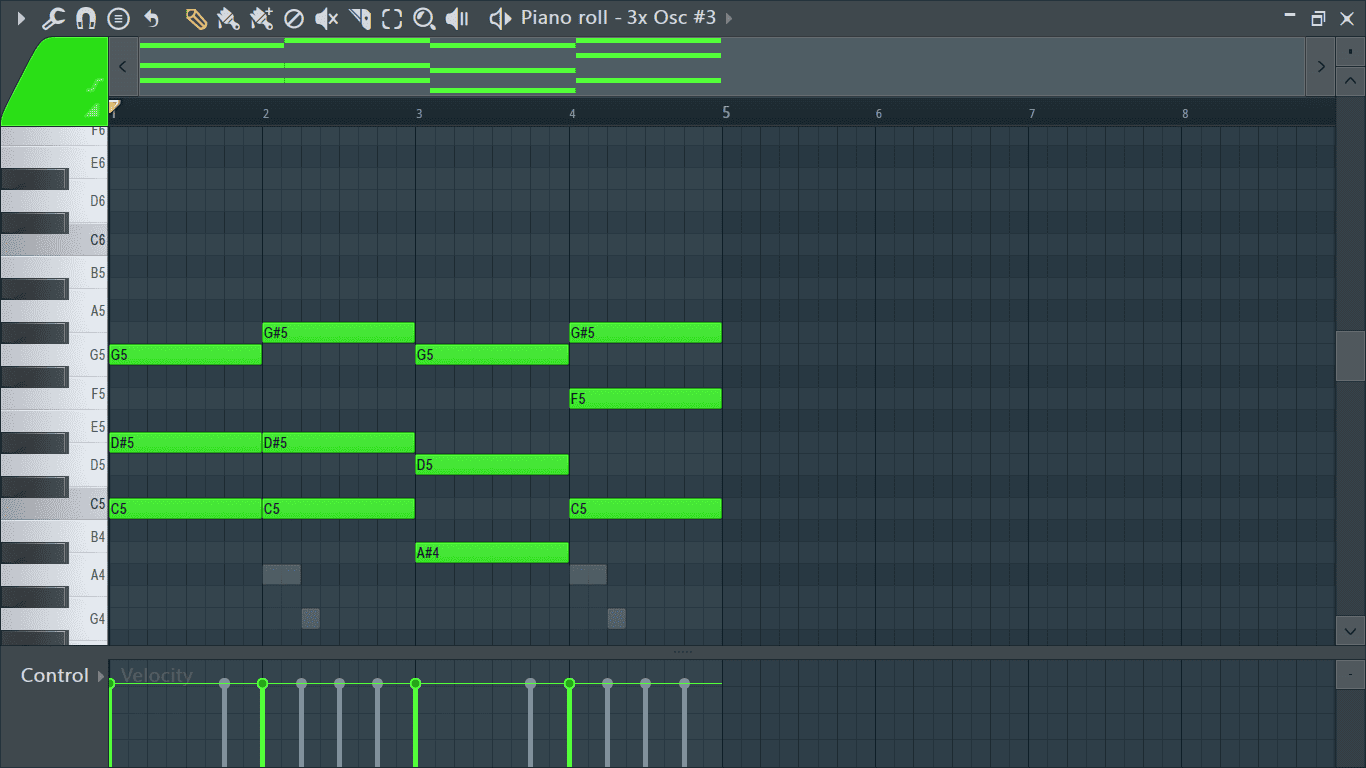
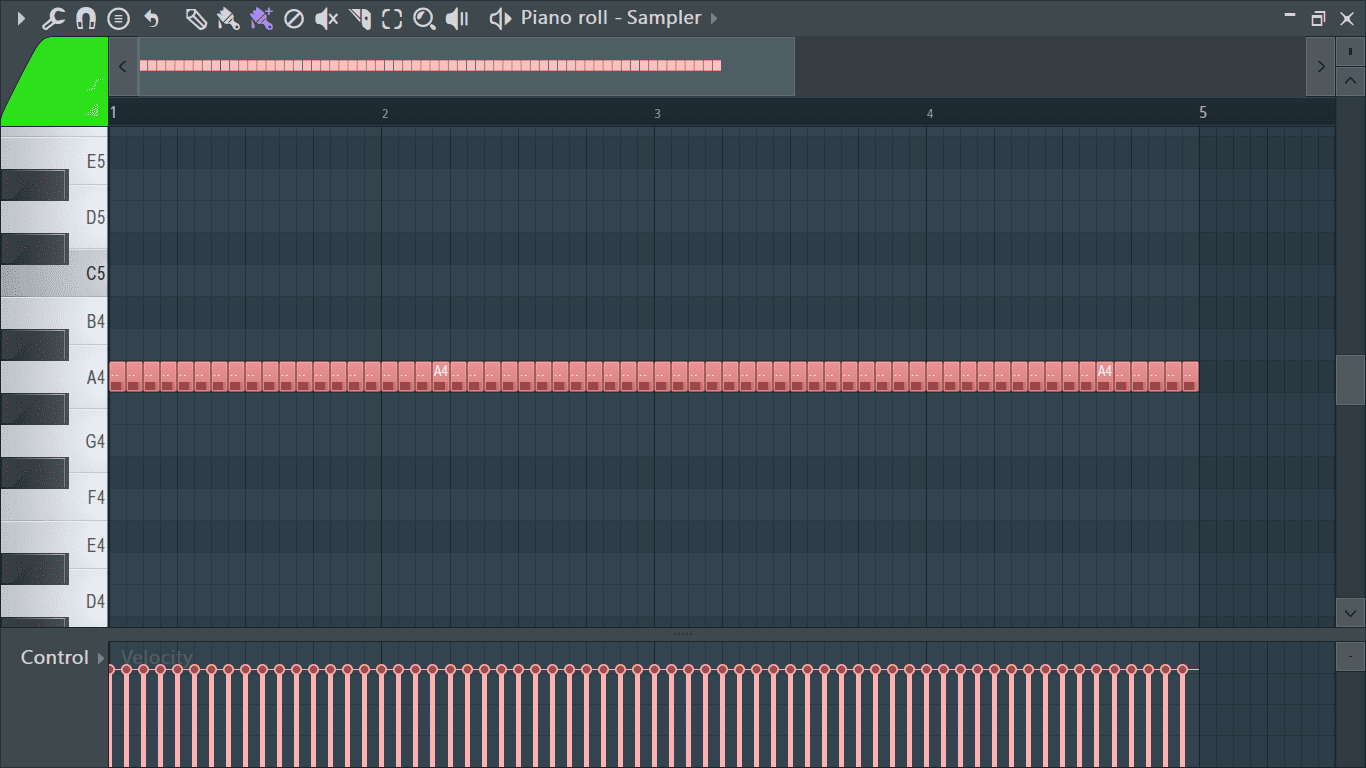
Before legato.
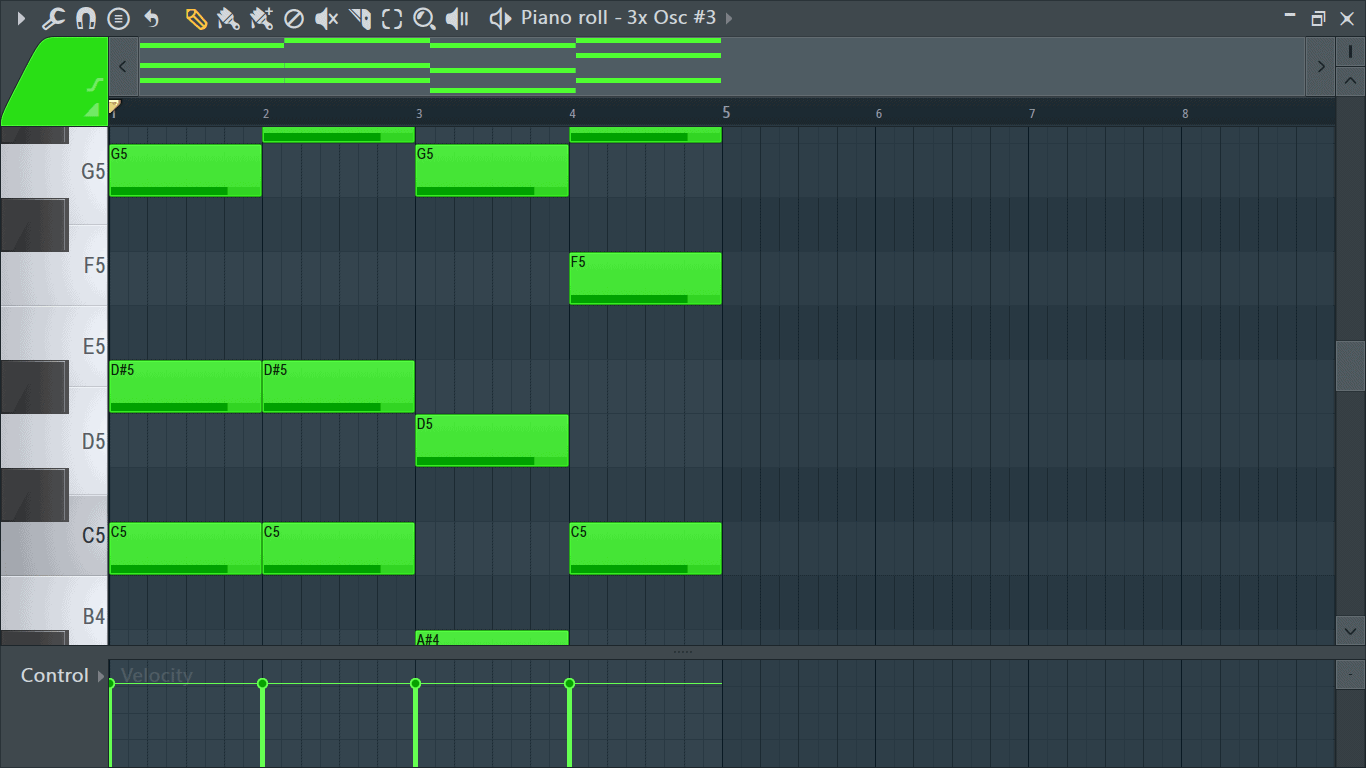
After legato.
Articulate
Use the articulate tool to change the length of notes on the piano roll and even chop chords. Its shortcut is Alt + L. Once you already have a melody or chord progression going, load the articulator tool by selecting it from the tool menu or by using the shortcut.
Quick Quantize
This will align the notes to the grid depending on the piano roll’s snap to grid setting.
Quick Quantize Start Times
This works the same as the previous quick quantize tool, however, it only affects the start of the note and leaves its length and end time.
Quantize
This gives you more options for applying quantization on the piano roll.
For a more in depth look into the three different types of quantization. Check out the ‘How to Quantize in FL Studio’ article.
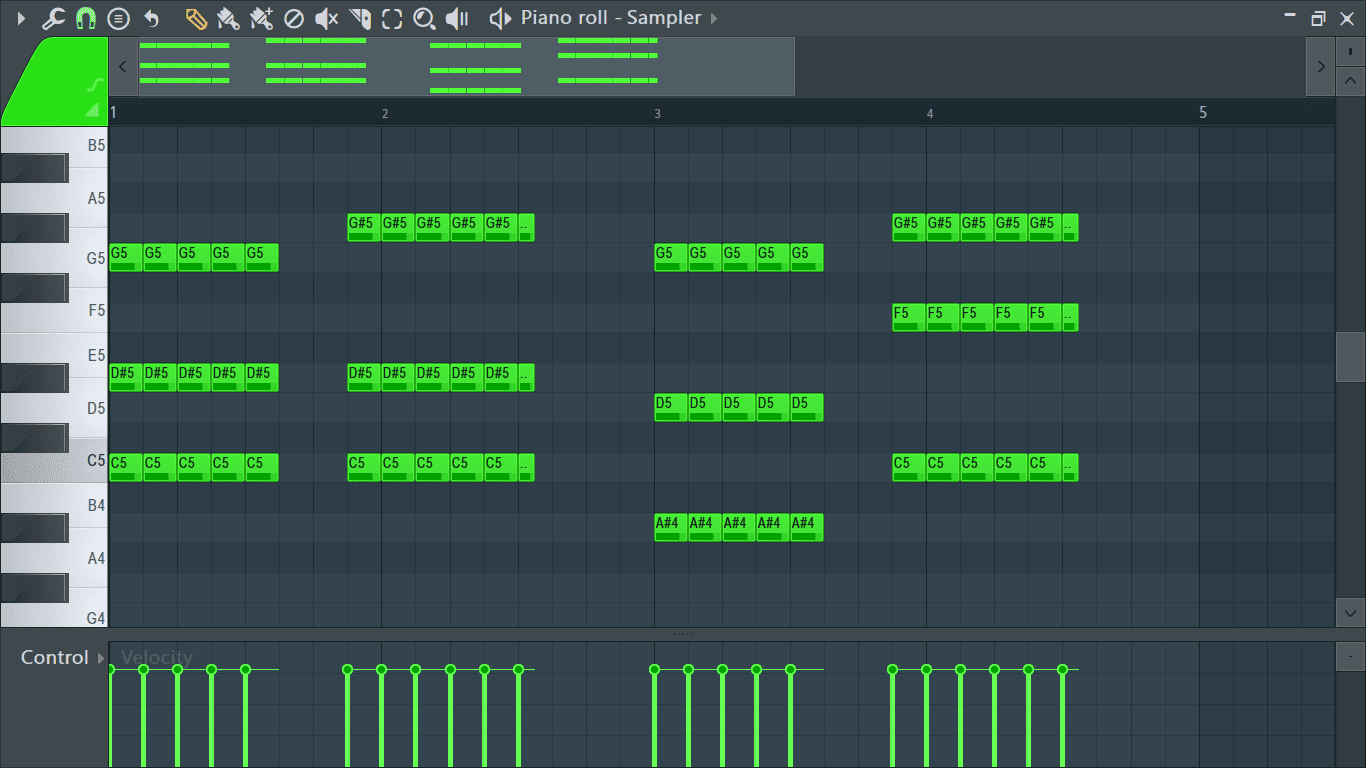
Quick Chop
Use this to automatically slice up the notes in the piano roll depending on the current snap to grid setting.
Before chop.
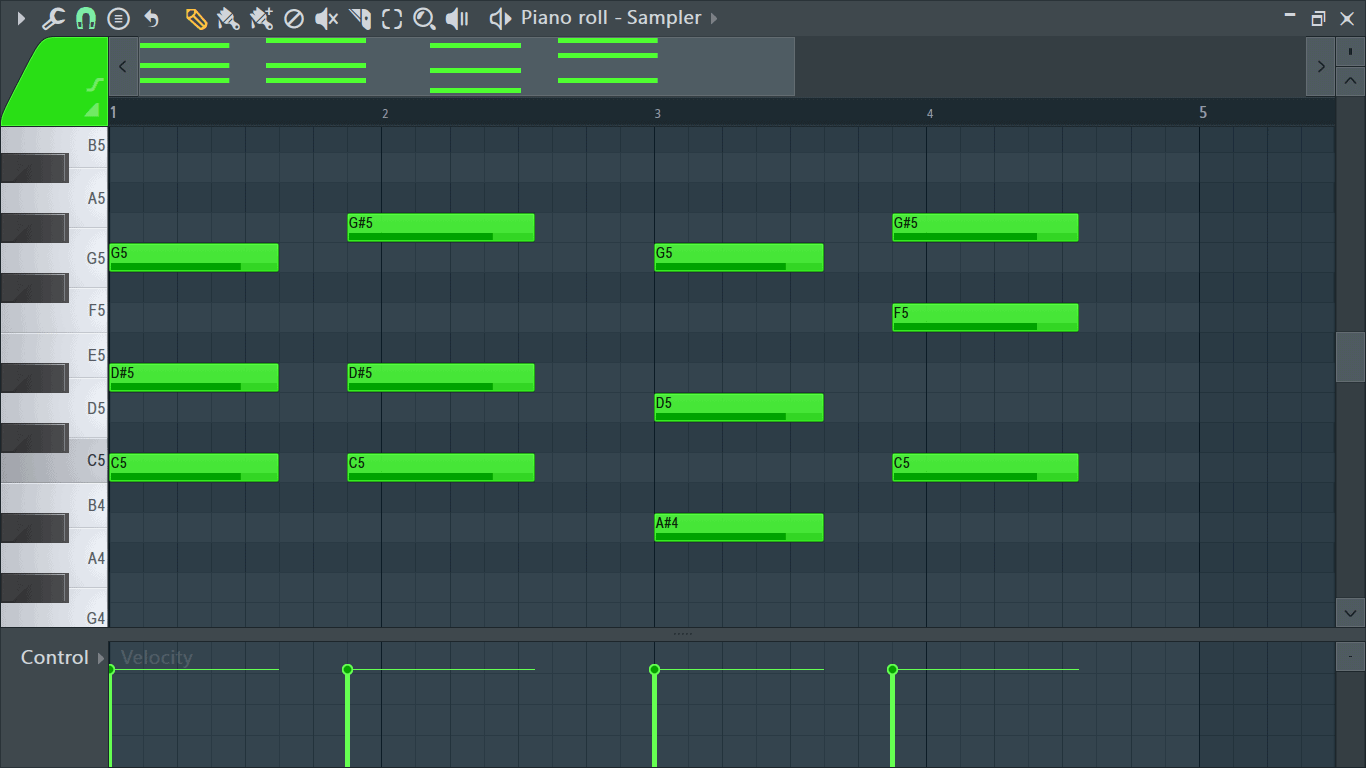
After chop.
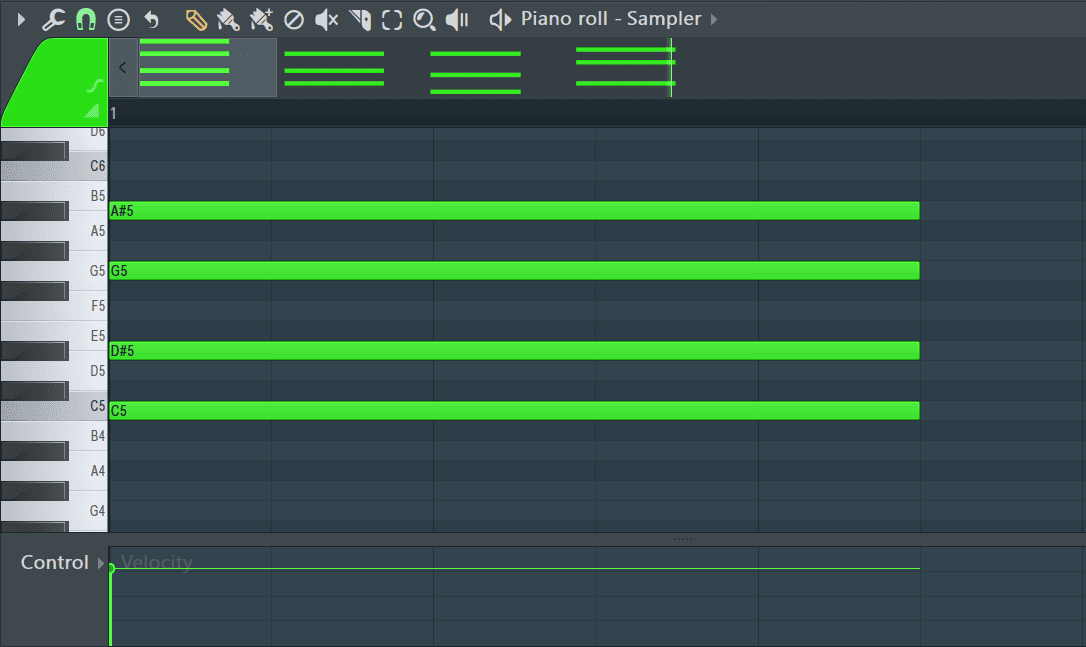
Chop
This functions the same as the quick chop tool, but offers more options and customization for the chops. Select the notes you want to chop before activating the tool.
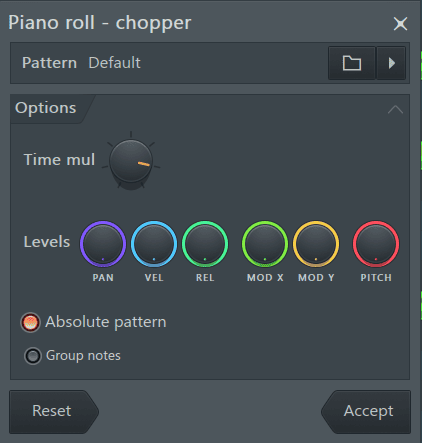
Use the time multiplication knob to increase or reduce the number of chops and experiment with the other knobs to see how they affect the notes.
Glue
This is the opposite of the two quick chop tools. It merges overlapping notes into one. The notes must be overlapping and on the same note for this to work.
Arpeggiate
This loads the piano roll arpeggiator. Play around with the settings on the arpeggiator to change the sequence of your notes and come up with new melodies.
Strum
The strum tool’s purpose is to replicate the ‘strumming’ effect created when playing chords on the guitar and other stringed instruments. It does so by changing the position, velocity, and length of the notes that make up a chord.
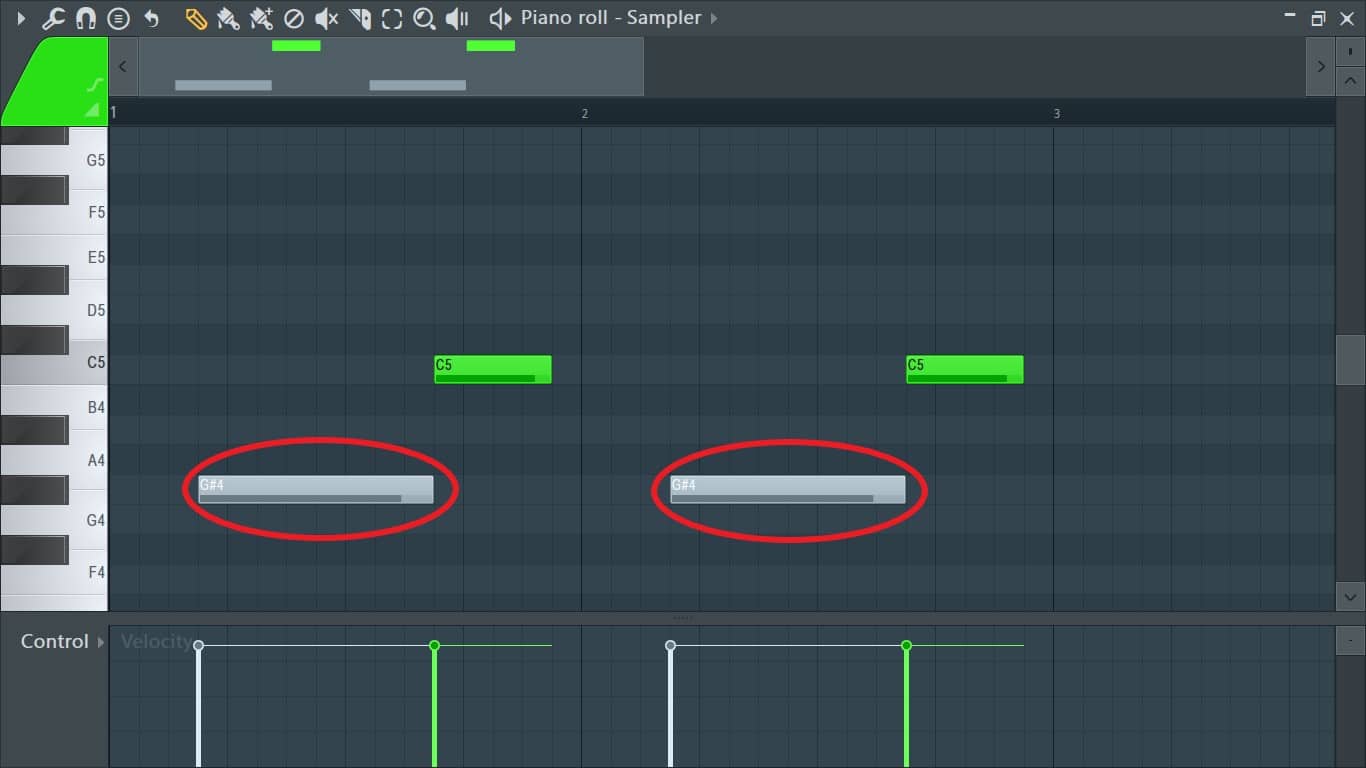
Chord before.
Chord after strumming.
Flam
Flams create a shorter and quieter note just right before the main to replicate the flaming technique used in drumming that makes a drum hit sound like it has a longer attack.
Before flam.

After flam.
Claw Machine
This tool adds, resizes and retimes notes. Use it to flip boring melodies into interesting ones and to create more complex drum patterns.
Limit
This tool transposes or sets the keyboard range for notes in the piano roll. Use it to also restrict notes to stay within the set scale or key.
Flip
This flips chords or melodies on the piano roll vertically or horizontally. It’s great for coming up with counter melodies and alternative chord progressions.
Randomize
Use this to randomize different note properties. It comes in handy for adding a realistic feel to a performance by randomizing the velocity and other properties of the notes.
Scale Levels
Use this to modify the note properties for the selected notes on the piano roll.
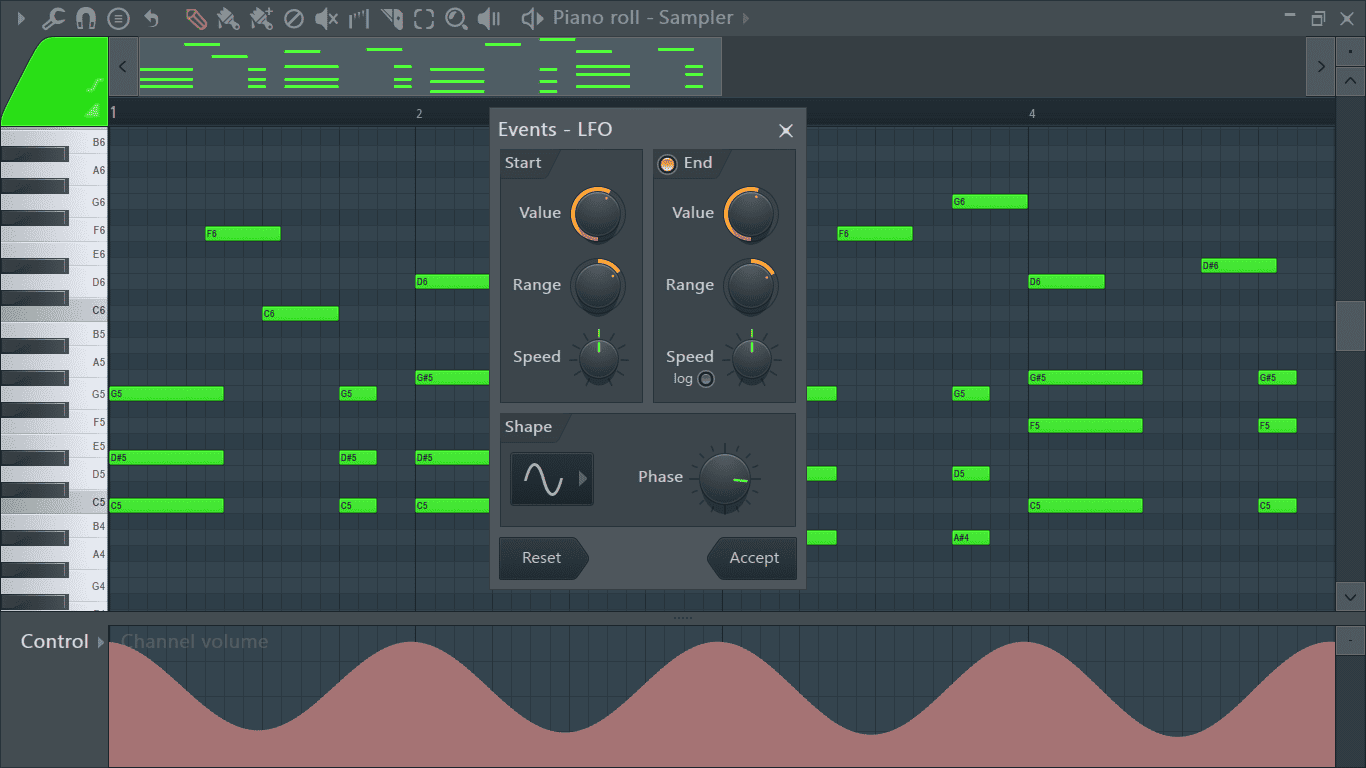
LFO Tool
This creates and edits low frequency oscillators for the channel controls.
Piano Roll Snap
The magnet icon represents the piano roll’s snap to grid setting. Changing it will change the piano roll’s grid intervals and thus affect quantization.
Click on it to view the different types of snap settings available.
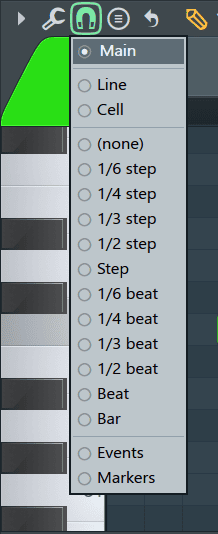
Choose the option that best suits your performance or track.
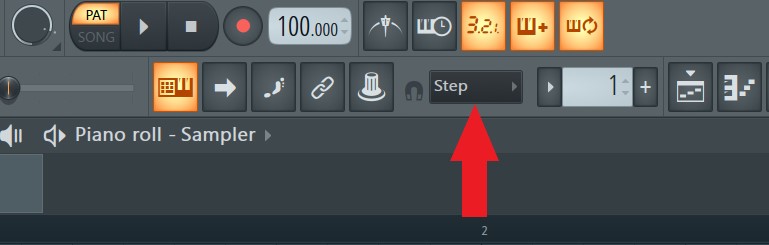
You can also use the main snap to grid settings found on the main toolbar. This setting affects both the grid on the piano roll and the playlist.
Stamp Tool
Clicking on the stamp tool will open a drop down menu containing different chords and scales.
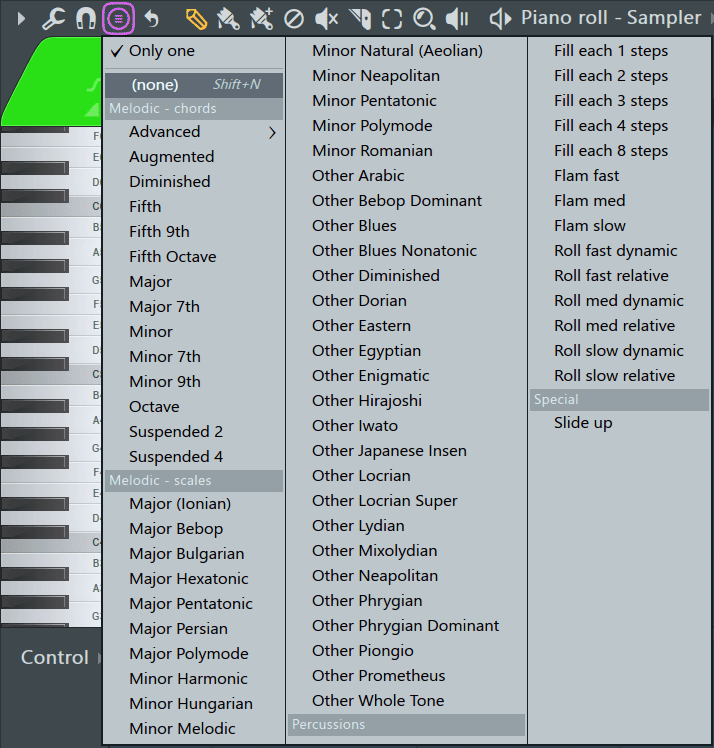
After you have selected a scale/chord, the next time you click on the piano roll the notes in the scale/chord will be drawn into the piano roll. Switch off ‘Only one’ at the top if you want to repeatedly stamp the scale/chord.
Loop Switch
This activates a marker that shows the extent of the loop set for the channel in the channel rack.
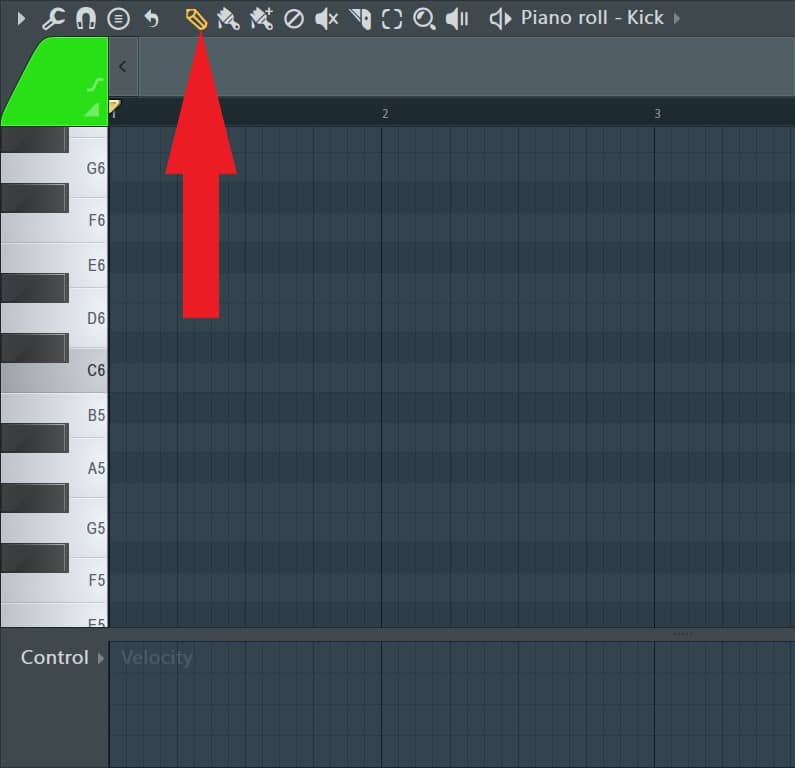
Draw
By default, the piano roll opens with draw as the tool in use.
It is characterized by a pencil-like icon on the toolbar that turns orange when activated.
The draw tool is responsible for most of the primary functions when dealing with notes in the piano roll. It will be your most used tool in the piano roll as you will find out with the right shortcuts, it can perform the duties of almost every other tool in this section.
Use it to lengthen and shorten notes by hovering the mouse cursor at the end of a note until it changes to a two sided arrow, then click and drag the end of the note to your preferred length.
Clicking on a note before drawing a new note into the piano roll will copy the note properties (length, velocity) of the clicked on note to any new notes drawn into the piano roll.
Paint

The paint tool is the first brush-like icon from the left and will turn light blue when activated.
It draws in multiple notes in a straight line when clicked and dragged on the piano roll.
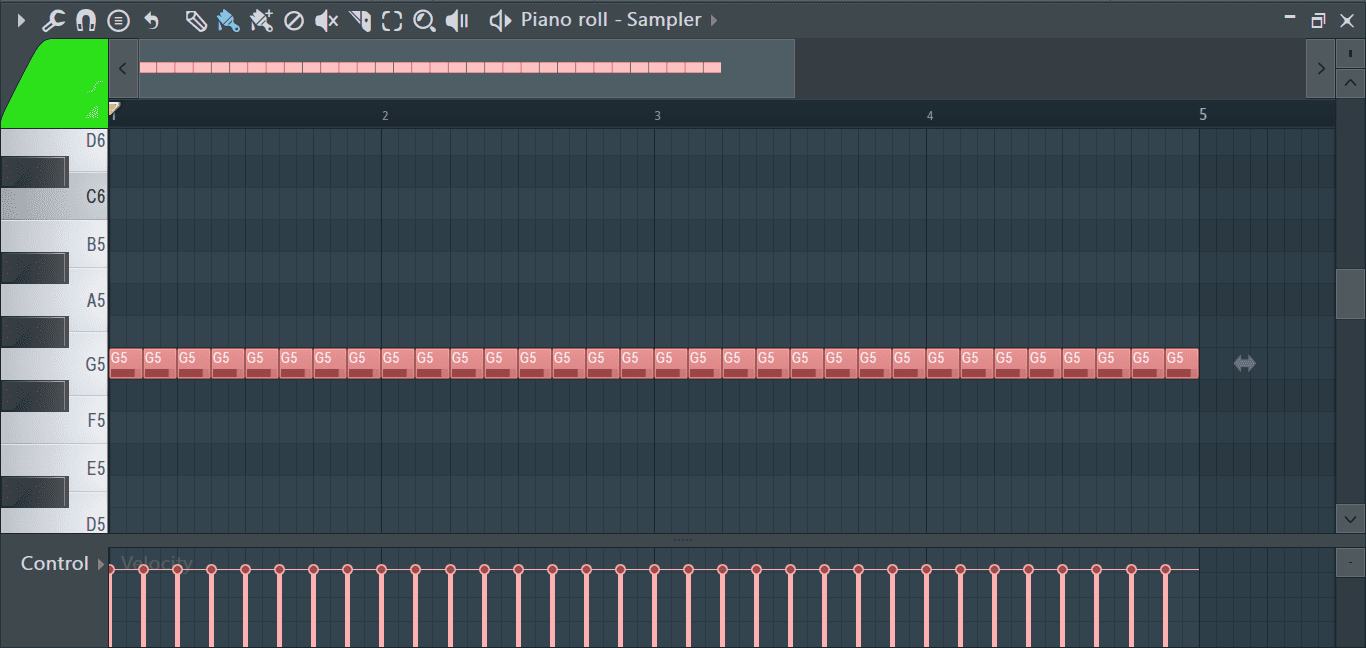
This is great for creating hi hat patterns and other very repetitive basslines and melodies.
Paint in Drum Sequencer Mode
This is the second brush-like icon among the tools that contains a cross. It will turn purple once activated.
This tool also draws multiple notes consecutively.
For this tool however, the length of the notes drawn depends on the set piano roll’s snap to grid settings.

It adds some extra functionality by allowing you to mute or unmute a note by clicking on it and right clicking on a note to delete it. A good application of this tool is creating hi hat rolls and snare or tom fills.
Delete
Use this tool to delete notes from the piano roll. For efficiency, this tool is activated if you right click when using the draw/pen tool.
Mute
This tool mutes notes in the piano roll. Mute notes by either clicking on a single note or clicking and dragging to mute multiple notes. Once notes are muted they will change color and turn to a lighter shade making them easy to distinguish.
Slice
This tool behaves like a knife and cuts through notes. It can slice through both single notes and multiple notes. Slicing using the right mouse button will automatically delete the sliced portions.
Select
Use this tool to make selections on the piano roll. To make a selection, click on a single note or click and drag over multiple notes to select them.
Alternatively, hold down Shift to make multiple selections and deselections.
Zoom to Selection
Dragging the mouse over an area while this tool is selected will fit the area to the size of the screen.
Playback
This will play the selected notes you click on.
Play/Pause
Acts as the play/pause button for the piano roll.
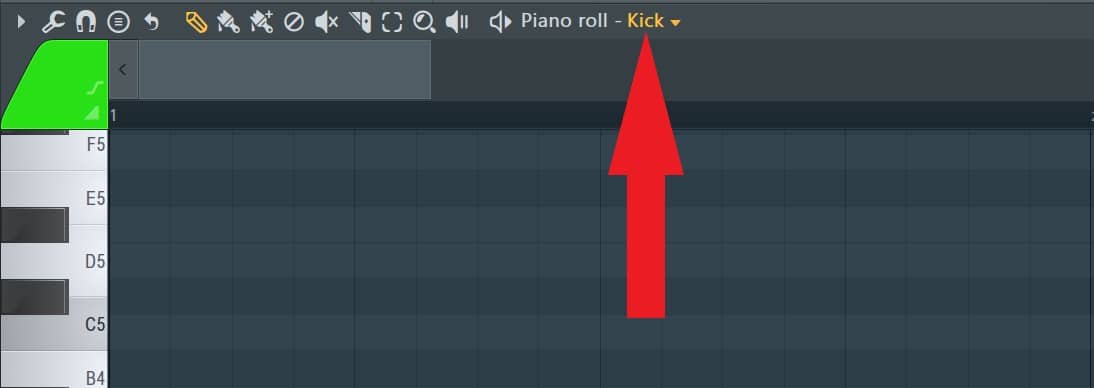
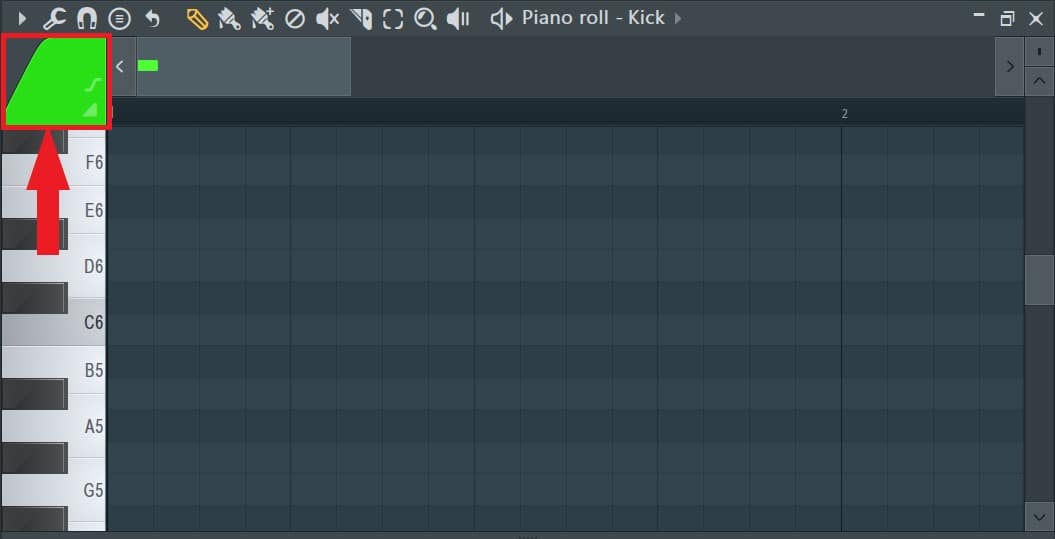
Target Channel
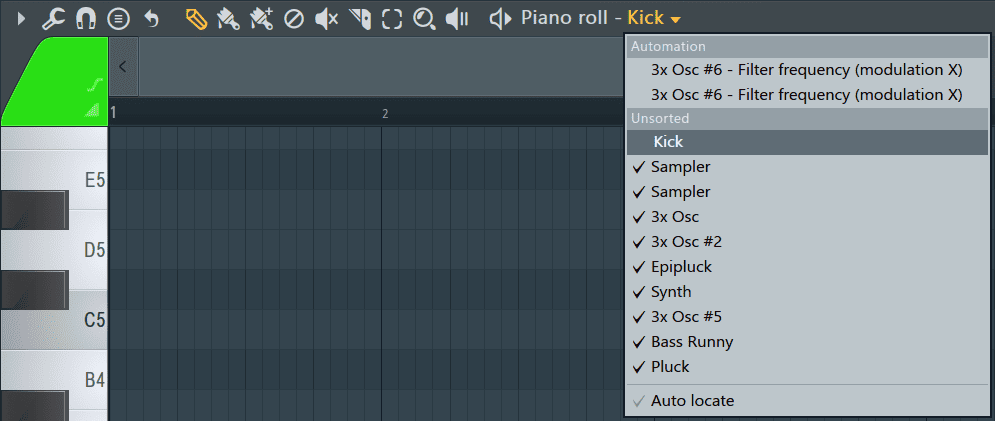
The target channel is located right next to the words ‘Piano roll’ on the toolbar and contains the name of the specific VST instrument or channel that is going to be triggered by the notes on the piano roll. In my case, the target channel is labelled ‘Kick’.
Switch between different channel’s piano rolls by clicking on the arrow at the end of the channel’s name to open up a drop down menu and select your desired instance of piano roll from the options available.
Legato, Portamento, & Note colors
Use the colored section located on the top left to change note colors and turn on or off legato and portamento notes.
For more information on how these work check out ‘How to Use Slide Notes in FL Studio’.
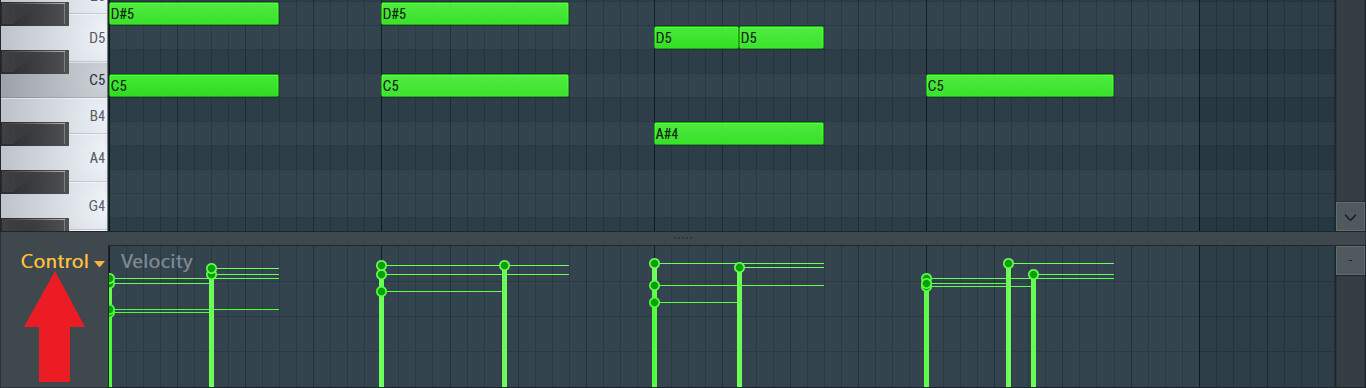
Event Editor
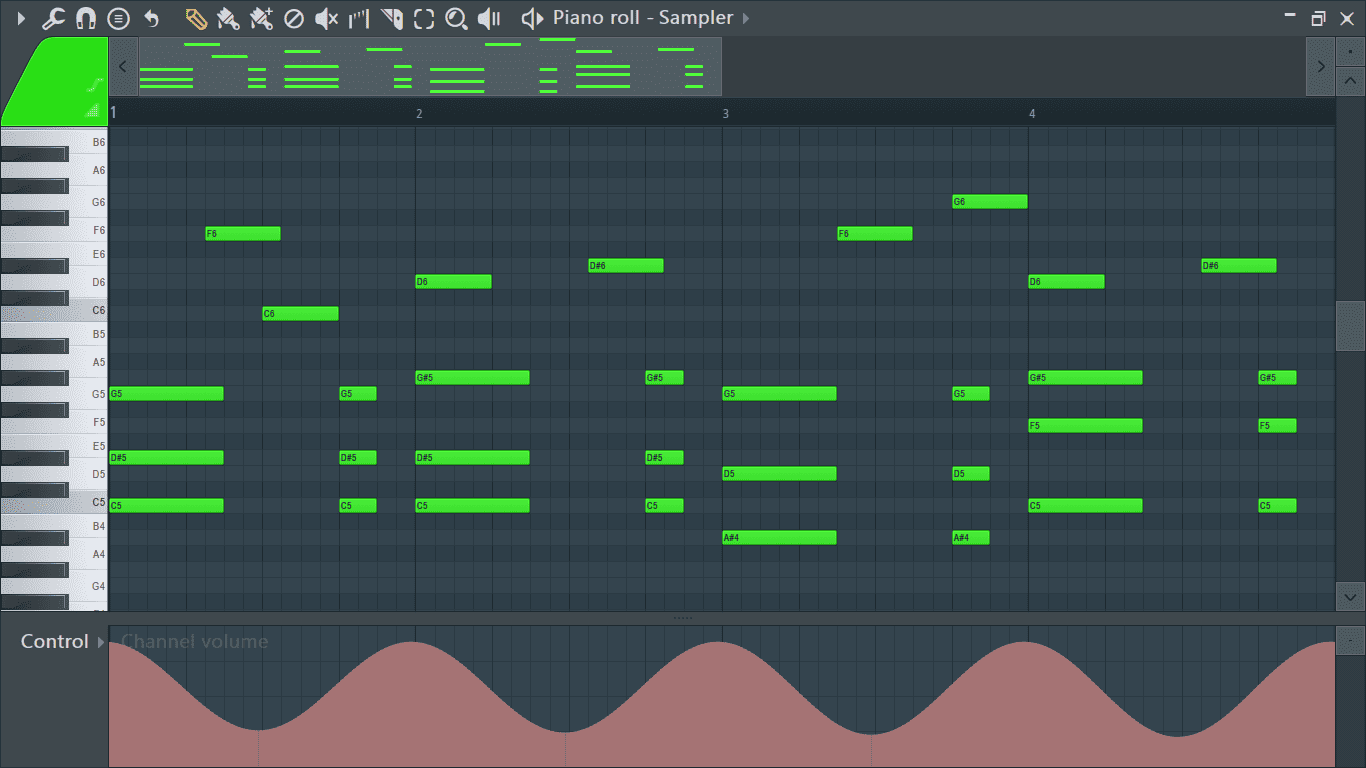
The event editor allows us to edit note properties and events on the piano roll. This section is located at the bottom of the piano roll.
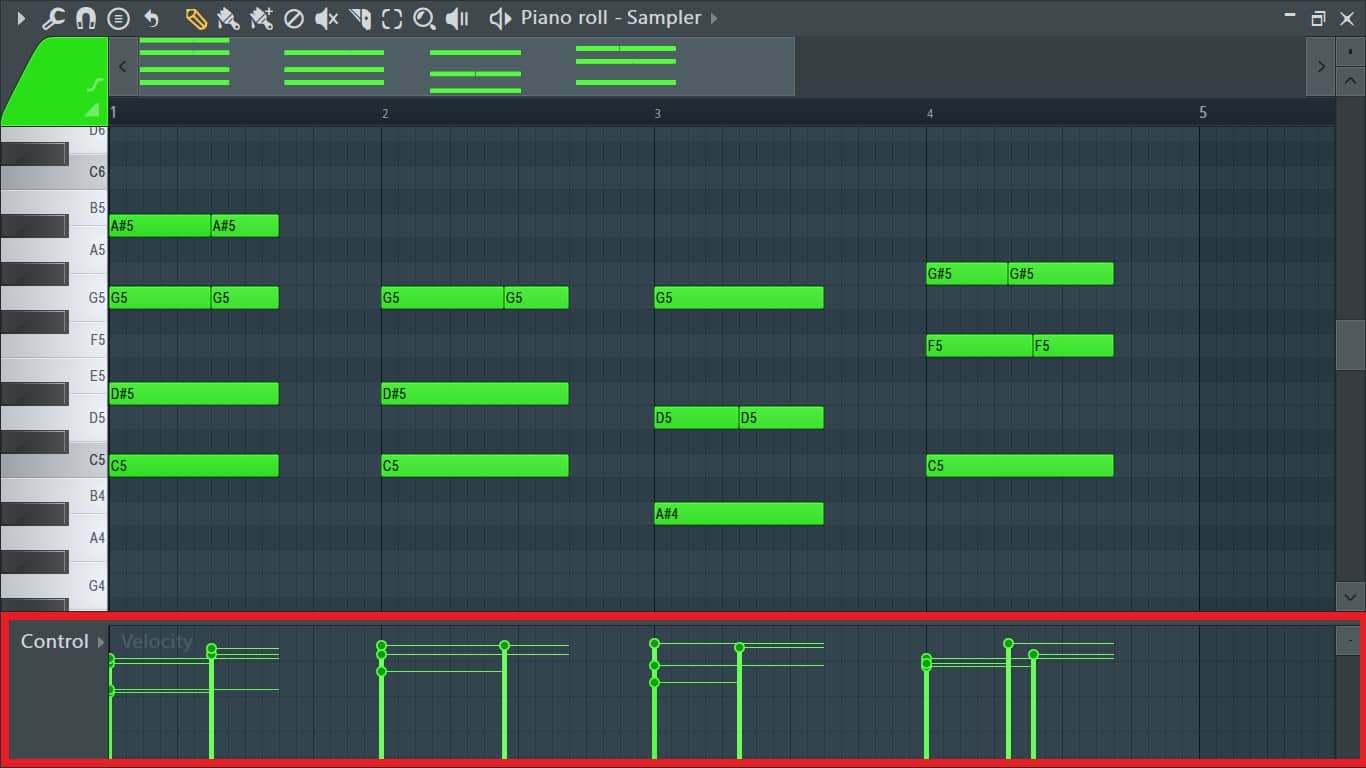
Click on the word ‘Control’ to switch between different note properties and channel controls.
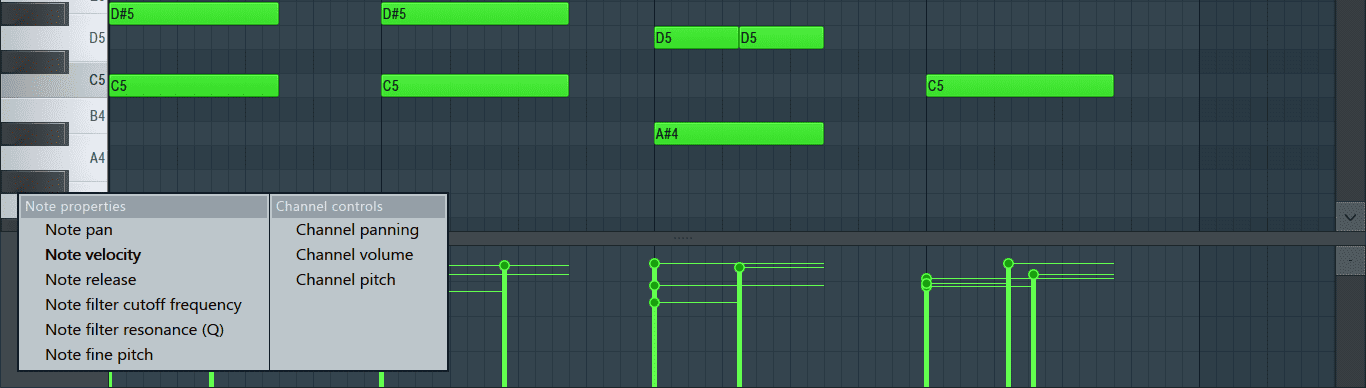
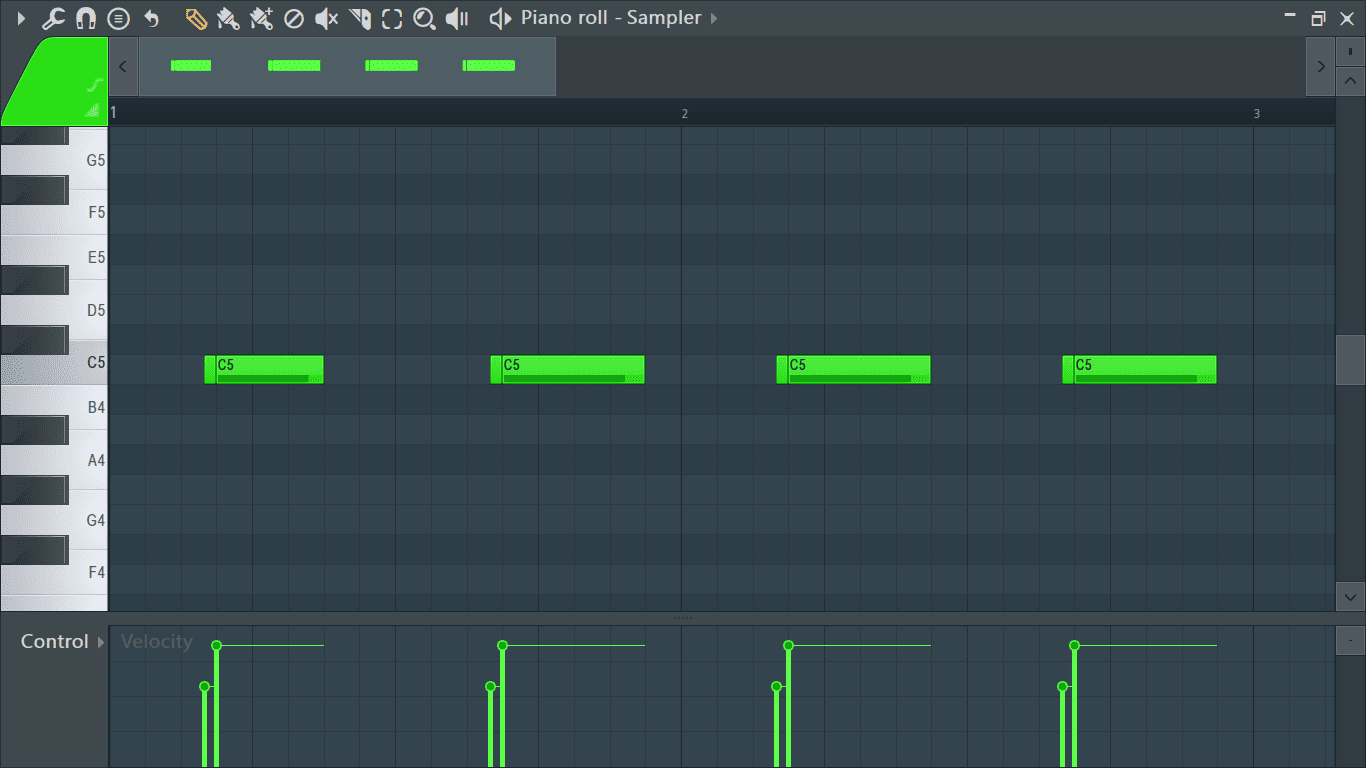
It’s set to velocity by default which is what you’ll be using mostly to control how soft or how hard a note is struck.
You can also double click on a note to edit its individual note properties through the note properties panel.
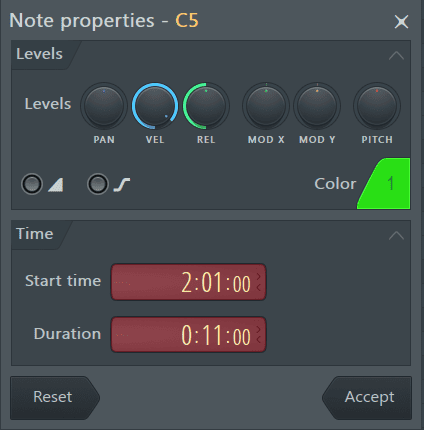
Use the channel controls to automate the parameters they’re linked to.
Conclusion
One thing I would strongly advise is learning the important shortcuts as this will optimize your workflow a ton. To get the hang of the piano roll, practice as much as you can and learn what works best for you. As always, have fun experimenting!

- How to Add Drum Kits to FL Studio - September 18, 2023
- Best Free Drum Kits for FL Studio - September 18, 2023
- How to Create Drum Patterns & Loops in FL Studio - September 12, 2023


![How to Sidechain in FL Studio [Complete Guide]](https://ProRec.com/wp-content/uploads/2022/08/image-260-180x180.png "How to Sidechain in FL Studio [Complete Guide]")
