MIDI stands for Musical Instrument Digital Interface. Created in the early 80s by some of the leading synthesizer houses, it was meant to act as a universal musical language that could communicate all the aspects of a musical performance digitally. MIDI information involves notes and changes made to parameters over time that are presented as automations.
Fast forward to today, MIDI largely shapes how we create, write, and compose music. As a music producer, knowing how to work with MIDI is a must-have skill, that can be very rewarding if you take the time to learn it.
In this article, we’re going to go over how you can record MIDI in FL Studio.
Preparing to Record
Before you begin recording, there are a couple of measures you need to take.
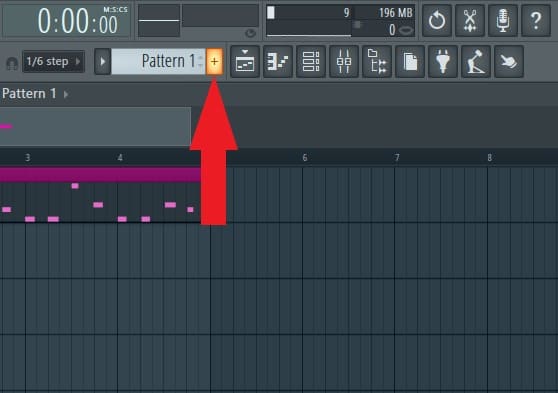
Step 1: Add a new pattern to record to. Do this by clicking the button with a plus (+) icon located right next to the pattern selector.
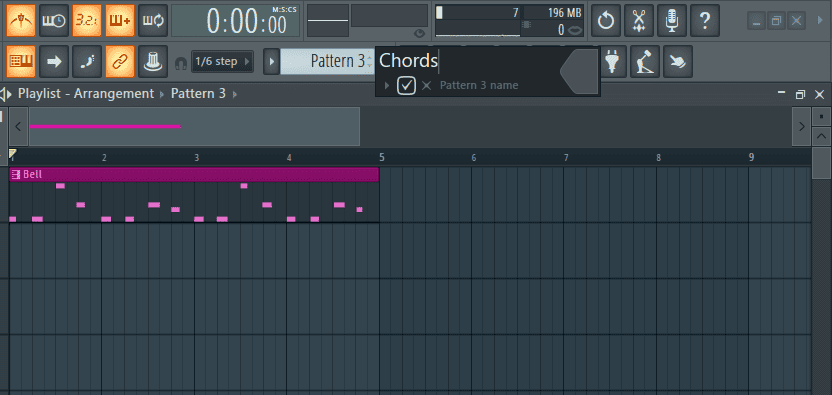
Step 2: You will be prompted to name the new pattern.
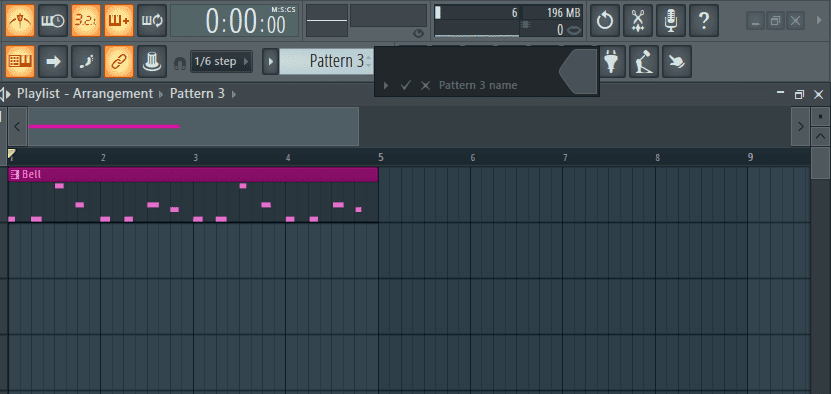
Name it and hit enter or click on the checkmark (✓) icon at the bottom of the dialogue box.
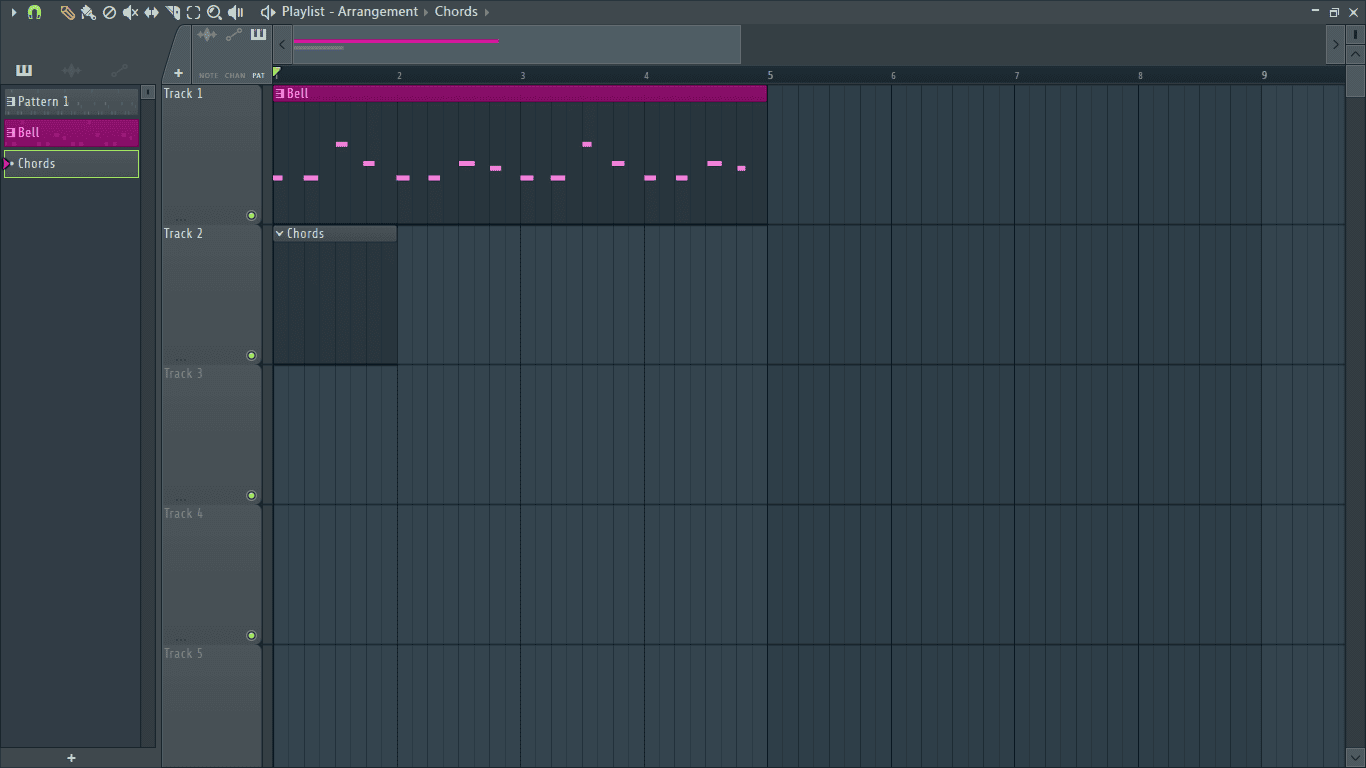
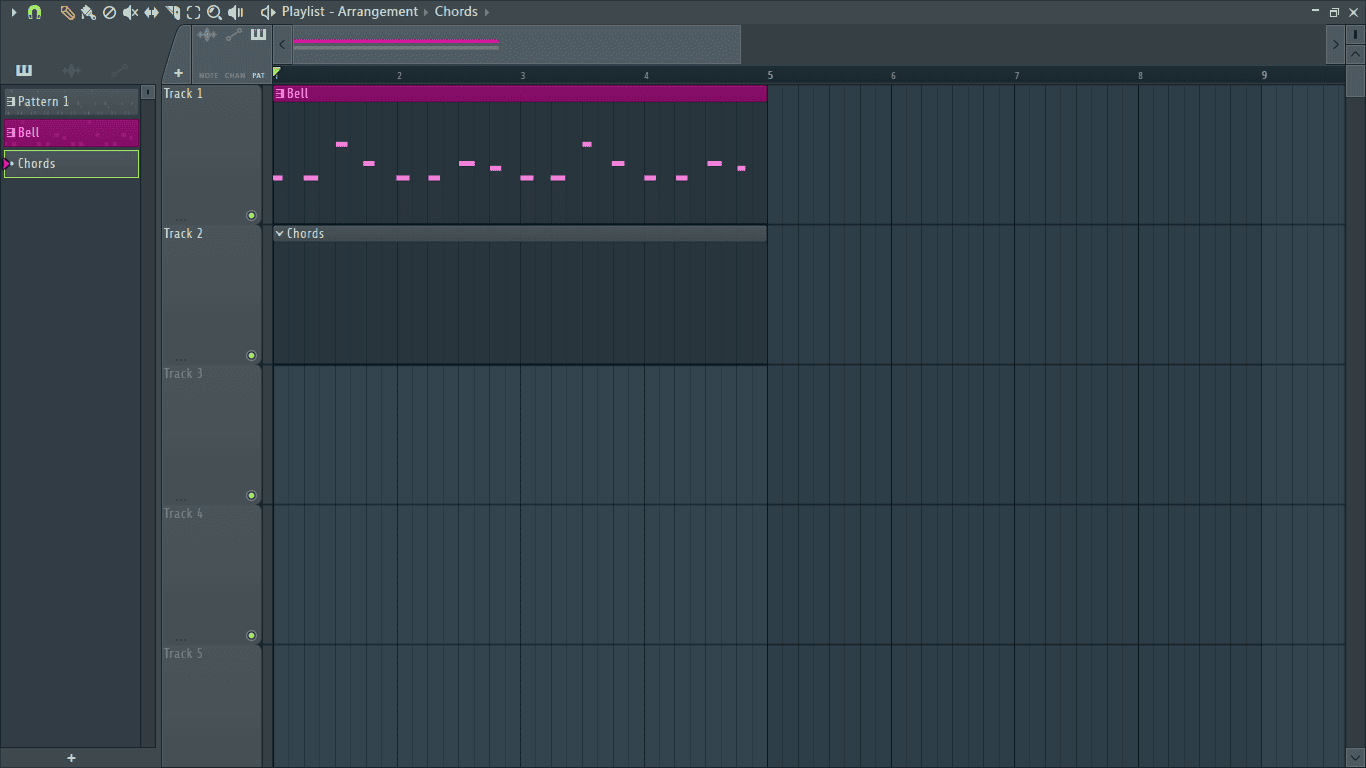
Step 3: Add the new pattern to the playlist by clicking it in at the starting point of any unused track.
Step 4: Next, hover your mouse cursor over the end of the pattern until it turns to a two sided arrow and click and drag until it covers the extent you want to record.
Step 5: Open the channel rack by clicking on its icon in the main toolbar or by pressing F6 on your keyboard.
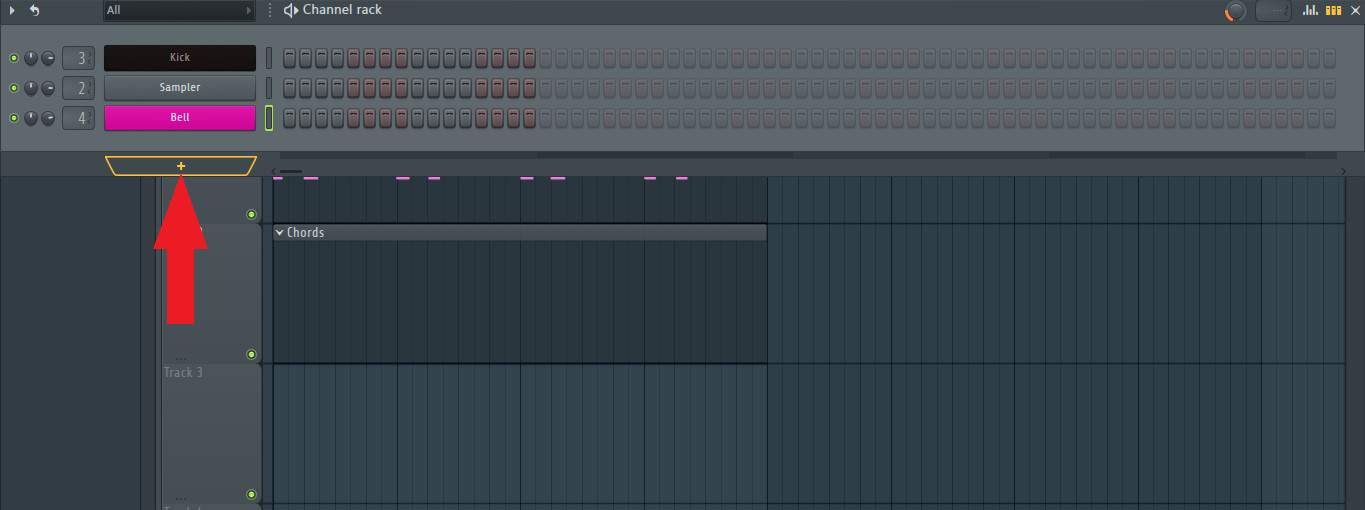
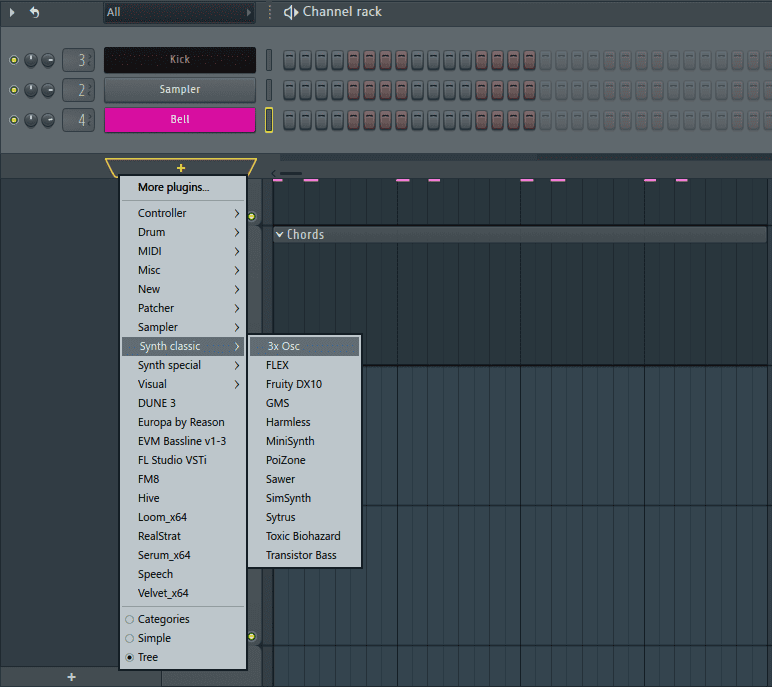
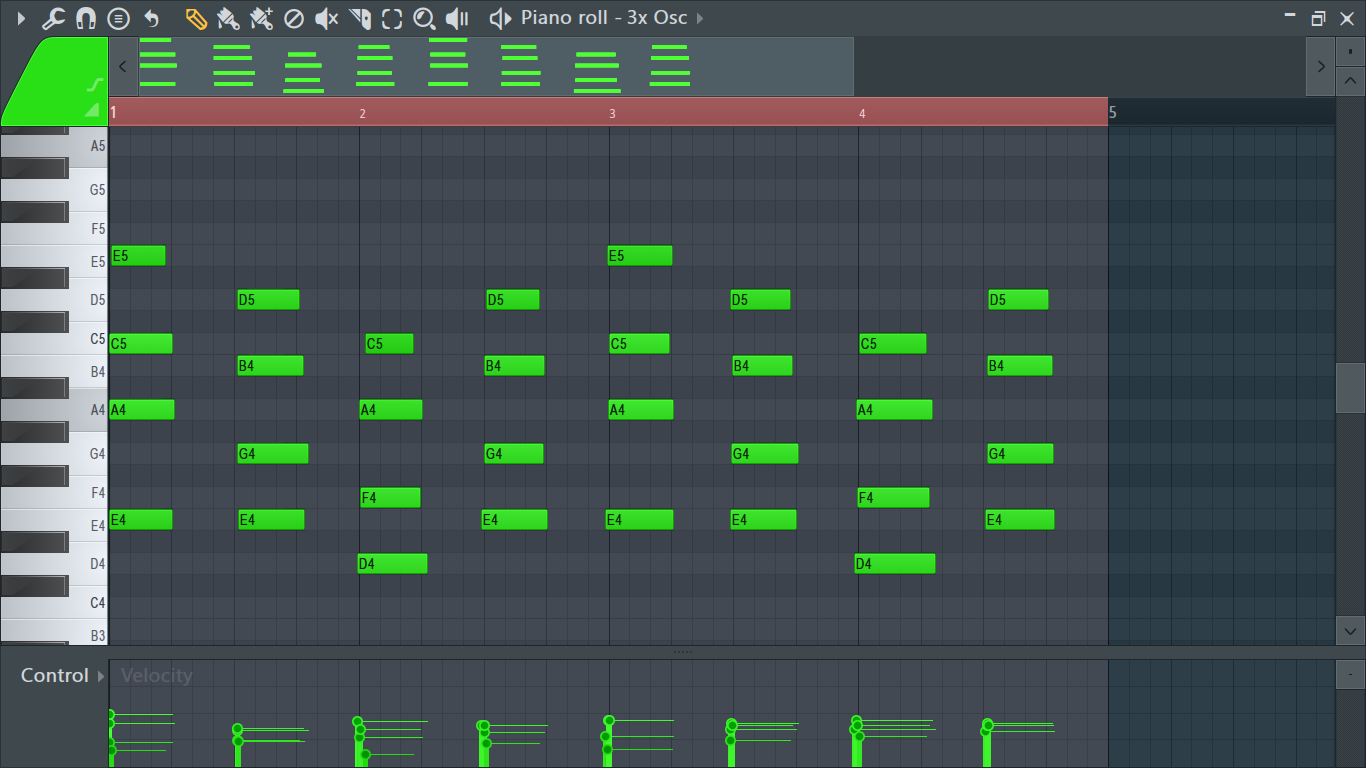
Step 6: Once the channel rack is open, click on the ‘+’ button at the bottom left of the channel rack to add a new channel and select a VST instrument to open.
In my case, I’ll select 3x Osc.
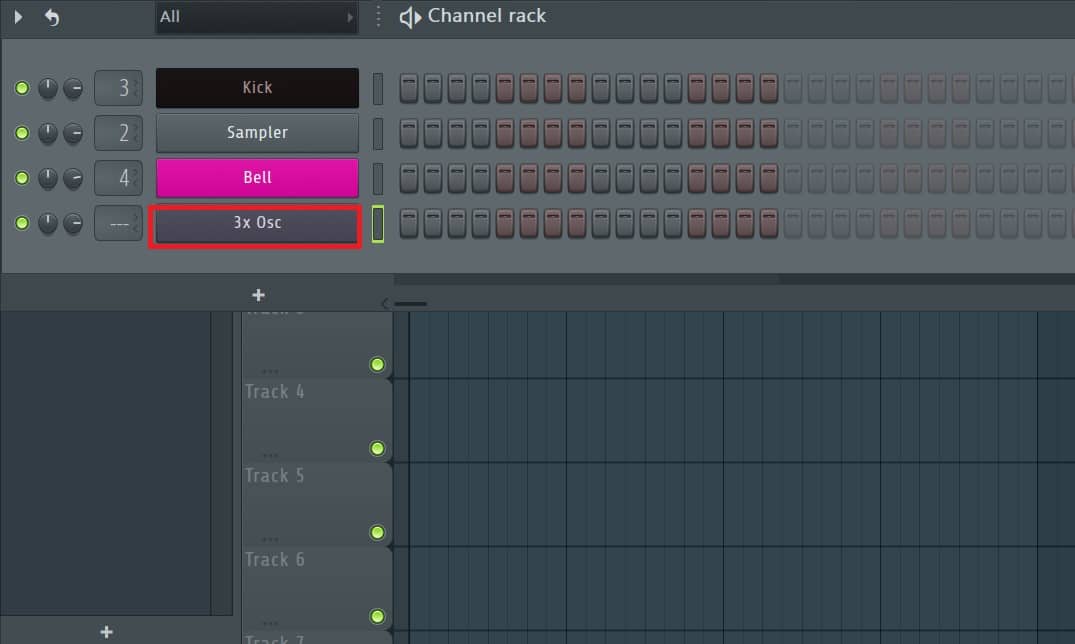
The plug-in will be opened in a new channel on the channel rack.
The MIDI Recording Process
Now that we’re set, let’s go over the recording process.
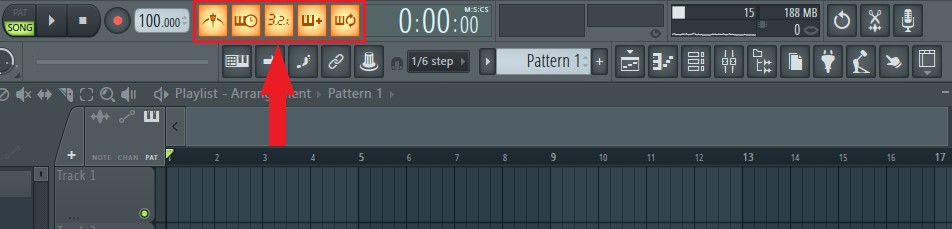
Step 1: First, make sure you’re recording to the right channel. Do this by opening the channel rack. Right next to the box containing the names of the various VST instruments and plug-ins are smaller boxes. (Highlighted in red below.)
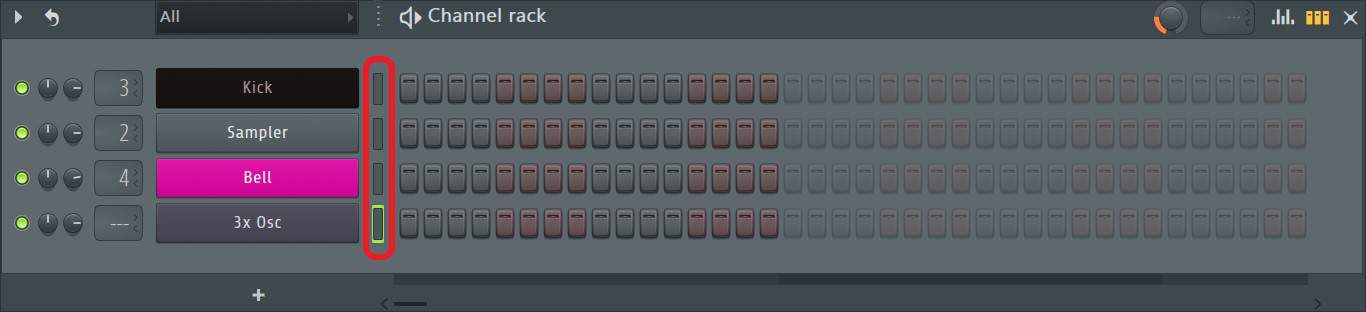
These small boxes are the channel selectors and are used to select which channel will receive the incoming MIDI input.
If a channel is selected, its channel selector will have a green glow around it.

Note: Before recording, always make sure the channel selector of the channel you want to record to is selected, otherwise, the MIDI information recorded will go to a different channel.
Step 2: Next, ensure the MIDI keyboard/controller is set up and ready to record. To learn how to set up a MIDI controller, check out the ‘FL Studio MIDI Keyboard Not Working [FIXED]’ article. If the device is active, an orange icon will be displayed in the input box whenever MIDI signals are detected.
If you’re using the typing keyboard to record, then make sure it is turned on. Do this by clicking on the ‘Typing keyboard to piano’ icon in the toolbar. (It will turn orange once activated and stay so until it is turned off.)
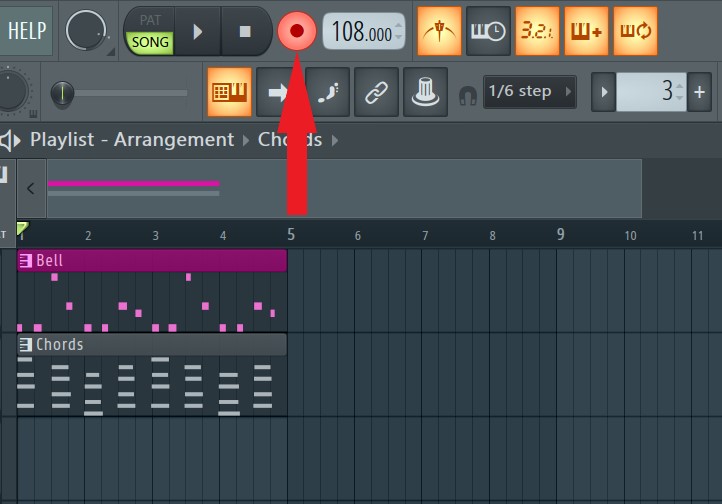
Step 3: Once ready to record, hit the record button located on the toolbar. (It will turn red when activated.)

This will bring up a window containing different recording options. Since we’re only recording MIDI, select ‘Notes and automation’.

Once you’re done press play to start recording.
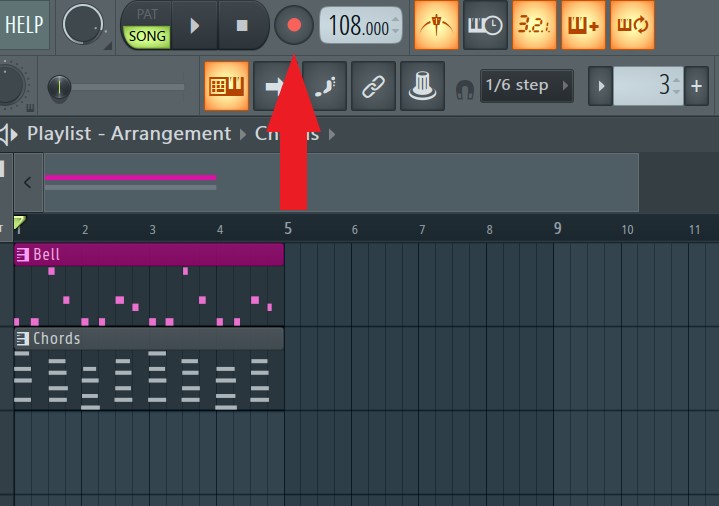
Step 4: When you’re done recording, press the record button again to turn off recording. (Make sure it is not red, otherwise, it is still active.)
Recording turned off.
Step 5: To view the recorded MIDI information, double click anywhere on the pattern clip to go to its piano roll.
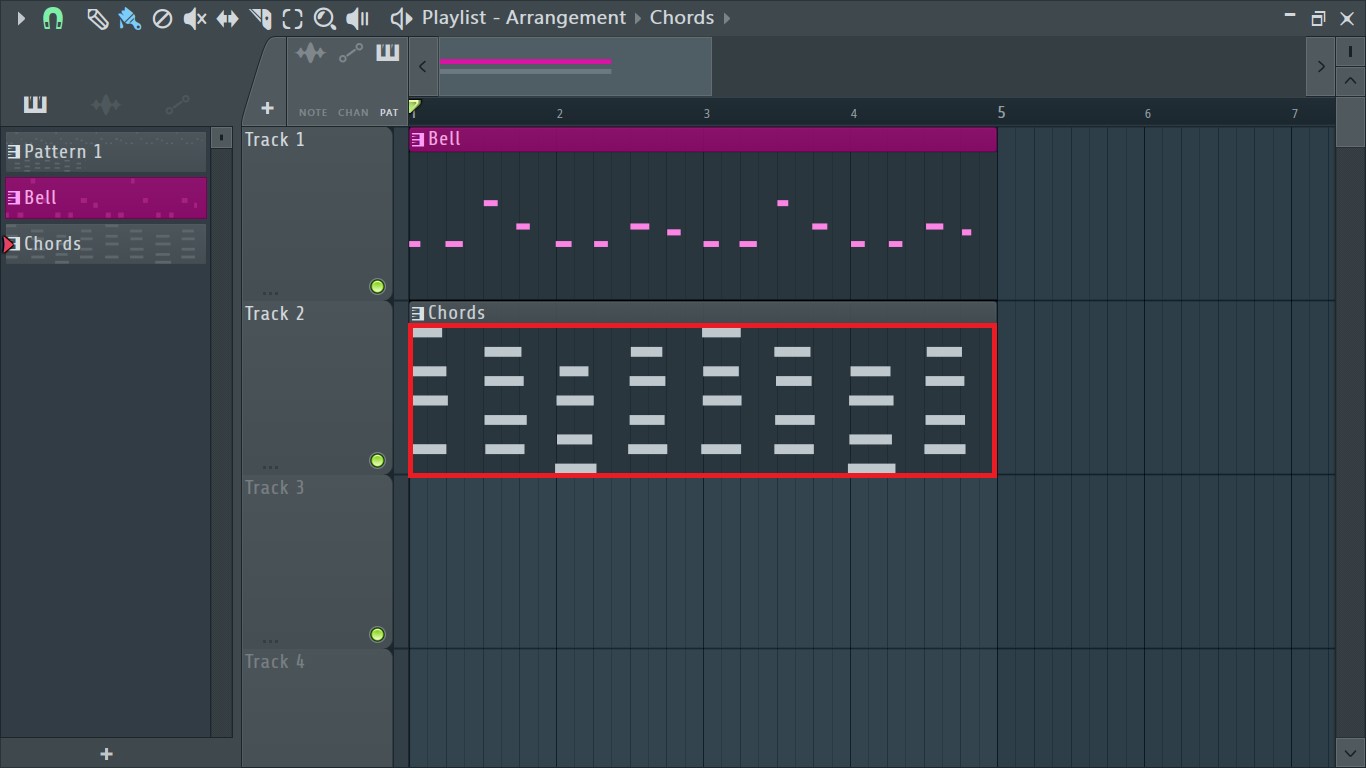
This is where the recorded MIDI information will be displayed. The piano roll is the main way to edit, manipulate, and arrange MIDI notes and other MIDI information in FL Studio.
Recording Settings
Although the recording process is quite straight forward, there are a couple of extra controls put in place to make the recording process even more efficient and personalized to you and your workflow. These settings can be found in the toolbar on the right of the tempo display.
Metronome
Tap on the icon above to activate the metronome to guide your timing when recording.
Wait for input to start playing

When turned on, recording will start the moment you press a note on your keyboard.
Countdown before recording
Turn this on if you want a metronome pre-count before you begin recording.
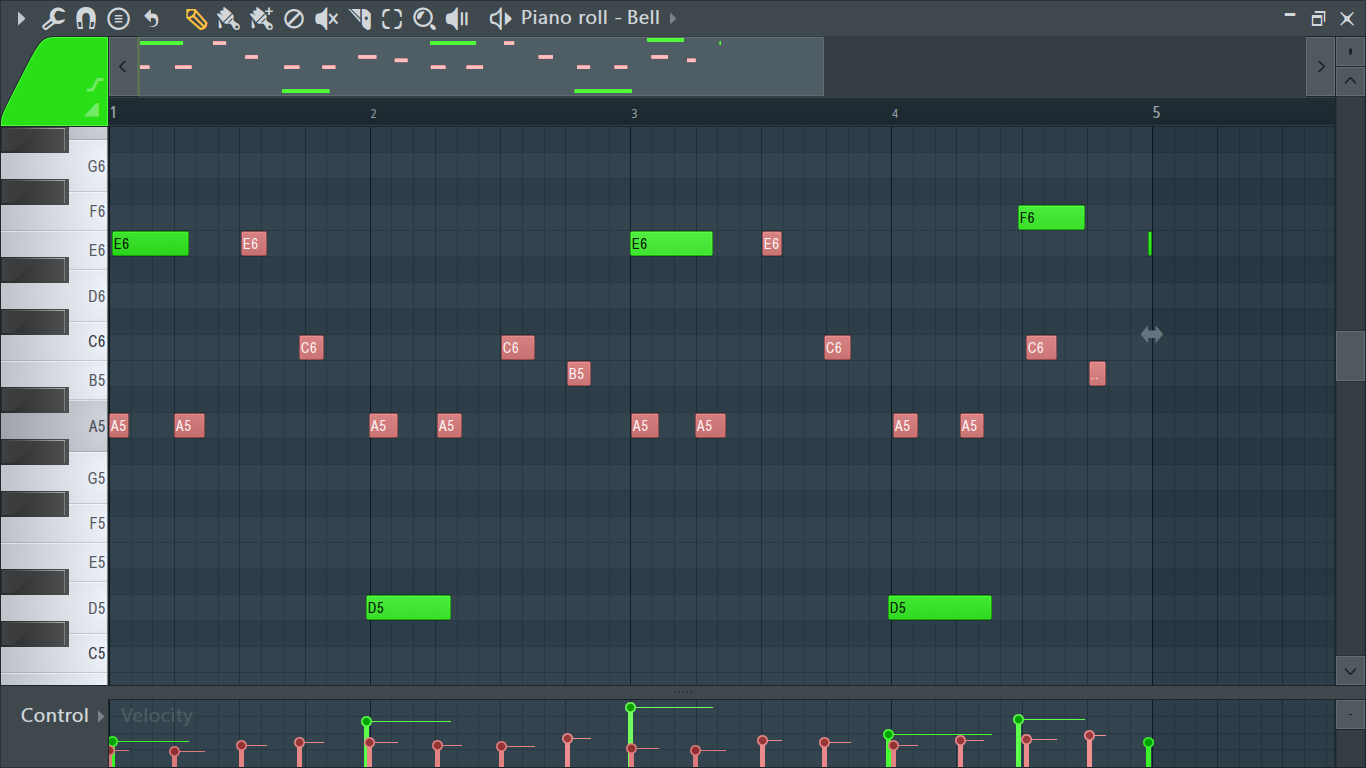
Blend Recording (Overdub)
If you’re recording over pre-existing notes in the piano roll, activating this will overlay the newly recorded notes over the existing ones and blend them together without deleting the pre-existing notes.
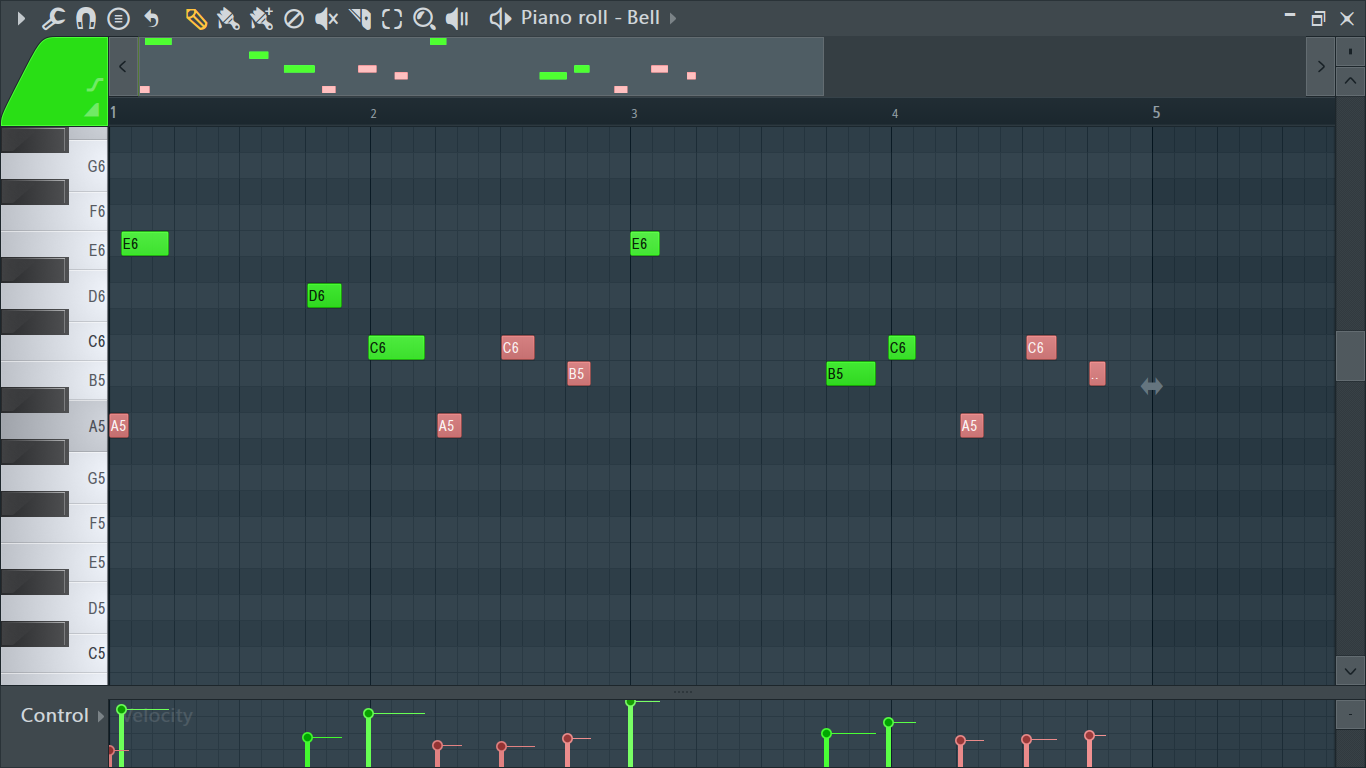
Below, the green notes are the newly recorded notes while the red notes are the pre-existing notes. With blend recording turned on, the pre-existing notes will not be deleted when new notes are overlaid over them.
With blend recording turned off, the pre-existing notes will be deleted when new notes are recorded over them. Here we can see some red pre-existing notes have been deleted where the newly recorded green notes appear.
Recording Loop
Activating this will allow you to record the looped region, in the piano roll or playlist, endlessly until the stop button is pressed. This is a handy tool for recording a melody that may be hard to play, or one you want to play until you get it just right. It works best when used in conjunction with the previously discussed blend recording (overdub) option.
Recording Filter Options
FL Studio has also put in place some recording filters that can filter out or modify certain aspects of the recorded MIDI information. They can be accessed by right clicking the record button.
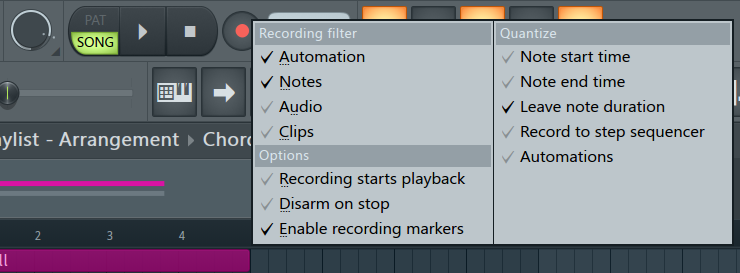
Tip: When selecting from the recording filter options, use the right mouse button instead of the left to select so as to prevent the pop-up menu from closing every time you select or deselect an option.
Under Recording filter, select the elements to be recorded. For MIDI, it will be ‘Automation’ and ‘Notes’.
Under Options, activating ‘Recording starts playback’ will start recording as soon as you’ve pressed the record button. Turning it off will require you to turn on the record button then hitting play to start recording.
Under Quantize, we have different quantization options for MIDI being recorded.
Note: The quantization options selected here will be applied to the MIDI as it is being recorded. The quantization applied will depend on your current snap setting. The main snap settings can be found on the toolbar.
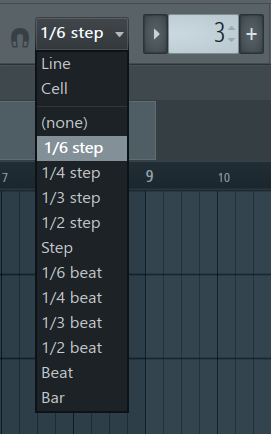
Note start time quantizes the notes’ starting times.
Note end time will quantize the notes’ end times.
Leave duration, if selected, will leave the notes’ duration unquantized and the duration will remain as recorded.
Record to the step sequencer is pretty self-explanatory.
Selecting ‘Automations’ will apply the quantization set to recorded automations as well.
Final Thoughts
Try out different recording settings and recording filter options to find out what works best for you and which settings enhance your workflow. As always, have fun experimenting!

- How to Add Drum Kits to FL Studio - September 18, 2023
- Best Free Drum Kits for FL Studio - September 18, 2023
- How to Create Drum Patterns & Loops in FL Studio - September 12, 2023


![FL Studio Slide Notes Not Working [FIXED]](https://ProRec.com/wp-content/uploads/2023/06/slide-note-and-normal-note-side-by-side-labeled-fl-180x180.jpeg "FL Studio Slide Notes Not Working [FIXED]")
")