Audio and MIDI make up the major building blocks of modern-day music production. Working together, the two elements have simplified the process of music creation, and paired with other resources available to producers today, have bridged most obstacles that our predecessors faced.
Let’s go over the various ways to import and export audio and MIDI in FL Studio.
How to Import & Export Audio
First, let’s start off with Audio.
Importing Audio into FL Studio
There are two ways to import audio into FL Studio.
Method 1: Drag and Drop the Audio File into FL Studio
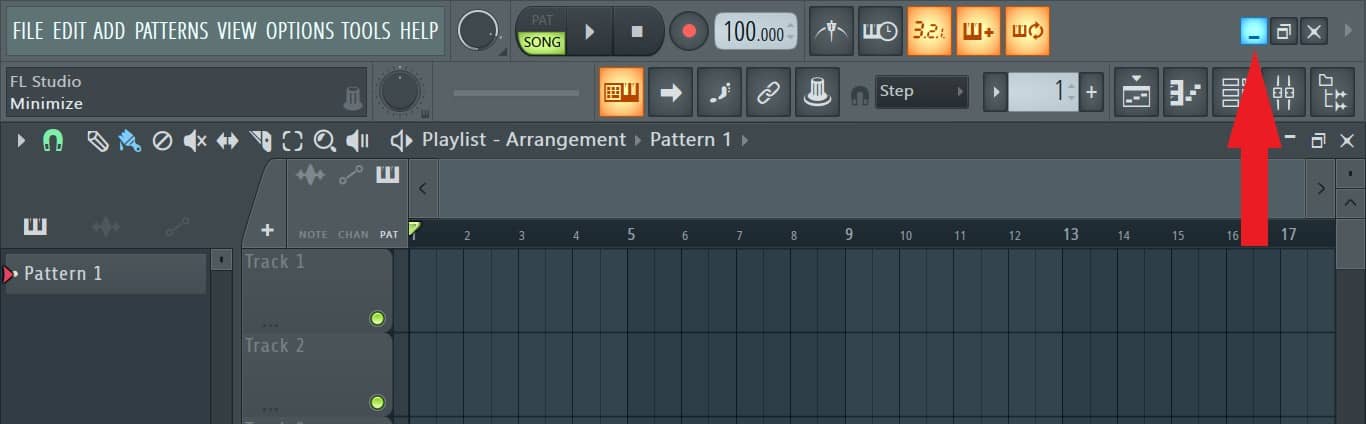
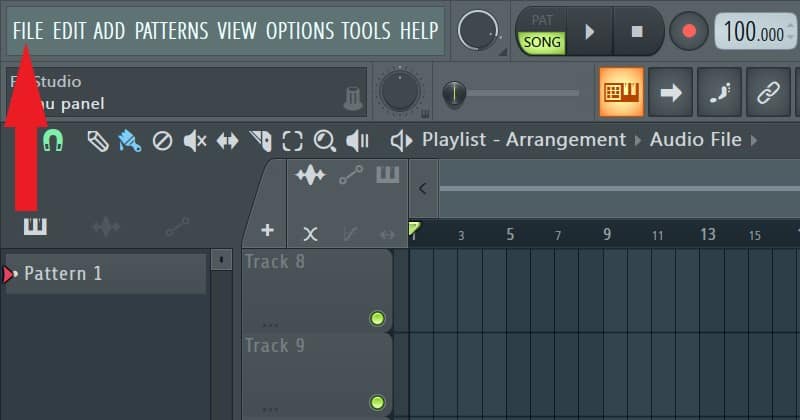
Step 1: Open FL Studio on your computer. Once it is open, minimize it by clicking on the minimize button located on either the right or left corner.
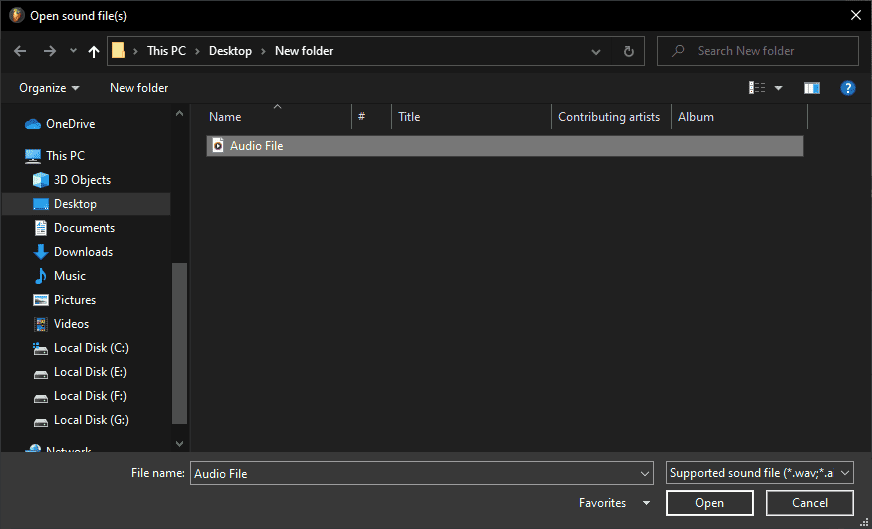
Step 2: Open the file explorer and navigate to the location of the audio file you want to import.

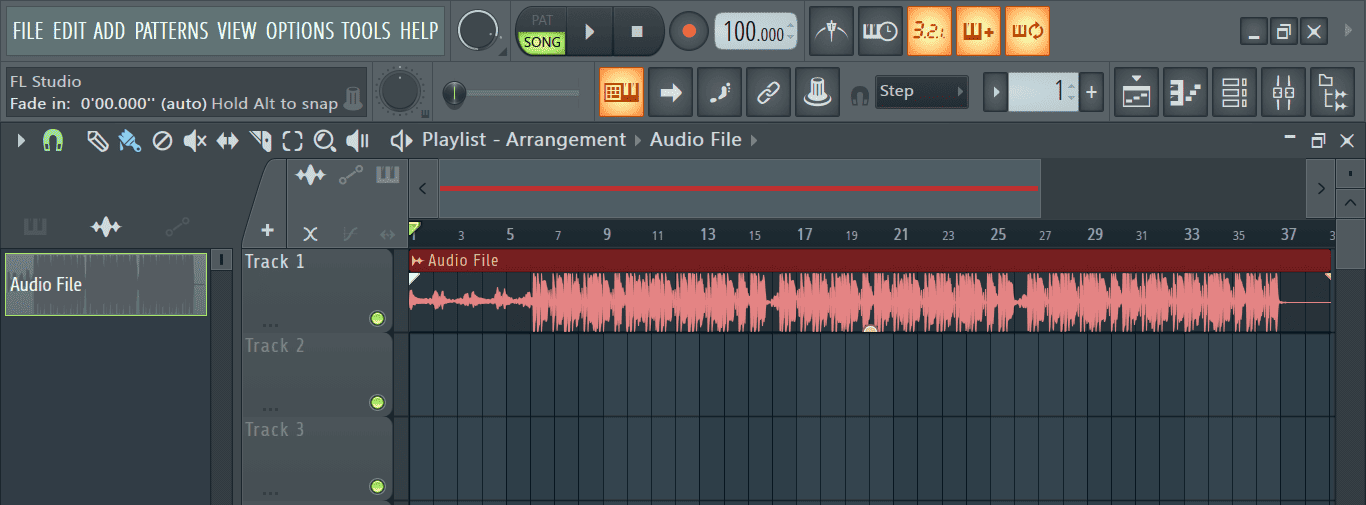
Step 3: Now, click and hold on the audio and drag it into the playlist.
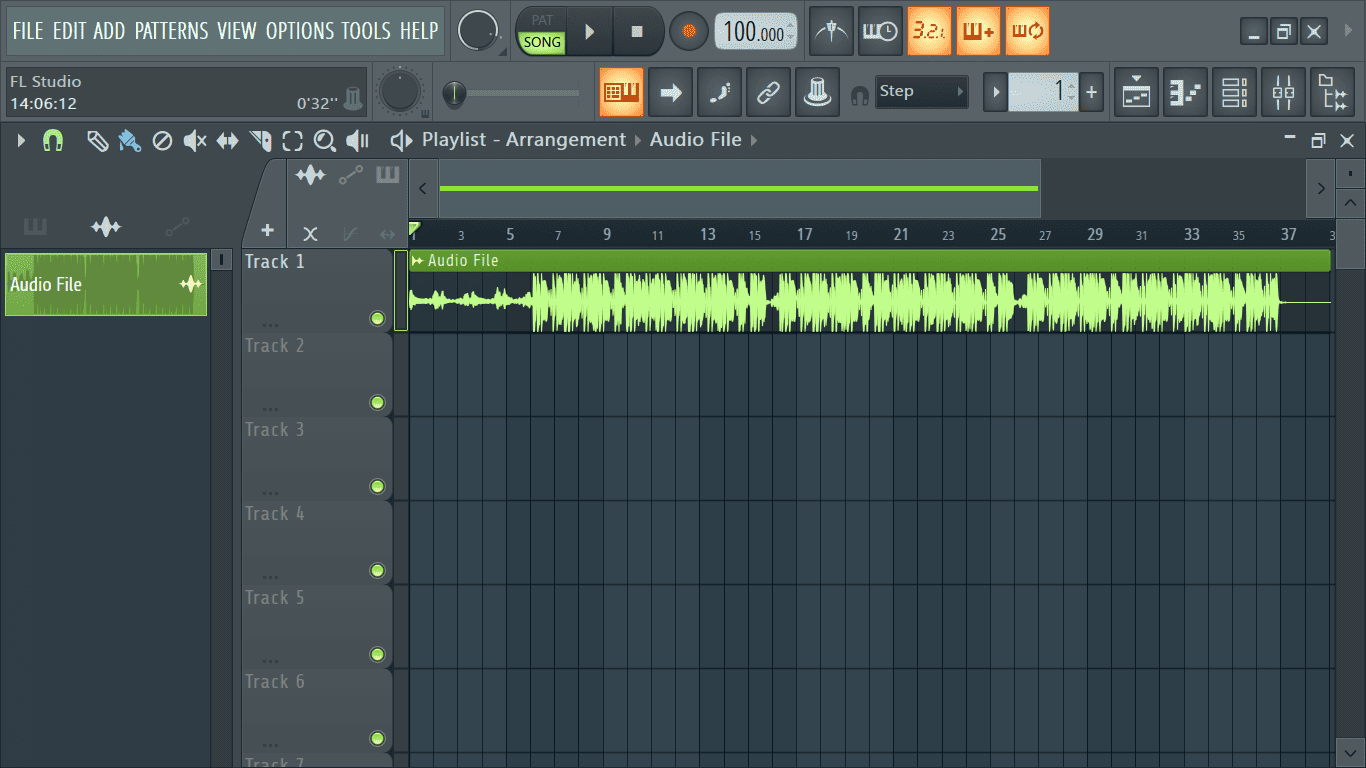
Vola! The audio has been imported into FL Studio.
Note: If you can’t drag audio into the playlist, open FL with administrative privileges disabled.
Method 2: Importing Audio through the Channel Rack
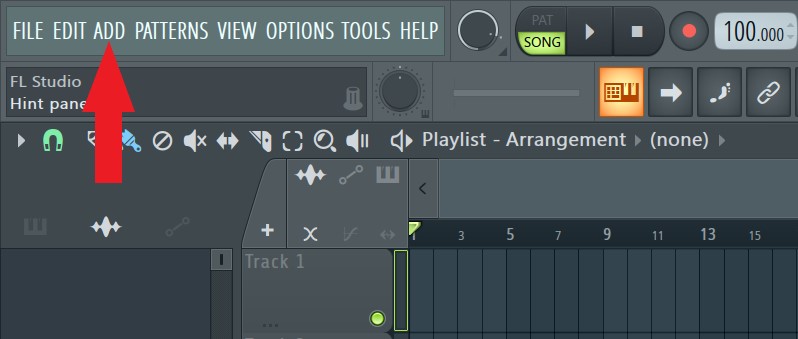
Step 1: Click on ‘Add’ located on the main toolbar.
Step 2: From the menu that opens go to Misc>Audio clip.
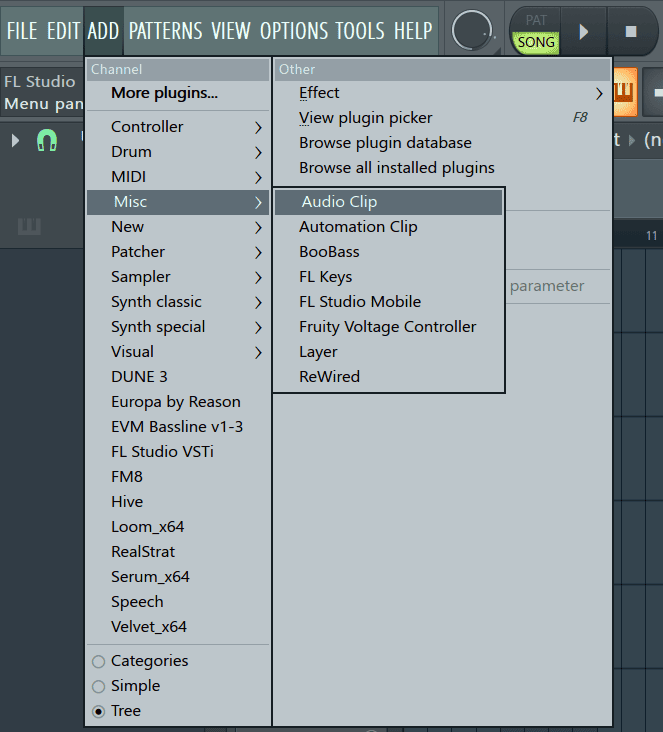
A sampler channel will be added awaiting audio to be imported.
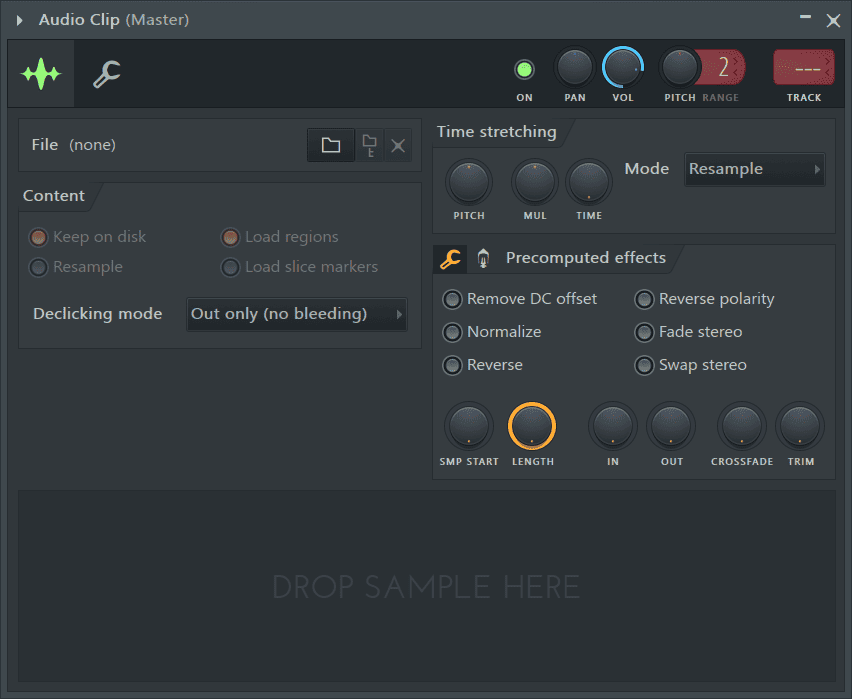
Step 4: Click on the folder icon in the sampler shown below.
This opens the file explorer.
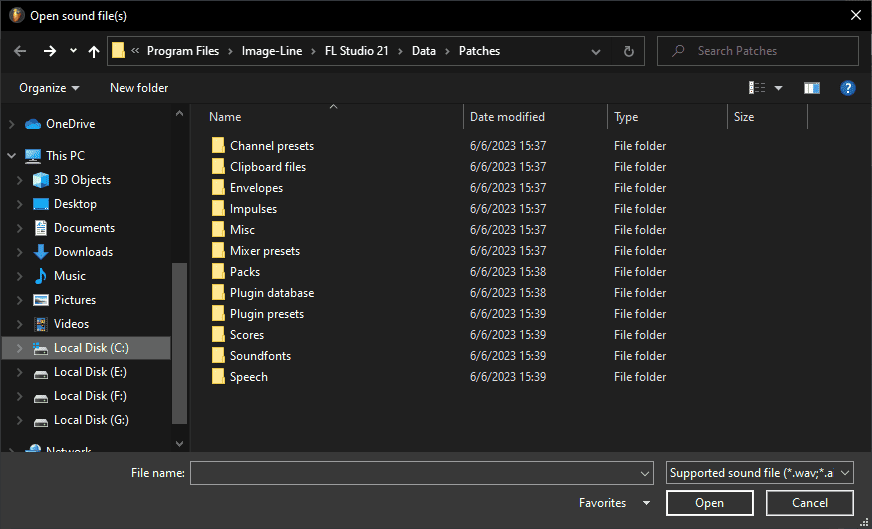
Step 5: Locate your sample, select it, and click ‘Open’.
Step 6: Once the audio file is loaded, click on it on the picker panel.
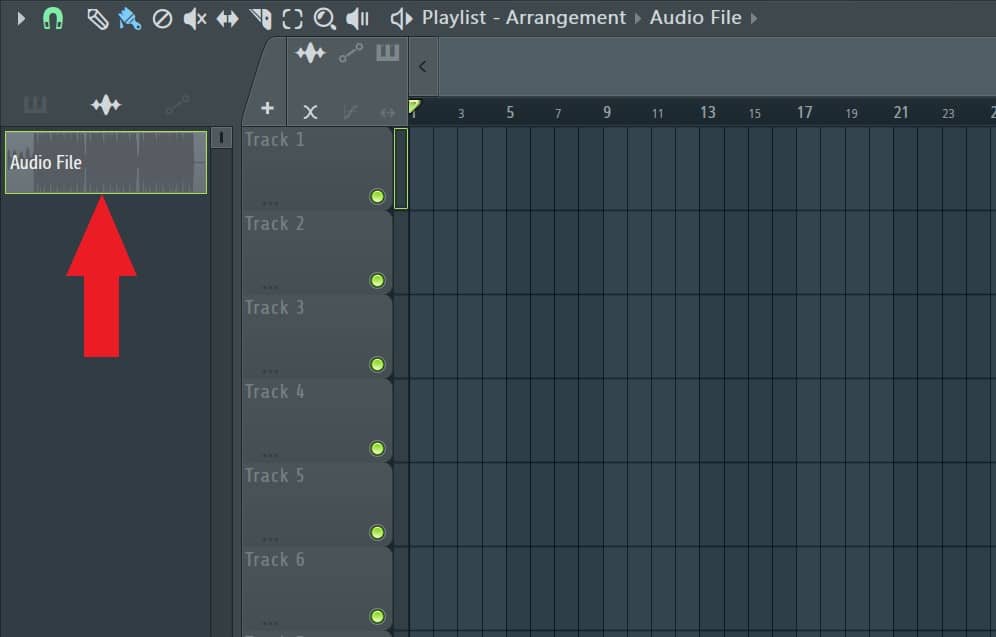
Then, drag it onto the playlist.
Exporting Audio from FL Studio
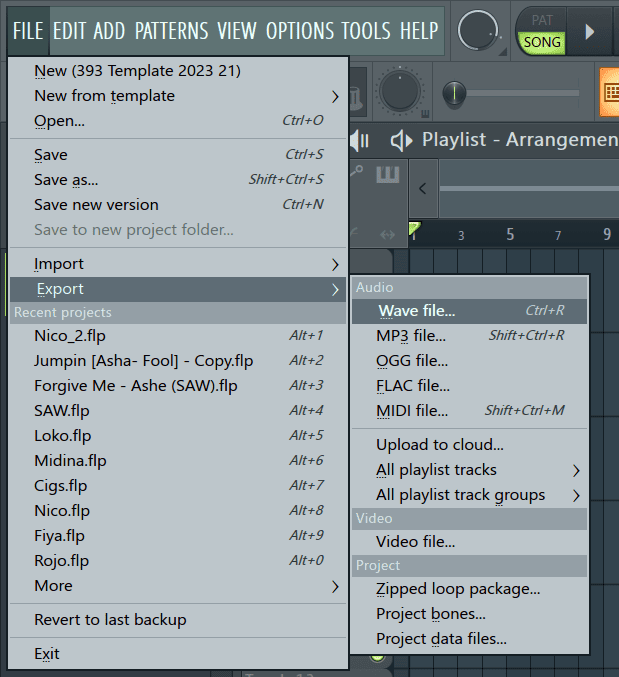
Step 1: When you’re ready to export your track, click on ‘File’ in the toolbar then go to export.
Select the type of audio file to be exported from the options.
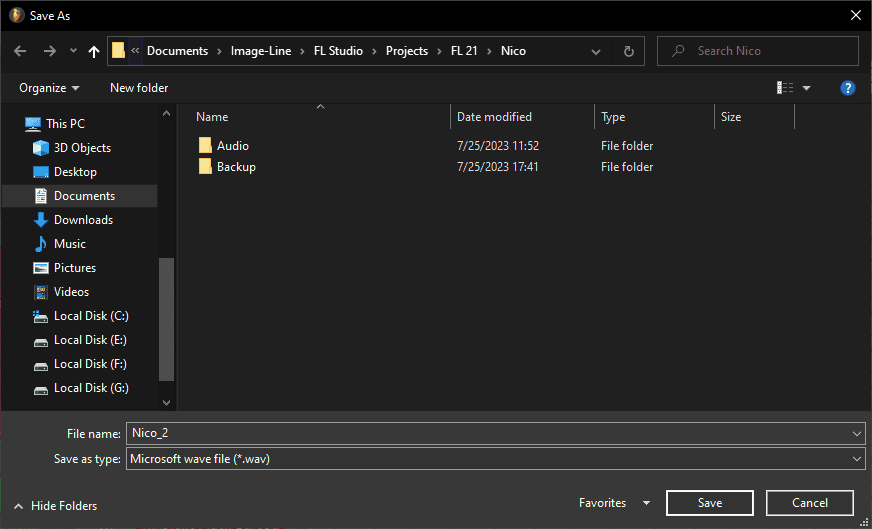
Step 2: You will be prompted to select a folder to export the audio to. Navigate to your desired folder, select it, and click ‘Save’.
Step 3: A window will pop up with more export settings.
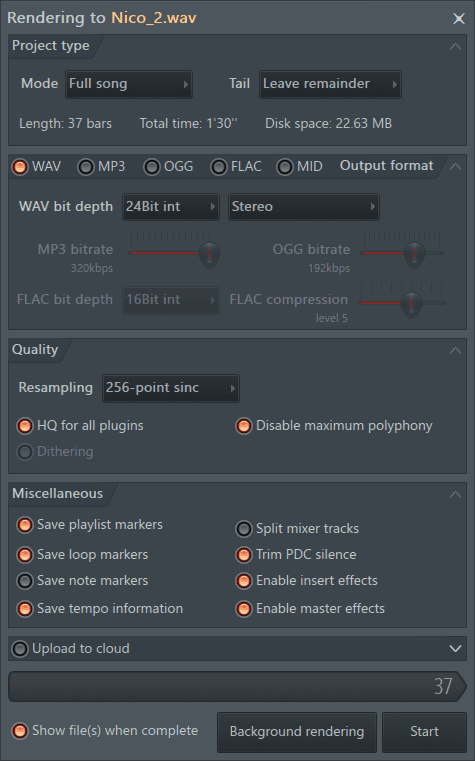
Audio Export Settings
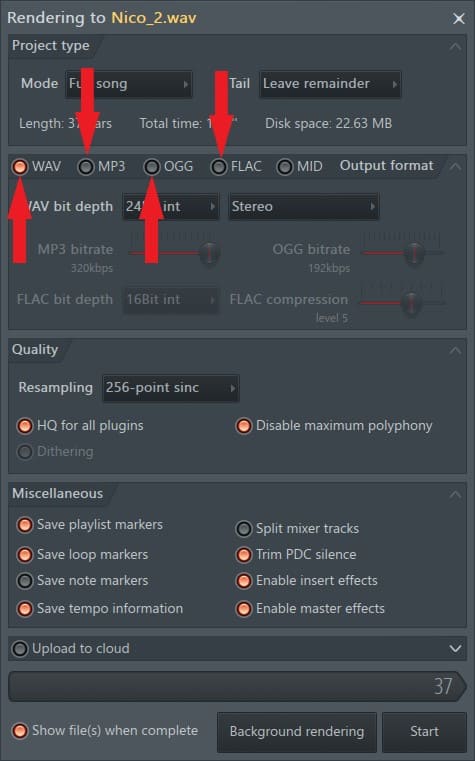
Let’s go over the settings required to get the highest quality when exporting audio in FL Studio. FL Studio can export 4 types of audio files, WAV, MP3, OGG, and FLAC.
Export multiple file types by clicking on the button next to the file type’s name.
For WAV files, set the WAV bit depth to either 24Bit or 32Bit and make sure it is set to stereo.
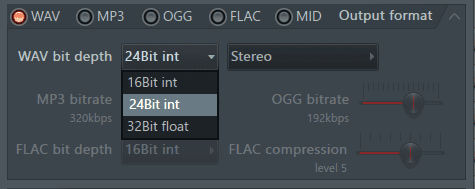
WAV files are lossless forms of audio meaning the audio’s quality is not affected when exporting. Use this if further processing/mixing is to be done to the audio.
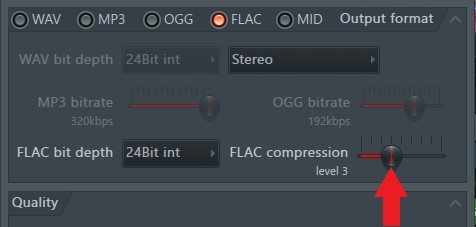
FLAC (Format Lossless Audio Codec) is also lossless form of audio. The audio in FLAC format is just as high quality as a WAV file, but data compression is applied to reduce the audio file’s size. It is recommended to use 24Bit.
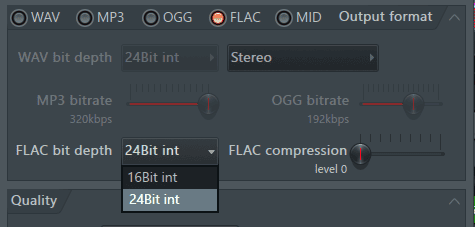
Use the FLAC compression fader to change the level of compression. This won’t affect the audio’s quality; it only affects the audio file’s size. Set the compression to match your desired file size.
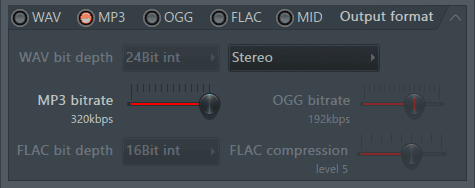
For MP3, make sure the MP3 bitrate is set between 256-320kbps. Increase the bitrate by dragging the ‘MP3 bitrate’ fader to the right. 320kbps is the highest quality for MP3 files. MP3 is not lossless meaning some quality of the audio will be lost during compression when exporting. Do not use it if further processing is to be applied to the audio.
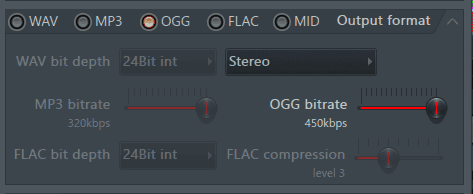
OGG is also not a lossless format. It will sacrifice some metadata to keep the file size small. If you’re looking for a step up from the quality of an MP3 file, but without the large space taken up by lossless formats, then OGG is the way to go. Set the OGG bitrate to 450kbps for the highest quality.
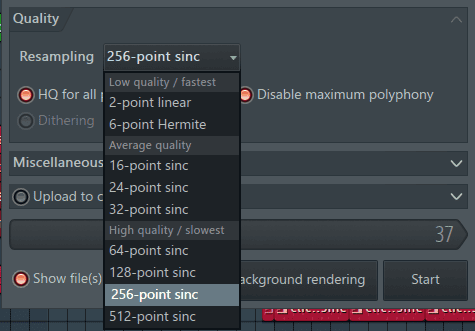
The ‘Quality’ section affects processing inside FL Studio’s plug-ins.
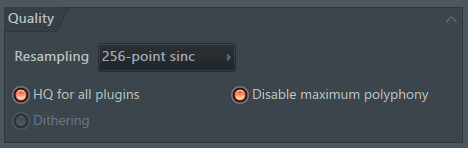
These don’t create a big difference on the exported file’s quality, however, I like to ensure that my resampling quality is set to a value in the high quality section.
Under Miscellaneous settings, we’ll only discuss the settings to the right since only they affect the audio quality exported.
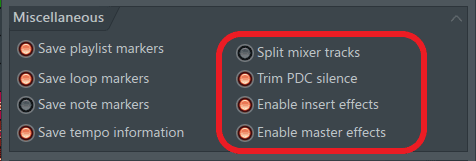
Activate ‘Split mixer tracks’ if you want to export the project stems.
Always make sure ‘Trim PDC silence’ is enabled, otherwise, there might be some seconds of silence before the track begins.
‘Enable insert effects’ applies the effects applied on the mixer when exporting.
‘Enable master effects’ applies the effects applied on the master when exporting.
How to Import & Export MIDI
Importing MIDI into FL Studio.
There are two ways to import MIDI into FL Studio.
Method 1: Importing Single Channel MIDI
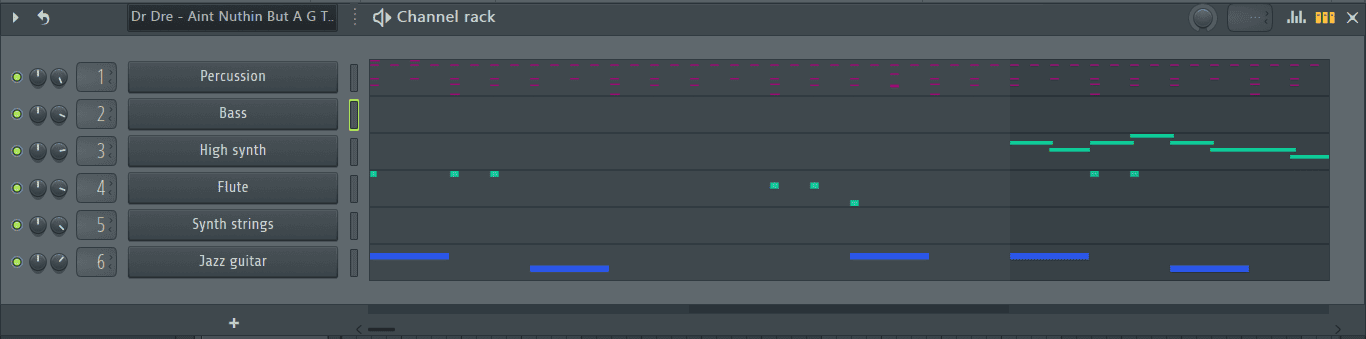
Step 1: Open your channel’s piano roll by right clicking on it in the channel rack and selecting ‘Piano roll’.

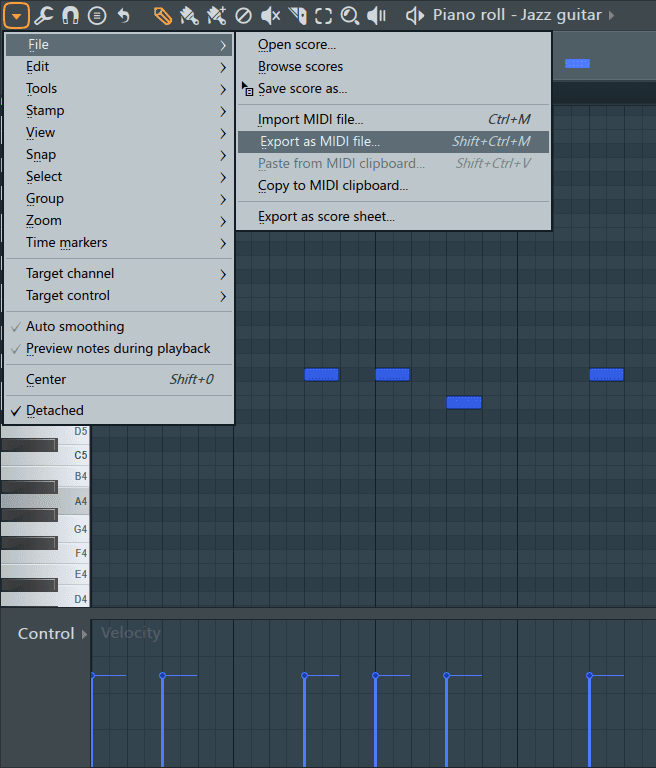
Step 2: Once on the piano roll, click on the arrow located on the top right corner.
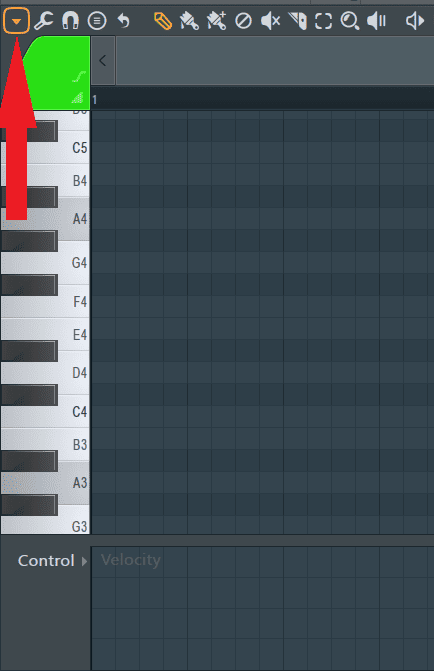
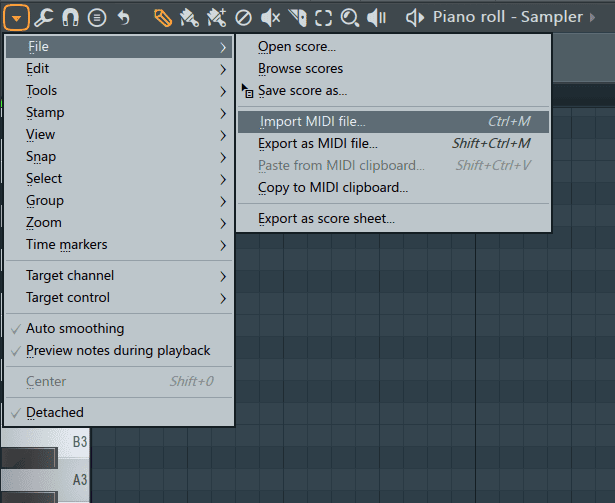
Then go to File>Import MIDI file.
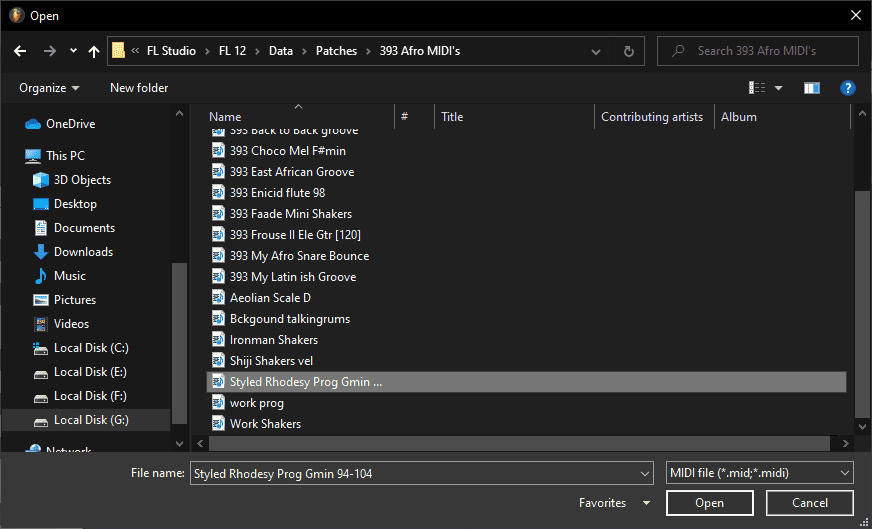
Step 3: Find the MIDI file using the file explorer and click ‘Open’.
The MIDI data will be imported into the piano roll.

Method 2: Importing Multi-Channel MIDI Files
For multi-channel MIDI files:
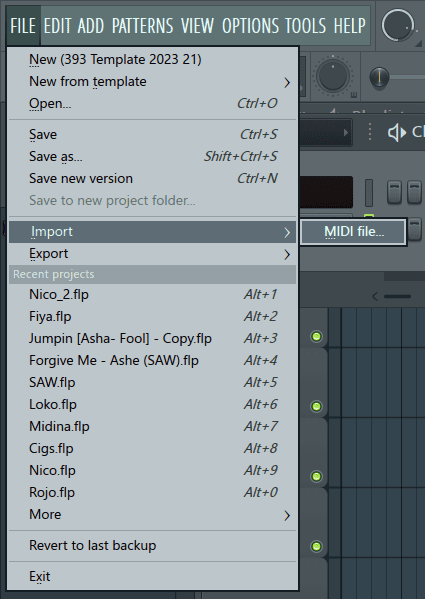
Step 1: Click on ‘FILE’ in the main toolbar and go to Import>MIDI file.
Step 2: Locate your MIDI file using the file explorer and click ‘Open’. The Import MIDI Data window will pop up.
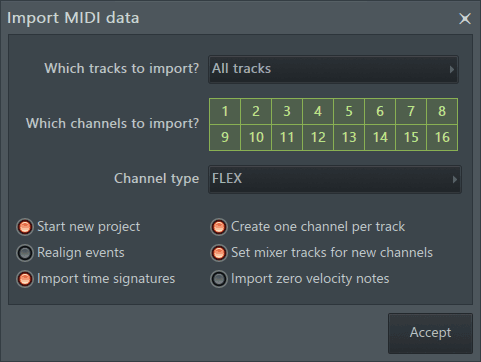
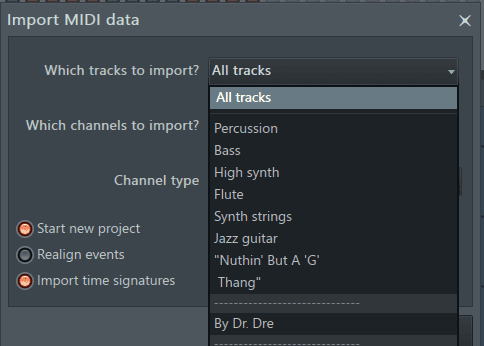
Step 3: Click on the dialogue box next to ‘Which tracks to import’ to select the tracks to import. I’ll leave it on ‘All tracks’.
Enable ‘Start new project’ to load the MIDI data to a new project. Disable it to import the MIDI to the project you’re currently working on.
Step 4: Click ‘Accept’ when done and the MIDI data will be imported.
Exporting MIDI
Step 1: Go to the piano roll where the MIDI to be exported is located.

Step 2: Click on the arrow on the top left corner of the piano roll then, go to File>Export as MIDI file.
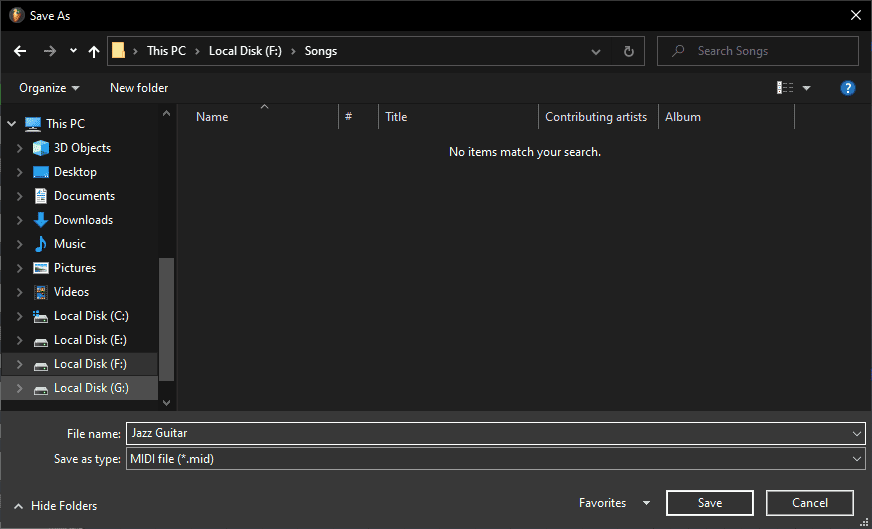
Step 3: Select a destination folder for the MIDI file then click ‘Save’.
Conclusion
You should now be able to import and export both MIDI and audio in FL Studio with ease. Till next time, have fun creating!

- How to Add Drum Kits to FL Studio - September 18, 2023
- Best Free Drum Kits for FL Studio - September 18, 2023
- How to Create Drum Patterns & Loops in FL Studio - September 12, 2023


