In this tutorial, I will guide you through the troubleshooting process to mitigate recording audio and/or MIDI recording issues. Since recording is often the first step of any production, these issues may hamstring and delay your session.
Luckily this guide will not only help you prevent recording issues, but you can also use the techniques in this guide in a live performance when you are not getting any playback from your MIDI or audio input devices. Recording issues may be caused by these two main issues:
- Hardware: this set of issues is normally straightforward to resolve, and mostly needs you to have an intimate knowledge of your studio hardware connections and signal flow.
- Software: these issues are often multi-pronged and there are several steps you need to follow to resolve recording issues through the software technique. On the one hand, they can be both in and outside-the-box troubleshooting techniques.
Let us just right into it!
Hardware
In my experience, this troubleshooting has always been straightforward to execute. It only requires you to know your studio or live setup intimately to be able to resolve recording issues quickly and efficiently to be able to identify where the recording issue is coming from. There are of course different techniques to execute when recording with microphones (audio & electric instruments) and with a MIDI controller, and there is a crossover between both. Let me demonstrate how:
- Firstly, you will need to mute your playback devices (speakers or headphones) and make sure all your recording devices’ connectors are connected firmly and securely. The reason you should mute your playback devices is to make sure that there are no random and loud buzzes, clicks, and pops that may damage your equipment and hearing.
- Make sure that you have the correct connector type for your hardware, whether using XLR, TRS, TS, USB or ADAT connectors. Check your cables, and make sure to maintain your cable connectors well because damaged cables may cause recording glitches, or not record at all.
- You may have made sure your connectors are firmly secure and work but are still not able to get any signal in to record your audio, and this can be solved by the easiest and in some cases, silliest cases of oversight. Turn on your device! Some come with an on/off switch button
- This last thing may be that your connection port has limited functionality, and you need to switch to another connection port. You may encounter this issue also when using incompatible audio interfaces, or cable connections (USB or Lightning)
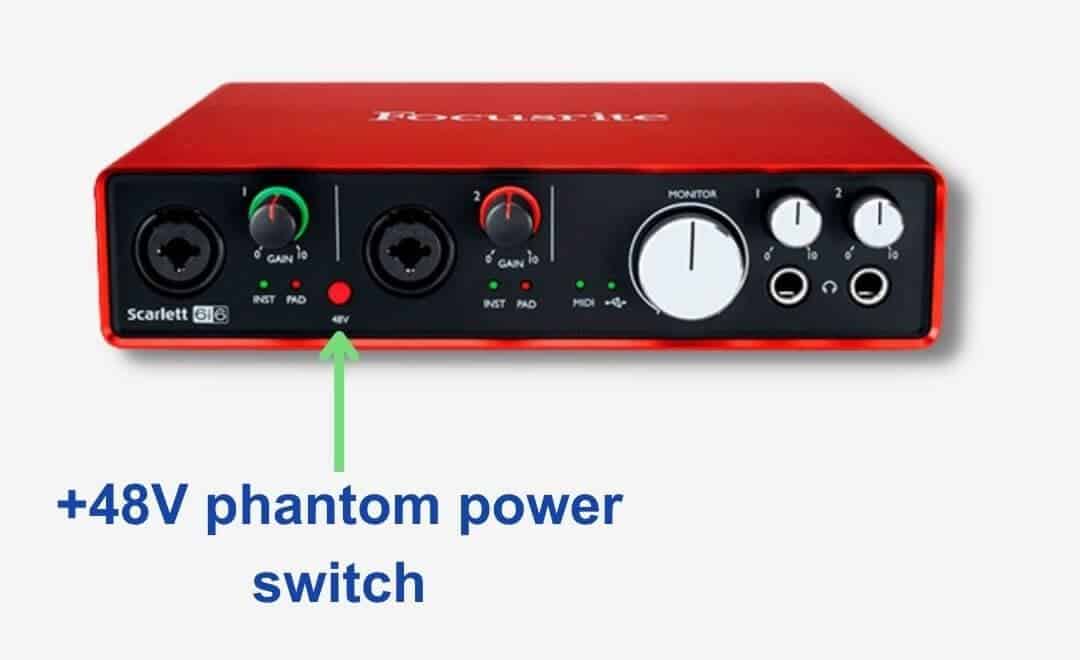
- If using a microphone, make sure you know which type of microphone you are using, and this is especially if it is a condenser microphone because they require a 48v phantom power that needs to be activated from your audio interface.
Software
Solving recording issues using the software technique may need more effort from you, but do not worry, this guide will walk you through this troubleshooting technique. I mentioned in the introduction can be solved both inside and outside the box. I will show you how to execute this technique firstly outside the box which leads to the inside-the-box techniques. This is how:
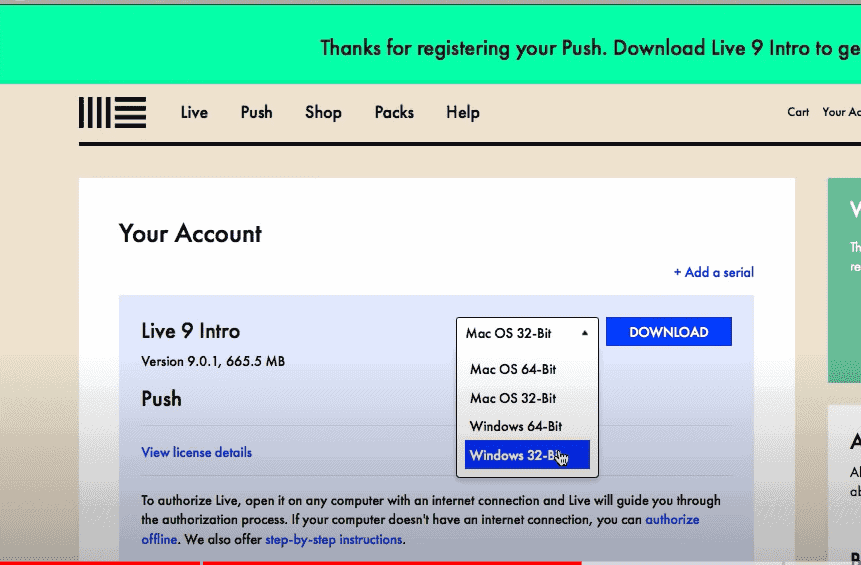
- Most MIDI and audio interfaces (used to record audio) are plug-and-play. This means that Ableton will recognise your device once you have plugged them in without the need for drivers, and third-party software. But in some cases, you will need these tools, sometimes, you will need to go to the manufacturer’s website to find these drivers or supporting software. In the best-case scenario, these drivers install automatically upon connection to your computer.
- Once you have to hardware connected and all the supporting drivers successfully installed, you need to restart Live, or in some cases, your computer.
From this point on, we are moving to inside-the-box solutions.
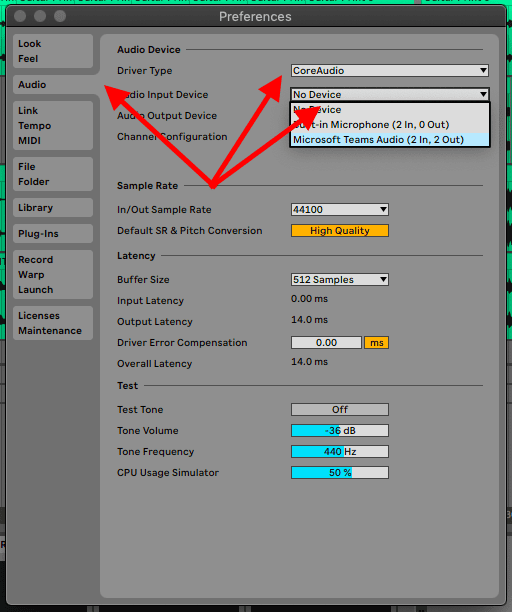
- A) When setting up audio recording devices, you need to go to the audio tab in the Live preferences, and select the type of audio driver that works with your audio interface, and also your audio devices
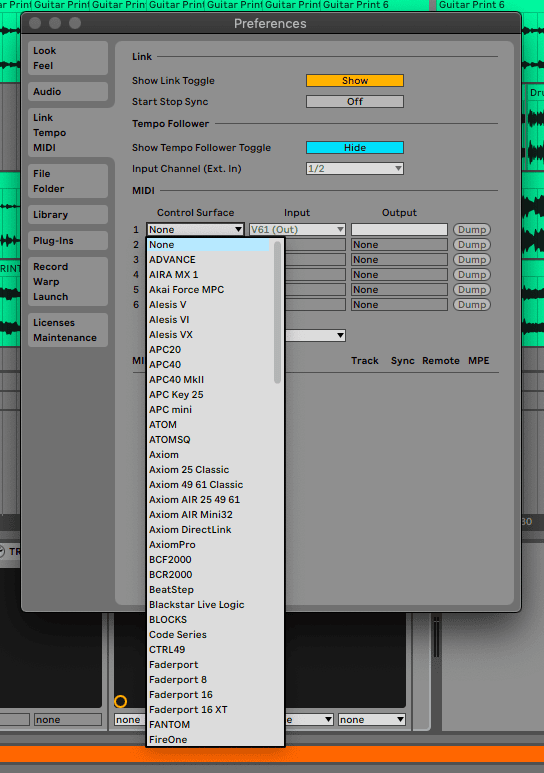
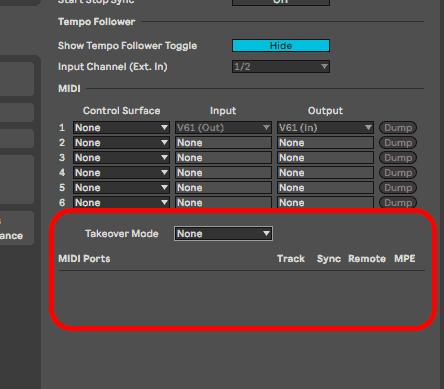
- B) when handling MIDI instruments, you need to go to the MIDI tab in Ableton’s preferences and select the MIDI devices you have connected in the Input tab. If your MIDI device is supported by Ableton, you will find it in the Control Surface tab.
- Now you need to arm your track whether MIDI or audio, to enable recording. You can arm more than one track to record all at once, by selecting the tracks by holding Shift and arming the tracks. This works for both audio and MIDI tracks.
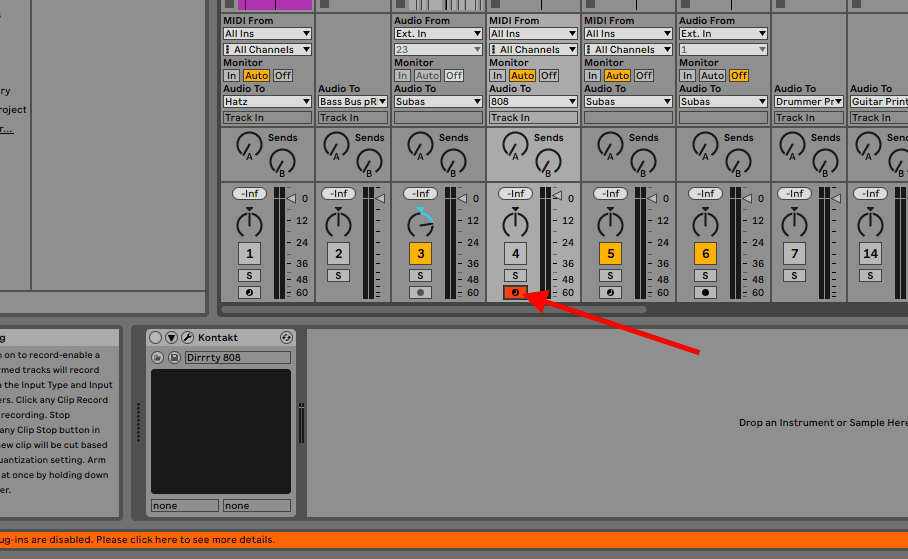
- If using audio, you need to select the proper track that matches the audio input on your audio interface.
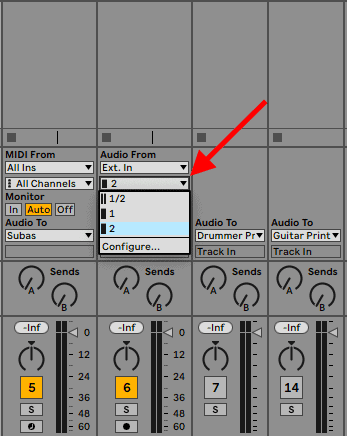
Tip! In cases where you have multiple MIDI devices connected, you will need to make sure that they are all activated for input or output use cases. You will see this on/off control below the MIDI selection tab.
Final Thoughts
If you have not noticed this yet, the hardware troubleshooting technique will come before the software technique. One leads into the other. What you should do before you connect your recording devices, you must at all times read the user manual that comes with the machines once you unbox them.
Once you have had enough experience with your studio setup, and using recording devices, you will get used to the troubleshooting process and notice what is causing recording issues. Find your needs and use cases and refer to this guide to assist you in the troubleshooting process. Have fun!
- How to Use Ableton Live’s Arpeggiator? - September 18, 2023
- How to Use the Piano Roll in Ableton Live + Shortcuts - September 18, 2023
- Ableton Arrangement View (Optimization & Usage) - September 16, 2023


![Ableton Tuner Not Working [FIXED]](https://ProRec.com/wp-content/uploads/2023/07/default-tuning-settings-ableton-180x180.png "Ableton Tuner Not Working [FIXED]")