Ableton Live’s tuner is a native Ableton effects plug-in, which means that it needs an audio input signal to function. This is where most people have audio routing issues, and the tuner doesn’t work. It is a plug-and-play effect and works once loaded nto your track. Simply put, there are mainly three reasons why your tuner effect is not working:
- Audio routing issues – you have connected your instruments and not properly routed the audio signal flow. This issue mainly affects audio tracks but MIDI tracks to a lesser extent
- Record Enable – you have correctly routed your tracks but you have not audio record or MIDI-record enabled
- Tuner Settings – Tuner is simple to use and has very few control parameters. One of the tuner views is dynamic and shifts your scale view. This view may make it seem like the tuner is not working
Beware that if you load many effects before the tuner, it may affect its functionality. This is especially true for audio effects that modulate your audio such as delays, strong reverb, or modulators.
Now let us get into it!
Audio Routing
Audio routing is one of the first steps when setting up your session. There are a lot of issues that come around if you do not set up your audio interface correctly, and one of them happens to be the functionality of the tuner effect. This is how you mitigate this issue:
Step 1: Connect your instrument or microphone correctly, and make sure you are getting an audio signal on your audio interface.
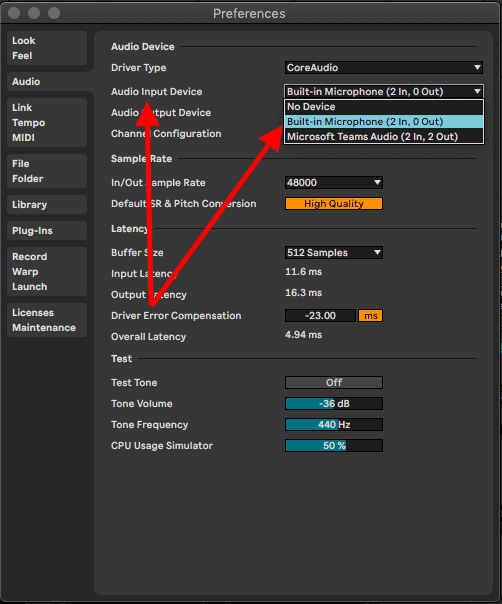
Step 2: Go to your Audio preferences (Cmd + , on Mackbook, or Ctrl + , on Windows)

Step 3: Go to your audio tab

Step 4: Select your audio input interface
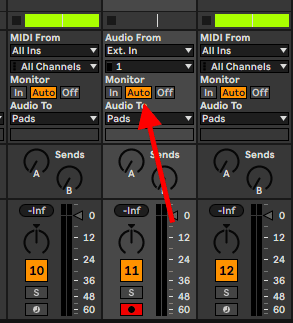
Step 5: Select the audio channel on your audio track
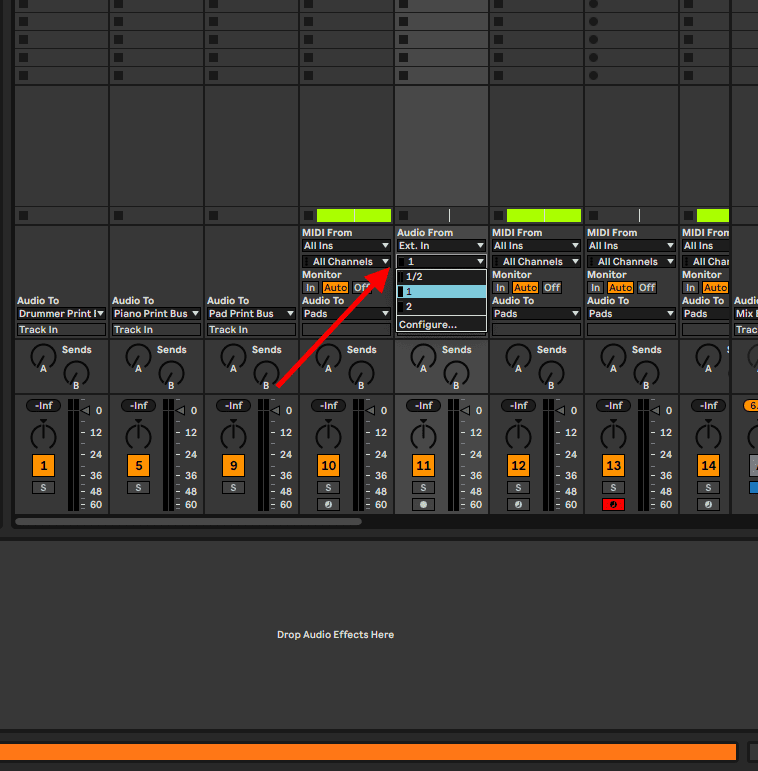
Step 6: Press record enable
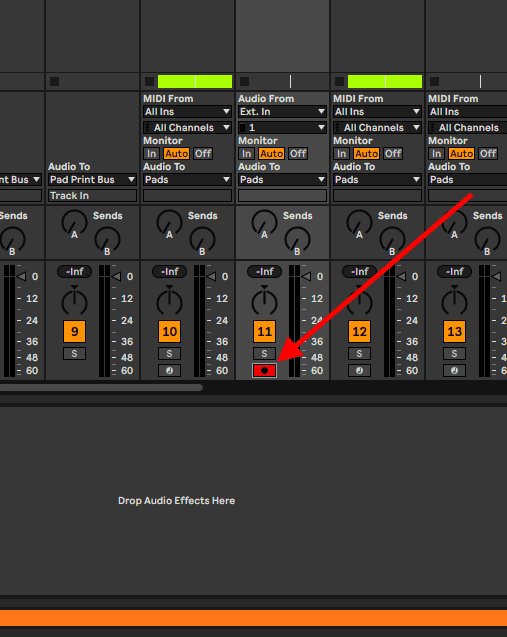
Step 7: Select the way your audio tack behaves (Off – no audio input or playback, Auto – audio input and playback happens when the track is armed for recording, and In – track playback is audible even if the track is not audible)
With your audio properly routed, your tuner should now work correctly.
Record Enable
Recording setup for audio and MIDI are very similar, and if you follow the previous steps, you will be able to set up MIDI devices just as audio devices. In this technique, I will show you how to avoid or mitigate the tuner effect not working on MIDI tracks specifically.
Let me demonstrate how to address the record enable setup through a MIDI track
Step 1: Since the tuner is an audio effect, when working with MIDI instruments and plug-ins (VSTi) you need to load your tuner after the plug-in.
Step 2: When using a MIDI controller, open the Ableton preferences (Cmd + , on MacBook or Ctrl + , on Windows)
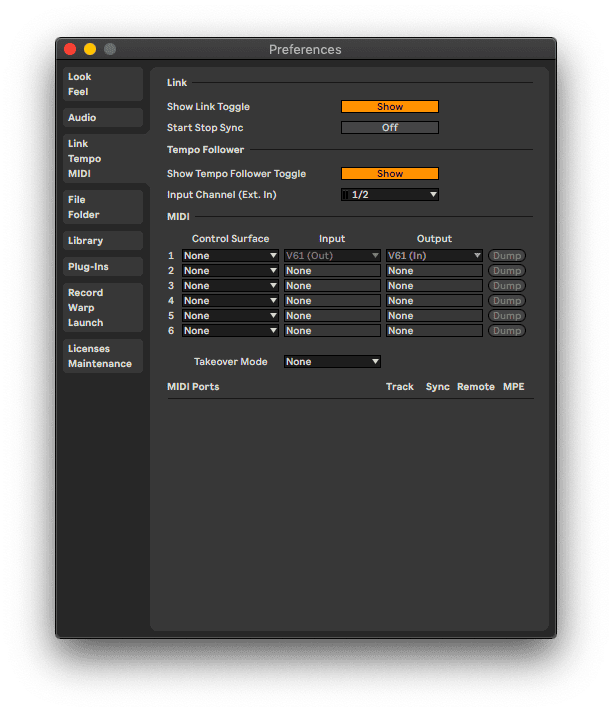
Step 2: go to the Link, Tempo and MIDI tab

Step 3: Select the correct control surface. It is supported by Ableton, you will find it in the Control Surface drop-down menu
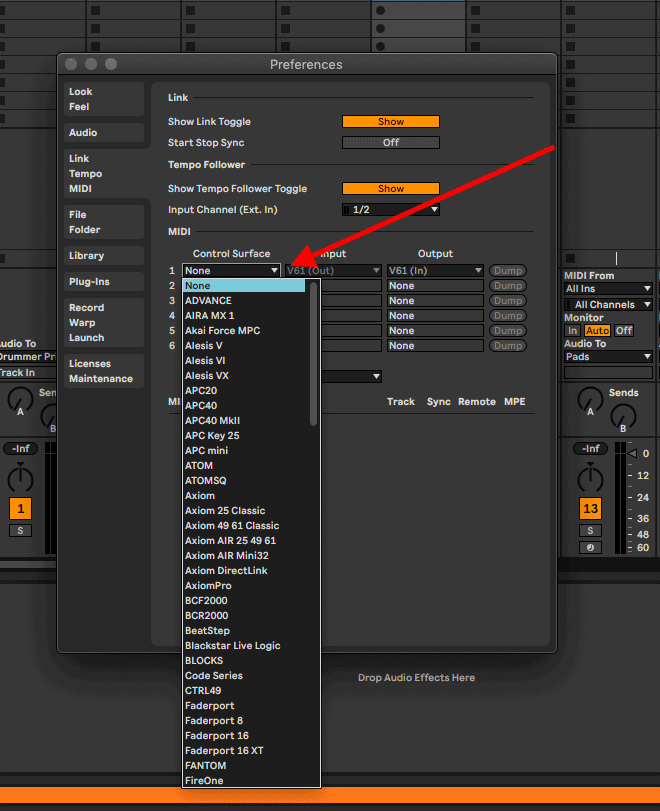
If not, find it in the Input/Output drop-down menu
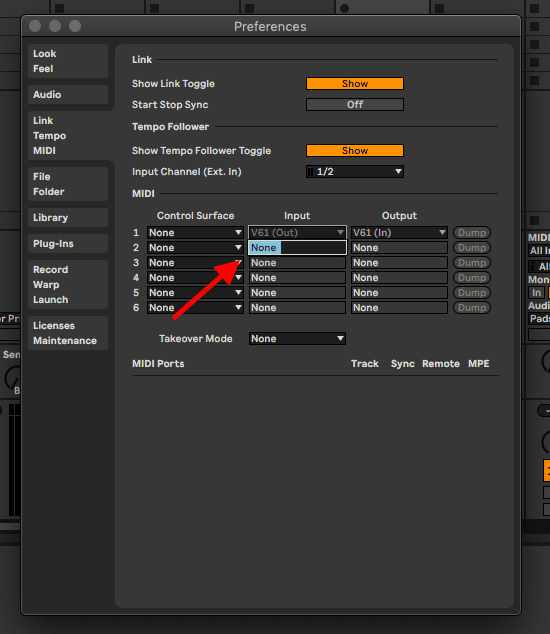
Step 4: arm the track

If you are using your keyboard as a MIDI controller, you will need to input-enable your keyboard from shortcuts to the MIDI controller here:

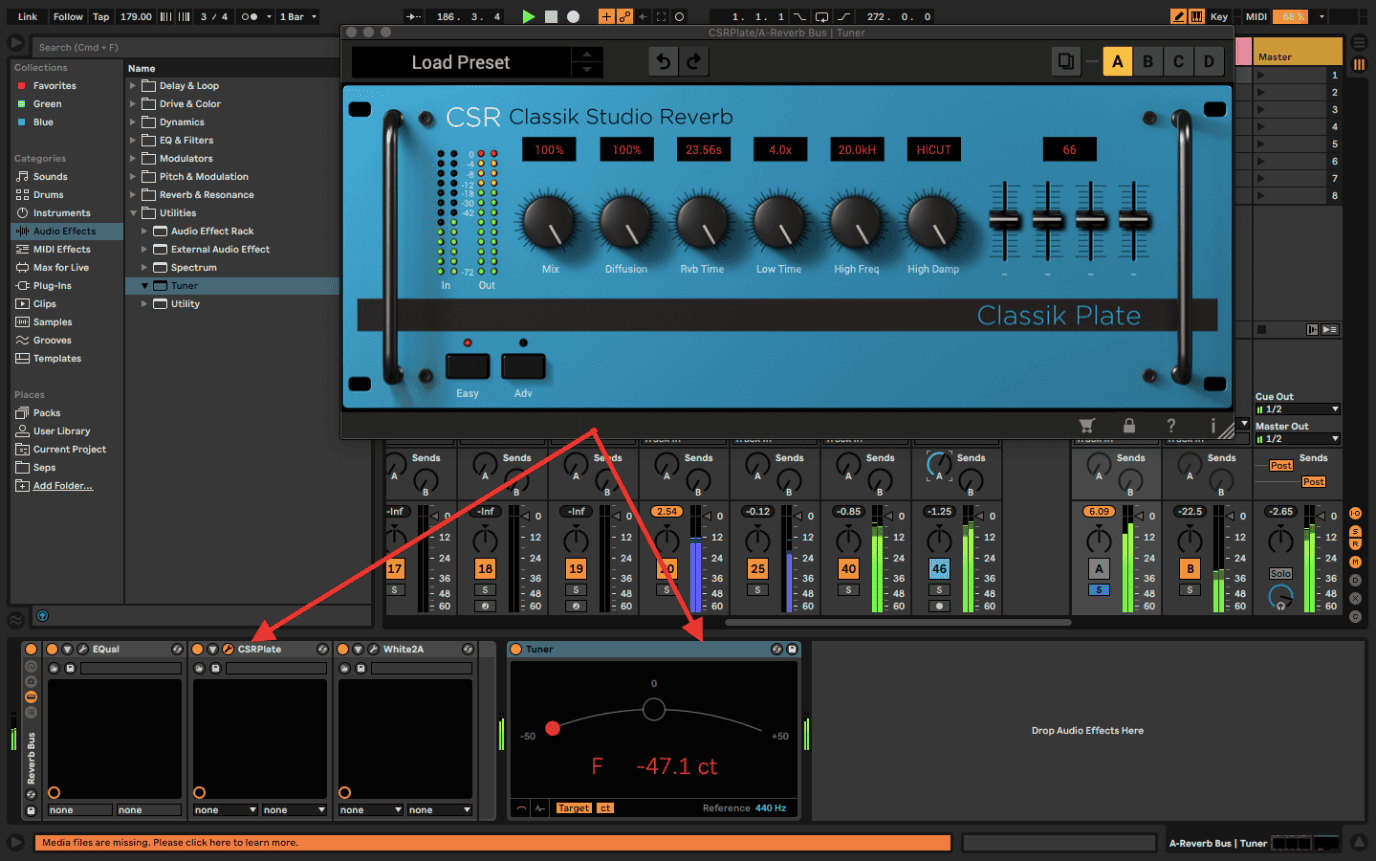
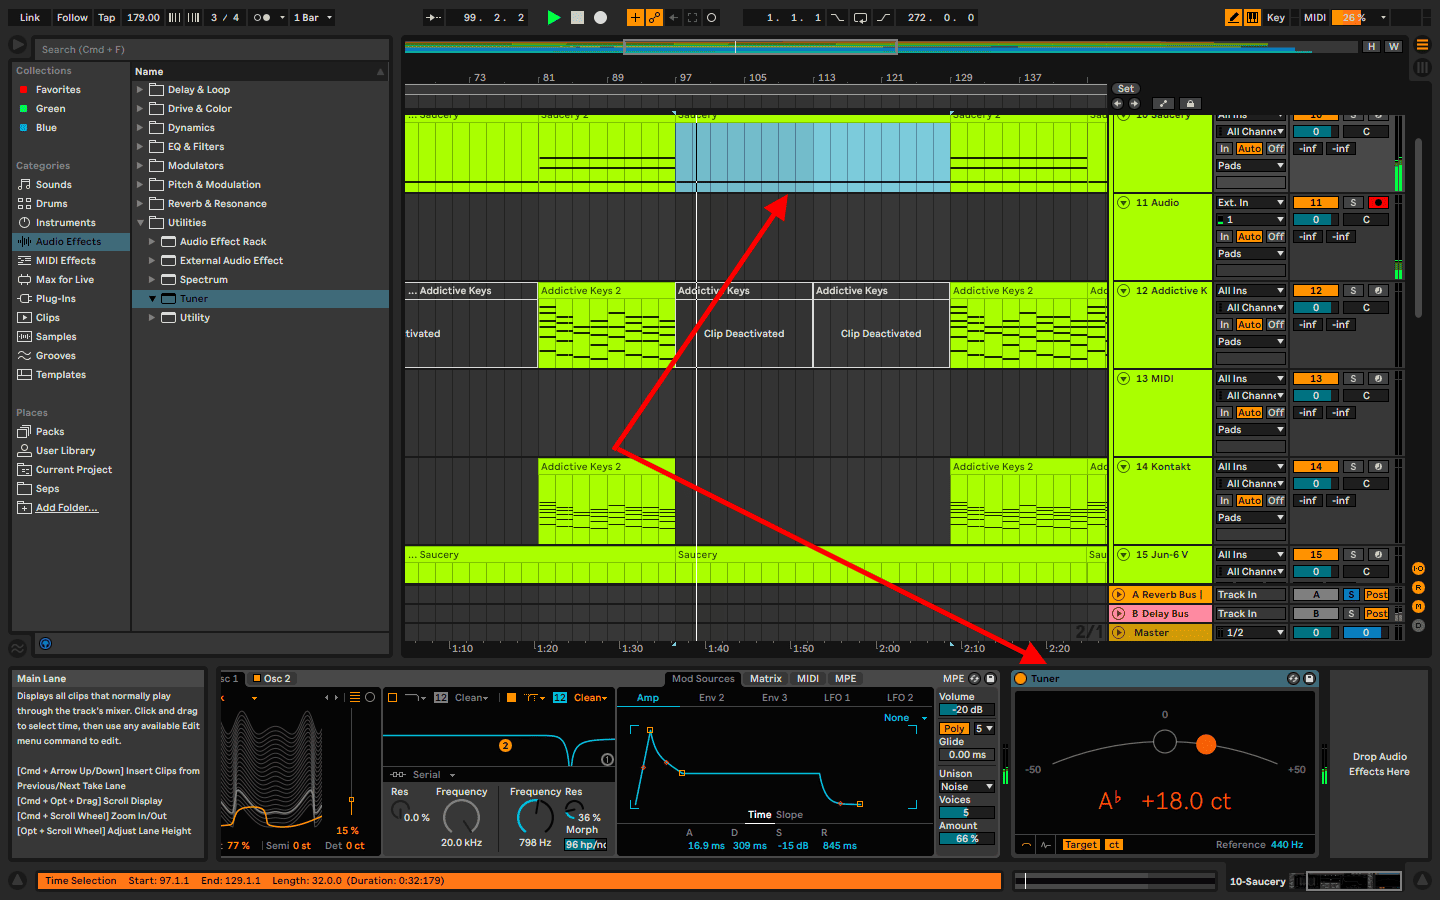
Tuner Settings
This section is the meat and potatoes of this tutorial. Since the tuner is simple in design and utility, you need to know what works and what doesn’t to prevent glitches and unusability in the future.
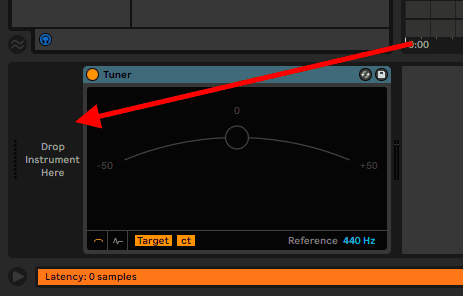
Firstly, if you have short samples like kicks and snares, the tuner will not be able to recognize these and give you active tuning responses. You will need samples of at least 1 second like notes from a guitar or 808 etc.
Secondly, the default tunning settings are in cents of Herts set to 440Hz, and this is because 440Hz corresponds to the musical note A4 (LA3) in the central octave of the piano. Hertz refers to the default reference frequency, and cents are a finer tuning where 100 cents represents divisions between semitones e.g., 100 cents between A and A#

Thirdly, if you are in the histogram view, you need to switch to Auto mode from the manual mode to move the view to the key of your sample playback. This mode may be a little bit too dynamic at first, and you may need to zoom out of this view to see everything that is happening.

Final Thoughts
Dealing with an unresponsive tuner is relatively simple, as it is a simple effect, to begin with. The hardest part of the technique comes with audio and MIDI setups and to a lesser knowing the different control parameters of the tuner. These techniques are also applicable to any 3rd party tuning plug-ins and effects, find your case use needs and apply these techniques to resolve any issues you may come by. Have fun!
- How to Use Ableton Live’s Arpeggiator? - September 18, 2023
- How to Use the Piano Roll in Ableton Live + Shortcuts - September 18, 2023
- Ableton Arrangement View (Optimization & Usage) - September 16, 2023

![Plug-ins not Showing Up in Ableton [FIXED]](https://ProRec.com/wp-content/uploads/2022/12/word-image-3394-3-180x180.jpeg "Plug-ins not Showing Up in Ableton [FIXED]")

