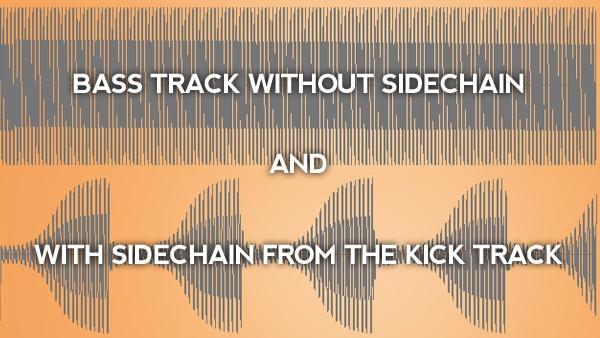
In my tutorial on how to use the compressor effect in Ableton, I describe a compressor as an audio effect that controls the dynamics of an audio signal (the loudest and the quietest parts of an audio signal). You can push this effect further by sidechaining. Sidechaining put simply, is using the input of an audio signal to control the dynamics of the track in which your compressor or effect is loaded.
Recommended Read: Parallel Compression in Ableton
You will use the sidechain effect for these two reasons:
- To create space for the primary or the track you want to pop through your session.
- To glue your tracks together to sound homogenous, especially if your track has elements that complement each other
You can also use the sidechain effect using:
- Manual sidechaining: you will use automation to create manual volume deduction (ducking) in volume to create space for your desired track.
- Using Ableton’s compressors: using Ableton’s native sidechaining function to sidechain.
- Sidechaining with 3rd party plug-in: certain Ableton compatible plug-ins that will allow you to sidechain.
This is how you activate and use the sidechain effect:
Loading and Activating Sidechain
Sidechaining is primarily a compressor’s function. You can also achieve sidechaining using 3rd party plug-ins. However, for this segment, I shall introduce sidechaining using Ableton’s native compressors. This is how you go about this technique using Ableton’s primary compressors:
Recommended Reads: EQ 8 Equalizer, Normalizing, and Quantizing in Ableton
Using Ableton’s Primary Compressors
Every compressor has this control programmed into it:
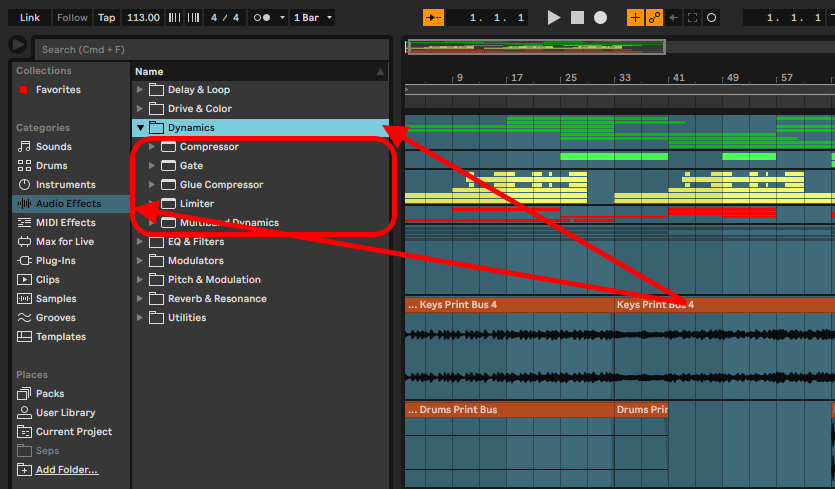
Step 1: find your preferred compressor in the Ableton browser under audio effects in the Dynamics subfolder. (select the preferred presets if appropriate):
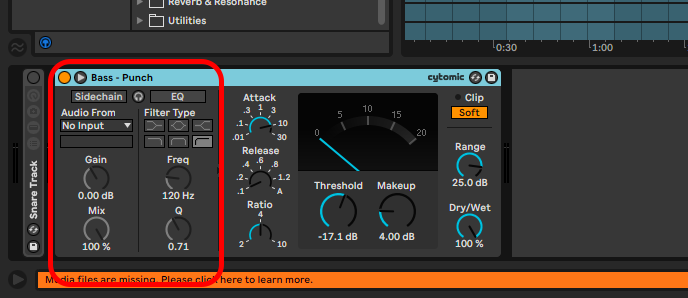
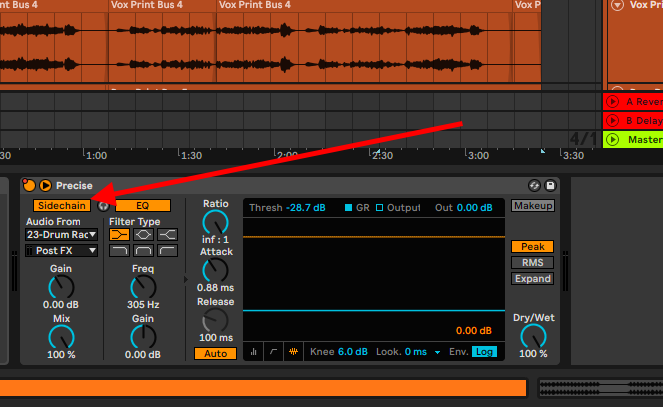
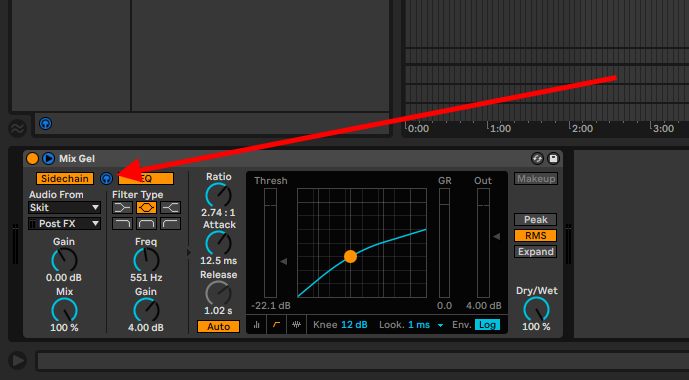
Step 2: once your compressor is loaded, open the sidechain extended menu:
Sidechain Panel
Step 1: Activate sidechaining and begin
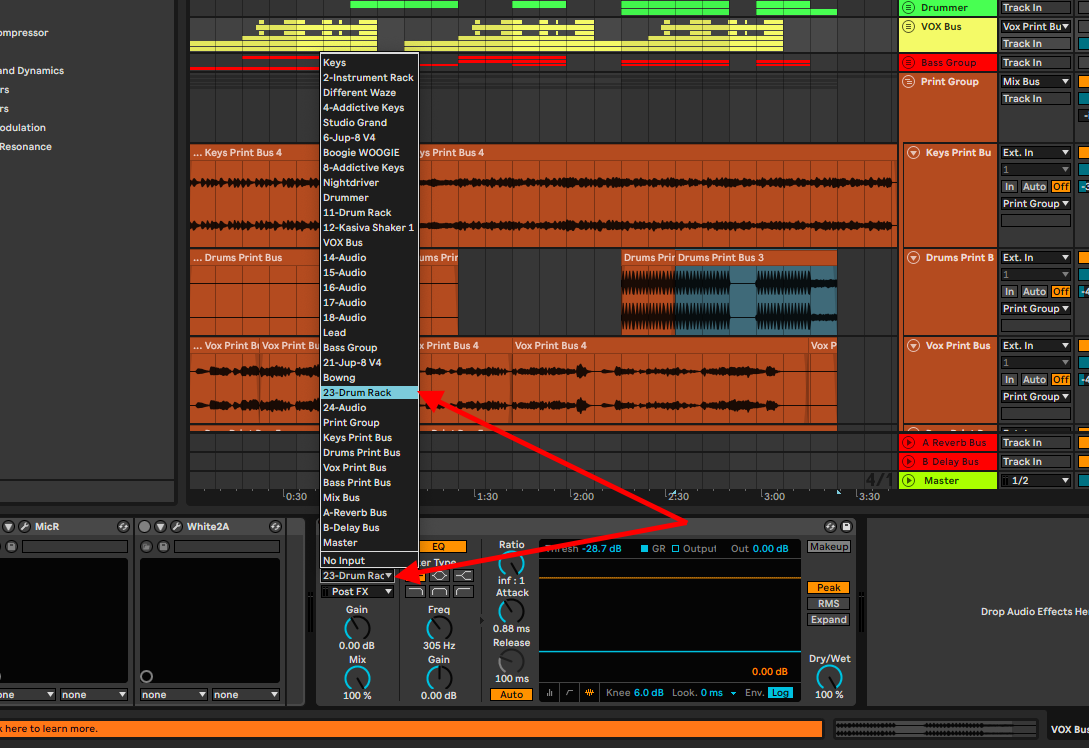
Here are the sidechaining parameters and what they do:
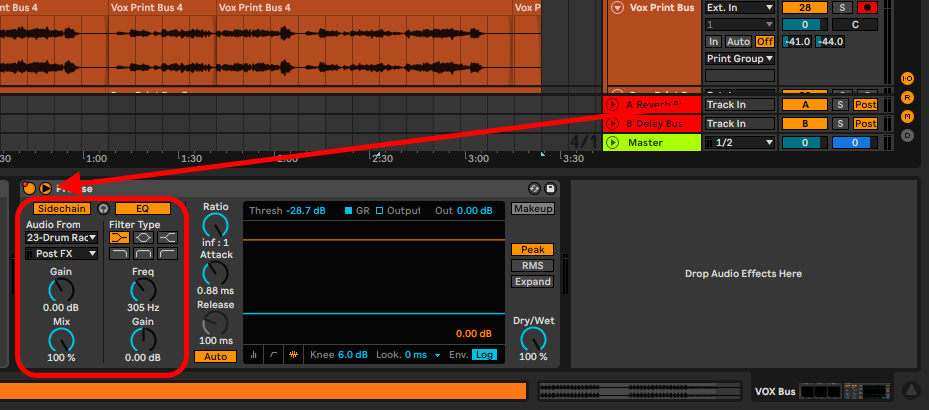
Audio From: this parameter allows you to choose the audio signal input that will trigger your compressor’s activation
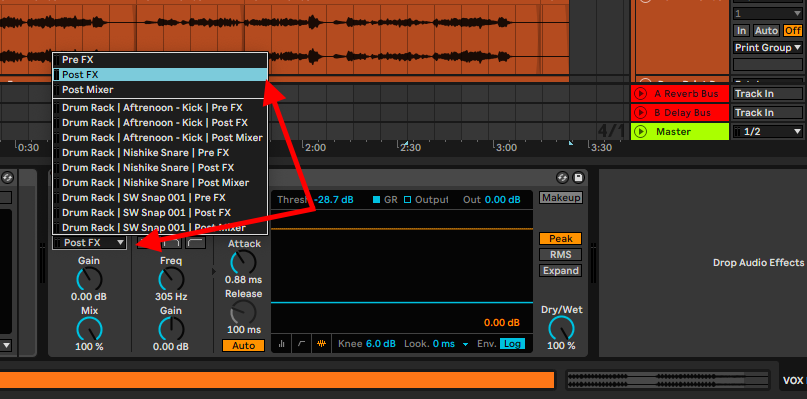
Pre/Post FX and Post mixer: Pre-FX means that the signal comes in ‘dry’ before any audio effects loaded into the track, while post-FX means that the audio signal comes in with the audio effects you have loaded into the track. Post mixer refers to the signal input after effects, panning, and fader level changes. Select your options here to suit your session.
Gain: this is the amount of loudness of your signal that comes into your compressor. Adjust this parameter if the audio input is too loud or too soft.
The Mix Control: this parameter affects the general audio signal input concerning gain pre/post-FX and Post mixer.
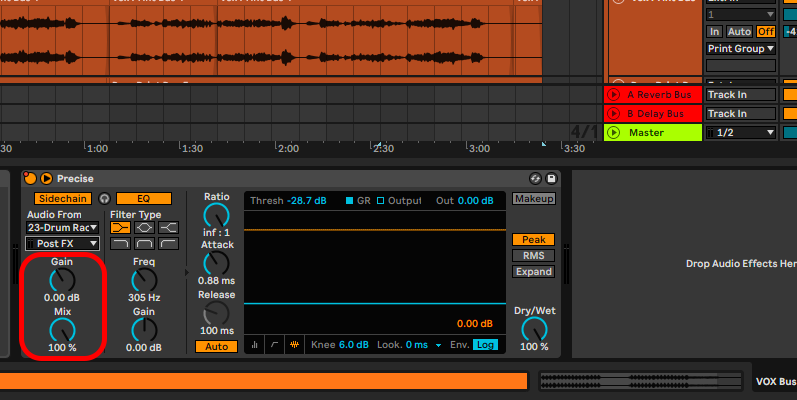
Handle these last two parameters carefully.
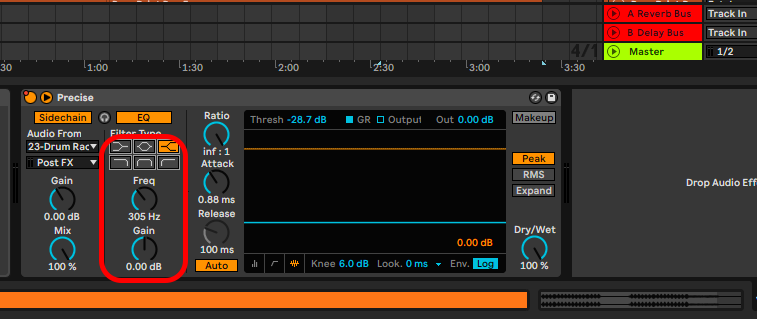
Equalizer Panel
Equalizer Panel goes further to affect the spectral range that the input signal occupies, and how the compressor will behave with the frequencies that come in the frequency range. You can also choose the best-suited frequency band.
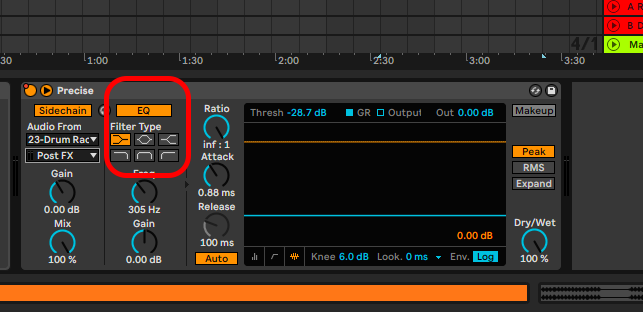
Depending on the frequency band selected you will get different parameter controls. If you select the low-pass, high-pass or midrange filters, you will deal with Q controls which affect how steep your EQ will be, while the bell curve, high-shelf and low-shelf band affect the gain. These frequency bands are affected by the frequency band range selections.
Tip! You can listen to your changes and parameter changes using the headphones icon between the Sidechain and EQ on/off toggles.
Sidechaining With 3rd Party Plug-in
Some 3rd party compressors (including compressor plug-ins) do not come with the sidechain function compatible with Ableton, while some do. For this demonstration, I will use Native Instruments Guitar Rig. You will notice that some of the sidechain functions are limited.
Here are some of the functions available to you when sidechaining with 3rd party plug-ins:
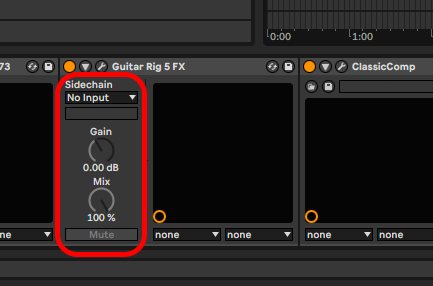
The functions afforded to you with 3rd party plug-ins are input selections, pre/post effects and post mixer options, and gain/mix control knobs
Manual Sidechaining
This technique is long and requires a lot of time to get every signal peak and trough to duck accurately to the reference track. I do not recommend this technique unless you have a handful of sections you need to have volume controls for creating space for your reference track. Here is how you execute this technique:
Step 1: identify the length of the peaks and troughs of your reference track
Step 2: create automation to suit the length of your reference track peaks and troughs

Pro tip! I highly recommend that you use this technique as a last resort or if you have one or two segments to sidechain.
Final Thoughts
Sidechaining is invaluable when you are mixing audio. You will need to do this to create space or glueing tracks and buses together. Often producers wonder how EDM producers such as Kaytranada make their kick and bass pop in the track, or how vocals cut through and sit above the track. You guessed it? Sidechaining is the answer. You can use sidechaining and the different sidechaining techniques to make your mixes sound clean and polished. Have Fun!
- How to Use Ableton Live’s Arpeggiator? - September 18, 2023
- How to Use the Piano Roll in Ableton Live + Shortcuts - September 18, 2023
- Ableton Arrangement View (Optimization & Usage) - September 16, 2023

")

