Track fades is one of the most useful tools in music production, and although audio clip or item fades are a must in any serious DAW, it is not the only way of fading in or out of a track or a song.
Let me show you the tools that REAPER gives you to fade tracks.
Recommended Read: Dynamic Split Function in REAPER
Item Fades
This is the classic way of fading tracks, it’s arguably the most used way of creating fades.
Mind you, this is only available if the track or song you’re trying to fade is an item. Either it’s a recording from the start or something you rendered it into a file.
REAPER by default creates small fades at the start and end of any item, you can change that setting in the Preferences, open it by pressing Ctrl+P (for Windows) or Cmd+, (for Mac), and go to the Media Item Defaults tab.
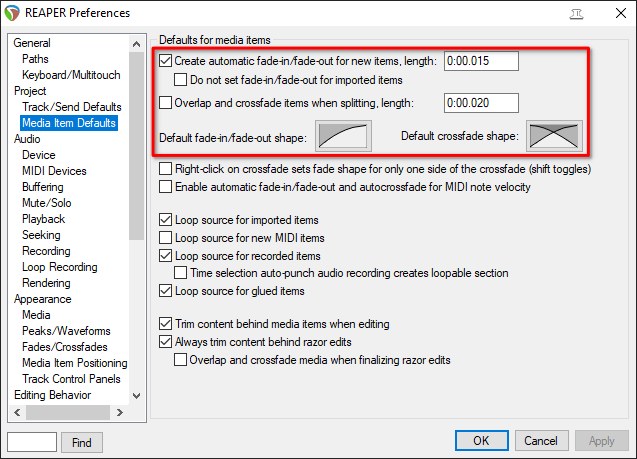
Here you can deactivate the auto fades, change the default fade length, or change the default fade shape of any items that you create in the project after changing the preferences.
Recommended Read: How to Split Stereo Tracks to Dual Mono in REAPER
Knowing this, you can also create or modify the fades on the existing items of your project by dragging in from either top corner of any item.
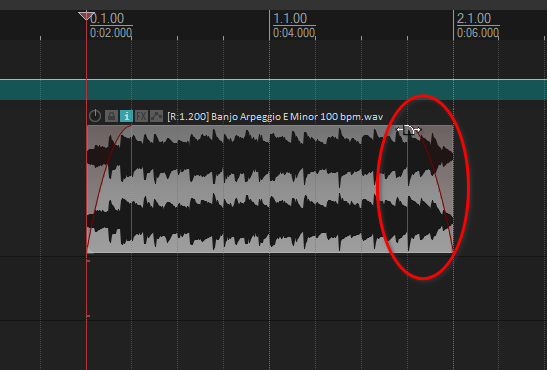
You can create fades as long as the item allows, or until it meets with another fade. When you drag one fade over the other in the same item, the first will push the latter.
Once you have a fade, right click over the fade to give it a different shape if the application asks for it. For this item I will use a gentle slow start and end shape.
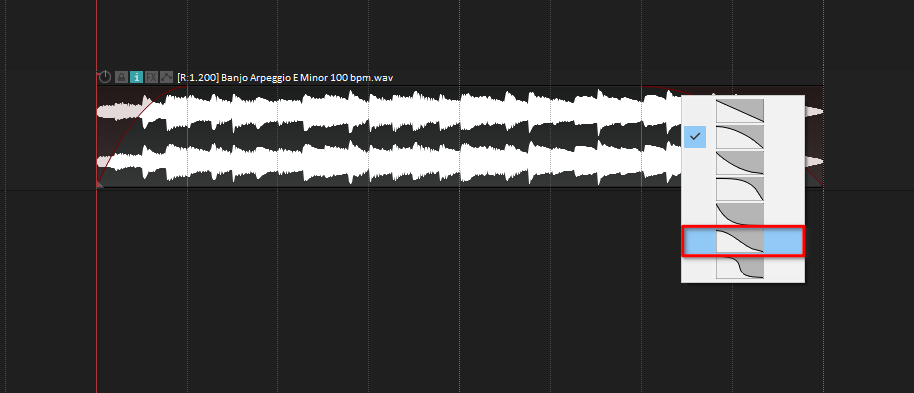
REAPER will automatically update the waveform to the fade changes you make in real time.
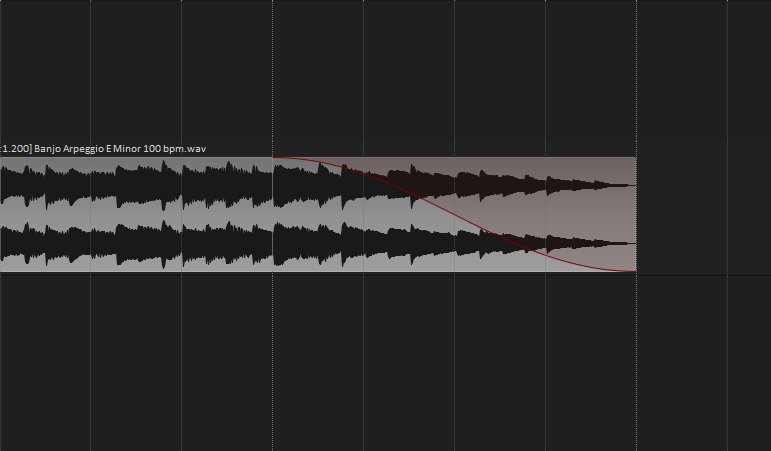
It’s good to have in mind that these fades, because they’re created on the item level, they will take effect before any FX processing, so if you want to keep how a compressor or a saturator reacts to the signal while the material is fading in or out, you probably want to use the next fade method.
Recommended Read: Convert Stereo to Mono & Mono to Stereo in REAPER
Automation
When you want to fade in/out on a mix or a virtual instrument, it’s not always the most efficient workflow to render it and edit the rendered file after that. In this kind of situation it’s probably better to use the REAPER automation/envelope features to archive this.
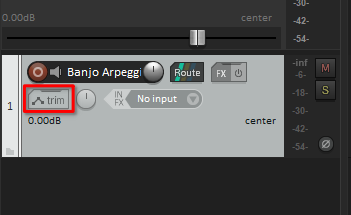
First, let’s take a look at the automation options that REAPER has available. In order to show each track’s automation settings, click on the trim button on the track.

Volume is your classic fader automation, but the Fader will trim what you write/draw on the lane. If you want the Fader to move reflecting what is written in the envelope lane, set the Automation mode to Read.
Volume (Pre-FX) acts just like automating a gain or trim plugin before all your FX. Automation moves done in this envelope lane will show on your track items’ waveforms.
and Trim Volume is an additional Volume envelope lane that will never be reflected on your fader by moving. Very similar to having a gain or trim plugin at the end of your FX chain and using it for automation.
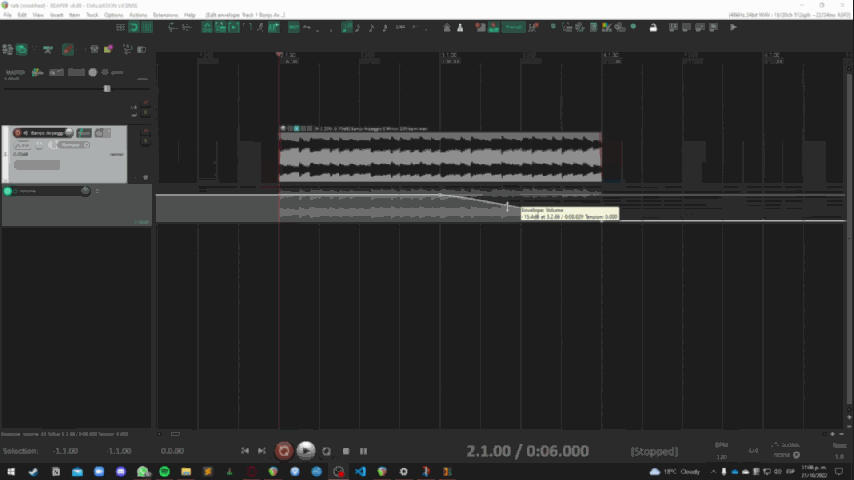
For this case, I will use regular Volume automation. In order to do this, click on the checkbox beside the name in the Envelope track settings window. Or, select the track and press V to show the lane.

Next, to create an Envelope point, hold Shift, and click over the envelope lane.
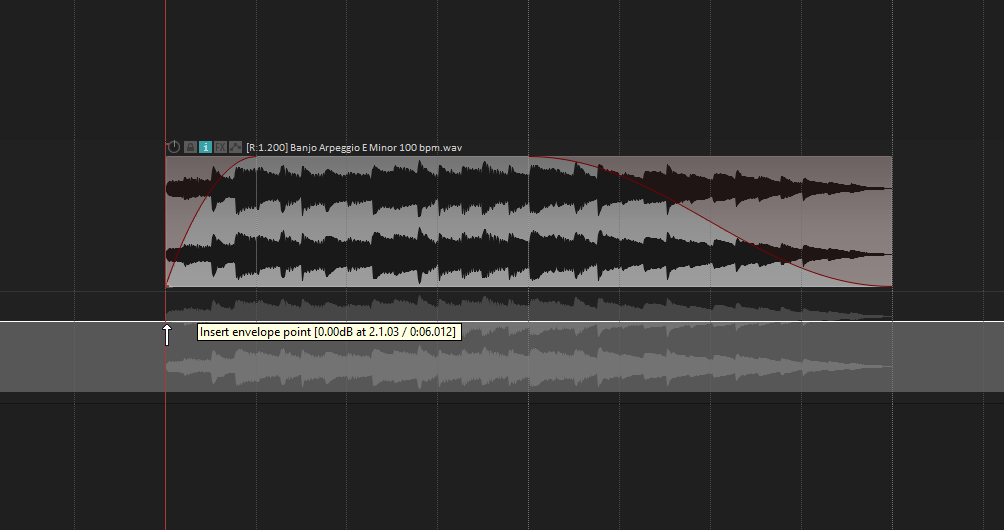
Now you can create the envelope points necessary to create fades.
After creating a fade using automation, you can also change the curve of the fade. Right click on the envelope point that starts the fade, and go to Set point shape. Here you can select which curve you want your fade to have.
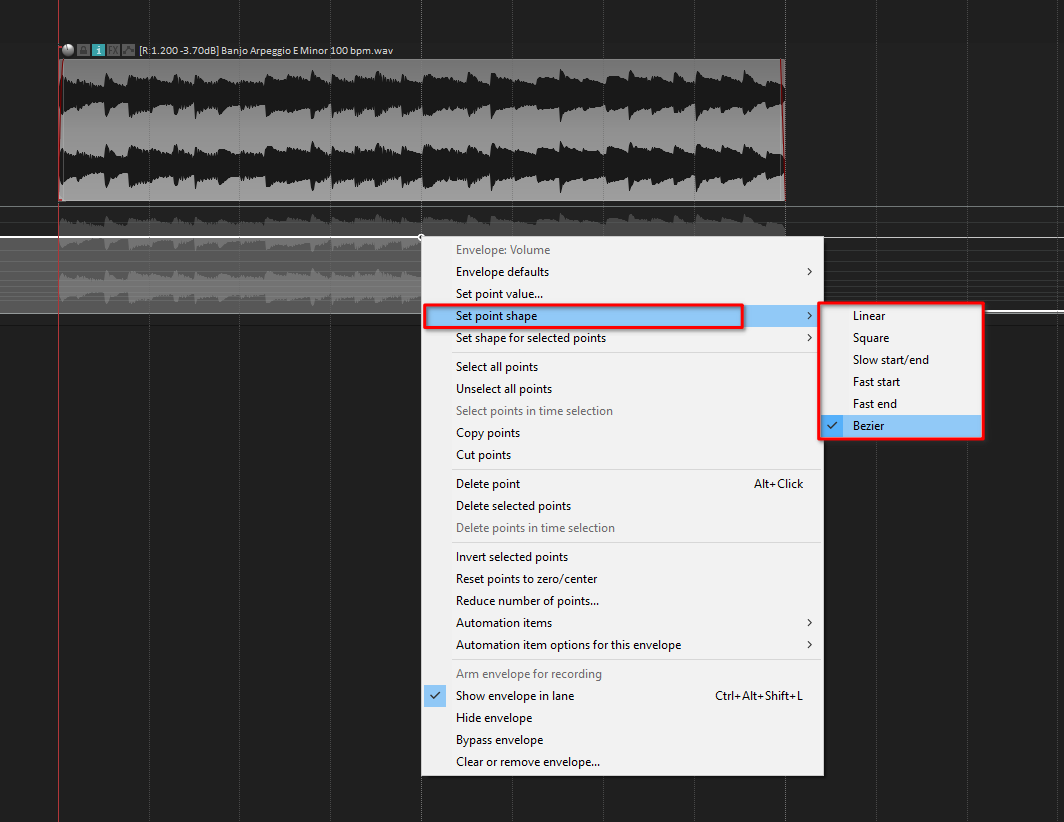
The Bezier type of curve is usually the most suited for song fade outs. You can also change the curvature by holding Alt (on Windows) or Opt (on Mac) and dragging the lane that creates the fade up or down.
Automation can also be applied to folder tracks to fade out a group.
VCAs
This method involves the use of automation and track groups, it allows you to fade out multiple tracks at once without depending on folders. Track automation works just like in the last section.
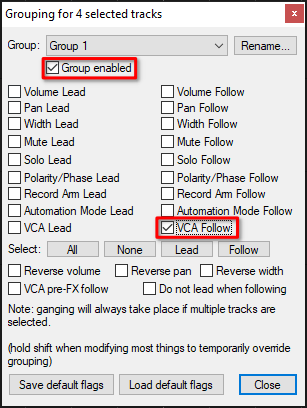
First, in order to create a track group that obeys the VCA, select the tracks you want to fade and press the shortcut Shift+G, this will open up the track grouping window.

Next, select the group you want to assign your tracks to in the top section of the window. After that, make sure the group is enabled, and check the VCA follow option to set the tracks up.
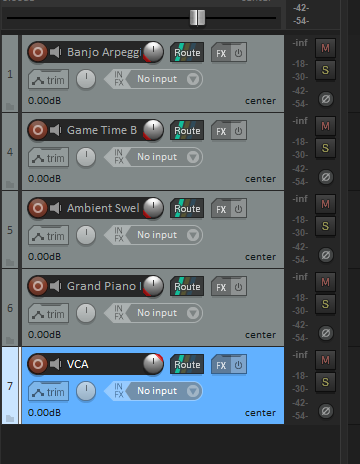
Now, without closing the Grouping window, create a new track and select it, this will be the VCA track. The grouping window will update the flags that correspond to the VCA track.

Make sure that the group number is correct and enabled, then, check the VCA Lead option. This will assign the VCA track to control the corresponding group.

The tracks that belong to the group should now have a ribbon above or below the volume knob/fader corresponding to their status of Lead or Follow.
Now, in the next gif you can see how the automation written on the VCA track reflects on the output of the rest of the tracks.

Conclusion
These are three different ways of fading out tracks in REAPER, each has its use-case with their advantages and disadvantages. I encourage you to try them out in different situations depending on your workflow. Have fun!

- Mixing in REAPER [ULTIMATE Guide!] - September 18, 2023
- How to Record in REAPER (Guitar & Vocals) - August 2, 2023
- Writing MIDI Drums in REAPER - July 3, 2023
")

")
