Sometimes it is impossible to capture a clean signal and noise ends up contaminating your recordings regardless of what you do. When this happens, using a Noise gate or EQ may not always be the best solution, and it may even cause your recordings to sound unnatural.
One scenario where noise is a common issue is live recordings. The other day I was recording a live session, and once I heard one of the distorted guitars I knew dealing with it would be a pain. In this situation, gating (with a pedal or ReaGate) would not do the trick, and EQ was certainly out of the question since it would compromise the guitar tone. I knew I had to find a more sophisticated solution.
For these types of situations using a Noise reduction software is a more viable option. Unfortunately, most Noise reduction tools are not cheap. Thankfully REAPER comes with a free and amazingly powerful Noise reduction plug-in called ReaFIR! In this tutorial I will show you how ReaFIR works and how you can use it to get noise free recordings.
How Does Noise reduction Work?
A Noise reduction software deploys algorithms that build an approximation of the signal’s Noise profile and then applies destructive interference to eliminate the noise from your tracks.
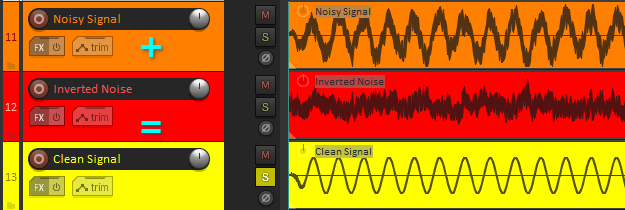
That’s the technical way of saying that it copies the noise of a recording and inverts the polarity to cancel it out, similar to noise canceling headphones. This results in a generally cleaner reduction of the noise in a recording. The catch is that noise reduction algorithms are not perfect, they usually need a noise sample of at least a few seconds to build the Noise profile.

However, you should know that Noise Reduction tools tend to generate audible artifacts if overused, and add a lot of latency to a signal, so they’re not usually suitable for live monitoring. Also, they work better when applied to recordings that have constant noise, if the noise in the signal keeps changing a lot throughout the recording, the application may not be as effective in some parts.
How to Use ReaFIR For Noise Reduction
ReaFIR is a stock REAPER plug-in that can do pretty amazing stuff such as Linear phase EQ, Resonance suppression, Gating, and among these functionalities, also Noise reduction! Now let’s get into how we can make use of this function specifically.
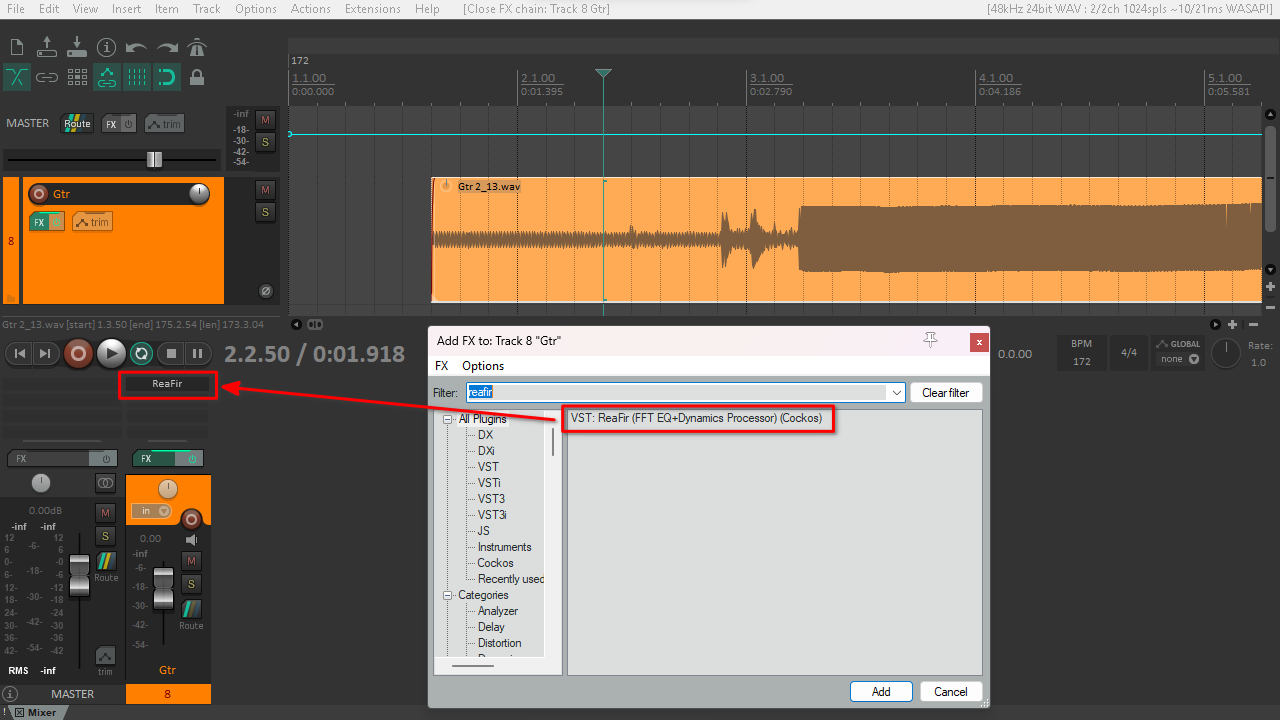
Start by loading the plug-in into the track where you need noise reduction. I will load it into a guitar recording that has a lot of noise or ‘hum’.
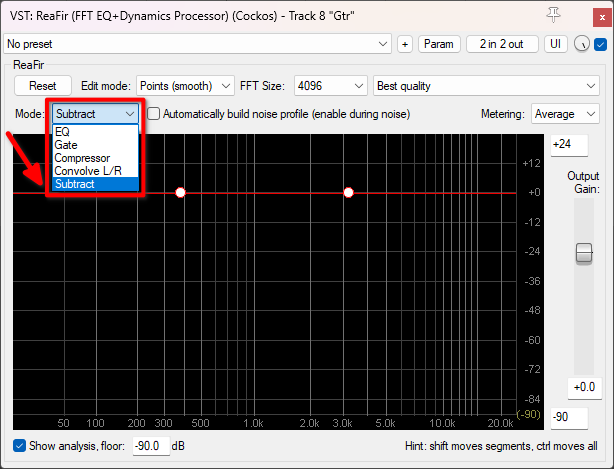
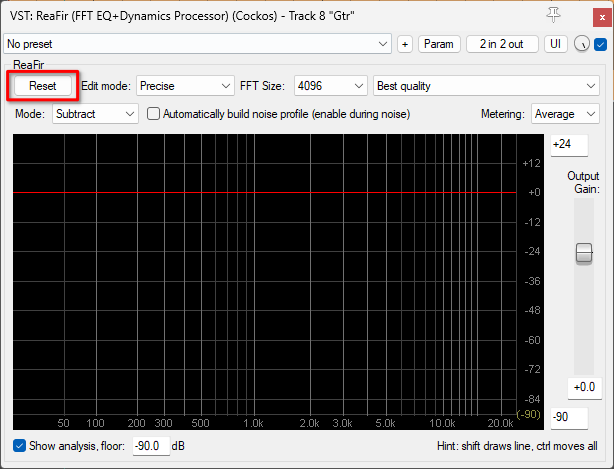
Then, change the ReaFIR Mode to Subtract
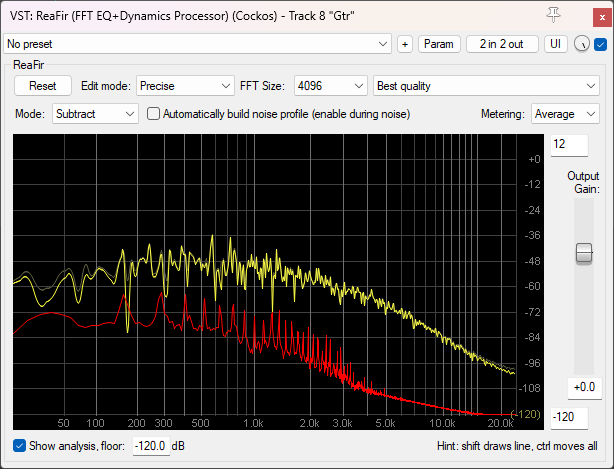
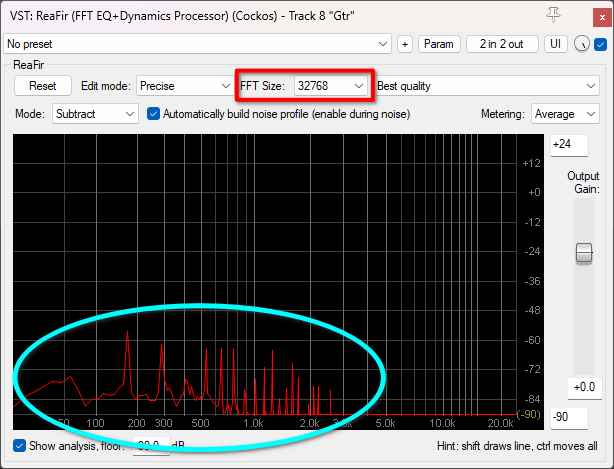
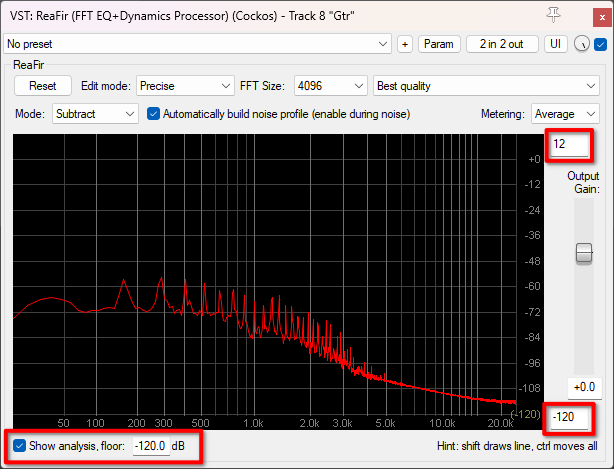
Next, you need to build the Noise profile. To do this, enable the ‘Automatically build noise profile’ and play a few seconds of the noise that you want to remove in a loop, ReaFIR will draw a red line from the bottom of the black Frequency display to represent it.
In this case, I asked the guitar player not to use a gate pedal while recording, knowing that ReaFIR would work better on post, rather than Noise gating. A gate would chop off the noise when the guitar is not playing and let it be when the signal goes above the gate’s threshold. Check the ReaGate article to know more about how it works.
Once you stop the playback, uncheck the option to build the Noise profile, and ReaFIR will be ready to remove the noise in your recording. The next time you play back your track, you’ll notice that Noise reduction has been applied.

If you want to reset the Noise profile and build it again, you can use the Reset button on the top and start the process again.
Let’s hear the difference between Noise gating and Noise reduction. I recommend listening to these audio samples in an acoustically treated space, or using studio headphones or IEMs.
Raw recording:
Using ReaGate:
Using ReaFir for Noise reduction:
Custom Tuning Options for ReaFIR
The default configuration will probably do the job for most applications, but if it doesn’t, there are a few settings that can be tweaked to optimize ReaFIR to your needs.
Increasing the FFT Size parameter will make ReaFIR more precise while creating the Noise profile, at the cost of a lot more latency. If you already had a Noise profile, you will need to create a new one after changing the FFT Size.
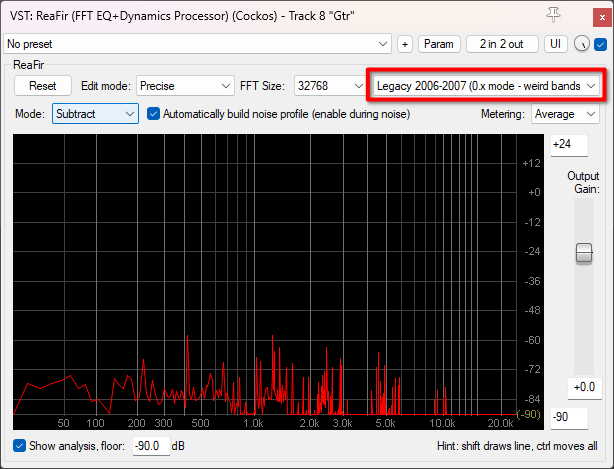
Changing the Best quality option to one of the legacy options can result in interesting sounds, especially if you’re into sound design and are looking for weird, glitchy or drowned sounds.
The Noise profile works somewhat like a gate threshold for each frequency and you can modify it manually by dragging your mouse pointer on it.

Hold Ctrl on Windows or Cmd on Mac and drag your mouse pointer to move the Noise profile up, making the noise reduction effect more prominent, or down if you want it to be more subtle. Keep in mind that if you have the Noise profile too low, the effect may not work at all.

Also, holding Shift lets you draw lines along the Noise profile, modifying parts of it. If you want to take advantage of this feature, you may prefer resizing the plug-in display so it fills the whole screen.

There are also a few options to fine tune the metering of the signal and the Noise profile, I recommend changing the Noise profile top and bottom limits to +12 dB and -120 dB on the right side so that the whole noise profile is easier to see for most use cases.
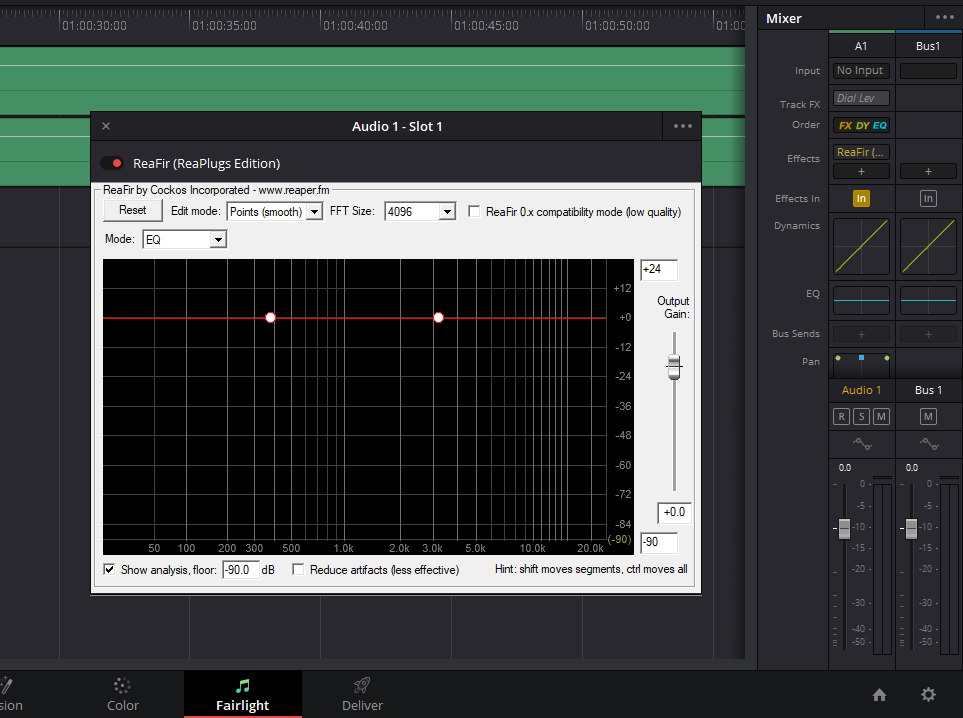
ReaFIR on Other VST Hosts
Just like most REAPER native plug-ins, ReaFIR is available on the ReaPlugs VST FX Suite. You can install the plug-ins system wide, and use them with any program capable of running VST2 formats e.g. other DAWs, OBS, video editing programs etc.
Final Words
ReaFIR is one of REAPER’s most powerful tools that has a lot of different functionalities with noise reduction being one of the more prominent ones. If you want to know more about the rest of its functions, take a look at the Reaper effects guide and stay tuned for future articles. Give it a try and don’t forget to also check the REAPER section to discover other fun, interesting, and useful techinques. Happy producing!

- Mixing in REAPER [ULTIMATE Guide!] - September 18, 2023
- How to Record in REAPER (Guitar & Vocals) - August 2, 2023
- Writing MIDI Drums in REAPER - July 3, 2023

![Mixing in REAPER [ULTIMATE Guide!]](https://ProRec.com/wp-content/uploads/2023/09/mixing-in-reaper-180x180.png "Mixing in REAPER [ULTIMATE Guide!]")


)