Complete Guide]
FL Studio lagging can be detrimental to your workflow and creativity. Latency can take the joy out of producing especially when you’re practicing or recording live audio and MIDI. Having a fix for these could be the difference between spending hours looking for a solution or spending those hours doing what you love.
In FL Studio, latency will largely be governed by these three things; how big your project is, how strong your computer is, and your FL Studio settings. Since we have little to no control over our computer’s specs, we’ll focus on using the other two factors to fix the latency and lag.
Let’s take a deep dive and look at the various ways to fix latency/lagging in FL Studio.
Use the Correct ASIO Driver
A lot of times, latency can be fixed by switching to the correct ASIO driver. All audio interfaces come with drivers that should be installed on your computer to ensure optimum performance especially when tracking. If you’re mixing, you can be a little more lenient with the choice of audio interface. However, using your audio interface’s drivers is always a safe bet to minimize the latency in FL Studio.
Check if you have selected the right ASIO driver by following the steps below.
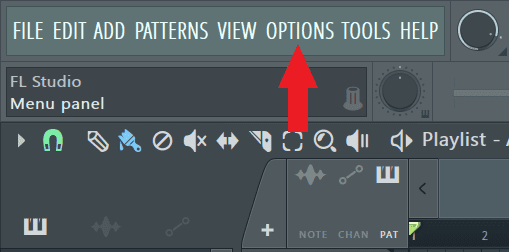
Step 1: Go to ‘Options’ on the main toolbar.
From the drop-down menu that opens, click on ‘Audio settings’.
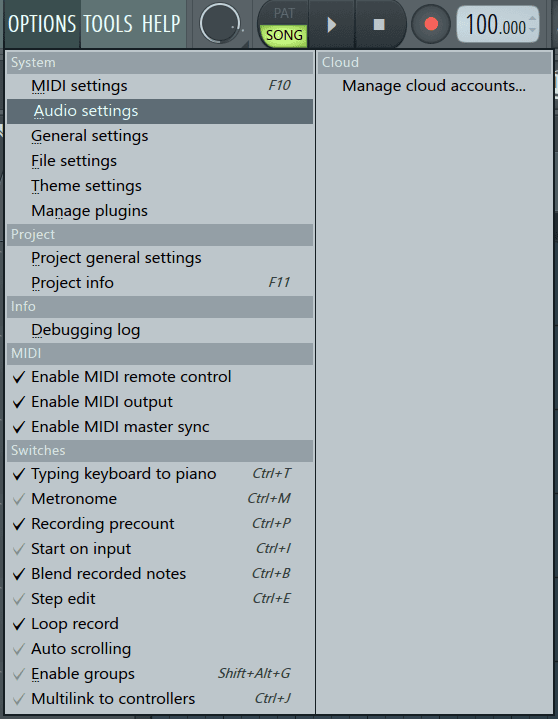
Note: This is how to open FL Studio’s audio settings page which is referenced throughout the article.
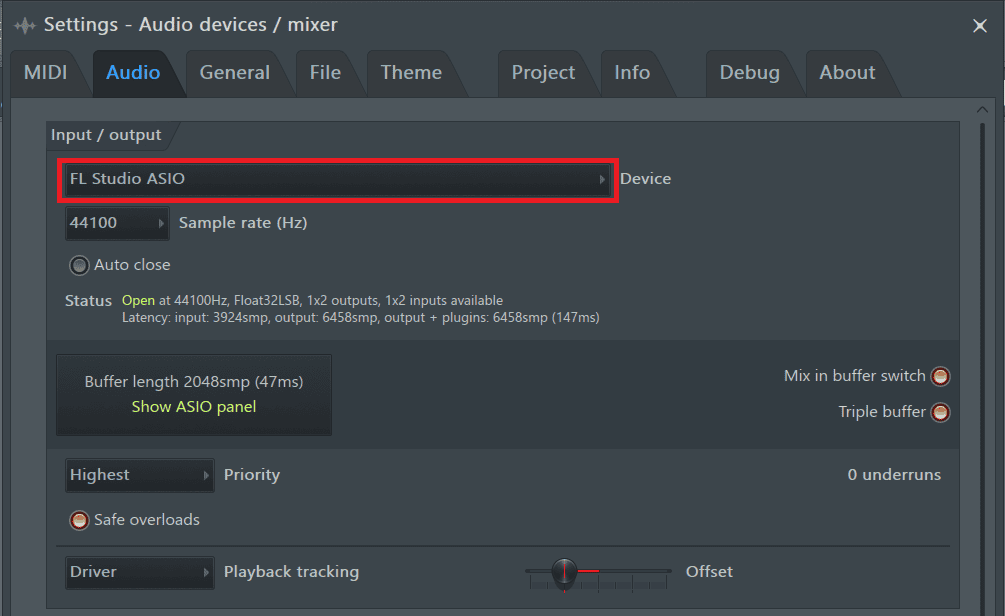
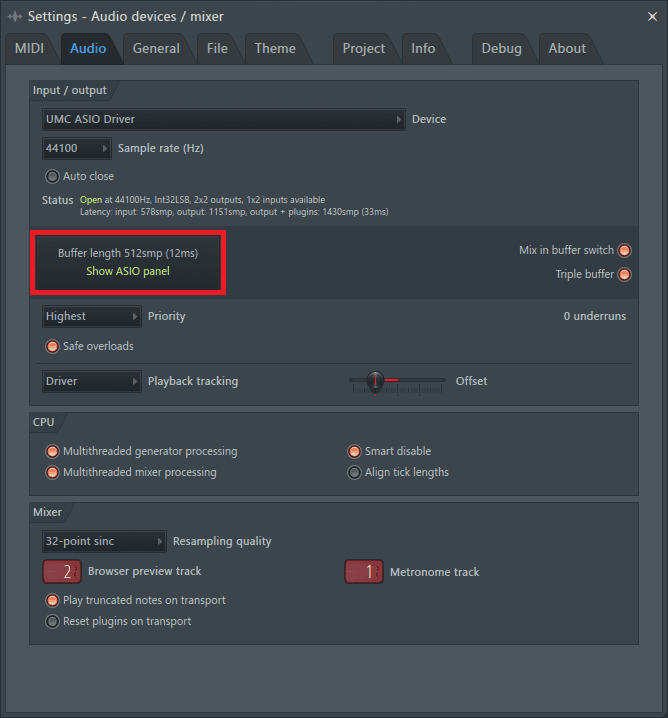
Step 2: On the Audio settings page, click on the area marked below to view the audio drivers installed on your computer.
From the list, select the ASIO driver that came bundled with your audio interface. In my case, it’s the ‘UMC ASIO Driver’.
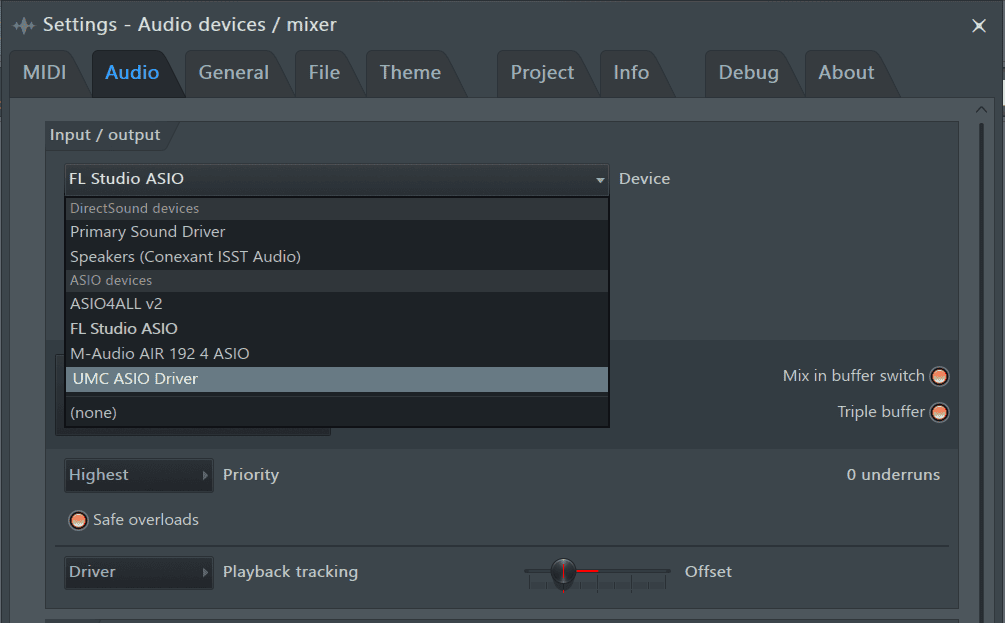
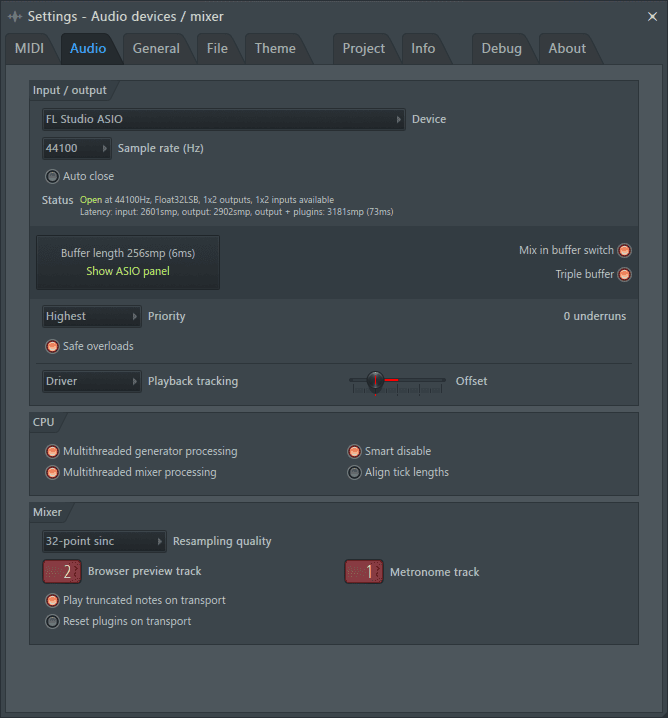
If your audio interface’s driver is not on the list, try downloading and reinstalling the driver. Alternatively, you could use ASIO4ALL if you can’t get the drivers. It is a default driver aimed at providing the lowest possible latency for FL. Another great alternative is FL Studio ASIO, which is handy if you have applications open in the background that are also using the audio drivers.
Decreasing the Buffer Length
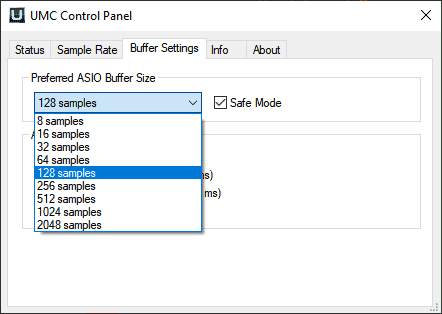
The buffer length determines how long your computer is allowed to receive, process, and return audio to your audio interface. If you experience latency during tracking, decreasing the buffer length will do the trick since it reduces the time taken to process the audio thus in turn reducing the latency experienced. Set the buffer length to 128 samples or as low as your computer can handle without crackles and pops in the audio. Although this may fix the latency, it’s also more demanding of your CPU. If you experience crackling audio, increase the buffer length. For mixing, you can set the buffer length to 1024 samples.
To change the buffer length:
Step 1: Open the Audio settings page.
Step 2: Click on the marked area below to open up the ASIO panel.
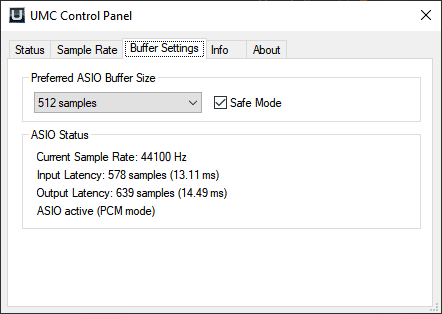
FL Studio recommends setting the buffer length between 10-40ms depending on what stage of the production you’re currently in.
Each ASIO panel will look different. Regardless, locate the ‘Buffer settings/length/size’.
To reduce the latency, I’ll decrease the buffer size to 128 samples.
While on the audio settings, try turning on or off ‘Mix in buffer’ and ‘Triple buffer’ to see if this fixes the latency.

Activate Multithread Processing
Our computers come with multiple cores that we can utilize when producing or mixing in FL Studio. Spreading the load across multiple cores lightens the stress on the CPU thus reducing the latency, and allows us to do more processing in our project. To activate multithread processing:
Step 1: Open FL Studio’s Audio settings. The multithread processing settings are located in the CPU section.
Activate ‘Multithread Mixer Processing’, ‘Multithread Generator Processing’, and ‘Smart Disable’.

Smart Disable
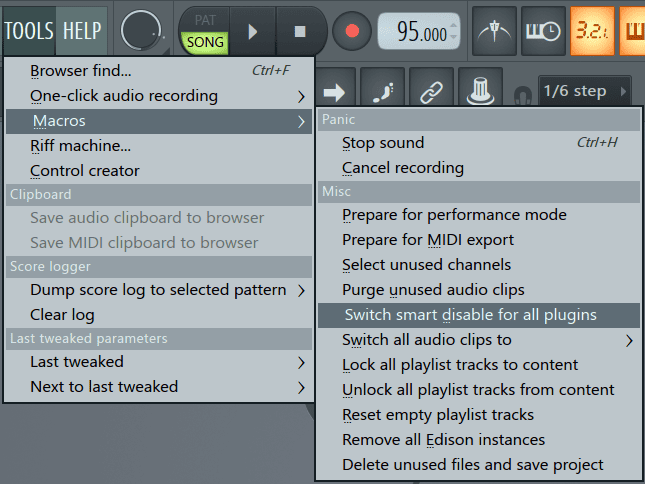
This disables inactive plug-ins and only activates them once they’re in use. It is particularly useful for big projects with heavy processing. To activate smart disable, go to Tools>Macros>Switch smart disable for all plugins.
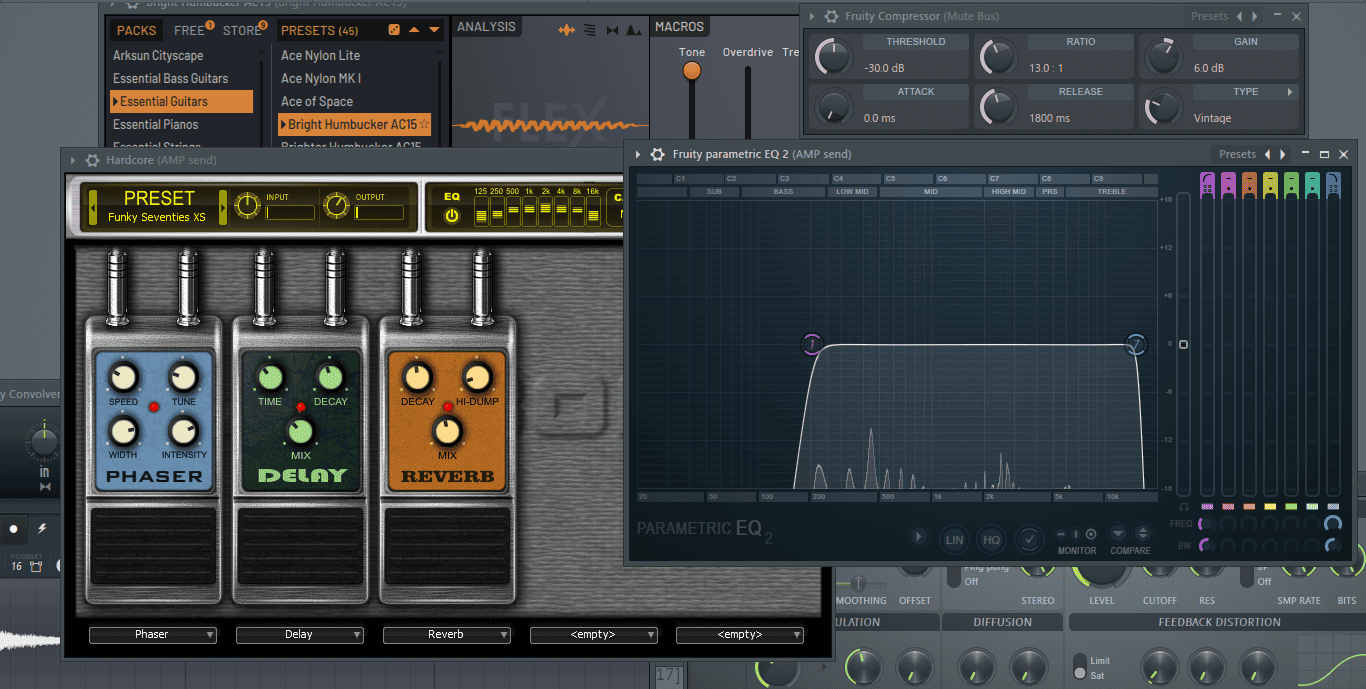
Closing All Plug-In Windows
It’s easy to get carried away while creating and forget to close some plug-in windows once you’re done with them. Some of these unnecessarily open windows may be taxing your system’s CPU and GPU.
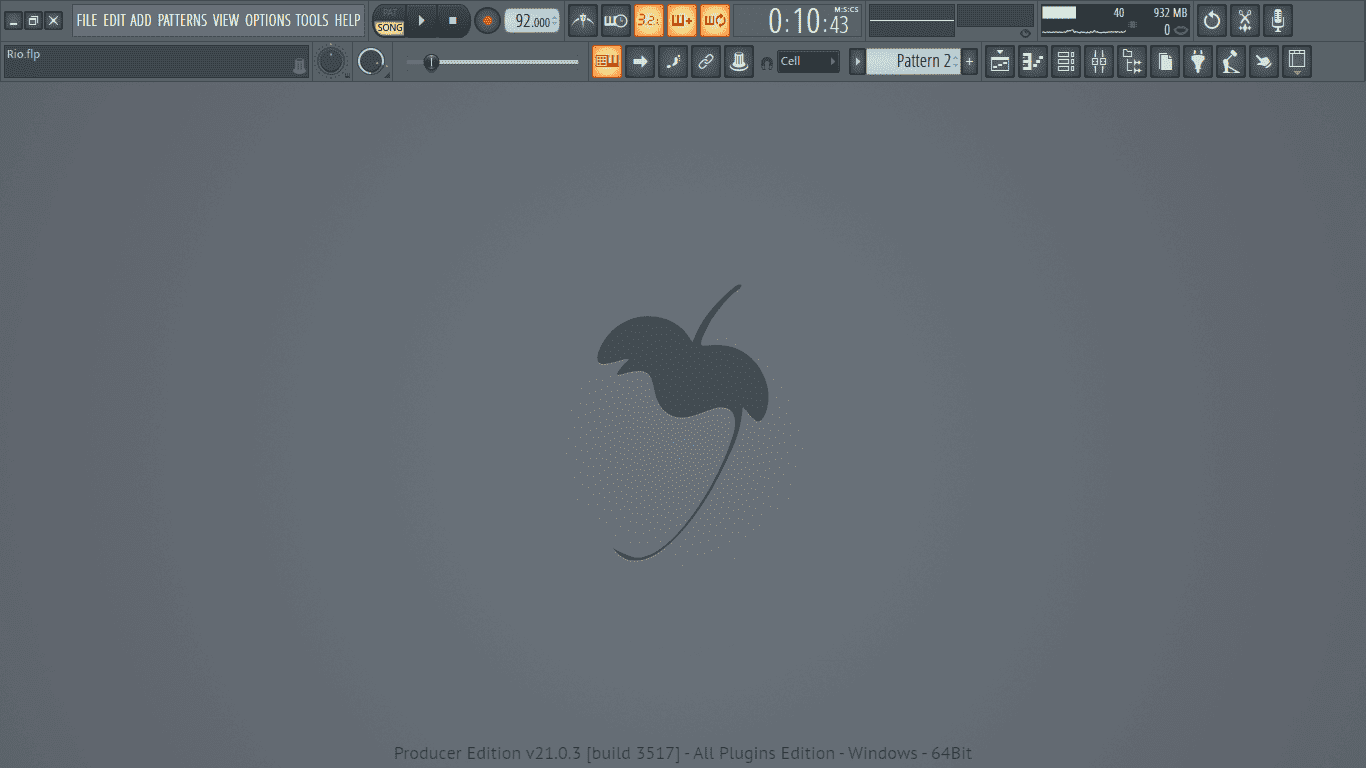
It’s always a good practice to keep plug-in windows closed unless you’re actively working on them. Luckily in FL Studio, hitting F12 will automatically close all open plug-in windows and other windows such as the mixer, the piano roll, and the playlist. Closing all these windows will take you back to FL Studio’s default page, but don’t be surprised, nothing was deleted. All information contained in the windows can be viewed by opening them again
Temporarily Disabling CPU-heavy Plug-Ins
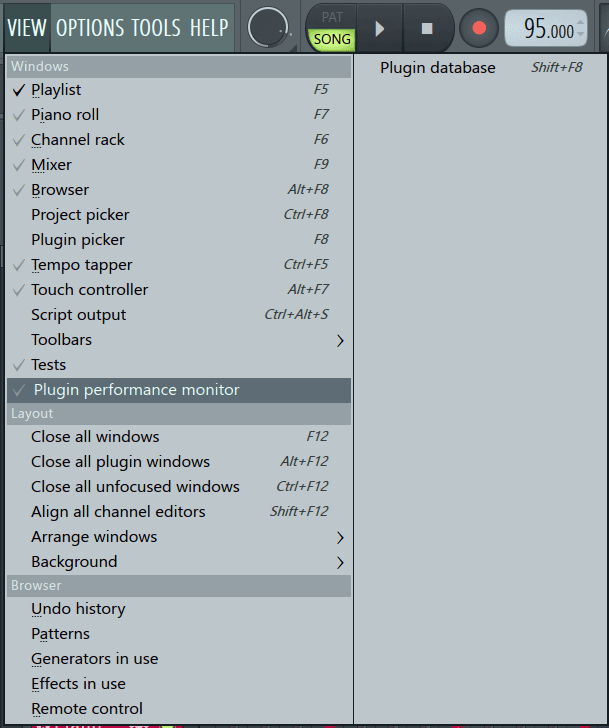
To free up more CPU and fix latency, you can temporarily disable plug-ins that are strenuous on the CPU. View the plug-ins taking up the most CPU by going to ‘View’ in the main toolbar and selecting ‘Plugin performance monitor’.

The plugin performance monitor ranks the plug-ins according to their CPU usage. Click on ‘Freeze’ at the top to pause the list from updating.
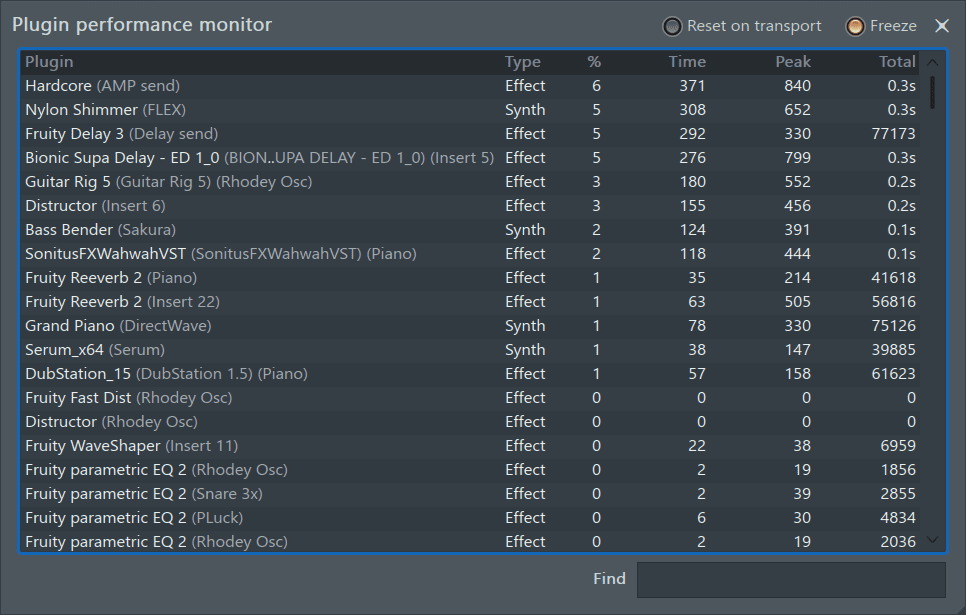
Once you’ve identified the CPU-heavy plug-ins, you can disable them temporarily if they’re not detrimental to the mix, and enable them once you’re ready to export or done recording.
Deleting Unused plug-Ins
Another way to fix latency is by deleting unnecessary plug-ins in the project. While we may test out many ideas, only a few of them will be part of the final product. Deleting these unused plug-ins frees up more space on your CPU and reduces the latency. To delete unused plug-ins:
Step 1: Go to Tools on the main toolbar.
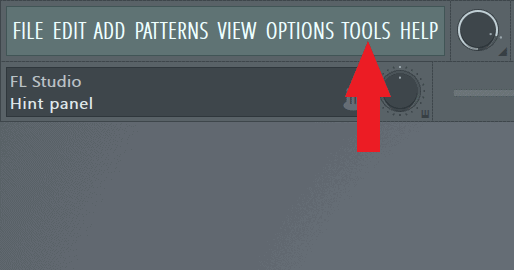
Step 2: On the drop-down menu, go to Macros>Select unused channels.
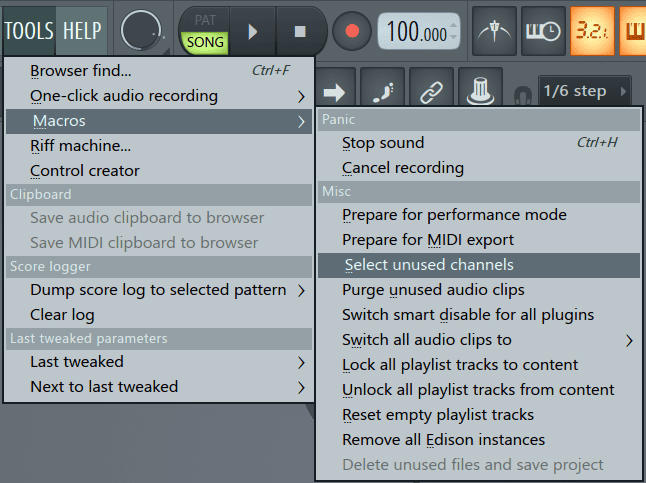
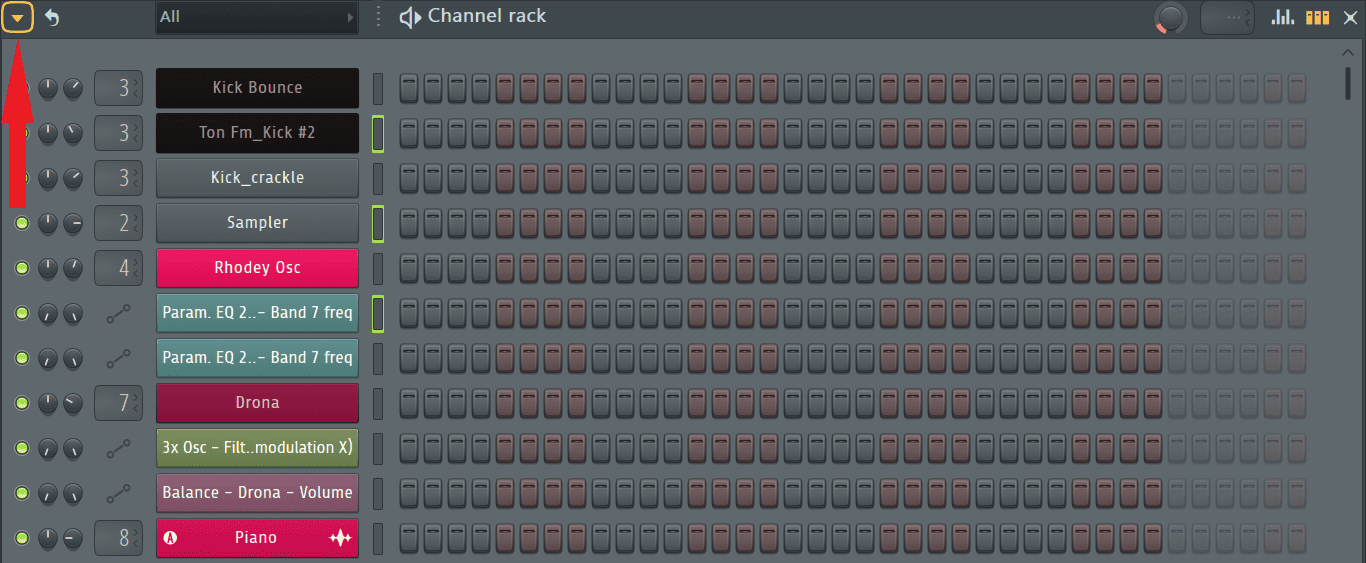
This action will select all the unused channels in the channel rack.
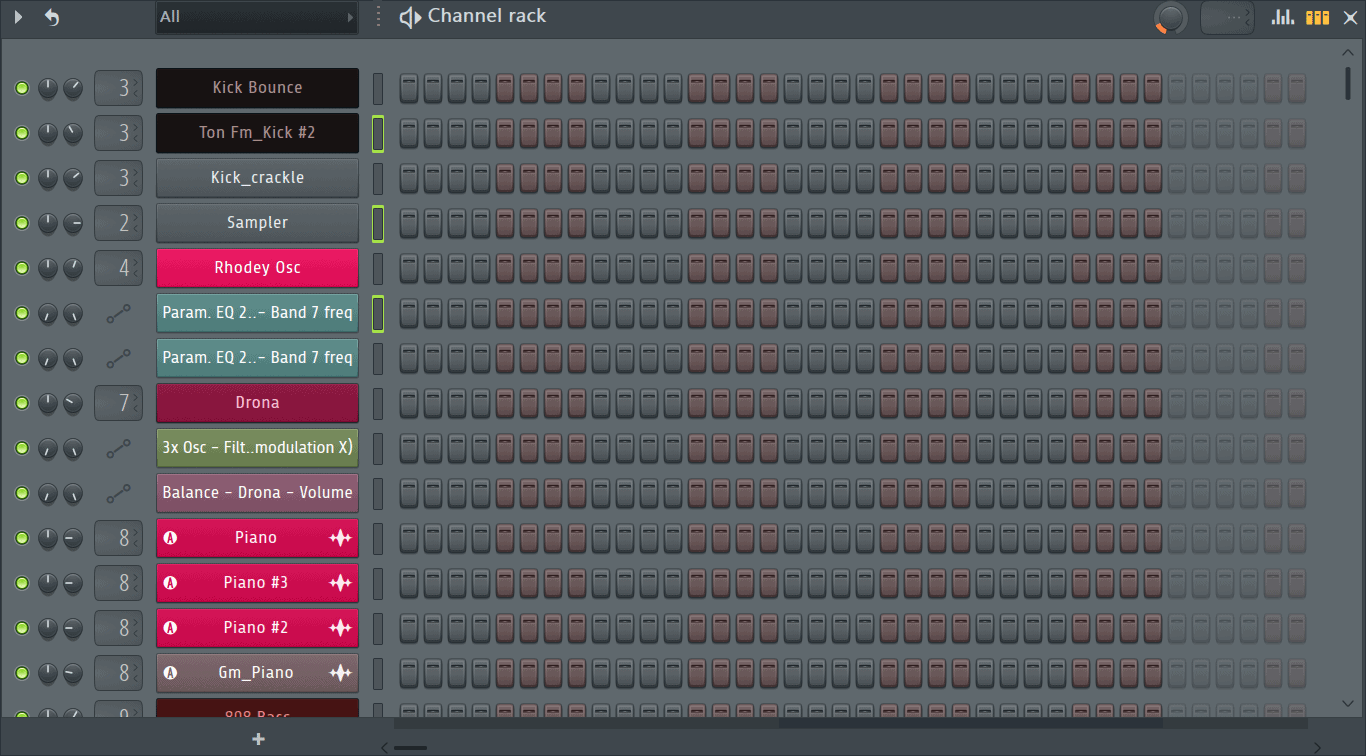
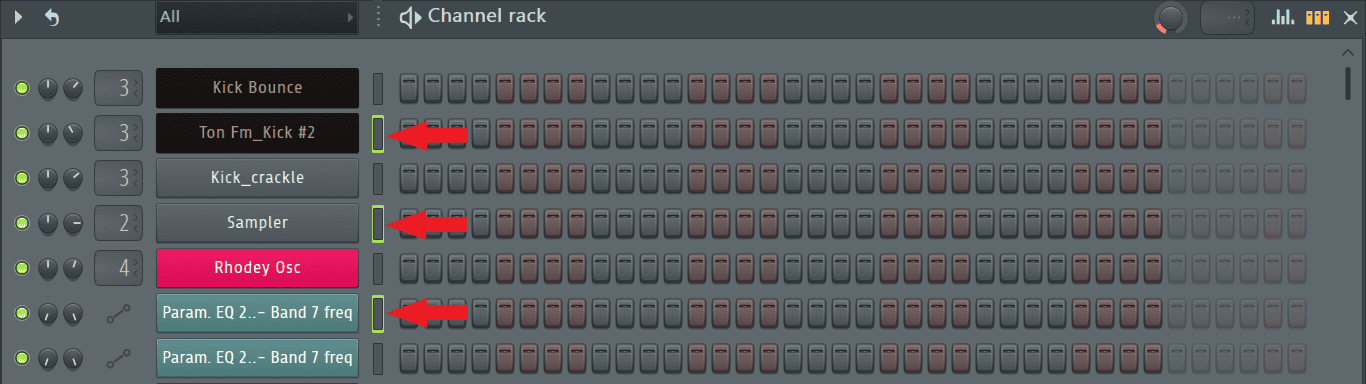
The channel selectors of the selected channels will have a green glow around them.
Step 3: With the channels still selected, click on the arrow at the top left corner of the channel rack.
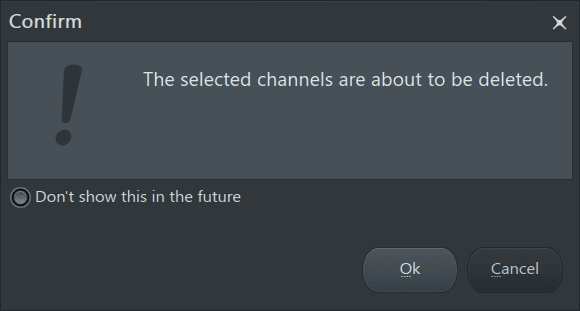
Step 4: From the drop-down menu, select ‘Delete selected’.
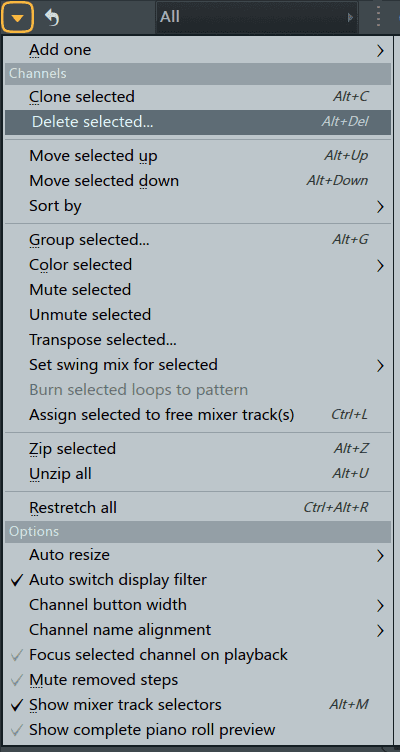
A window will pop up asking you to confirm the deletion. Click ‘Ok’.
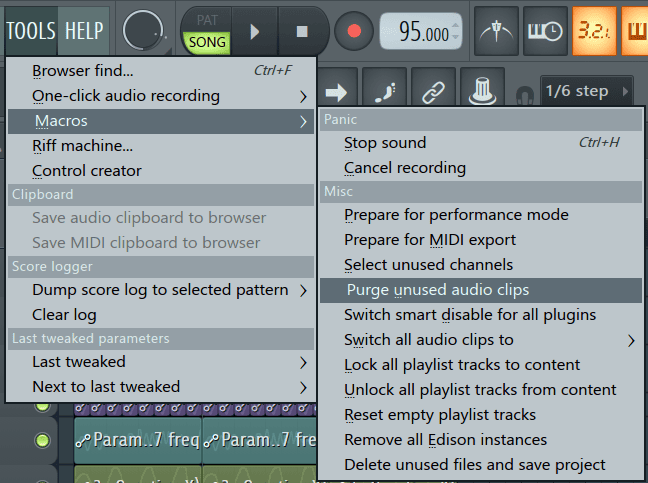
Deleting Unused Audio Clips
Deleting unused audio clips frees up RAM and lightens the load on the CPU, therefore reduces the latency. Remove unused audio clips by going to Tools>Macros>Purge unused audio clips.
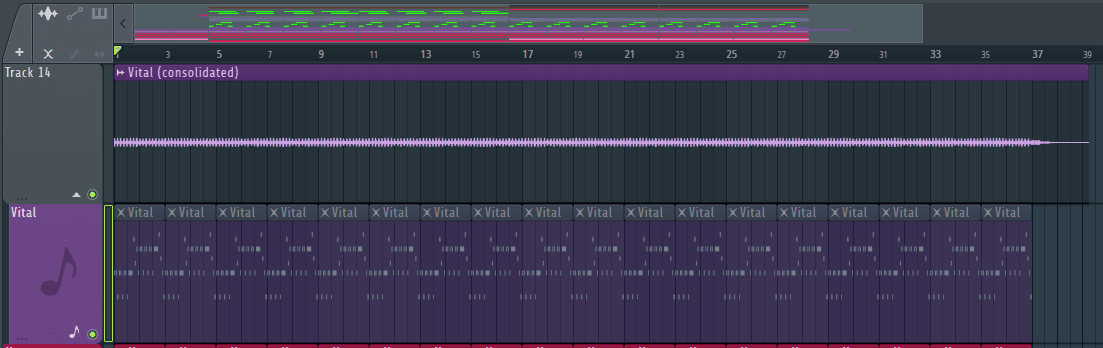
Freezing/Consolidating Tracks
Another fix for latency in FL Studio is consolidating MIDI tracks to audio. This is a great way to do away with CPU-heavy plug-ins and patches that could be creating latency and replace them with lighter, CPU-friendly audio tracks.
Step 1: Open the plugin performance monitor by going to View>Plugin performance monitor.
Step 2: Identify CPU-heavy plug-ins from the plugin performance monitor.
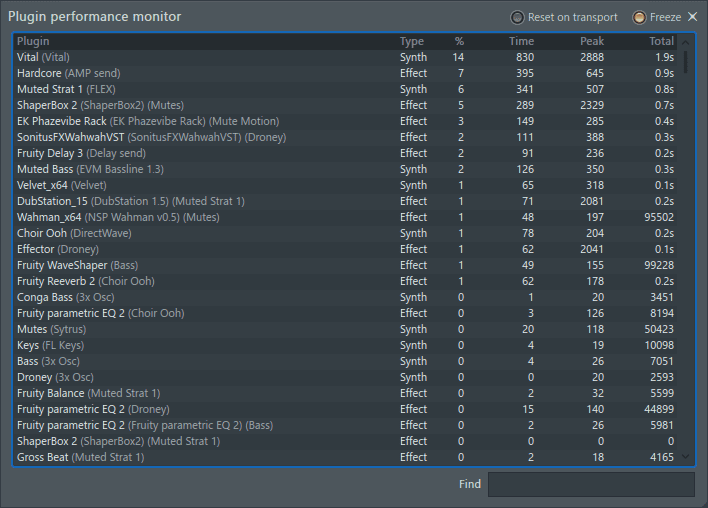
‘Vital’ is currently the heaviest plug-in on the CPU.
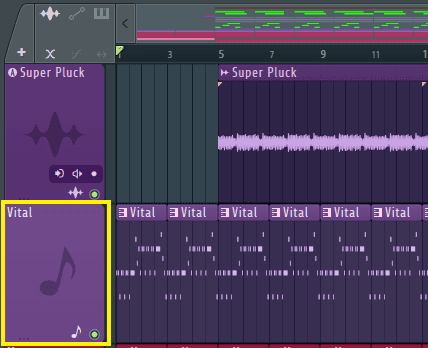
Step 3: Locate the plug-in in the playlist.
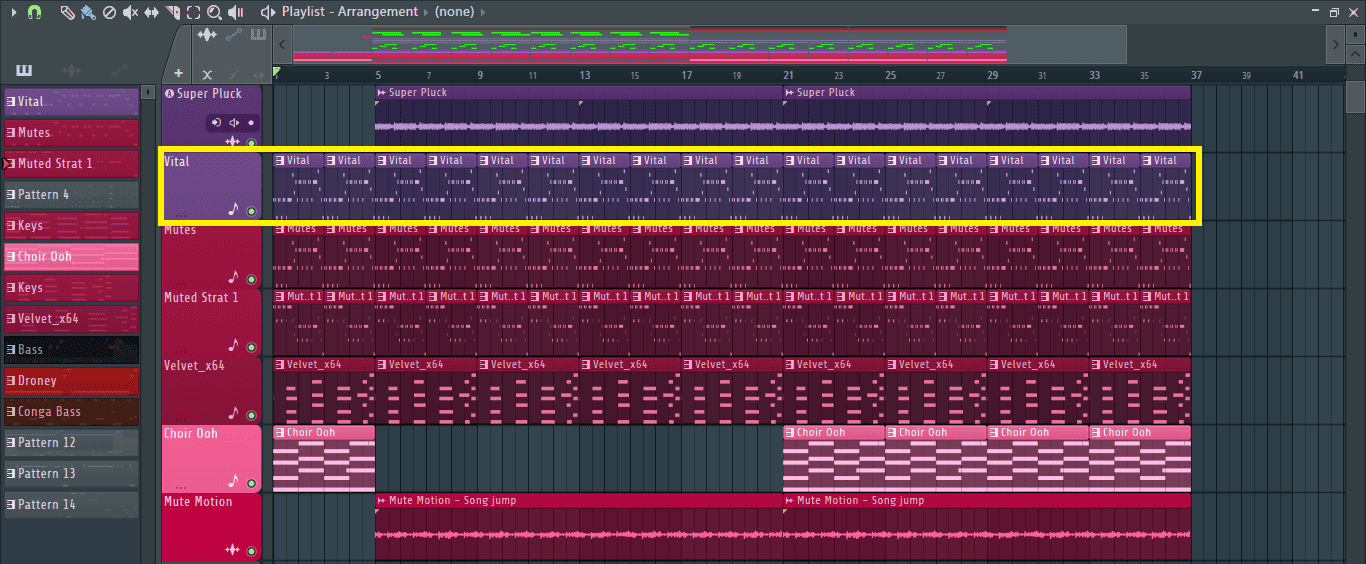
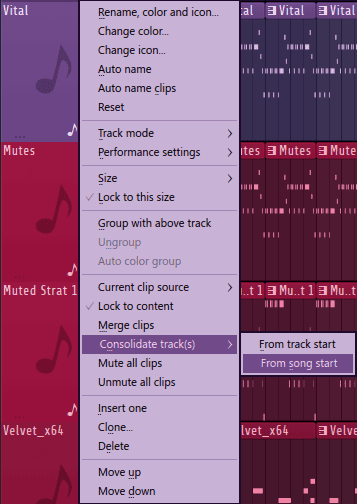
Step 4: Right-click on the area marked below on the desired playlist track.
Step 5: From the pop-up menu, go to Consolidate track(s)>From song start.
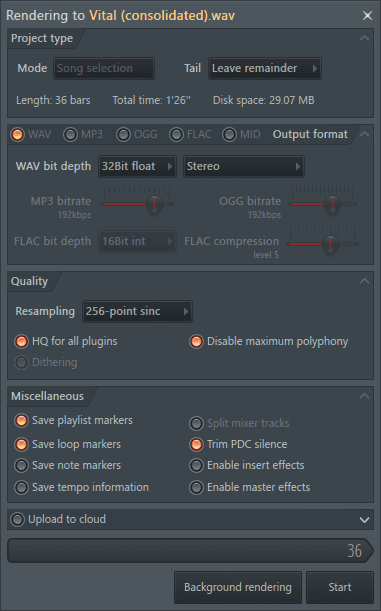
FL Studio’s export setting window will open. You’ll need to tweak some settings on this window to achieve your desired end result.
Step 6: Click on the dialogue box next to ‘Tails’ to determine how reverb, delay, and other tails are rendered in the exported file.
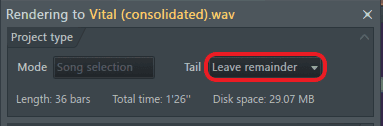
This will present you with three options.
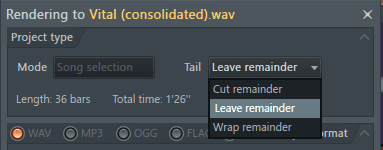
Cut remainder will not render the tail. The consolidated track will end exactly where the MIDI clips end in the playlist.
Leave remainder will render the exported track with the tails playing till completion.
Wrap remainder will add the tail at the beginning of the consolidated audio track to create a seamless loop.
Step 7: Next, from the Miscellaneous section, turn on ‘Enable insert effects’ to render the consolidated audio with the processing applied on its mixer channel. I’ll activate this feature so that I can delete the effects plug-ins as well and reduce the latency even further. Also, be sure to turn off ‘Enable master processing’ so that it can be applied in real-time on the master track and click ‘Start’. The track will be consolidated to audio while the original MIDI track is muted.
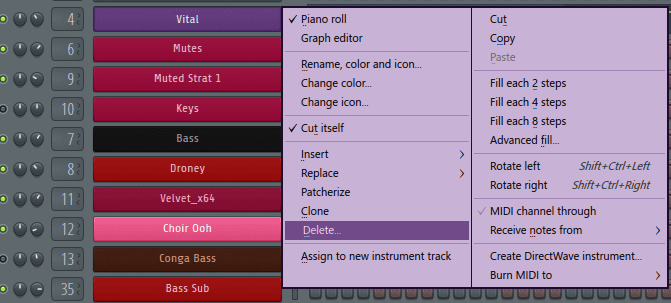
Step 8: I’ll locate Vital in the channel rack and delete it by right-clicking on it and selecting ‘Delete’.
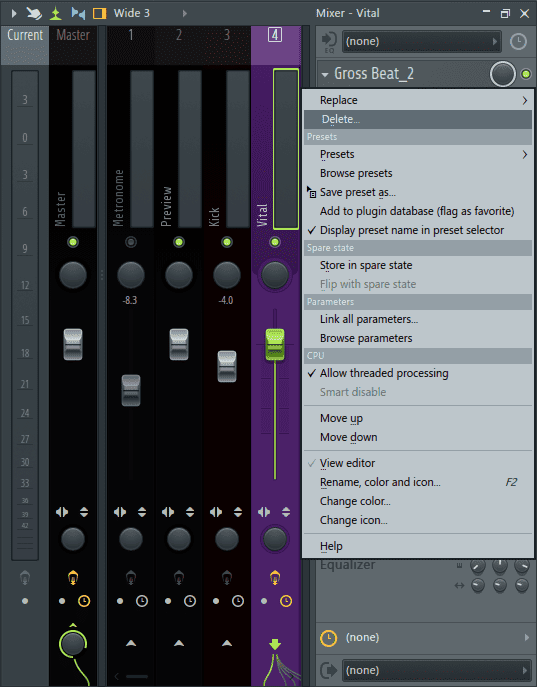
I’ll also delete the insert effect plug-ins found in Vital’s mixer track. Delete an effect by clicking on the arrow next to the effect’s name and selecting ‘Delete’.
Closing Other Programs Running in Your Computer’s Background
Applications running while FL Studio is also running may be competing with FL Studio for the available processing power and RAM. In extreme cases, this may lead to a lag in FL Studio. Closing CPU-heavy applications, for example, web browsers, allocates more processing power and RAM to FL Studio reducing the latency experienced.
Conclusion
Latency and lags in FL Studio can be fixed by reducing the stress on your CPU and controlling the size of your project. You can even take it a step further and implement good CPU-saving practices from early on in your mix or learn how to set up your project to be CPU-friendly. As always, have fun experimenting!

- How to Add Drum Kits to FL Studio - September 18, 2023
- Best Free Drum Kits for FL Studio - September 18, 2023
- How to Create Drum Patterns & Loops in FL Studio - September 12, 2023


