As an Amazon Associate ProRec.com earns from qualifying purchases. Any links that take you to products are affiliate links, and we may earn a commission if you make a purchase. We appreciate your support.
All text and image links lead to Amazon unless stated otherwise. All product scores are based on ProRec’s in-house scoring model
| Thumbnail | Voice Over Interfaces | ProRec Score | Price |
|---|---|---|---|
 | 9.1 | Check Price on Amazon | |
 | 8.7 | Check Price on Amazon | |
 | 8.5 | Check Price on Amazon |
Introduction
An audio interface is an absolute requirement these days for voice overs. You need one if you are going to use an XLR mic. The reason you would choose an XLR mic over USB is because of better sound quality. Interfaces have become quite affordable these days, and there really is no reason why you should forgo one as a voice over artist.
When choosing an audio interface for voice overs, the first thing you want to consider is the I/O config. Usually, a couple inputs are all you need if your use case is limited to voice over acting. If you are streaming, podcasting or recording instruments, then you’ll need multiple simultaneous inputs, so make sure to pick an interface with a more elaborate I/O configuration.
An interface takes the analog signal from your mic, amplifies and converts it to digital (so it can go to your computer) and then back to analog for playback. This is why solid preamps and AD/DA converters are absolutely important, so you can get a high quality output with a lower noise floor.
Better interfaces will also let you directly monitor yourself as you are recording, allowing you to adjust the input gain on your mic to how you would like it to be.
Other things you want to consider are connectivity (USB or Thunderbolt) that aligns with your laptop, budget, and driver support (good manufacturers offer extended support).
Other than that, any extra money you have is better spent on a good mic and acoustic treatment for the space around your mic. Sound treatment is a very essential component of your entire setup, so make sure to not overlook that aspect.
Similarly, having a high quality mic will elevate your recordings, probably even more so than an interface. If you’re using a gain hungry mic such as an SM7B, then make sure your interface has the right gain, or you may need to get an external device such as a Cloudlifter to power your microphone.
Best Audio Interface for Voice Over Reviews
All text and image links lead to Amazon unless stated otherwise. All product scores are based on ProRec’s in-house scoring model
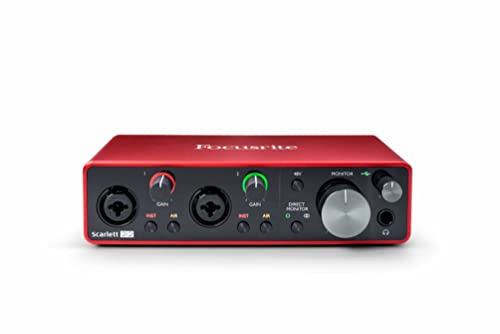
Scarlett 2i2 3rd Gen Benefits
- The 2-in/2-out, 192/24-bit conversion rate Scarlett 2i2 offers not only unsurpassed D/As and clean preamps with perfect clarity tested on our PR-40 microphone, but also provides enough gain to drive the signal from the mic without slipping for even quieter speech for the price range.
- The 2i2’s latency numbers are exceptional. Recording at a 44.1kHz sample rate, you can expect as low as 7ms of round-trip latency, even without using the direct monitoring switch to modulate your speaking voice for better voiceover quality.
- The AIR circuit is great for doing vocals or voiceover work. When turned on, it adds a little boost to the middle/upper range, which is great for narration, and sounds much better. If you don’t have a mic such as the MT1A that has an EQ response to boost AIR frequencies by default, the feature is a must-have.
- The Scarlett 2i2 is cheap, reliable, and easy to use. The interface is solidly built with no wobbly knobs or switches, and the sound quality is great for the price it retails at. This is great considering more expensive options aren’t always better quality, they just have more features that you may not need.
Scarlett 2i2 3rd Gen Drawbacks
- While the preamp is detailed, clean, and hiss-free, it doesn’t have a lot of headroom, especially when paired with a low output mic such as the SM57 or RE20. As a result, our mic signal was very low and had to be adjusted later in a DAW.
- The 2i2 doesn’t have the option to plug in a power supply, so it can’t stay on when your PC is off. This would have been useful in situations where we had monitors/speakers hooked up and wanted to hear our mic or plug in a device for music without powering the computer on.
All text and image links lead to Amazon unless stated otherwise. All product scores are based on ProRec’s in-house scoring model
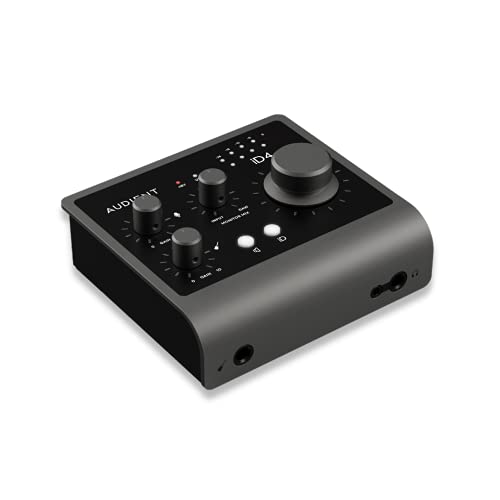
Audient iD4 MKII Benefits
- The 2-in/2-out 24-bit/96kHz Audient ID4 MKII has the same preamps as interfaces many times its price and a lot of gain range so you get similar results when tracking vocals. It even works well with low-sensitivity dynamic mics; with the gain all the way up, we didn’t hear any noticeable hiss or distortion on our CAD E100s.
- The ID4 MKII has a very low noise floor, even compared to UA’s Volt and the SSL2. With an SM7B, we got little to no noise on the spectrograph, and our voiceover recordings were remarkably clean with low self-noise.
- The interface’s build quality is professional, and should last a long time. Its aluminum box is thick, solid, and has some heft to it. The knobs have similar materials that give it some durability, and everything plugs into each port very firmly.
- Apart from the useful loopback feature, the addition of a monitor mix meant we didn’t have to turn off our monitors to avoid feedback when recording, unlike other interfaces in this price range. Moreover, the iD button’s smart scroller is super convenient to adjust the mix in our headphones while keeping the DAW front and center.
Audient iD4 MKII Drawbacks
- Unlike most interfaces, the main volume knob on the right is digital and does not save your settings when you switch off your computer. As a consequence, the volume resets back down to zero every time, and the sound format switches back to 44.1kHz, forcing us to set it up again each time.
- While it saves a lot of space on the interface, the ID4 MKII has the same one knob design as the previous ID4. The lack of dedicated knobs can be more complex and frustrating to deal with. Since there isn’t a separate dial or mute button for the headphones, when we switched to speakers, they still produced sound.
All text and image links lead to Amazon unless stated otherwise. All product scores are based on ProRec’s in-house scoring model
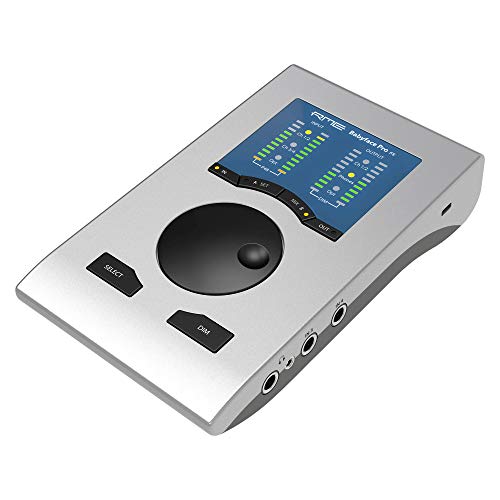
RME Babyface Pro FS Benefits
- The 12-in/12-out 24-Bit/192 kHz Babyface Pro FS’s pres are fairly transparent, and can output enough gain to run our Shure SM7B microphone without Cloudlifter boosting or noise floor problems. The sound quality on our voice overs was clear with no crackling, and the up to +65 dB of gain was plenty, especially considering there’s no noise across the whole range.
- The interface has pristine sound quality and great DAC/ADC conversion. The sound is wonderfully transparent, the inputs are super clean, and there is a significant boost in clarity and punchiness in the sound quality. This results in greater detail during playback as well, which makes for a much easier time tracking narration.
- The Babyface Pro FS has arguably the best-in-class latency for the price – we didn’t encounter hiccups of any kind, even with the audio buffer as low as 48 and 64 samples on Ableton and Logic. If you need to lower the monitoring latency, routing though RME’s TotalMix app can give you some extra speed.
- Both the software and hardware on the Babyface Pro FS are rock solid. The interface itself has sturdy aluminum construction with durable buttons, dials, and connections, with a lot of room for expansion, offering not only ADAT in and out, but also MIDI I/O and DIM functions. As for software, the optimized drivers are some of the most stable ones available and will be supported by RME for a long time.
RME Babyface Pro FS Drawbacks
- The mixer application is clunky and old, and isn’t as intuitive as some other interface software. Getting around your workflow isn’t a breeze initially, but it behaves flawlessly once you understand how the application works.
- The controls on the front are too few and some important functions such as Phantom power can only be accessed through the TotalMix application, which isn’t super convenient if you use a different program to record voice overs.
Verdict
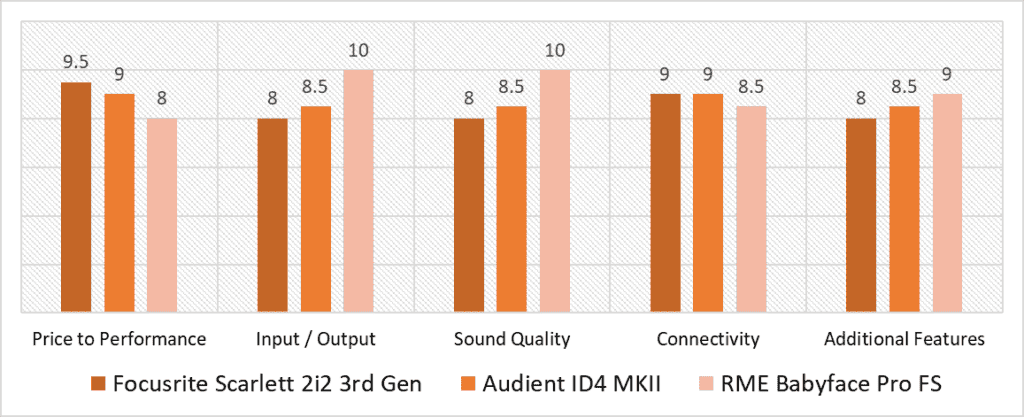
According to our scoring model, the categories with the most variance between them are Price to Performance, Input/Output, and Sound Quality. The Scarlett 2i2 is the budget buyer’s choice for the price it retails, and outscores the other two interfaces comfortably. However, it lacks the dual headphone jack that the Audient ID4 MKII has, and has only a fraction of the I/O of the RME Babyface Pro FS, which tops that category by a wide margin. As for Sound Quality, the ID4 just edges over the Scarlett 2i2, but falls short of the clarity and transparency that the Babyface lends to voice overs.
Apart from clean sound, the Babyface Pro’s preamps have the most amount of gain, and its DAC/ADC conversion as well as latency numbers outshine both the Scarlett and the ID4 MKII. However, for the hefty price tag, it’s not the best value option for every voice over artist, coming in third after the Audient ID4. Regardless, you also get great build quality as well as a solid set of features including DIM functionality, DC power, and a fantastic Monitoring Mix, however, its dated software only puts it ahead of both the Scarlett 2i2 and ID4 by a slim margin despite its longer update cycle.
Like the Focusrite Scarlett, the Audient ID4 has a USB-C connection, which is an upgrade over the Babyface Pro FS and its USB-B port. It’s also the most consistent product, offering great value, enough gain for low-sensitivity mics, and boasts a very low noise floor for tracking voice recordings, which puts it in the middle between the Scarlett and RME’s Babyface. The Audient also has the benefit of having the most digital features, including a loopback feature and smart scroll iD, which is far better than just the AIR function on the Scarlett.
With everything weighed in, the best interface for voice over is the RME Babyface Pro FS with an overall score of 9.1. While it may not be the most affordable interface on the list, the Babyface has some of the cleanest high-gain preamps and converters a voice over artist can get, and despite its size, it also has a ton of I/O to expand into any VO studio setup, as well as some extra features to sweeten the deal. Additionally, considering RME’s driver support for its products and the interface’s pristine build quality, RME’s Babyface Pro FS provides tremendous value in the long-run. Highly recommended!
Frequently Asked Questions
Do I need an audio interface for voice over?
An audio interface is a must-have for any professional VO studio setup if you don’t want noise-ridden, distorted recordings. If we ignore the fact that computers don’t have XLR and TRS inputs, even the best of computers don’t have encoders or the same DAC/ADC converters as the cheapest interfaces.
What is a good audio interface for voice acting?
While the kind of interface you need depends on your recording setup, generally, a 2-in/2-out interface is the best place to start. Whichever brand you choose, you’ll want to make sure the converters offer at least 24bit/48khz, and that the preamps have the appropriate level of gain for your microphone. Additionally, you want to make sure your PC has the right ports to plug the interface in.
Do I need a preamp for voice over?
A preamp is absolutely essential for any voice over artist. If you don’t want to deal with excessive noise and distortion, or weak microphone signals, you’ll want to have a decent audio interface to keep the noise floor low and have the option of adjusting input gain to boost your microphone signals.
How do I record audio for voice over?
To record an audio voiceover, the first thing you need to do is connect your interface to your PC, and plug in your microphone into the preamp. Next, you’ll want to set up your microphone within your recording app and record your script. You can then import your tracks into your DAW for post-processing (EQ, noise gates, compressors, etc), to normalize your voice and make it easier on the ears before exporting the finished file to your hard drive.
![Best Audio Interface for GarageBand [2023 Reviewed]](https://ProRec.com/wp-content/uploads/2022/05/garageband-180x180.png "Best Audio Interface for GarageBand [2023 Reviewed]")
![Best USB-C Audio Interface [2023 Reviewed]](https://ProRec.com/wp-content/uploads/2022/08/usb-c-port-180x180.png "Best USB-C Audio Interface [2023 Reviewed]")
![Top Audio Interfaces with ADAT [2023 Reviewed]](https://ProRec.com/wp-content/uploads/2022/09/ADAT-180x180.png "Top Audio Interfaces with ADAT [2023 Reviewed]")
![Best Audio Interface for Windows 7, 8, 10 & 11 [2024 Compared]](https://ProRec.com/wp-content/uploads/2022/07/Windows-180x180.png "Best Audio Interface for Windows 7, 8, 10 & 11 [2024 Compared]")