A physical MIDI keyboard is great for recording virtual instruments. But if you don’t have one, you can use REAPER’s Virtual MIDI keyboard almost the exact same way without actually using any hardware. With this option, you can use your computer’s keyboard or mouse as a musical instrument. You can either MIDI press notes on your screen with a mouse, or you may assign them to your PC or Mac’s keys. The process isn’t very complicated, so let’s jump right into it.
Setting up the Virtual MIDI Keyboard
The virtual MIDI keyboard works just like a physical MIDI keyboard, with the added benefit of not having to enable it as a device inside Preferences, like you would with other MIDI devices.
Assign the Virtual MIDI Keyboard To a Track
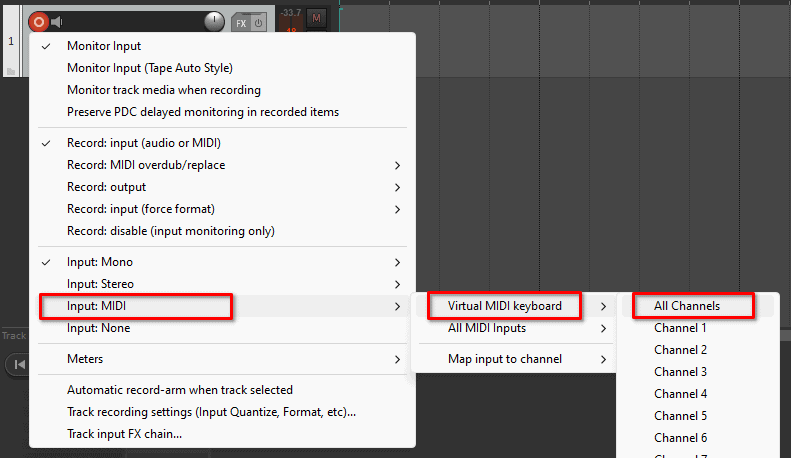
Start by creating a new track and loading a Virtual Instrument on it. Then, right-click on the Arm button of the track and navigate through the options Input: MIDI > Virtual MIDI keyboard > All Channels.
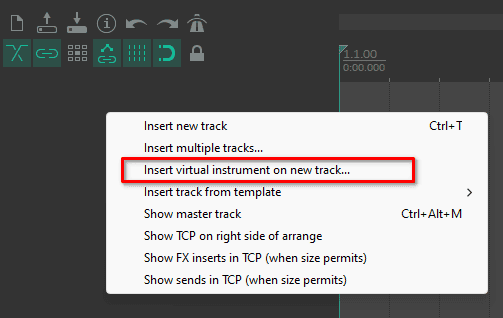
A faster way of doing this is by right-clicking on the Track Panel (TCP) or on any track that’s in it and selecting the option ‘Insert Virtual Instrument on a new Track…’.
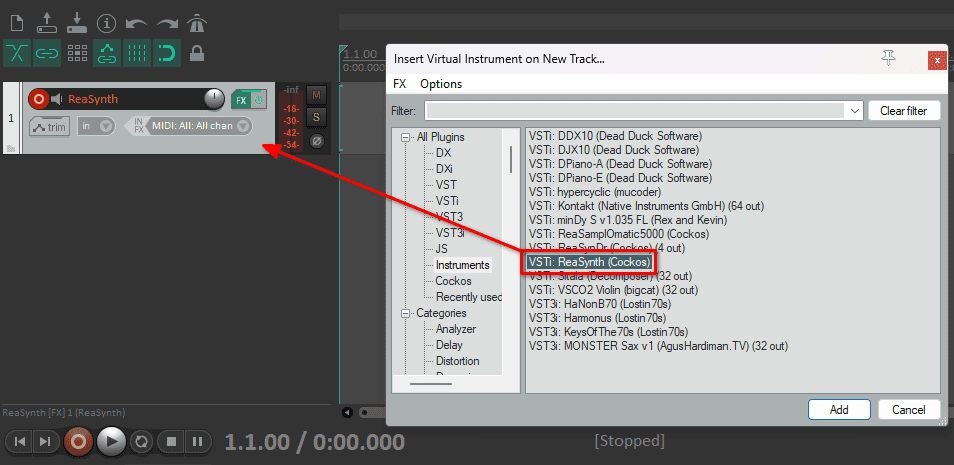
This will open the FX browser in the Instruments tab. Double-click the one you want to load, it will be Record armed with track monitoring enabled and the Input will automatically be set to All MIDI Inputs: All Channels, Virtual MIDI keyboard included. You will get the same result by dragging any Virtual Instrument to the empty space of the TCP.
Open the Virtual MIDI Keyboard
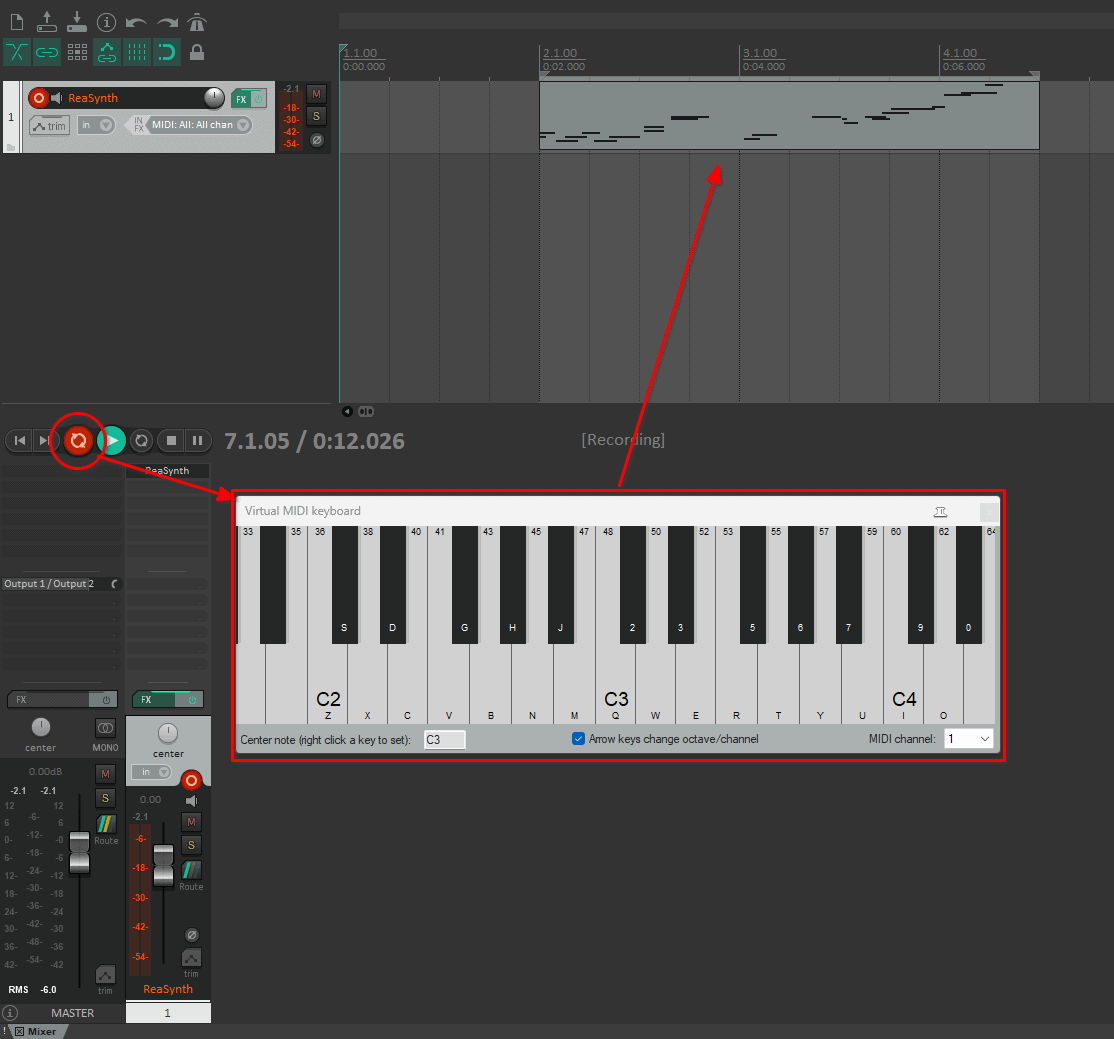
Once the Instrument is loaded and the Input is selected, open the Virtual MIDI Keyboard by going to the View menu at the top and selecting the option Virtual MIDI Keyboard. Alternatively, you can use the shortcut Alt+B on Windows or Opt+B on Mac.
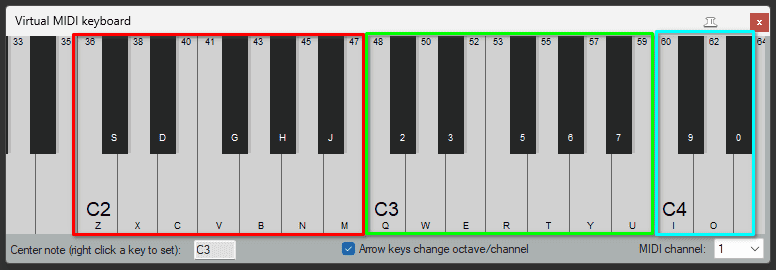
This will open a Piano Roll with letters that correspond to different keys of your computer’s keyboard. You can either click on the notes or use the assigned keys to trigger the notes. The Virtual MIDI Keyboard assigns two octaves to your keyboard, something like this.
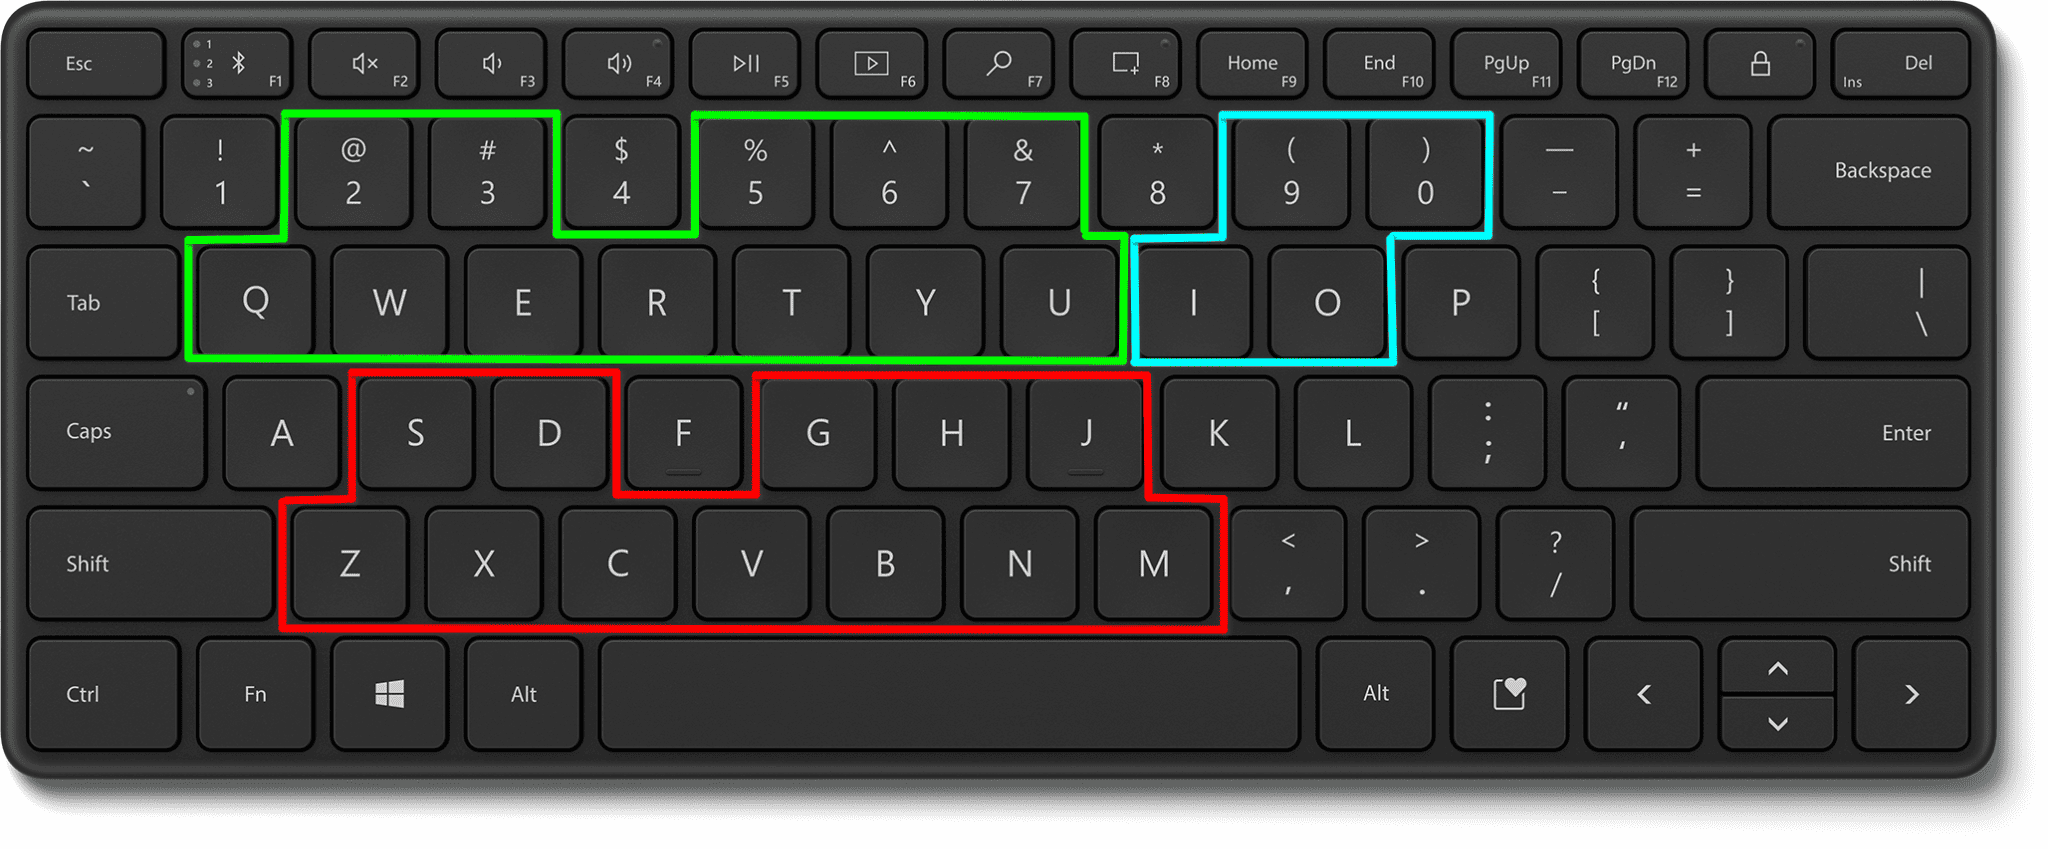
The numbers on the top are the MIDI note numbers that correspond to each note, and the letters are the keys each note is assigned to. On the bottom of the Virtual MIDI Keyboard, you can change the center note of the keyboard and the MIDI channel.
Play and Record
Now that everything is set up, you can start playing and recording music. Press the keys on your computer keyboard or click on the keys with the mouse and you will hear the notes coming out of your Virtual Instrument whenever you have the Virtual MIDI Keyboard widow focused.
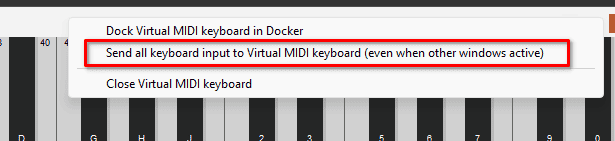
You can also enable the ‘Send all keyboard input to Virtual MIDI keyboard(even when other windows active)’ option. This is useful when you need to constantly navigate through various windows while triggering MIDI notes with your keyboard. This will disable all Keyboard shortcuts.
To start recording, click on the Record button on the REAPER transport bar and each keystroke will appear as a MIDI note in a new MIDI item.
Conclusion
The REAPER virtual MIDI keyboard is a useful feature that allows you to play and record virtual instruments without needing a physical MIDI device. It’s extremely easy to set up and you can use it whenever you need. I hope this article was helpful. Make sure to take a look at our other REAPER articles, and Happy recording!

- Mixing in REAPER [ULTIMATE Guide!] - September 18, 2023
- How to Record in REAPER (Guitar & Vocals) - August 2, 2023
- Writing MIDI Drums in REAPER - July 3, 2023
")

")