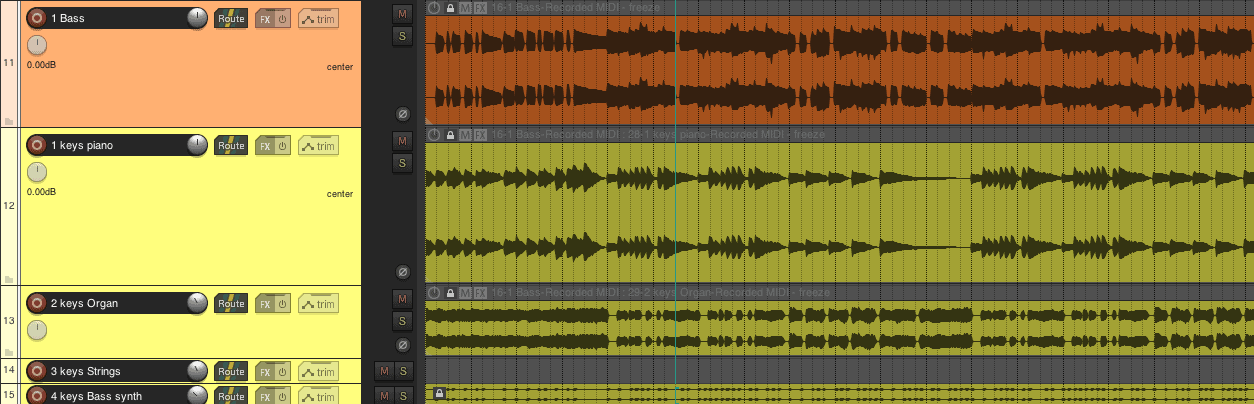
There will be times in your production journey when it may be necessary to declutter your workspace a little bit, and there are many reasons to do this. As someone that has spent most of my early career working on an older PC, having to make do with what I had, I have become sort of an intimate friend with Freezing and Rendering tracks in place.
This guide will show you how to use the Freeze feature in REAPER, which will allow you to maximize your resources and make it easier to process, not only on your PC, but also in your brain.
What Is Track Freezing?
Track Freezing is the process in which you can render one track by applying either all or some of the FX loaded into it. Similar to the “Render in place” feature that you can find in some other DAWs like Logic Pro or Cubase.
Remember that the option to Freeze a track gives you the chance to quickly go back if you have any problem whatsoever down the line, edit the original parameters and Freeze the track again.
Step-by-Step Process
Freezing a track is a fairly Simple process, and there are a couple of different ways to do it.
Freezing The Whole Track
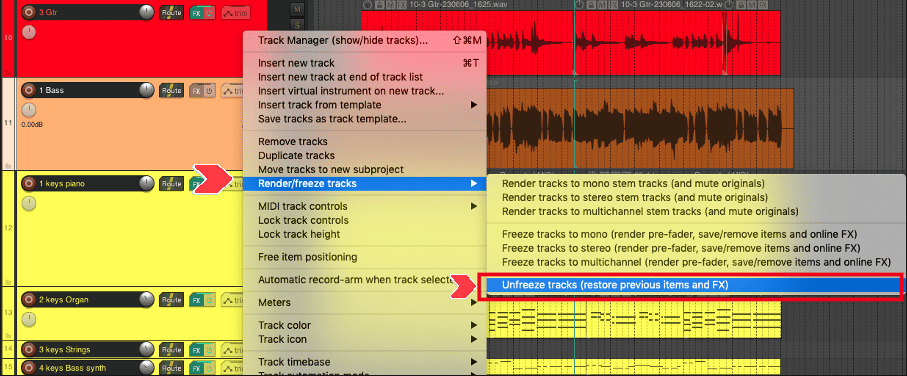
The easiest one is right-clicking on the track you want to freeze. Then, select “Render/Freeze tracks”. Here you will be presented with a couple of options.
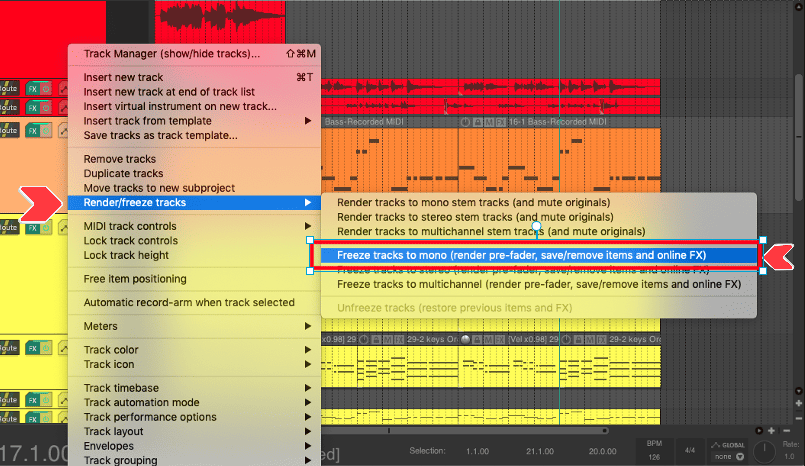
You may notice that there are two groups of options, “Render Track” and “Freeze Track”. But, what’s the difference?
First, “Render track and mute originals” will create a new track with the rendered audio, leaving the original track visible but muted. This is useful if you still need the original track and plug-ins available at all times. However, the track and plug-ins will still be loaded into RAM, even if muted tracks don’t use CPU by default.

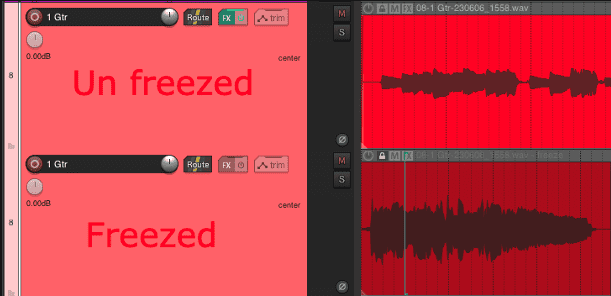
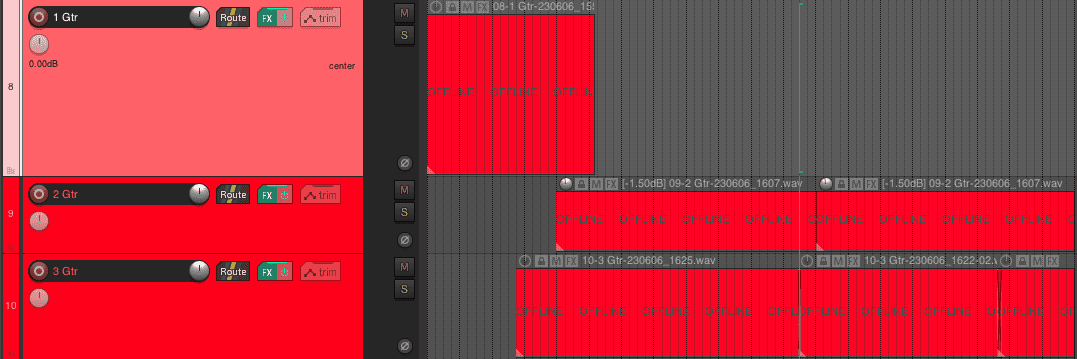
The “Freeze Track” option will render the audio in the same track, hiding the original source, and locking it. It will also switch into Offline mode and hide all the Fx currently on the track. This is the most useful for me, because aside from liberating system resources, it also gives me much needed visual, mental relief for each stage of the production process.

Freezing Up to Selected FX
The second method is for partially freezing a track. It consists of freezing the signal chain up to a determined plug-in, so if you’re already mixing your Virtual instruments, you can still freeze only the instrument and keep the mixing plug-ins live in the FX Chain.
You can do this by entering into the Fx Window and selecting the last FX that you want to apply to the track.
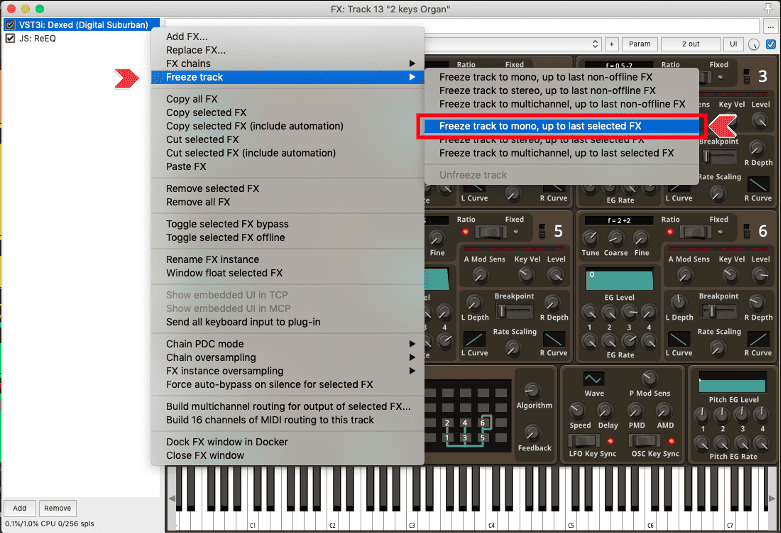
Then, right-click it and select one of the options “Freeze track to ***, up to last selected FX”
Use Cases for Freezing Tracks in REAPER
One of the primary uses of the Freeze track function is to have a semi-permanent print of whatever you are doing to the source, so you can liberate some processing power and RAM.
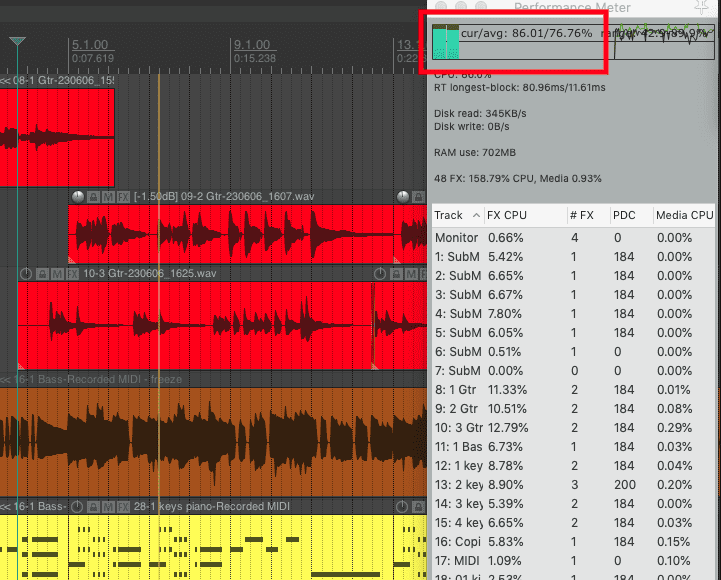
Thus, If you’re working on a machine that doesn’t have enough juice to run the whole project and processes properly, and you already tried raising your buffer size (or can’t) you may have to limit the amount and types of plug-ins you have on each REAPER project to maximize your resources.
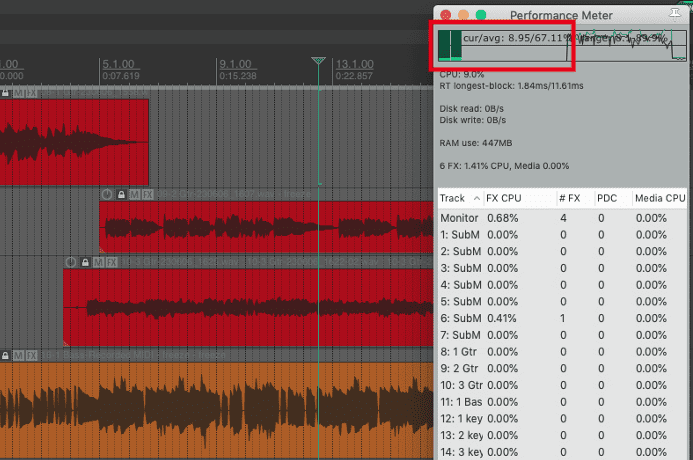
When you freeze a track, the existing plug-ins will not only be hidden but also set to an Offline state, which means that they will not be loaded into your processor or RAM, while allowing you to go back by Unfreezing the track, just in case you need to do a modification or you find a mistake.
This is especially useful if you have multiple synths, DI guitars processed with Amp sims, and or heavy Instrument libraries. You’d get audio files ready for mixing that will not cost you any processing power, while keeping a safety net should you ever need it. It’s the best of both worlds!
Another use of the Freeze Track feature that is often overlooked is to declutter your mind. It allows you to focus on what is really important at each stage of the production or post-production process.
Even if you have the most capable system in the world, having dozens of plug-ins in your Project with hundreds or even thousands of parameters running smoothly, you may still run into option paralysis. Freezing track forces you to make decisions at the moment, allowing you to focus on the essentials needed at each stage, reducing the mental load along the way.
DISCLAIMER: if you have frozen tracks in your Project, beware when Cleaning your project directory, you may end up erasing the files that were originally on the tracks and not be able to properly Unfreeze your tracks.
Conclusion
Freezing and Rendering tracks is a very useful tool that not only can help you out to keep your projects organized, keep a clear head, get the most out of your current set up, and even communicate better and throw around files with other professionals on large teams. Go ahead and experiment to find what works best for you, and remember to be careful at the moment of cleaning the project’s directory. I hope this information is useful to you, and feel free to go crazy!
")
")
