Crackling and pops in audio can make you lose momentum and creativity when working on a project and is a clear sign that the ‘FL Studio is not responding’ message, that we all fear, is just around the corner. Crackling audio is mostly caused by too much stress on the CPU making it hard for the computer to process audio which leads to the cracking or pops heard during playback or after export.
In this article, we’re going to look at the various ways to fix crackling and pops in audio during playback and after export.
Increase the Buffer Length
This should always be the first fix applied when crackling audio is heard during playback. Buffer length is the amount of time your computer takes to process incoming audio from your sound card or audio interface. Shorter buffer times are heavy on the CPU, but good for tracking while longer buffer lengths are light on the CPU, but are not fit for tracking.
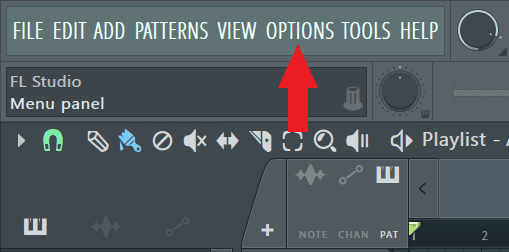
Step 1: Open FL Studio’s audio settings by clicking on ‘Options’ in the toolbar then ‘Audio settings’.

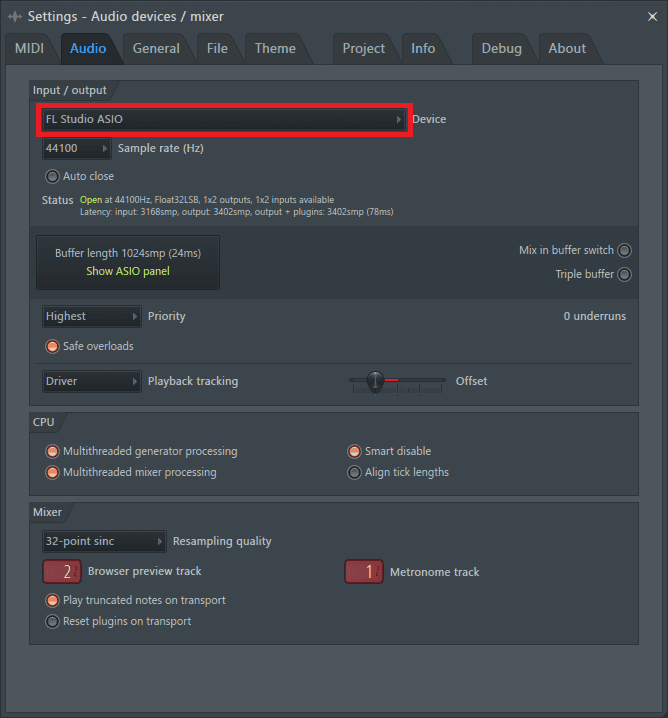
Step 2: Once the audio settings are open, first, click on the dialogue box marked below to view the audio drivers installed on your computer.
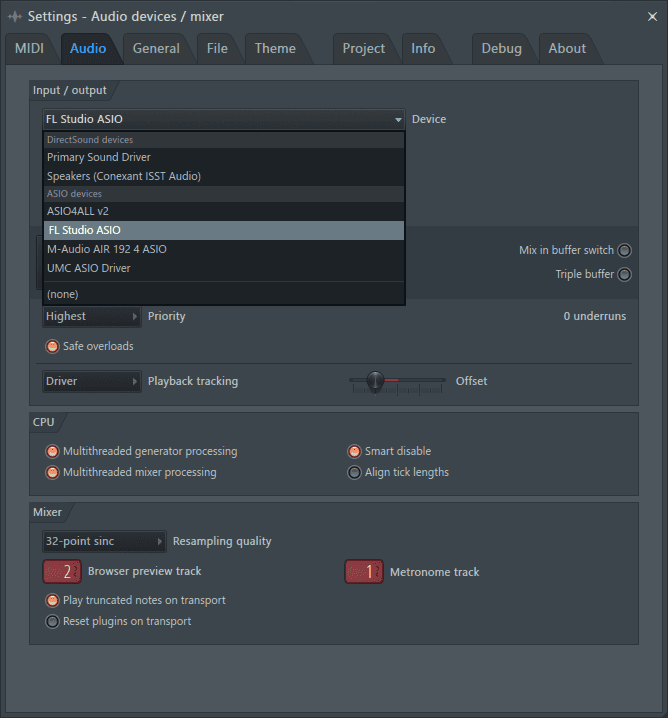
Step 3: Select the driver that came bundled with your audio interface. If you don’t have an audio interface, select either FL Studio ASIO or ASIO4ALL.
Step 4: Once done, click on the area marked below to change the buffer length.
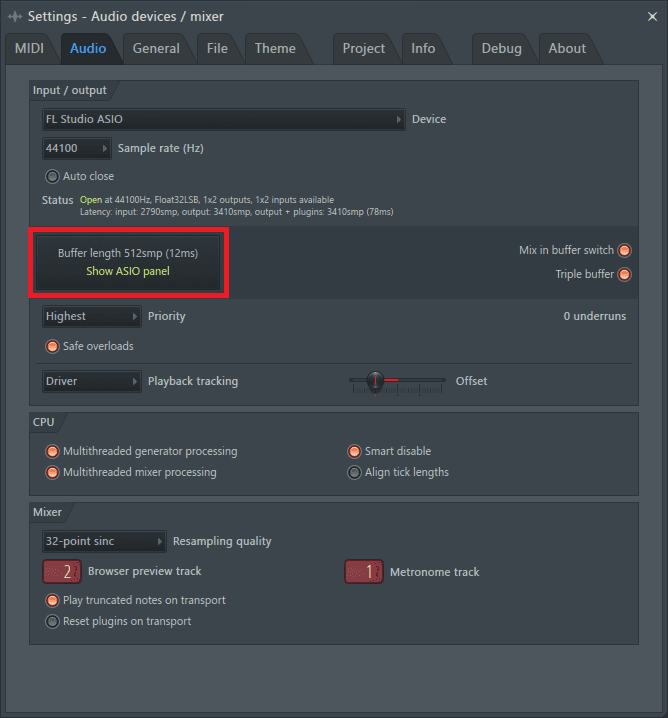
This opens up an ASIO panel containing different buffer lengths to choose from.

Step 5: Increase the buffer size to a higher value to stop experiencing crackling audio. In my case, I’ll first set the buffer size to 1024 on the ASIO panel.
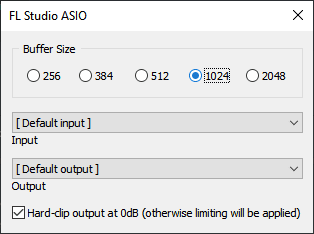
If I’m still experiencing crackling audio, I’ll set it even higher to 2048.
Additional Audio Settings to Stop Crackling Audio
While still on the audio settings tab, there are other various settings that can be used to ensure FL Studio produces a clean stream of audio.
Be sure to turn on ‘Mix in buffer switch’ and ‘Triple buffer’.
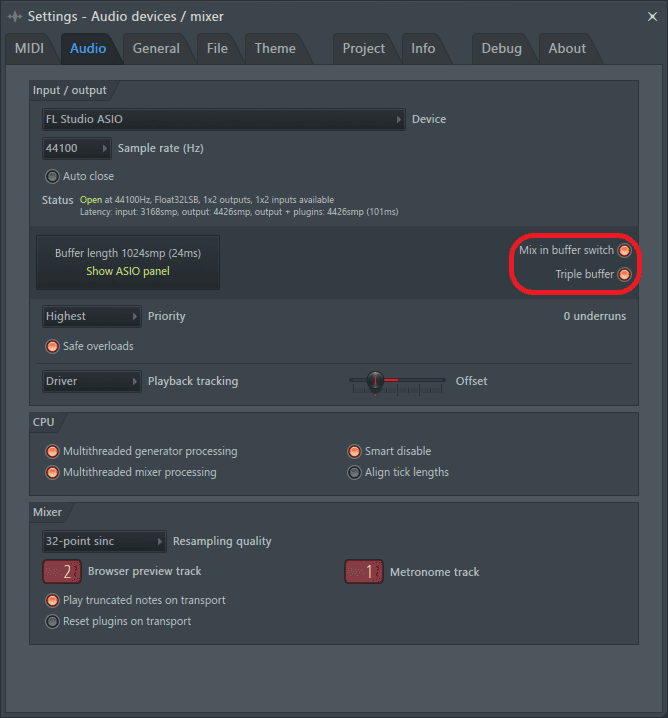
Priority in the audio settings determines how much CPU priority is given to the mixer. The higher the priority the more resources such as RAM and processor power will be dedicated to carrying out mixer tasks. To prevent crackling audio, it is best to set it to ‘highest’.

Under the CPU section, ensure you have activated ‘Multithreaded generator processing’, ‘Multithreaded mixer processing’, and ‘Smart disable’. This will reduce the amount of stress on your CPU when using FL Studio.

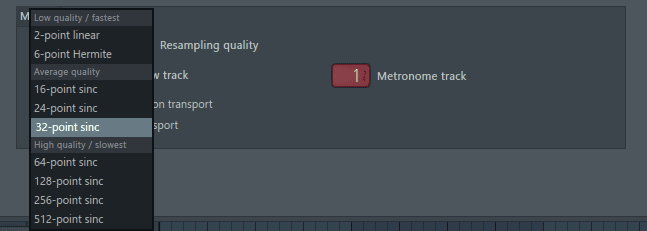
Under the mixer section, set the resampling quality. Do this by clicking on the dialogue box shown below.
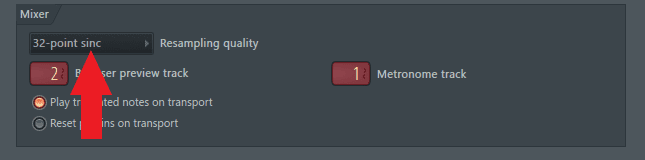
Set it to a value in the average quality section.
Timebase (PPQ)
Reducing the timebase (PPQ) reduces the stress on your CPU which in turn reduces cracks and pops in the audio. Reducing this makes you unable to zoom in as much on your clips in the playlist.
Step 1: Access the timebase setting by going to Options>Project general settings.
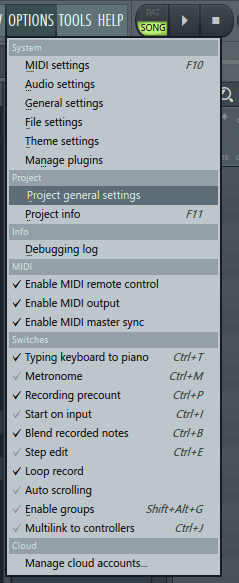
Step 2: Next, click on the dialogue box next to ‘Timebase (PPQ)’.
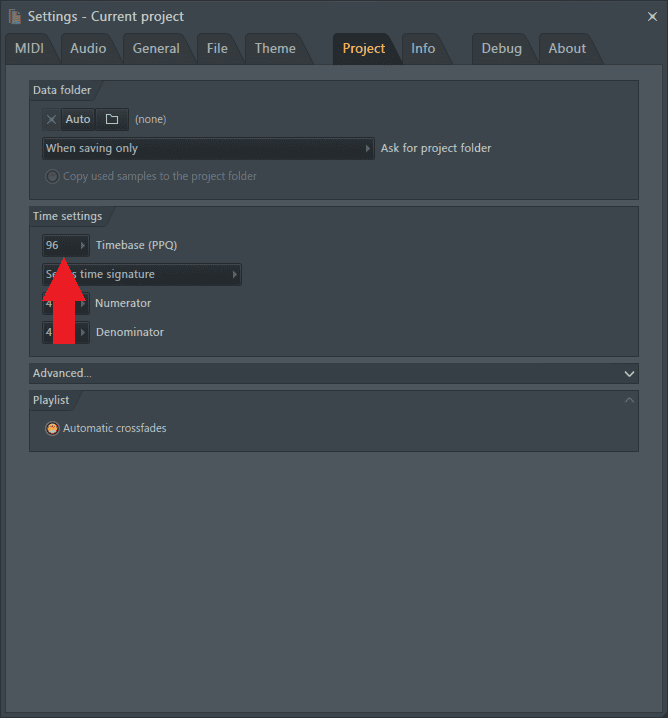
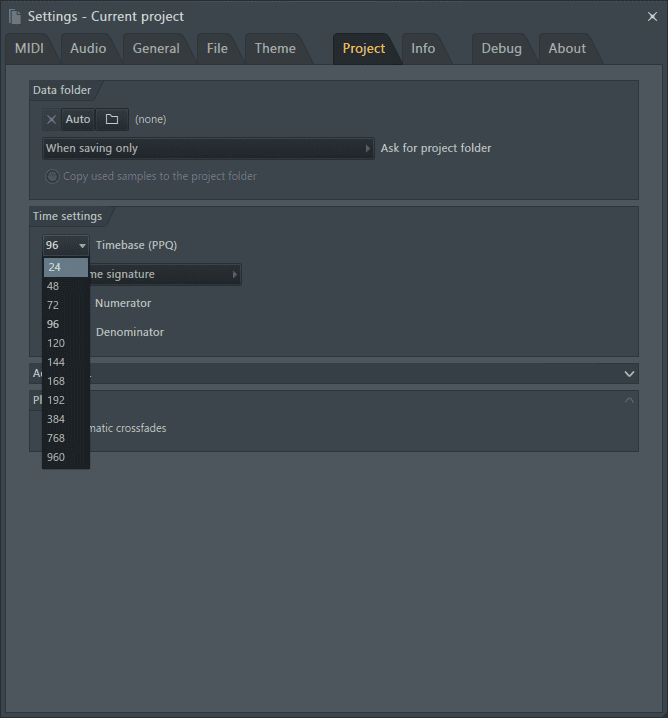
Set it at its lowest, 24.
Removing CPU-Intensive Plug-Ins & Effects
Another great alternative for fixing crackling audio is identifying plug-ins heavy on the CPU, bouncing the audio being produced or processed by the plug-ins, and then deleting the plug-ins. This will reduce the amount of stress on the CPU, make your project respond faster, and prevent crackling audio.
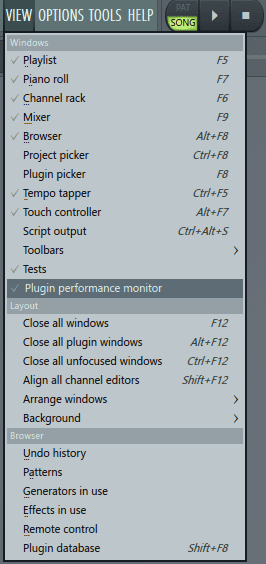
Step 1: First, open the Plugin Performance Monitor by going to ‘View’ and then selecting it from the drop-down menu.
This is the Plugin Performance Monitor.

It shows all the plug-ins used in a project and ranks them according to CPU usage. It’s great for identifying CPU-heavy plug-ins present in the project. Activate ‘Freeze’ located at the top right corner to pause incoming input.
Now that you can identify the plug-ins taking up the most CPU, the next step is to locate them in your channel rack/mixer and bounce the signal being produced/processed to audio.
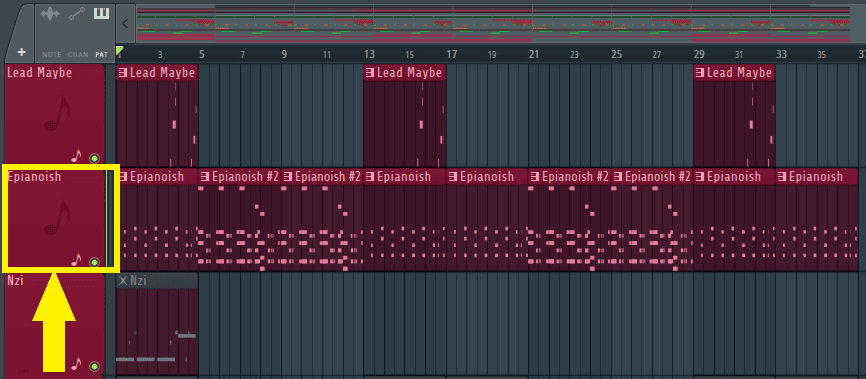
Step 2: From the Plugin Performance Monitor, I can see that the plug-in with the highest CPU usage is an instance of Sytrus labelled ‘Epianoish’. I’ll go to the playlist by pressing F5, and locate it.
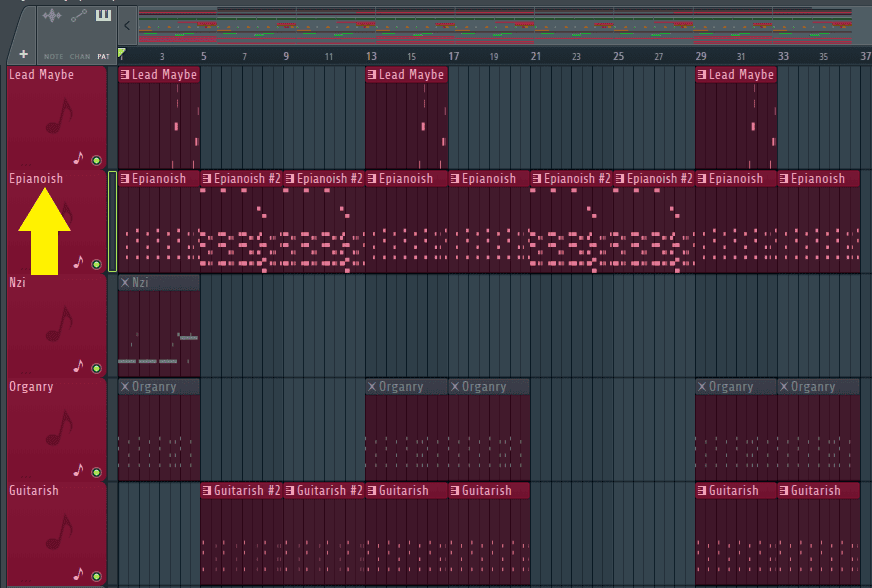
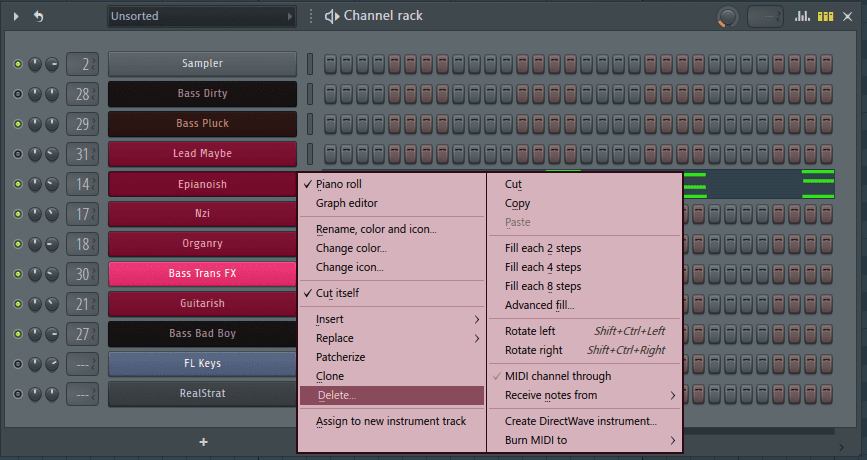
Step 3: Once located, I’ll right-click on the region shown below of the playlist track labelled ‘Epianoish’.
From the options go to Consolidate track(s)>From song start.
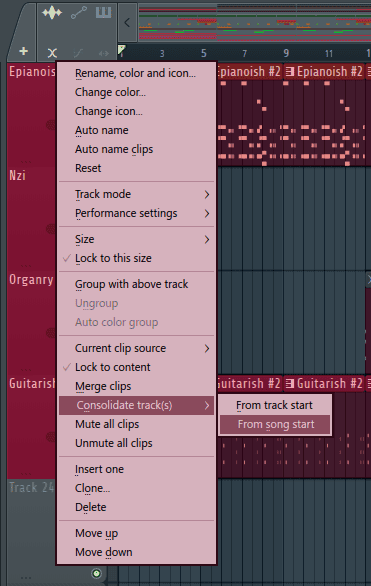
This renders the MIDI clip turning it to audio and mutes the original MIDI clip.
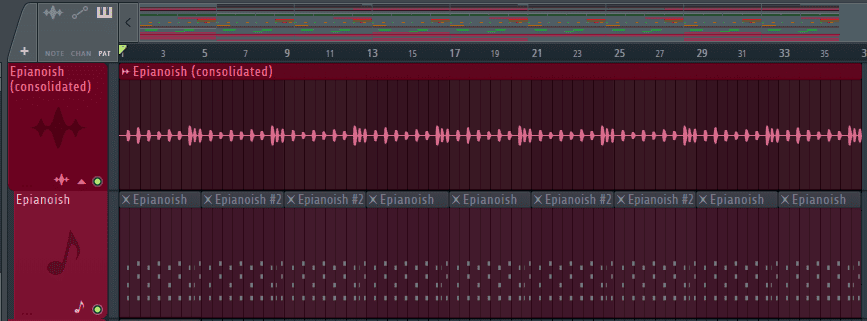
Step 4: Now I can go to the channel rack, and delete the CPU-heavy plug-in that I just consolidated to audio.
My audio should now be free of cracks and pops.
Close All Plug-Ins Open in The Background
While creating, it’s easy to get carried away in the moment and forget to close a plug-in’s window once you’re done tweaking it. Unlike other DAWS, you will have to manually close plug-in windows in FL Studio, otherwise, they will still be open in the background.
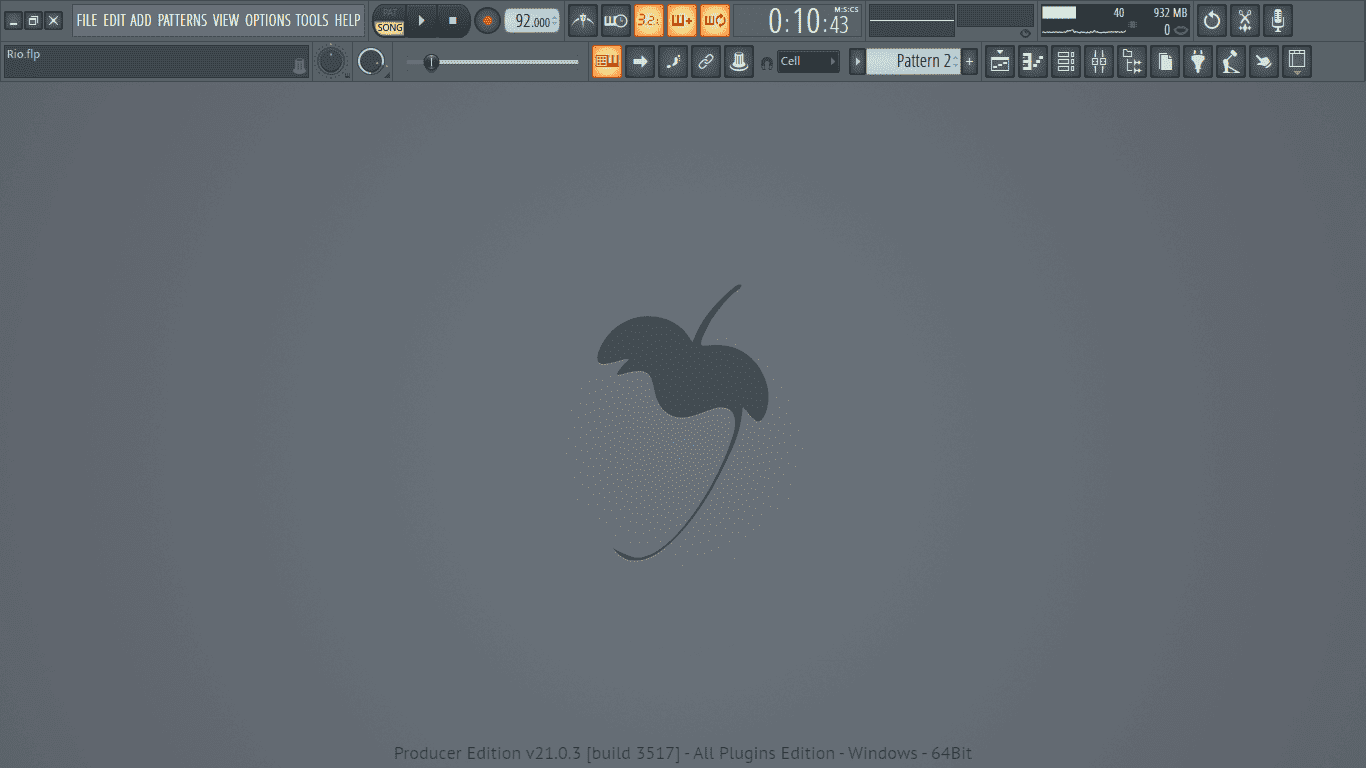
Close all open windows by just pressing F12. This will close all the plug-in windows open in the background and other windows that may be open, for example, the playlist, the channel rack, and the mixer so don’t be surprised when FL Studio displays its default background.
Using Stock Plug-ins
FL Studio’s stock plug-ins use considerably less CPU in comparison to their 3rd party counterparts. Stock plug-ins can be used to stop crackling audio in two ways.
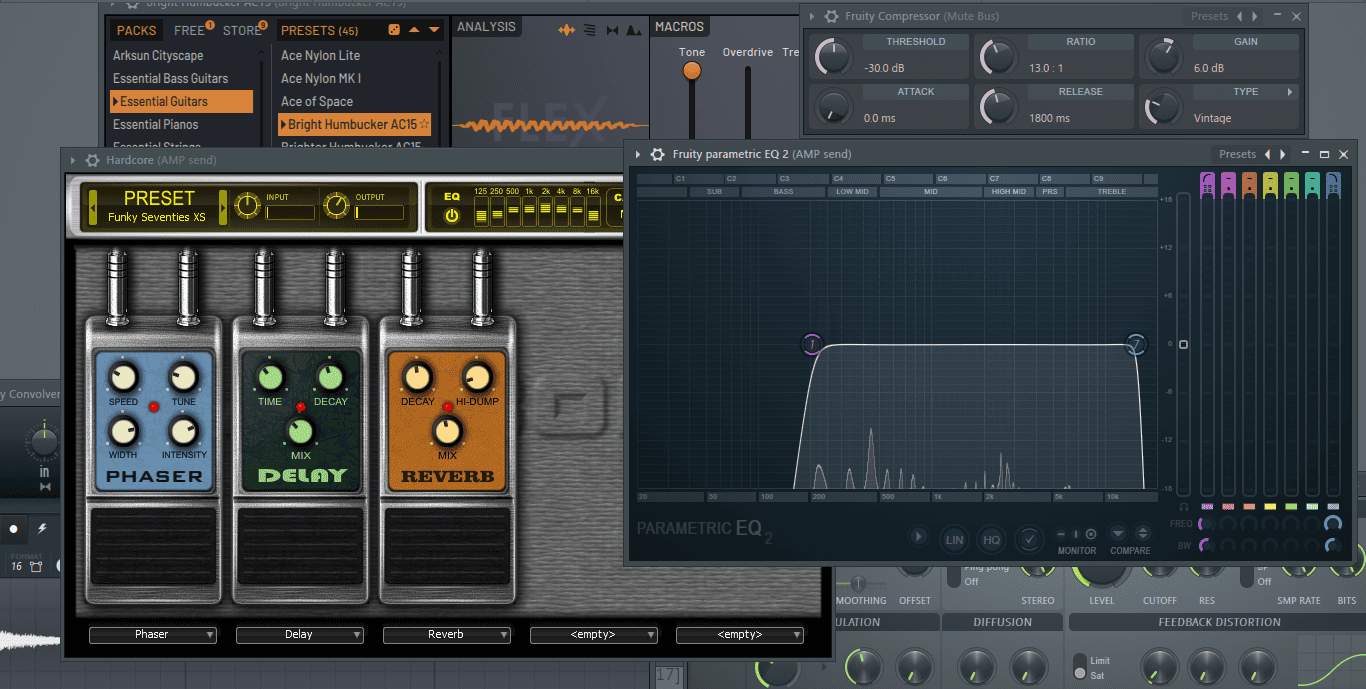
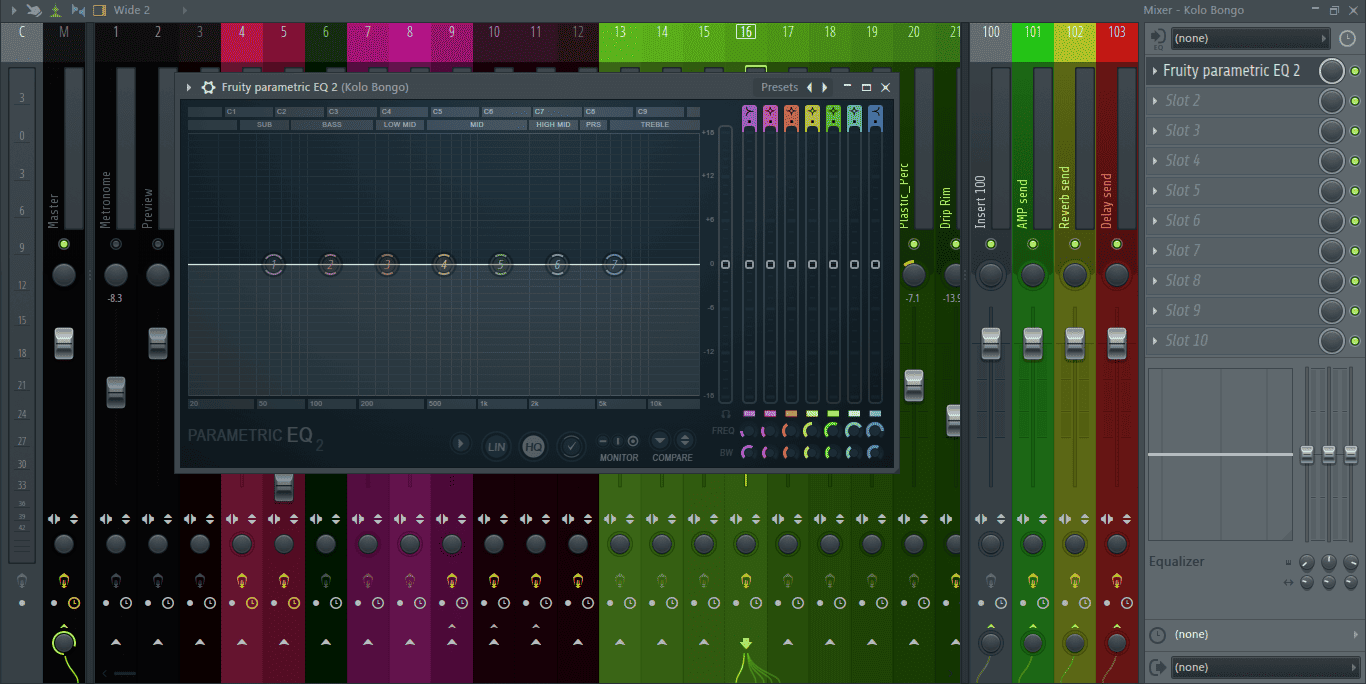
One, use FL Studio’s stock plug-ins when making simple actions. For example, in case I just need a simple high/low cut, I could use the stock EQ, Fruity Parametric EQ 2, instead of a 3rd party plug-in which would be heavier on my CPU.
Two, you can replace already existing CPU-heavy 3rd party plug-ins with simpler, lighter stock plug-ins. This works exceptionally well for effect plug-ins if the processing applied can be replicated by stock effects.
Smart Disable Plug-Ins
This spares CPU usage by disabling plug-ins unless they are in use. This handy feature is great for freeing up some extra CPU usage when working on large projects using lots of instruments and effects.
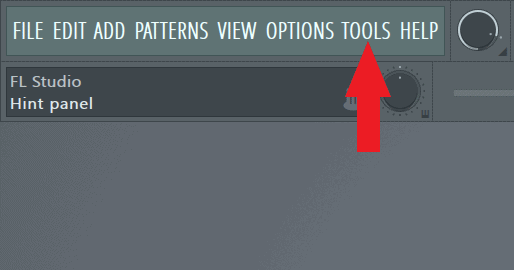
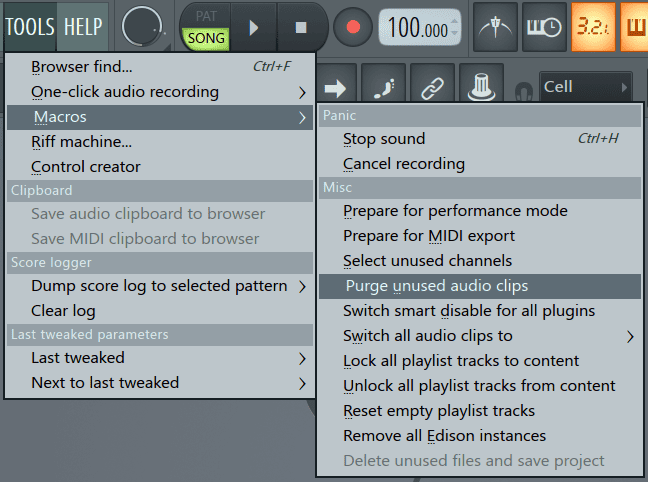
Step 1: Activate smart disable by clicking on Tools in the main toolbar.
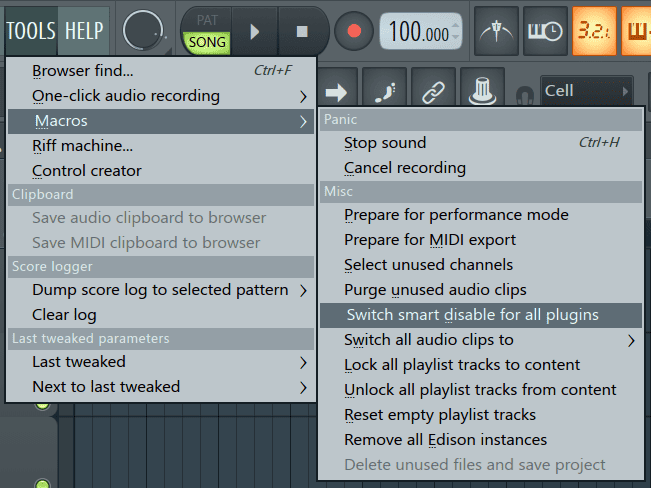
Step 2: From the menu go to Macros>Switch smart disable for all plugins.
Remove Unused Channels & Effects
When you’re done arranging, it’s quite common that some ideas did not make the final cut. To save on CPU, you can remove these unused ideas by deleting their channels and effects.
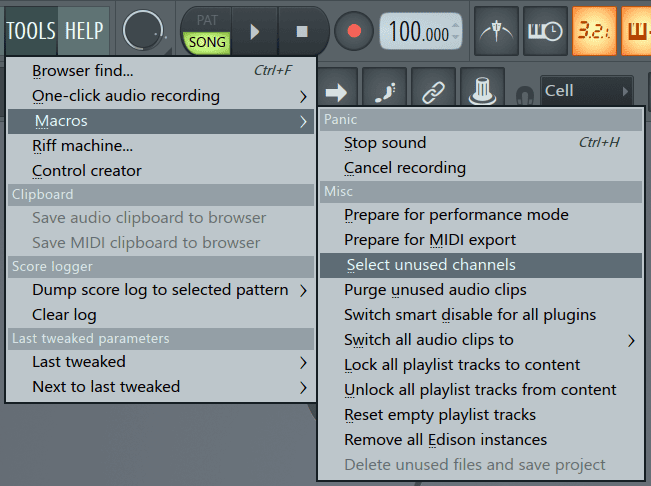
Step 1: Go to Tools>Macros>Select unused channels.
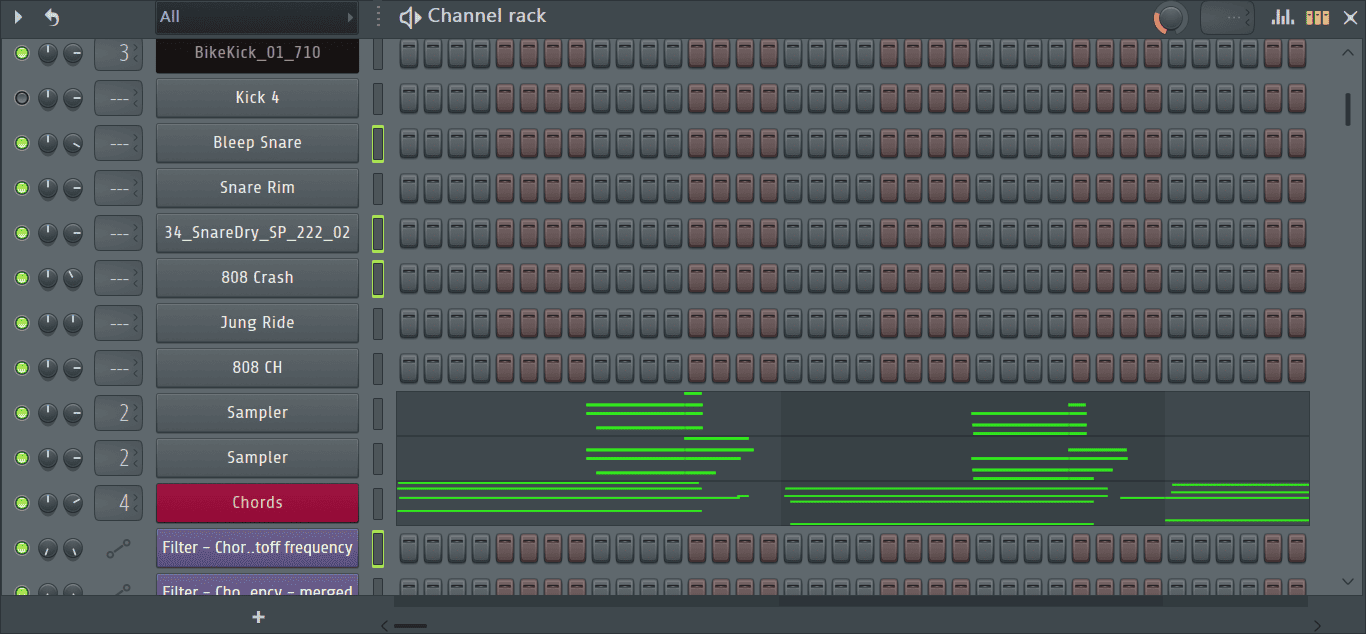
All the unused channels will be selected in the channel rack. (Selected channels have a green glow around their channel selectors.)
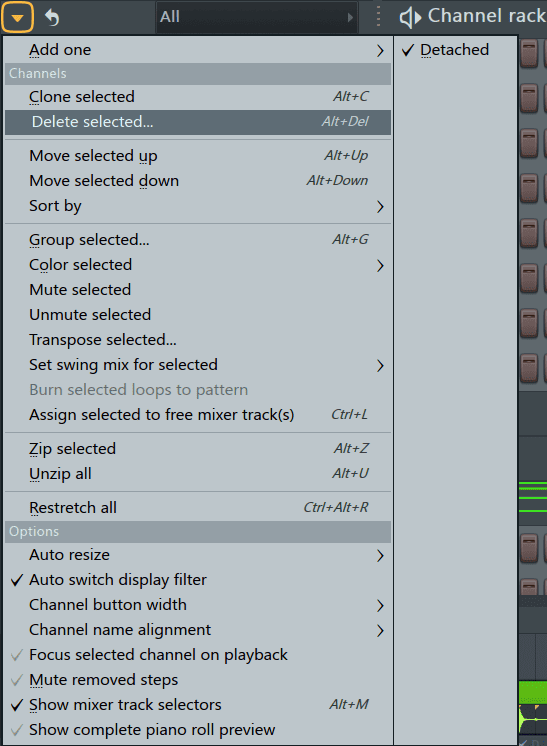
Step 2: With the unused channels still selected, click on the arrow located at the top left corner of the channel rack.
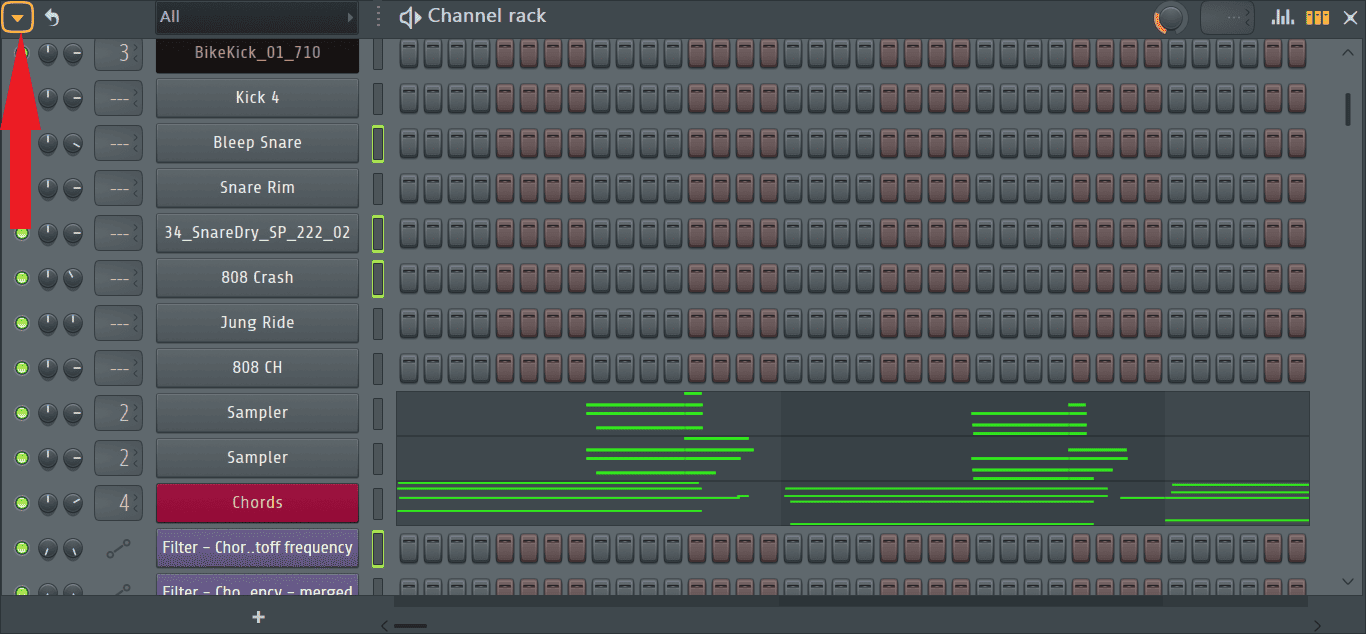
From the drop-down menu select ‘Delete selected’.
Removing Unused Audio Clips
Audio clips used in your project use up your computer’s RAM so deleting unused audio clips could be just the fix for crackling audio. To remove unused audio clips, go to Tools>Macros>Purge unused audio clips.
Oversampling Factor in Plug-ins
A handful of native and 3rd party plug-ins contain an oversampling factor setting. It is usually set in the following values 2x, 4x, 8x, 16x, 32x, and so on. The higher the value set the higher the stress on the CPU, but also the higher the quality of the audio produced.
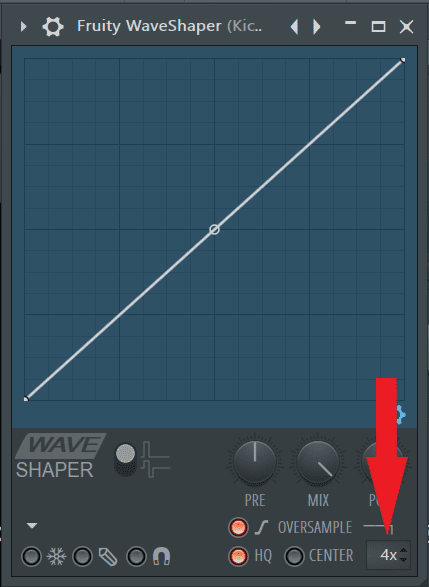
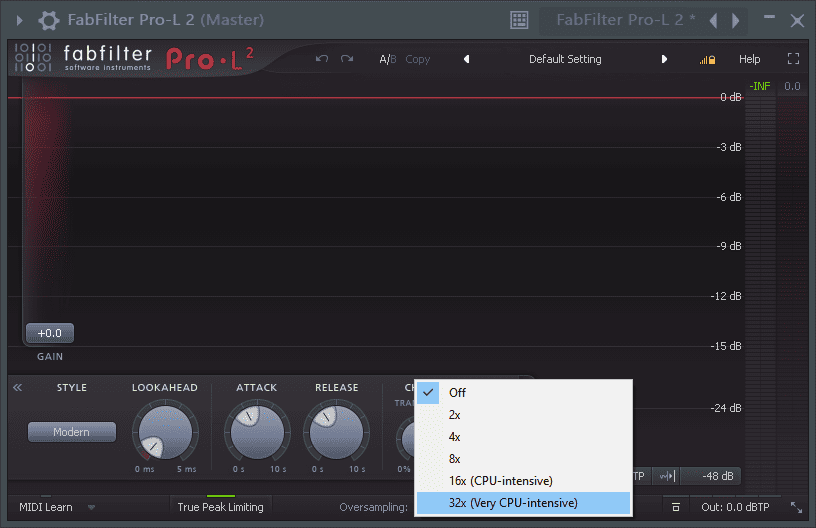
To correctly set the oversampling factor, you must first determine what you want to achieve.
To stop crackling audio during playback, try setting it to a low value, for example, 2x or 4x. If that doesn’t fix the problem, then try turning it off for good.
To stop cracks and pops in audio after exporting, try setting the oversampling factor to higher values in different plug-ins, both instruments and effects.
Tracking Out Projects Before Mixing
Once you’re done producing, it is good practice to track out all the individual sounds used in the project before you begin the mixing stage. Doing this gives you a fresh slate to work, a chance to explore new ideas, and loads of free CPU resources at your disposal.
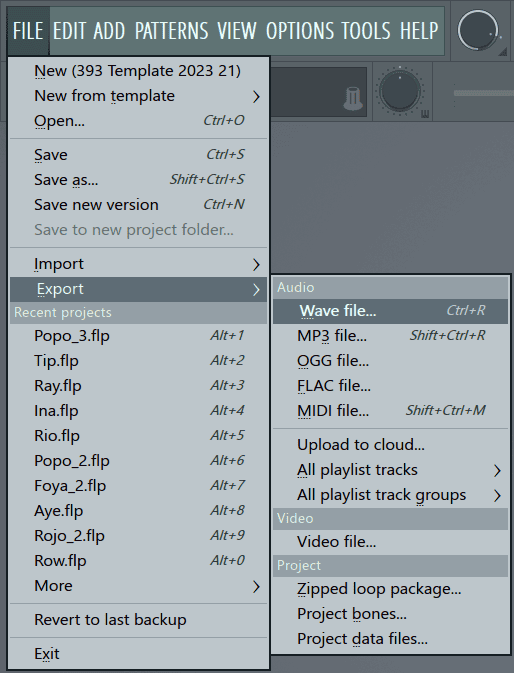
Step 1: Go to File>Export>Wave file.
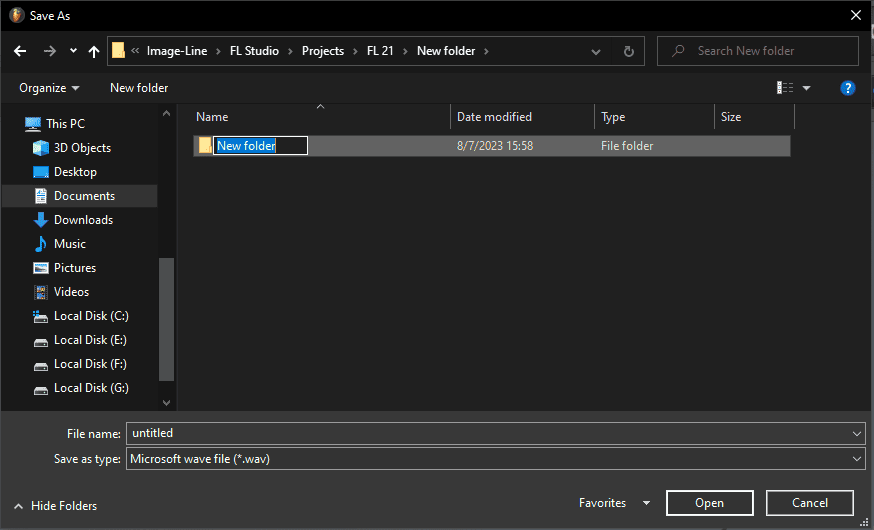
Step 2: Browse to your preferred location, create a new folder, name it, and click open.
Step 3: Ensure you have turned on ‘Split mixer tracks’ under the miscellaneous section of the export settings.
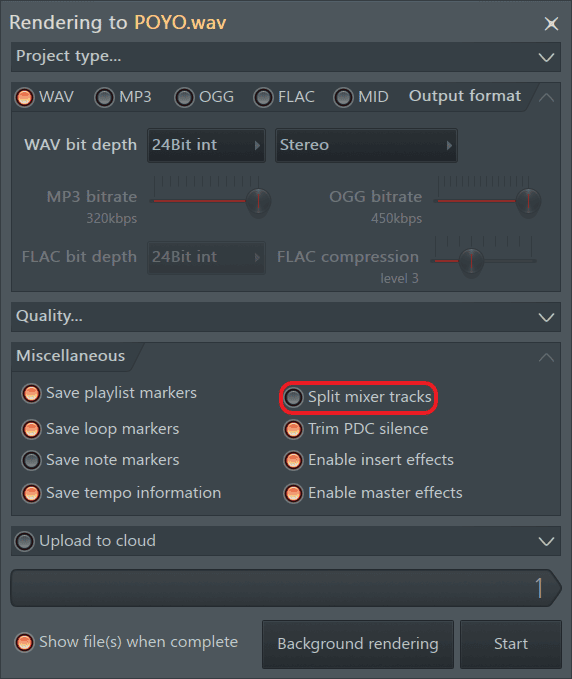
Now I can open a new project, import the files, and start mixing.
Alternative Fixes
You can also try implementing these out-of-FL fixes to see if they remedy the issue.
Closing unnecessary applications running in your computer’s background, for example, Chrome.
Setting your computer’s power plan to support high performance. Your computer’s performance may be limited if its power plan is set to preserve battery life.
Conclusion
Don’t let crackling audio get between you and your creativity. Just try out one of the fixes and find what works for you. Until next time, have fun creating.

- How to Add Drum Kits to FL Studio - September 18, 2023
- Best Free Drum Kits for FL Studio - September 18, 2023
- How to Create Drum Patterns & Loops in FL Studio - September 12, 2023
")


