If you’re recording vocals, often the person singing is not going to be in perfect pitch. This is where autotune saves the day. Autotune corrects the wrong notes by adjusting them to fit into the scale of the song.
If the song is in the key of F major, you can change the singer’s notes to only match the notes in F major. Sometimes, instead of using autotune on a complete track, producers and mixing engineers will manually adjust only the incorrect notes.
Auto-tune is an essential part of any producer’s toolbox. In FL studio, NewTone and Pitcher are native plugins that can help you achieve this effect. The FL Studio signature edition and higher come with these tools. However, Antares Autotune Pro is the top autotune plugin on the market if you’re a dedicated music producer or engineer searching for the finest long-term value.
There are three things that you need before you start pitch correction using auto-tune
- Scale – Setting the scale to the song’s true key will reduce automated tuning errors.
- Input type – You’ll have settings in your autotune plugin for different voice ranges and instrument types. This makes the autotune more precise and realistic-sounding.
- Retune speed – Retune speed controls how quickly the autotune tunes an out-of-tune note. Faster retune speeds result in a robotic sounding vocal while slower retune speeds give you a more natural sounding vocal.
I typically have pitcher or any pitch correction tools as one of the first plugins in the vocal effect chain.
Three Ways to Autotune in FL Studio
NewTone
NewTone only functions with pre-recorded audio and samples because it doesn’t operate in real-time when you record vocals. NewTone allows you to manually edit the notes to fit the scale of the song. There are several parameters that make pitch correction simple, as well as many parameters that let you examine each note in detail.
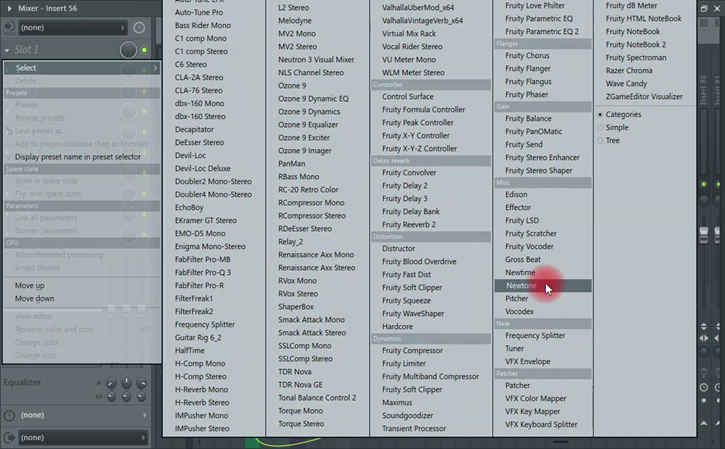
To add NewTone on your mixer track, click on one of the effect slots, from the effect window that appears, select NewTone.
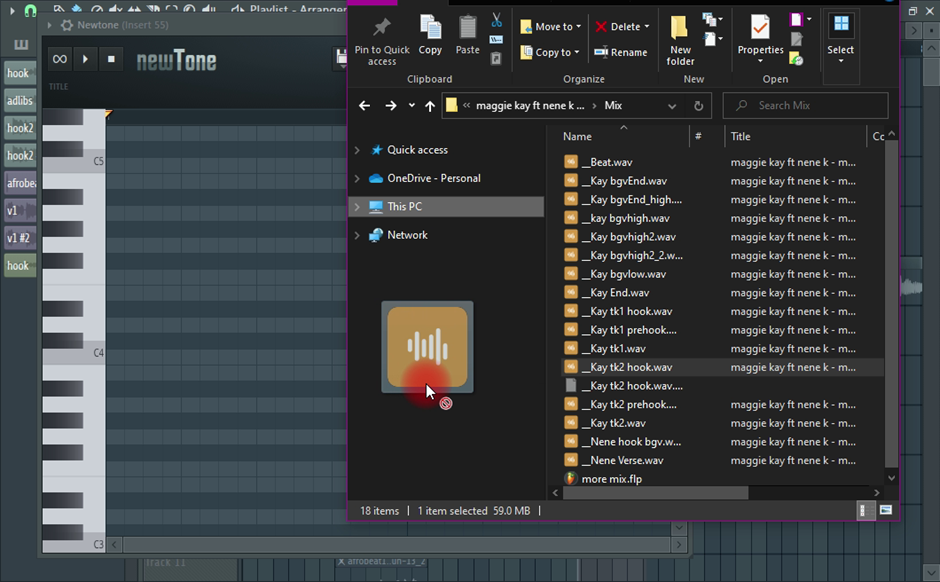
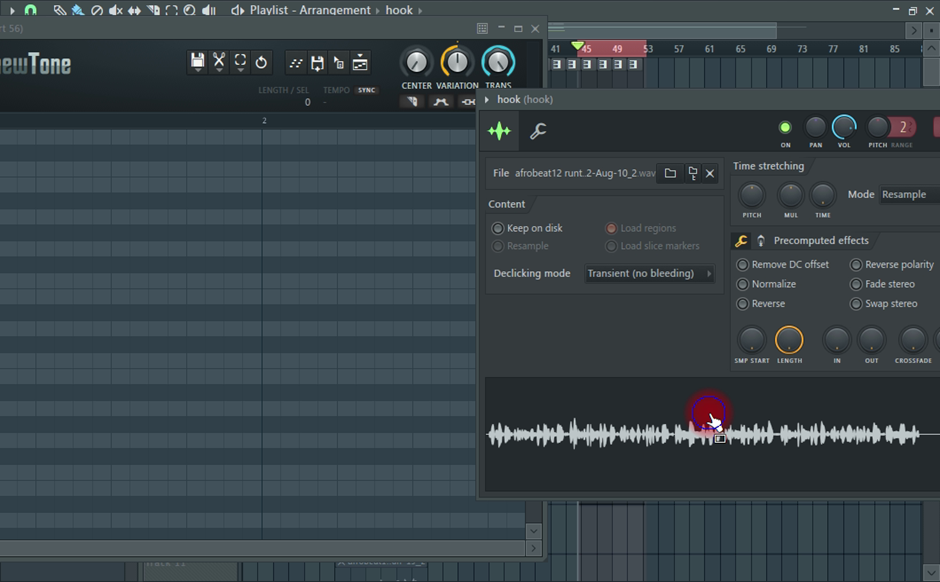
Drag and drop the audio clip you want to alter into the NewTone interface.
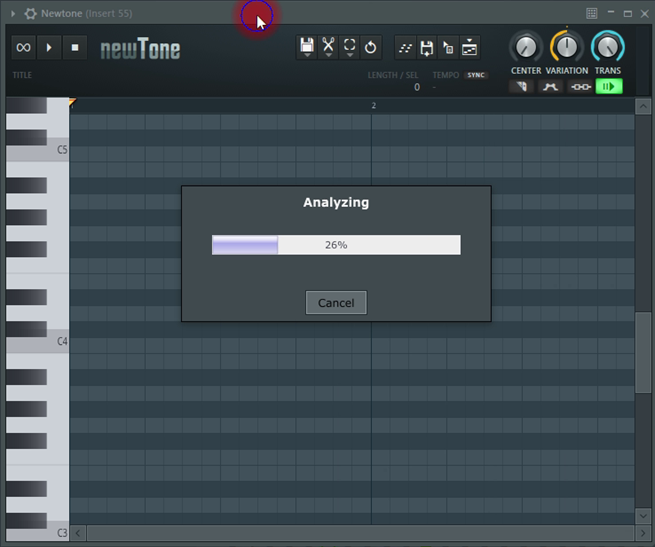
The audio will be examined after which it will be added to the interface.
If the audio track you want to edit is already in your FL Studio project, you can drag it into the NewTone effect after exporting it.
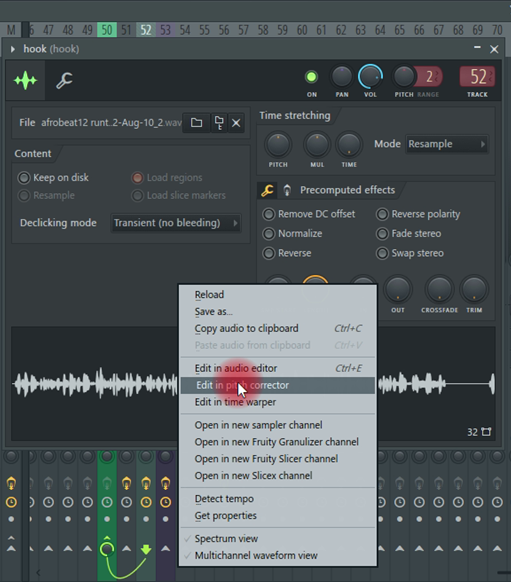
Another way is to Double-left click on your file, right-clicking on the waveform window, and selecting “edit in pitch corrector”.
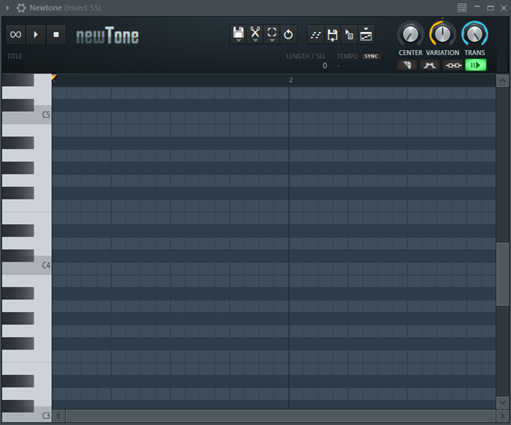
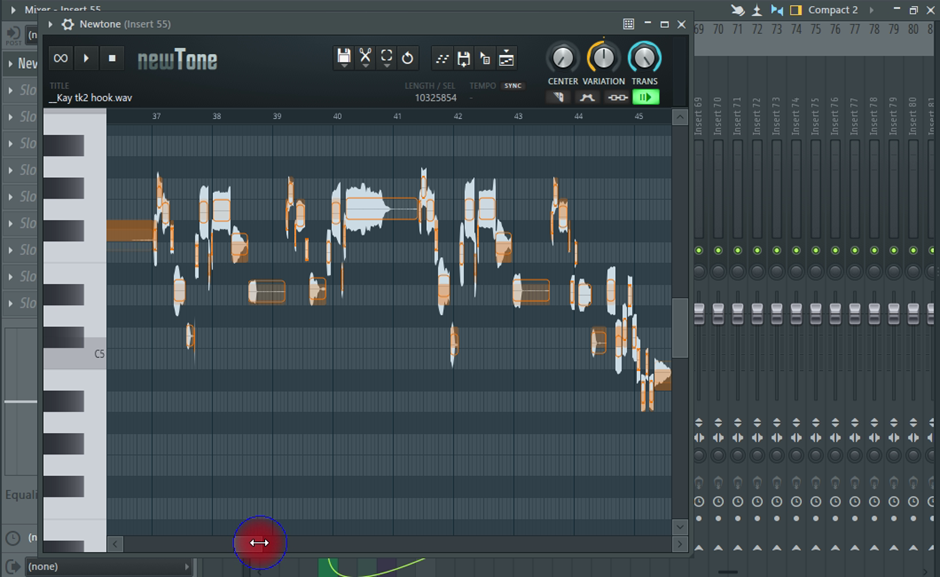
After analysis, you’ll see a piano roll on the left that displays the note pitch and blobs in the timeline section that display the pitch of each note.
On the toolbar, there are three main controls. Center, variation and trans.

Center determines how close you want the highlighted notes to the nearest pitch. A higher value produces a sound that is more autotuned.
Variation controls vibrato and pitch errors. A high value produces a robotic sounding effect.
Trans (Transition) controls the pitch transition speed between notes.
Using these three controls I am able to manually tune each note of a vocal performance. There are even more options when you enable Advanced mode. You do this by clicking the second icon under the variance control on the toolbar. It lights up purple when activated.
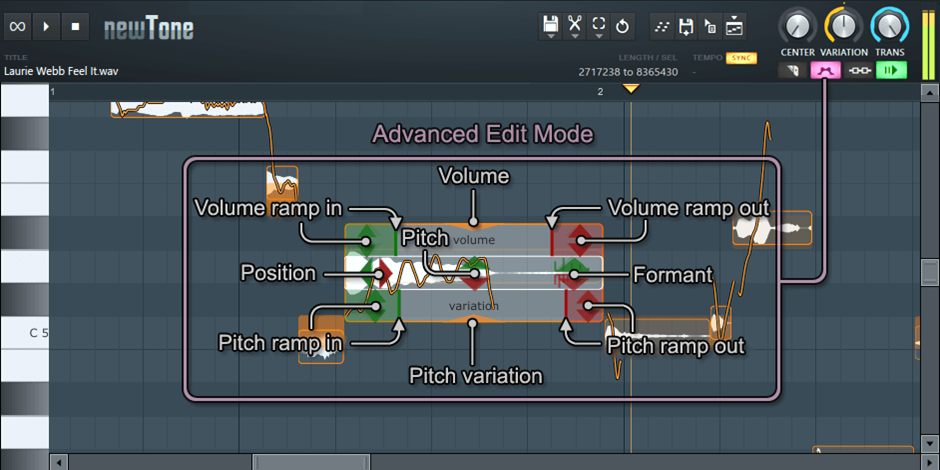
Using your mouse, drag in any of the highlighted segments to edit. Dragging the pitch position allows you to move the notes left or right. The audio’s pitch variation is evened out when you drag the pitch variation. In the advanced mode, less is more. A little change can greatly affect your audio. It’s why I love it though.
When you are done editing the audio in NewTone, you can export it back into your project by using any of the four options in the toolbar.

- Export as midi
- Save as Wav
- Drag selection
- Send to playlist
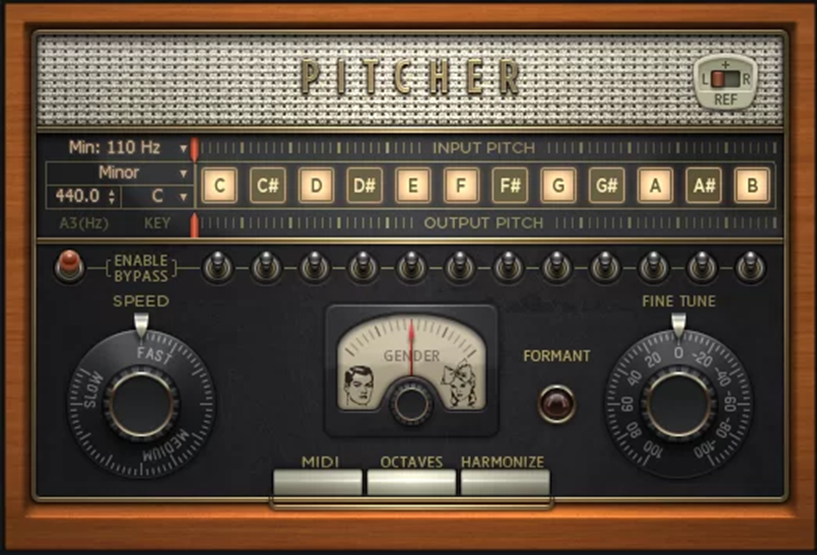
Pitcher
Pitcher is a real-time pitch correction plugin. It works with both live performances and pre-recorded vocals.
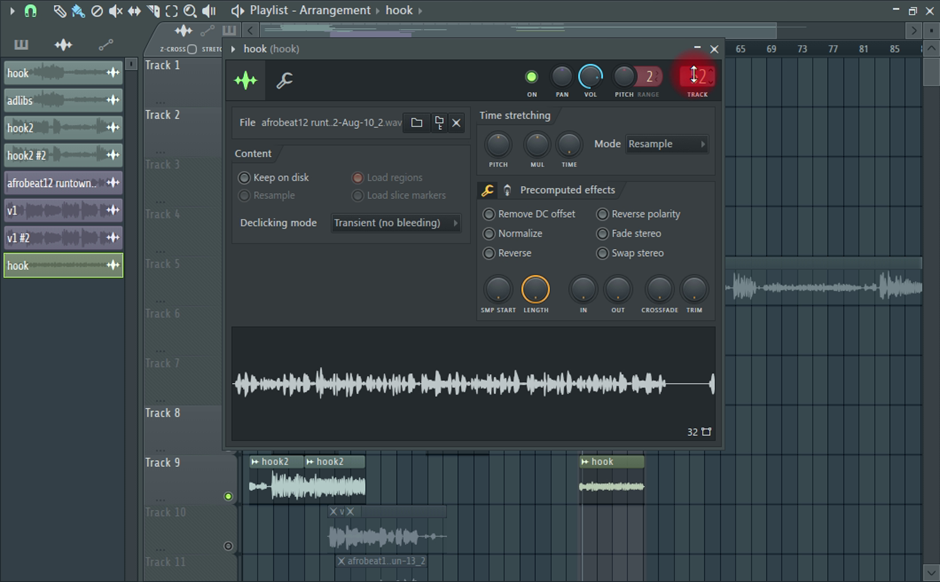
To use pitcher, assign your audio track to a mixer channel by double clicking on the audio. Set the destination Mixer Track by clicking the Mixer Track routing display and dragging up or down.
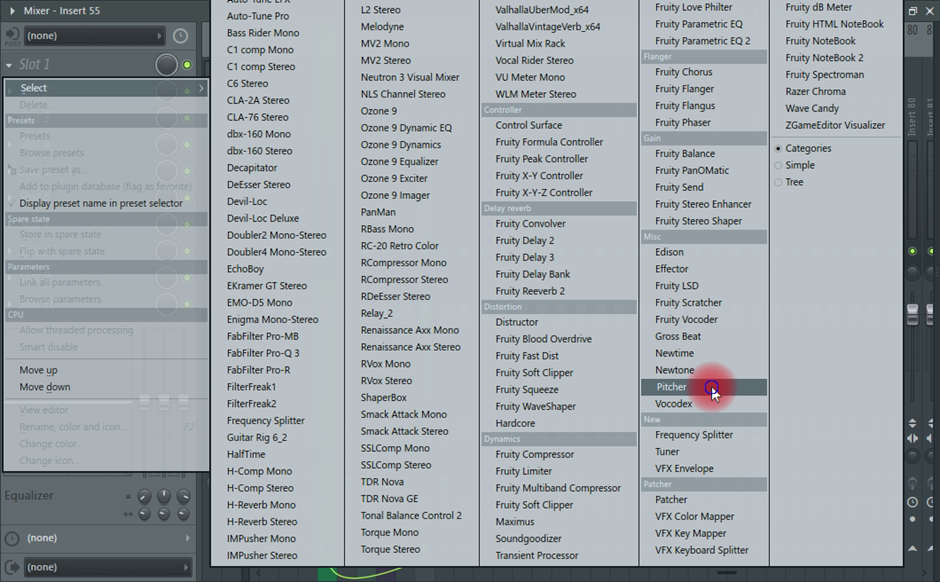
Pitcher can be selected by simply clicking on the drop-down menu in the mixer channel’s effects slots
For the best results, I select the scale of the track.
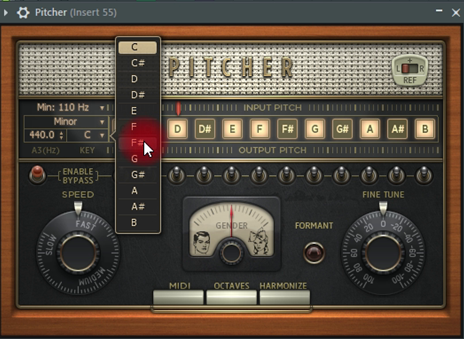
The notes of the selected scale will remain activated and the rest will be disabled. I use the input pitch panel to check for the notes the vocalist is singing before I choose whether or not to enable or disable a note.
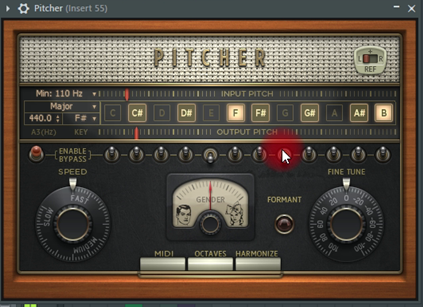
The next thing is selecting the gender or vocal range. If the vocal is deep, I turn the dial all the way to the left. If it’s in soprano, I drag to the right towards the woman icon. Setting the retune speed will affect the tone of the audio.
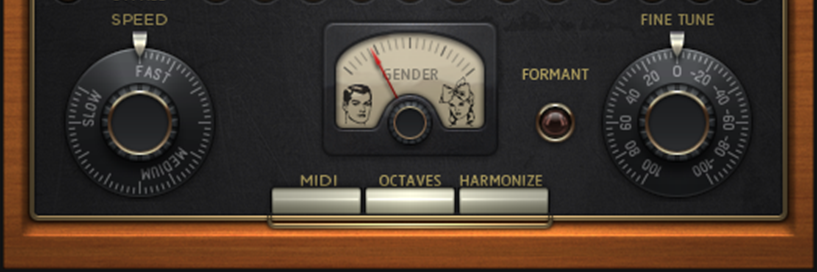
Formants are resonances or peaks in a sound’s frequency range. When the formant option is deactivated, you will hear a robotic sounding vocal. When activated, it maintains a constant formant as the pitch is changed.
Antares Auto-tune
For years, Antares Auto-tune has been the industry standard. It was created by Dr. Andy Hildebrand and made popular in 1998 when Cher released “Believe.” Since Antares is third party, you’ll have to download and install it, you can get it here.
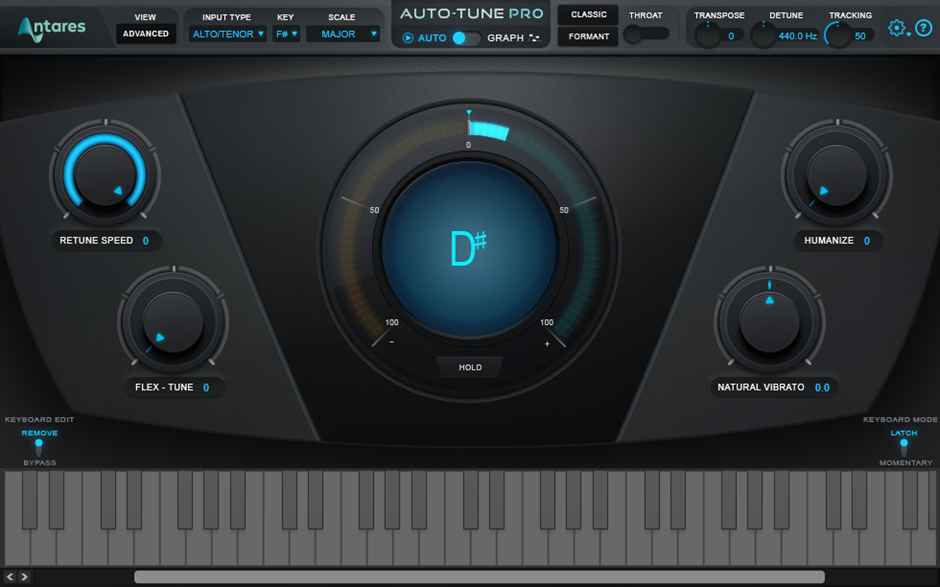
There are two correction modes on Autotune. Auto-mode and Graphical mode. Auto-mode processes the audio in real-time. It analyses the audio and decides how to process it as it moves through. Graphical mode works best with pre-recorded vocals. It allows you to manually edit each note.

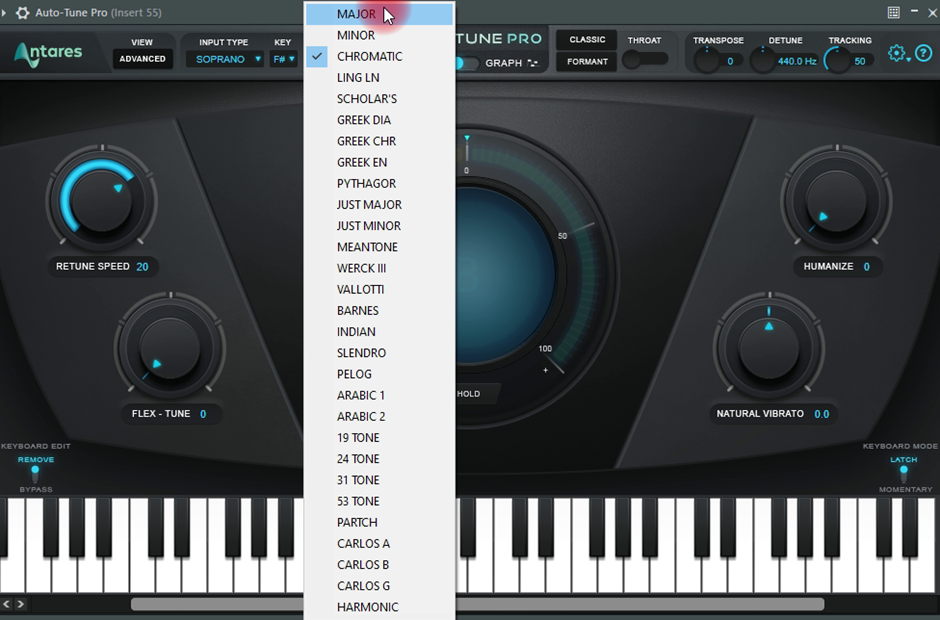
The plugin starts in auto-mode by default. To tune your vocals, select the input type (soprano, alto. tenor, bass or instrument),
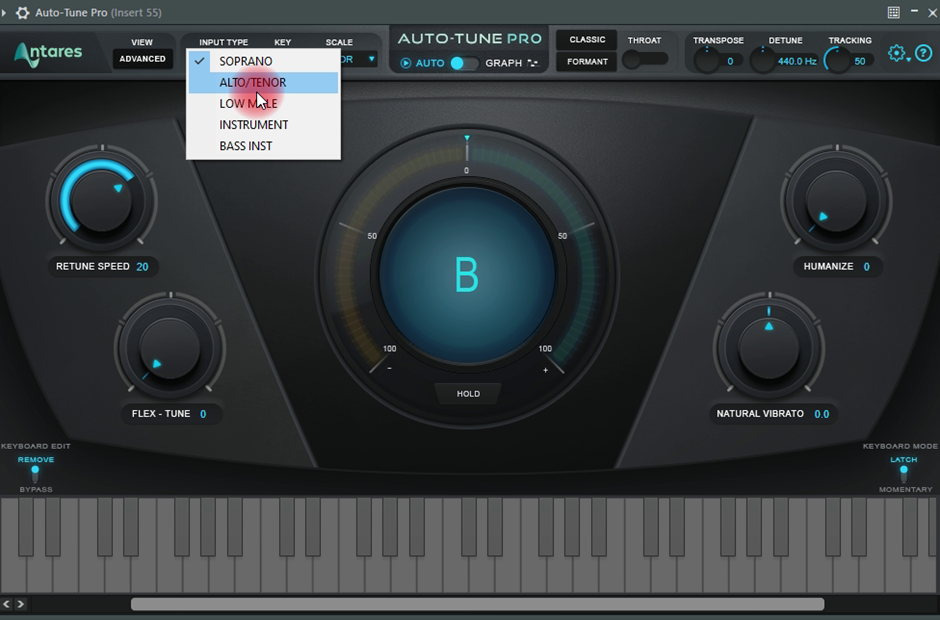
select the song scale and adjust the retune speed to taste.
Other controls I use to fine tune the effect are:
Humanize: You can further reduce Auto-tune’s robotic effect by using this setting. When using low Retune Speed values, Humanize will reduce the retune speed for longer sounds to make them sound more natural while leaving a fast retune speed for shorter sounds.
Natural vibrato: A high value will increase the vibrato of a vocal. It is used to tame the vibrations of a vocal performance.
Tracking: this represents auto-tune’s sensitivity. You generally won’t need to adjust the default setting of 50. However, you might set it higher if it’s a studio recording, or you could need to lower it if there is a lot of background noise.
Flex Tune: When Flex Tune is set to zero, the program can tune each individual vocal sound to the nearest pitch. With a higher value, the vocal needs to be closer to the correct pitch for it to be adjusted. It allows the singers voice variations as they change notes pass unaffected. This setting also works great for guitars as the player slides up and down notes.
Detune: you may never need to change the default A=440Hz setting as most instruments are tuned to this standard; but in case you come across a track recorded with a a different A reference point, you can adjust this to match.
You can add more vibrato by using the create vibrato effect. You can toggle this on by clicking on the advanced option.

You can select the type of vibrato using ‘Shape’. ‘Rate’ allows you to choose the speed of the vibrato. To adjust the time between the beginning of the note and the beginning I use the onset delay control. The onset rate defines the time it takes for the vibrato to reach its highest point in milliseconds. Variation adds a natural feel to the vibrato by adding random variation.
The vibrato can also be further defined by “Pitch amount,” “Amplitude amount,” and “Format amount.”
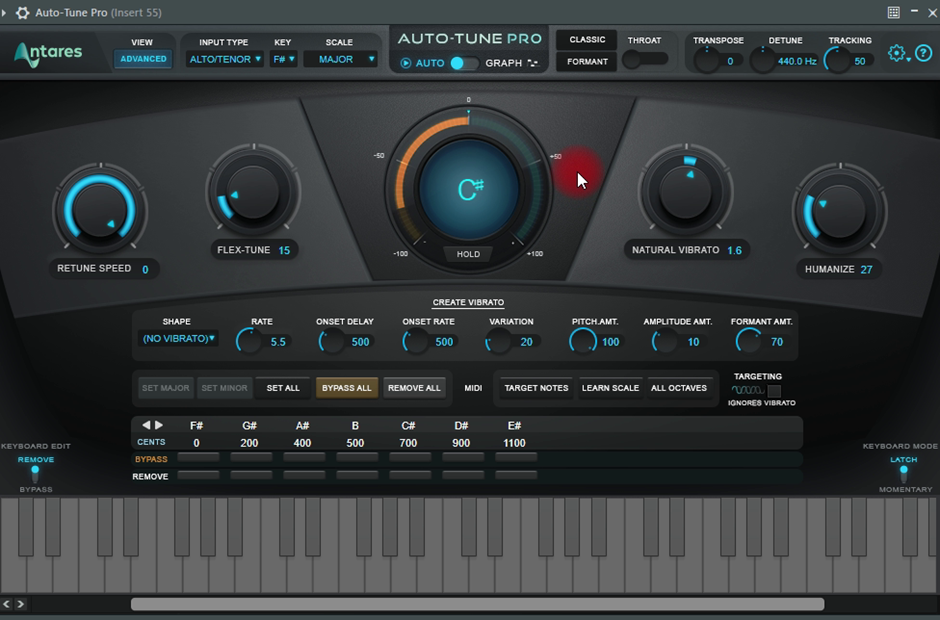
I always set the pitch amount to 100 for a smooth vibrato feel.
For an auto-tune effect like T-pain, I use the auto-mode. For a more natural sounding tuning, I use the graphical mode or edit the notes in NewTone. For the best of both worlds, I add NewTone before Pitcher or Antares Auto-tune on the effect chain.
Conclusion
Since its inception, the use of autotune has been a source of controversy. Some people consider it to be a cheat but Dr. Andy Hildebrand, the inventor of autotune, argues that producers used to record multiple takes and select the best parts for the final result. This in itself was cheating. Autotune simply allows you to simulate perfect pitch without having the artist record multiple takes.
Regardless of which side you’re on, remember that with great power comes great responsibility. Use autotune carefully, it’s been known to make pop stars.

- FL Studio Tempo Changes When I Press Play [FIXED] - January 14, 2023
- How to Speed up / Stretch Sample in FL Studio - January 14, 2023
- How to Find / Detect Tempo BPM in FL Studio - September 30, 2022


![FL Studio Piano Roll Helpers Option Tab Missing [FIXED]](https://ProRec.com/wp-content/uploads/2023/07/piano-roll-helpers-180x180.png "FL Studio Piano Roll Helpers Option Tab Missing [FIXED]")

)