Just a couple of days ago I received a new MIDI Fader controller, something I was planning on buying for the last couple of months as a multi-purpose tool in the studio. As I was setting it up, it occurred to me that It would be a nice idea to lay some useful tips, tricks, and Ideas about how to make the most out of these kinds of controllers using the MIDI learn feature in REAPER.
There are endless options, and a bunch of things that you can control via MIDI messages inside REAPER. Starting from basic DAW functions like transport control, to more specific things such as plugin parameters for automation writing, to switching guitar patches for a live rig.
I will start this tutorial with the hardware setup, and then I’ll get into the different things you can do with MIDI learn, so let’s get right to it!
Hardware Setup
Before you do anything, you first need to set up REAPER so it recognizes the MIDI controller as such.
Start by connecting your controller to your system. After your OS recognizes the controller, open Preferences using Ctrl+P on Windows or Cmd+, on Mac. Then navigate to the MIDI devices tab in the left part of the window.
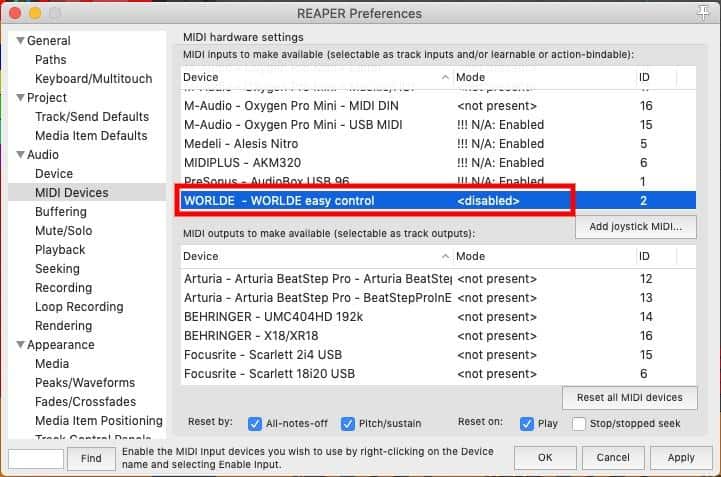
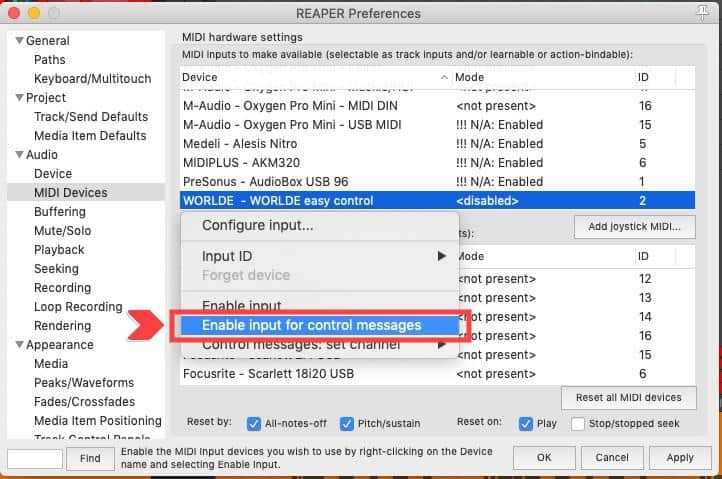
You will see your controller’s name in the MIDI input list, right-click it and click on the ‘Enable input for control messages’ option. This will tell REAPER that the incoming MIDI messages from this device are meant for controlling system or plug-in parameters via Continuous Control (MIDI CC) messages, not musical notes.
Using MIDI Learn
Once the device setup is complete, you can start by assigning buttons or controllers to parameters inside REAPER. You can do this with any parameter as long as it has an action, including custom actions (macros). You can also assign MIDI control messages to any automatable plug-in parameter.
Controlling REAPER Parameters
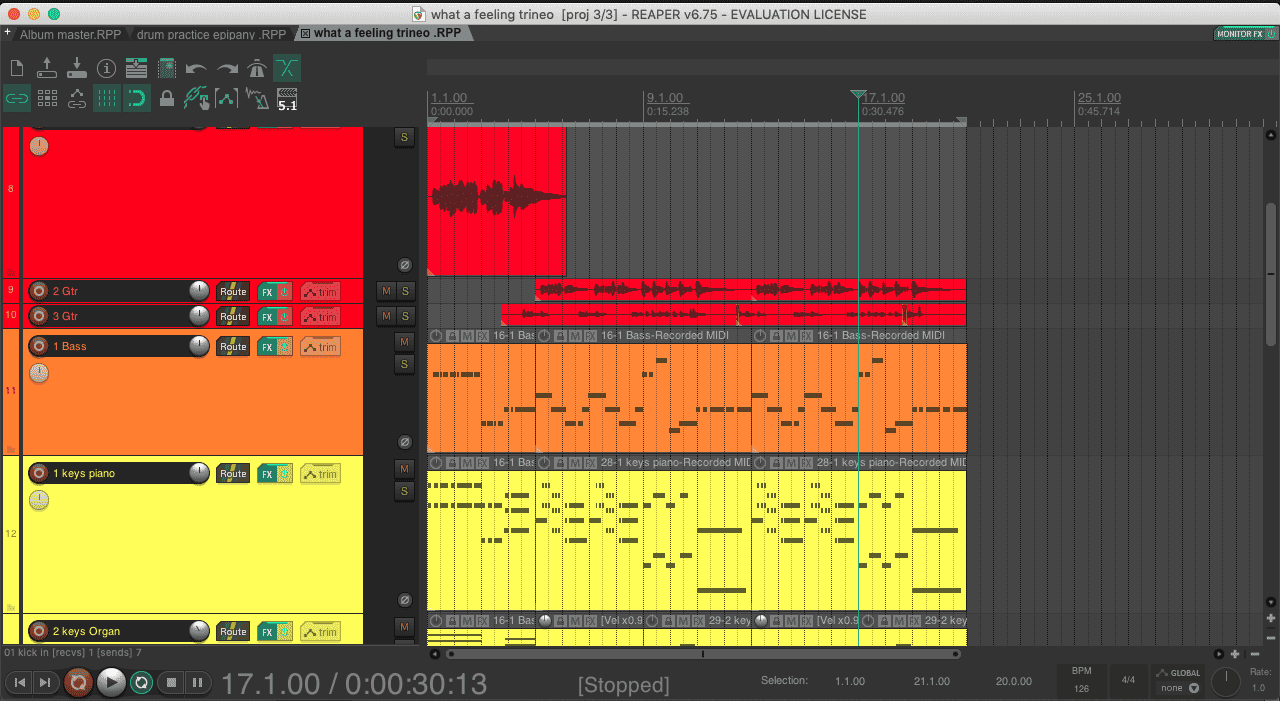
The Transport controls are the first and the most useful parameters I like to program when I have a MIDI controller available. The easiest way to do this is by going to the Actions list, searching for the corresponding actions, and assigning the MIDI control to the action.
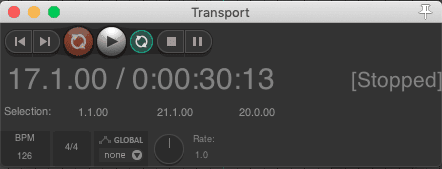
In this case, I will search for ‘Transport: Play/Stop’
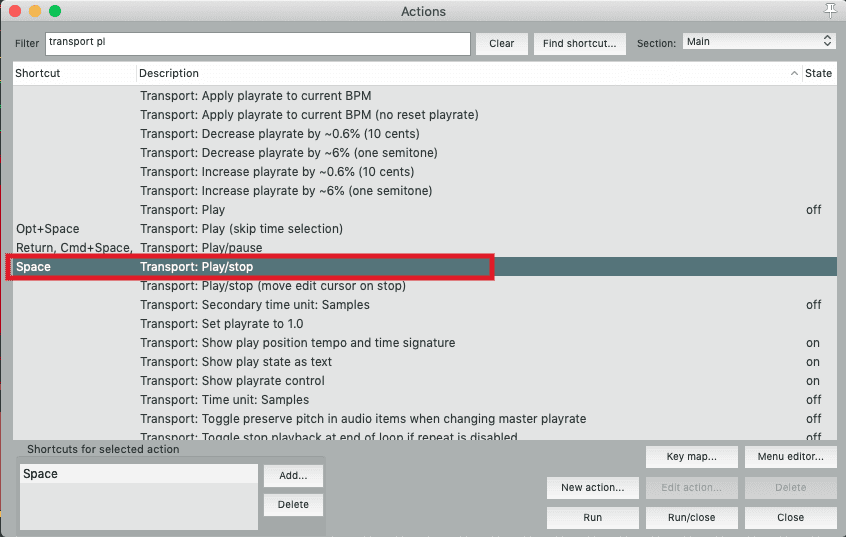
By selecting an action on the Action list, you will be able to see the different short-cuts and MIDI commands assigned to it in the bottom-left corner. Go ahead and click on the Add button here.
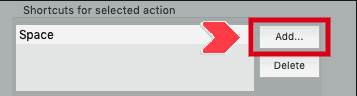
This will open a blank Keyboard/MIDI/OSC assign window. Now you can either press the button or move the Knob/fader in the controller and REAPER will automatically recognize the MIDI command. Once you click the OK button, the action will be mapped to the button/knob/fader on the controller.

Now, the transport controls are usually assigned to buttons in the controller. In case you want to assign a knob or fader to any other parameters such as faders or the Playback Rate control, I want to highlight a very useful tip. You can change how the REAPER parameter reacts to the MIDI CC on the Keyboard/MIDI/OSC assign window.
Parameter assignments are set up as ‘Absolute takeover’ by default, which means that the parameter will jump to the value position of the MIDI CC message immediately.
However, you can activate the ‘Relative takeover’ option, which means that the changes will only take effect after you move the physical fader in the controller, to the position of the controller inside REAPER. Give it a try, you may like it better depending on your preferences, and your workflow.
Controlling Plug-in parameters
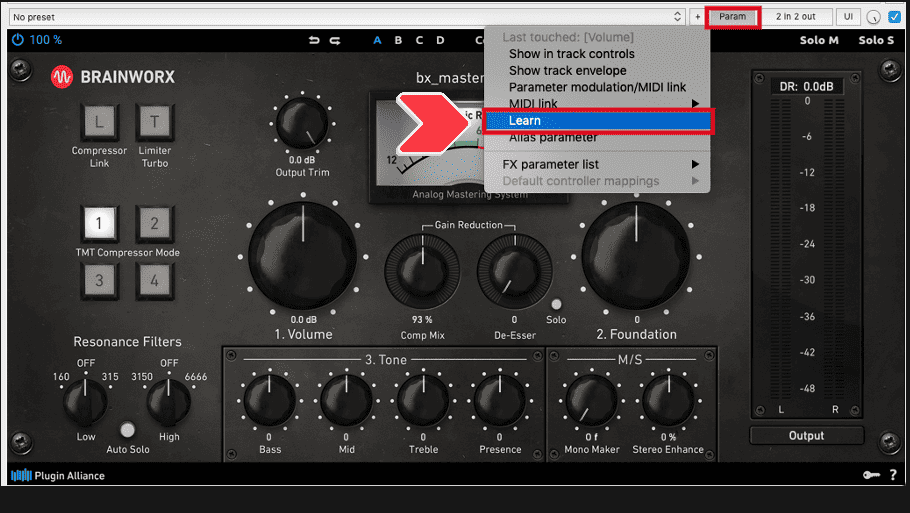
This is where the real fun begins. Assigning MIDI controls to plug-in parameters is as easy as assigning them to DAW Actions. You first have to open up the plugin and click on the parameter we want to control. You need to do this because the MIDI learn function works with the last touched parameter. Now click on the ‘Param’ button at the top right corner of the plug-in window, and select the ‘Learn’ option in the menu.
From here on, it’s the same process as when we assigned the MIDI command to a DAW action, just move the fader or press the button on the MIDI controller, the only difference is that you now have a couple more configuration options.

I recommend always checking the option ‘Enable only when track or item is selected’ unless you really know what you’re doing. This option is useful because most of the time there will be more than one instance of the plug-in in the project, and you’d want to assign the same MIDI CC to the same parameter across several tracks.

If you want to assign the same MIDI CC to different plug-ins even in the same track, make sure that the MIDI CC only affects one plug-in at a time. In this case, you may want to activate the option ‘Enable only when effect configuration is focused’ or ‘Enable only when effect configuration is visible’
Once you have assigned all the MIDI commands to the parameters you want, you may want to save this configuration. This is done by clicking again on the ‘Param’ button, going to ‘Default Controller mappings’, then selecting the ‘save as default’ option. This will make it so that every time you load this particular plugin, this same configuration will be loaded so you can stay consistent.

Conclusion
Setting up a MIDI controller for Reaper is a relatively easy operation, but the possibilities are endless in regards to what you can control, and it can highly improve your workflow if done right. Go ahead, experiment with what you have and go crazy! You may find new uses for old gear that might surprise you. Happy producing!
")


")