You often hear voice-overs on radio, tv shows, animations, documentaries or in podcasts, spoken word and audiobooks. A great voice-over gets you into the mood of the podcast or show, captures your attention and brings some inspiration. Any producer, voice actor or musician who wants to make good voice-overs needs to have an idea of the sound they want to hear and how to get it right.
In this article you’ll get to learn some tricks in recording voice-overs in Adobe Audition. We’ll go through the basics of what voice-overs are all about and how to record quality voice-overs in Audition.
Can you do Voiceovers in Adobe Audition?
Adobe Audition lets you set up a recording session and record audio for voice-overs, vocals or podcasts while at the same time monitoring the session with headphones or studio monitors. Once you’re done with the recording session, you can edit the audio or mix it by adding various effects like EQ or reverb and then export the final mix to a 2-track stereo, high quality audio format.
Is Adobe Audition good for voiceover?
As we’ll see later on, Audition has several features that make it ideal for recording voice-overs and this makes it easy to finish the whole recording process within Audition, without necessarily having to use another DAW. From recording to editing to mixing Adobe Audition has got you covered. When it comes to live recording, you get high quality sound reproduction with Audition’s low latency. Latency is a small lag or delay in the audio signal between the microphone and the DAW.
How to do Voiceovers in Adobe Audition?
To record a voice-over you need a setup that includes at least a condenser mic, an interface and a PC/laptop with the Adobe Audition DAW. You also need headphones to listen and monitor the recording process.
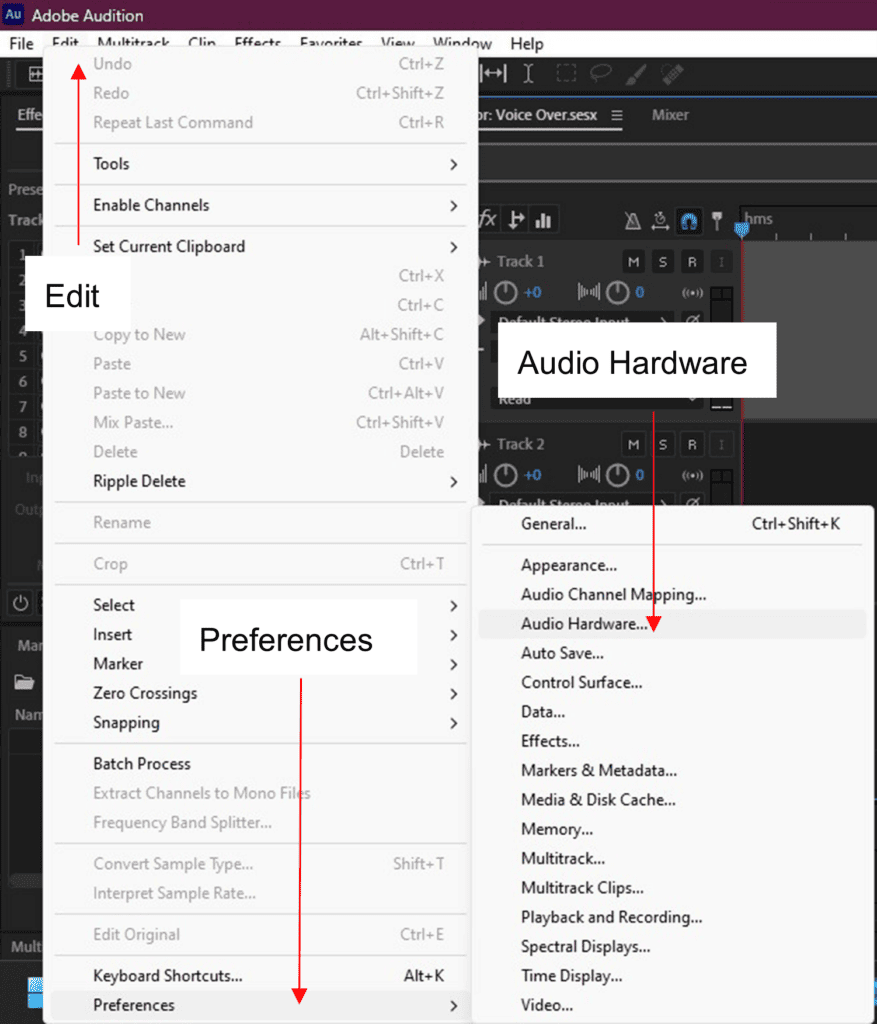
After you’re done setting up, fire up Adobe Audition and start the recording session. The first step will be to sync your audio interface inputs and outputs in Audition. To do this simply click on Edit on the menu bar and select preferences on the pop-up menu, then click on Audio Hardware
Menu bar > Edit > Preferences > Audio Hardware
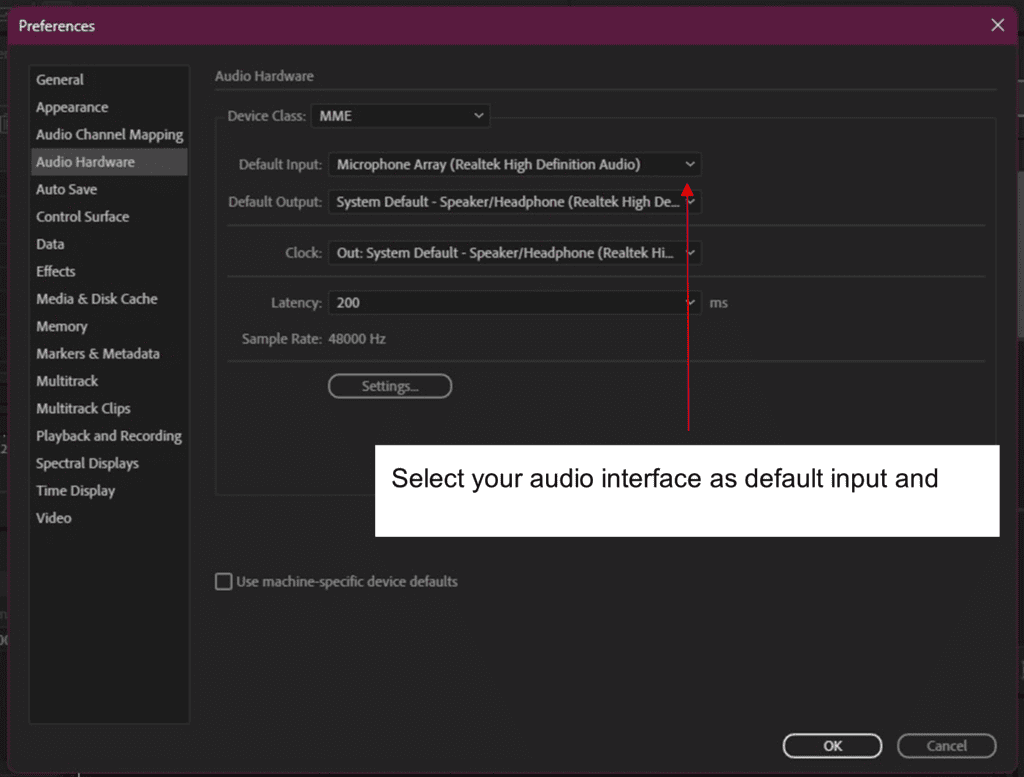
Set the default input and default output devices to the AD/DA converter you are using for your session.
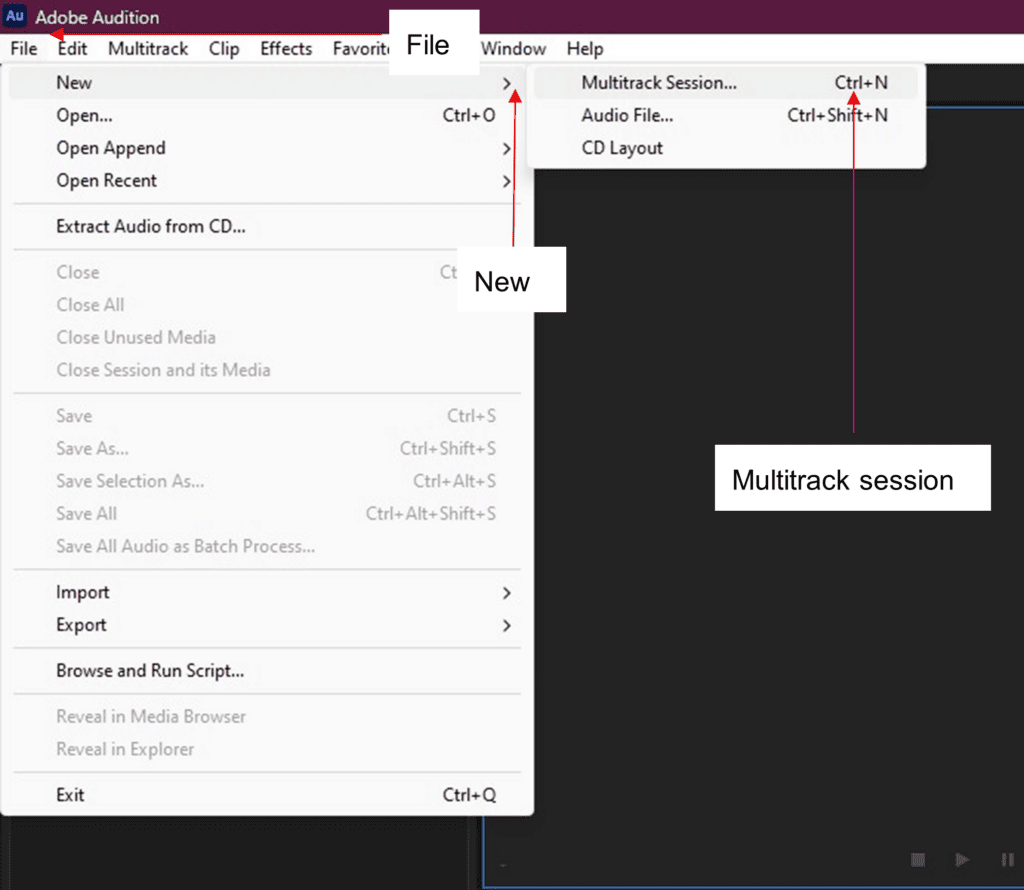
Now it’s time to open the multitrack session. Do this on the New Multitrack Session option on the File menu.
Menu bar > File > New > Multitrack Session
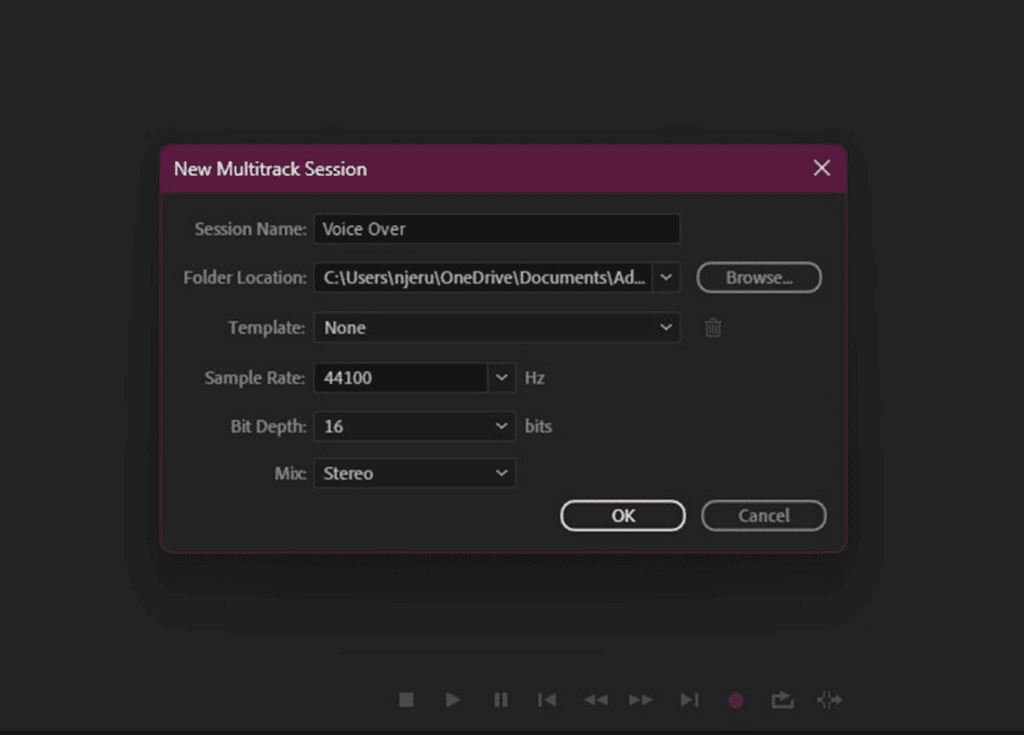
Change the name of the session, along with sample rate and bit depth. Try to keep the sample rate at 44100 Hz or at most 48000 Hz and bit depth at 16 bits to prevent latency while recording.
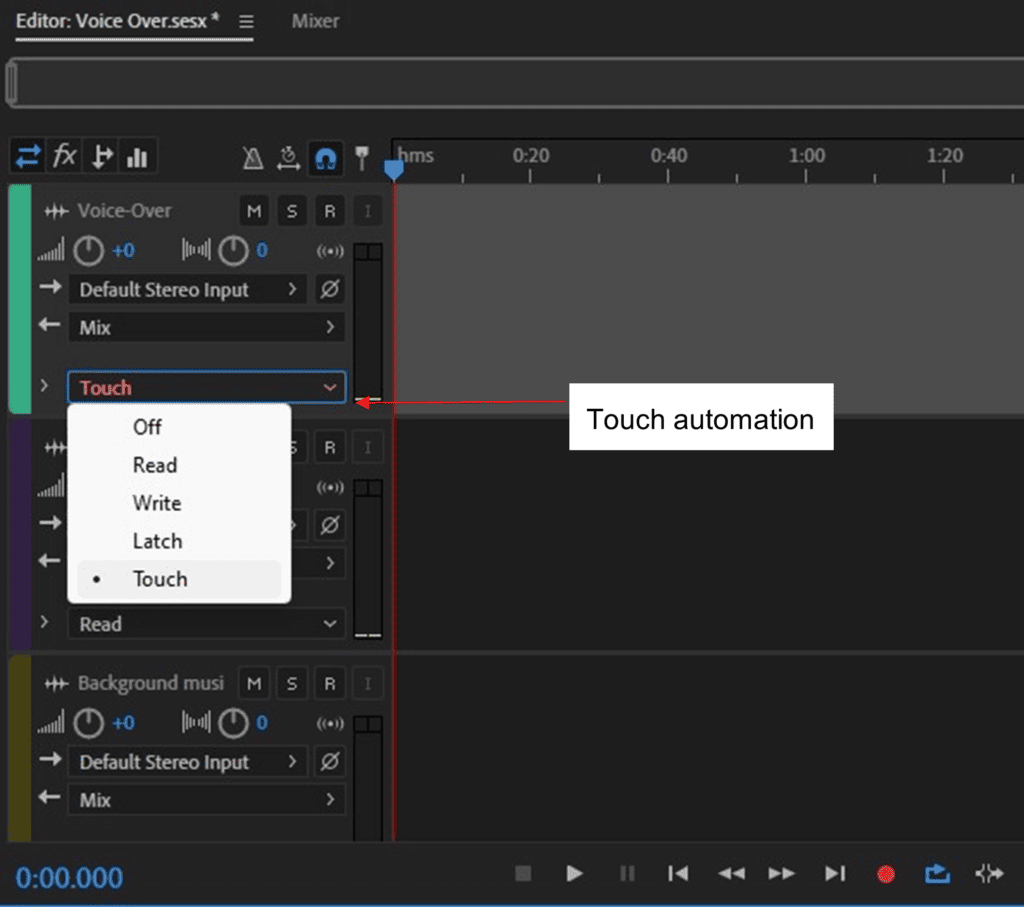
Then select the mode of automation. This gives you the option of recording volume changes into the track when the artist is talking into the mic, by adjusting gain on the fly while recording or during playback. Automation can be done in four different modes: read, write, latch and touch. We’ll go with touch automation, it’s a better choice for voice-overs.
Touch automation allows us to even out high volume ranges by turning up or down (touching) the fader while recording the voice-over for parts that are either too soft or too loud, but only as long as you are touching the fader. As soon as you stop changing the gain, the fader returns to 0 dB.. Turn automation on at the bottom of the track’s menu.
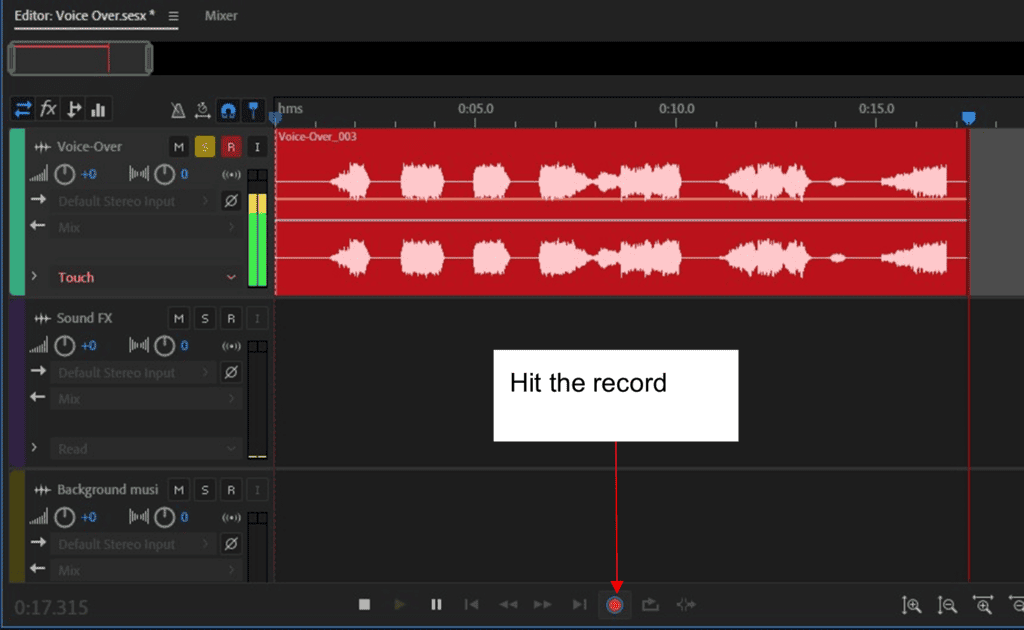
Finally, record-enable the Voice-Over track by selecting the ‘R’ button on the top right of the track menu, and select ‘S’ to solo the track being recorded. You’ll notice that the volume level meter for the channel is active.

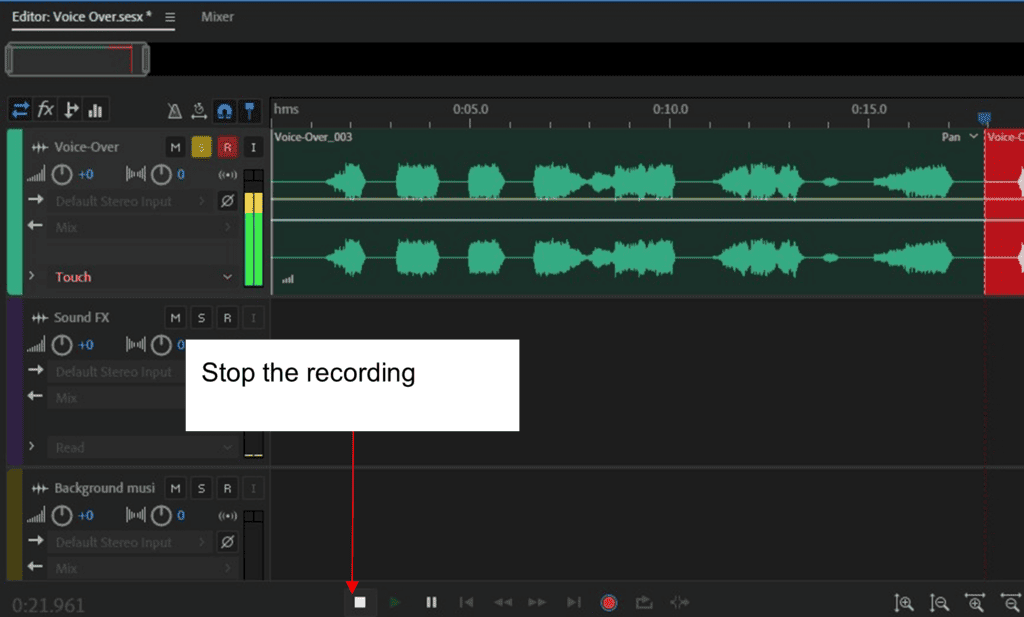
When you’re ready hit the record button…and the stop button once you’re done with the voice-over, then disable recording on the channel.
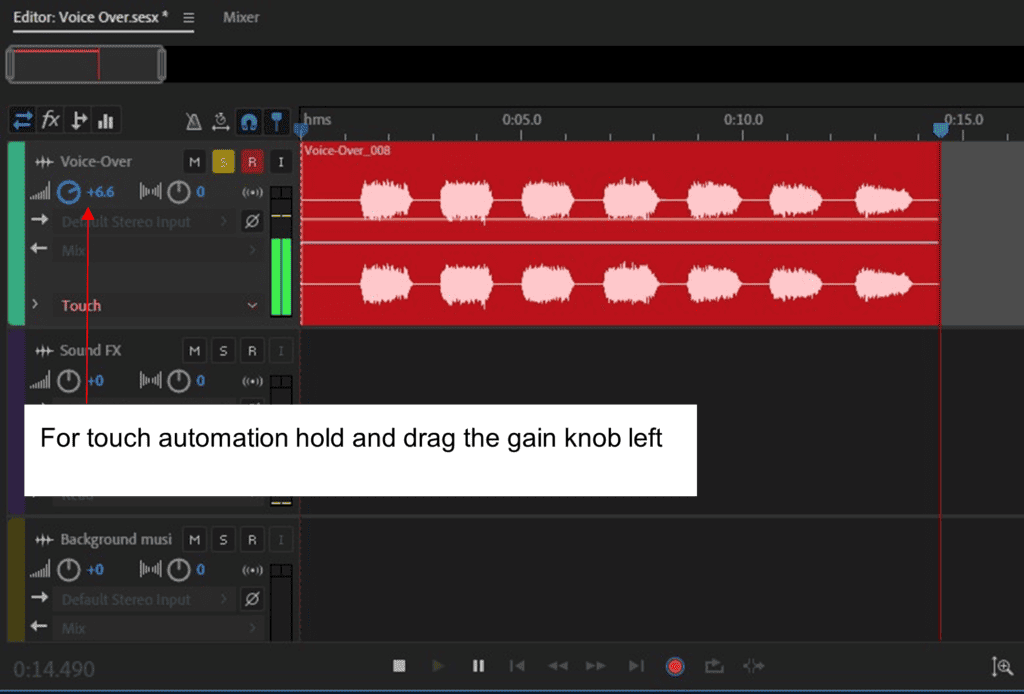
Don’t forget to automate the volume control in the mixer panel when the session gets too loud or inaudible. And it’s better to record a few takes of the voice-over and choose the best one.

The Mixdown
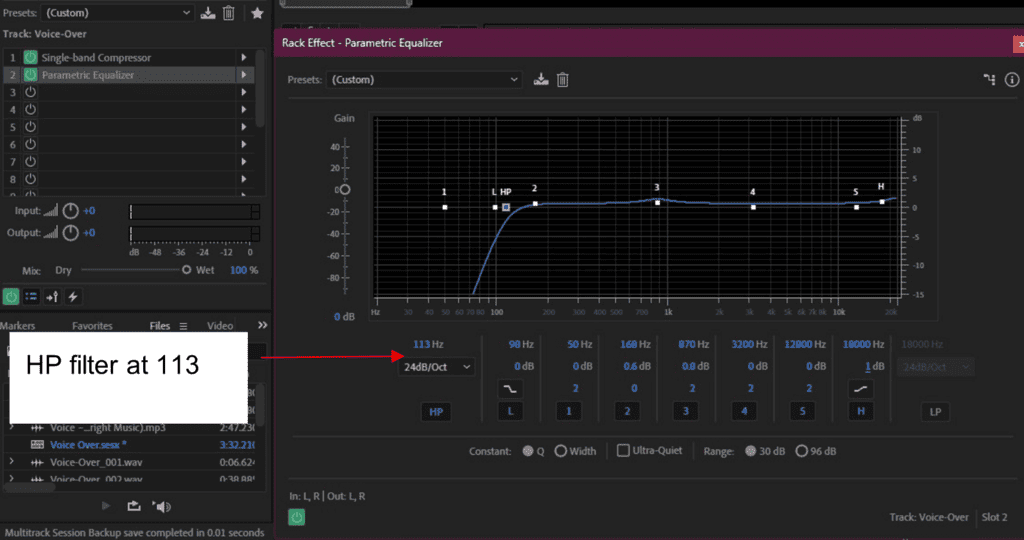
After the recording session, you might want to add some effects. Voice-overs tend to be a bit boomy so you’ll need to cut out the bass frequencies. This is where a parametric equalizer comes in handy. There’s not much to EQ, only a high-pass/low-cut filter to clear out the bass below 160 Hz.
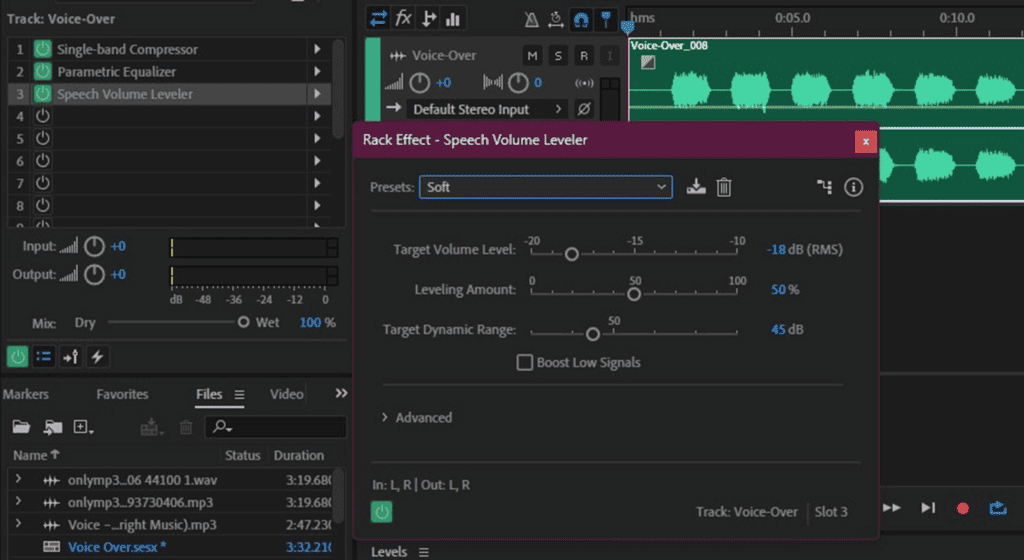
Audition also has a Speech Volume Leveler, which has the effect of adding some amount of space to the recording and making it a little airy, since voice-overs tend to sound like they were recorded in a box. To get some clarity and be able to hear details in the voice-over, use a high leveling amount (70 % – 100 %) and set a lower dynamic range (45 dB). For an easy and smooth sound set a lower leveling amount (about 50 %) and a higher dynamic range (around 60 dB).
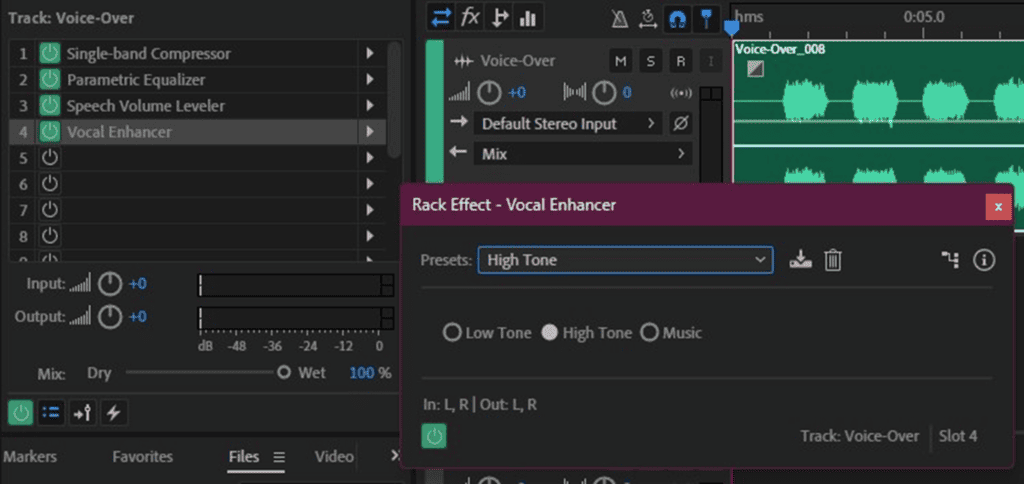
Add a Vocal Enhancer and set it at High Tone to turn up the high frequencies and get some sizzle in the vocal track.
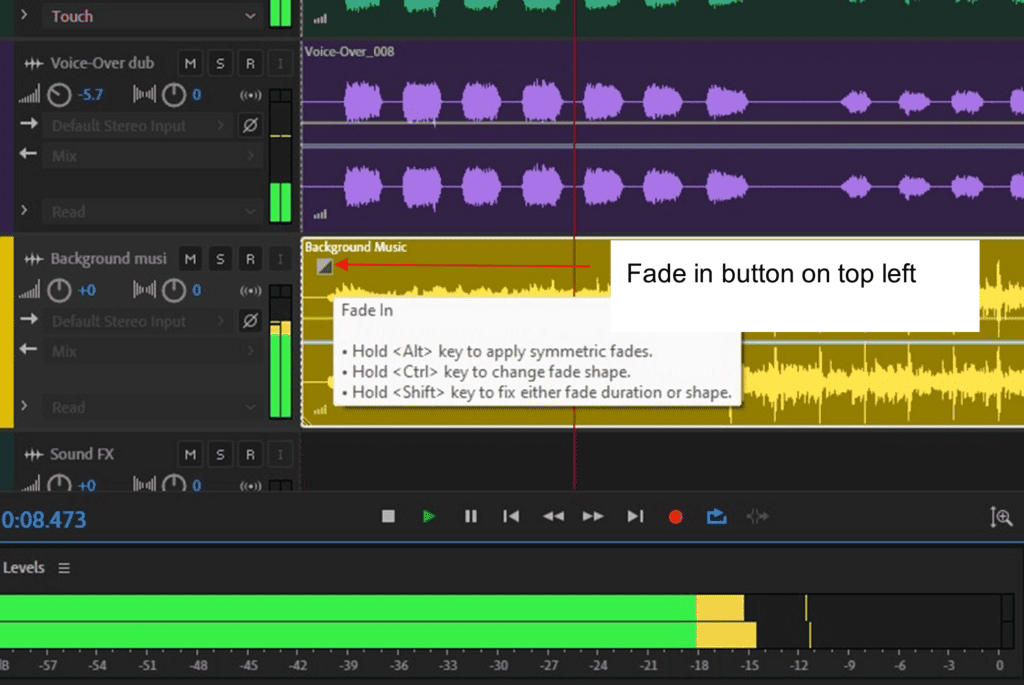
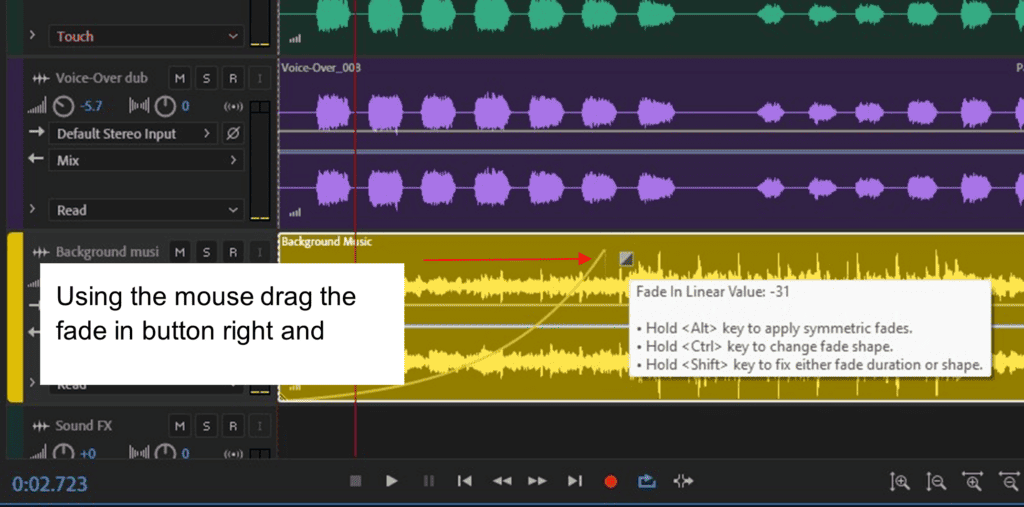
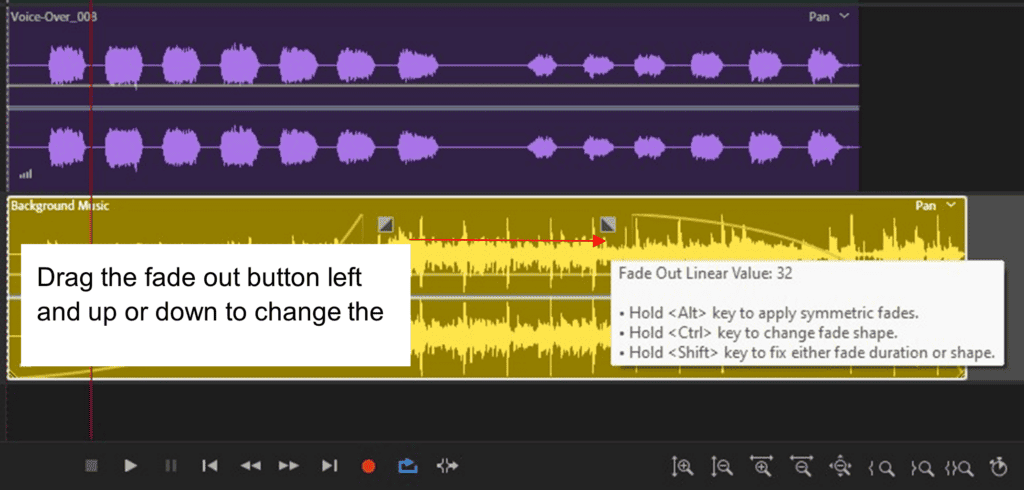
Also, when there’s sound effects or background music in the recording, a fade-in at the start of the voice-over or background music and a fade-out at the end can come in handy. A fade-in is a gradual rise in the volume of the track at the intro from silence to full volume, and a fade-out lowers the volume towards the end of the track. Just find the small squares in the corners of the audio track, drag right (for a fade-in) or left (for a fade-out) and up or down until you get the best curve.
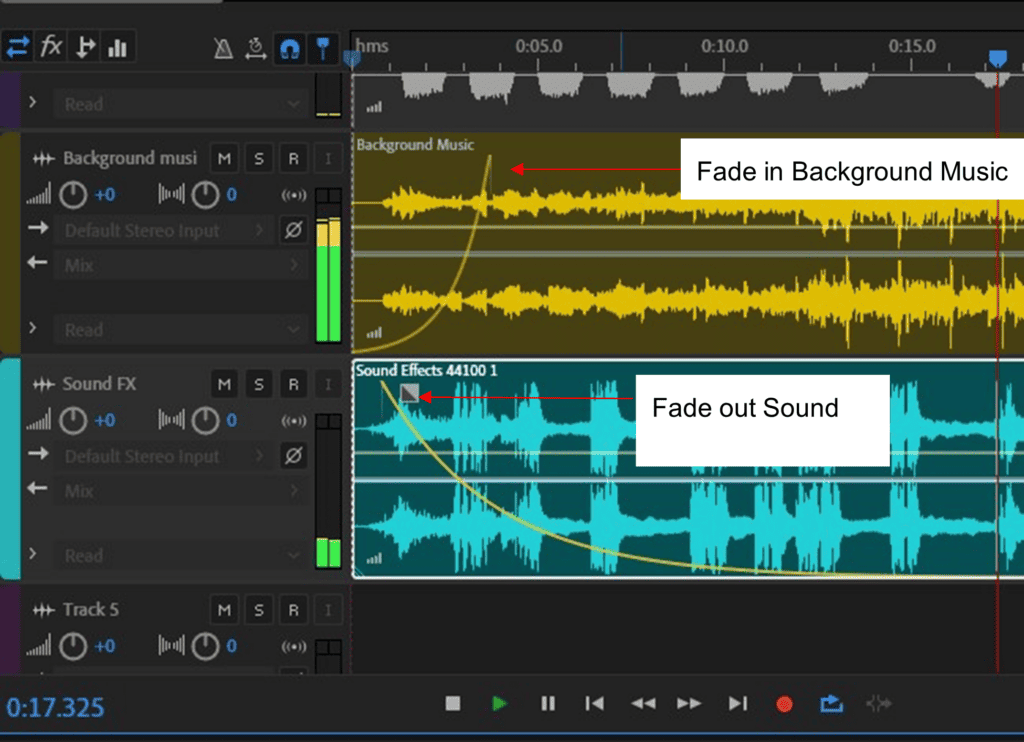
You can also use a crossfade between two tracks like background music and sound effects, by fading in one track and fading out the other such that they overlap into each other.
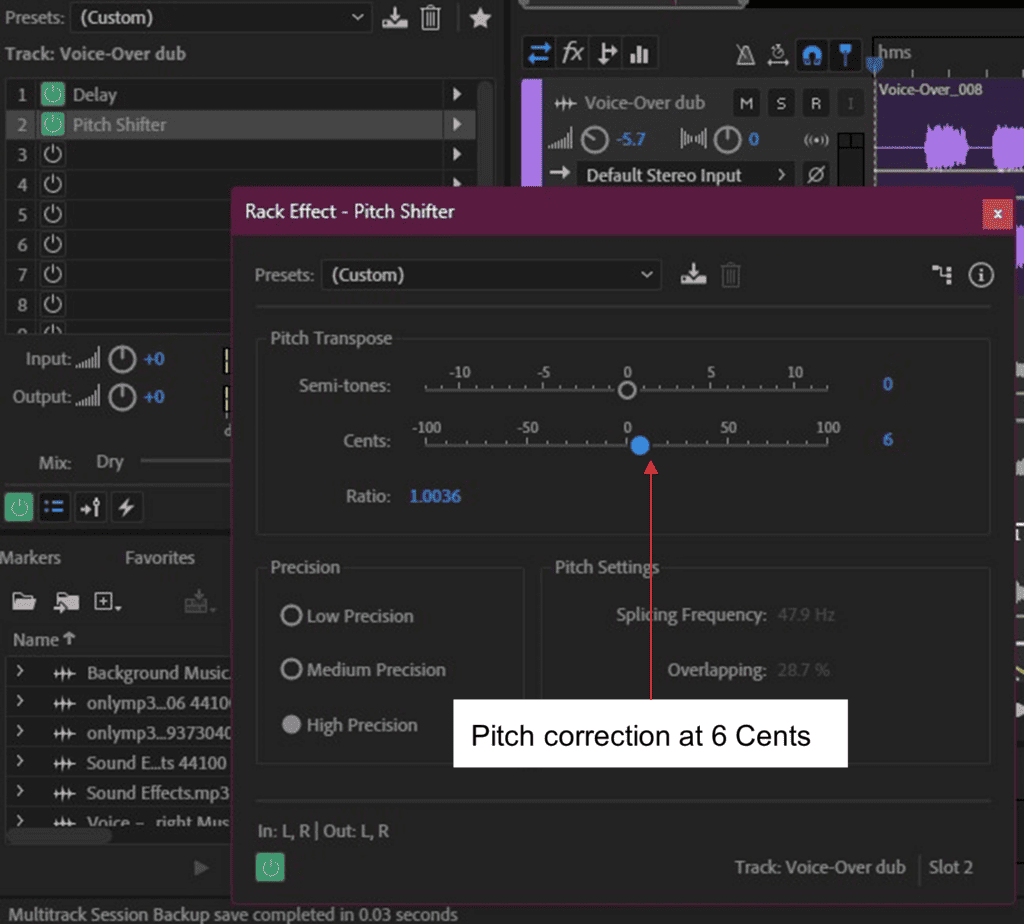
To enhance the voice-over and give it more presence, add another take of the recording to a separate track and double it over the voice-over track, but at a lower level. This is known as overdub.
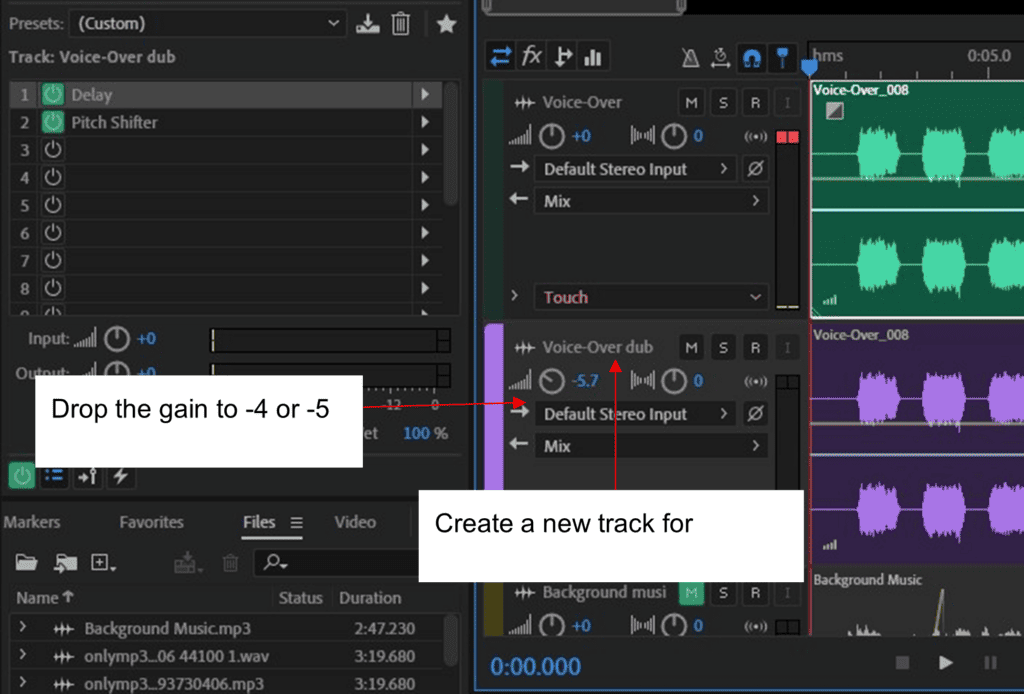
Try adding in a pitch shifter on the dub and set it at about 5 to 10 cents for a bit of depth.
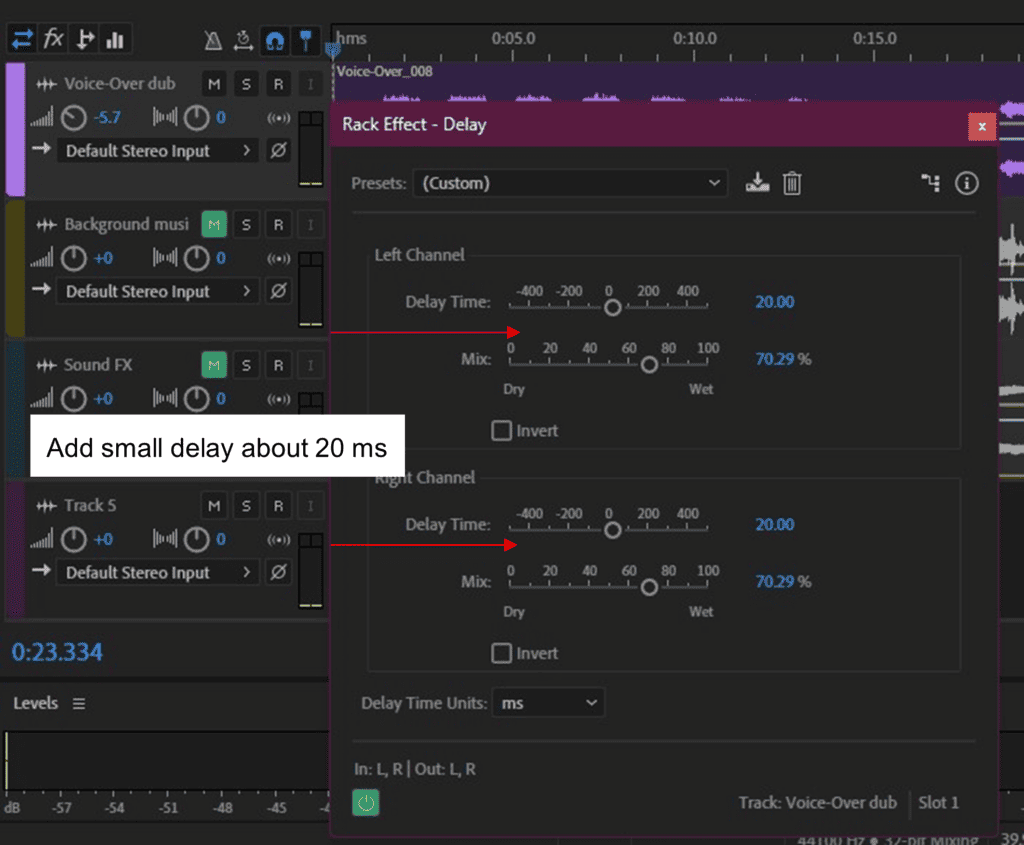
Finally, add some delay on the doubled track (about 10 ms – 20 ms) to make it more audible.
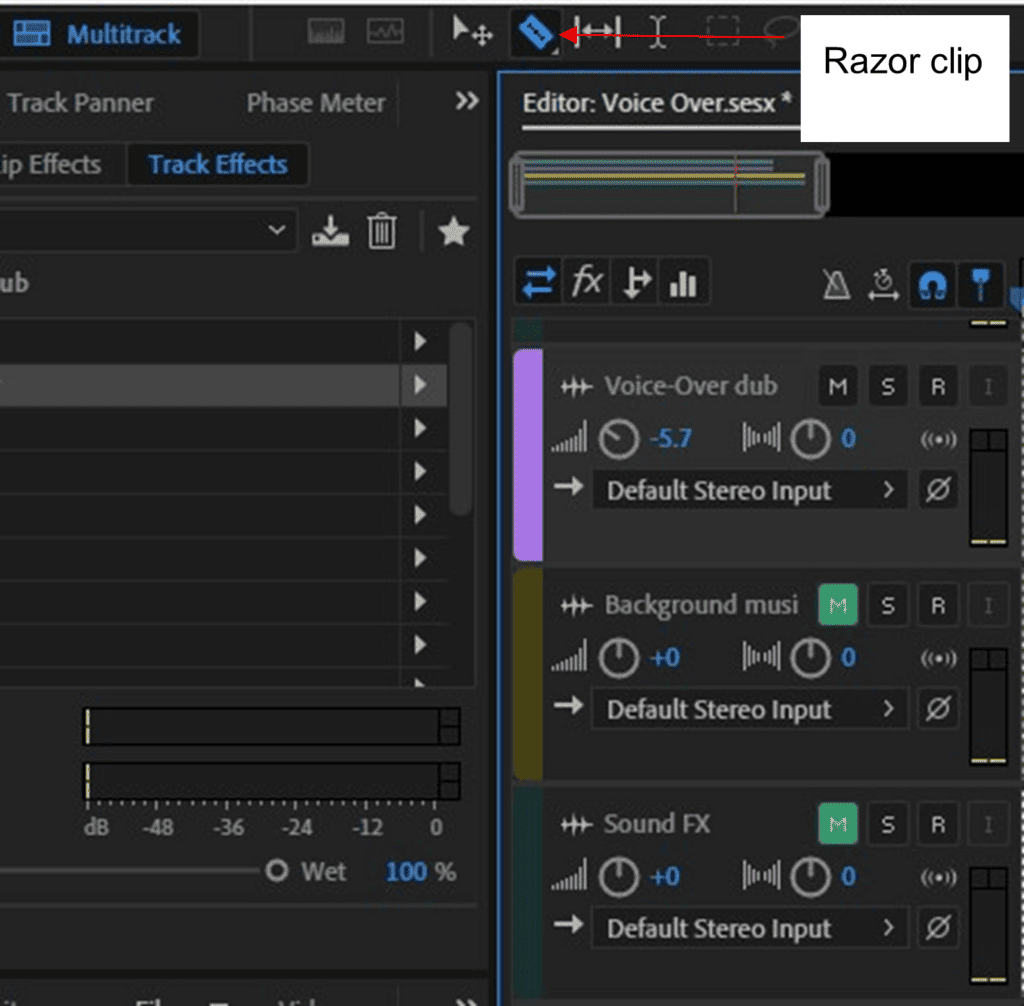
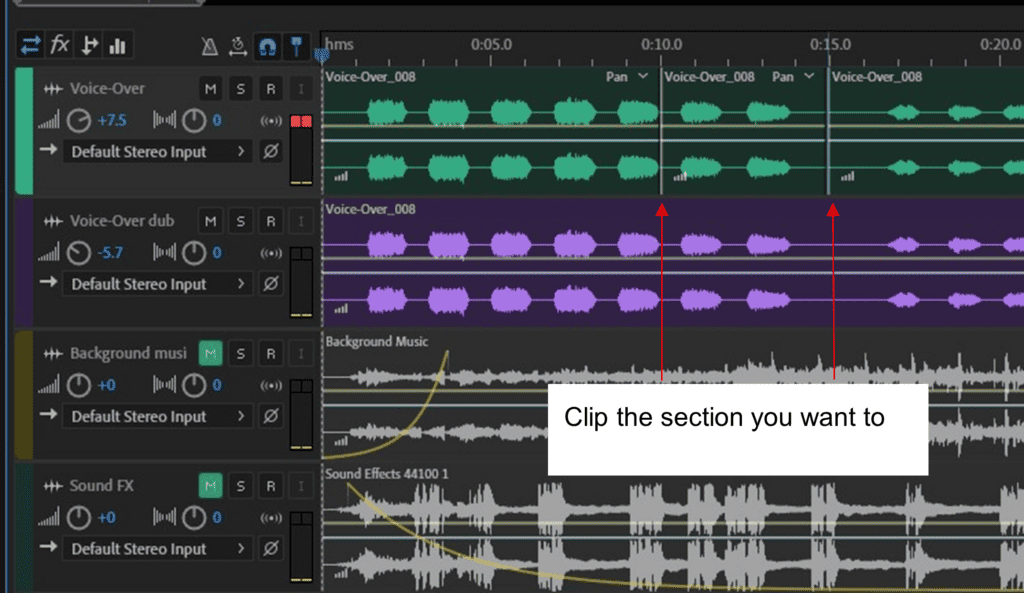
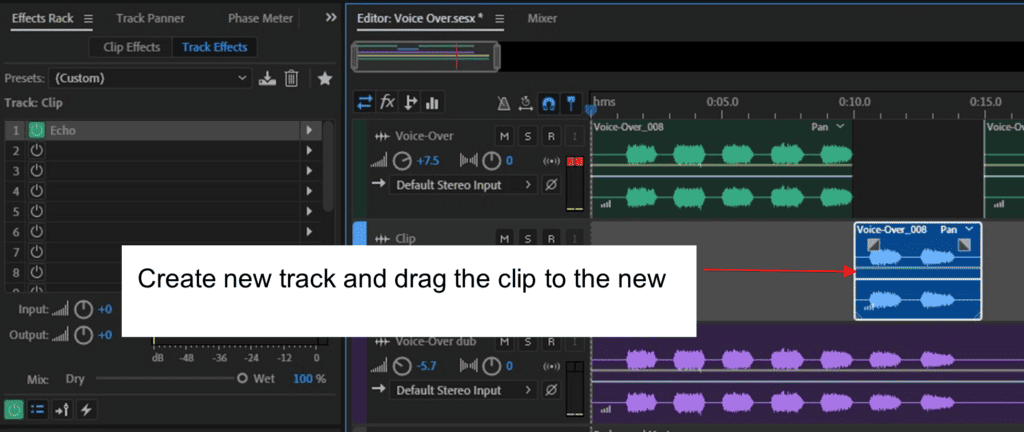
If you need to edit the voice-over at a specific point, maybe add echo or reverb or EQ, select the razor/clip tool and clip out the portion that needs to be edited, move it to a different track and add any changes or effects to the track.
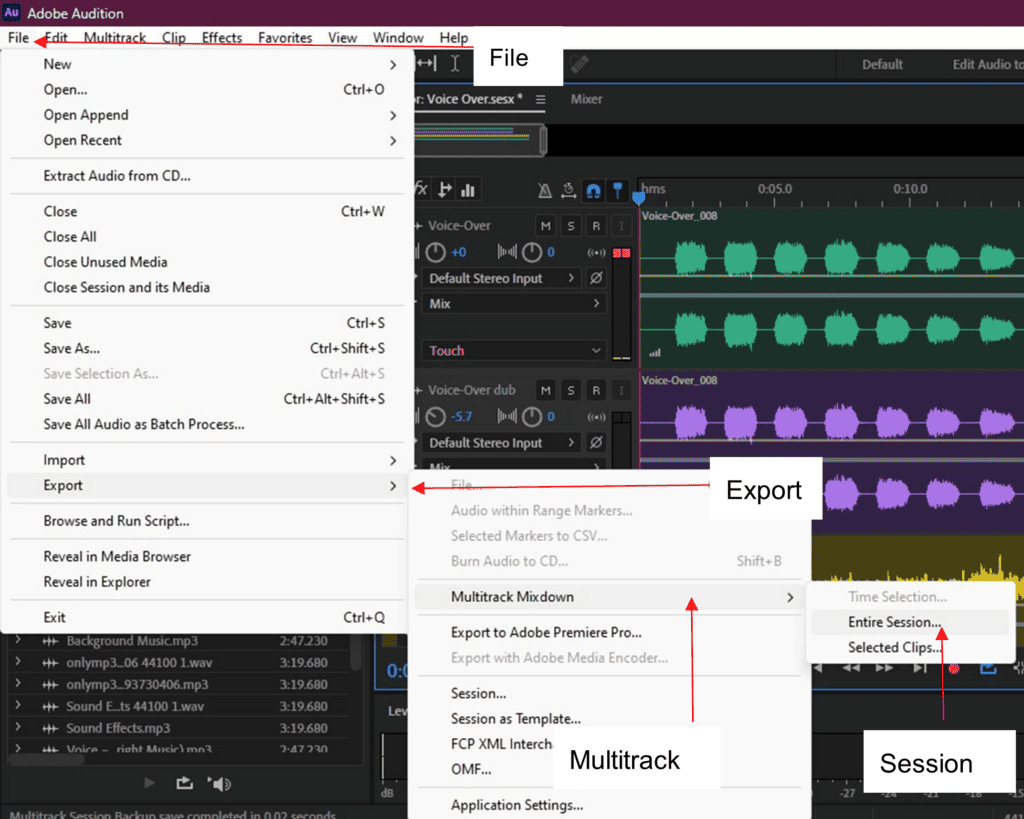
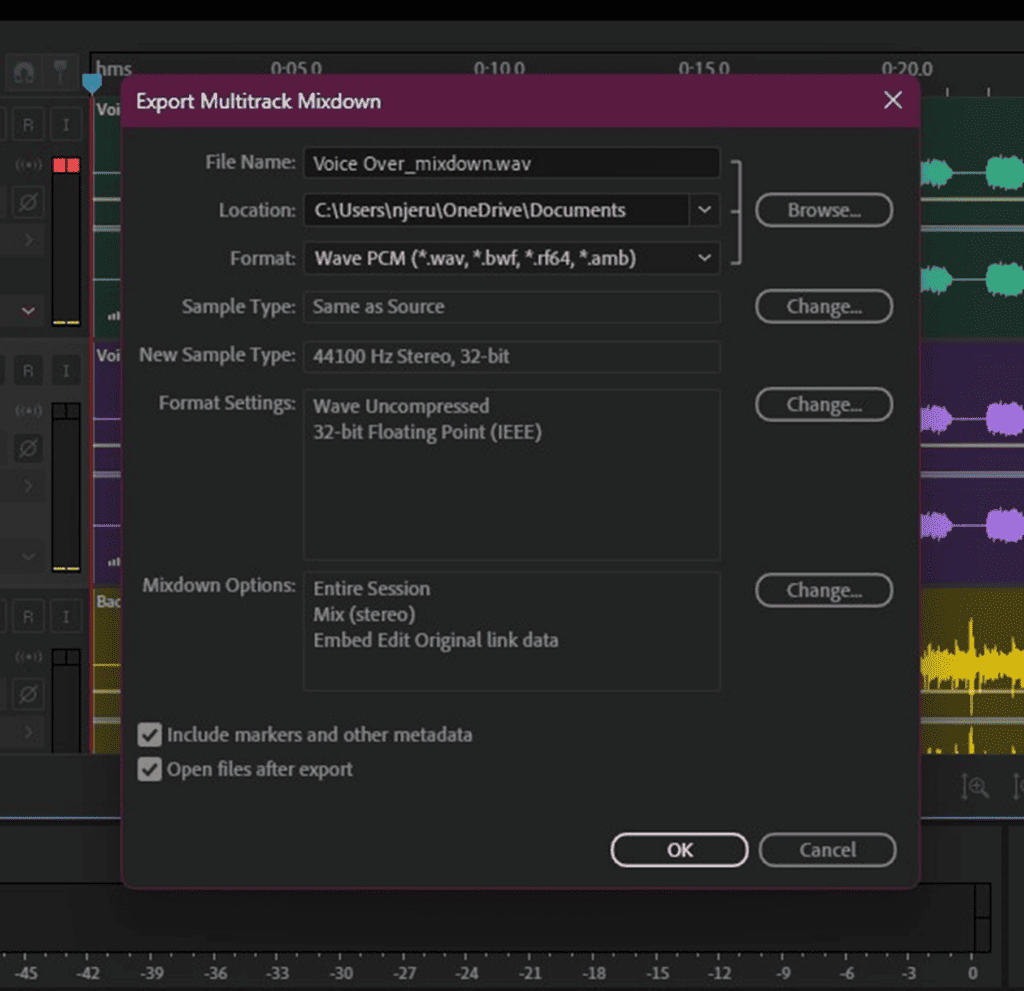
The last step is exporting a stereo mix to a WAV/mp3 file format.
Menu bar > File > Export > Multitrack Mixdown > Entire Session
Conclusion
Remember to do a soundcheck to get the right mic placement before recording, ask the voice-over artist to do a few takes as you make any corrections or improvements, then select the best sounding take. This makes it easier to record more artistic, better-sounding voice-overs that you’ll be proud to hear.
![How To Use Adobe Audition For Podcasts [Complete Guide]](https://ProRec.com/wp-content/uploads/2022/07/image-156-180x180.png "How To Use Adobe Audition For Podcasts [Complete Guide]")

 Latency in Adobe Audition")
 Vocals in Adobe Audition")