Think of this: a guitarist hits a string on his guitar but there’s a glitch and he hears the sound of that note on the studio monitors/monitoring headphones after a fraction of a second. Or you’re recording a hook on a synthesizer from your MIDI keyboard but there’s some buffering when you listen to the playback on your monitors. This glitch or buffering (delay) you get when recording audio is called latency.
Latency is a small gap in processing an audio signal between input and output, as it flows from the microphone or MIDI keyboard, through an audio interface, into your PC’s Digital Audio Workstation for recording and back to the interface for output monitoring. It can cause interruptions and make you lose sync while you’re in the recording session. Adobe Audition is a great choice for recording audio, but you can still encounter some latency. In this article, we’ll work around some ways to fix latency in Adobe Audition.
Optimize your PC performance
You want to make sure that your PC is at full capacity while you’re in your recording session. Close any programs running in the background before you open Audition to avoid any freezing or crashing. Also, turn off your Wi-Fi or internet connection on the PC that you’re running Audition on.
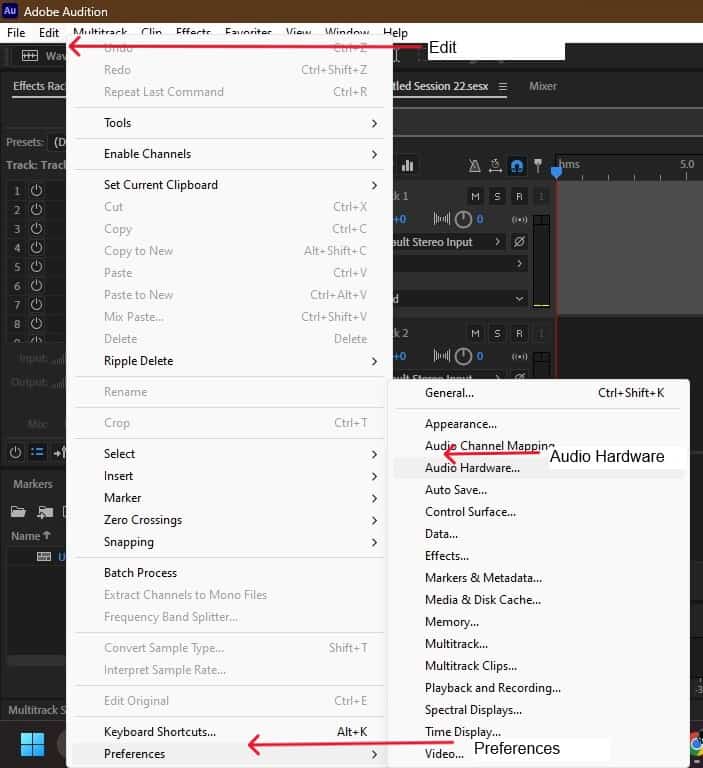
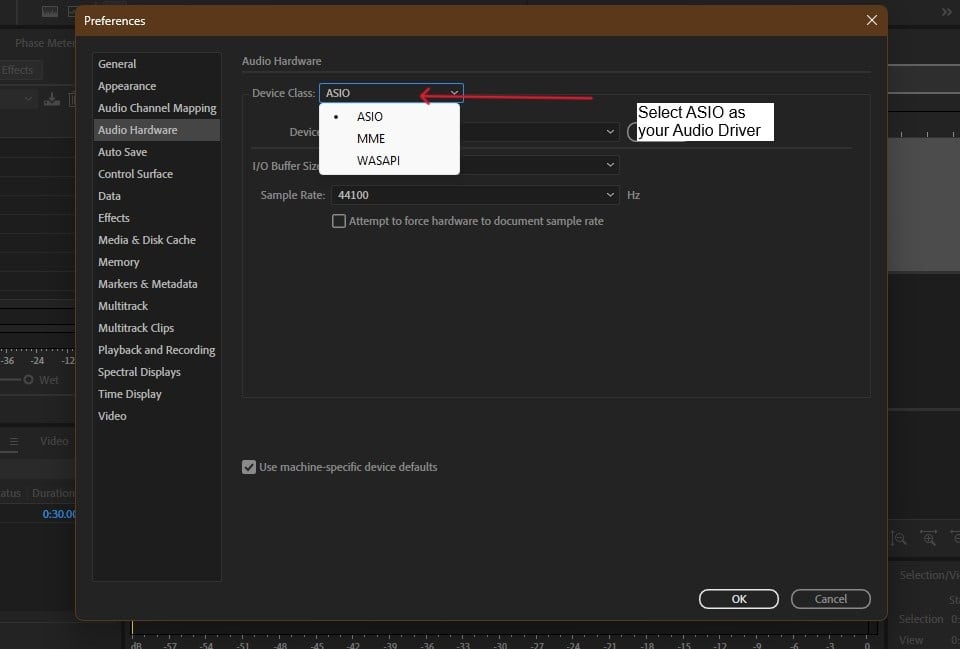
Another important thing is the audio drivers installed on your PC. Audio drivers relay audio between the DAW (Audition) and your audio interface. If you open your Audition Audio Hardware settings, you’ll see that the default audio driver is MME. But MME is known to be quite slow. A great sound card driver that comes with low latency is ASIO which has several features that make it ideal for recording with Adobe Audition, one such feature is that you can make multitrack recordings with several inputs and outputs. But first, you’ll need to download and install ASIO. Once you’re done installing, start Audition and head to Audio preferences to select ASIO as your audio driver:
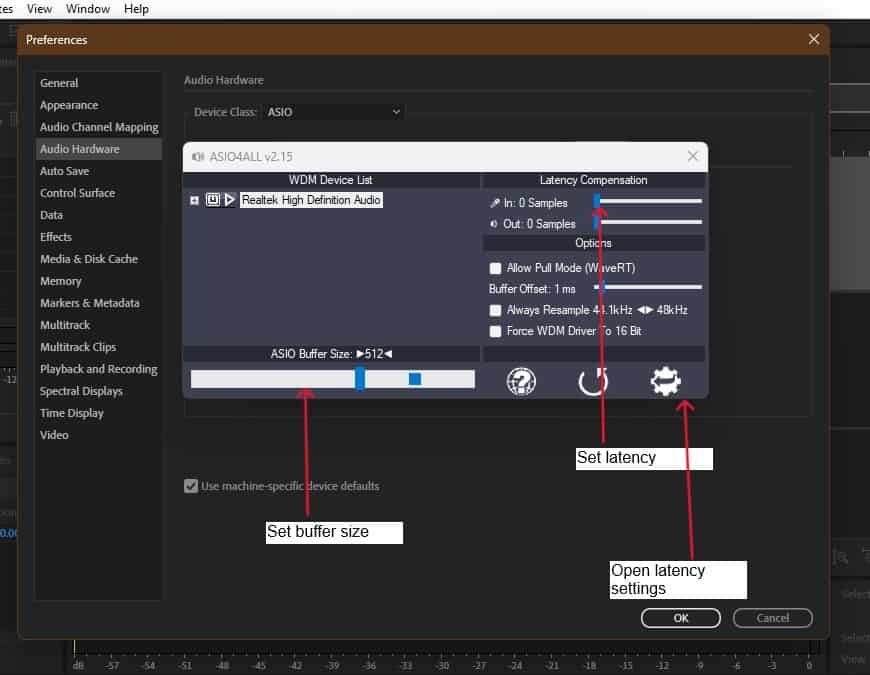
Edit > Preferences > Audio Hardware > Device Class > ASIO
Open ASIO settings to choose your latency and buffer size settings, along with your default input and output, which should be the soundcard you’re using.
Reducing latency in Audition
Set latency and buffer size
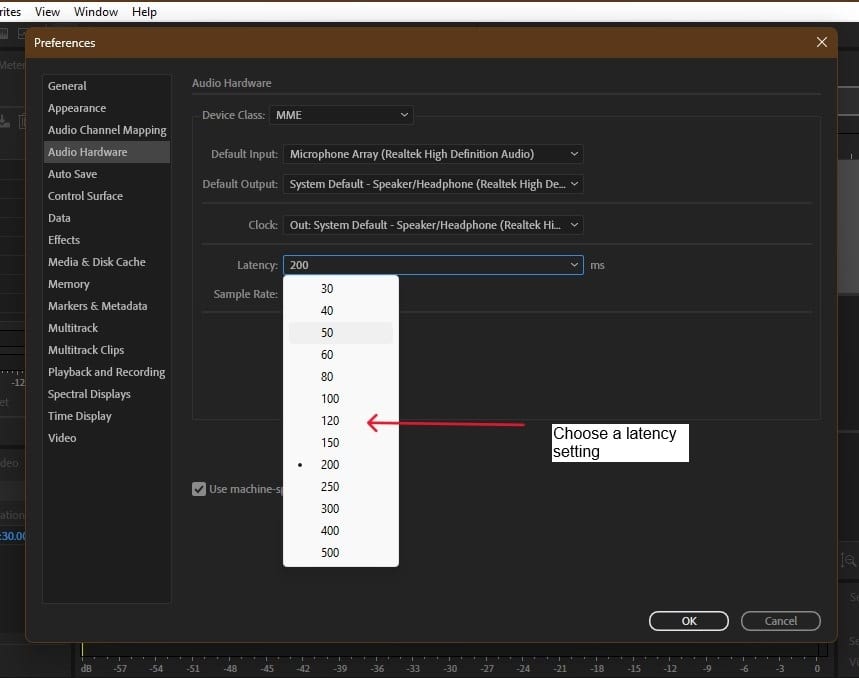
If you decide to stick with the default (MME) audio driver, you still get an option to adjust the latency. Find the latency option in Audio Hardware Preferences and select the ideal latency, ranging between 30 ms to 500 ms. The default value is 200 ms, but you can reduce it to about 50 ms if there’s too much latency or to the value that lets you record without any delays. In short if for example, your recording lags by 100 ms, Audition will shift the audio 100 ms to compensate.
Edit > Preferences > Audio Hardware > Latency
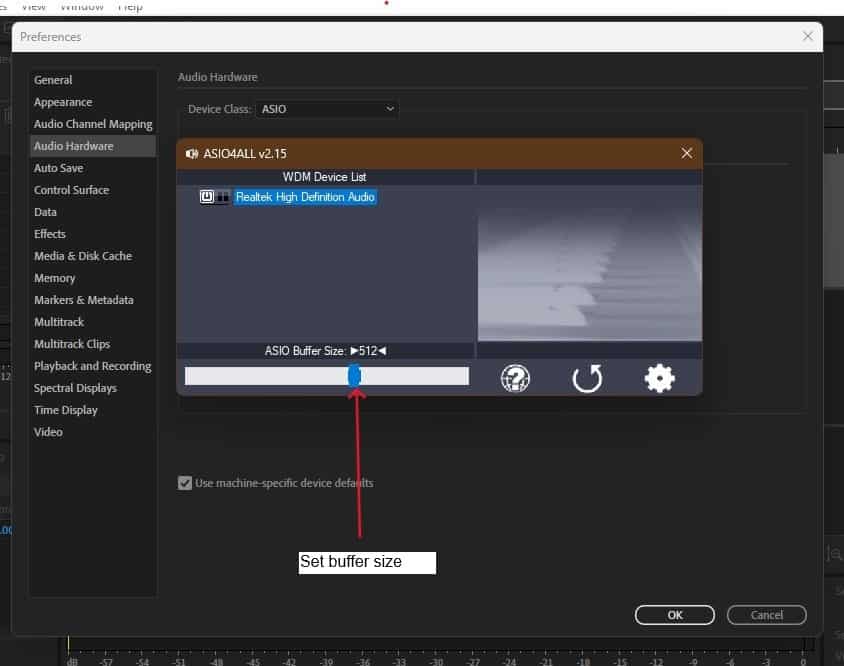
With ASIO, you’ll also need to set the buffer size. A buffer is a block of audio coming from the sound card to be processed by the PC (and DAW). Audio coming into the PC goes into a buffer memory and is processed before another block of audio goes into the buffer. The smaller the buffer size the faster the PC processes the audio, but this will be too much on your PC, and Audition since it processes too many blocks of audio, and in a short time.
It’s better to have a higher buffer setting if you’re recording multiple tracks in your session and have effects on your tracks, to increase the size of audio being processed by Audition at a time. A buffer size of 512 should work fine. Reduce the buffer size (to reduce the amount of time it takes for the sound to go from the mic or instrument to the soundcard where it’s converted to a digital format, through Audition, and back to the soundcard for monitoring) if you want lower latency but to a level that is good for your PC. To set the buffer size go to Audio Channel preferences:
Edit > Preferences > Audio Hardware > Device Class > ASIO
Render effects
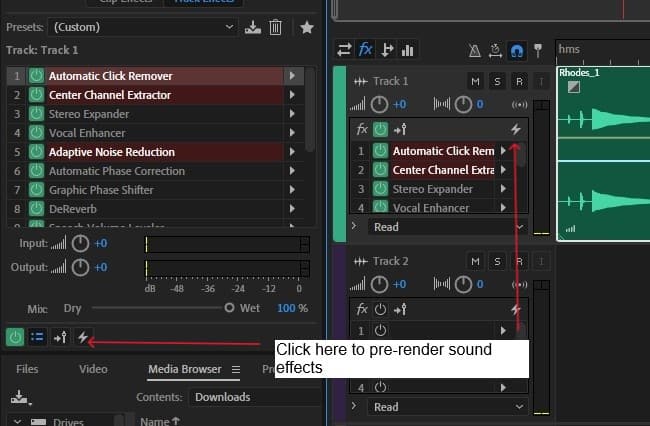
Adding effects like reverb or plug-ins while recording multiple tracks with input and output channels at the same time is another cause of high latency. Audition lets you pre-render effects on any track, that is, it applies the effects on the audio in the background and saves the audio with effects, to avoid processing the effects every time you record or playback the audio. Rendering your track will go a long way in reducing latency even when you continue to add any effects. You can render your track first by selecting it and switching on the small lightning bolt button at the bottom-right of the effects rack.
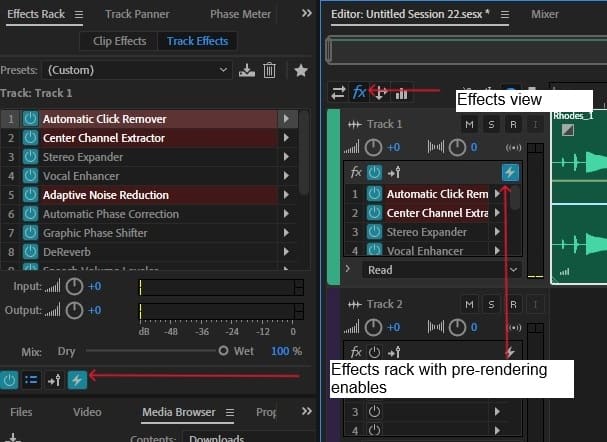
Or switch to effects controls at the top of the multitrack panel (click on the fx button) and turn on the pre-render button on the right end.
Input monitoring
In a multitrack live recording session using a mixer, and especially if you’re sending the tracks to aux sends or inserts or direct out channels for analog effects, you’re likely to experience some latency while monitoring because of all the gear and bus tracks.
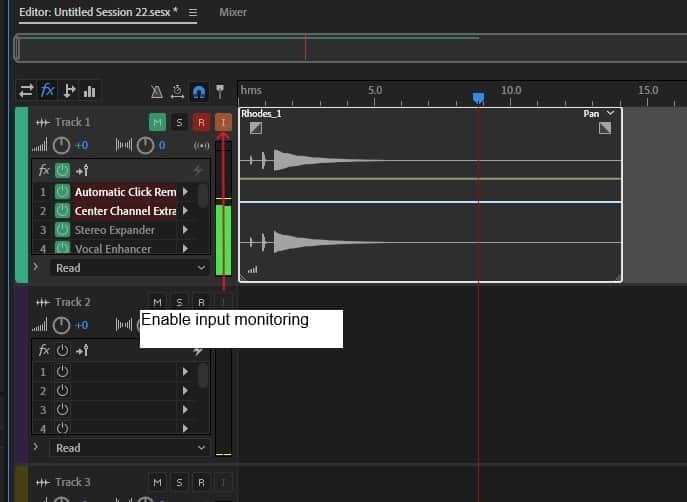
One way around this is to disable input monitoring in Audition, and instead monitor your tracks from the soundcard or mixing console. If you’re using a soundcard and you’re routing the audio for processing in Audition, (the number of tracks will depend on the number of inputs provided by your soundcard), disable input monitoring in any idle tracks (that aren’t currently recording) and instead focus on recording one (or several) tracks to avoid monitoring delay.
Also, mute or turn down the gain on any idle audio channels. Turn the track input monitoring on or off (the “I” button) at the top right corner of the track’s control panel when you want to listen to recording session playback through your headphones. If you want to listen to the mic or instrument input live without it passing through the DAW (and without any effects) turn on your soundcard’s monitoring and disable the track’s input monitor in Audition.
Conclusion
Whether you’re recording MIDI on a synth using a MIDI keyboard, or a live session with mics and live instruments you’ll want to have as little latency as possible while monitoring or when you playback your audio.
In Audition, watch out for effects that add up to the latency like Stereo Expander, Vocal Enhancer, and Speech Volume Leveler; effects that come with high latency are displayed in red on the effects rack, like Center Channel Extractor. In general, effects are better used with pre-rendering to avoid delays when monitoring.
Turn off input monitoring in Audition and instead monitor on your headphones through an interface, so that you can hear the audio without it going through Audition (a dry signal without any effects). This way you’ll bypass any latency caused by Audition’s effects. If instead, you prefer to listen to your mix with effects, mute the monitor out in the sound card and enable Input Monitoring in Audition.


![How To Use Adobe Audition For Podcasts [Complete Guide]](https://ProRec.com/wp-content/uploads/2022/07/image-156-180x180.png "How To Use Adobe Audition For Podcasts [Complete Guide]")
![Adobe Audition Not Playing [FIXED]](https://ProRec.com/wp-content/uploads/2023/02/word-image-4675-8-180x180.png "Adobe Audition Not Playing [FIXED]")
 Latency in Adobe Audition)