Introduction
Nowadays it’s safe to say that MIDI is an irreplaceable tool in any producer’s kit. Here at ProRec, we have already touched on that subject a couple of times in the past, but it’s due time we take a deeper look into this subject and its infinite applications, so today I’m going to take you through the steps for MIDI recording in REAPER and some useful tips and tricks I learned through my journey as a media composer using MIDI for my sketches and mock-ups.
Setup and Inputs
First things first, if you want to record MIDI, you will need to set up your MIDI controller or use REAPER’s Virtual MIDI Keyboard, which are the easiest ways to get MIDI performances into REAPER. Keyboards, pad-based controllers, electronic drum kits, or whatever you can think of, choose your weapon, and let me show you a quick recap on how to set it up.

Once your controller is ON and properly connected to your recording system, go to the REAPER preferences and select the “MIDI Devices” Tab on the left side.
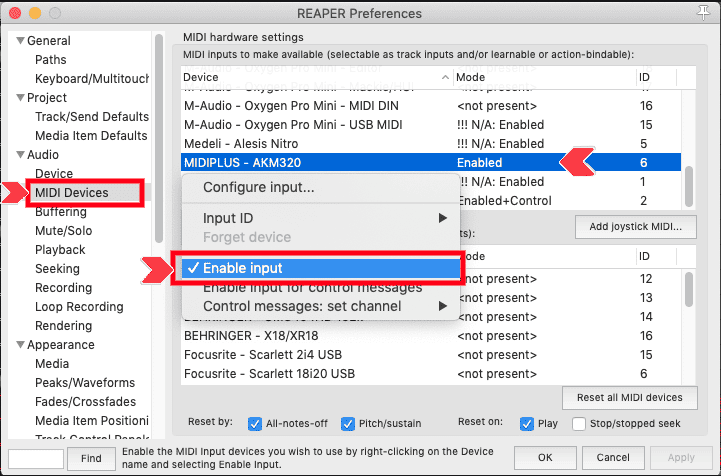
Then, find your MIDI device in the MIDI inputs list. Right-click it and choose Enable input and Enable input for control messages.
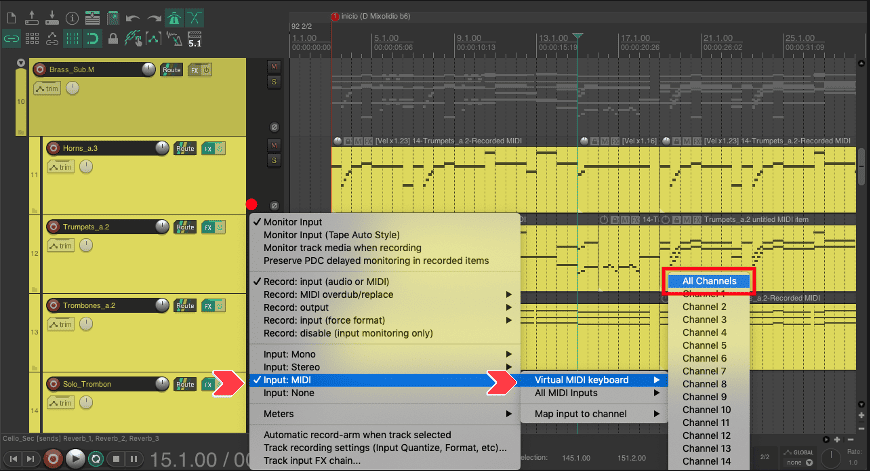
After that, it’s only a matter of creating your track and changing its input to MIDI > *Your device name* > All channels, once the track is Rec armed you’re all set! it’s time to record.
Recording Modes
REAPER by default sets the new Tracks’ record mode as “Record: MIDI (Audio or MIDI)”. This means that each time you hit the Record button, REAPER will create a new item, just like recording audio sources. However, there are better ways to record MIDI, you can Right-click on the track meter to see all of the track recording options.
These are the dedicated MIDI record modes, which change how the Record function interacts specifically with MIDI items that are already present in the timeline.
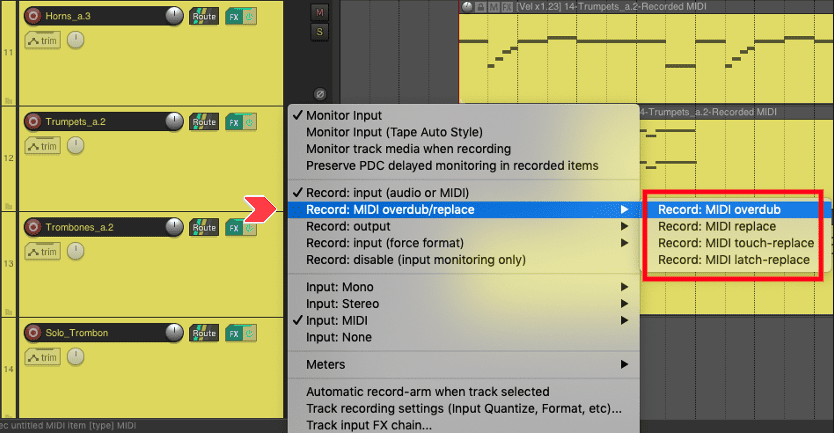
MIDI Overdub
The first mode you will find is called “MIDI Overdub”. In this mode, each time you try to record over an existing MIDI item, REAPER will add the newly played MIDI notes to the MIDI item, instead of creating a new MIDI item on top of the previous one.
This is extremely useful for recording more intricate parts, as you can play multiple lines one on top of the other, for example, you can play first the left hand of a difficult piano arrangement, and then the right hand. It’s also very popular when Recording MIDI Drums, first the Kick and Snare, then the hi-hats, then adding accents, and so on.
MIDI Replace
If you’ve ever “Punched-In” audio, this mode will be familiar. This is the equivalent of that but applied to MIDI, The notes you play will replace the notes that are already in the MIDI item, basically overwriting the performance.

However, MIDI has the added benefit that you don’t have to Glue or Consolidate the performances afterward. This mode is especially useful if you need to correct only a few measures of something you have already recorded. Try using it alongside the “Time selection auto punch” Global record mode.
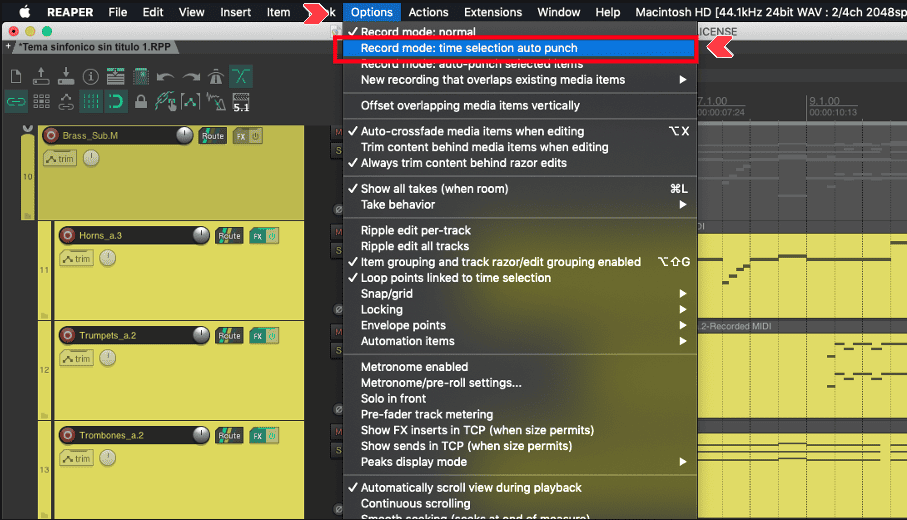
This is different to track record modes, but basically, this mode allows you to create a time selection and only Record or better said, “Write” your performance into that time selection
MIDI Touch-replace & MIDI Latch-replace
These modes are based on the “MIDI Replace” idea but with one great difference. Instead of needing to “punch” where you need the recording to start, these will only start replacing the notes once you start playing on your controller. The only difference between the two appears when you stop inputting notes.
Touch-replace will only start the replacing of the notes once you start performing, but will automatically stop the moment you are not pressing any more keys. On the other hand, Latch-replace will remove subsequent notes and leave silence instead. These two modes are especially useful for quick edits and minor corrections, as they can be used on the fly with minimal setup, just hit Record and replace as many bars as you may need to.

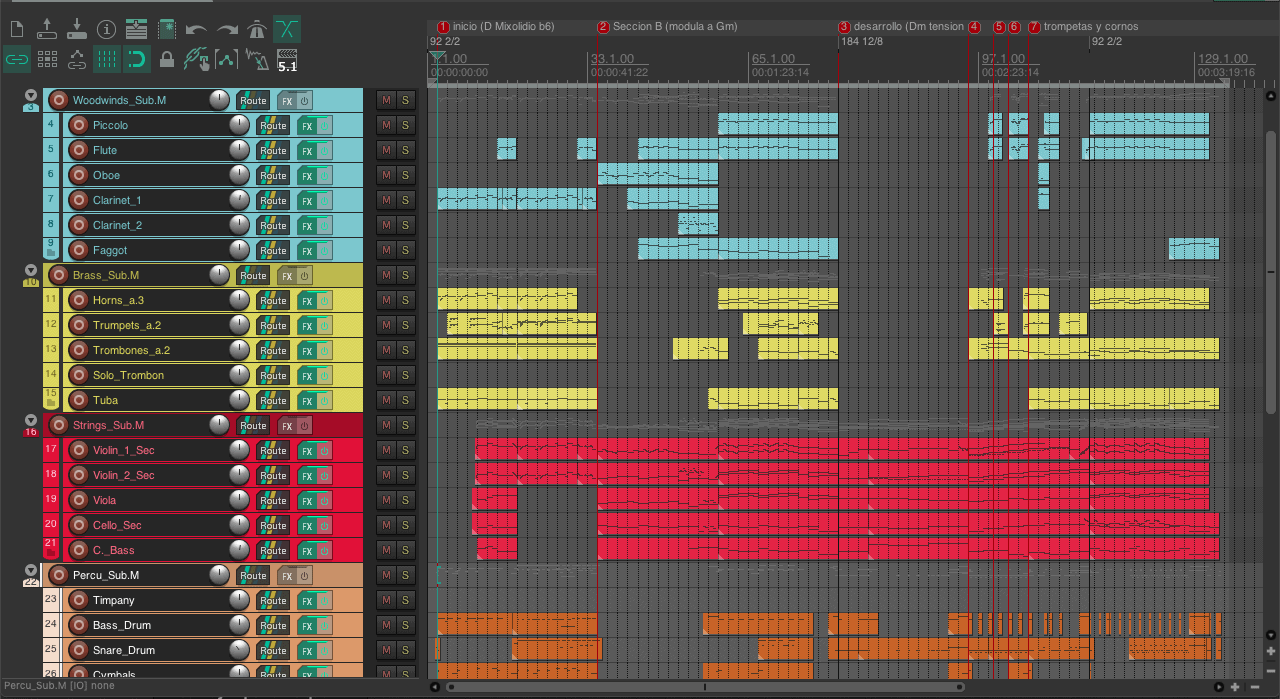
Layering Multi-channel Instruments
In REAPER, each MIDI item contains 16 MIDI channels that can be used simultaneously. These MIDI channels do not have anything to do with audio channels or audio tracks, but instead are inherent to the MIDI protocol. This allows me to load multiple instruments, each set up to receive a different MIDI channel and load different articulations of the same instrument in each instance.
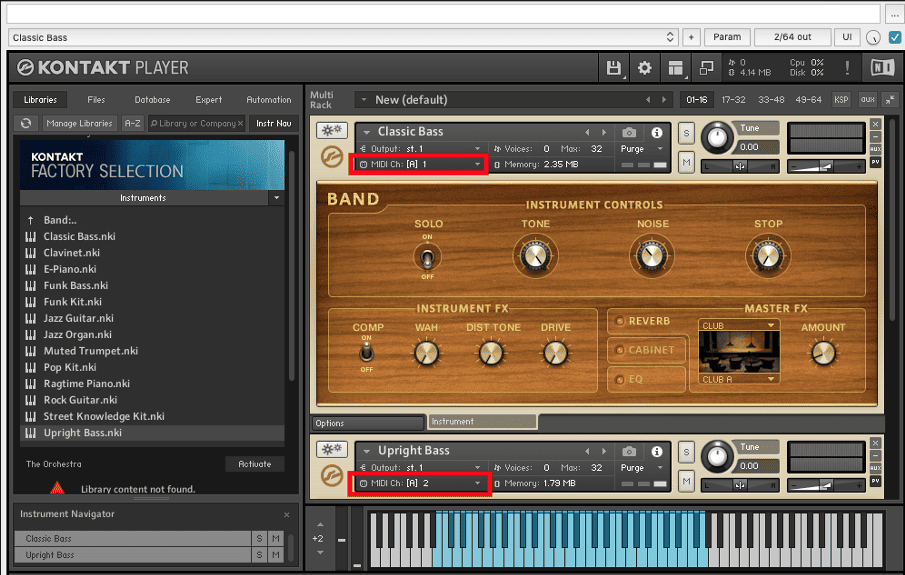
This is my bread and butter as a media composer. I can set one track per instrument in the ensemble, then, use each MIDI channel for a different articulation. In this particular case, I can use MIDI channel 1 for a Classic Bass Sound, and MIDI channel 2 for an upright bass. In another track, I may have strings with one instance set with a Legato articulation and another instance with a Stacatto articulation loaded.
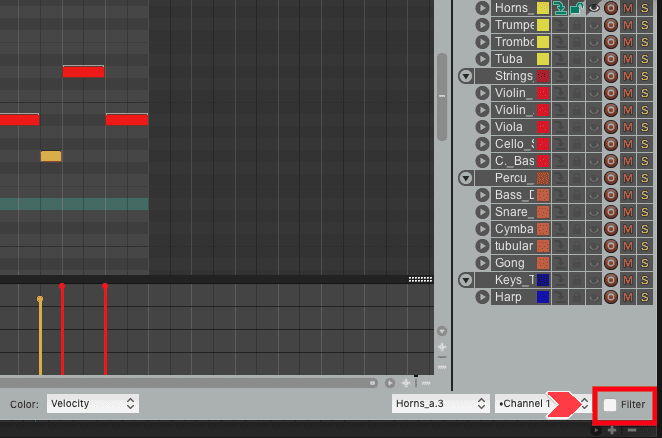
There are also a few ways to easily differentiate the MIDI channel each note is set as. You can filter the notes using the Channel option at the bottom-right of the MIDI Editor, then ticking the Filter checkbox right beside it.
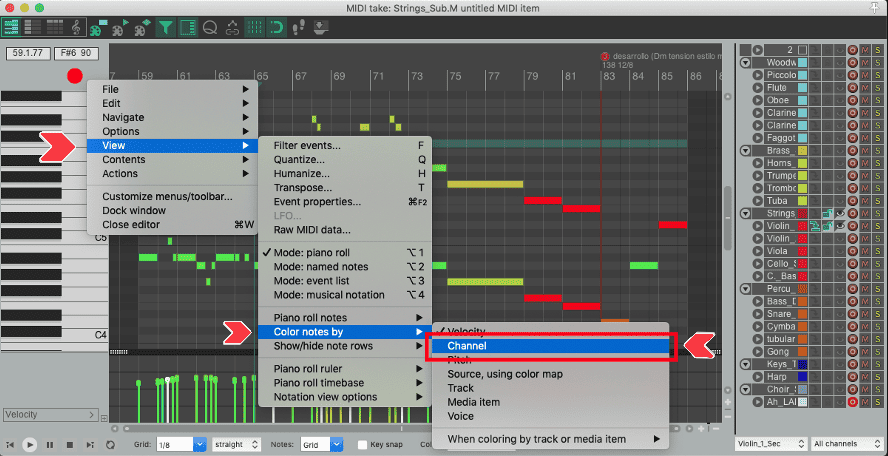
You may also consider viewing all notes while still being able to recognize which note is set to which articulation. You can also set up your MIDI Editor to color based on the notes’ MIDI channel. right-click on the gray part at the top of the piano roll, and navigate through the options View > Color notes by and select Channel.
Using these techniques can speed up your composition, arranging, and production workflow while keeping good quality and consistency.
Continuous control
MIDI information is not only about playing notes, there is also a great amount of information that can be sent through MIDI, one of the most versatile kinds of information is the “Continuous Control” also known as MIDI CC. This can be easily accessed at the bottom-left side of the MIDI editor window. Here you can see all of the different layers of information, from velocity, to pitch, to the 120 CC channels available per track.
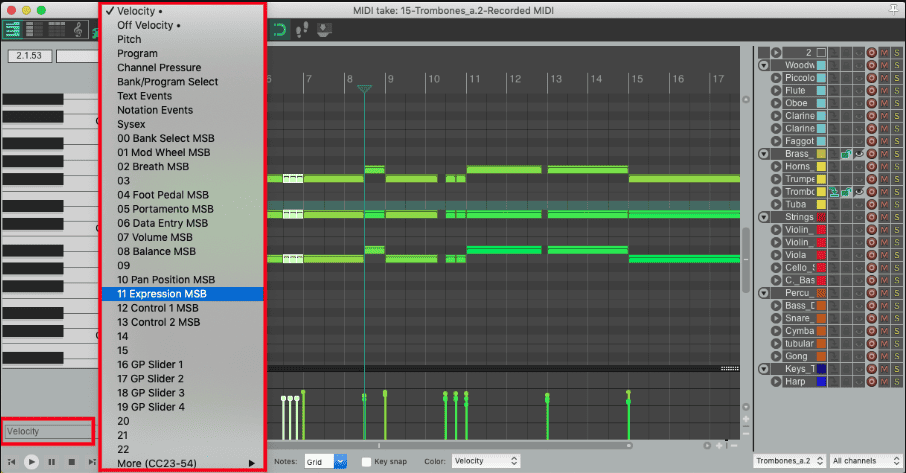
MIDI CC is really useful when using expressive instruments, such as woodwinds or string instruments. Most professional libraries have different parameters linked to different CC channels. the most ubiquitous is probably the “MIDI CC 01” also known as “The Mod Wheel”. It tends to have its own dedicated physical control in most controllers and synths and is usually programmed to control the parameter you need the most on the fly.
In most synths, the Mod wheel is linked to a Cutoff filter, and in most orchestral libraries it is linked to the “Expression”, which is a more realistic way of controlling the musical dynamics (p, mp, mf, f, ff…), including Crescendo or Decrescendo think of it as changing each notes’ dynamics on the fly, which will affect how loud a note sounds and it’s timbre.
Other MIDI CC channels can be used to control other nuances like the quality of legato, activate and deactivate different sections of an orchestra, also modify additional effects like vibrato, tremolo, reverbs, or even multi-microphone instruments.
Conclusion
There are a plethora of different tools for MIDI recording in REAPER that can make your life easier and help you achieve the professional sound that you may be looking for. Now it’s your turn to keep experimenting with those settings and find what works best for your workflow and style of music. Have fun and go crazy!

 in REAPER")

 in REAPER")