Introduction
Time is of great importance in our lives. All activities are built on this resource. It only varies from one activity to another. In Adobe Audition you can factor in time in many ways. The two basic ones are the duration of the audio file that you are editing or recording and the overall editing process.
Generally, time is useful in structuring and organizing. For instance, you structure your day and organize what comes first and what comes last. Similarly, factoring in time in Adobe Audition helps you organize and structure.
In Adobe Audition, it also relates to speeding up and slowing audio. It is useful in quickening the editing process. Although, this sounds like an awkward idea to some audio editors it actually makes the process faster. We can only argue on the issue of the efficiency of editing with faster playing audio. To support the viability of this, the playback speed button is common to a number of streaming sites. Therefore some people’s attention and internalization of content are not affected by how fast content is playing.

You can also apply a change in the duration of an audio file by increasing or decreasing the file speed. Eg Bringing a 51-minute recording down to 50.
Therefore this article will look at changing the playback speed and changing the speed of the actual files.
Speeding Up or Slowing Down Audio Process
This is referred to as multitrack clip stretching. It is a description of a non-destructive process. At the end of the editing process, you intend to have the speed remain as it was at the start of the editing process. Although in the end as well, you might want to have other changes like changing the levels and deleting unnecessary words to stick. This is a process that makes you do the editing work faster.
Recommended Read: Adobe Audition Mono to Stereo and Stereo to Mono
Follow this process to speed up or slow down audio in Adobe Audition. Once Adobe is launched, head over to the multitrack view – Note that you cannot use this feature in the waveform view – Here is a visual representation.
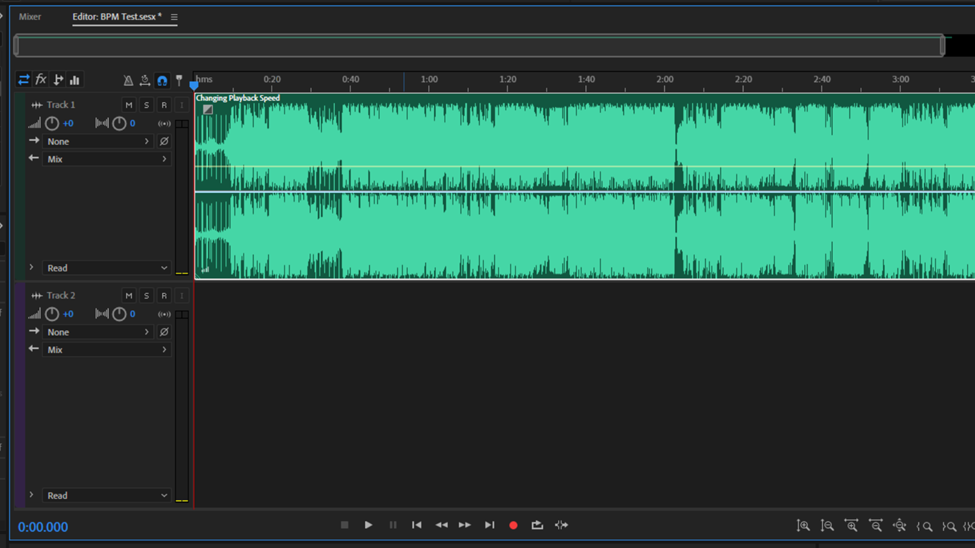
You can do this to multiple audio files or just a single file. Therefore before starting make sure you select the file that you intend to change the playback speed. After selection head over to the property bar on the left side of your screen.
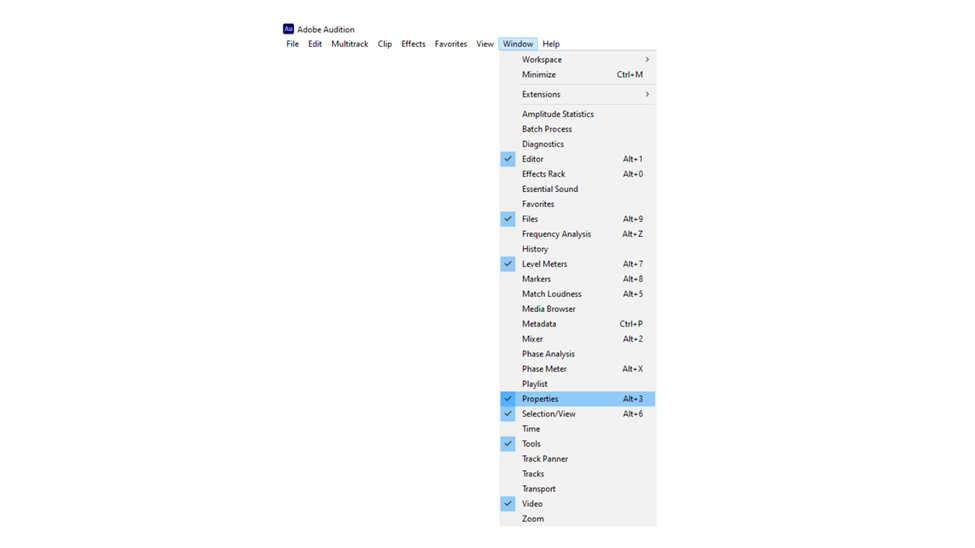
If you cannot find this panel click on the Windows option followed by Properties. Alternatively, you can activate this panel by using Keyboard shortcut Alt + 3.
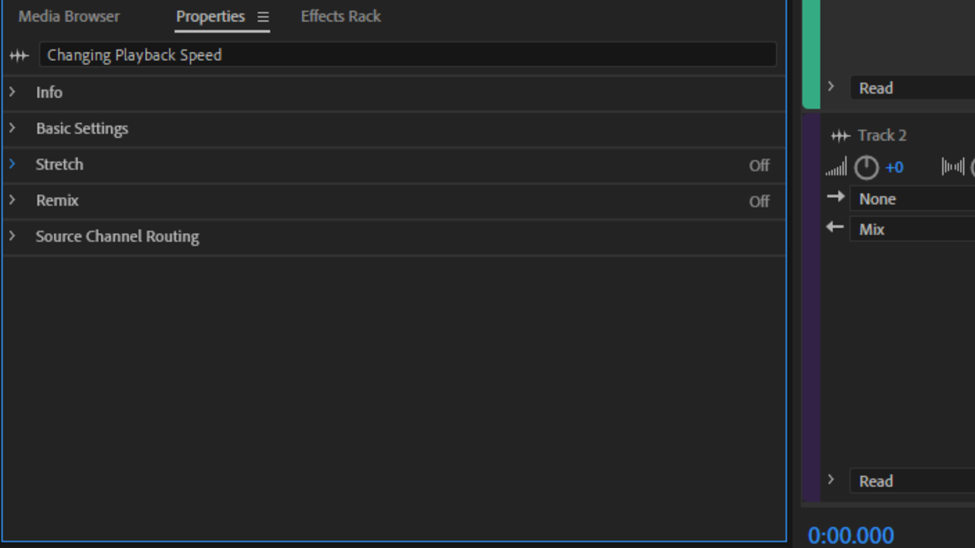
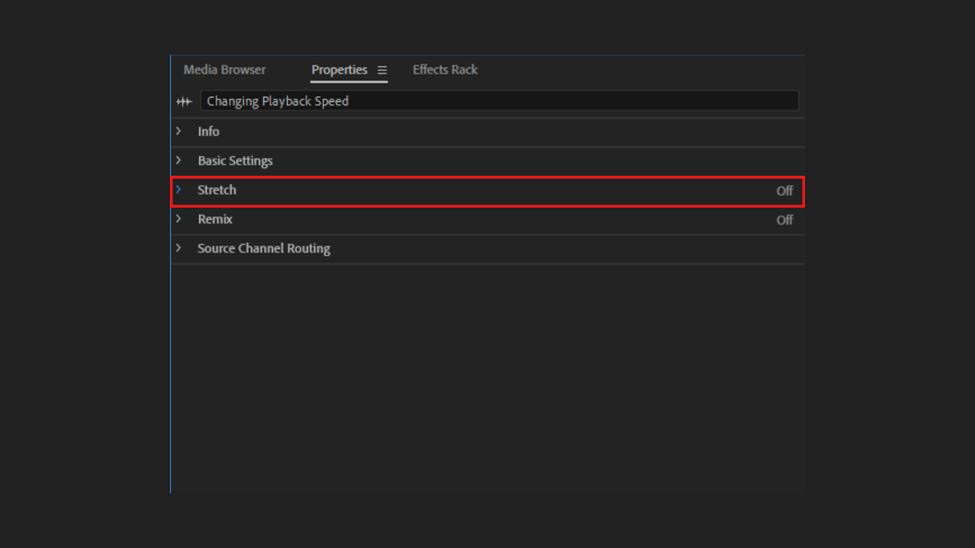
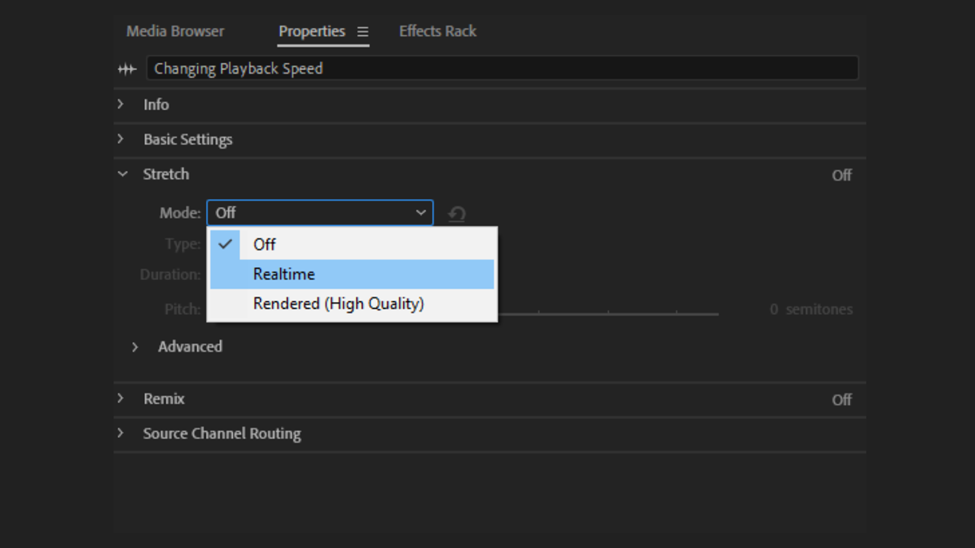
From the properties panel, there is a bunch of information. From these open the Stretch option.
In this opened window, change the Mode from off to Realtime. When the setting is off, it means that the audio is in its original length. Realtime allows you to listen to the stretch settings applied. The last option, Rendered is almost similar to Realtime, but the only difference being this effect is better in instances where you will face latency when playing back.
After Mode, the next setting to look at is Type. In this entry, there are three options;
- Monophonic – Pick thiswhen editing solo musical instruments or dialogue.
- Polyphonic – Use this for music with multiple instruments. Also useful in audio that has multiple and a mix of different sound elements.
- Varispeed – This option will change the speed and the pitch as well.
Of these three pick Monophonic. Note that you can always change the pitch as it is not only limited to the first two options. You can do this by using the Pitch slider option.
Next, you will see two settings below the Type entry become active after you changed the mode from off to realtime. These are the Duration and Stretch entries.
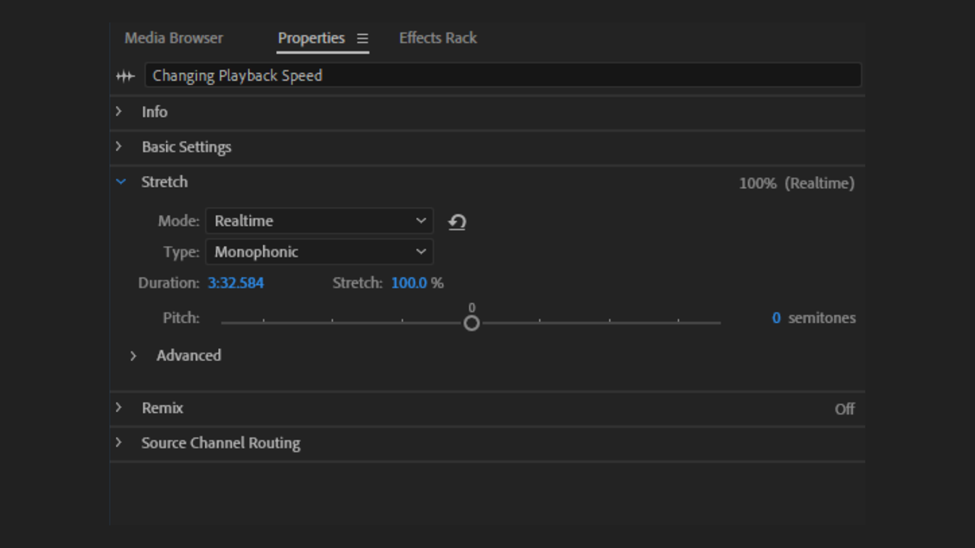
The real-time set as 100% means that the speed is not changed. Also, the duration is not changed. This also applies to the duration. From the image, my audio duration is 3:32:584 which is the original length of the audio.
To change the speed, hover your mouse over the 100% figure and the mouse pointer will change to a double-headed arrow. This will allow you to drag to the left or right. As you drag it to the right the figure increases which makes the file speed slower. The duration in this instant will decrease. If dragged to the left the stretch figure reduces and the speed of the file increases. The duration now becomes shorter.
Alternatively, you can use the Toggle Global Clip Stretching icon. This is highlighted in the image below.
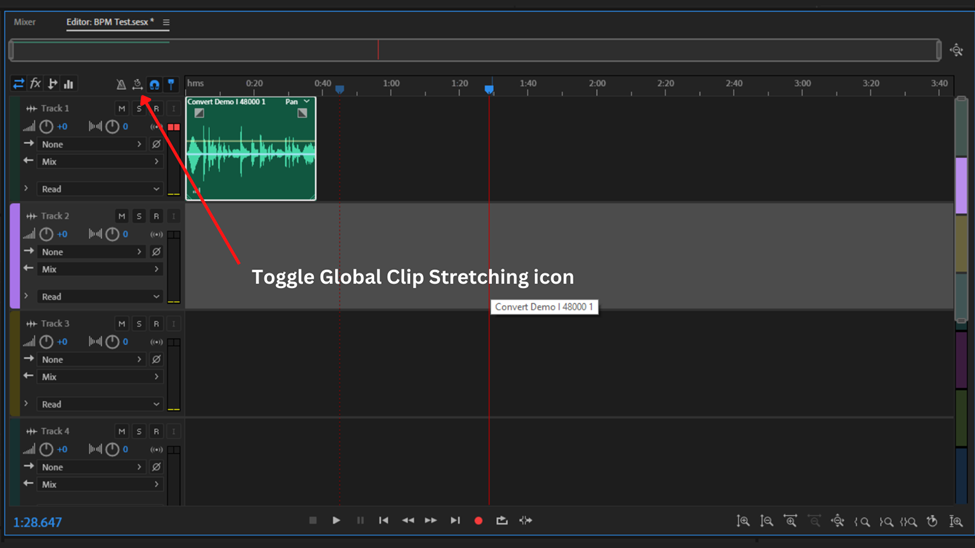
Click on the track to select it. Then click on the Toggle Global Clip Stretching icon to activate it. When activated it will turn from white to blue.
There will be two triangles that will appear on the selected files. This is one of the triangles.
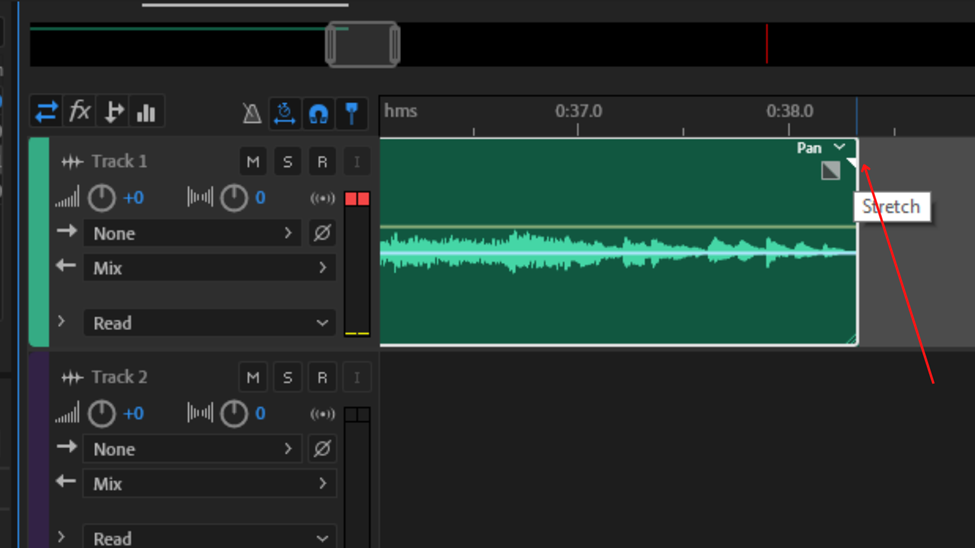
If you hover your mouse over this option a double-headed arrow will appear alongside a stopwatch sign. You can left-click the mouse, hold and drag to the left or right. Dragging to the left makes the audio play faster while the right makes the audio play slower.
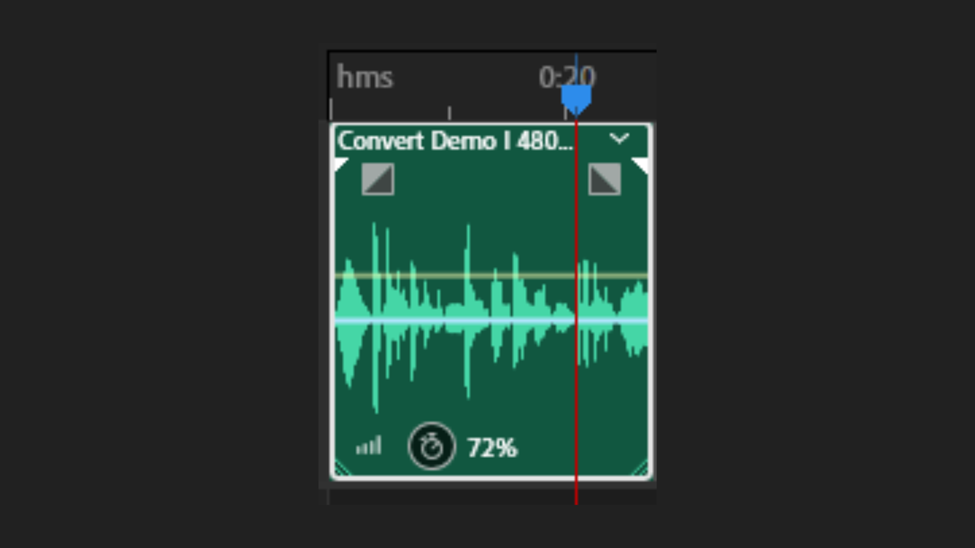
Anytime you stretch a clip, a stopwatch sign will appear on your clip alongside a percentage figure. This will help you identify which clips have been stretched and to what percentage.
Use this process to speed up your editing process to half the time you would take to do the editing at regular speed. Once you are done change the Mode from Realtime back to Off so that the actual speed of the audio is not affected.
If you want to apply these changes, right-click on the track, and from the dropdown list hover your mouse over the Export mixdown option. A new dropdown list will appear on the left. From this list click on Selected Clips. From the pop-up box type in the names and change the additional details like the format and in which folder do you intend on saving the file and click OK to save your file. The newly saved file will have a different speed compared to the previous version.
Conclusion
If you are looking to speed up your editing process here is a process to help you with that. Note that you have to relisten back for any overlooked errors. Similarly, this process can be used in cases where you recorded very slow vocals and listening back you find the audio too slow. I have used it for music and also to change the tempo when Djing.
A point that I would want you to note is that always pay attention to pitch changes as it is an attribute of changing the duration of the audio. You want your audio to sound natural and great after this whole process.
![Adobe Audition MME Device Internal Error [FIXED]](https://ProRec.com/wp-content/uploads/2022/09/image-112-180x180.png "Adobe Audition MME Device Internal Error [FIXED]")
![Adobe Audition Razor Tool Greyed Out [FIXED]](https://ProRec.com/wp-content/uploads/2022/08/image-179-180x180.png "Adobe Audition Razor Tool Greyed Out [FIXED]")

![Adobe Audition Record Button Greyed Out [FIXED]](https://ProRec.com/wp-content/uploads/2022/09/image-20-180x180.png "Adobe Audition Record Button Greyed Out [FIXED]")
)