The visual aspects of music production and audio engineering are rarely talked about in in audio related spaces. There has always been more of an emphasis placed on the more auditory aspects given the nature of the work that we do. In a lot of cases however, it can be quite advantageous to use our eyes as opposed to our ears to achieve our goals. For audio engineers, this will mostly be in the editing phase of production before we begin mixing and mastering proper.
There are times when seeing a waveform is more useful than hearing it.
For example, when editing a voice recording there may be breathing sounds at the start before the person being recorded starts to talk or sing. These breathing sounds are significantly lower in loudness levels than the rest of the recording and thus may not be visible to the eye.
Another example would be if you are having issues with the size of the waveforms, even if your input levels and channel meters are correct but the visual waveform is massive, and it looks like you are clipping then you should know that there is an easy fix to all of this.
In order to handle these situations effectively, one would need to zoom in or out on the waveform. Luckily, Pro Tools has a feature that allows us to do just that.
Recommended Read: How to Zoom In & Out in Pro Tools + Zoom Shortcuts
Waveform Zoom using Zoom Controls
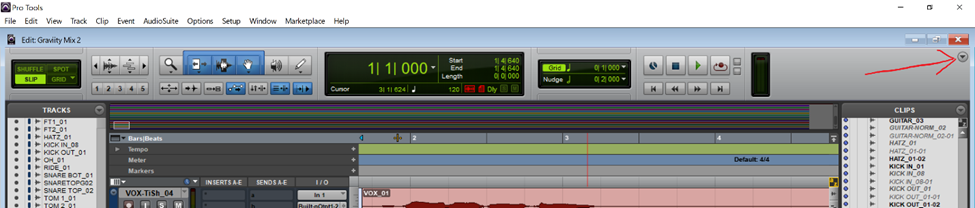
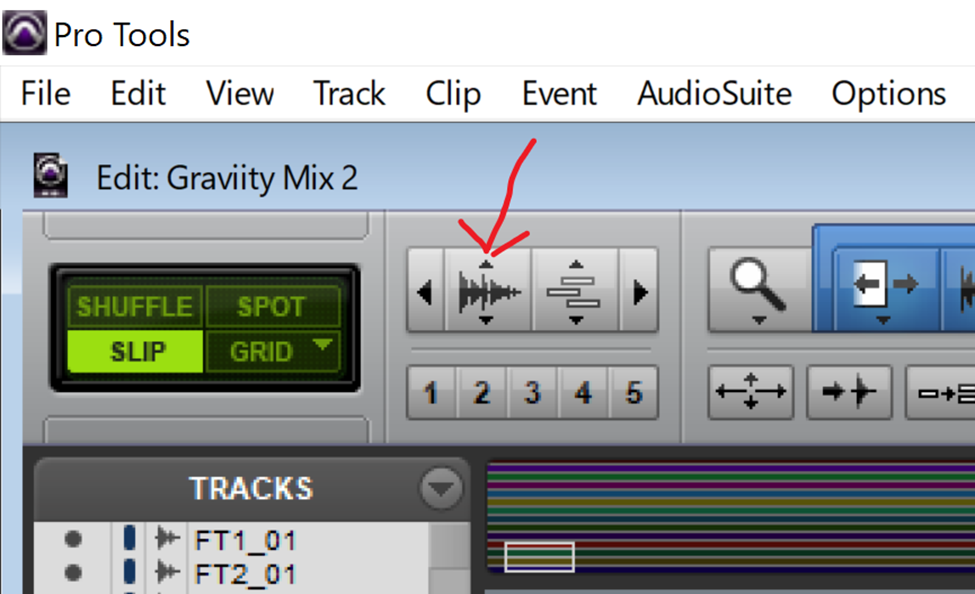
In order to zoom in and out on a waveform in pro tools, we can use the Audio zoom button that is part of the zoom controls that are located on the tool bar.

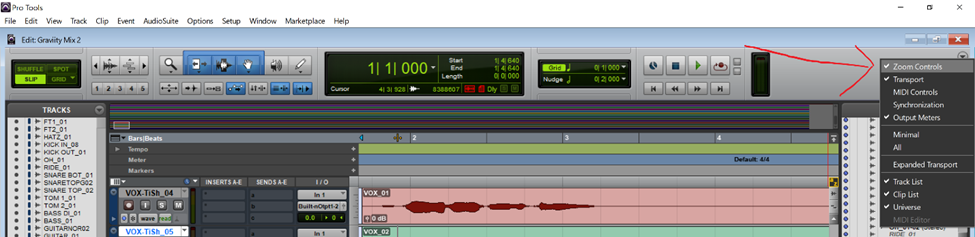
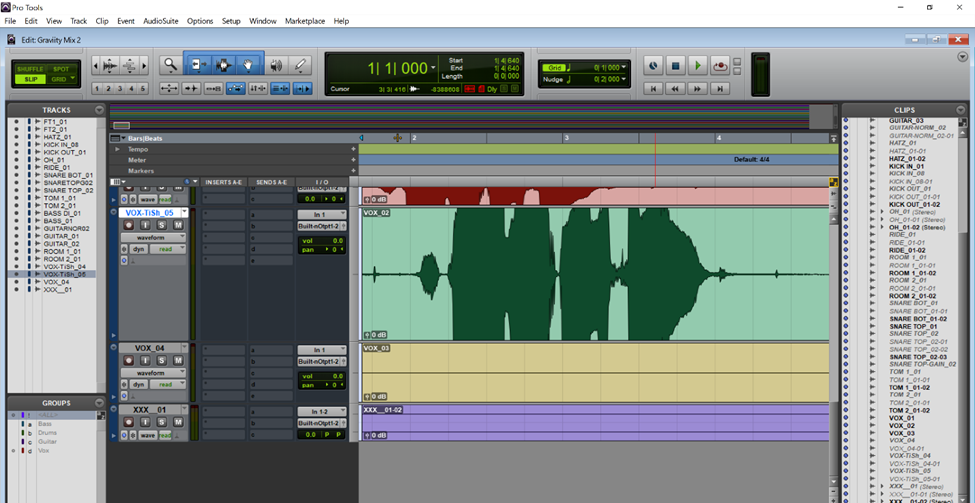
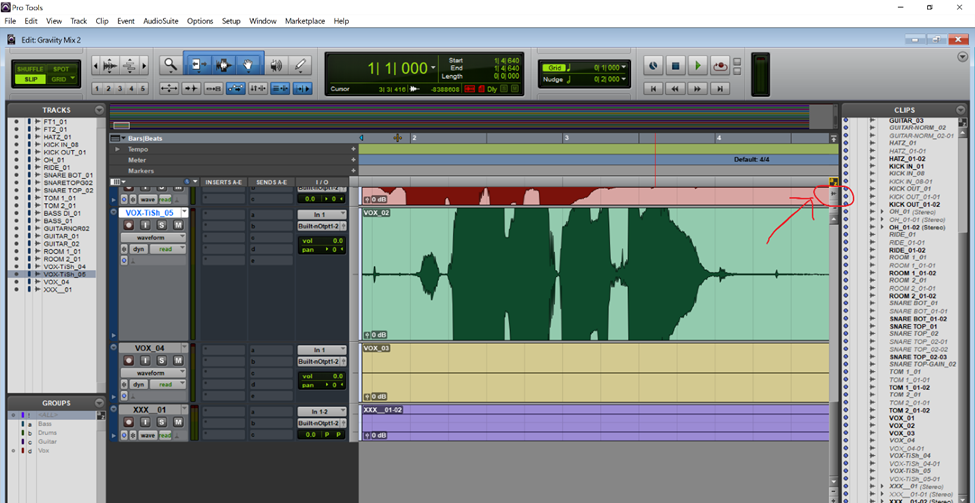
In case you cannot see the zoom controls here, the option to display them may have been turned off. To display the zoom controls, click the little arrow near the top right of the edit window. This will bring up a drop-down menu where you can choose what is displayed on your toolbar.
To zoom in on a waveform using the Audio zoom button, simply click the upward pointing arrow.
Below is a picture of the waveforms before zooming in
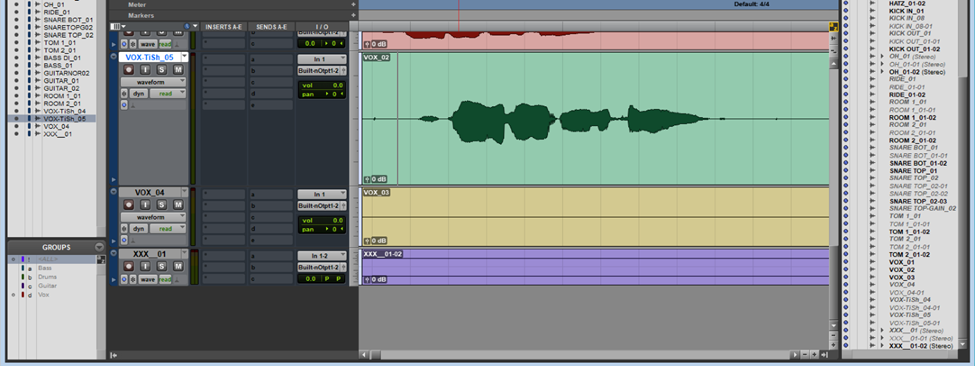
After clicking the upward pointing arrow, the waveforms in the session will appear as follows
This has the effect of making the waveforms appear larger thus allowing for easy editing.
To zoom out simply click the downward pointing arrow on the Audio zoom button.

This will reduce the size of the waveform.
IMPORTANT NOTE: Despite the fact that the waveforms look as if they are clipping, they will sound exactly the same as they did before zooming in. Audio zoom only affects the appearance of the waveform and not the loudness of the output.
An alternative to using the audio zoom button on the tool bar is using the audio zoom button on the right side of the edit window. It is located under the Keyboard Focus button. Much like the audio zoom button on the tool bar, clicking the upper part of this button will zoom in on a waveform while clicking the lower part will zoom out.
Waveform Zoom using Keyboard Shortcuts
Like most Pro Tools functions, audio zoom can be done using on screen buttons as well as keyboard shortcuts. Below is a list of the shortcuts used to zoom in and out on waveforms
On PC
Holding Shift + Alt + Rolling the mouse wheel backwards will zoom in on a waveform
Holding Shift + Alt + Rolling the mouse wheel forwards will zoom out.
Holding Ctrl + Alt + ] to zoom in
Holding Ctrl + Alt + [ to zoom out
On Mac
Holding Shift + Option + Rolling the mouse wheel backwards will zoom in on a waveform
Holding Shift + Option + Rolling the mouse wheel forwards will zoom out.
Holding Command + Option + ] to zoom in
Holding Command + Option + [ to zoom out
Conclusion
In conclusion, we can see that there are several ways to zoom in and out on audio waveforms in Pro Tools. This process only affects how the waveform looks on screen and not how it sounds during playback. Hopefully integrating this into your Pro Tools workflow will lead to faster more efficient editing.

- Pro Tools Won’t Play [No Playback FIXED] - April 16, 2023
- No Sound in Pro Tools [FIXED] - April 16, 2023
- Pro Tools Not Recognizing Audio Interface [FIXED] - February 4, 2023


)