What is a Noise Gate?
Just like a gate, a noise gate automatically “shuts off” some sounds and “lets in” others into your recording. Shutting off, in this case, refers to muting some sounds while letting in refers to allowing playback of audio that is past a certain level. When you set up your instruments and start recording, the mic will pick up noise in the environment that you are recording in. Noises present might be a hissing sound, a hum, or air conditioning noises. What a noise gate does is eliminate such noises while keeping the relevant stuff intact.
Recommended Read: How To Remove Background Noise In Adobe Audition
For example, a podcast host asks a question and there is a silence before the guest answers. In that instance, it closes to cut off any room noise present. Once the guest starts talking it opens allowing the words to be heard. It is also convenient in eliminating heavy breaths in pauses throughout a recording. For this to work there is a threshold set which is crucial in determining what level of sounds are being cut off and what sound levels are remaining.
How to Use Noise Gate in Adobe Audition
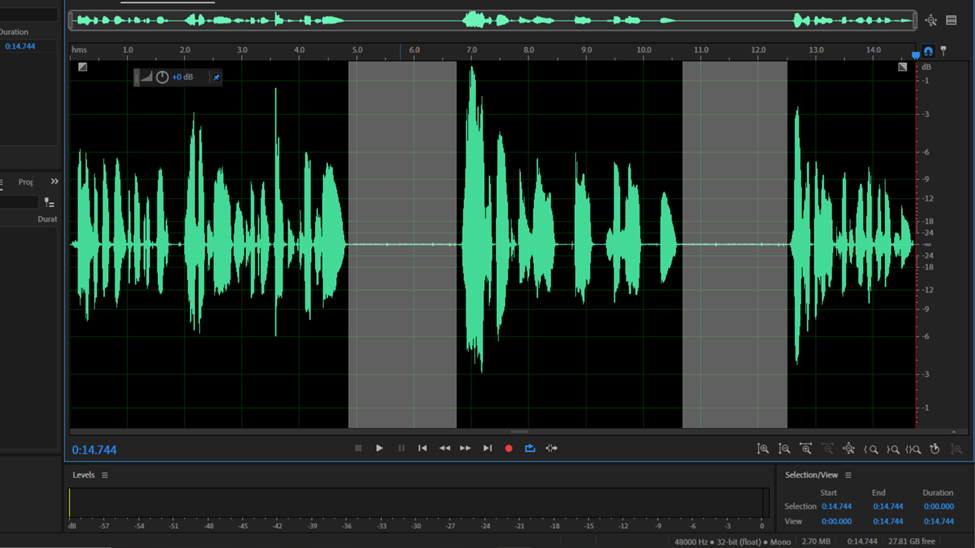
First, launch Adobe Audition. Click Ctrl + I or Ctrl + O to open the file. We are applying this effect on a file with background noises, especially in the silent parts of the recording. So for my file, I will be monitoring how this effect is applied to the highlighted parts in the image below.
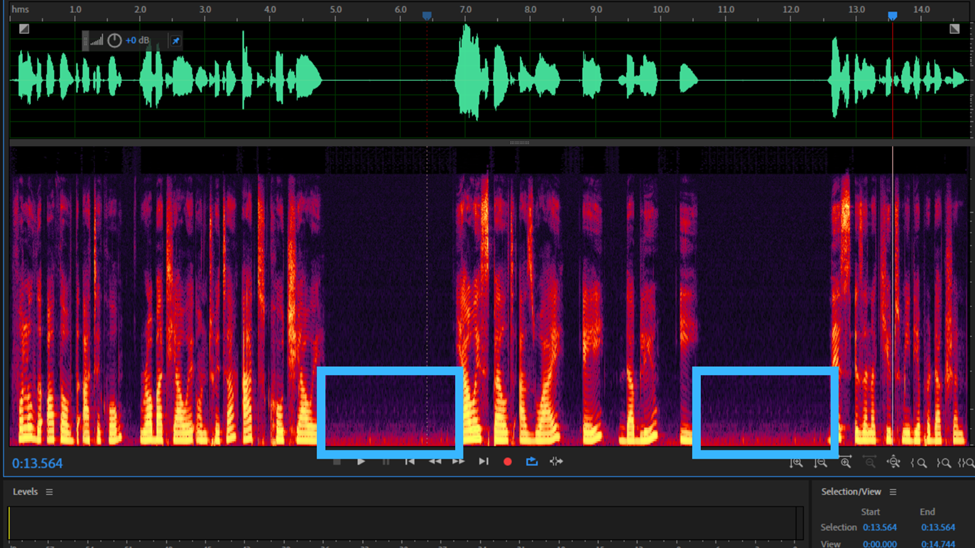
Here is a look at the file with the Spectral Frequency View display on. Looking at the silent parts in between the speech under the spectral view shows that there is a bit of noise in the silent parts of the recording.
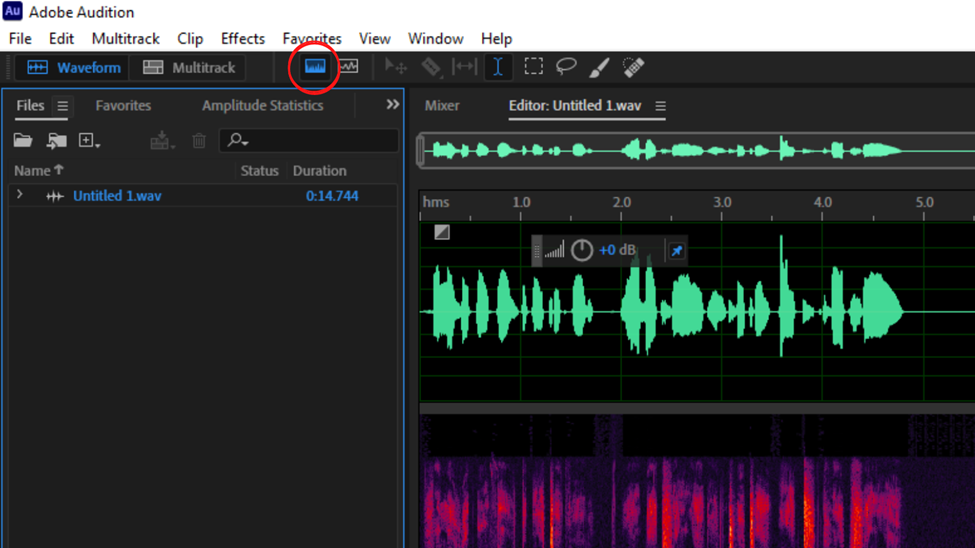
To turn this feature on click on the icon circled in the image below or use the keyboard shortcuts, Shift + D.
Next, make a selection of a portion of your file. Click at any point and drag till you have some duration of your file selected.
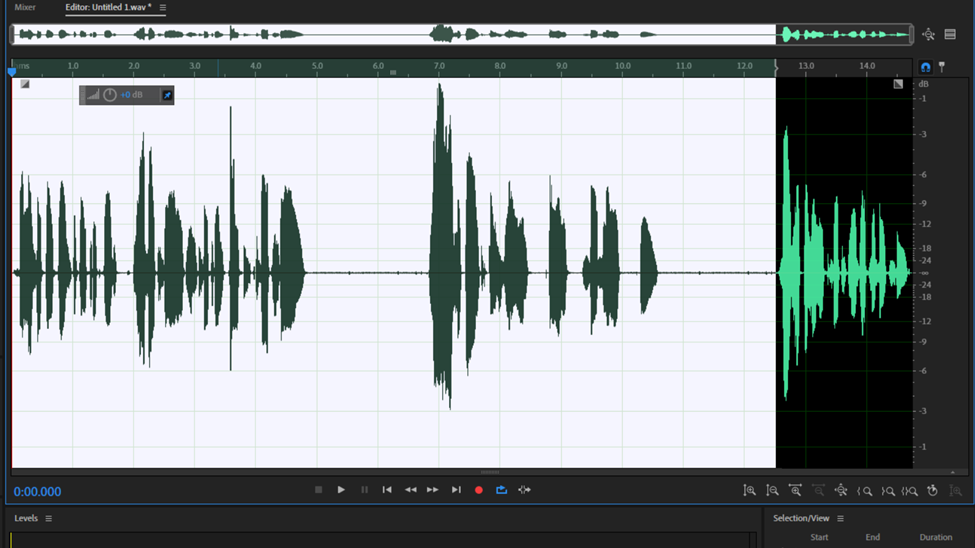
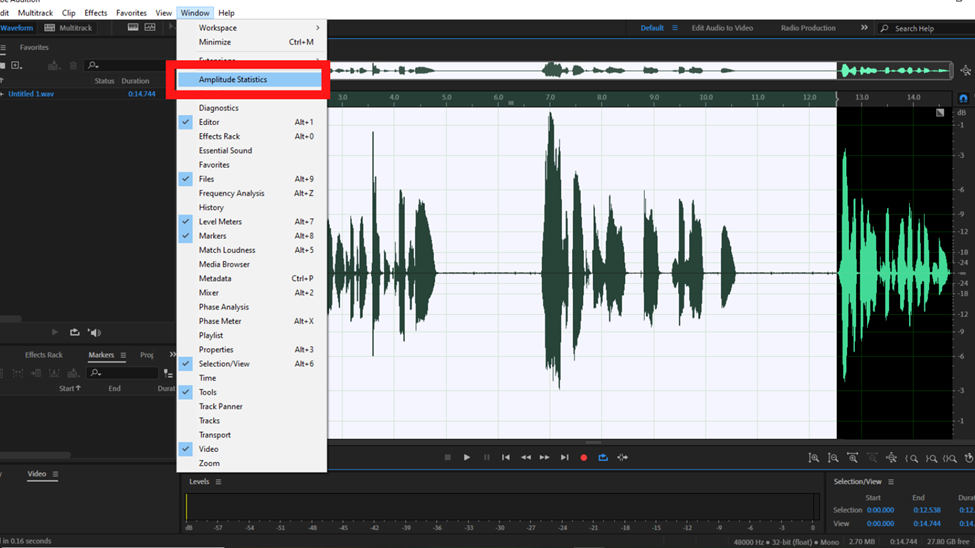
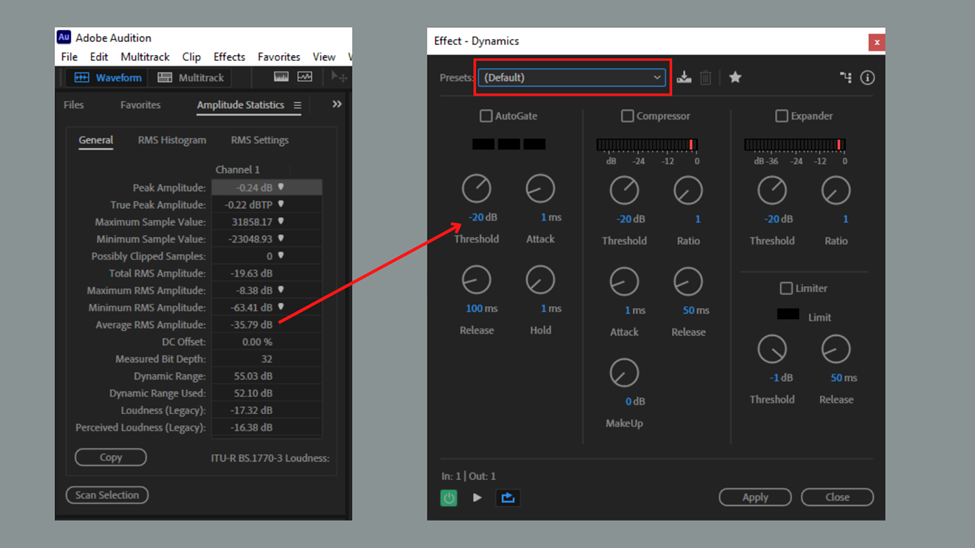
This selection is meant to act as a sample of our whole file. You can also select the whole file using Ctrl + A or double-clicking on the audio waveform. Either of the selection will work. To get this data that is used for the noise gate effect click on the Window option on the menu tab. In that dropdown click on Amplitude Statistics.
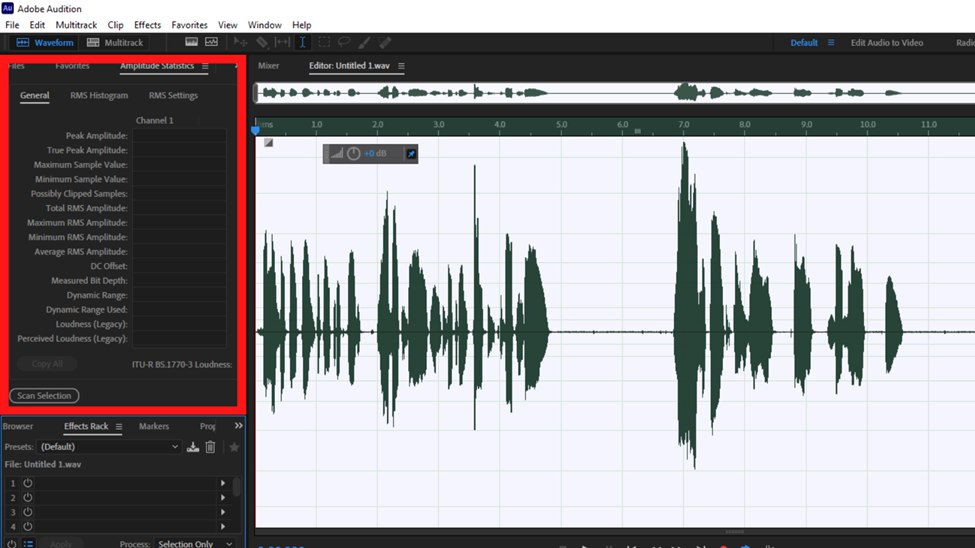
After you click on Amplitude Statistics some data appears on the File Panel. On the left side, we have some titles for figures and on the right, we have a table that is blank as highlighted below.
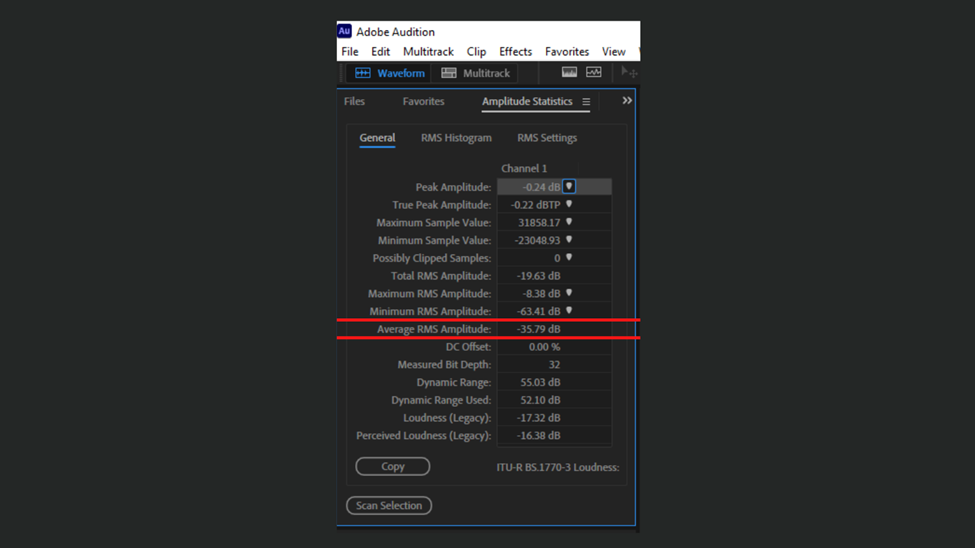
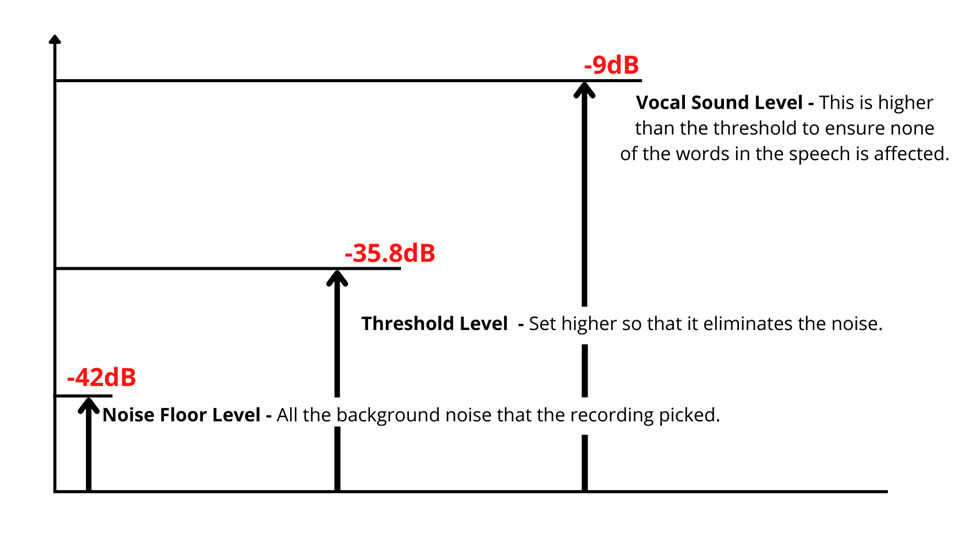
To get these data, click on scan selection. You will have numbers filled on the table. Average RMS Amplitude is the data that we will use. Mine is -35.79dB.
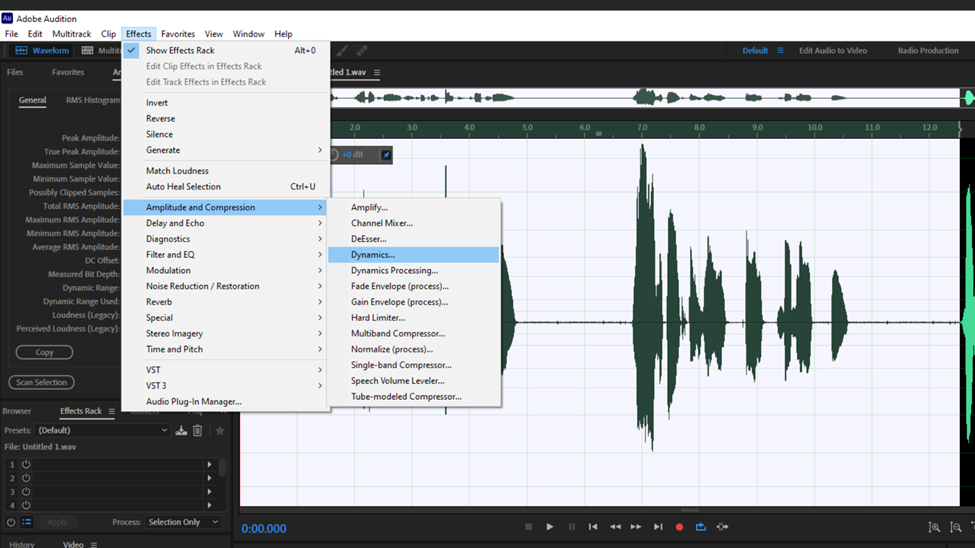
Next click on the Effects option in the menu tab. In this dropdown scroll down to Amplitude and Compression. Hover your mouse over this option to open a new dropdown tab. Under this click on Dynamics.
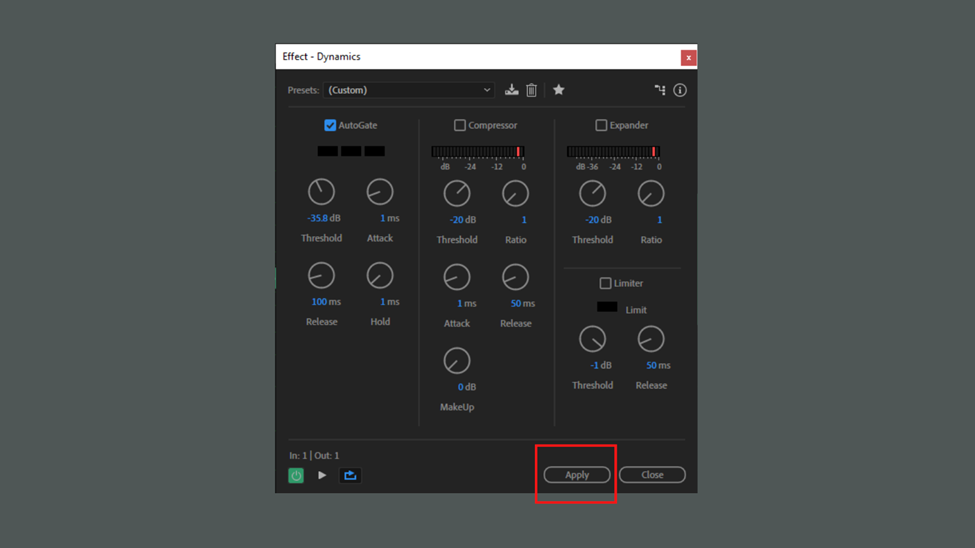
After you click on Dynamics a new dialogue box will pop up.
If you play your audio file using the space bar you will notice that the noise in between the pauses is still present. Here is the modification to be made in this dialogue box.
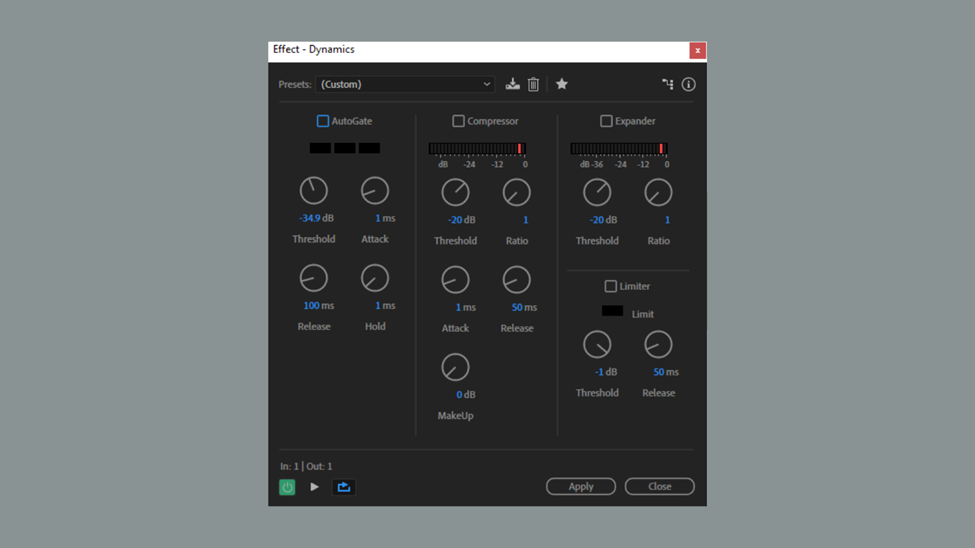
First, for the options under Presets dropdown pick default.
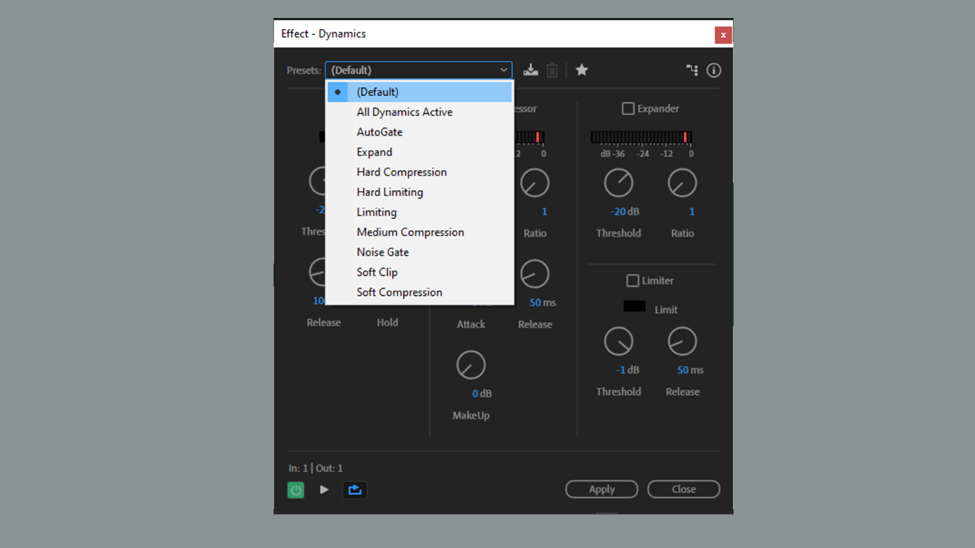
Of the options below presets (AutoGate, Compressor, Expander, and Limiter) just pay attention to AutoGate. After picking default as the preset the figure for the Threshold will be -20 dB.
Head over to the File tab and use the Average RMS Amplitude number to fill as the Threshold i.e. Change -20 dB to -35.79dB.
Here is how the dialogue box figures and options will be set as. Remember to click on the Autogate box to select it.
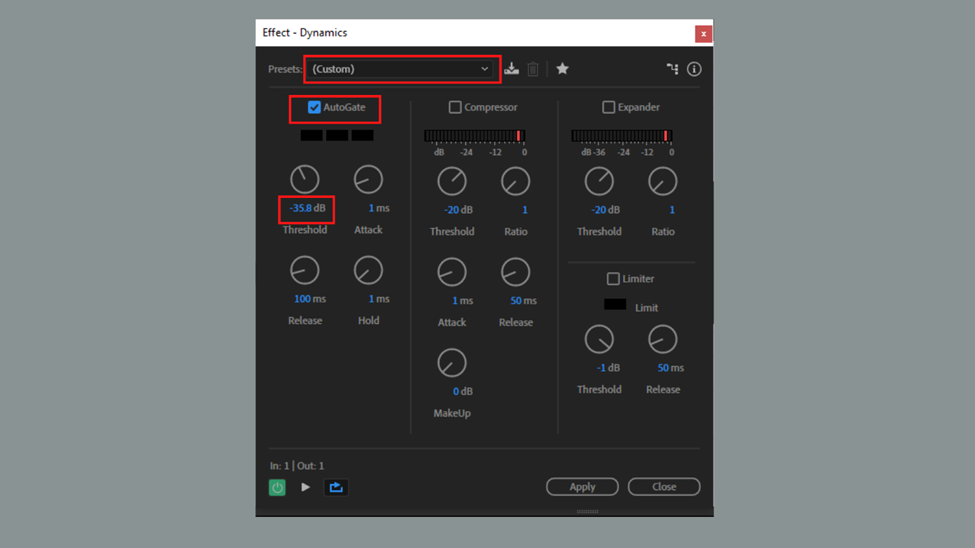
The presets reverts back to Custom. Clicking on the AutoGate box applies the effect hence if you play it you get to hear how the effect is being applied. For the Threshold, if you type in -35.79dB it rounds it off to -35.8dB. This should not be a cause for concern. The threshold can also be adjusted using the knob by either dragging it to the left or right. Click on play using the spacebar or the play button at the bottom of the dialogue box to assess whether the effects applied do not have a negative effect on the file being edited.
This threshold figure of -35.8dB means that any sounds that the mic recorded and are under -35.8db will be muted and anything above will be audible. Here is the scale from the soundbar meter in adobe audition illustrating what sounds are being eliminated and what sounds will be heard.
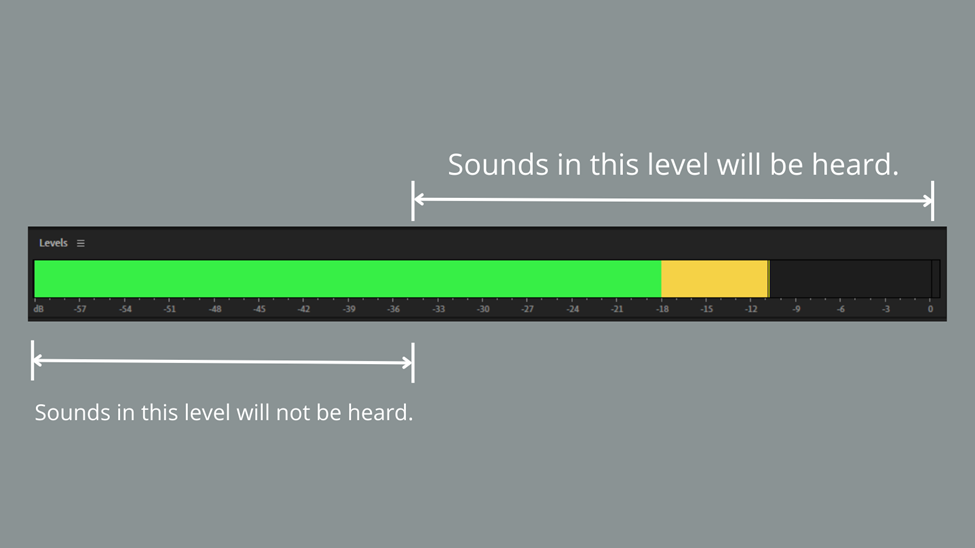
So, for instance, we set this incorrectly as the file is shown below.
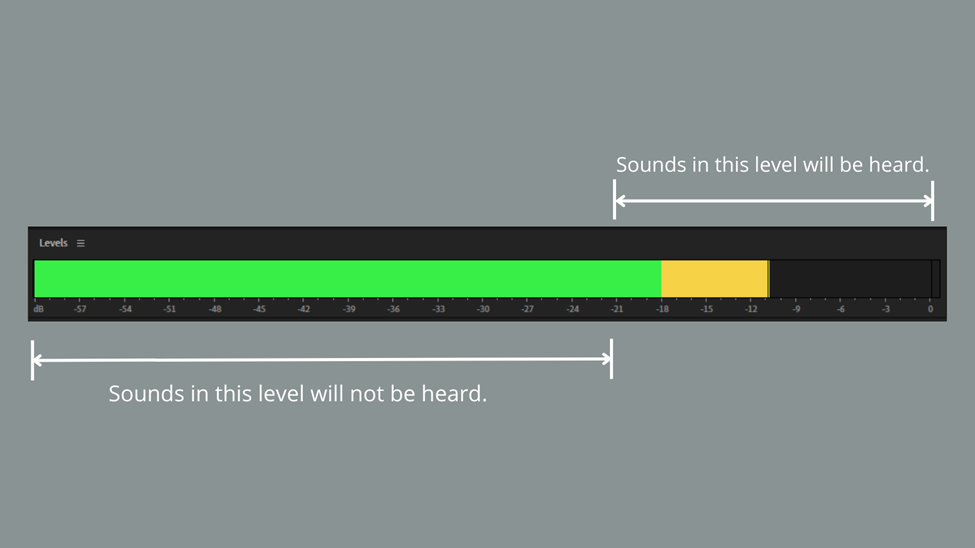
This will affect some words in the speech. Because the threshold is set at a limit that exceeds the level of some words. If the guest was making a statement and one word or even a whole statement has vocal levels below -21dB level, the words will be muted. It is essential therefore that the threshold is higher than the noise floor and its level shouldn’t be higher than the vocal level.
The noise floor is the measure of the signal created from the sum of all the noise sources and unwanted signals. Therefore the noise floor is the audio you get when no one is speaking into the mic and the surrounding sound is the one being recorded.
Click on apply to effect these changes after playing back and ensuring the audio sounds good.
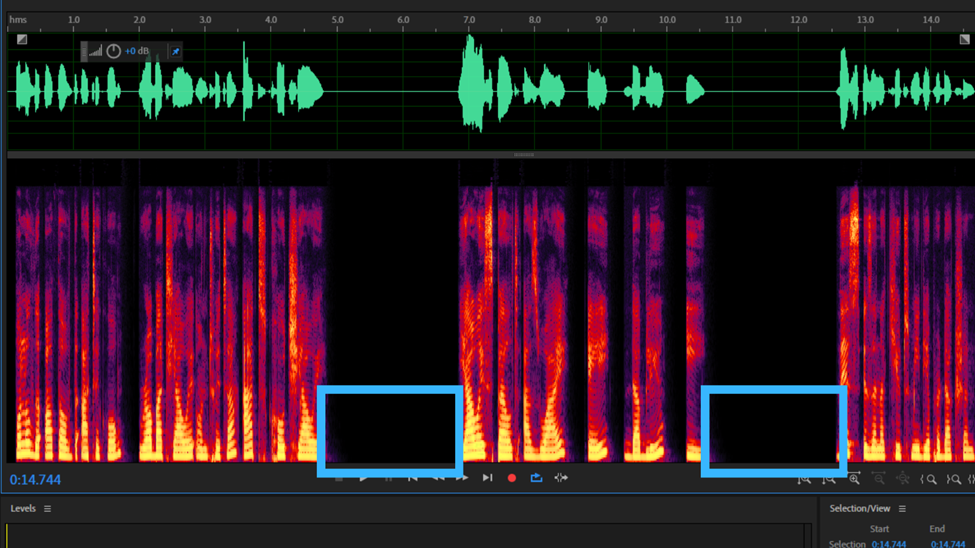
At the start of editing, you did look at the file under a spectral view. As highlighted there was a bit of noise but if you look at the spectral view now with the NoiseGate effect applied you will notice that the silent parts do not have noise as shown below.
Conclusion
From the spectral view of the audio with the noise gate effect applied you will also notice that other tiny little gaps in the speech were cleared off the noise that was present.
Prior to knowing the availability of this feature and understanding how to apply it, podcast editors tend to apply effects that affect the vocals. Personally, at times I would try to reduce the noise in each gap manually by minimizing the amplitude which was a tedious process considering some podcasts are over an hour long.
With a noise gate, you are now able to remove noise without affecting the vocals of the person making the speech. It is the appropriate function to use when a recording was done using an omnidirectional microphone hence sound was recorded from all directions and sources in the room yet you want the vocals to stand out. Or you might have increased the gain level in the mixer hence increasing the room noise and now you want to counter that.

")
![How To Use Adobe Audition For Podcasts [Complete Guide]](https://ProRec.com/wp-content/uploads/2022/07/image-156-180x180.png "How To Use Adobe Audition For Podcasts [Complete Guide]")
