Dynamics plug-ins and hardware units are some of the most fun tools for audio processing out there. Understanding them can be quite challenging at first, but once you get the hang of how signal detection works, you’re up for the party. That is precisely what I want to write about today. In this article we are going to explore Signal detection, Side-chaining, and how they are used in REAPER
Recommended Read: How to Normalize in REAPER

What is a Side-Chain?
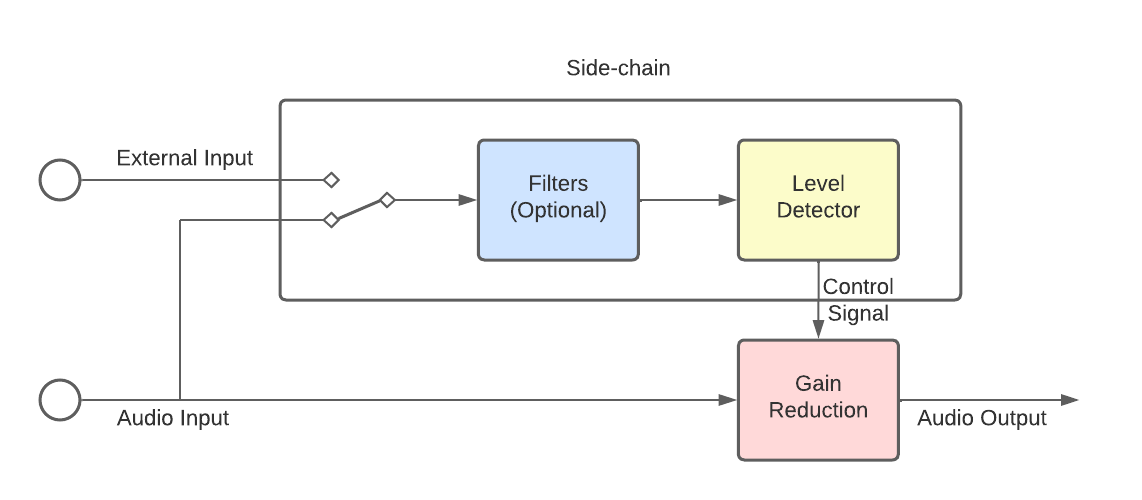
All dynamics processors, compressors, gates and expanders rely on detecting a signal and reacting to it. This is where Side-chaining comes into play, it is essentially the detector signal path for any audio plug-in or processor.
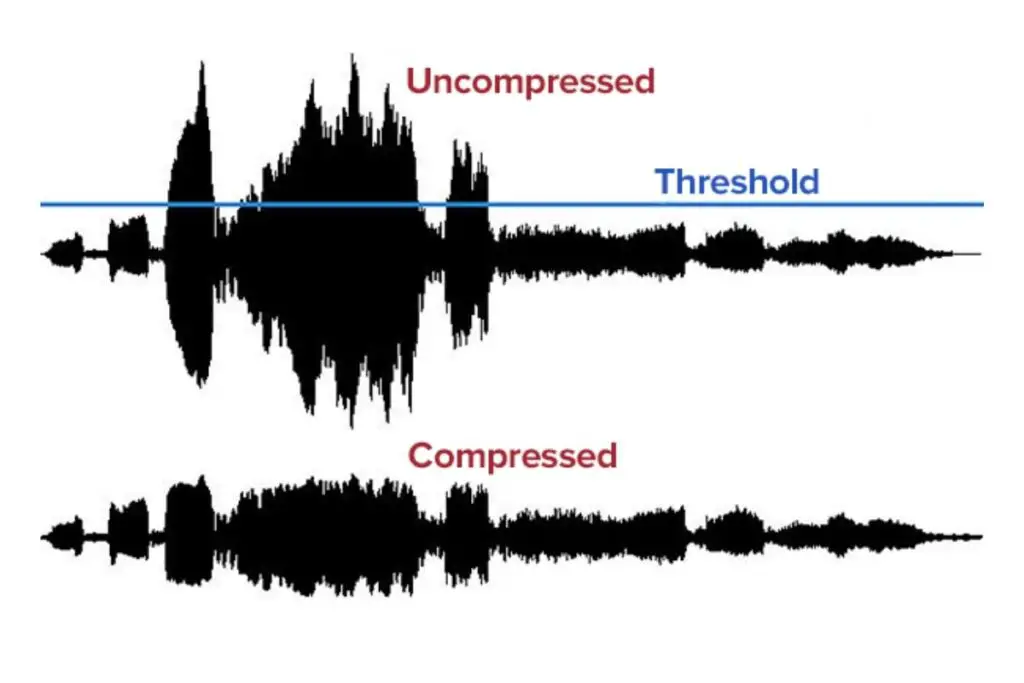
For example when you use a compressor on a track, if the audio goes above a certain level it begins to turn the audio down, but if the audio stays below it the audio will be unaffected. If you Use a gate instead, it won’t let the audio through unless it goes above that threshold like when you want to go to a nightclub and the guard won’t let you in unless you’re an adult. That decision making happens in the side-chain audio path.
Most of the time, the side-chain is fed with the same signal that is going to get processed, This is called an Internal side-chain signal path. But some plug-ins and hardware processors allow you to use an external signal to trigger dynamic processing, in other words, an External side-chain signal path. Let’s take a look at a dynamics processor diagram.
Now, you may be thinking. ‘But, isn’t Side-chain a compression technique?’ And you would be partially right. External side-chain compression is one of the most common compression techniques that takes advantage of this signal path. It can help you minimize clashing between elements in a mix, making more room for one track, getting the other out of the way. I will cover this topic more in depth next, for now you should know that there is a lot more to it than that.
How to Use an External Side-Chain in REAPER
Plug-in External Side-Chain
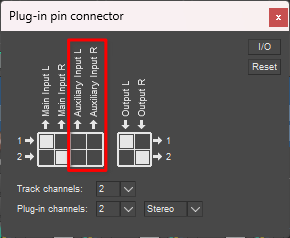
For starters, make sure that your plug-in has an External side-chain input. The easiest way to check this is to either go over the plug-in manual, or take a look at your Plug-in pin connections.
It should have two extra inputs labeled as Side-chain, SC, or Auxiliary inputs.
Now that you’re sure that your plug-in supports an External side-chain signal path, let’s see how to set up an External side-chain compression system in REAPER.
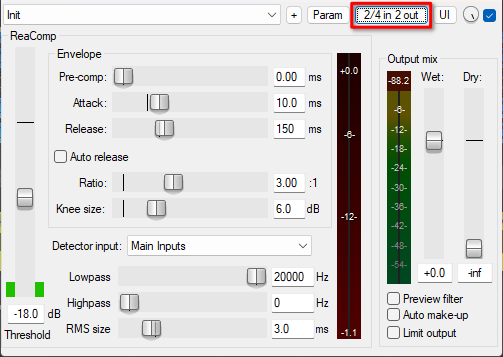
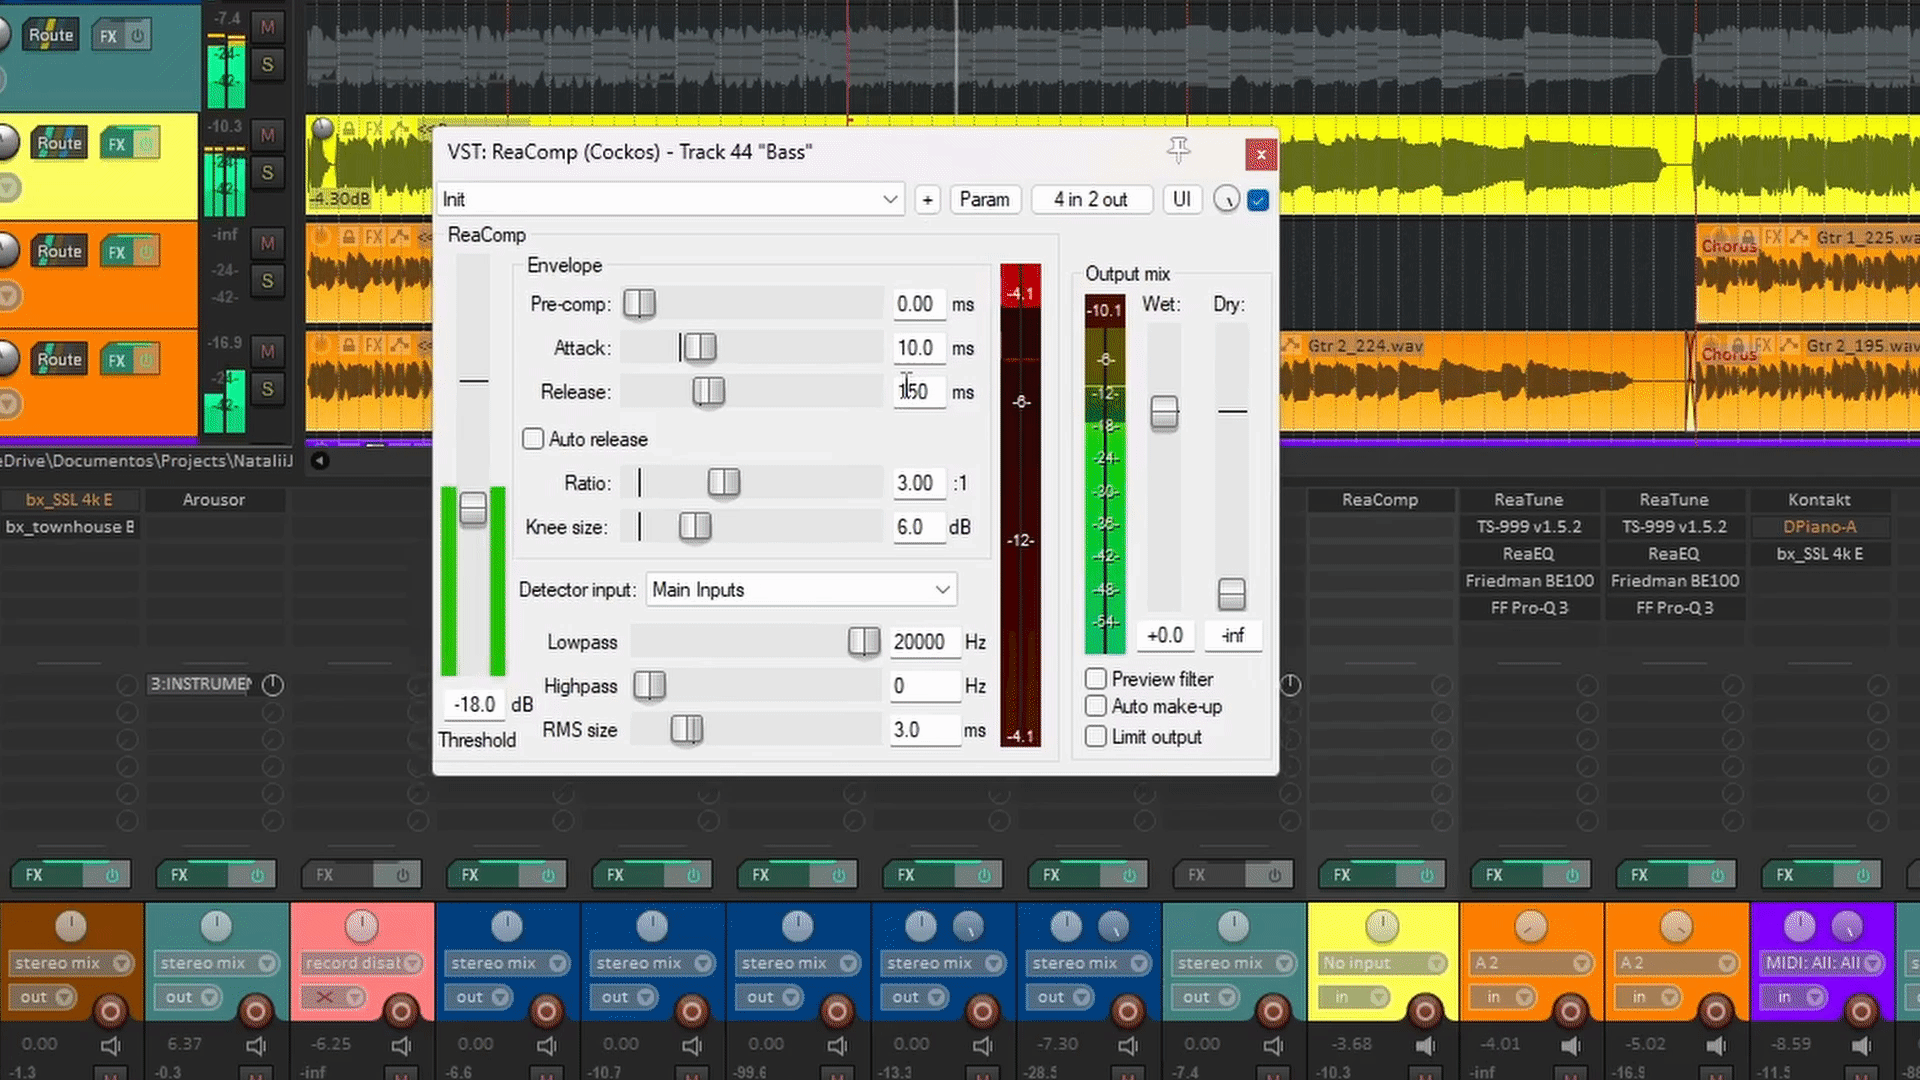
For this example I will be using ReaComp as it’s REAPER’s stock compressor. The end goal is to compress the Bass in this session using the Kick signal. This will reduce the level of the Bass signal each time the Kick hits, effectively making more room for the Kick.
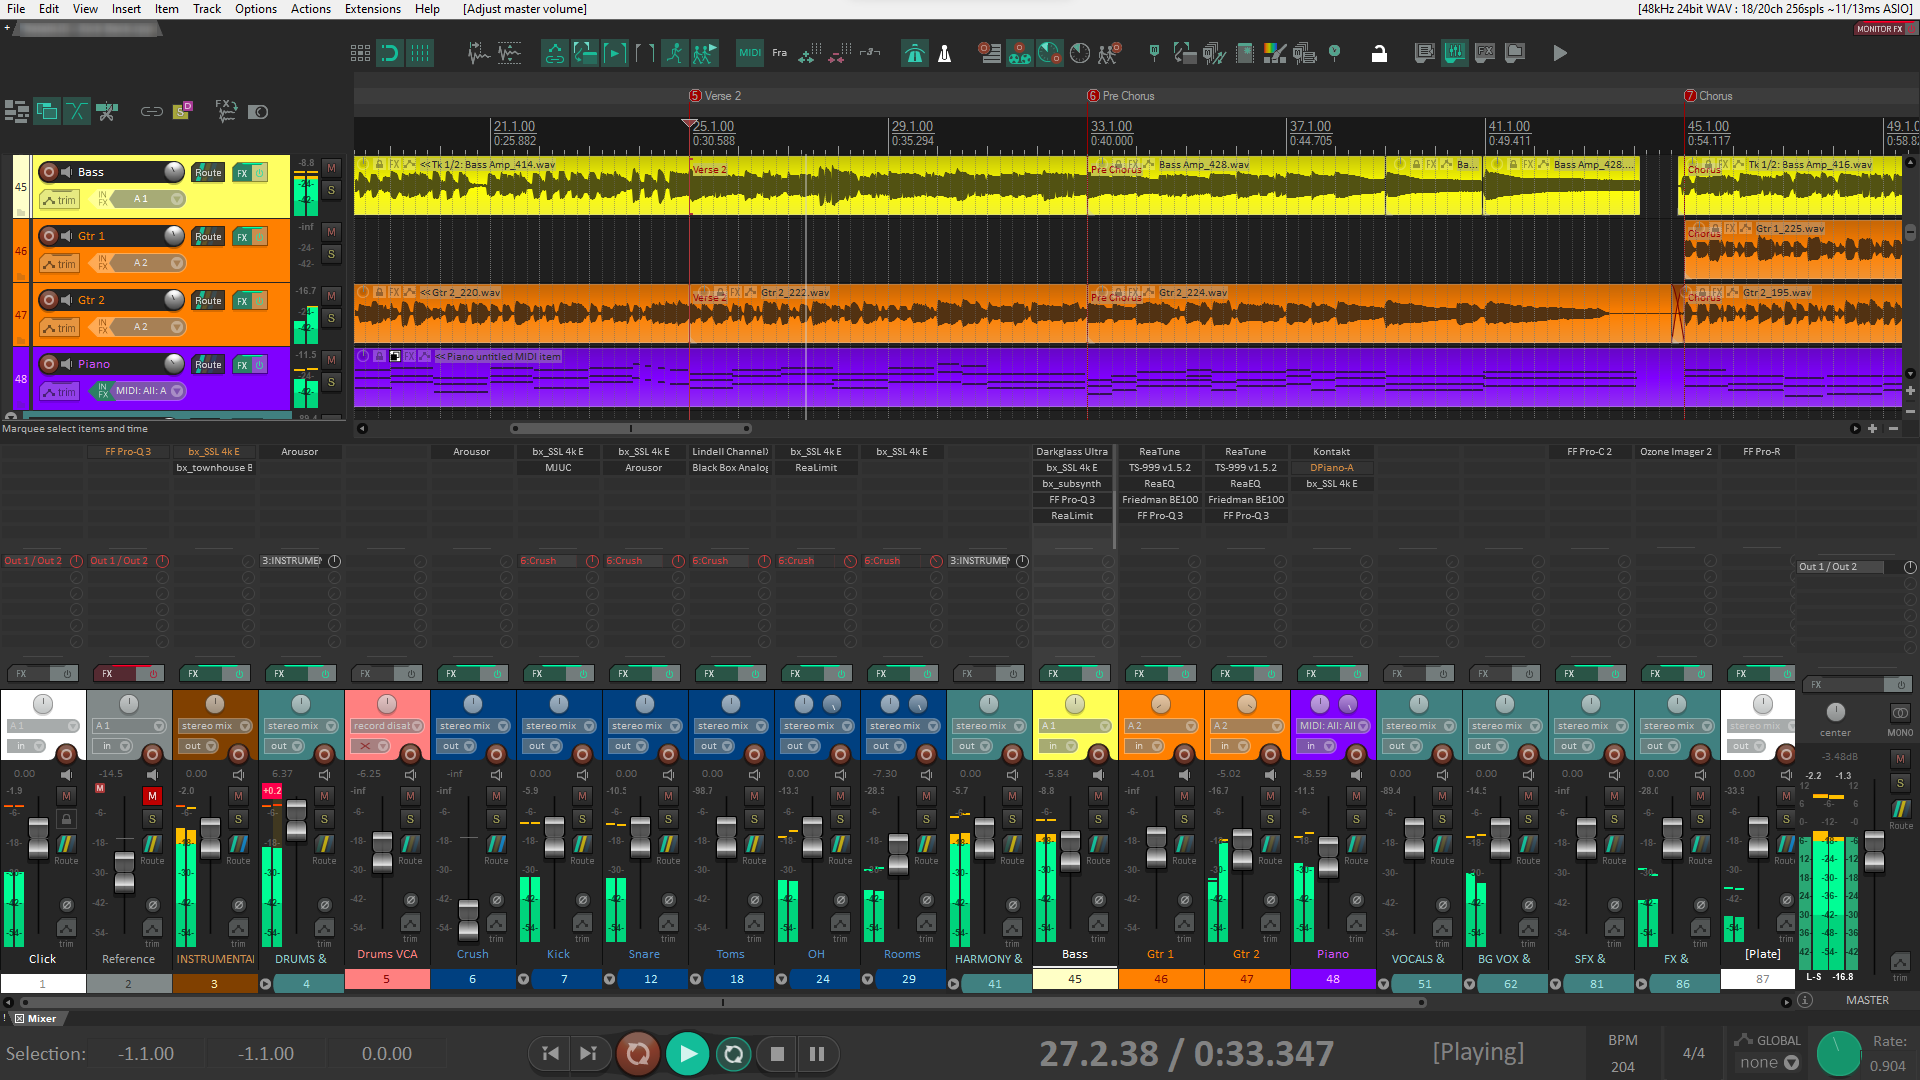
First, I open the Mixer window or MCP as it’s easier for me to do it here.
Then, I will load ReaComp to the Bass track.
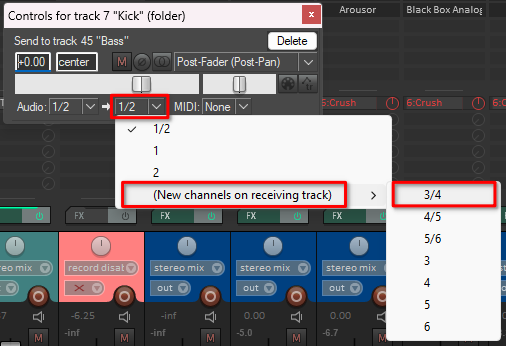
Now, you may know that dragging from the routing button of one track to another, creates a send. So, in this case I will drag from the routing button of the Kick into the ReaComp window.

You may notice that the receiving track now shows two pairs of Peak meters.
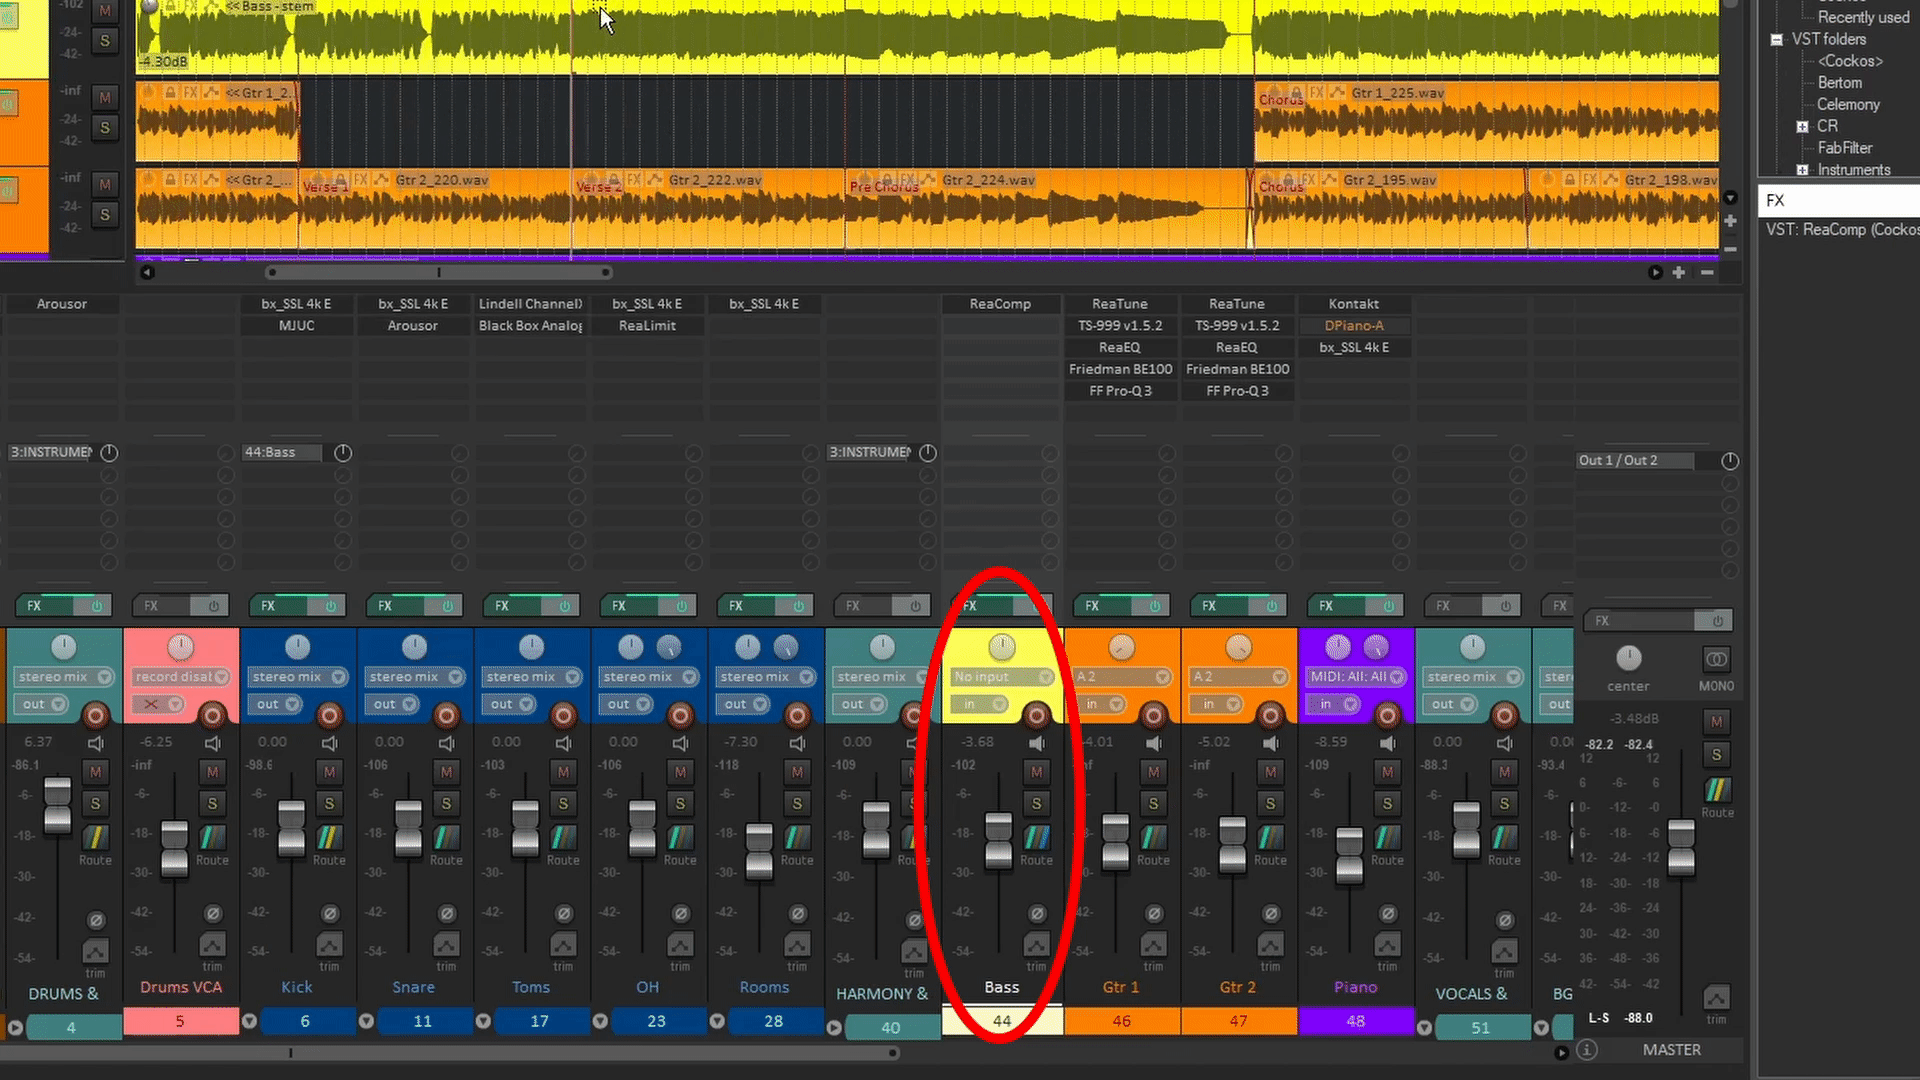
This process creates a send that connects the Kick signal to the Bass track, to channels 3-4 instead of the usual 1-2. This prevents both signals from mixing and allows you to treat the Kick as a Control signal that will be read by ReaComp as an External side-chain.
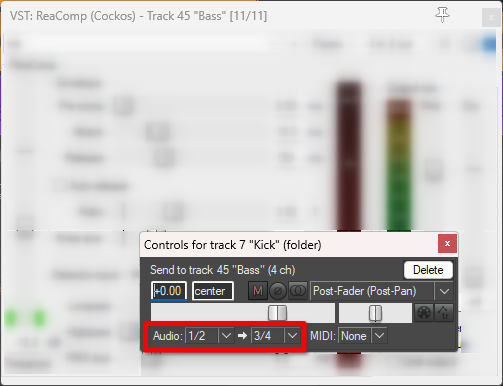
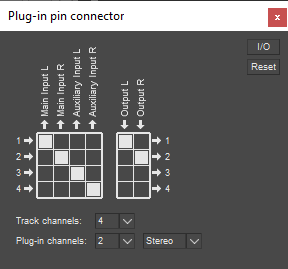
Your Pin connections should look like this.
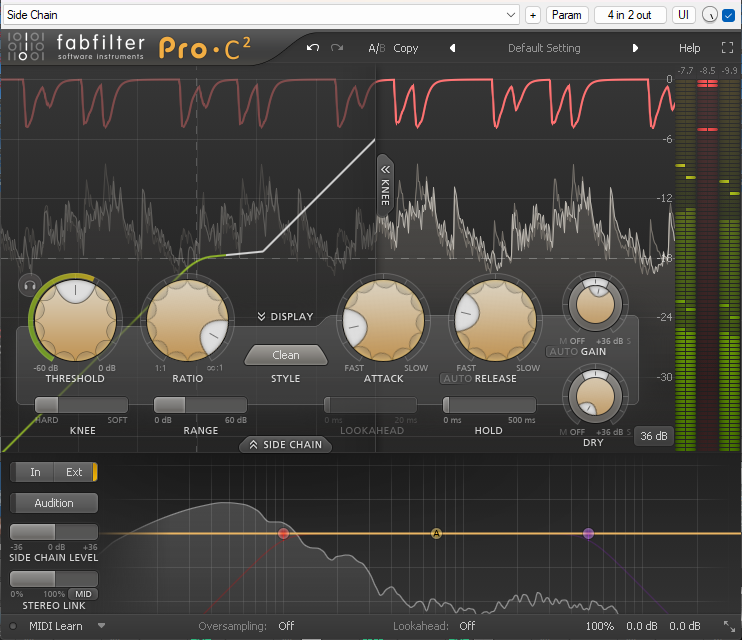
Next, change the Detector input in ReaComp to Auxiliary Inputs to enable the External side-Chain compression.
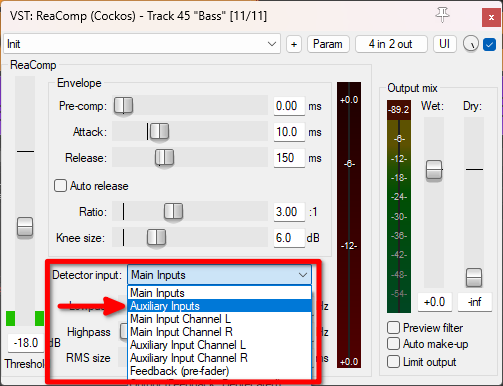
After doing this, The Peak meters in ReaComp will show the kick signal.
All that’s left is setting up ReaComp to react properly to the Side-chain signal. I’m looking for about 3dB to 4dB of gain reduction per Kick hit, with a fast Attack and fast Release.

Side-Chain Parameter Control
Now that you know how to use an External side-chain signal with a dynamics plug-in, I’m really excited to tell you that REAPER lets you control ANY parameter in ANY plug-in using a similar method. This is a feature that I haven’t seen anywhere else, although I don’t discard the possibility of other DAWs having a similar system.

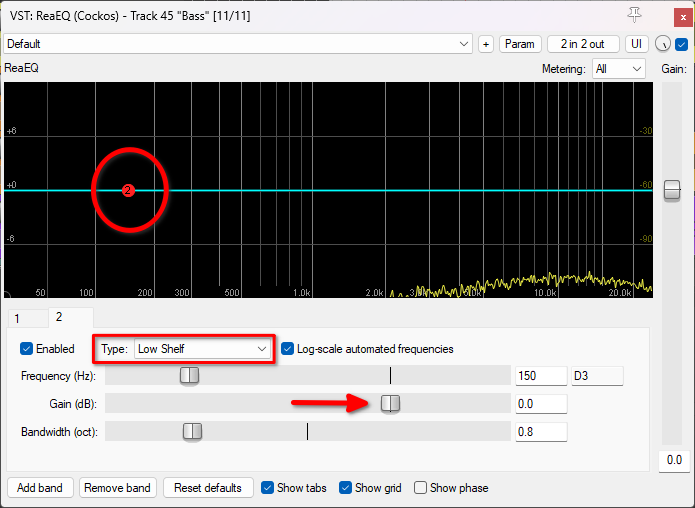
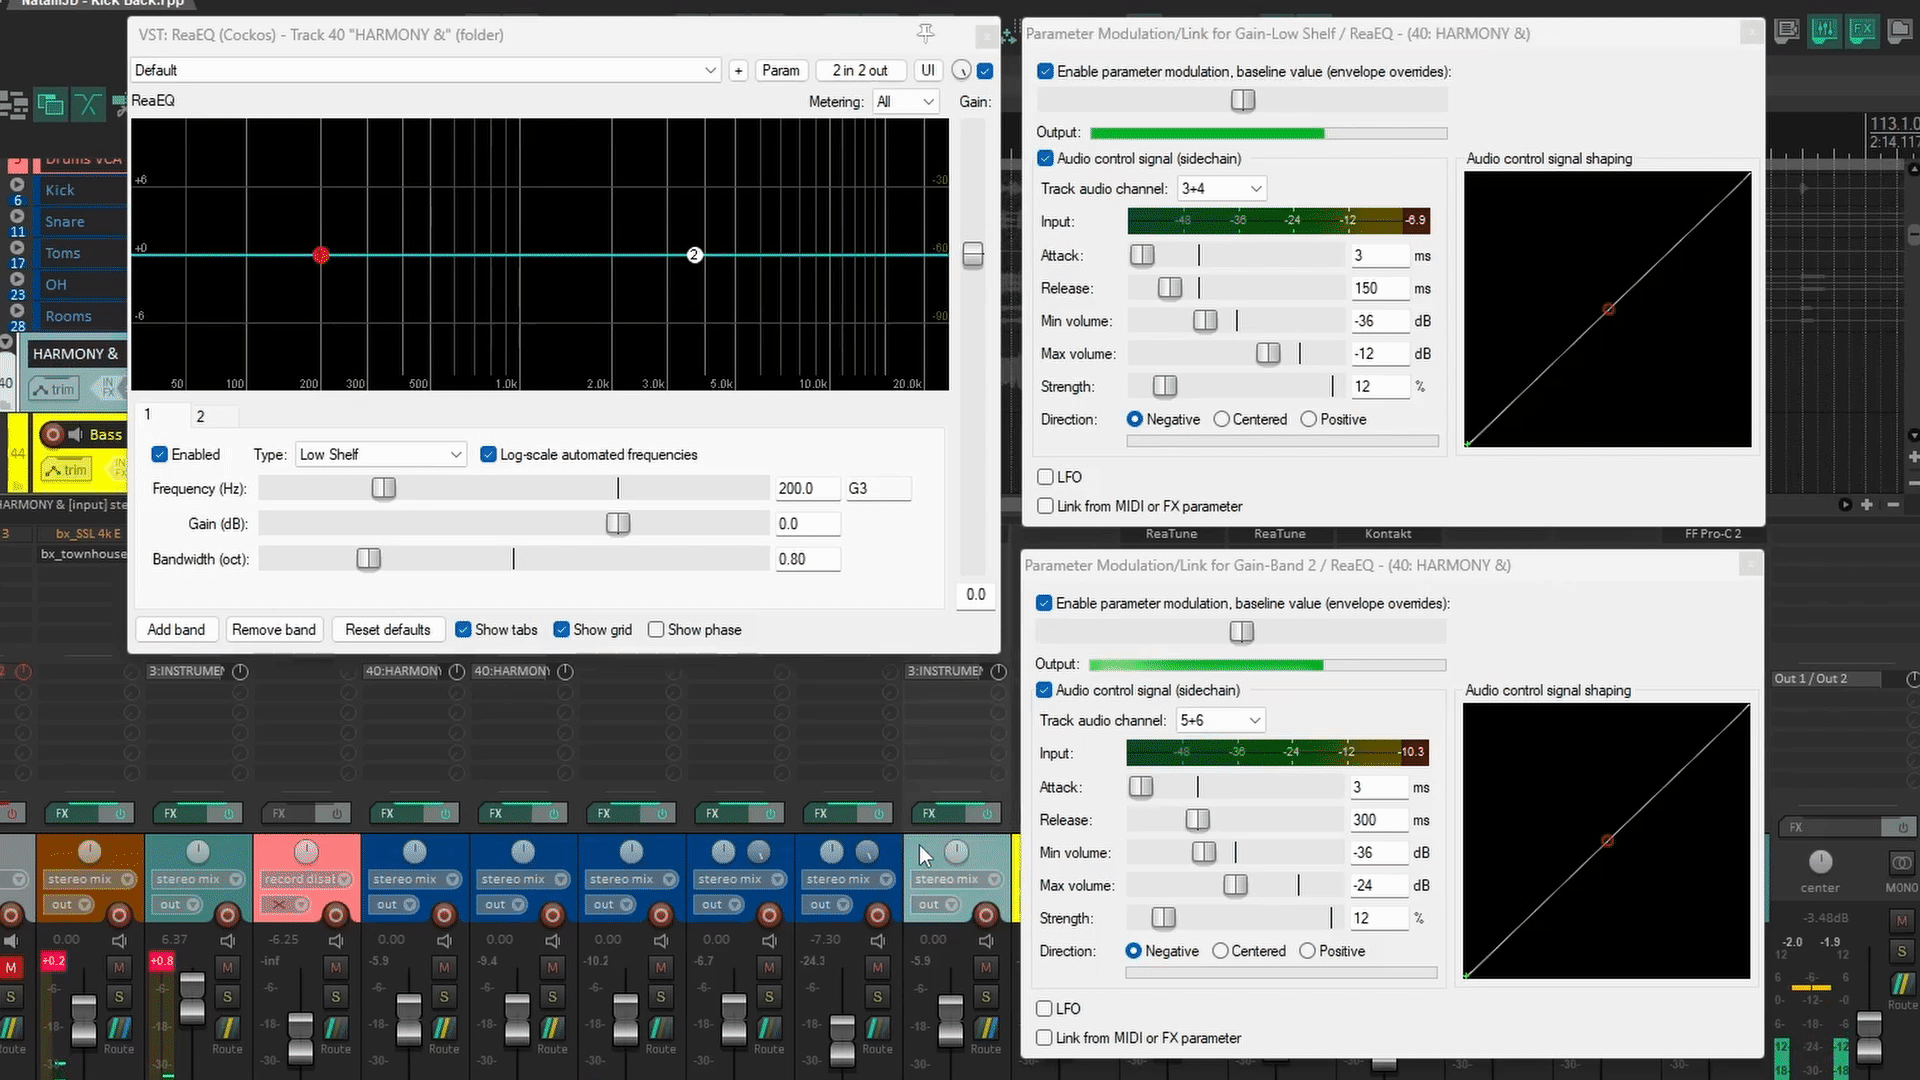
My favorite use case is creating a Side-chain dynamic EQ with only stock plug-ins. For this example, I will show you how to duck only the low frequencies of the Bass track using the Kick signal using ReaEQ.
First, load ReaEQ on the Bass track
Then, create a send from the Kick track to the Bass track, but change the Receiving channels to 3-4.
Next, Create a Low shelf in ReaEQ, set the Gain at 0dB and click the parameter. Now Gain is the Last touched parameter.
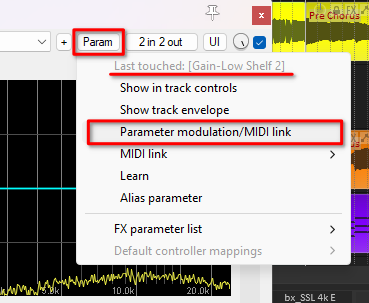
Click on the Parameter button on the top-right of the UI and select Parameter modulation/MIDI link.
Now, in this new window, enable the Audio control signal (sidechain) option, and this starts to look like a compressor.
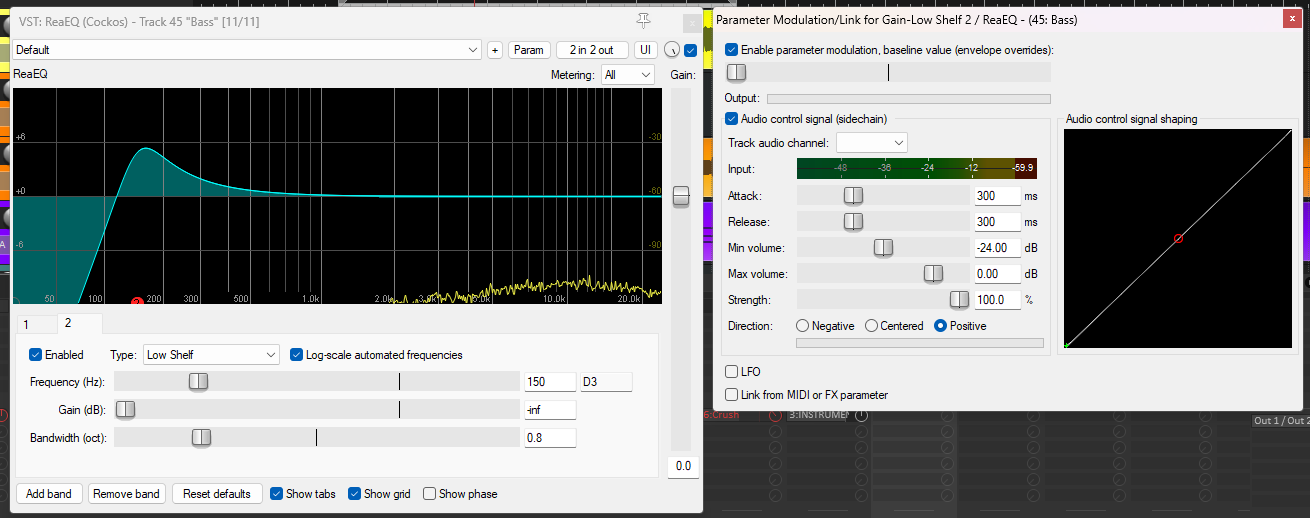
For this purpose, it’s best to set the Baseline value at the center and change the Direction to Negative.
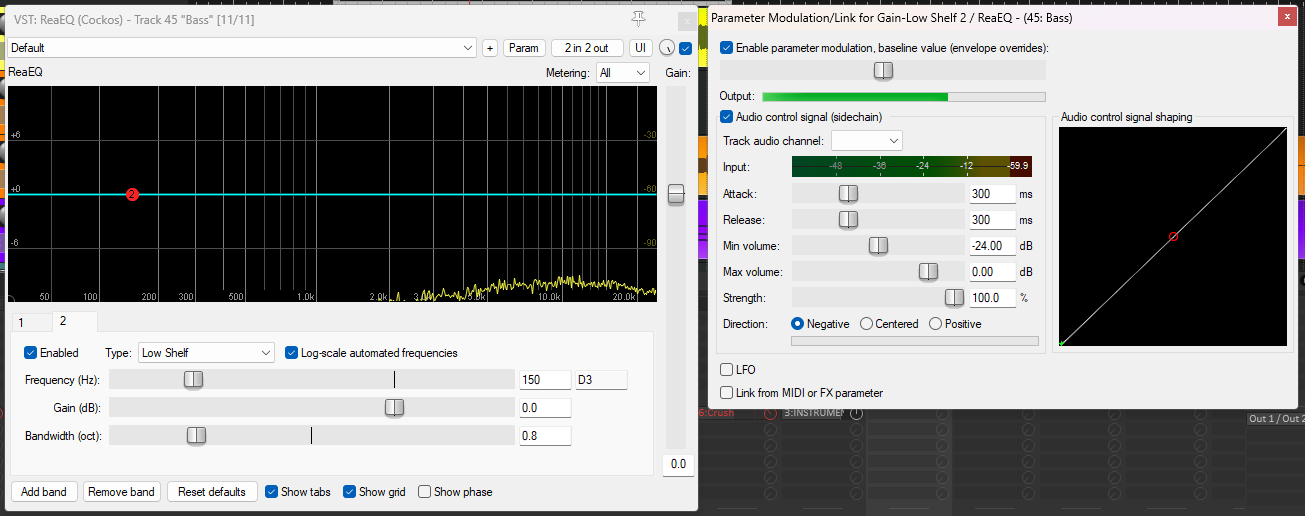
The Min volume, Max volume and Strength parameters allow you to tweak the range of audio signal that is going to affect the parameter’s movement, and how strongly.
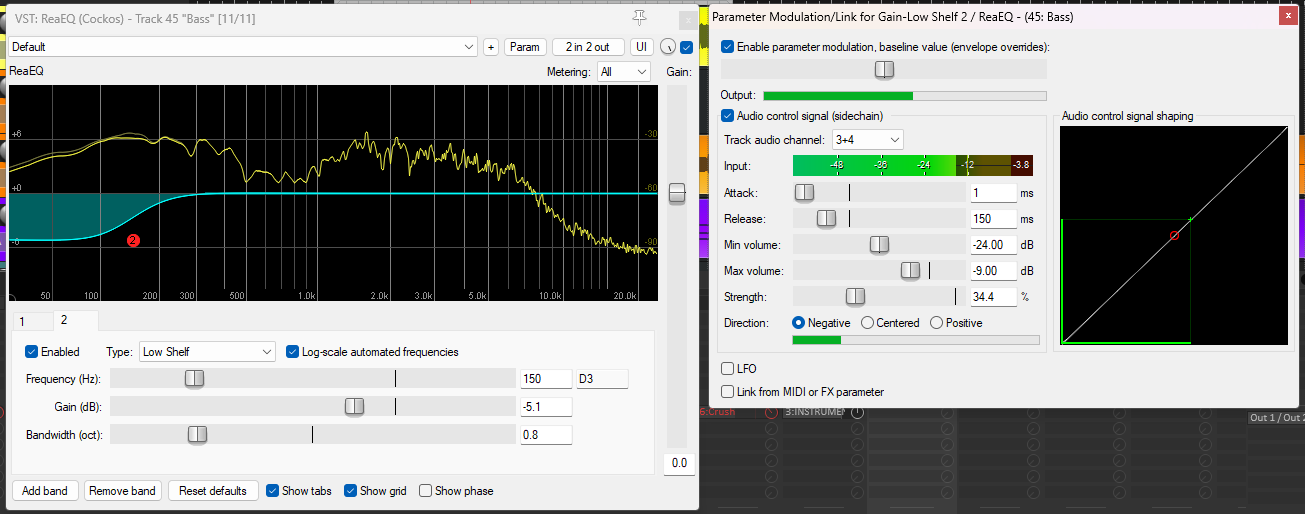
Now you basically have a free Dynamic EQ by only using stock plug-ins and features. This trick can also be tweaked to function as a more subtle and natural-sounding gate, or apply it with a distortion plug-in to add crunch to your trap hi-hats using the kick. The possibilities are basically endless!
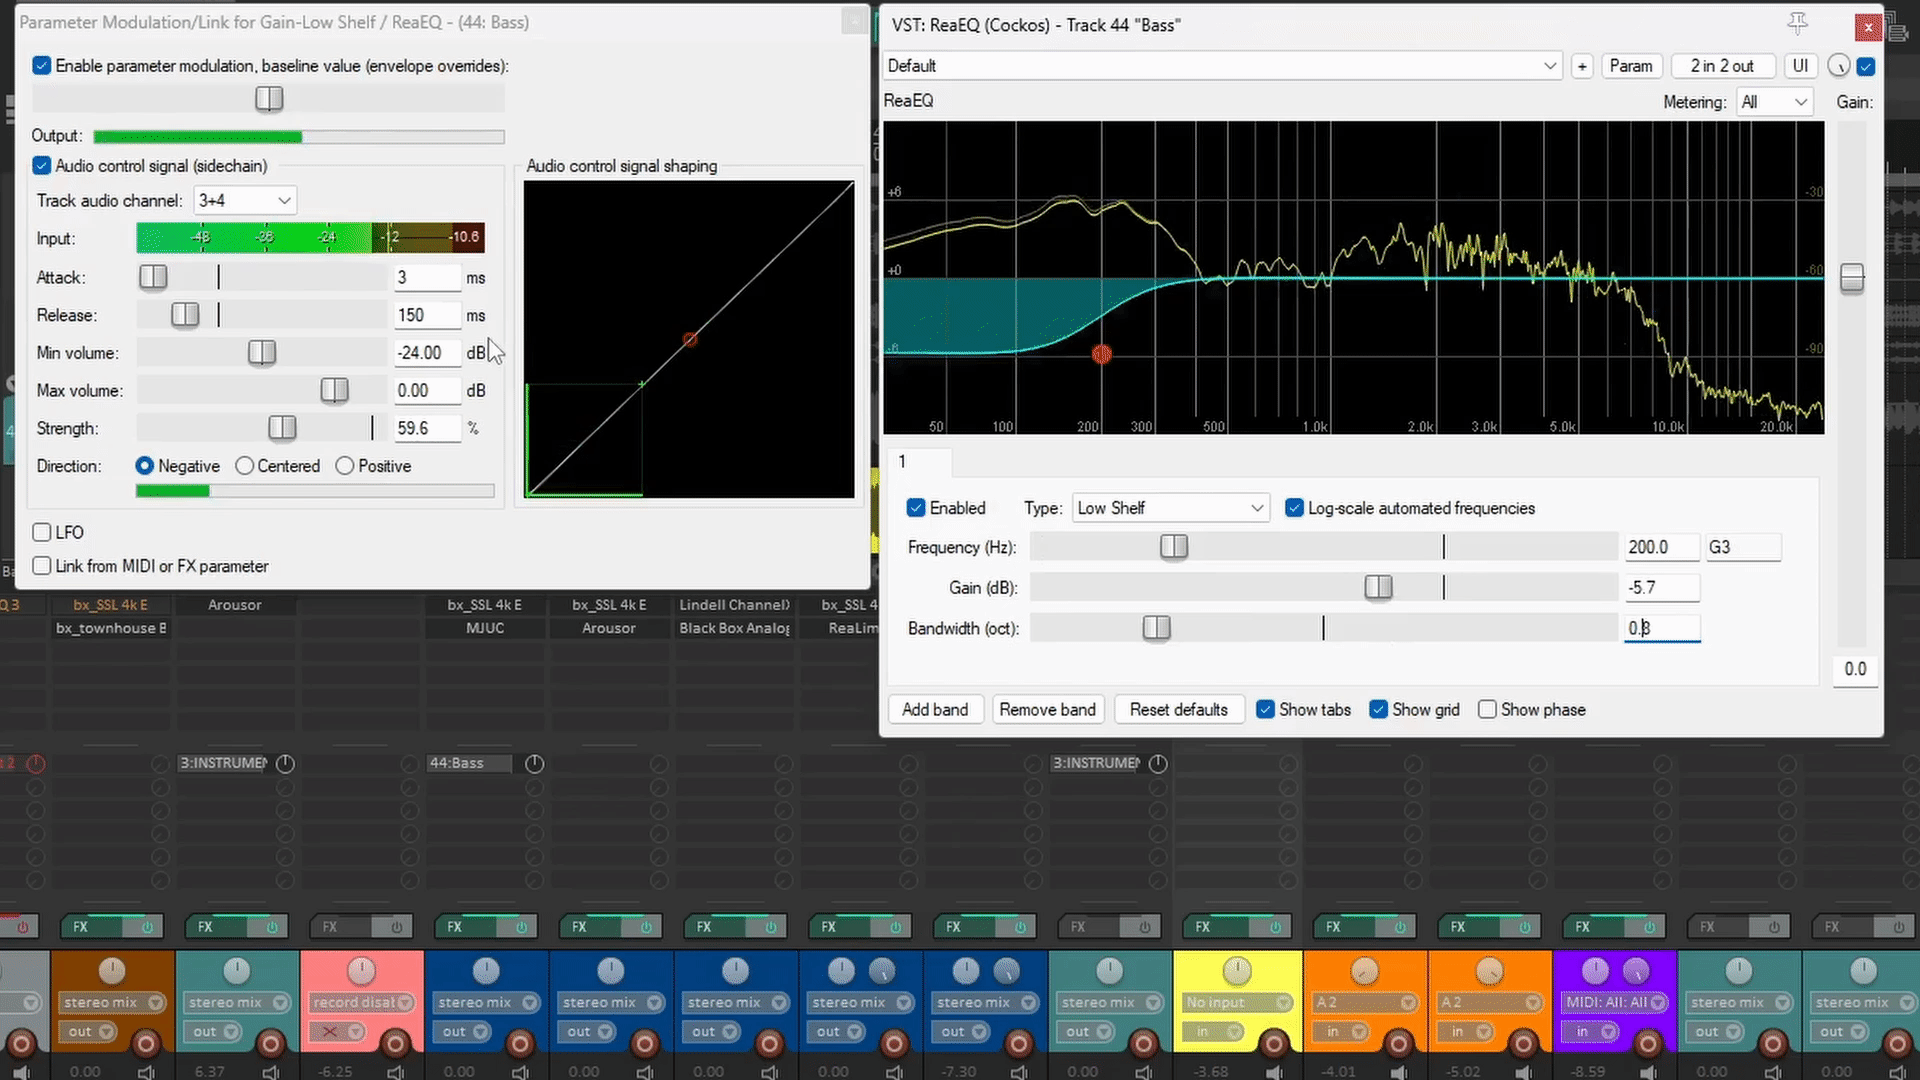
You can also use multiple Side-chain or Control signals to modulate different parameters at a time using more pairs of channels in the receiving track(5-6, 7-8 …). The next gif shows a Dynamic EQ that listens to the kick and snare in separate channels to duck different frequencies in the harmony instruments using ReaEQ.
Final Words
These were just a few examples of External side-chain usage in REAPER. Feel free to experiment with gates, expanders and applying Side-chain parameter control with any kind of parameters you can think of, I bet you will find something interesting and probably useful for production, mixing, or even mastering! These are one of the most powerful features in REAPER and one of the reasons I love it so much. If you want to know more, feel free to check more of my writings in the REAPER section. I hope you learnt something and have fun!

- Mixing in REAPER [ULTIMATE Guide!] - September 18, 2023
- How to Record in REAPER (Guitar & Vocals) - August 2, 2023
- Writing MIDI Drums in REAPER - July 3, 2023


