Introduction
Echo and reverb can be both, beneficial and a nuisance. How the situation turns out depends on what you are trying to achieve with your audio. The two effects can be added in post-production, or during a recording session through mixers that have echo effects or by using echo or reverb hardware.
Reverb is essential in establishing a scene. It enhances sound quality by making your audio richer. The effect is beneficial for both vocal editing as well as music. Sometimes it can be a bit too much and a reduction is what’s required. I once repurposed a live event into a podcast episode. The event was held in a hall and there was a lot of reverb. Since I wanted to reduce the cathedral-like feel of the audio I had to reduce the reverb.
With the growth of remote podcasts, one common issue that podcasters face is an unwanted echoey effect on their podcast audio. Treating this gets technical as you first have to consider the hard surfaces and try countering this by having rugs, carpets, and acoustic panels. Even if you take care of reverberant surfaces, you will still encounter some reverb. Things start getting more technical when you have to consider things such as acoustic panel placements. You might eventually be able to deal with it but what do you do if you are not able to kill off the echoey effect completely?
This article looks at removing these two effects. It might be a case where the effects were mistakenly added during a recording. It could also be a case where you are not in the perfect environment and you end up with reverb and echo on your recordingsl. The effects can also be mistakenly added in a post-production process.
Let us start with how you can take care of reverb in Adobe Audition.
Recommended Read: Adobe Audition Mono to Stereo and Stereo to Mono
Removing and Reducing Reverb in Adobe Audition
In Adobe Audition there is a dedicated function to do this.
Below is an audio file that has reverb. To remove this effect double click on the waveform first to select it.
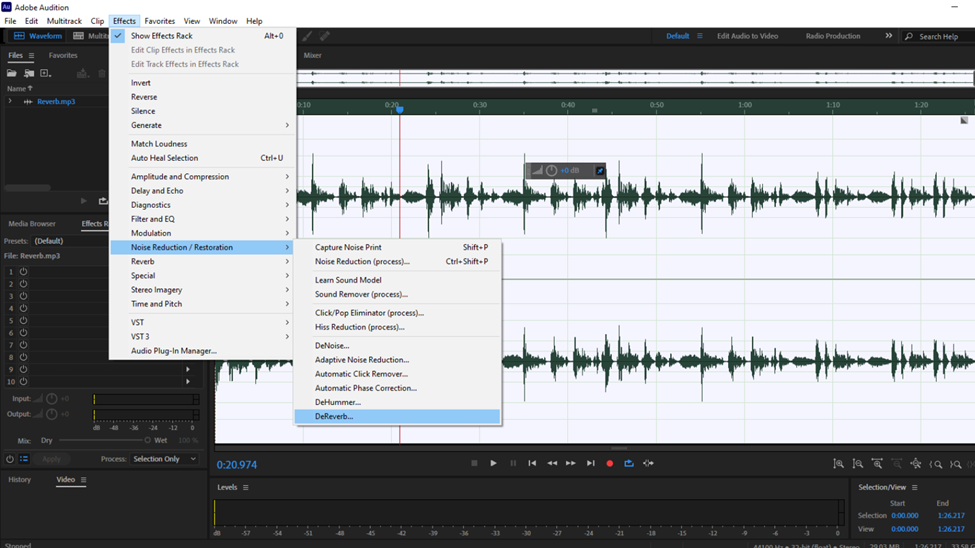
Next click on Effects to open a dropdown list.
From this list, hover the mouse pointer over the Noise Reduction/ Restoration option.
This will open a new list and from the options present click on DeReverb.
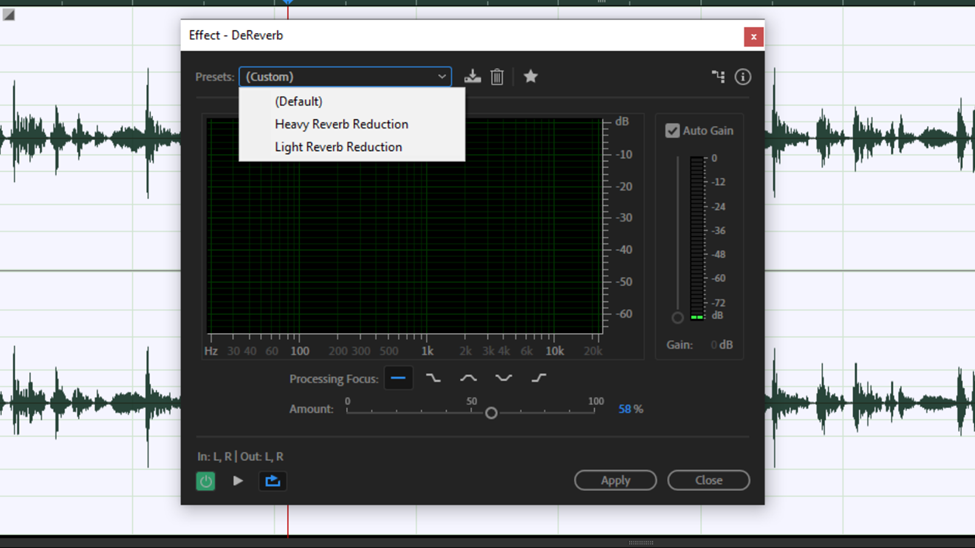
Clicking on this option will open a DeReverb pop-up box that looks like this.

There are a number of elements in this box. Pay attention to these.
First, the Presets slot. Clicking on this will open a list with three options; Default, Light Reverb Reduction, and Heavy Reverb Reduction. Default as a preselected setting will sometimes work but fail to provide you with good results in other instances. Heavy and Light Reverb Reduction options are for too much reverb or little reverb effect in your audio file respectively.
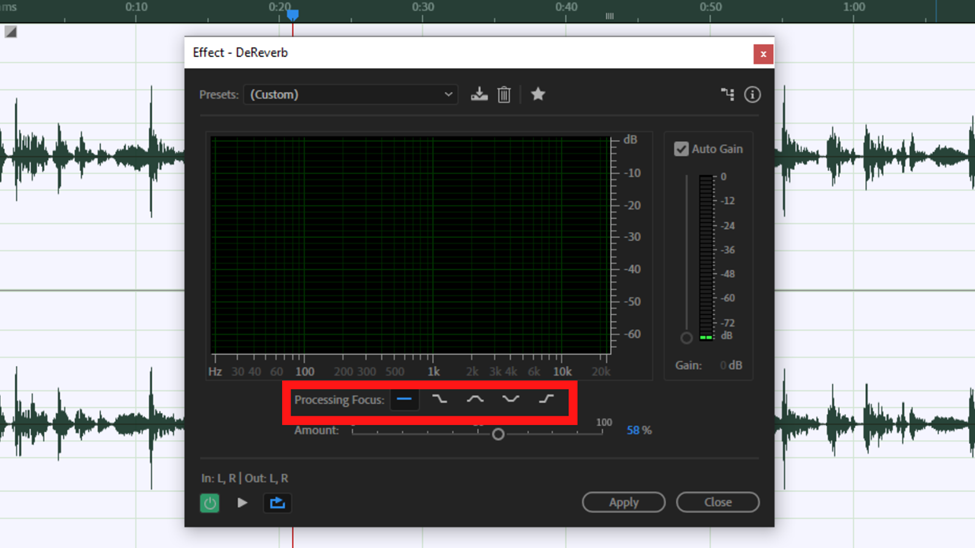
Next, make sure the Processing focus is on the straight line option. This applies this change to all frequencies, whether high or low in the file. This said option is highlighted in the image below.
Next, check the amount slider. This is highlighted in the image below.
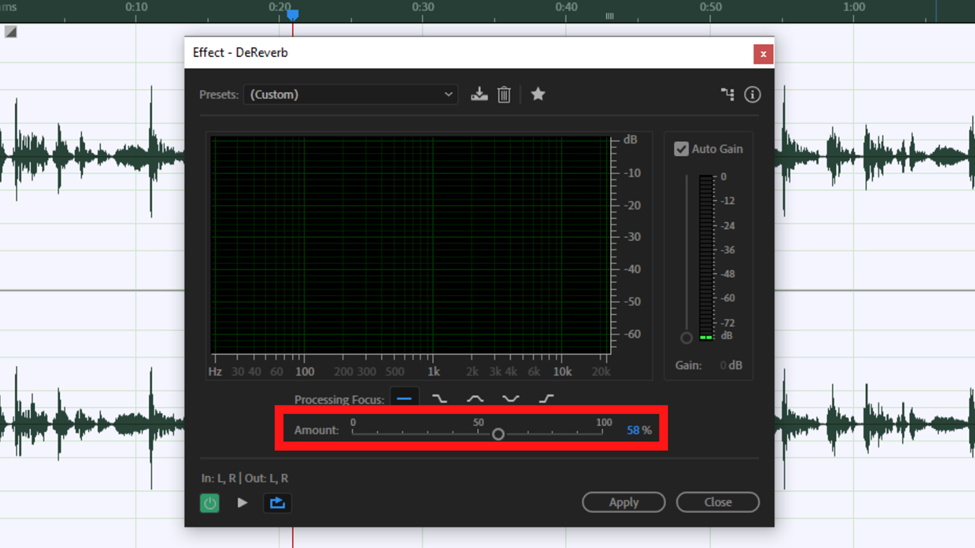
On this Slider, you get to input how much of DeReverbing you intend to apply. The input is in percentage. Our audio files vary therefore there is not an ideal number to input. Just keep adjusting the slider as the audio is playing. As you listen back you will be able to determine the ideal percentage to apply.
After you are content with the amount of DeReverb to be applied, click on Apply to effect these changes and close this dialogue box.
Lastly, I will point this out: to remove the reverb as the title of this article says you will have to drag the amount slider to 100% but at the expense of affecting the quality of your audio. Therefore, every time you have to listen back to how the end result will sound.
Alternate way of Handling Reverb in Adobe Audition
You can use a Reverb plugin. I sometimes use TAL-Reverb-4. It is a free-to-download plugin.
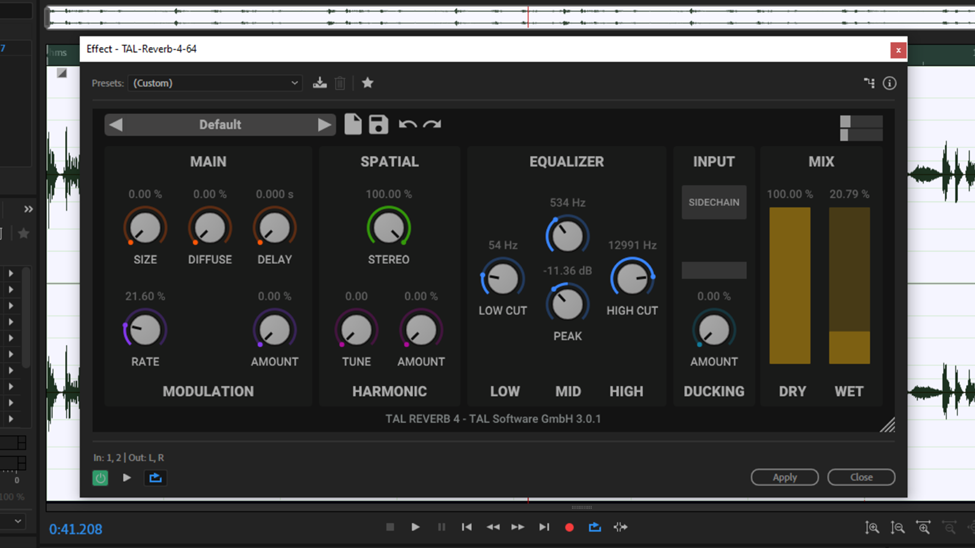
Adjust the knobs under the Main tab. To kill off the reverb in my case I adjusted the Size, Diffuse, and Delay amount to Zero.
Removing and Reducing Echo in Adobe Audition
For a case where your audio has mild echo, the Dereverb process outlined in the first part of this article will also be useful in removing or reducing echo
Secondly, you can also use a plugin called Crumplepop Echo Remover. Sadly, this is limited to Mac users and it comes with a price.
Alternate way of Handling Echo in Adobe Audition
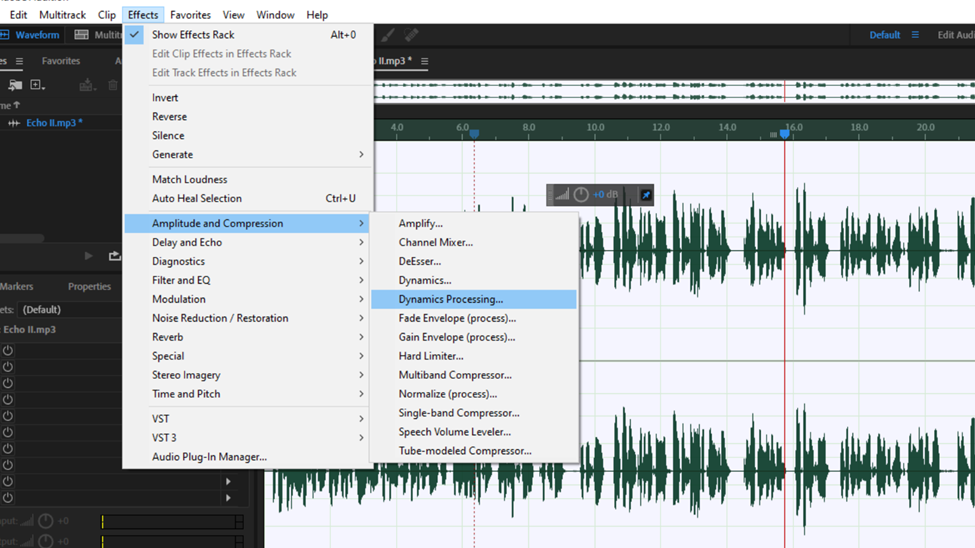
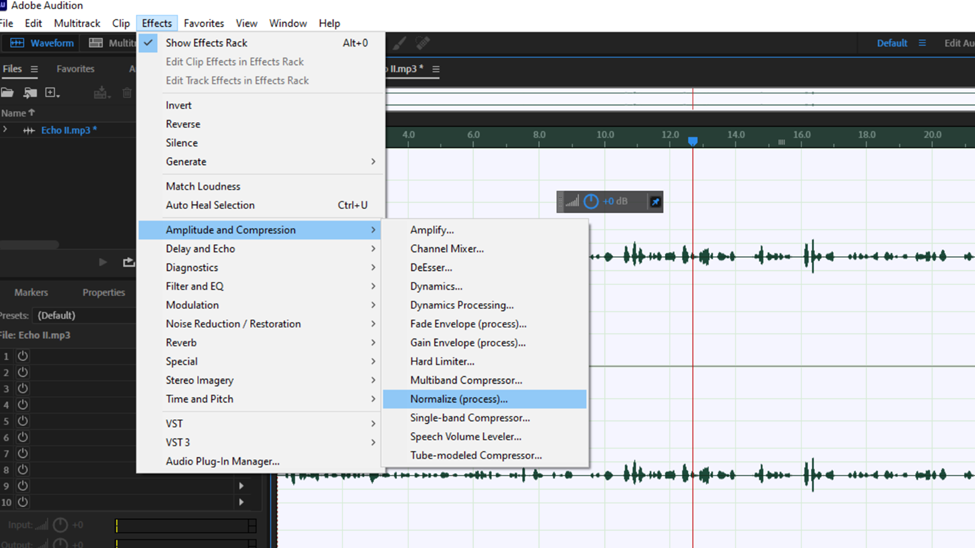
Once, I found myself in a case where the echo was a bit severe/harsh. I was required to reduce it. In this case, I used Dynamic Processing. To get to this effect click on the Effects option followed by hovering your mouse pointer over the Amplitude and Compression option. From this new list click on Dynamic Processing.
This should open this pop-up box.
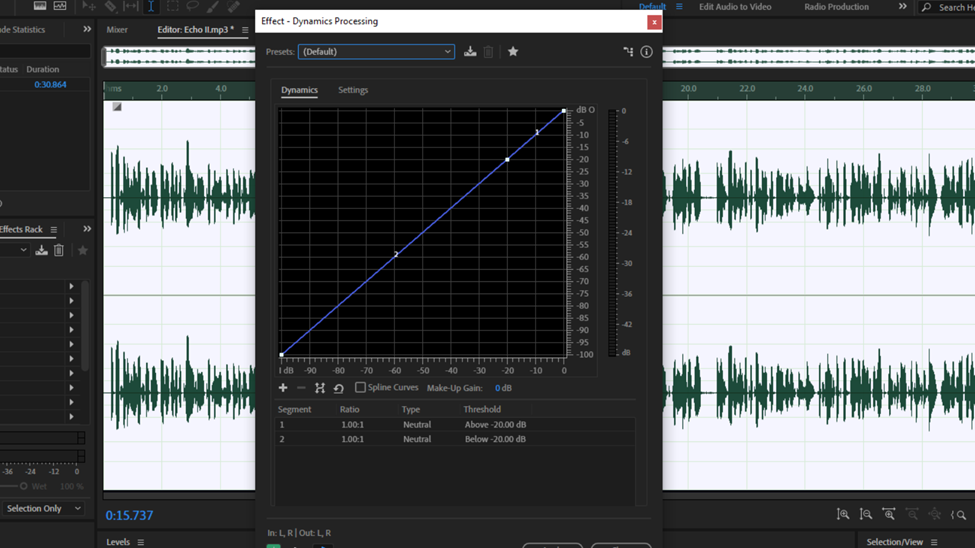
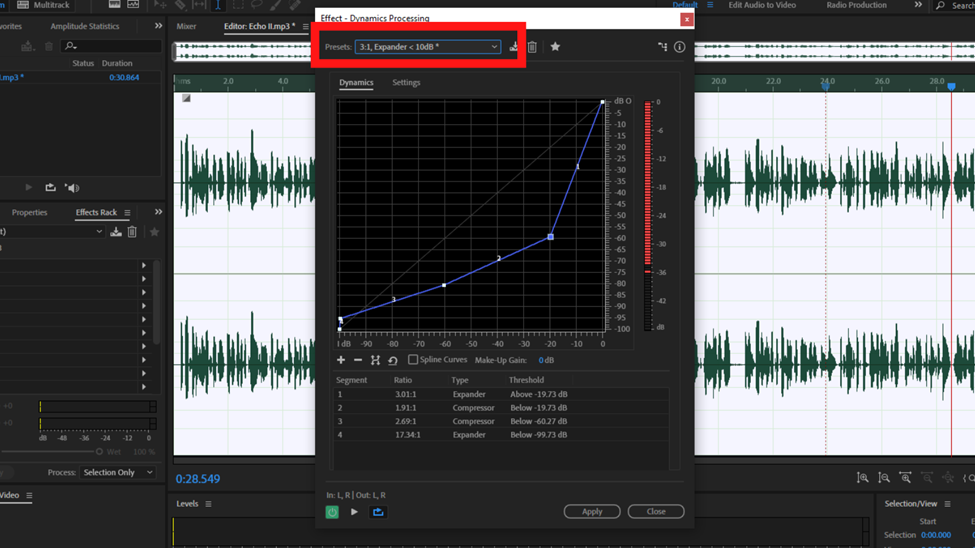
To manipulate the echo present you can do it by adjusting the blue line in the graph section of this pop-up box. Keep adjusting until you get a desirable result. Not only will this process work with the preset set as Default but it also works with other presets like 3:1, Expander < 10dB.
You can also select the Spline Curves box to make give the line graph a smooth look and a better-applied effect to the audio. During this process, just ensure that your final audio is not affected. Look out for some frequencies, either low or high being cut off at some point.
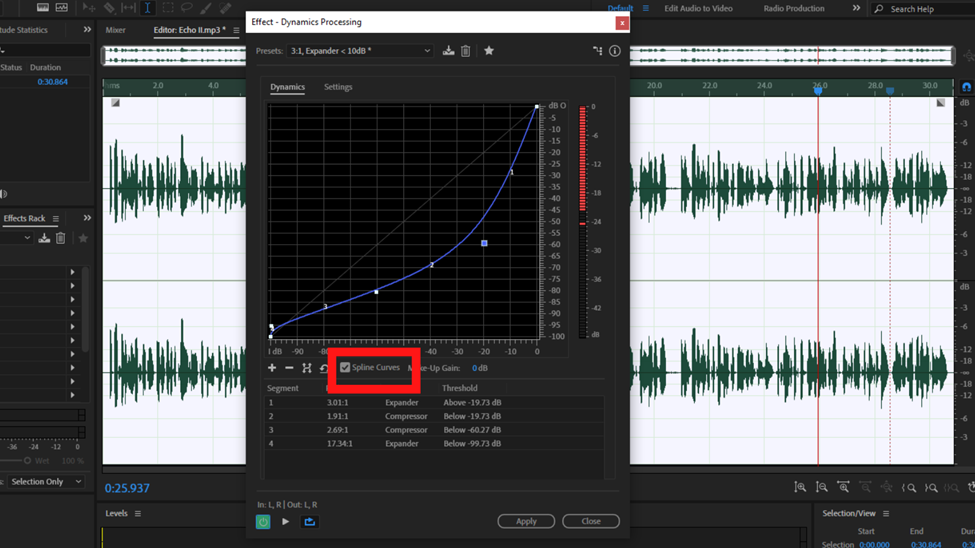
After you are content with how the audio sounds click Apply to save these changes. The amount of echo that was in your file will be either reduced depending on how you adjusted the line.
This will also affect the volume of your file. Increase the volume by Normalizing the audio by following the steps below.
Effects > Amplitude and Compression > Normalize (Process)
The image representation of the process is shown in the image below.
Ideally, the dynamics processing process is meant to effect changes to audio inputs and outputs. This is why your waveform considerably shrinks after applying this effect.
If you amplify the audio to louder levels the echoes will reemerge and their presence will be obvious once again. Therefore in a case where you really need the volume raised once again to a higher level, I would suggest using the DeReverb process just to kill off the “residue echo” sounds.
Here is a summation of the reduction or the removal of echo in audio:
- If you have just moderate or mild echo just follow the Dereverb process. With that, you get better results.
- If the echo is severe and annoying like the echo present in a large new empty building or an auditorium use the process outlined in the Alternative section above. But not that the level of the sound will be affected.
Conclusion
The subject of reverb and echoes is quite extensive. Its consideration not only starts when you sit in front of Adobe Audition and start to edit but way before getting to this. There is a mention of acoustic panels and rugs in this article indicating that it is a problem with many layers. It is among the key considerations when building studios.
The article however provides you with a process to correct these two after a recording is done. It is a detailed outline. Does following it to the latter get the job done? Yeah, it might but the audio varies. The audio that you are editing is nowhere close to my examples. Therefore getting good-sounding audio at the end of the day is based on your quality check process. Once you make changes, either the slider in the dereverb process or the graph section in reducing or removal of echo have you ascertained first that the audio sounds great with the new made changes settings?
Always make sure that your quality checkups are top-notch before finalizing the edit.
")

![Adobe Audition Not Recording [FIXED]](https://ProRec.com/wp-content/uploads/2023/02/word-image-4791-1-180x180.png "Adobe Audition Not Recording [FIXED]")
![Adobe Audition Razor Tool Greyed Out [FIXED]](https://ProRec.com/wp-content/uploads/2022/08/image-179-180x180.png "Adobe Audition Razor Tool Greyed Out [FIXED]")