In Ableton and audio production in general, quantization is the process of correcting timing issues that occur after recording. Often, vocalists and instrumentalists miss the bar when recording, and this could be because of lag issues with your software, low playback delay compensation, or the lack of a metronome or click-track.
Recommended Reads: Multiband Dynamics, Glue, Parallel and Compressor effect in Ableton
When To Quantize
There are moments when quantizing a recording can be harmful to your production. In live recordings where you are also recording video, quantizing your recording could throw off your audio-video synchronization and affect your audience’s engagement with the production. In this instance, quantization is detrimental.
You can also bypass quantization when you are recording a band, to keep all the instruments and vocals natural, and if you want to keep the live feel to your recording, feel free to skip quantizing your recording. Often, melodic instruments and vocals add flavor to the recording by veering off the metronome. This adds dynamics color to the production, especially during solos, intros, and outros
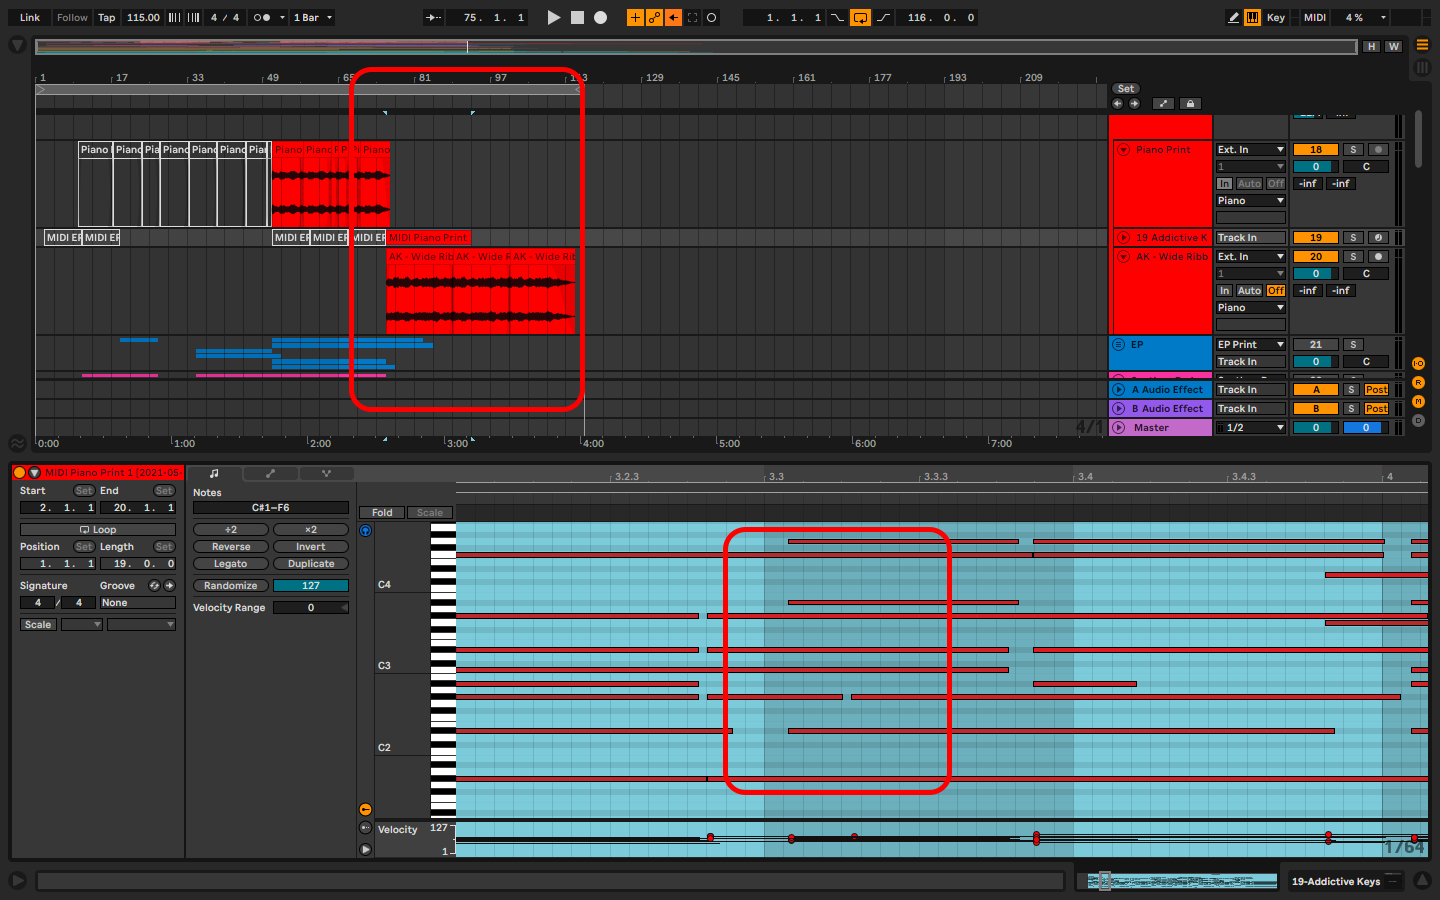
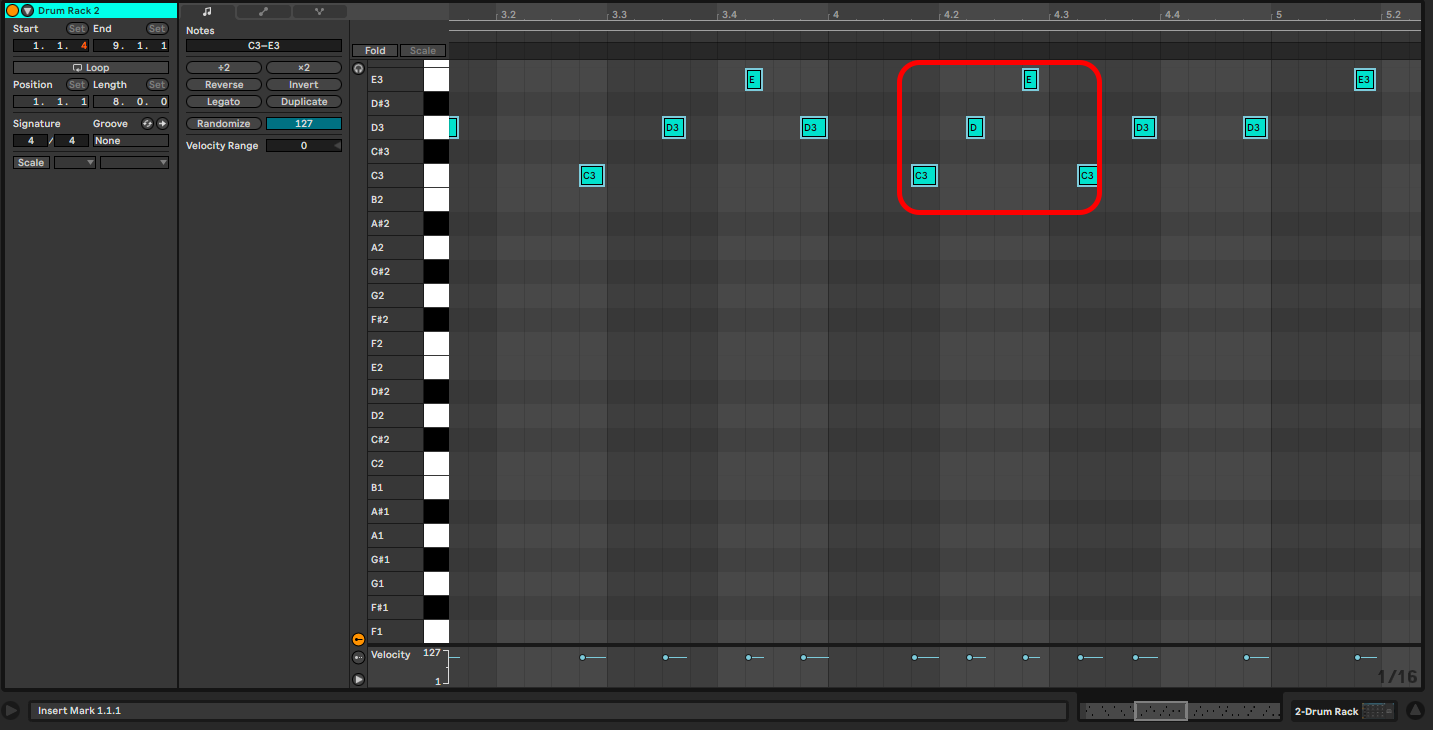
In the example above, you will the outro section of a song where the pianist and rapper are playing off each other. This section is spoken word, and the pianist is accompanying the vocalist. There is no need to quantize this segment, so that the jazz pianist can move freely, not only in key but in tempo with the vocalist.
Recommended Reads: EQ 8 Equalizer, Sidechaining, and Normalizing in Ableton
Why Quantize
Quantize to snap everything to the grid of your session, and make your productions sound clean and professional, and also helps the band sound professional.
Shortcuts
There is only one quantization shortcut. On a Windows computer, Ctrl + U, and on Mac, Cmd + U. You can also access the quantization function by:
Before you Quantize
If you do not address this issue you will get quantization errors where your audio or MIDI will snap to the wrong bar. Either playing before or after the intended bar. You can affect your overall quantization settings, your grid settings, and grid divisions.
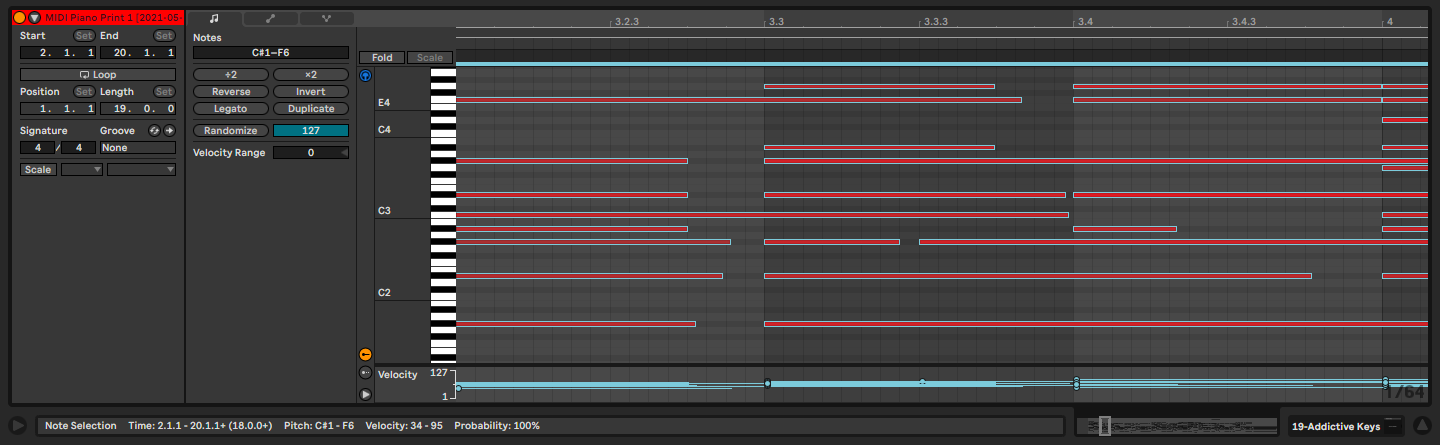
Quantization Settings
You can see in this example that the grid divisions are in 1/8ths. Longer than the off-note difference to the bar.
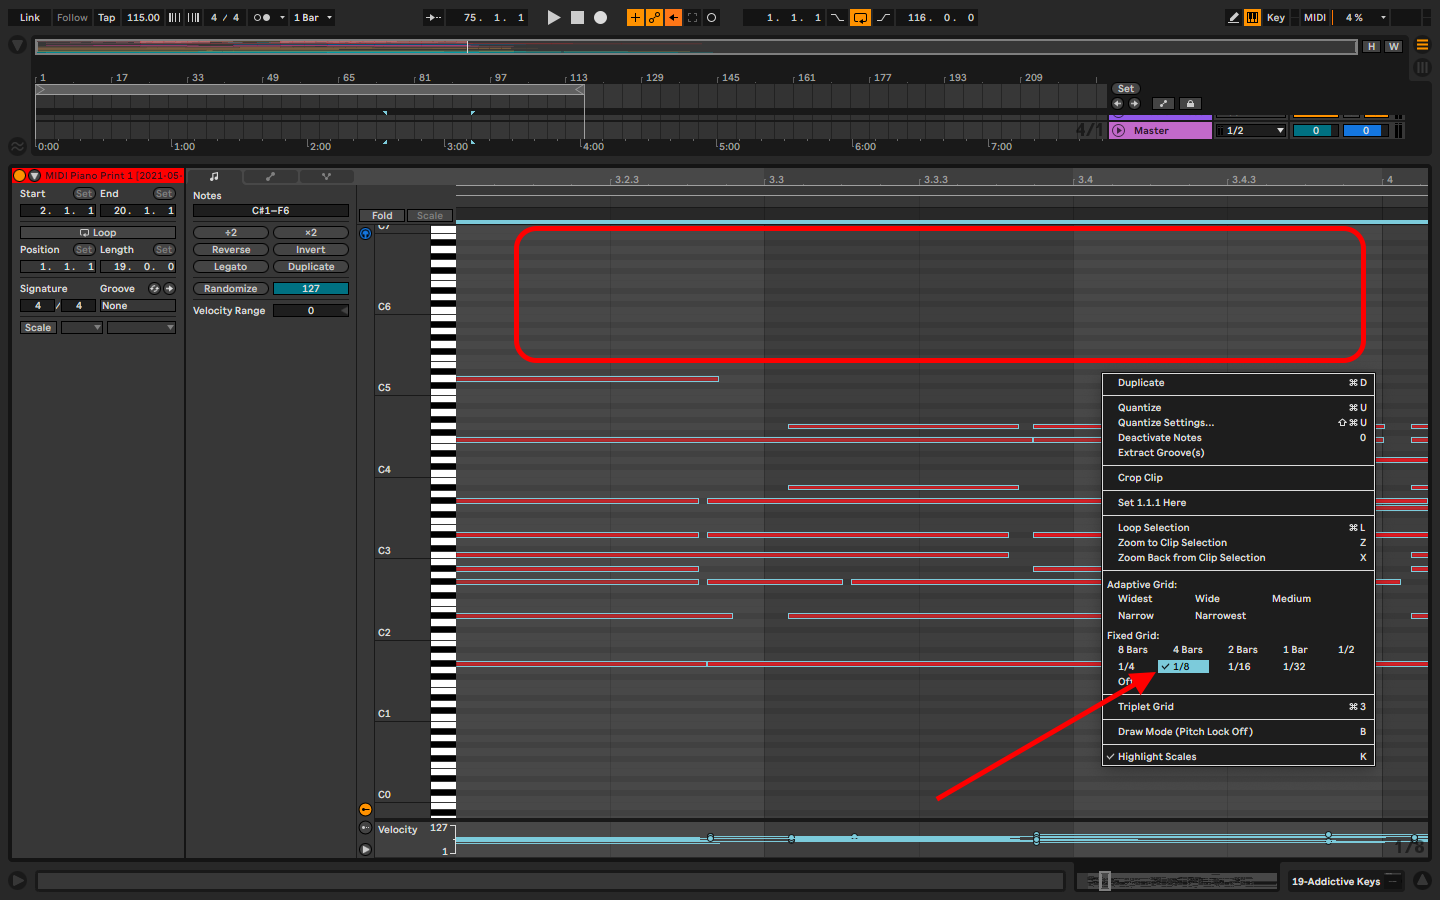
If you quantize in this mode, your notes will quantize incorrectly. You can set a hard rule for how Ableton to quantize your audio and MIDI by:
Step 1:
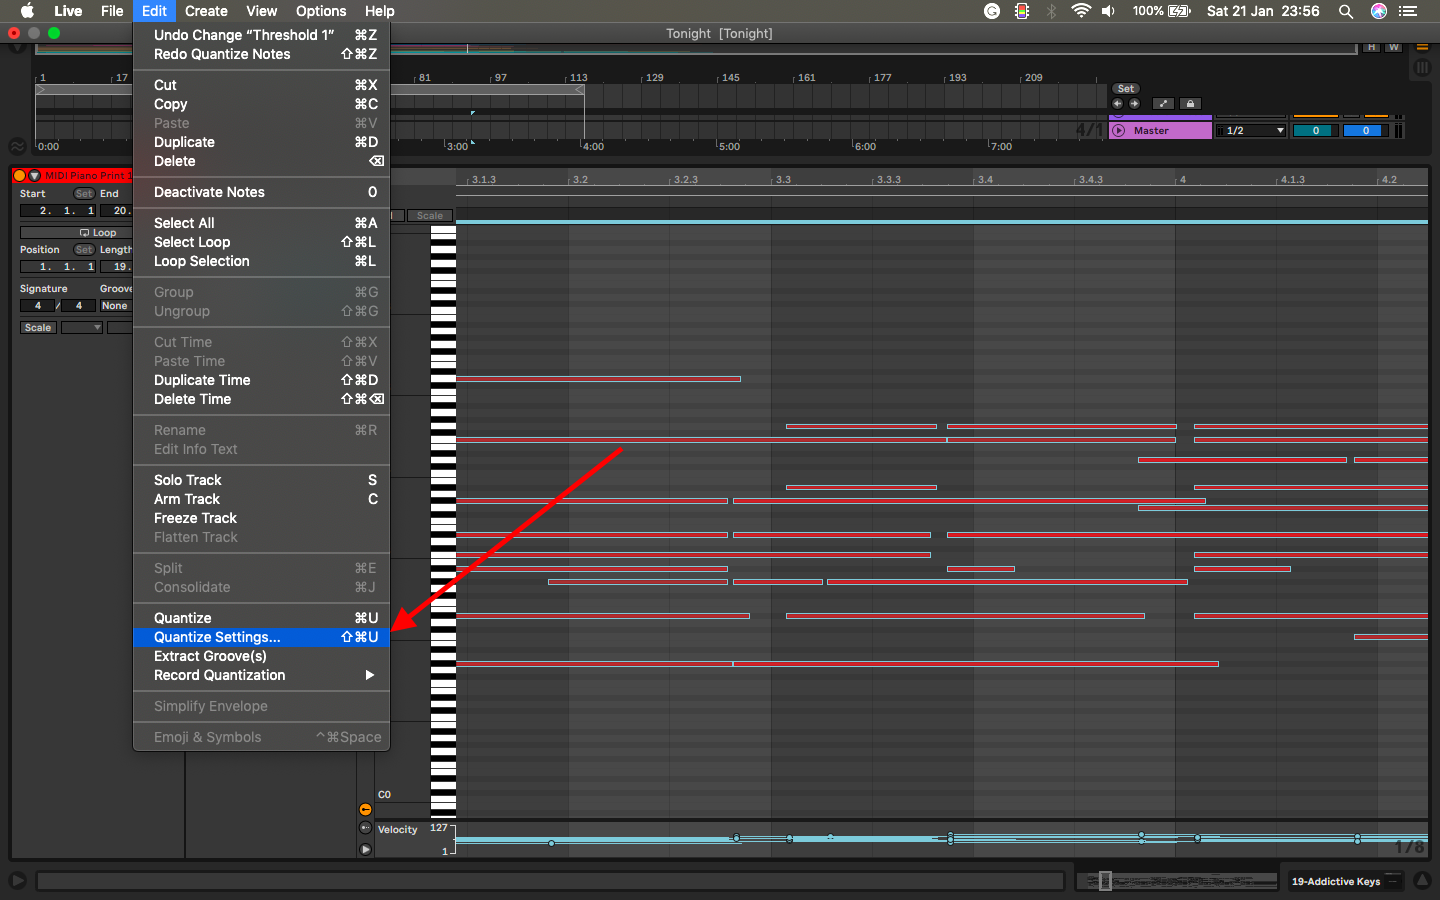
Go to the edit menu and select the quantization setting or via the shortcut, Ctrl + Shift + U – Windows, or Cmd + Shift + U on Mac.
Step 2:
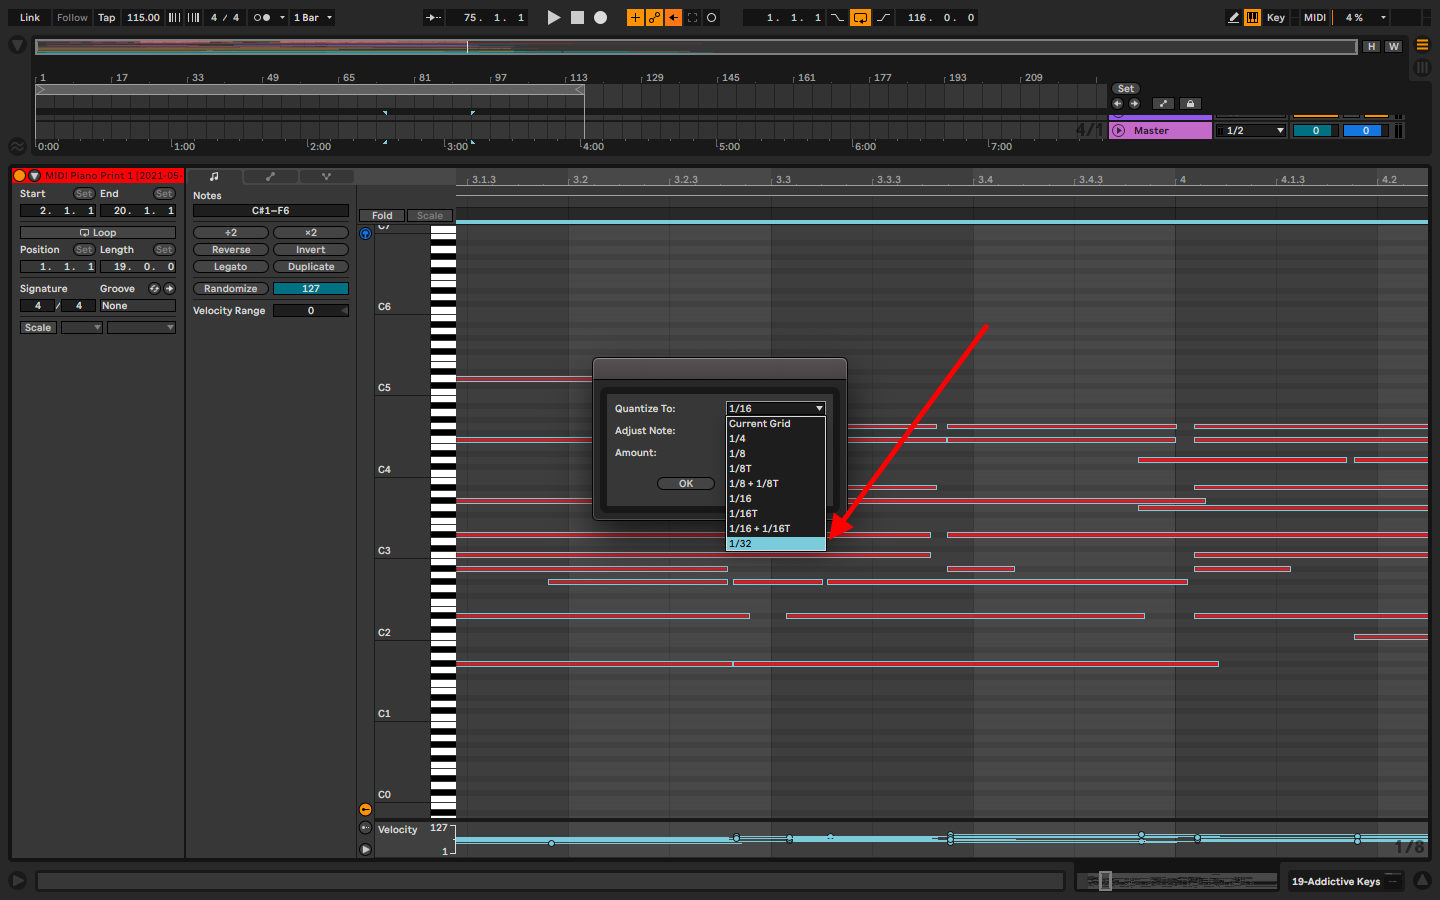
Set the appropriate quantization setting depending on the recording’s difference from the bar.
Step 3:
Highlight the notes you want to quantize and proceed. You can quantize all the notes in a MIDI clip at once if you want by highlighting all the notes with the shortcut Ctrl + A on Windows, or Cmd + A on Machines, and then quantize.
Grid Divisions
For accurate quantization. You can affect your grid length by:
Step 1:
Right-click on your clip view to open the edit menu

Step 2:
Select how your grid behaves. You will find 2 grid types, Adaptive – this option depending on the option you select, allows your grid to divide itself and continue to divide itself further when you zoom in or out. Fixed – this makes your grid rigid, and unchanging even when you zoom in or out.
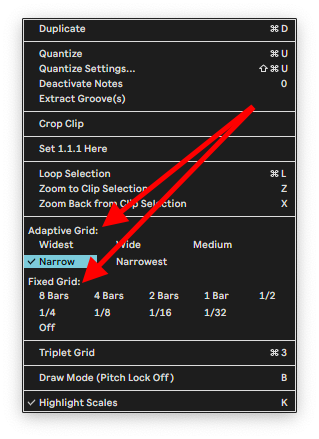
Depending on how you divide your grid or set your quantization setting, you will get the best results by first analyzing the difference between the grid and your recording.
How to Quantize MIDI
Step 1:
Go to the edit dropdown menu

Step 2
Select quantize
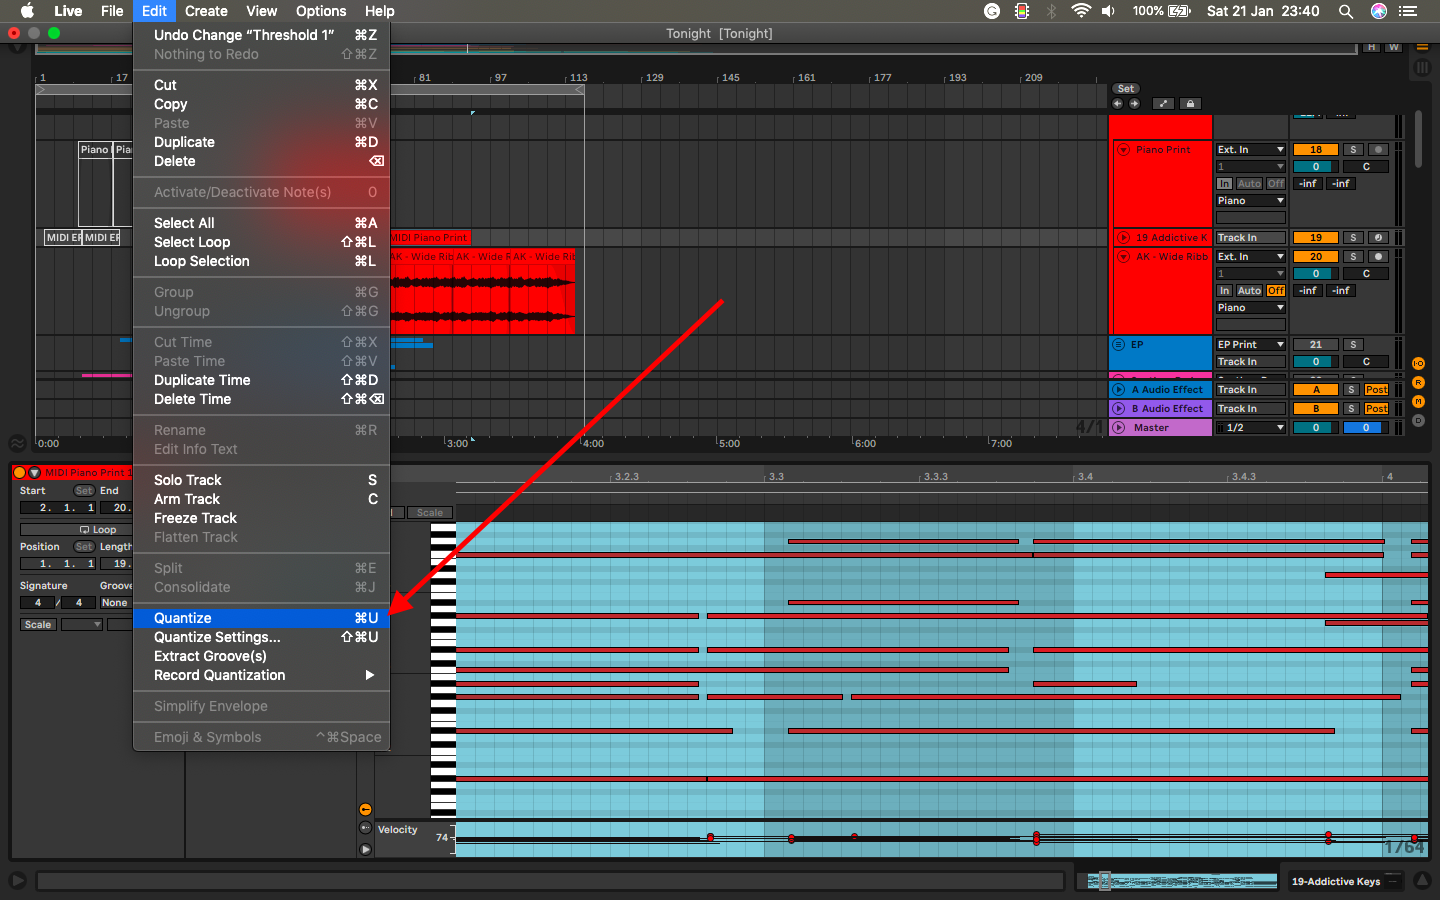
This will snap everything in time
Or simply use the shortcuts( Windows computer, Ctrl + U, and on Mac, Cmd + U).
Tip!
When recording MIDI you can make sure Ableton quantizes audio before you have to during the recording process by recording quantization. This is how you do it:
Step 1:
Go to the edit option and open the Record quantization menu.
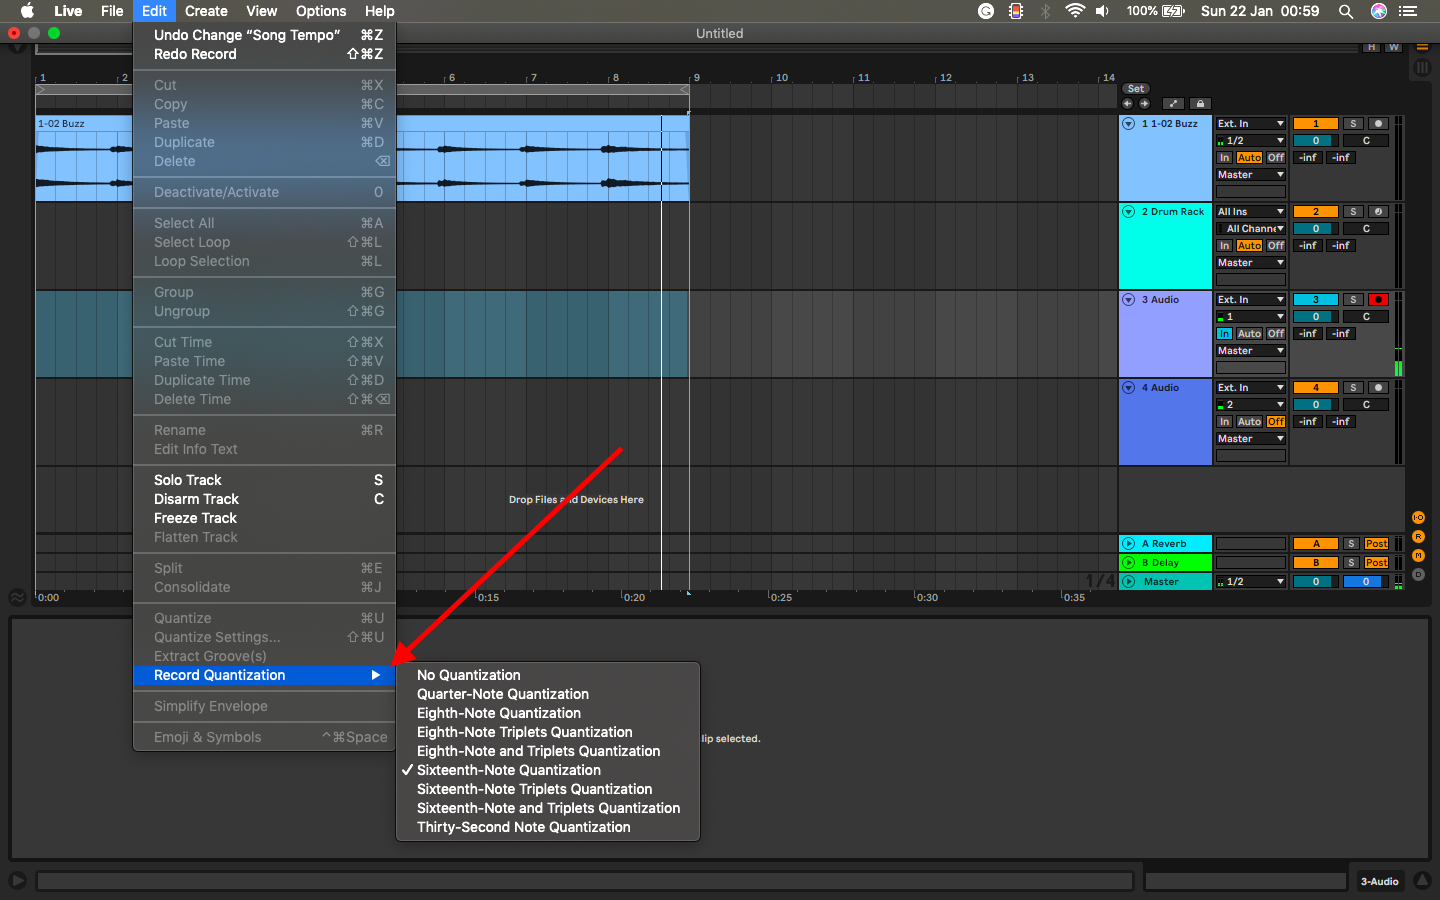
Step 2:
Depending on the play style according to timing, select how your MIDI input quantization should be treated and recorded.
This quantizes your recording by how you chose Ableton to treat the MIDI recording.
How to Quantize Audio
Audio is much more complicated to quantize than MIDI. This is because there are different types of audio depending on the type of audio you are recording. These audio categories are either, rhythmic (drums and percussions), melodic (a woodwind, brass, or vocals), harmonic (chords), or complex (full songs or ensembles)
Because of these different orientations to audio, you will have to warp audio to quantize without quantization errors. These errors in audio in audio make your recordings sound skewed and sometimes, robotic, lagged, or too fast. You must know how to treat your audio samples by category to avoid this issue. Here is what you need to know about these audio orientations and what to choose when you are quantizing them.
When you record or import audio samples, depending on the categories I have given above, select the different algorithms, so that Ableton will manipulate them accurately. Here is what these algorithms mean.
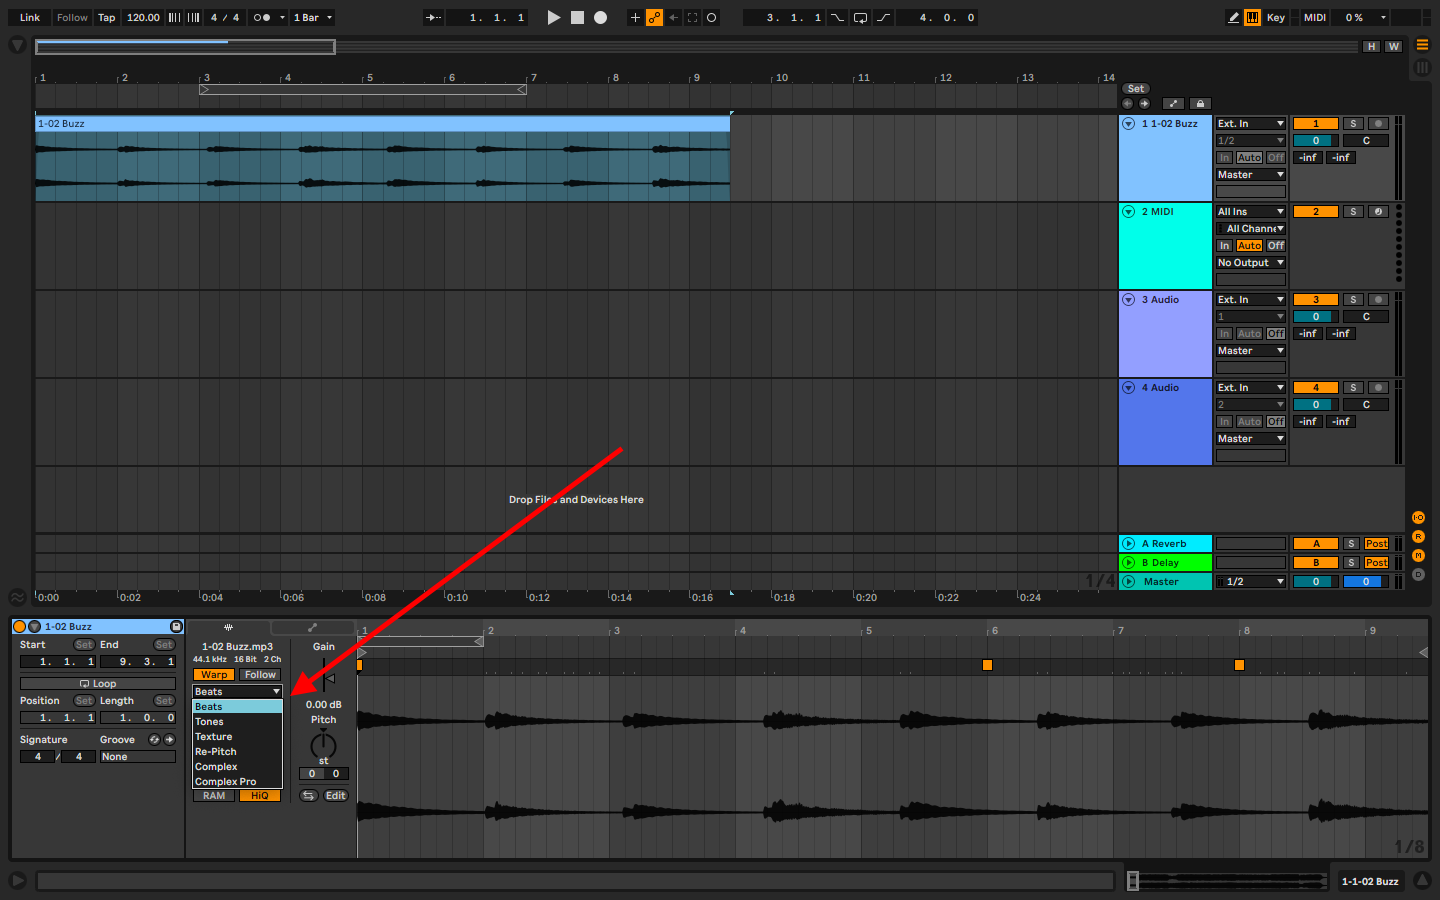
- Beats: This algorithm is designed to handle rhythmic audio
- Tones: this algorithm is best for monophonic (melodic) audio types with a clear pitch I. E. Vocals
- Texture: This algorithm best suits harmonic samples I. E. chords
- Re-Pitch: this algorithm re-pitches the sample by analyzing the difference between the tempo of the project, and the tempo of the sample
- Complex & Complex Pro: these algorithms are best suited for samples that have various elements in them.
Once you have recorded your audio or imported your sample (more on how to sample and resample in Ableton here), and selected the most suitable algorithm, quantize your audio by:
Step 1:
Use the shortcuts (Windows computer, Ctrl + U, and on Mac, Cmd + U) or step 1 and 2 on how to quantize audio.
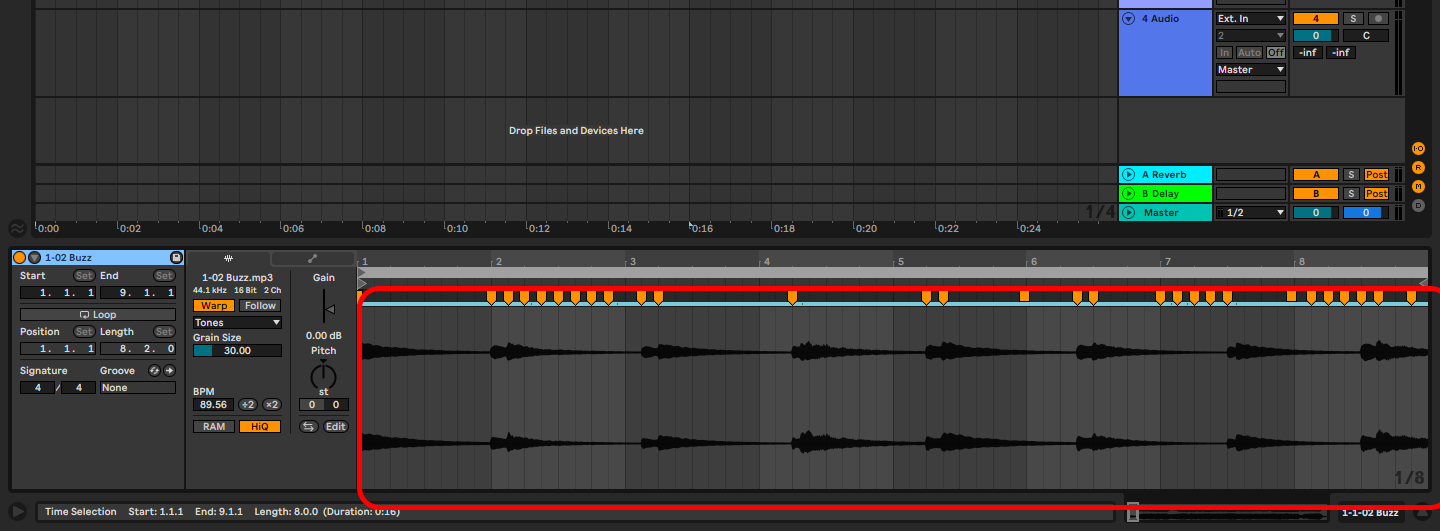
This creates warp markers that you now manually adjust if the quantization was not accurate.
Step 2:
Manually adjust your warp markers for accurate quantization.
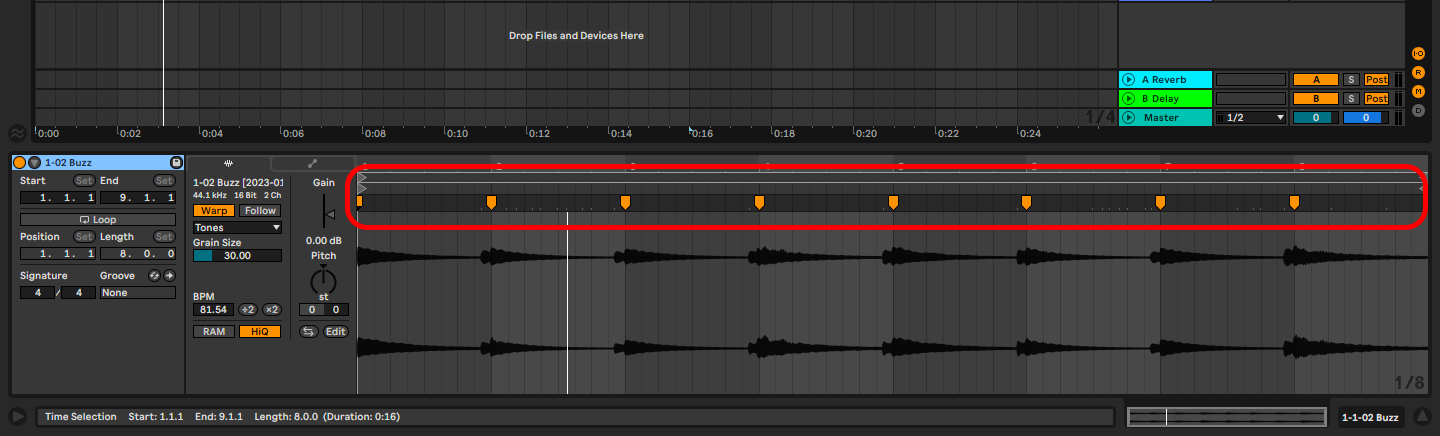
Feel free to remove unwanted warp markers—more on how to chop and treat audio samples here.
Final thoughts
Quantization is simple and direct and typically comes as the next step after any recording.
There are different instances in which you will need to quantize your recordings and others where it is better not to. This choice is up to you as the producer to choose when and when not to, the choice is yours. Have fun!
- How to Use Ableton Live’s Arpeggiator? - September 18, 2023
- How to Use the Piano Roll in Ableton Live + Shortcuts - September 18, 2023
- Ableton Arrangement View (Optimization & Usage) - September 16, 2023
![Ableton Tuner Not Working [FIXED]](https://ProRec.com/wp-content/uploads/2023/07/default-tuning-settings-ableton-180x180.png "Ableton Tuner Not Working [FIXED]")


![Ableton No Sound (Monitors & Headphones) [FIXED]](https://ProRec.com/wp-content/uploads/2023/05/greyed-out-muted-tracks-ableton-180x180.png "Ableton No Sound (Monitors & Headphones) [FIXED]")
 + Shortcuts)