Normalization can be one of those obscure terms that doesn’t really get explained in the audio community when you’re starting out. I’ve seen the fear in the comments and posts with concurrent doubts about it. So, I figured, why not write an article about it? Let’s explore what normalizing is, how to use it in REAPER and when it makes sense to use it.
Recommended Read: How to Sidechain in REAPER
What is Normalization?
Normalization is the process of altering the amplitude of an audio item so that one of its measured parameters reaches a certain value.
When an audio file is normalized, the volume of the file gets adjusted so the loudest peak reaches either 0 dB or -1 dB. The idea is to get the loudest part as ‘loud as possible’, without introducing any clipping or distortion.
Normalization can be a useful tool for increasing the volume of a track that is too quiet or for making multiple tracks consistent. However, normalization does not improve the quality of the audio. It’s important to use normalization carefully and in conjunction with other techniques, such as compression and EQ, so that the final mix is well-balanced and pleasing to the ear.
The most common way of normalizing is to set the peak level at 0dB. If you’ve ever seen or heard anyone talk about normalizing, this is probably what they’re referring to. By normalizing to this level, you make sure that the normalized audio items stay just below clipping.
Other parameters that can be used for normalizing are RMS and LUFS levels, which are different averaging methods and units. When applied to all the audio in a project properly, it facilitates having everything around the same perceived level.
Now, REAPER has a few quick and simple tools to normalize to all of these units natively. Let’s check them out
How to Normalize in REAPER
Normalize Dialog
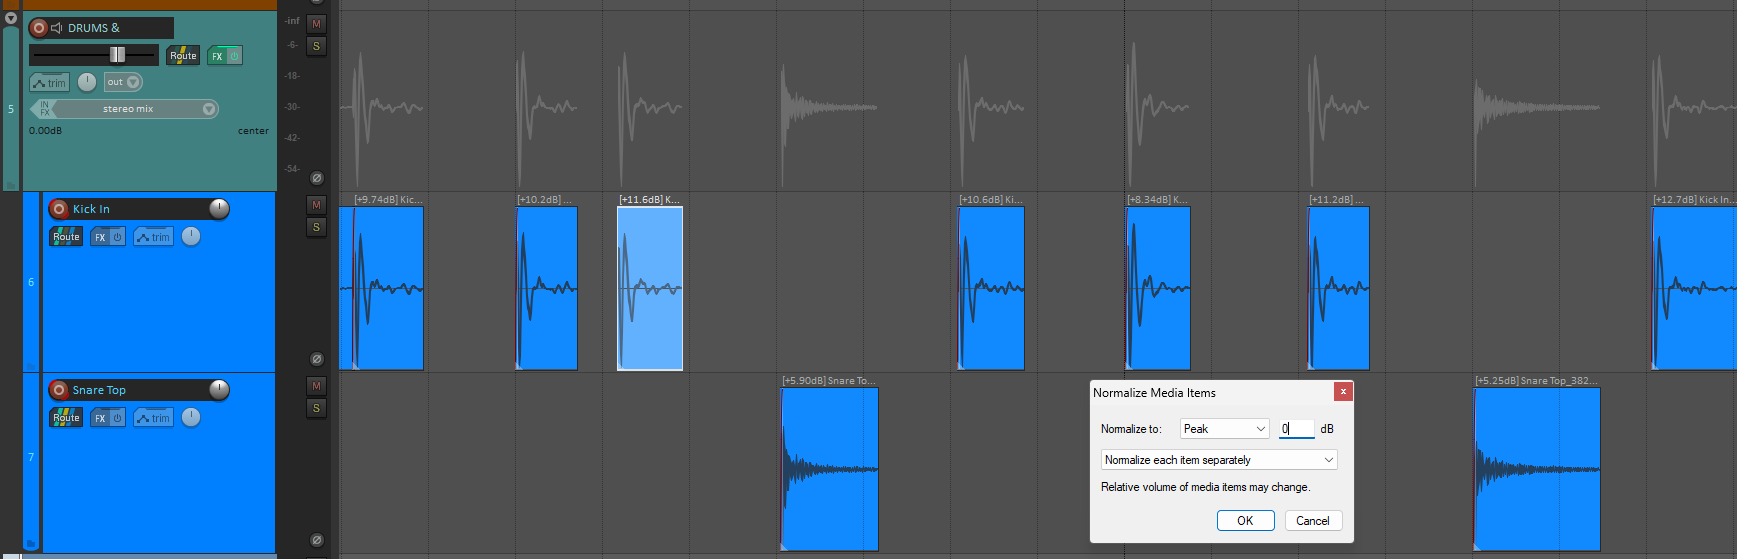
The easiest method for normalizing audio is by using the Normalize dialog. First, select the audio items you want to normalize.
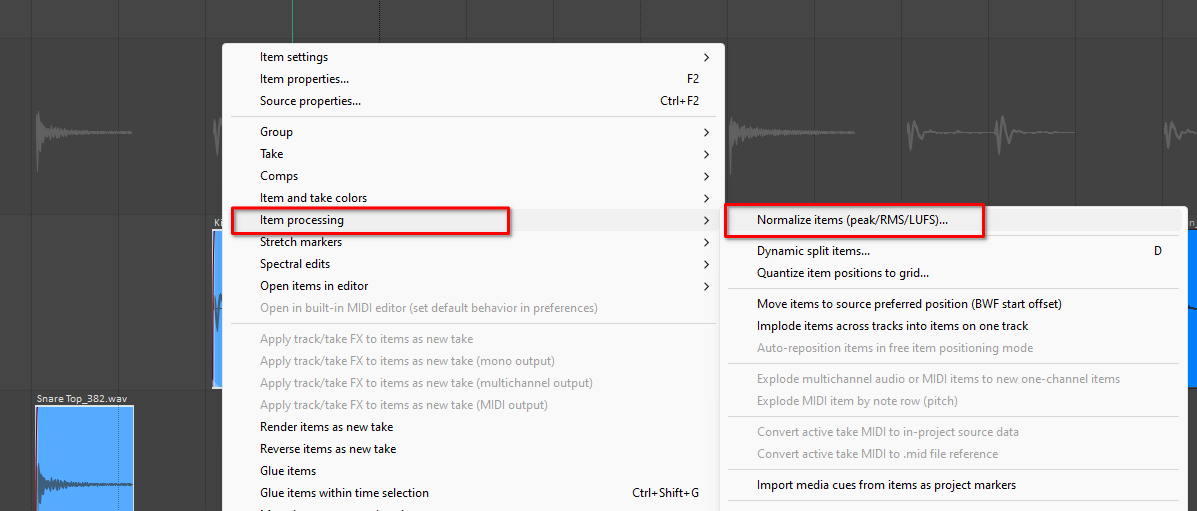
Then, right click any of those items and go to the option Item processing, then Normalize items (Peak/RMS/LUFS)…
Here, you can tailor the normalization to your specific needs. First it’s the audio parameter that you want to normalize.
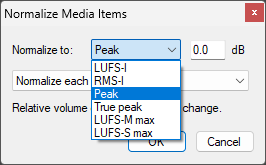
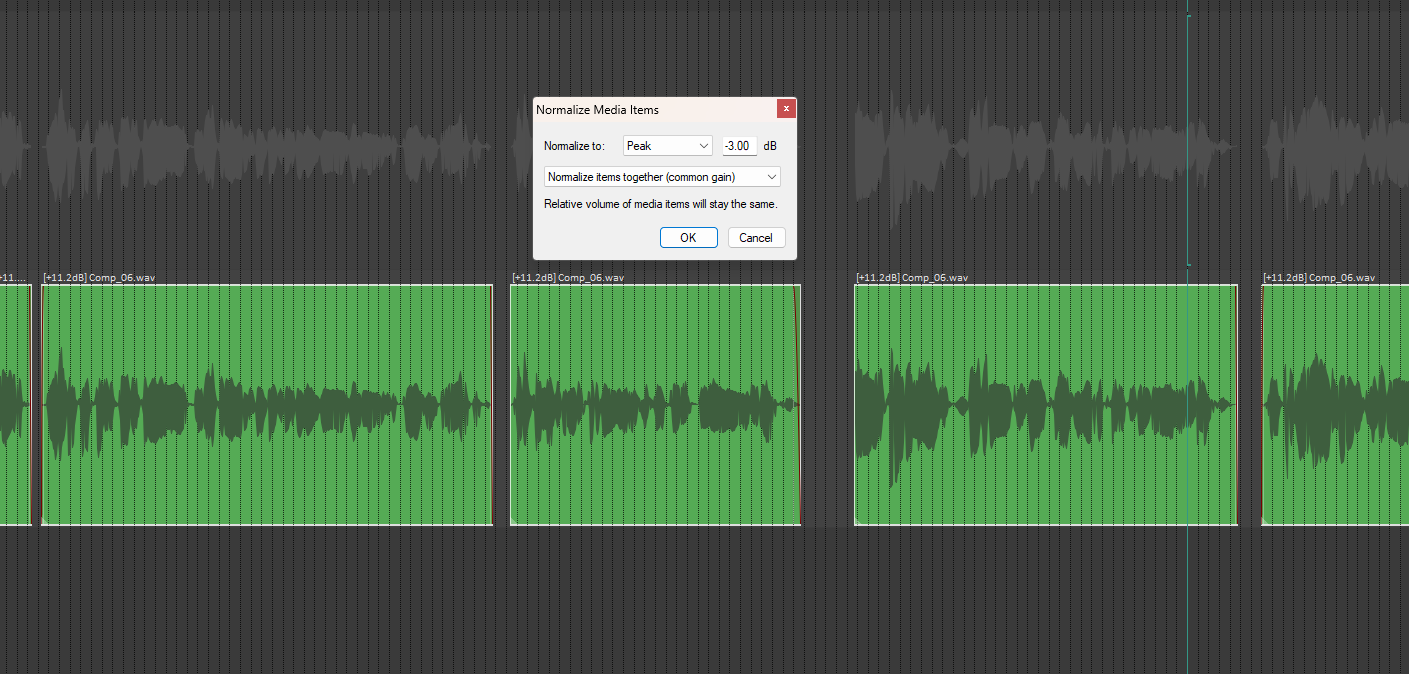
Peak: takes the audio sample that has the highest absolute amplitude and makes its level match with the number on the right, then adjusts the rest of the audio item accordingly.
True peak: over-samples the audio before normalizing, taking into account intersample peaks for the process, which tend to have a slightly higher measured level.
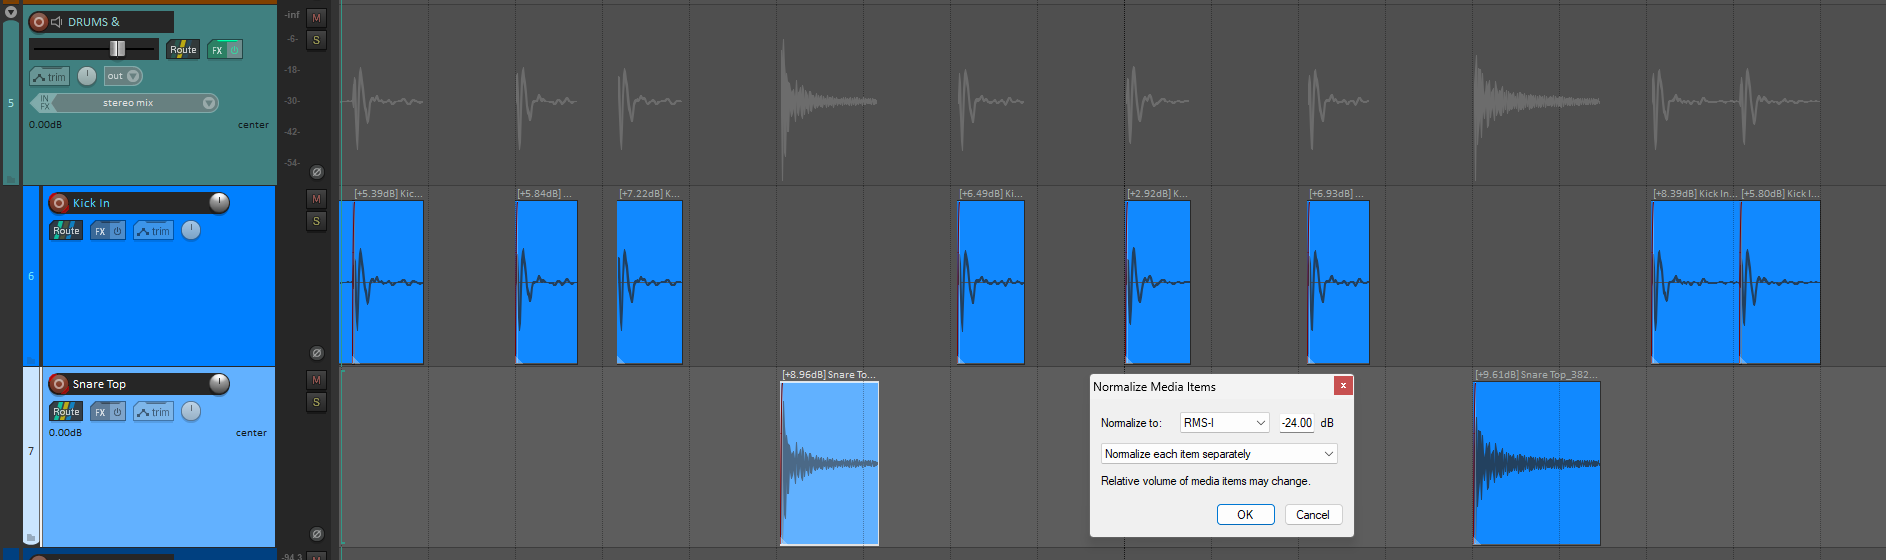
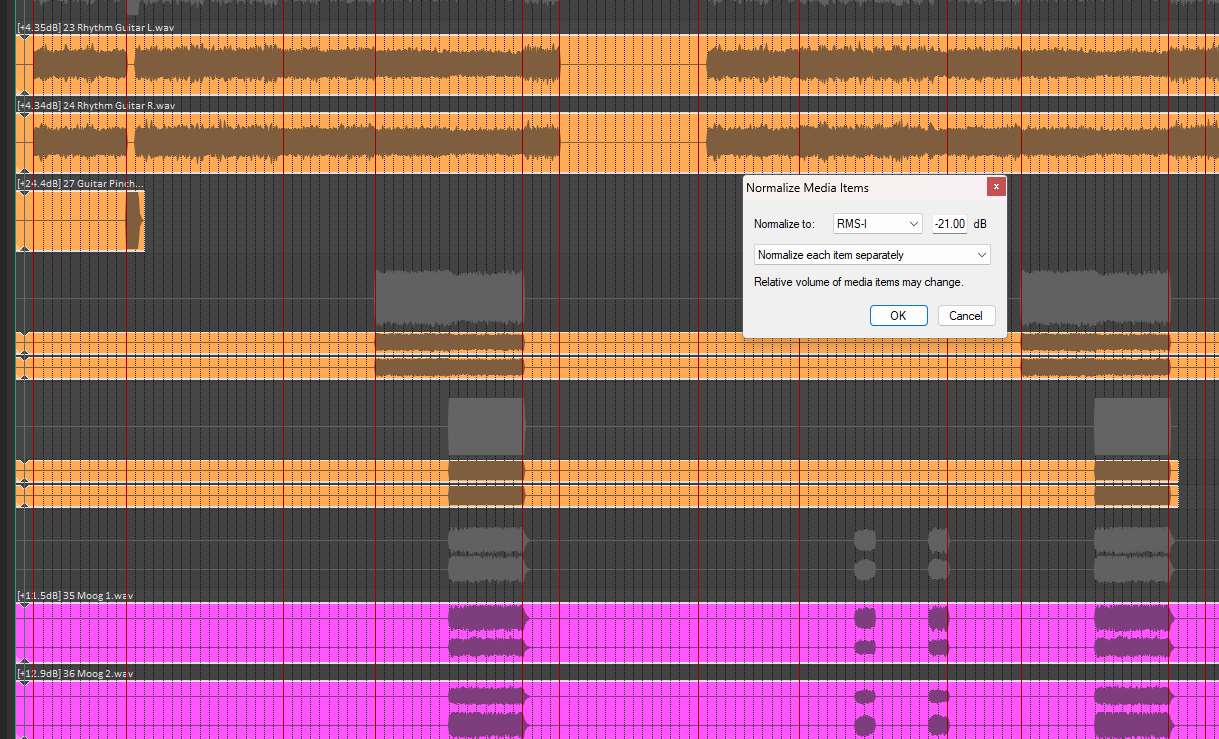
RMS-Integrated: averages the energy of the whole audio item to a single number, then increases or decreases the amplitude of the audio item so that the RMS level matches the value on the right.
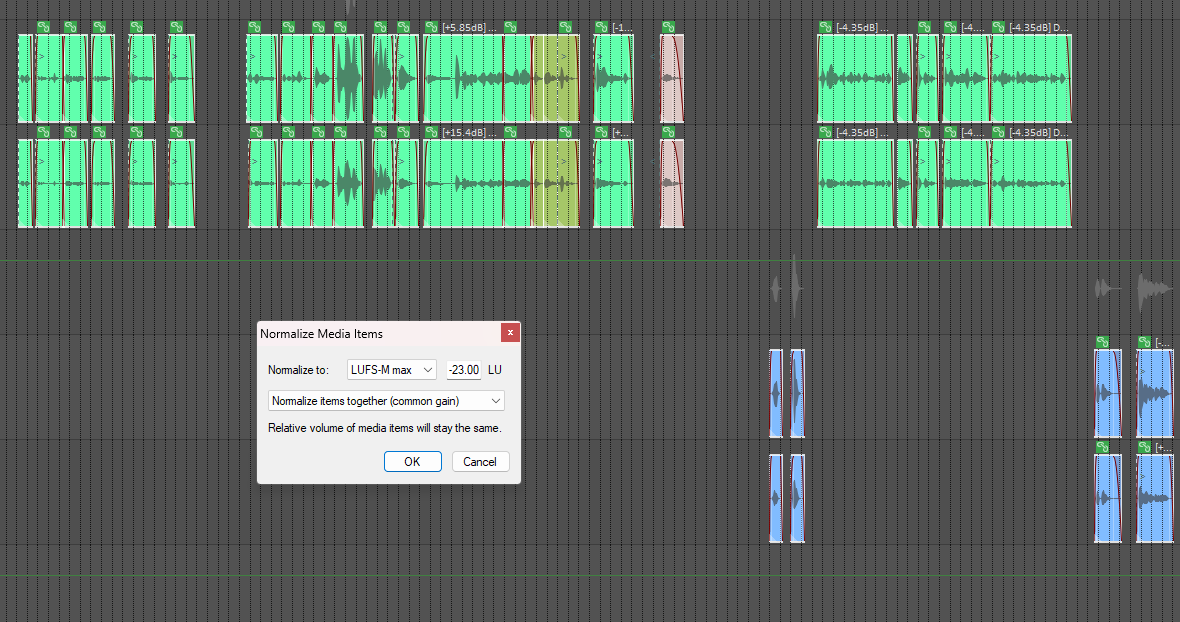
LUFS: is a different kind of averaging that more accurately approximates human hearing. It can take into account the whole audio item with the Integrated(LUFS-I) value, just like RMS-I, But it can also use different averaging window maximums like Maximum momentary(LUFS-M max), or Maximum short-term(LUFS-S max).

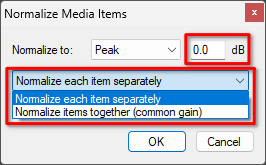
Just to the right of it, is the value you want to match. And below that, you can select if you want to treat each audio item separately or normalize to a common value along all the selected items, keeping the relative level between them intact.
Then, click OK to apply the normalizing. MIDI items will be ignored.
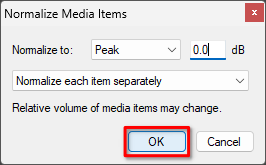
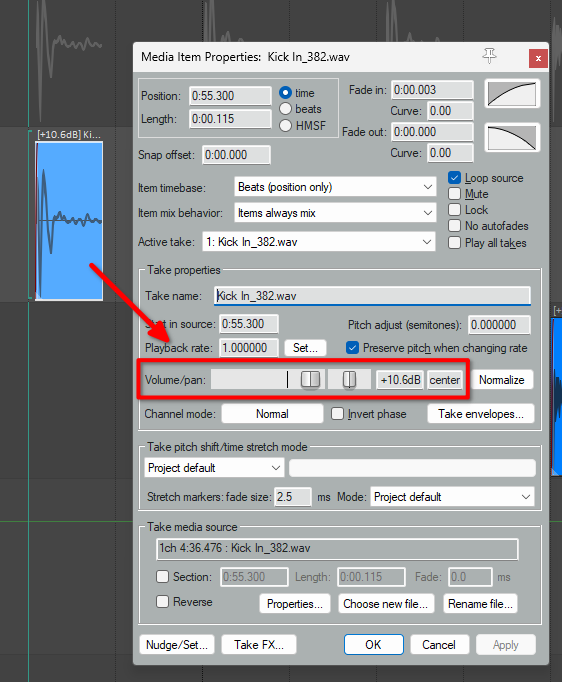
This will modify the Item volume parameter inside the Item properties so that the parameter you chose reaches the level you typed.
Using actions
There are also a few actions available to speed up your workflow. Try searching ‘normalize’ in the Action list.
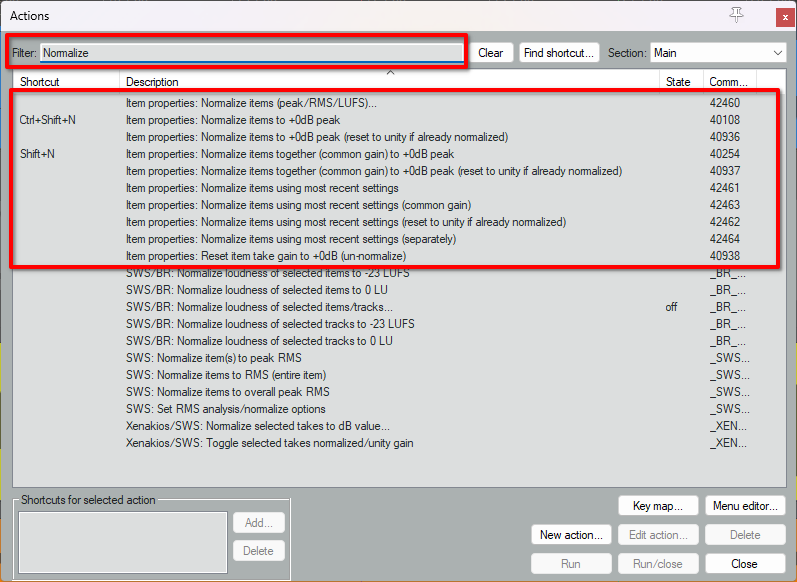
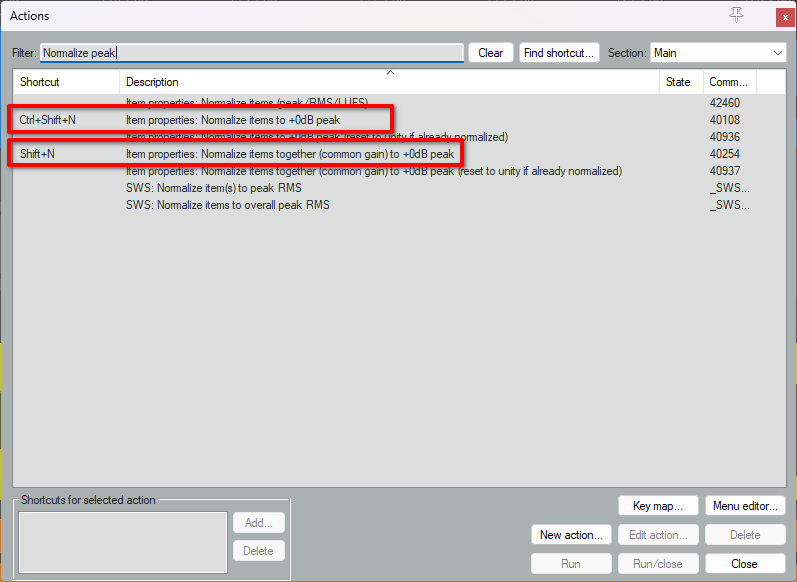
There are a few options to normalize peak values to 0dB, Ctrl+Shift+N to normalize individually or Shift+N to normalize to a common gain
Or if you don’t want to open the Normalize dialog each time, you can use the actions that include ‘using most recent settings’.
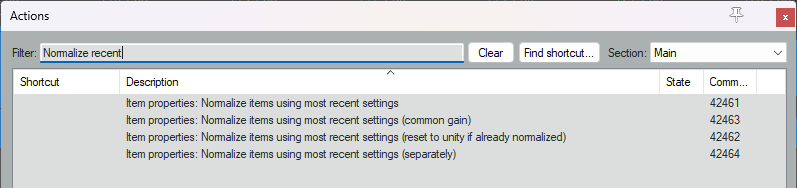
Here you can set up the Normalize dialog just one time and set up a few shortcuts, saving you time that you can spend in other parts of your projects.

FAQ
Now that you know what normalizing audio is and how to do it, let’s answer some of the most common questions and bust a few myths along the way.
What Value Should I Normalize to?
Normalizing is not a ‘must’ in audio work so it depends on the end goal, but here are a few examples of where it makes sense and what parameters are used.
In post-production it’s a requirement to have dialogs measured at -23LUFS or -27LUFS depending on the media the audio is intended for, so normalizing really makes hitting that target fast and easy even with processing applied.
In music production, it’s not rare to hear renowned mixing engineers say that they normalize all their tracks before mixing. Some normalize to one or various peak values depending on the instrument, some like to normalize to -21 or -18 dB RMS. It can help tremendously with the gain staging and hitting that sweet spot for plug-in emulations or hardware processors.
When I have to edit a podcast or a radio spot, I like to normalize to -3dB peak. It helps me make sure that I’m not clipping any plug-in inputs and gives me enough headroom for processing.
When should I Avoid it?
It’s often advised to normalize your audio so it’s easier to see the waveforms and edit. I firmly believe that that’s not a good reason to normalize your audio on its own. If you need to see bigger waveforms, REAPER has a feature called Peaks display zoom, you can find it in the Peaks display settings.

The easiest way to access these settings is using the View menu at the top.
 <>
<>
You can also use the shortcuts Shift + Up/Down to quickly modify the Peaks zoom on the fly.

It’s also a good rule of thumb to avoid normalizing audio to high average(RMS/LUFS) values since it can lead to clipping.
Is Normalizing the same as Compression?
No, normalizing doesn’t modify your dynamic range or tonal character at all unlike compression or limiting. It’s common to suddenly hear the noise of a recording after normalizing it, this usually happens because with the sudden amplitude change, the noise in the recording can rise above the noise levels of your listening medium and become evident to human perception.
Final Words
Although normalizing is not a necessary process for most applications, it sure is one of those tools that just make your life easier. It may take a few tries to get the desired result out of it and properly integrate it into your workflow. Don’t discard it right away if it doesn’t work how you expect at first. Believe me, it can save you precious time. Also, take a look at the REAPER section to discover other awesome tools and features that are available at your disposal. Happy producing!

- Mixing in REAPER [ULTIMATE Guide!] - September 18, 2023
- How to Record in REAPER (Guitar & Vocals) - August 2, 2023
- Writing MIDI Drums in REAPER - July 3, 2023
")


![Mixing in REAPER [ULTIMATE Guide!]](https://ProRec.com/wp-content/uploads/2023/09/mixing-in-reaper-180x180.png "Mixing in REAPER [ULTIMATE Guide!]")