Introduction
Normalizing for a layman is bringing something to a standard state. This definition can be used with Adobe Audition, albeit with a few more intricacies to the normalization process.
Whenever we record or piece together different audio files, you will find some sections louder than others. The normalizing process is key in giving prominence to the quieter section. Therefore, it is important to note that the process is not there to make the audio have a standard level from start to finish, but to make the quieter parts more audible.
Recommended Read: How to use DeEsser in Adobe Audition
Here is a quick example. When editing a drama podcast episode, there are sections where the characters whisper to each other and another section where there is commotion and shouting. Normalizing ensures that the whispering part remains as is. The impression does not get altered but at the same time the whisper itself is loud enough to be heard.
Follow the steps below to normalize your audio file.
How to Normalize in Adobe Audition
Normalizing can either be done to a particular section of your file or the entire file. If you need to do the former, make sure to select the part that you want to normalize. If you are normalizing the entire file then go ahead and Ctrl + A to select all.
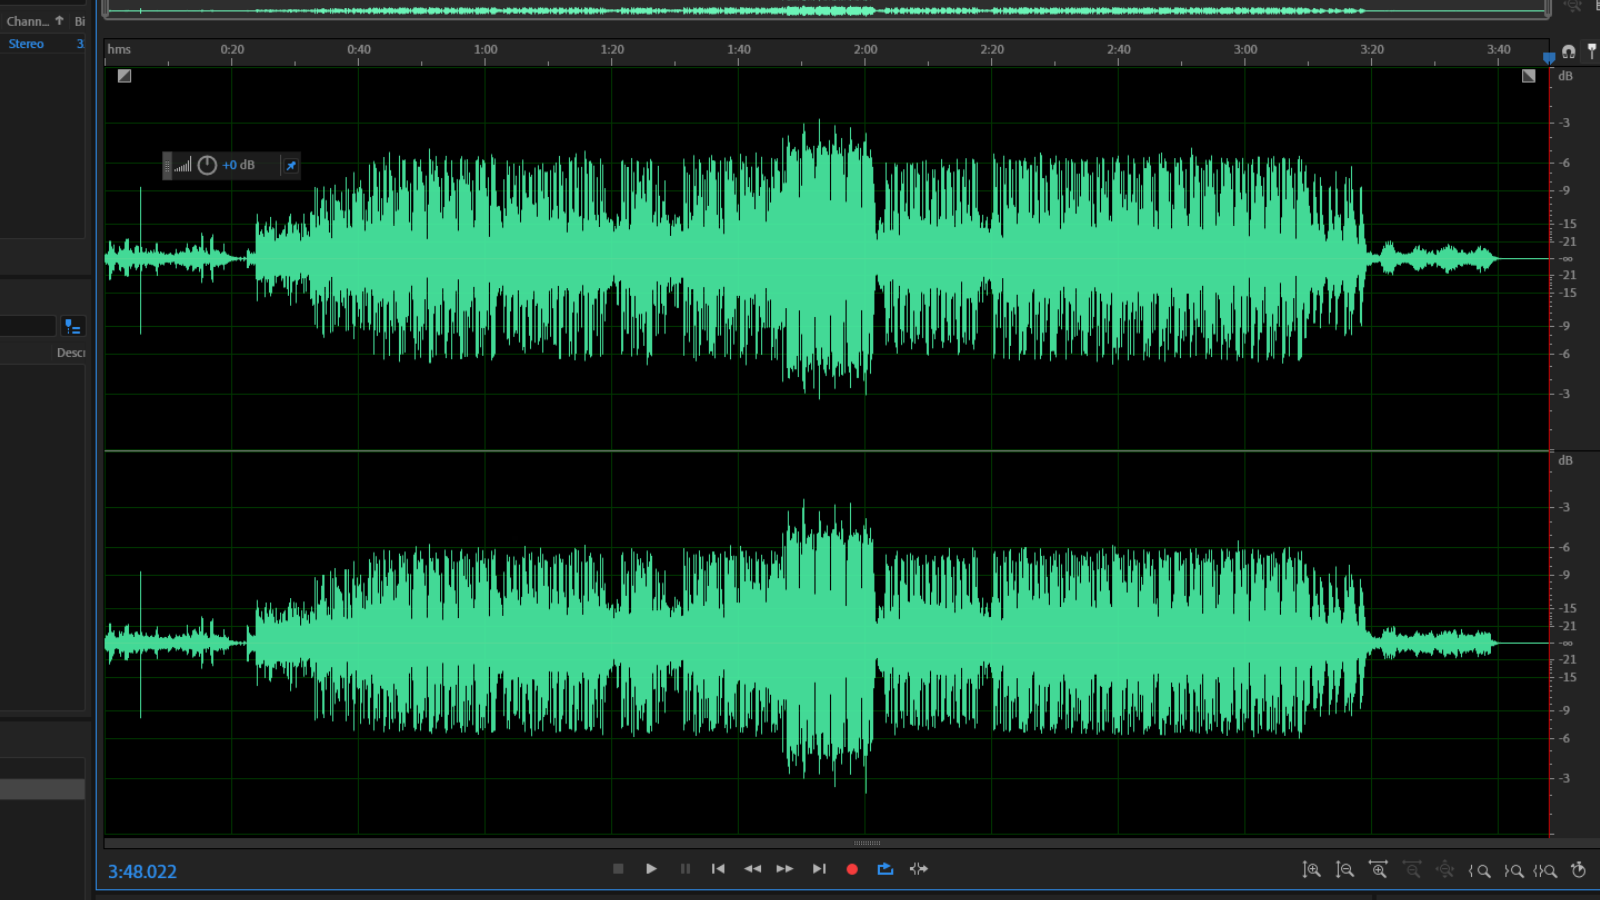
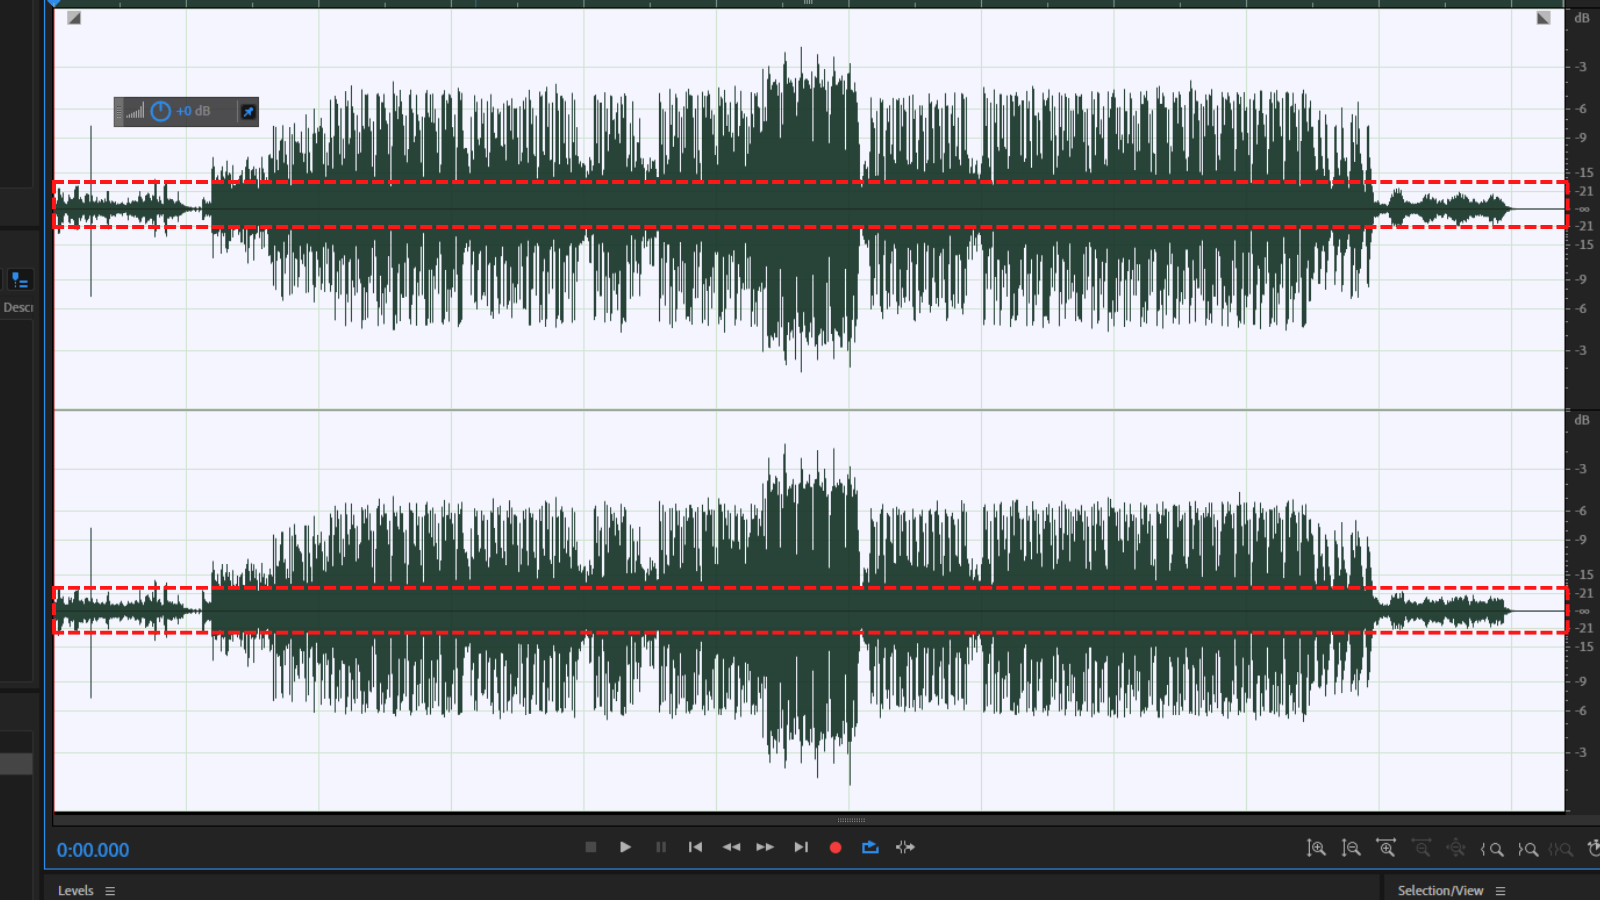
This is what my audio waveform looks like.
The normalizing effect will make the quieter sections of the file louder. How loud the quieter parts are adjusted is dependent on the louder parts of the file. Therefore, this process uses the louder sections of your file as a reference point.
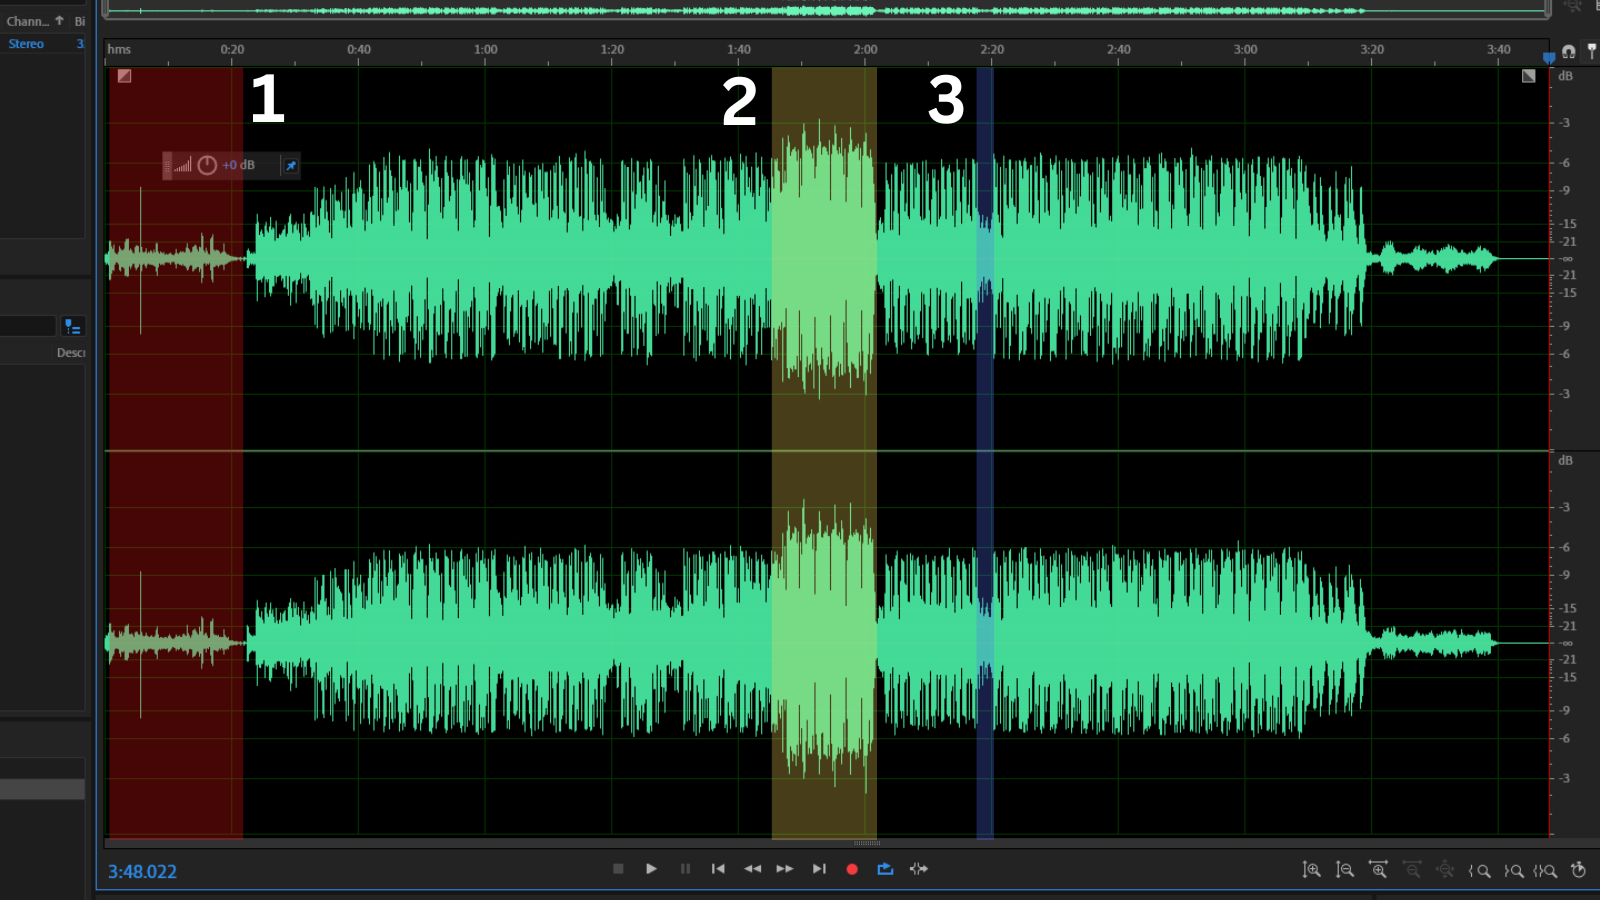
In the screenshot above there are three highlighted sections. Section 1, highlighted in red, is one of the quieter sections of my audio file. Section 2, highlighted in yellow, is the loudest. Lastly, we have section 3 which is highlighted in blue. This part neither falls in the loudest nor the quietest section of the file.
Recommended Read: Adobe Audition on iPad (Possibilities & Alternatives)
Normalizing a file makes softer sections like 1 and 3 louder. First, it takes the peak section of the file, in this case, 2 being the peak, and increases the volume of the lower sections using the peak level as the reference.
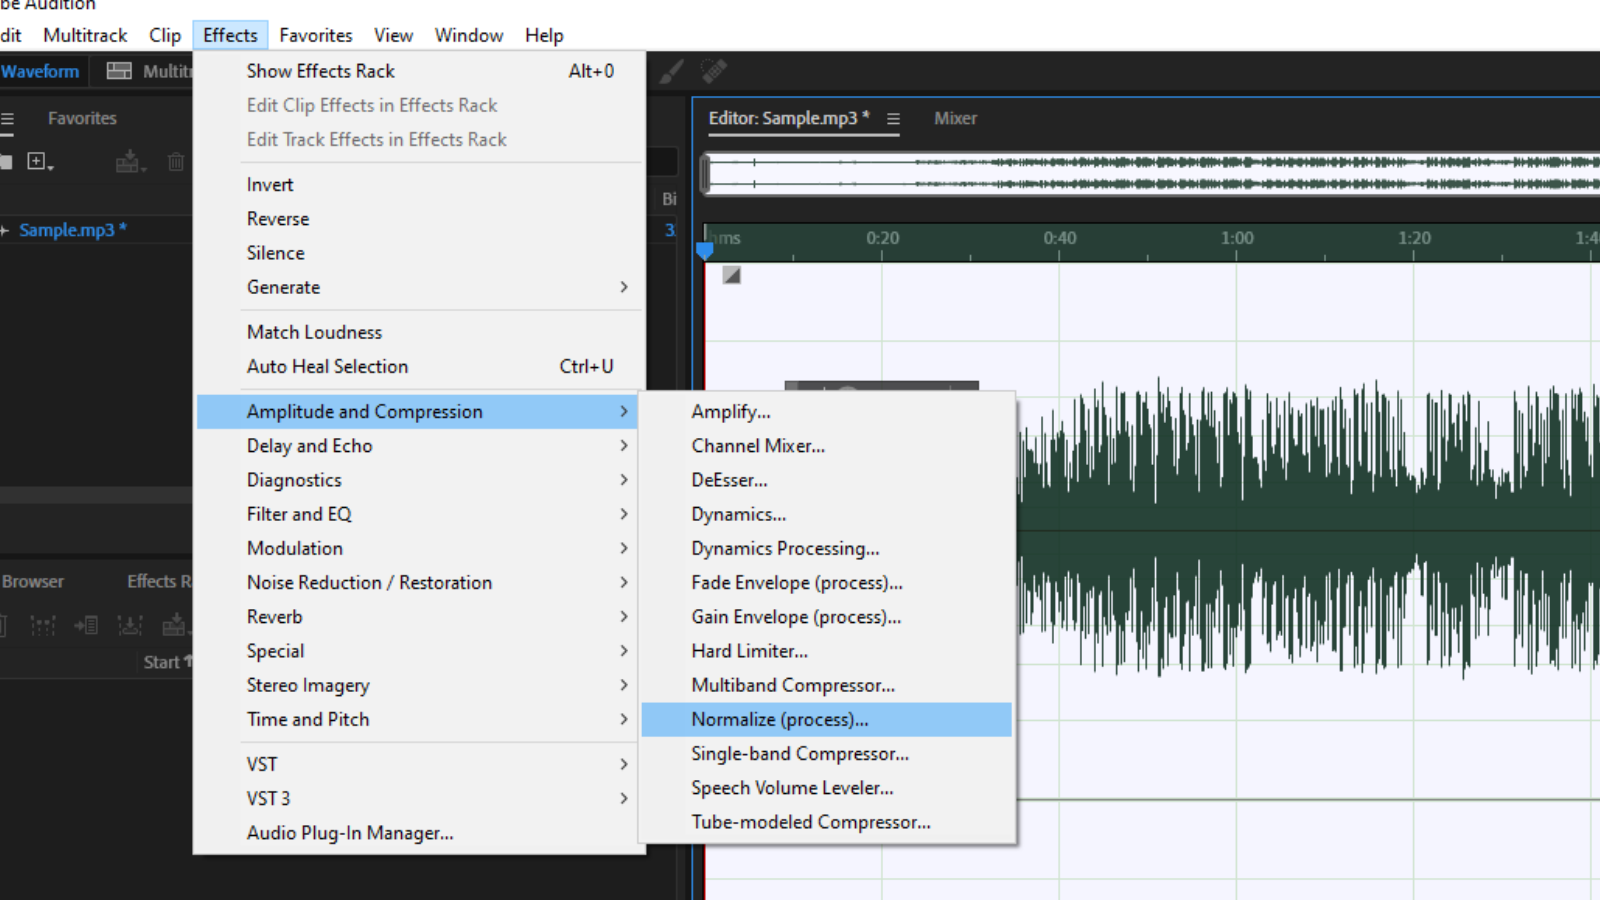
Select either the whole file or the part that you want to normalize and click on the Effects option in the menu tab.
From the dropdown list, hover your mouse over the Amplitude and Compression options.
A new dropdown will pop up. Under the new list click on Normalise (Process)…
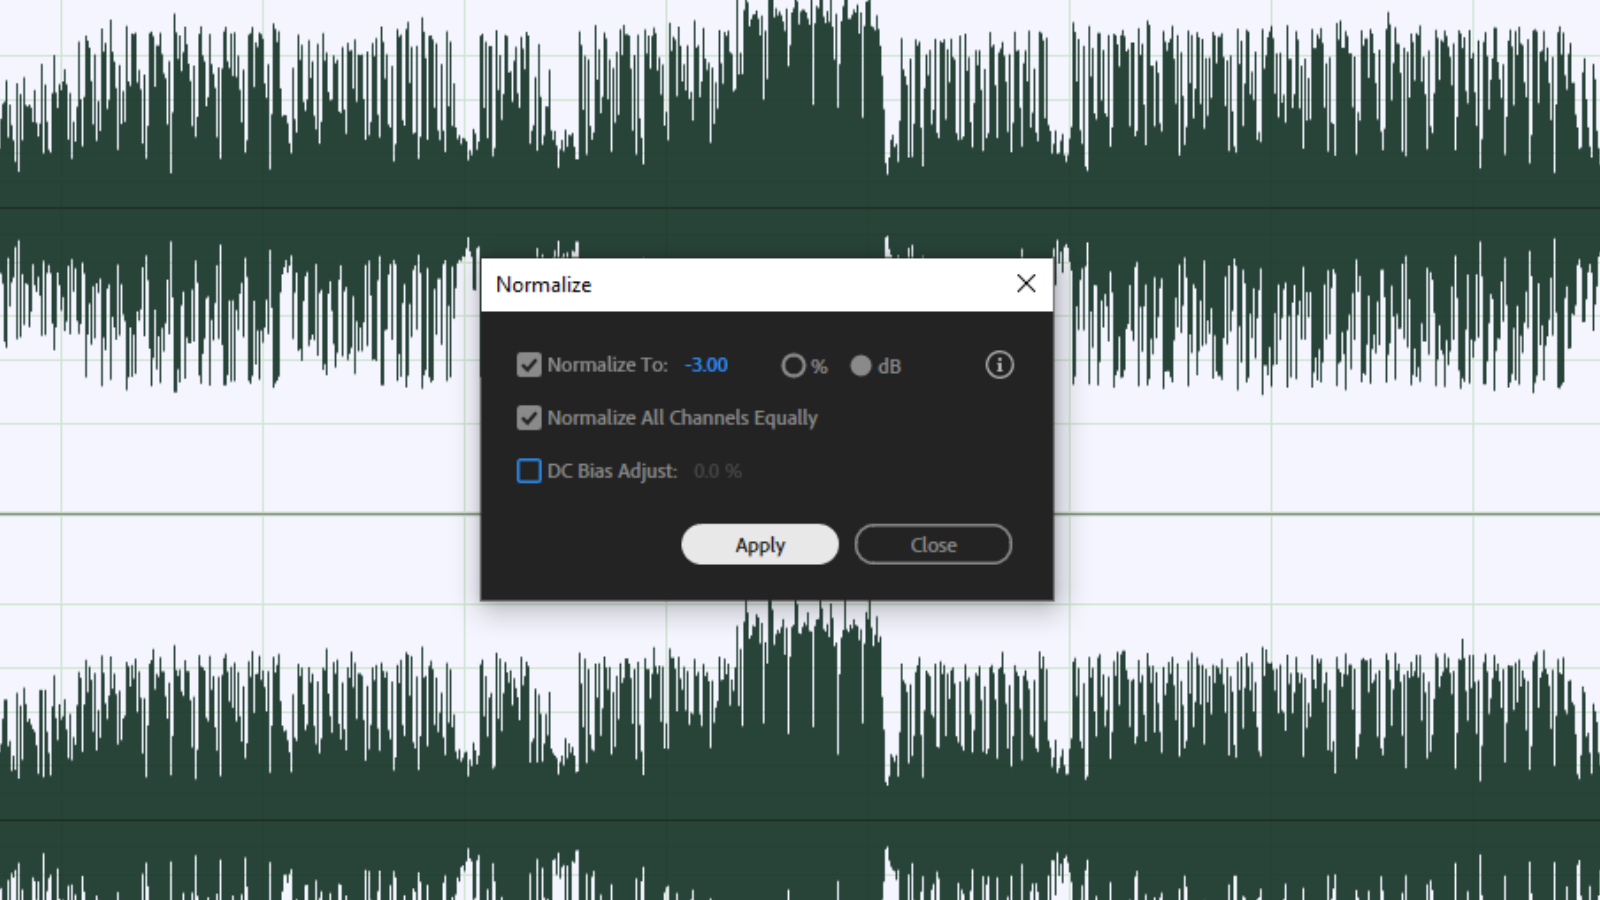
Once you follow the process outlined above you will open the normalize pop-up box as shown below.
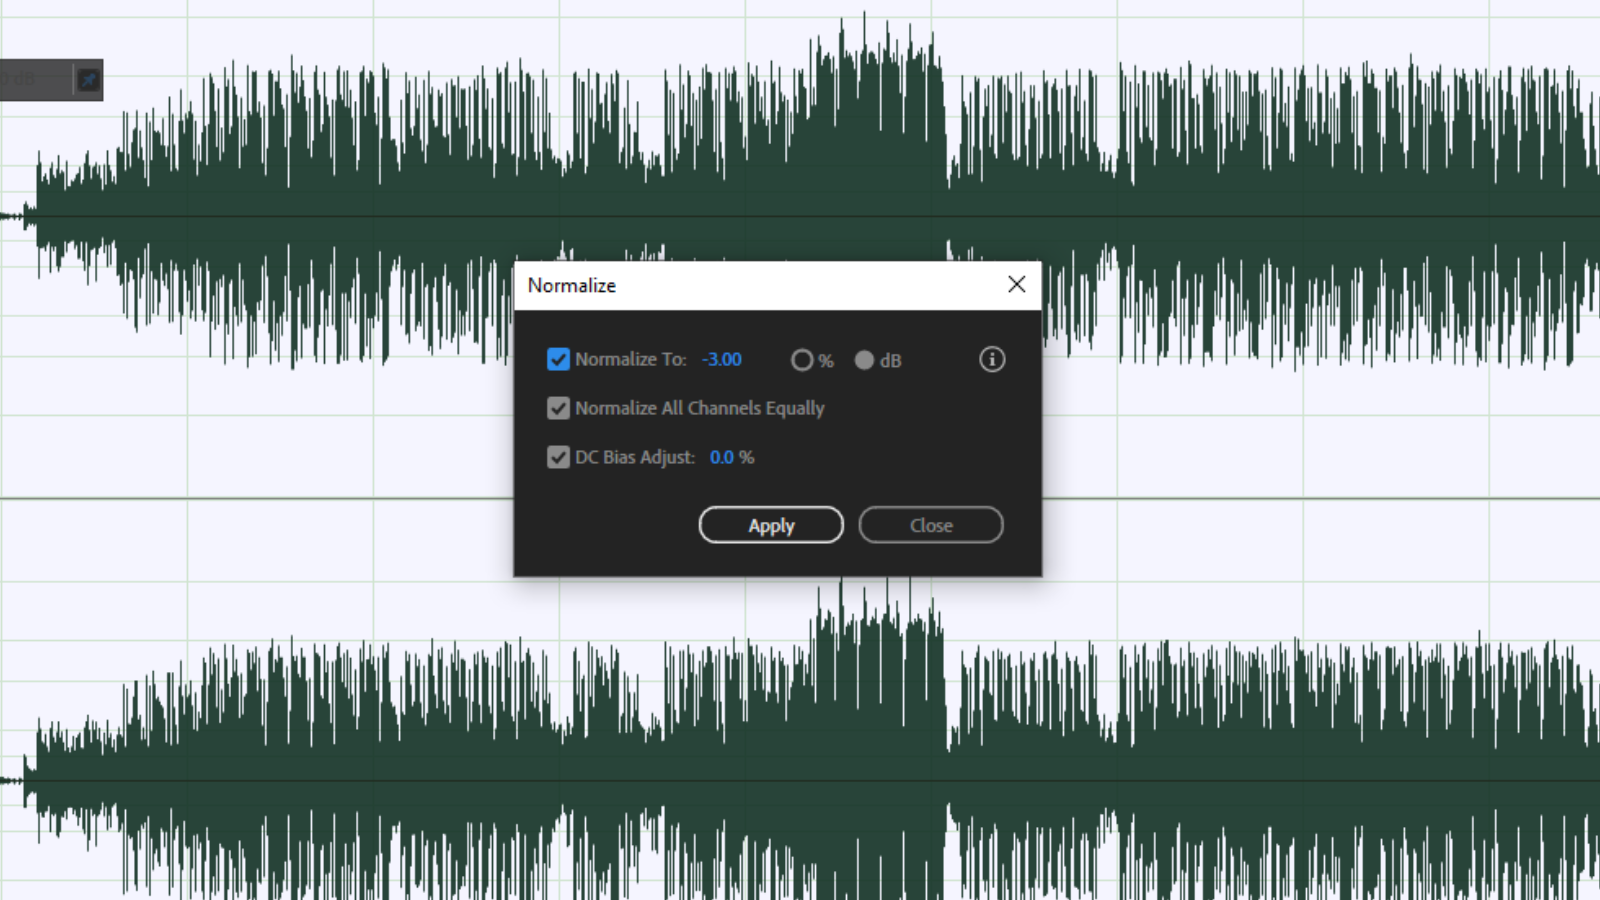
This pop-up box has three sections, Normalize To, Normalize All Channels Equally, and DC Bias Adjust.
The first section – Normalize To – can either be adjusted as a percentage or in dB. To make normalizing adjustments as a percentage, click on the circle next to the percentage sign. If the original file has a loud peak of 70% and the softest parts are 10%, normalizing to 100% makes the loudest peak become 100% and the lowest parts are raised to 40%.
Recommended Read: Is Adobe Audition a Good DAW?
On the other hand, the dB adjustment means you can apply the normalization using a dB figure. A lot of the time -3 dB is usually my go-to number for normalizing. Remember the larger the number the quieter your peak sections will become. For instance, if I key in -6 dB, the audio waveform will get reduced further as compared to keying in the -3 dB figure.
The next section, Normalize All Channels Equally, only has a checkbox. By default, this is usually checked. Whenever you are normalizing a stereo file the amplification is done equally to both left and right channels, that is if you have this option selected. If deselected, normalization will be applied independently to each channel which will cause an imbalance in the level of the file. Therefore, always ensure that this box is checked so you normalize all channels equally.
The last section is the DC Bias Adjust. Once you start a recording in Adobe Audition, you will see two lines highlighted in the image below.
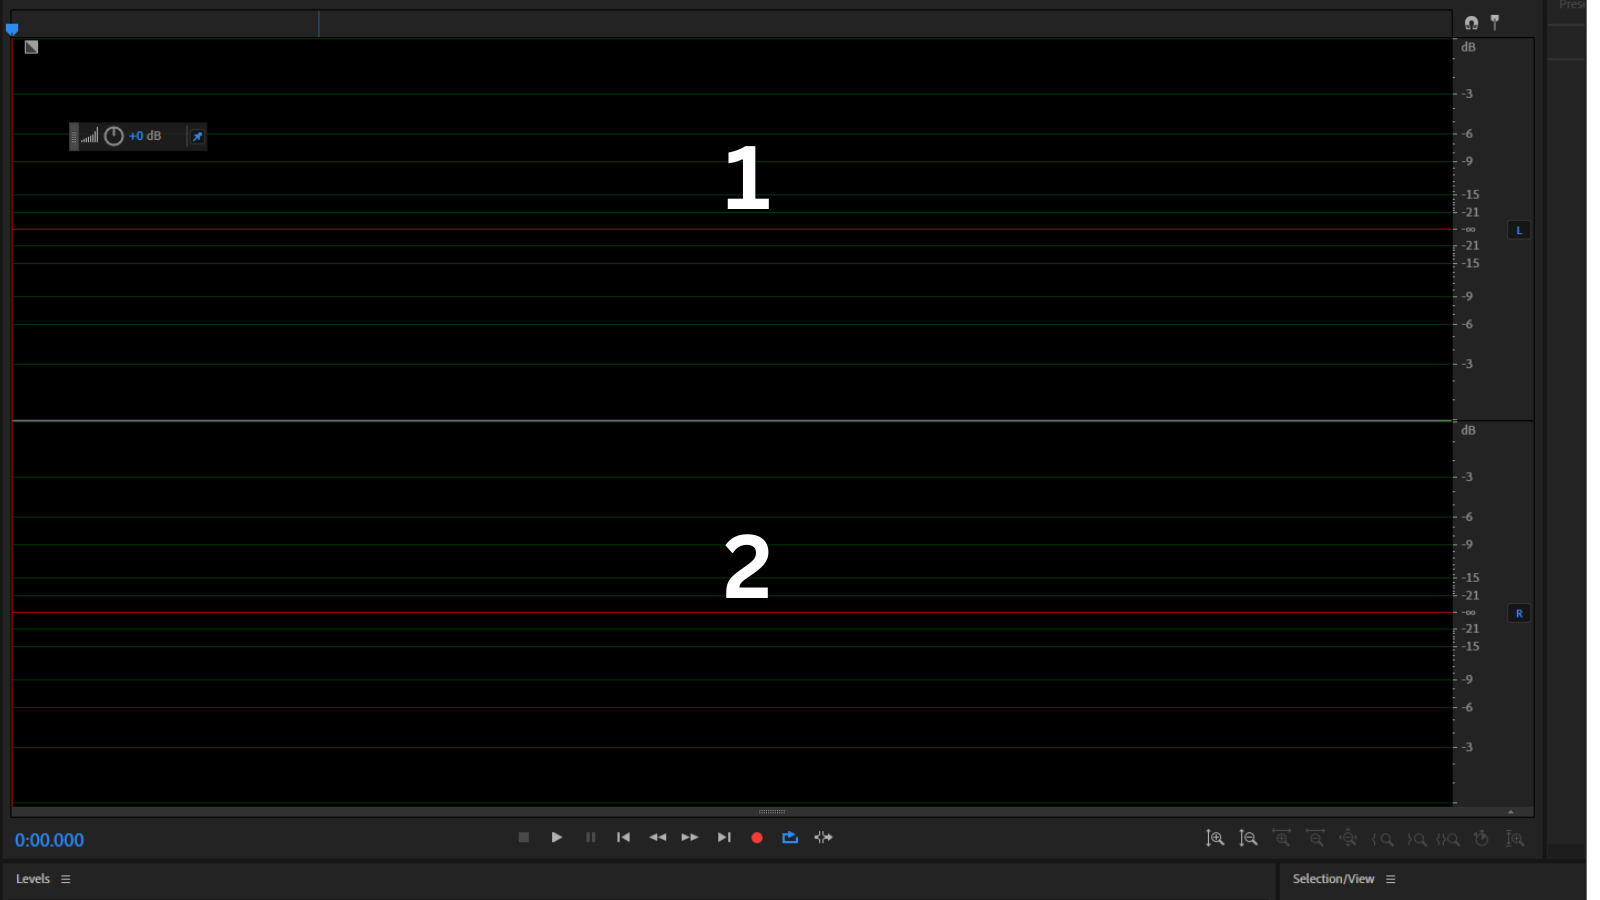
This is what shows for a stereo recording. For mono, you will get a single line running down the middle.
Here is the line with an audio waveform on it.
Whenever you open an audio file in Adobe Audition this line ought to be in the middle of your audio waveform. A DC Bias means the audio is distorted. This will occur from having a bias in the hardware that you are using.
If that happens, the waveform needs to be centered by setting the percentage to zero. This setting is only handy whenever your audio file is skewed. If your waveform looks perfectly centered there is no need to make any adjustments.
You can now apply the normalizing effect to the file.
Do this by clicking OK on the normalizing pop-up box.
Alternative Method
Alternatively, you can normalize your audio files by clicking on the Favourites option in the menu tab. Under this option, you’ll find some pre-made effect combinations that you can apply automatically whenever you edit. The presets range in terms of functionality as the dropdown list has modulation, time-based effects and dynamics effects.
The drop-down list under favorites has two Normalizing presets. These are: Normalize to -0.1 dB and Normalize to -3 dB. Pick either of these two depending on what works best for your case.

Conclusion
Normalizing audio is sometimes mistaken for a process that will give you a standard audio level from start to finish. If you intend to have a ‘flatline’ effect where your file will have a -6dB level from start to end that is not normalizing. This is a completely different effect called hard limiting.
Normalizing makes the quieter sounds more prominent hence more audible. It also ensures the louder parts are slightly adjusted and not distorted at the same time.
Whenever you are working in multitrack view and some of the audio files need to be normalized always ensure that the audio is normalized before mixing multiple files into one file.


![Adobe Audition Razor Tool Greyed Out [FIXED]](https://ProRec.com/wp-content/uploads/2022/08/image-179-180x180.png "Adobe Audition Razor Tool Greyed Out [FIXED]")
