There are as many plug-ins available as there are drops in the ocean. With this wide selection and formats, producers and audio engineers tend to amass a large number of plugins on their hard drives. These can range in their use from plug-ins whose aim is music composition in the form of synths, instrument plug-ins and sound banks, to effect plug-ins made for mixing, that is, compressors, equalizers, gates, reverbs.
Recommended Read: How to Add/Install Plug-ins in Pro Tools
The list of plug-ins is endless. With their varying user interfaces and sound processing algorithms and the different ways we can integrate them into our production and audio engineering workflows it is not uncommon to find oneself having different plug-ins that all do more or less the same thing albeit with slightly varying results.
Add onto that the fact that certain companies offer their plug-ins for free with either limited or full functionality. For Pro Tools users, having a large number of plug-ins means a lot of back and forth. You want to organize them in a way that you minimize time scrolling through long lists trying to find the right plug-in. This is where plug-in management comes in.
Recommended Read: How to Rescan Plugins in Pro Tools
Organizing Plug-ins
How Pro Tools organizes plug-in lists can be determined by the user from the Preferences section. To access preferences, click Setup on the menu tab and on the drop-down menu, scroll down to Preferences.
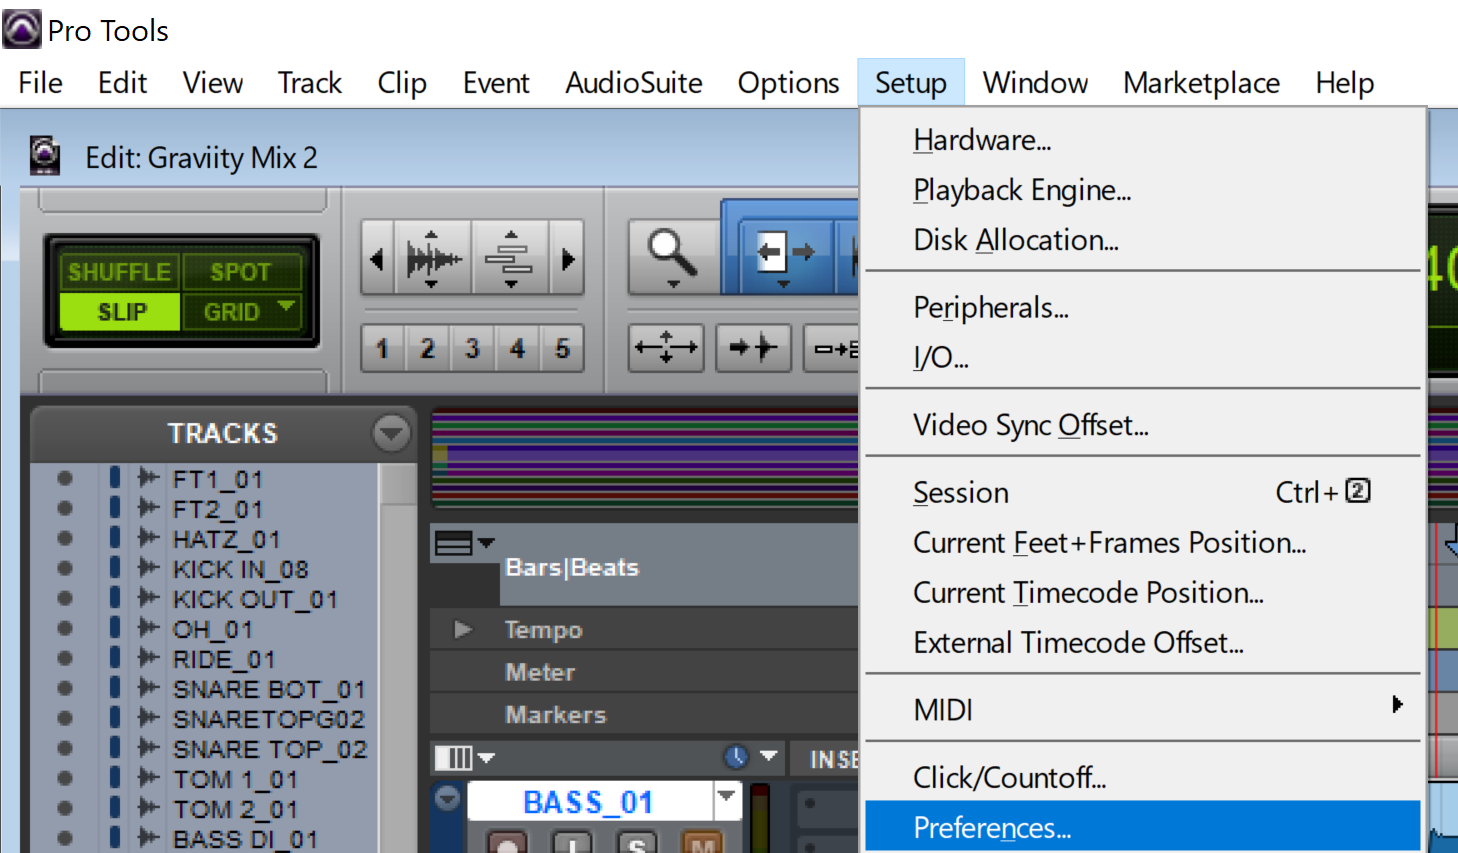
In the Display tab of the preferences window, there will be a section labelled “Organize Plug-in Menus by”. Here users can find a few different options that allow them to determine how Pro Tools will organize plug-ins in lists. These options are:
- Flat List
- Category
- Manufacturer
- Category and Manufacturer
After selecting one of the options, be sure to click OK to apply the selected choice. Simply closing the window will maintain whichever option was selected before any changes were made
In this article we will look at how these organization options affect how Pro Tools arranges plug-ins along with the pros and cons of each option. Note that the option selected hear will affect how plug-ins will appear in both the Audio Suite menu and when trying to add a plug-in as an insert in the Mix Window
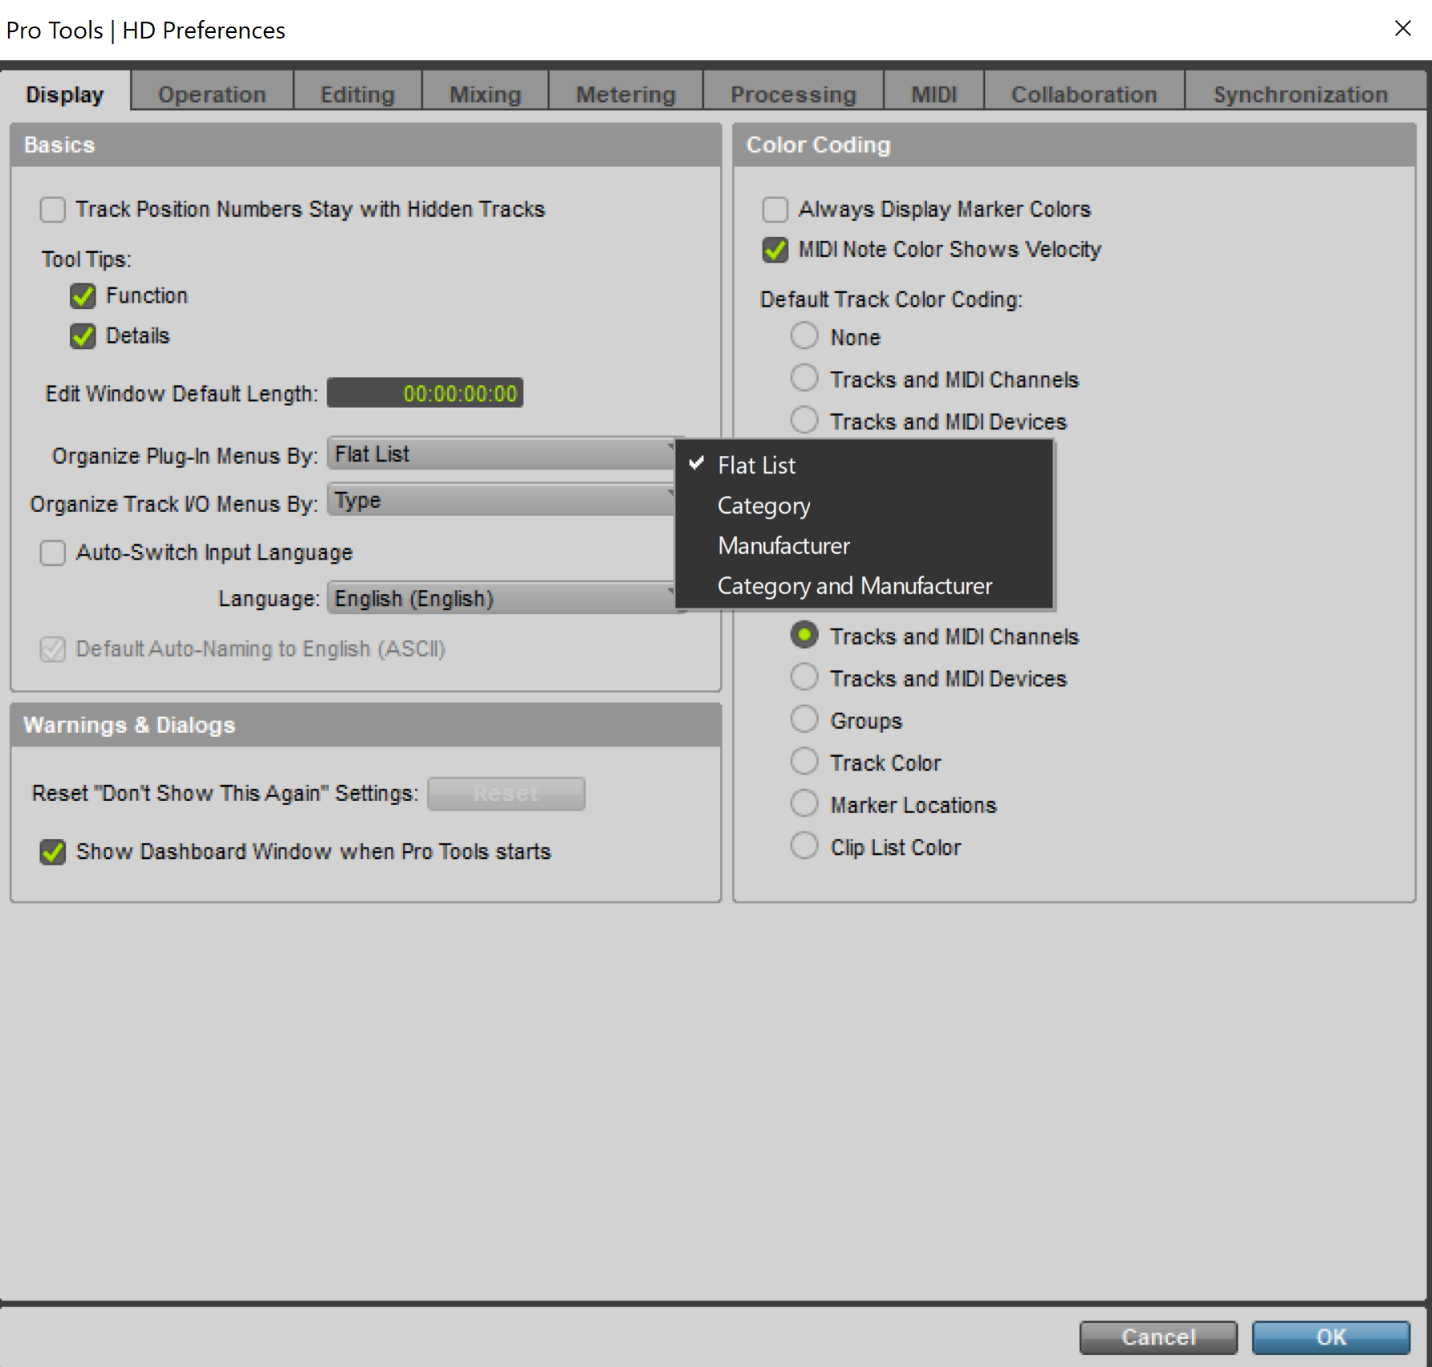
Flat List
The Flat List option arranges all the plug-ins in alphabetical order in a single list. This list can get quite large and may make it difficult to find a plug-in when working on a session. It is therefore not recommended. Plug-in lists arranged using the Flat List option will look like this in the Audio Suite menu
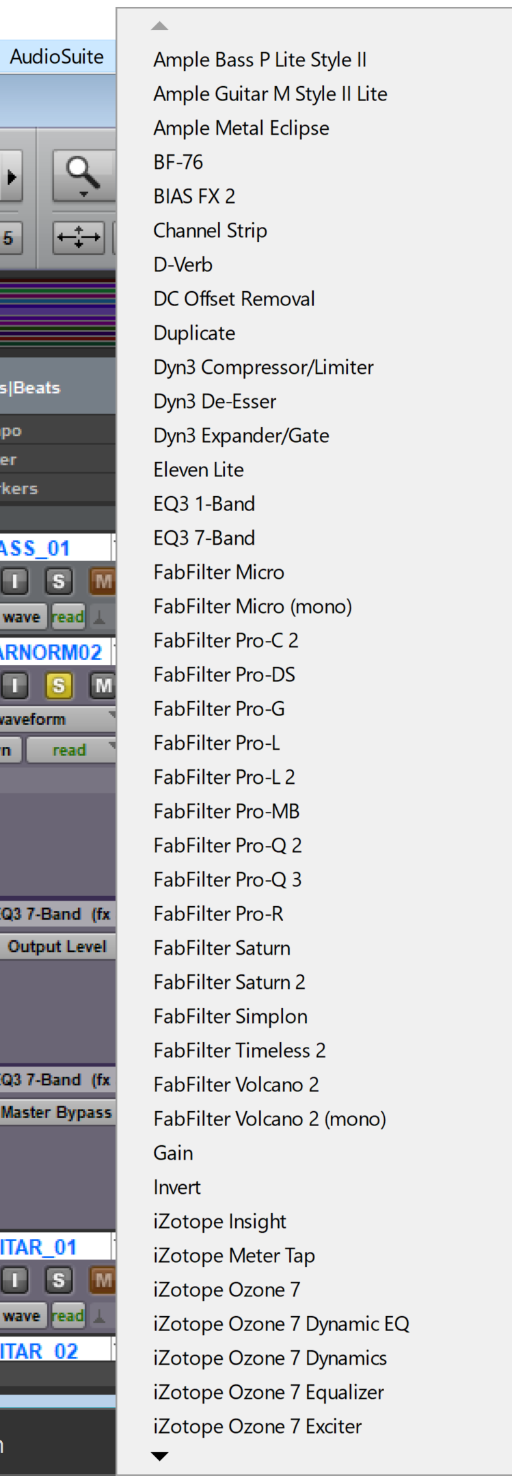
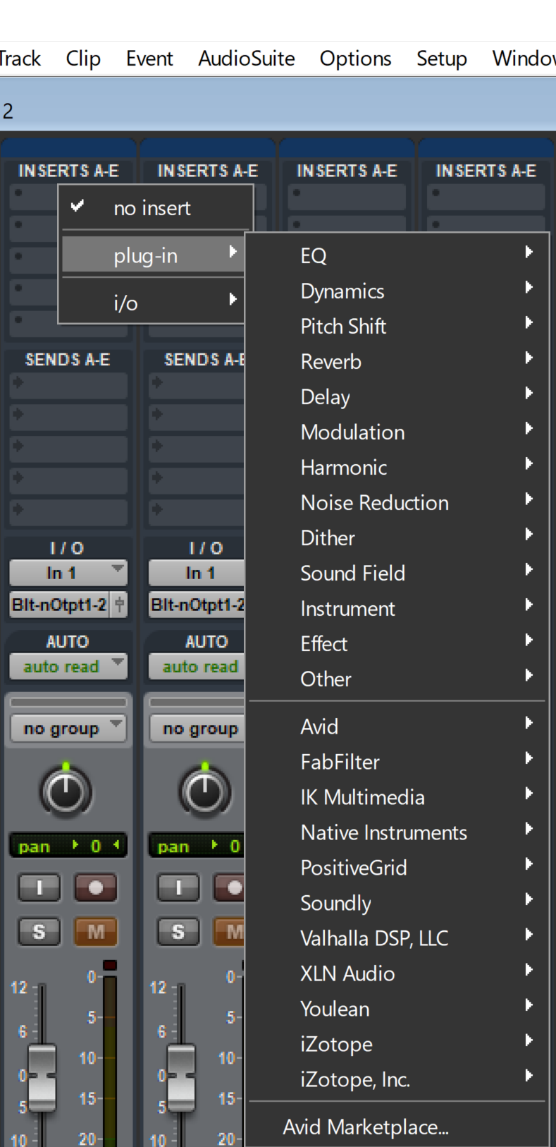
This is what the list looks like when inserting a plug-in in a channel in the mix window or the inserts tab.
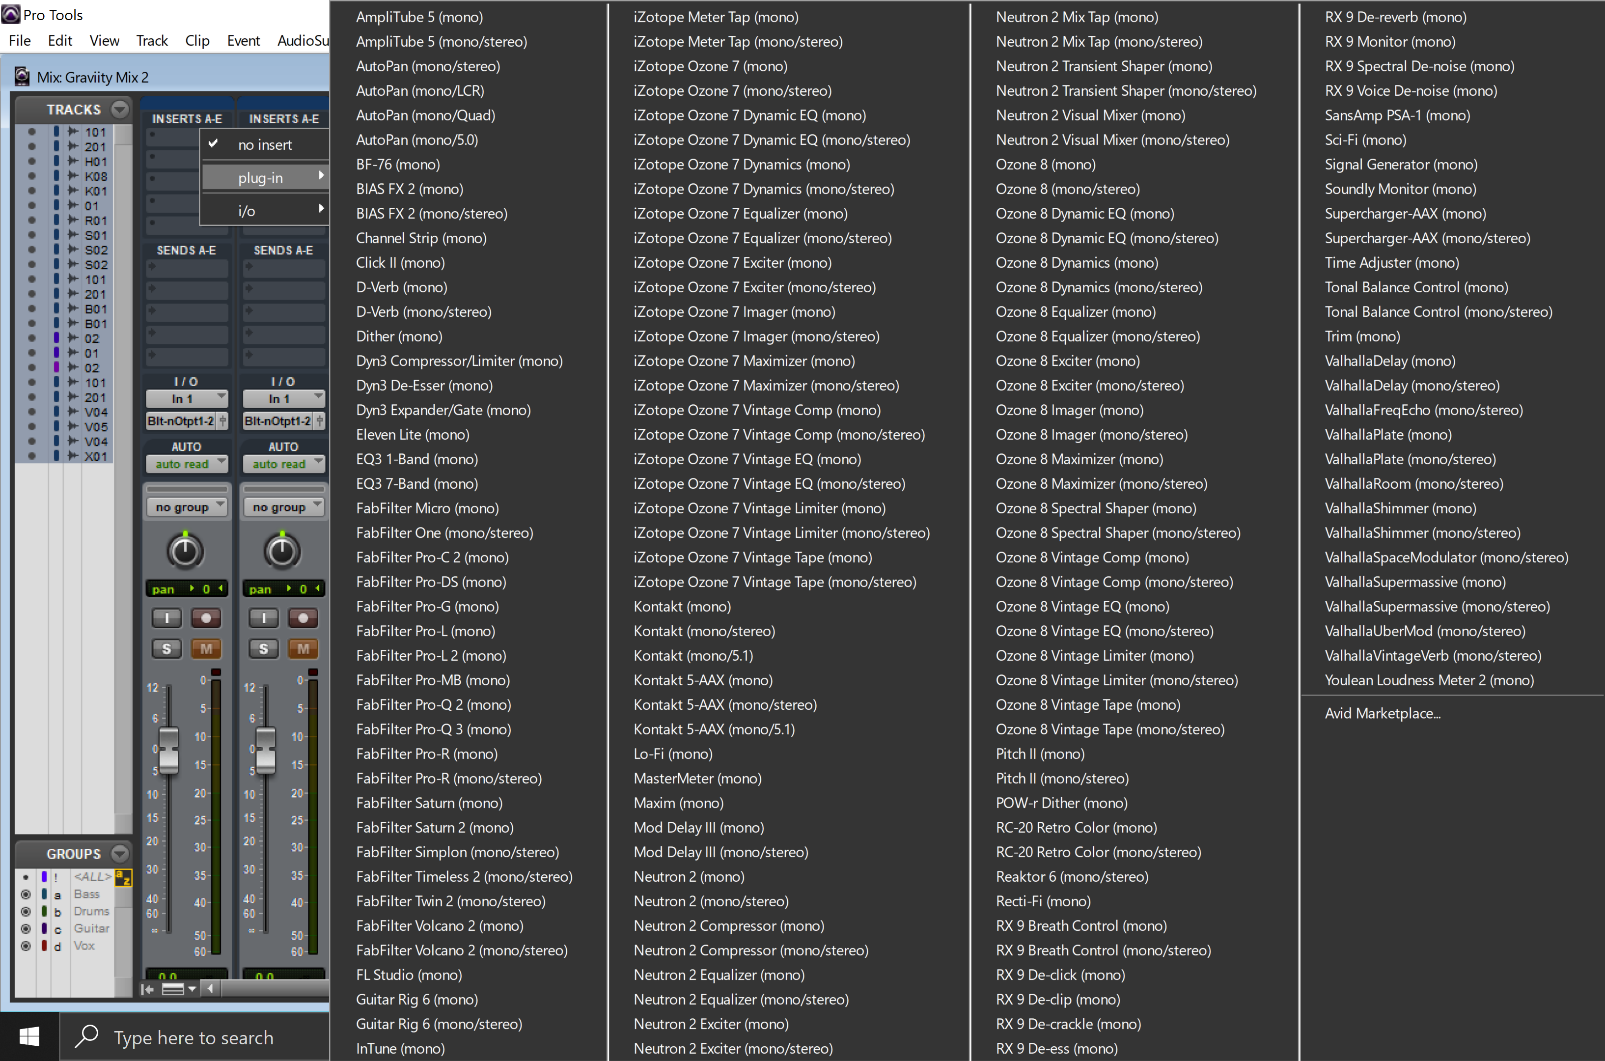
Scrolling through this long list can lead to time being wasted and the list itself also looks cluttered. This is therefore not a popular option.
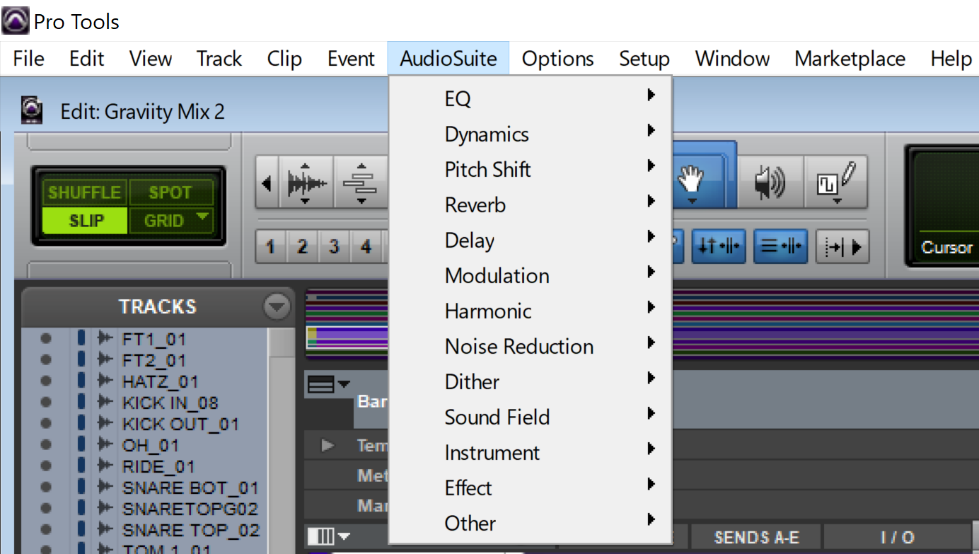
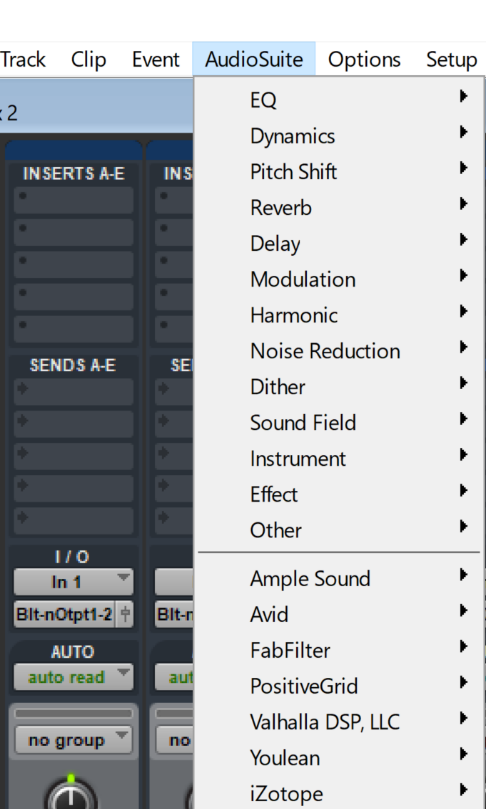
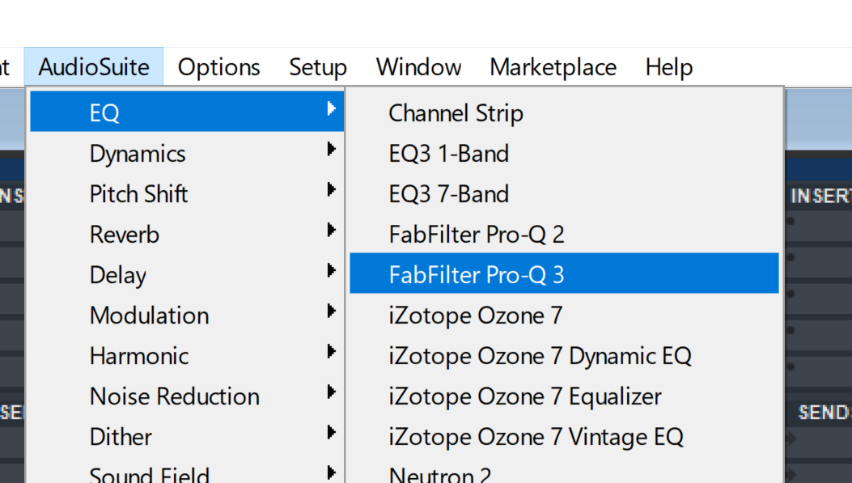
Category
Applying this option will organize plug-ins by category according to the function of the plug-in. The default categories used by Pro Tools include:
- EQ- These are plug-ins used to alter the frequencies within a signal. Pro Tools does not separate the different kinds of EQ but instead groups them all under this one category.
- Dynamics- These are plug-ins whose functioning is affected by the difference between the highest and lowest levels within a signal. This category of plug-ins includes: compressors, limiters gates and expanders.
- Pitch Shift- As the name implies, these plug-ins are used to alter the pitch of a signal. These plug-ins include things like auto-tune and its alternatives.
- Reverb- These are plug-ins that give a sense of space to a signal by simulating different environments. There are several kinds of reverb that affect signals in different ways. Like with the EQ category, Pro Tools does not split these into subcategories.
- Delay- These are plug-ins that record an input signal and play repetitions of it after a set period of time.
- Modulation- These plug-ins change a signal over time. They can be used to add a sense of movement or dimension.
- Noise reduction- These are plug-ins used to mitigate unwanted sound in a recording.
- Harmonic- Harmonics are multiples of a fundamental frequency. Harmonic plug- ins are therefore plug-ins that add or modify the overtones of a signal. Saturation plug-ins therefore fall into this category.
- Dithering- These are plug-ins used to add noise to a signal to make quantization distortion less noticeable. These are usually used in mastering.
- Sound Field- These are plug-ins that affect the stereo image of a session.
- Instrument- These are plug-ins used to add musical instrumentation to a session.
- Effect- Are plug-ins used to add special effects to a signal. These plug-ins usually work by combining multiple effects together using simple interfaces.
- Other- These are plug-ins that cannot be classified as any of the above.
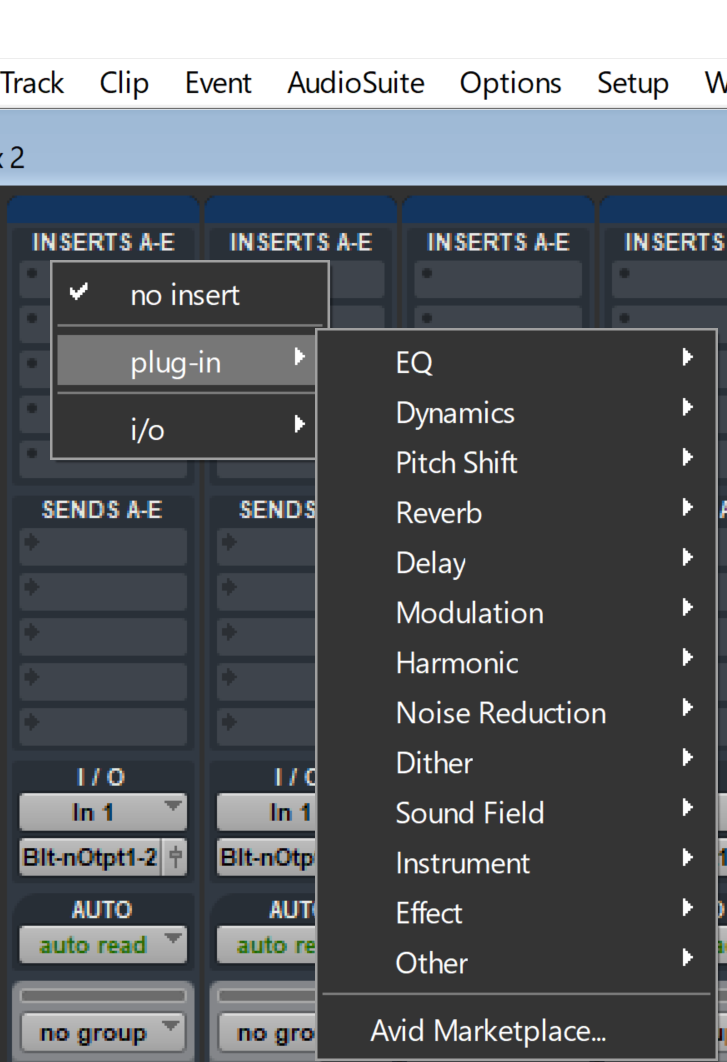
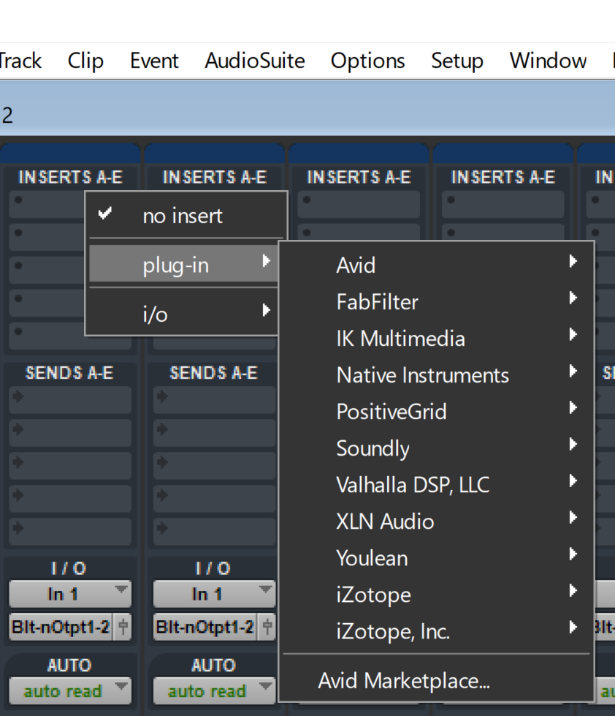
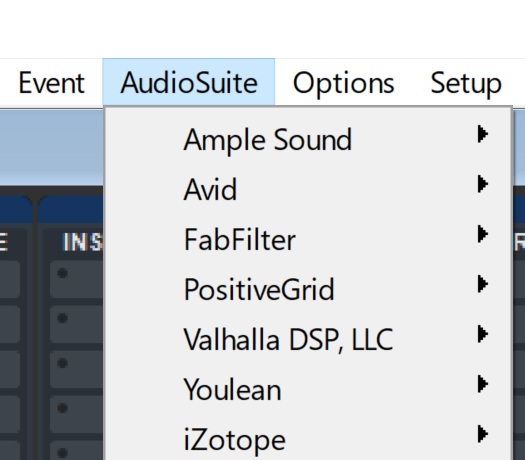
Manufacturer
This option groups plug-ins according to the manufacturer. This option is especially helpful when using plug-in bundles. Users will find this option helpful if they trust certain manufacturers and would prefer to use their plug-ins or in case a client specifies that they want a project mixed or mastered using plug-ins from a certain manufacturer for example Waves or iZotope. One disadvantage of this however, is that it groups plug-ins of all kinds under their manufacturer without taking into account what the plug-in actually does. It is possible to lose precious time trying to find a plug-in that performs a specific function using this option.
Category and Manufacturer
This option is a combination of the “Category” and “Manufacturer” options. It splits the plug-in list into two sections; one section organizes plug-ins by category while the other organizes them by manufacturer. This is the most flexible option and the preferred pick for a lot of users.
Setting a Plug-in as a Favorite
Pro Tools enables users to set a plug-in as a favorite. This creates a special list for specially flagged plug-ins that is independent of other categorization options. To flag a plug-in as a favorite, open the Audio Suite menu and navigate to the desired plug-in. Next, hold Command (Mac) or CTRL (Windows) and click on the name of the plug-in. Now, whenever the Audio Suite menu is opened, this plug-in(s) will appear at the top of the list. Below is an example of how a plug-in set as a favorite would appear in the Audio suite menu.
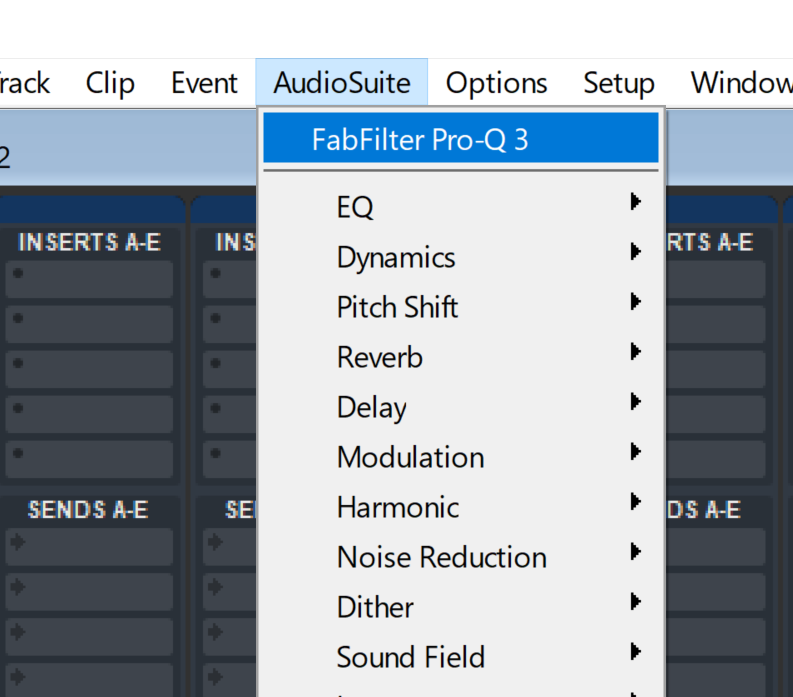
To remove a plug-in from the favorite list, simply Command/CTRL + Click on it again from the favorite list or from anywhere else where it appears in the Audio Suite menu.
Conclusion
From the above examples, we can see that Pro Tools gives users many ways of organizing their plug-ins. Finding the best option that works for a user’s individual workflow is therefore made simple. This is especially true with the use of the Favorite feature.

- Pro Tools Won’t Play [No Playback FIXED] - April 16, 2023
- No Sound in Pro Tools [FIXED] - April 16, 2023
- Pro Tools Not Recognizing Audio Interface [FIXED] - February 4, 2023

![Pro Tools Loop Playback Not Working [FIXED]](https://ProRec.com/wp-content/uploads/2022/09/image-205-180x180.png "Pro Tools Loop Playback Not Working [FIXED]")


)