Introduction
In recent years, audio loops have become quite popular among music producers both as a music production tool and as a source of income. This has made looping an essential part of the music production process and a skill that many producers need to learn.
Recommended Read: How to Loop Record in Pro Tools
What is an Audio Loop?
An audio loop is simply a piece of recorded audio that repeats itself for a length of time.
Why Do People use Audio Loops?
A lot of producers use audio loops as a basis for their productions whereby they take a loop and build the rest of their song around that loop. Others, especially in the hip hop world, may take loops and chop them into smaller segments and sample them to make entirely new musical ideas.
More Recommended Reads
Creating Loops in Pro Tools
Looping in Pro Tools is a fairly simple process that can be applied to both audio and MIDI clips and which can be done in a variety of ways.
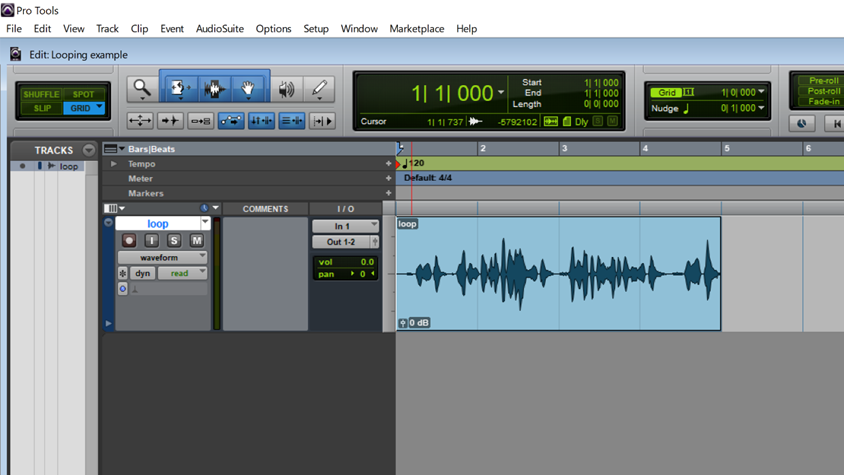
For this example, I will be using a four-bar audio clip as my original clip.
Looping Method 1: Using the Loop Option in the Clip Menu
One way of looping a clip is using the Loop option under the Clip menu.
Step 1: Select the clip from the Edit Window
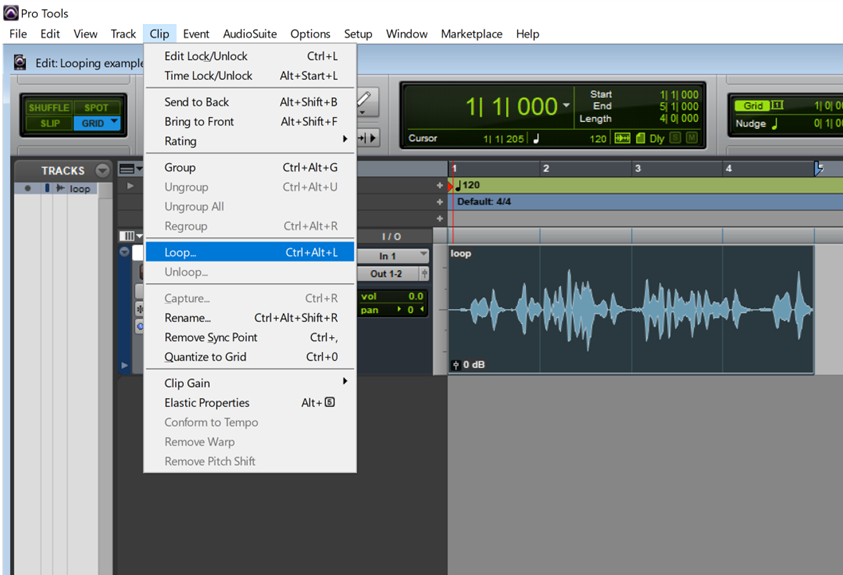
Step 2: Open the Clip menu and select the Loop option
Step 3: In the dialogue box that appears, enter the desired number of loops and/or select whether you wish to loop until the end of the session or until the next clip that is on the same track. It is important to remember that the number of loops entered in this dialogue box will also include the original clip. That means that entering the number 10 will result in the original clip and nine repetitions.
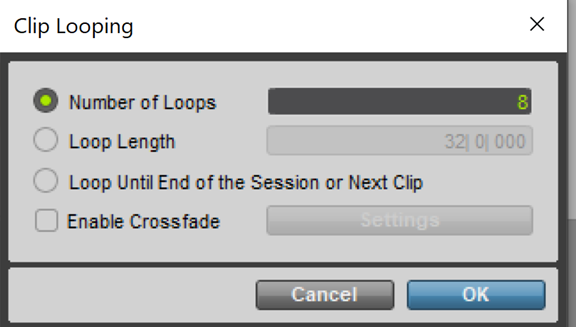
Step 4: If it is necessary, you may add crossfades between the loops by ensuring that the Enable Crossfade option is active.
Step 5: Click OK confirm
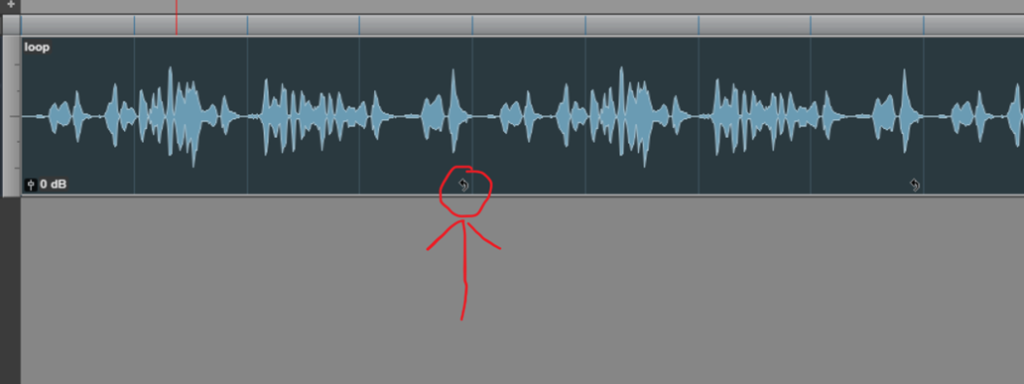
The small curved arrow indicates the point at which the clip starts over.
Looping Method 2: Using the Loop Trim Tool
Another way of looping clips in Pro Tools involves the use of the Trim Tool. To use the trim tool to loop, one must first change its operating mode from Standard (It is set to this by default) to Loop.
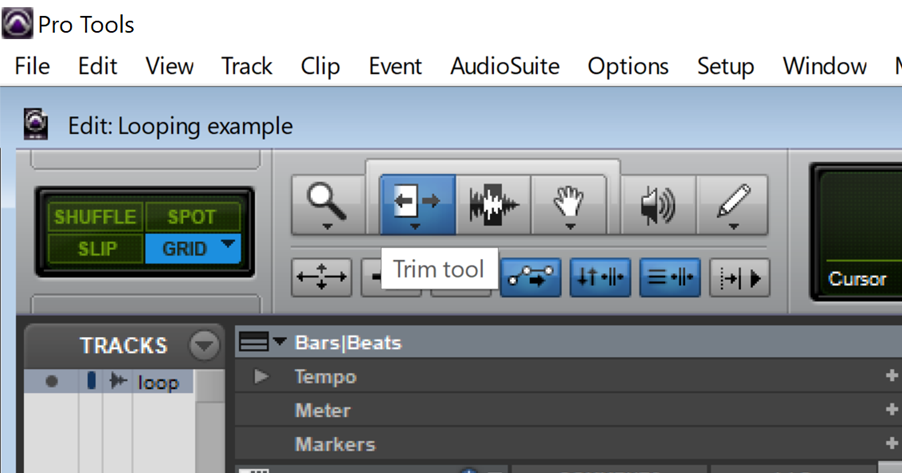
Step 1: Right click the Trim Tool Icon from the tool bar or Click and hold on the icon to bring up a menu that has options for the different trim modes.
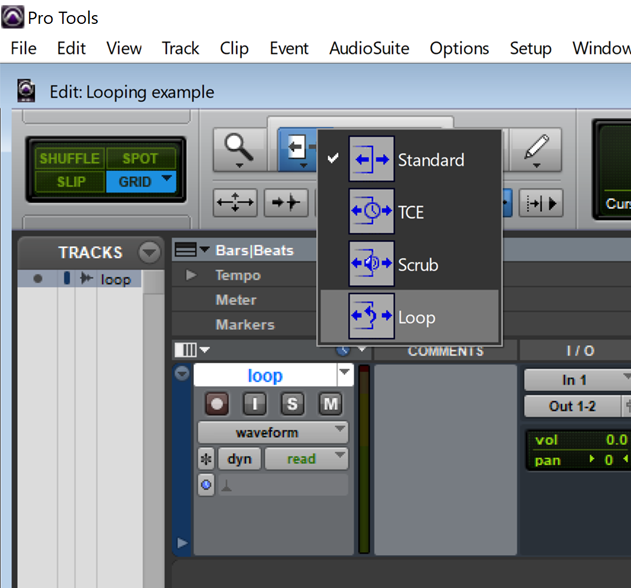
Step 2: select the Loop option from the list.
Step 3: Use the Trim tool as you would use it to extend the length of a track by placing the pointer at the end of the clip and clicking and dragging to the desired length.

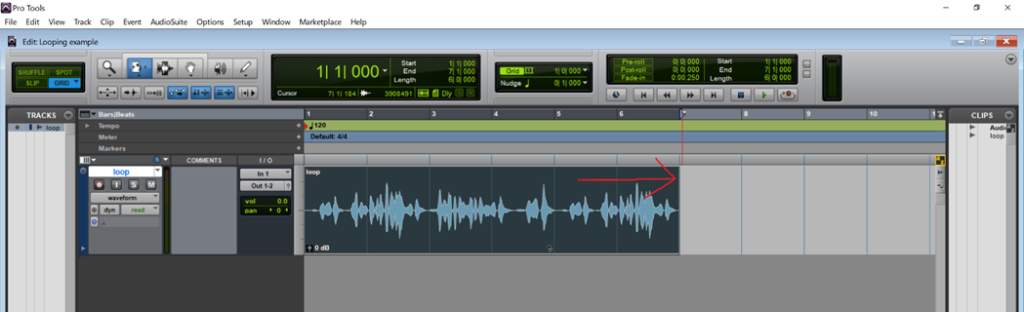
Dragging the mouse in the direction indicated by the arrow above loops the clip up to whatever point you let go of the mouse button.
One drawback of using this method is that you would have to manually add the crossfades in between loops if you want to enable crossfades.
Looping Method 3: Context menu
The third way you can loop a clip is by simply right clicking the clip in the edit window and selecting Loop from the drop-down context sensitive menu.
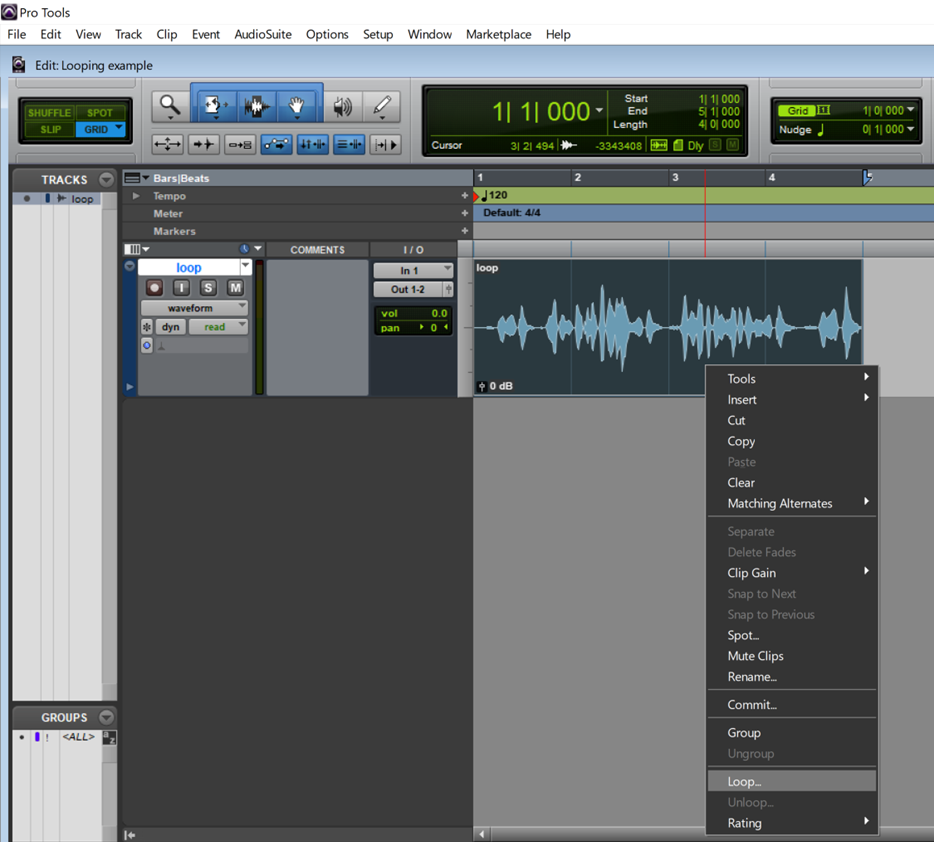
Much like using the Loop option from the Clip menu mentioned in method 1 above, clicking loop after having right clicked on an audio or MIDI clip will bring up the Clip Looping window.

Clip Looping with Keyboard Shortcuts
As with many processes one can do using Pro Tools, it is possible to loop clips using keyboard shortcuts.
To open Loop Settings use the keyboard shortcuts
Command + Option + L on Mac
Ctrl + Alt + L on a Windows PC
To change the operation mode of the trim tool use
Command + 2 on Mac
Ctrl + 2 on PC
The above shortcut will cycle the Trim tool through the various modes.
How to Revert a Looped Clip to its Original State
To unloop an audio clip the steps taken are very similar to looping a clip.
Unlooping Method 1: Using the Clip Menu
To unloop a clip, first select the looped clip in the edit window
Next, open the Clip Menu and select Unloop
Unlooping Method 2: Using the Loop trim Tool
Similar to using the loop trim tool to loop a clip, unlooping a clip using this tool requires us to place the mouse cursor at the end of a loop and click and drag in such a way as to make the loop shorter. This method is suited more for shortening loops than completely unlooping a clip.
Unlooping Method 3: Context Menu
This is the simplest method of unlooping a clip. Like looping method 3 above, simply right-click (or Option Click) a looped clip and from the drop-down menu select Unloop.
Conclusion
Looping clips is a great way of setting up a sound to repeat either throughout your Pro Tools session or for however long you need it to. Pro Tools provides producers and engineers with a variety of ways to loop and unloop audio and MIDI so that they can choose the method that best suits their needs or is more suitable to their workflow.

- Pro Tools Won’t Play [No Playback FIXED] - April 16, 2023
- No Sound in Pro Tools [FIXED] - April 16, 2023
- Pro Tools Not Recognizing Audio Interface [FIXED] - February 4, 2023


![Pro Tools Stuck on Loading Plug-ins [FIXED]](https://ProRec.com/wp-content/uploads/2023/01/image-16-180x180.png "Pro Tools Stuck on Loading Plug-ins [FIXED]")