Chromebooks have become quite popular these days. And for good reason! They offer great functionality at a surprisingly low cost. They are super efficient at web browsing, which is 90% of what most people need a computer for on a day to day basis.
Knowing this, it’s no surprise that at least some people have tried pushing these compact devices to their absolute limits, and the audio community is no exception!
Personally, I find it a bit hilarious that people sometimes treat REAPER like the original Doom game. There’s always someone out there trying to run it on a really basic system due to its low resource requirements. And in that pursuit, people have found a way to run it on Chromebooks!
In this article I am going to detail the process of how you can Install and run REAPER on a Chromebook, so let’s get started!
Installing REAPER on a Chromebook
Most Chromebooks have the ability to run Linux applications by creating a Linux container inside Chrome OS. And since you can easily install REAPER on Linux, one thing leads to another and poof! You have REAPER now running on a Chromebook. Let me show you how you can do this step by step.
Enabling the Linux Development Environment
The first step is enabling the Linux Development Environment, which is basically a Linux emulation or compatibility layer inside Chrome OS.
Open your Settings, extend the Advanced section, and go to the Developer tab.
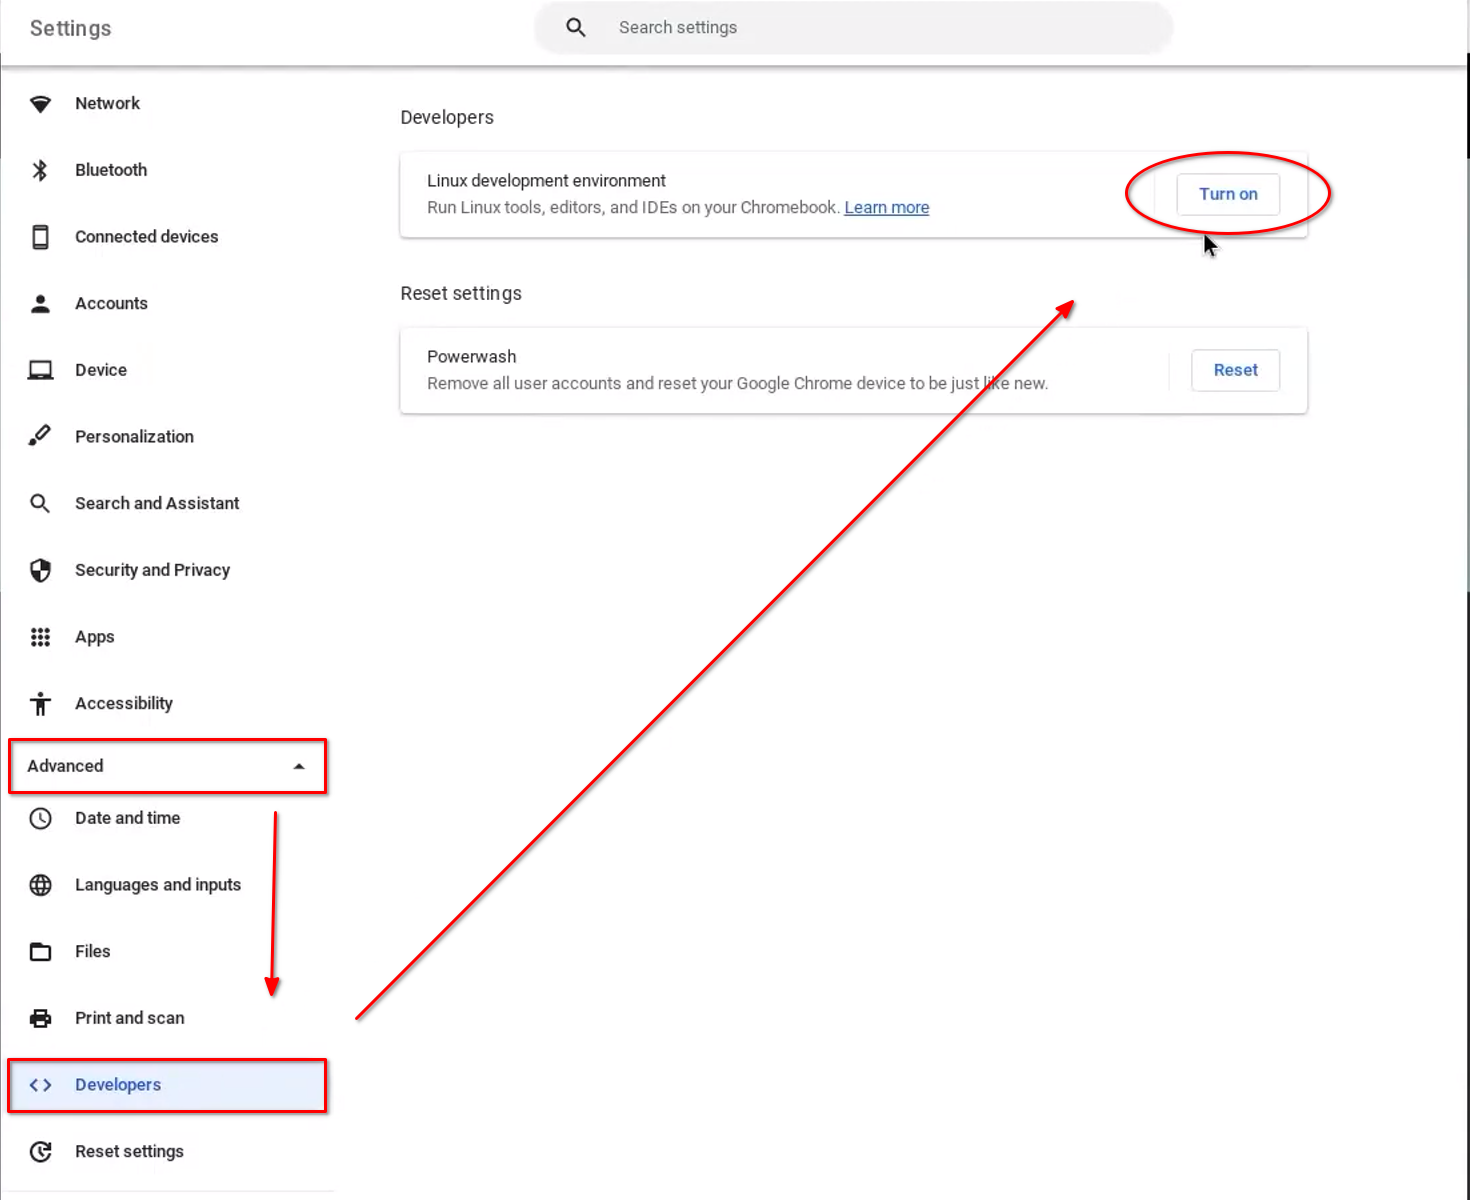
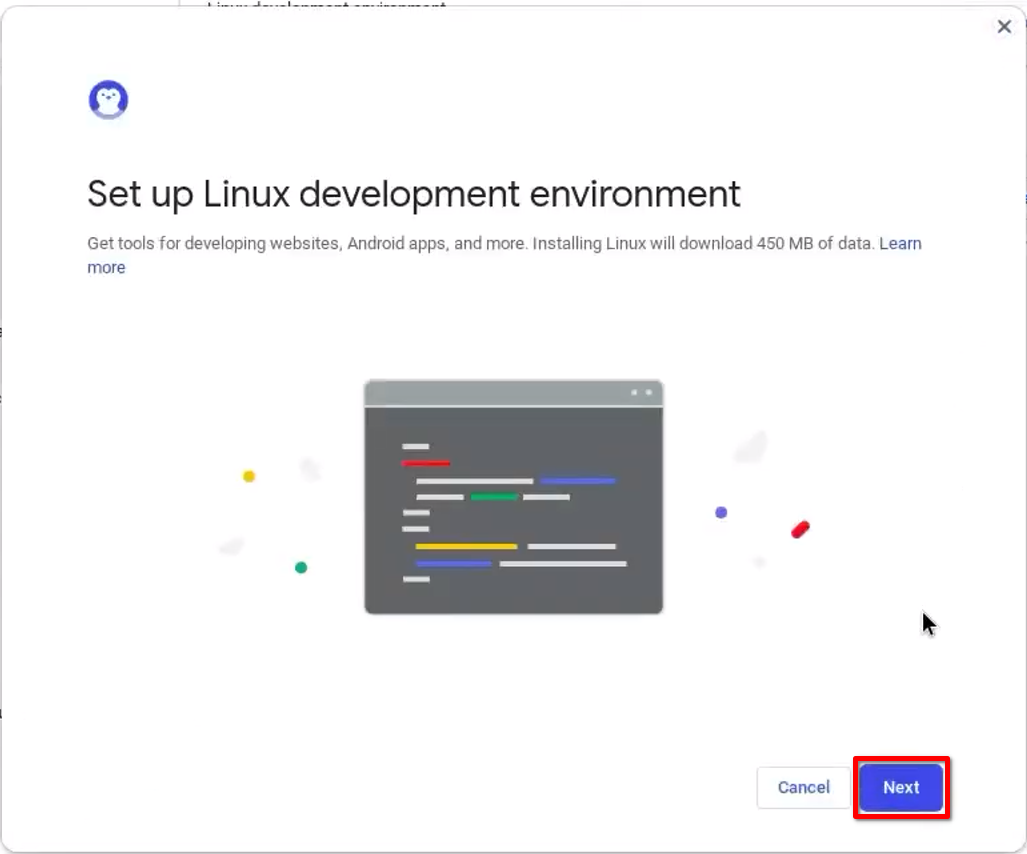
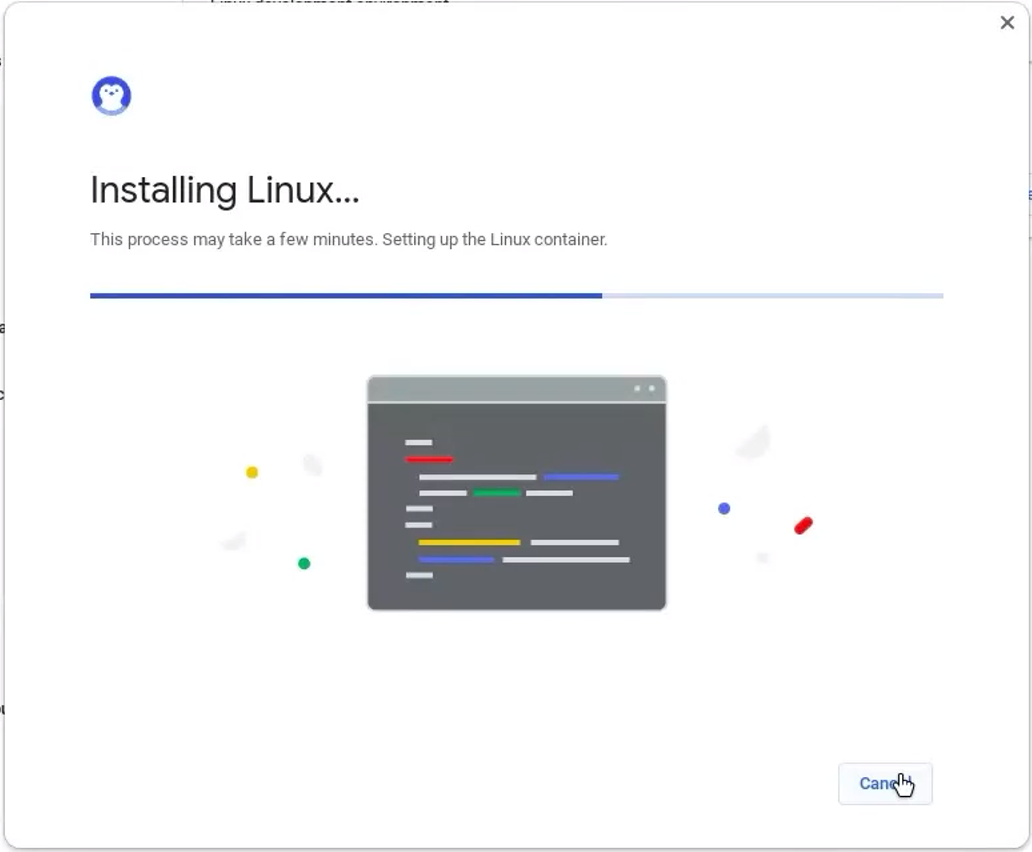
Click the Turn On button next to ‘Linux development environment’ and follow the on-screen instructions (it may take a few minutes).
This process will install the Debian 11 guts on your Chromebook, it will allow you to run Linux commands, as well as install tools and apps using the APT package manager.
As a bonus, you may want to allow the Linux subsystem to access your Chromebook’s microphone so you can use it as an input inside REAPER. To do this, open the Settings once again in the Developer section.
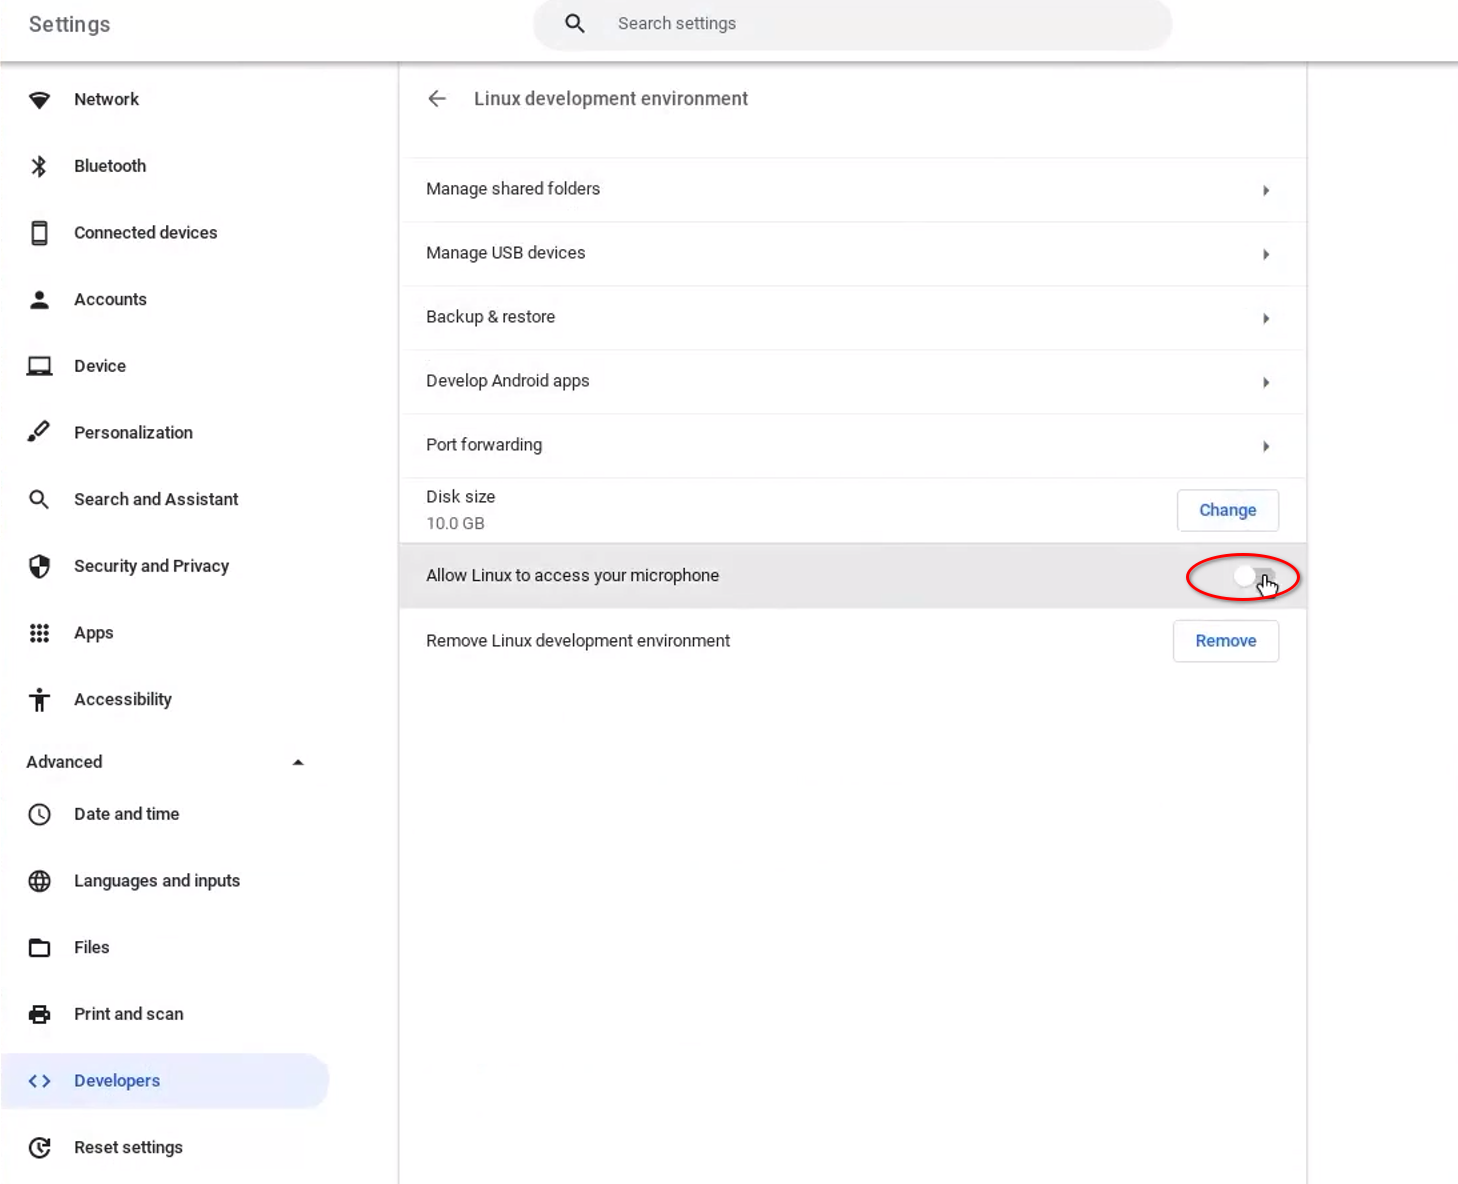
The Linux development environment option will now open a few extra settings, here, you just have to enable the option Allow Linux to access your microphone and restart your device.
Installing REAPER As a Linux App
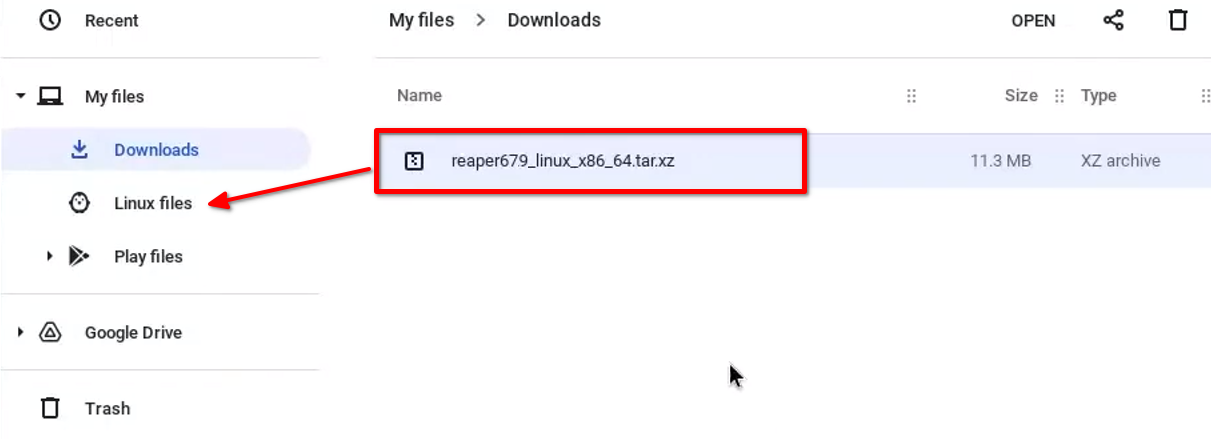
Now that you can install Linux apps on your Chrome device, it’s time to get the REAPER installer. Make sure to download the default Linux installer.

Next, move the compressed installer into the Linux files folder that appear in your filesystem.
Now, unzip the contents of the installer. You can use this command on the terminal, no need to navigate folders.
tar -xvf reaper679_Linux_x86_64.tar.xz
In this case, the highlighted numbers 679 represent the version of REAPER that I downloaded, so make sure to match the version number of your installer.
You can now go through the installation process as I have detailed in the How to install REAPER in Linux guide (running the install script and using the I command). While this has worked for a lot of people, I could not get it to work for me. Instead, I used the portable version that comes with the installer and added a shortcut on the menu. If you want to follow the proper installation process, please review the Linux installation article. For now, I will show you how to setup the portable version.
To open REAPER, paste this launch command on the terminal using Ctrl+Shift+V instead of Ctrl+V.
./reaper_linux_x86_64/REAPER/reaper
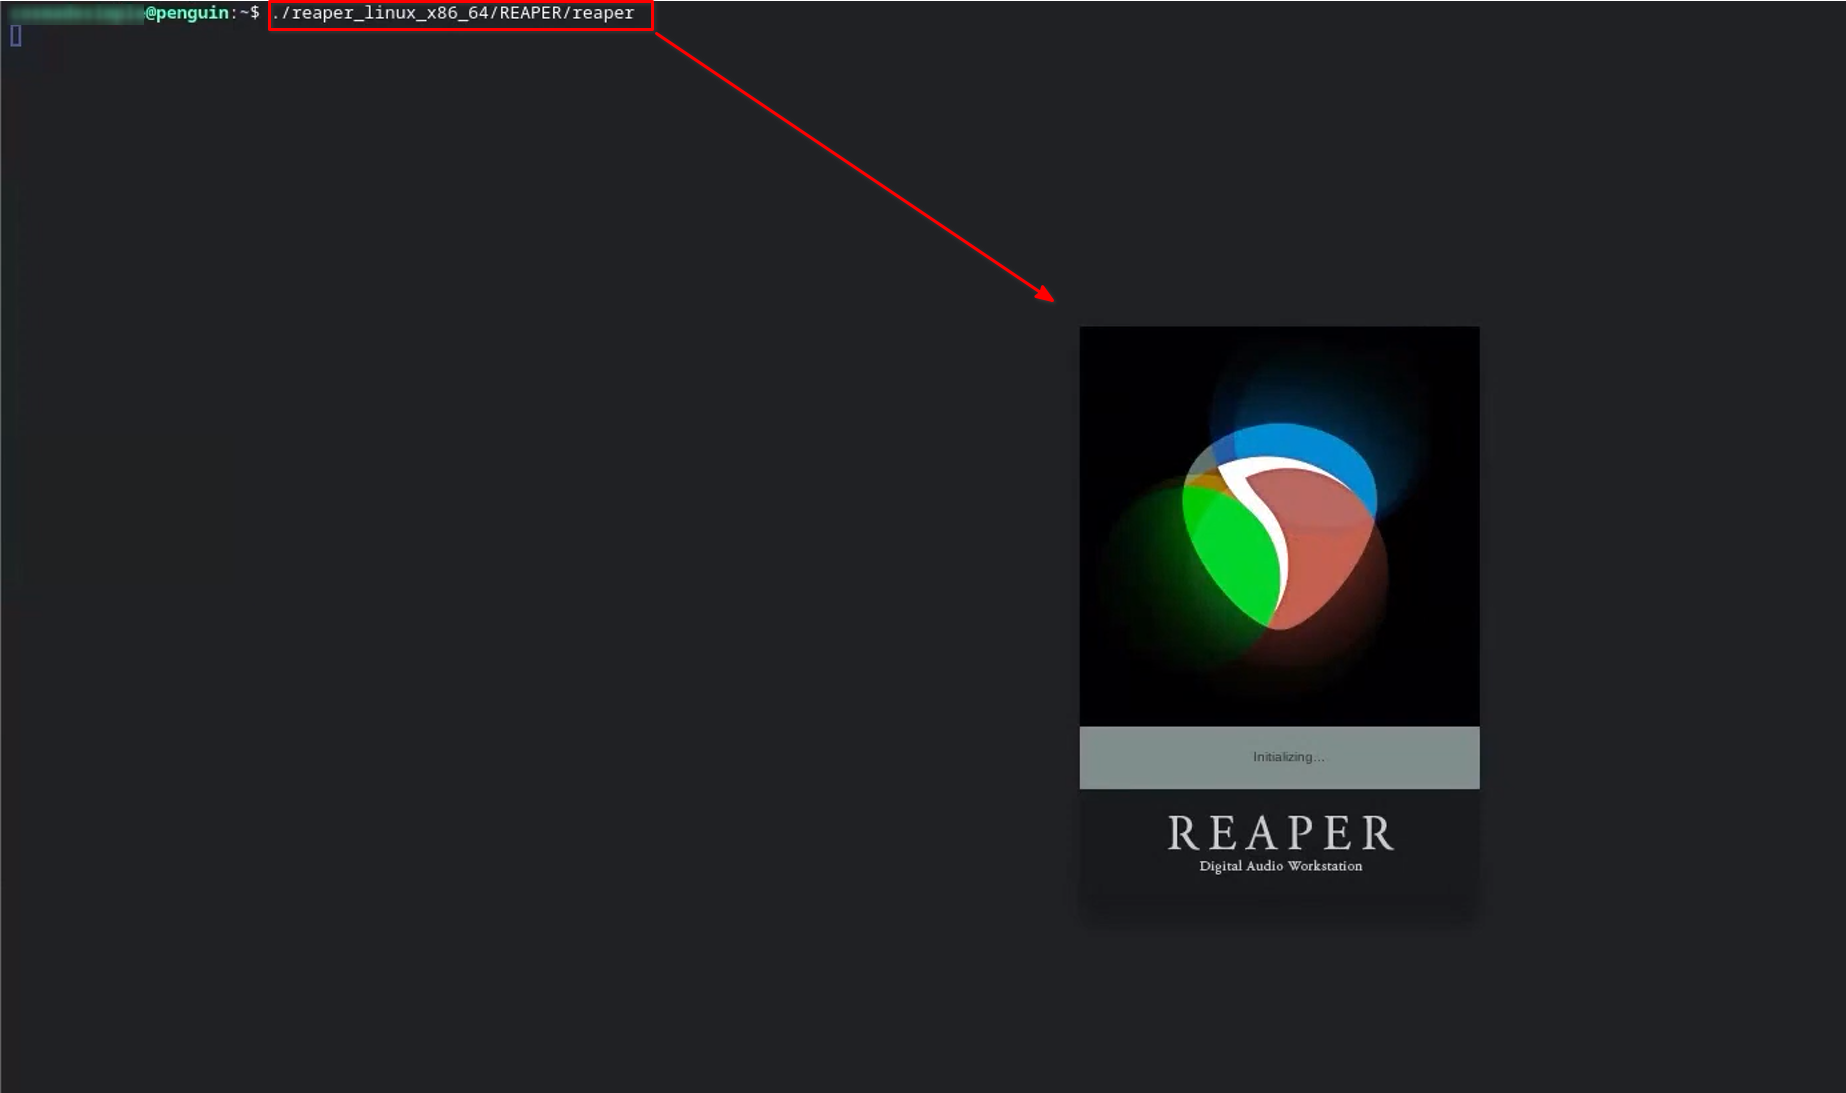
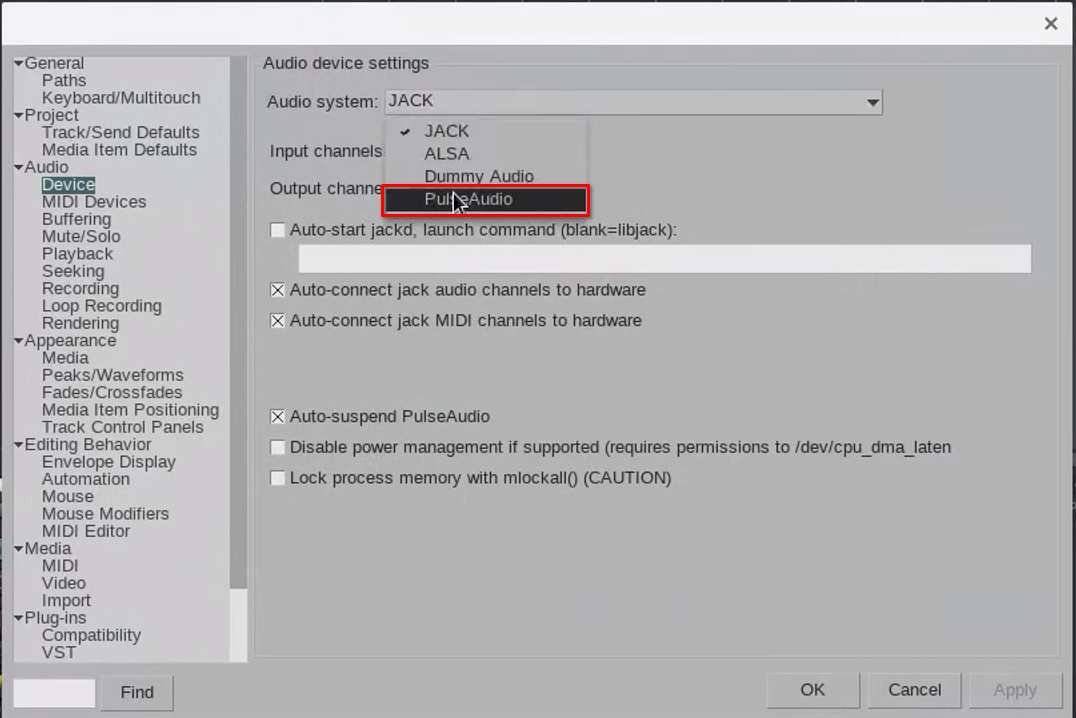
REAPER will tell you that it can’t use JACK, which is the Linux low latency audio driver.

However, changing the audio driver to PulseAudio in the REAPER preferences will allow you to use the integrated speakers on your chromebook, as well as your microphone if you activate the option to allow Linux to access your microphone.
Adding the Menu Shortcut
This step is completely optional, but I highly recommend you set up the shortcut/launcher on your menu so you don’t have to enter the launch command every time you want to start REAPER.
To modify the Chrome OS menu, you need to install kmenuedit using the following command on the terminal.
sudo apt install kmenuedit
Press Enter to accept the installation process. Then use the command kmenuedit to open the application.
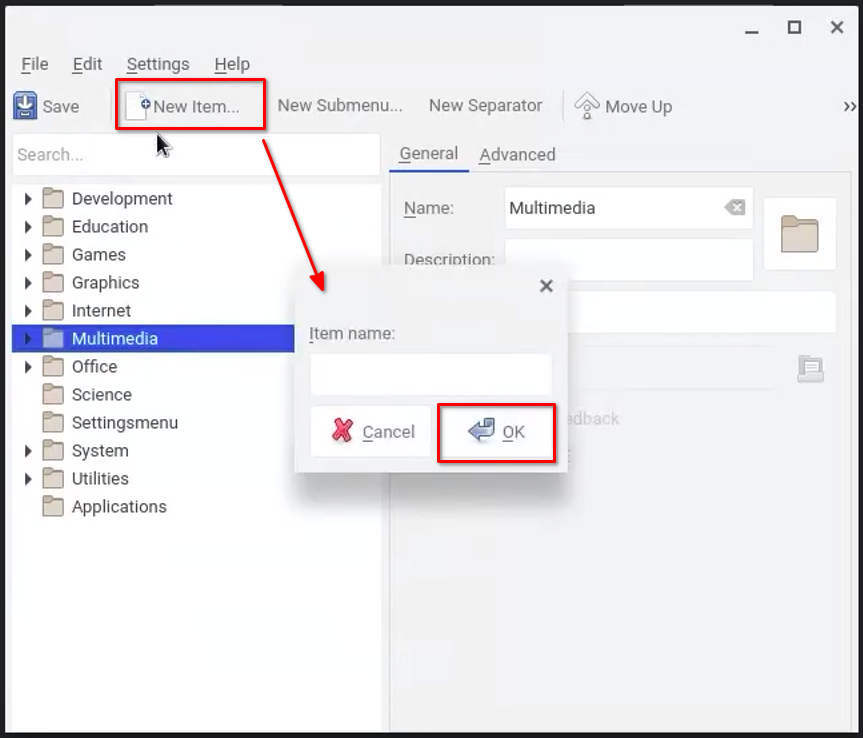
Click on the New item… option and give it the name REAPER.
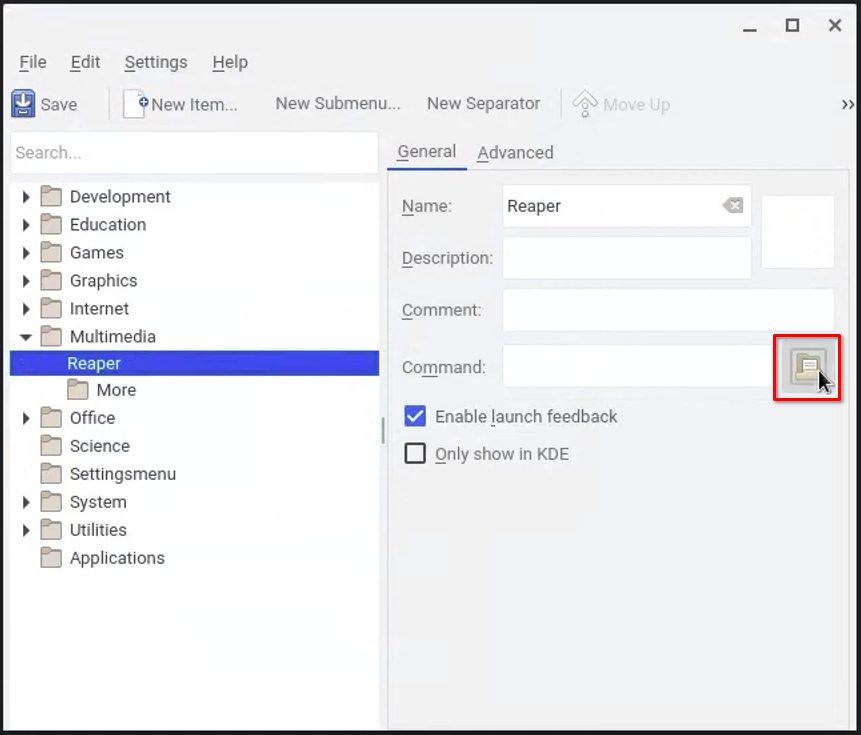
On the right side, click the icon beside the Command text and navigate to the reaper folder: reaper_linux_x86_64 > REAPER. Then select the file named reaper.

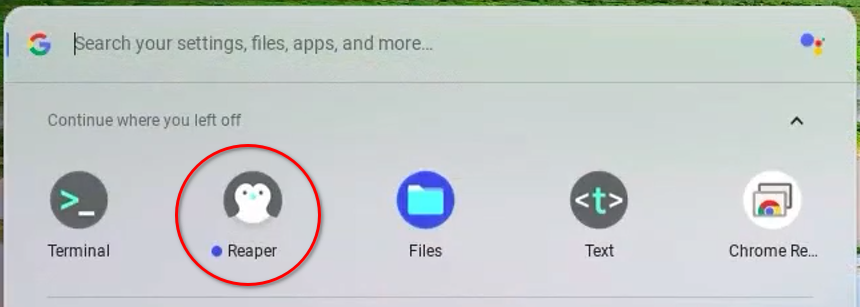
Now save and exit the application, the REAPER launcher will now appear on your menu and you can use it to open REAPER whenever you like.
Conclusion
Using REAPER on a Chromebook is an awesome alternative for remote editing and getting ideas out while you’re away from your main rig. I personally don’t recommend using this as your main working audio system because of the limited resources. The REAPER instance runs on an emulated system that is nested inside another. This usually leads to massive inefficiencies, but its utility can’t be denied given the right conditions and knowing what to expect. I hope you got some use out of this guide, and feel free to share it with the rest of the REAPER community. Happy producing!

- Mixing in REAPER [ULTIMATE Guide!] - September 18, 2023
- How to Record in REAPER (Guitar & Vocals) - August 2, 2023
- Writing MIDI Drums in REAPER - July 3, 2023
")

")