When you have everything connected and ready to record in your studio, and you hear a delay or something that sounds liek a late echo, then you know you are running into latency issues.
Recommended Read: Dealing with MIDI Latency in REAPER
Latency is defined as the time it takes for data (sound) to transfer from one place to another. In this case, it’s the time it takes for a signal to enter your audio interface inputs, go through your machine, DAW and effects, and come out through the interface outputs again. This is inherent to every digital system, but can be minimized under certain circumstances.
Latency is every engineer’s worst nightmare. It can throw you off and ruin your recording experience. In this article, we’ll look at the most common culprits and how you can deal with them to eliminate any latency issues you may have in REAPER.
Audio Device Settings
The first variable that can be affecting latency in your recordings is your audio diver, make sure to use your interface ASIO driver if you’re working on Windows. Then, make sure that your Sample rate and Buffer size work for low latency audio work. If you want to know more about audio settings, check this article.
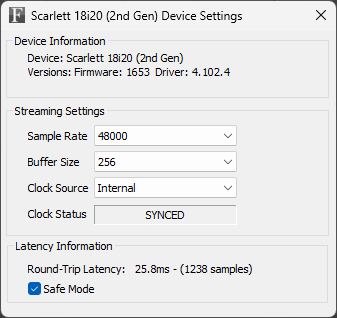
REAPER will show you how much latency your audio driver is reporting on the top-right side of the main window.
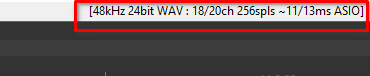
In this example, the audio driver is set up at 48k Hz, 256 spls and reports a latency of 11 input + 13 output latency, for a total roundtrip latency of around 24 spls. This is what my Focusrite scarlett interface reports, but if you have a different interface, it will probably report different latency values.
Usually people start to notice and feel weird at around 20 ms roundtrip latency, so a good rule of thumb is to keep your buffer size at 256 spls or less, I’ll expand further in the next articles. This, alongside a good interface and audio driver should solve most of your latency problems. I’ve had friends follow these instructions but their interface sometimes just introduces latency out of the blue. Still, stay tuned for the next articles that will go more in depth on troubleshooting the latency your audio device reports.
Effects Pre-Delay Compensation (PDC)
Most audio effects or plug-ins like EQ or Compressors work in real-time, which means that just as the DAW is playing back or recording, the plug-in processes the audio and delivers the result to the DAW. But some plug-ins like Pitch shifters or Brickwall limiters need more time to process the audio, these plugins introduce a delay on the signal that the DAW must compensate for, this is Pre Delay Compensation or PDC.
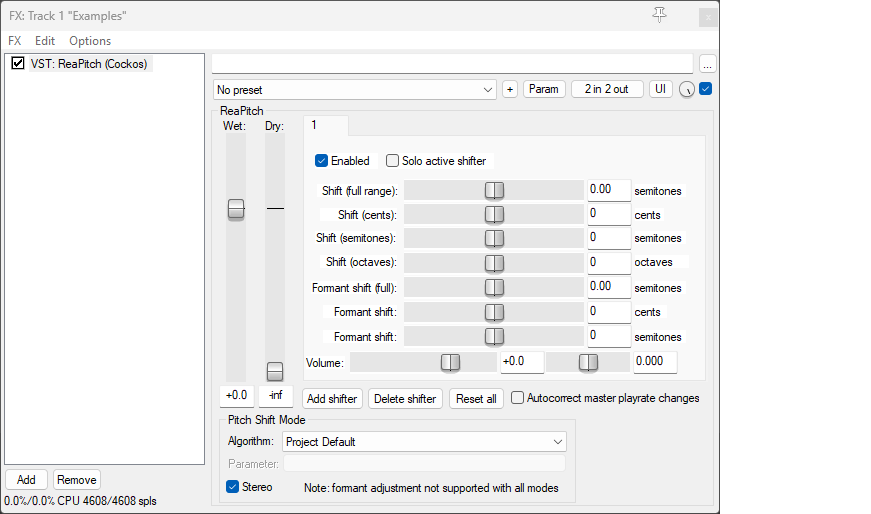
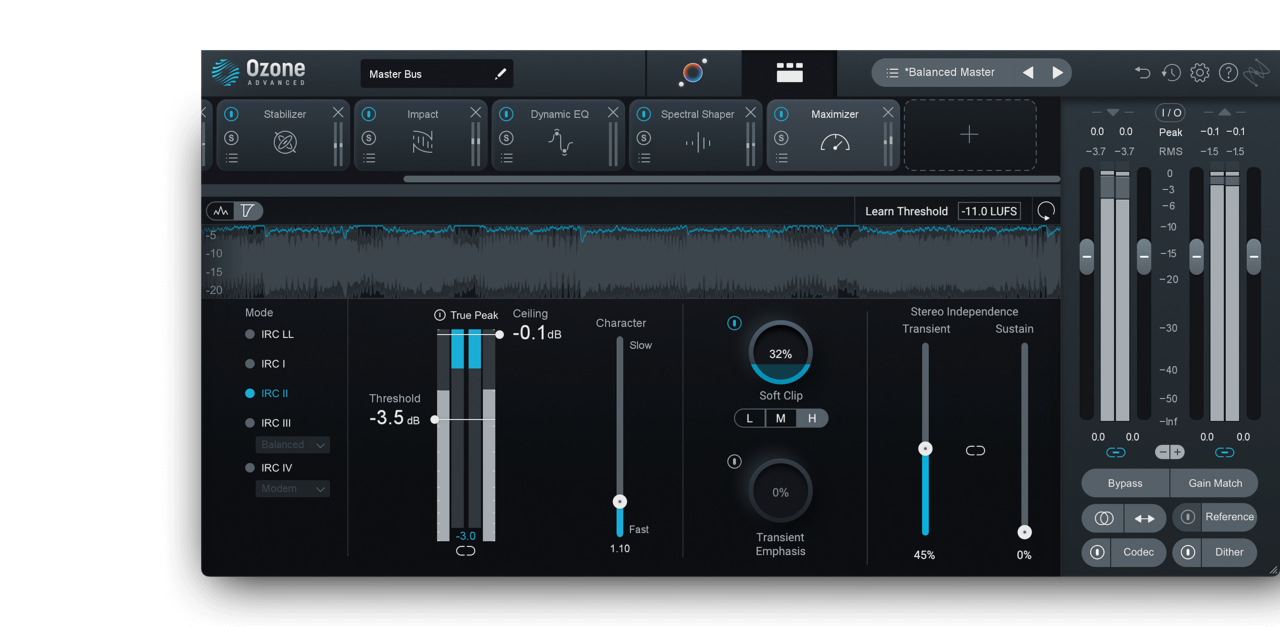
This system works wonderfully if you’re only playing back audio, but when it’s time for recording, the DAW can’t predict the signal that’s going to be processed, so the signal just ends up being delayed. If you’ve tried any time to use ReaPitch over a vocal performance while recording, or recording while using a mastering processor in your master track like iZotope Ozone, you may have encountered very heavy latency regardless of how your Audio device is set up.
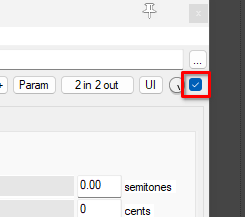
If this is the case, you only need to bypass any plugin in your recording chain that may ask for PDC. To do this, untick the checkbox on the top-right side of your plug-in
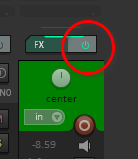
Or bypass the whole track FX chain by clicking on the power button on the track.
But how would you know what plugins are causing latency? REAPER has a very easy and clever system to diagnose this quickly.
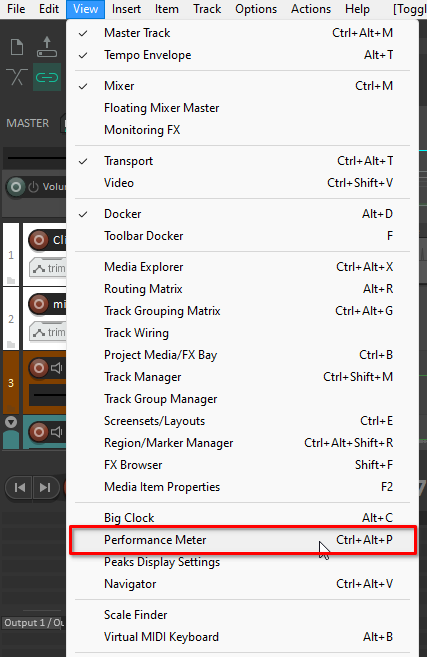
First, open your Performance meter by using the shortcut Ctrl+Alt+P, or going to the View menu and selecting Performance meter.
This window will show how much CPU and PDC is using any given track’s FX chain.
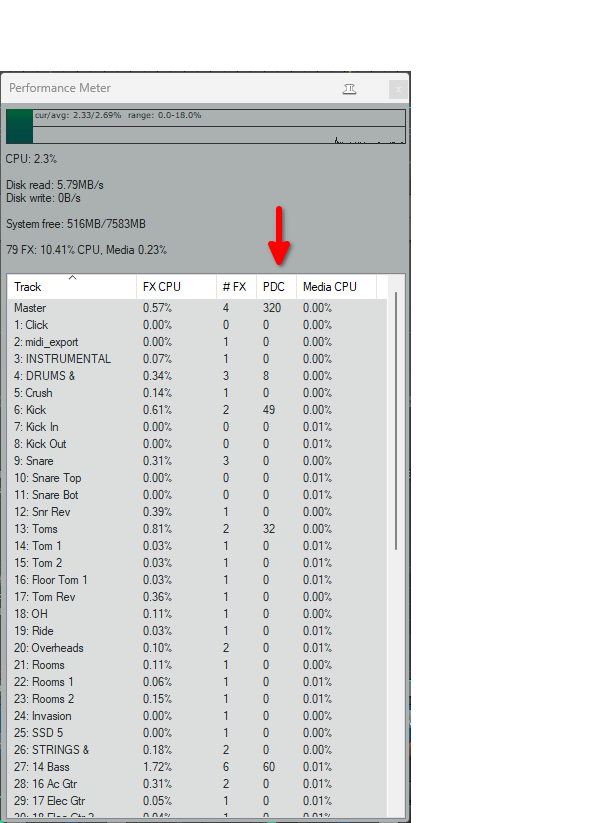
Then, make sure that the tracks that carry your audio, including your master track don’t have a PDC higher than your Buffer size, so if any one uses more than that, double click on the PDC value and that will open the track FX chain. In this case, it’s the Master track.
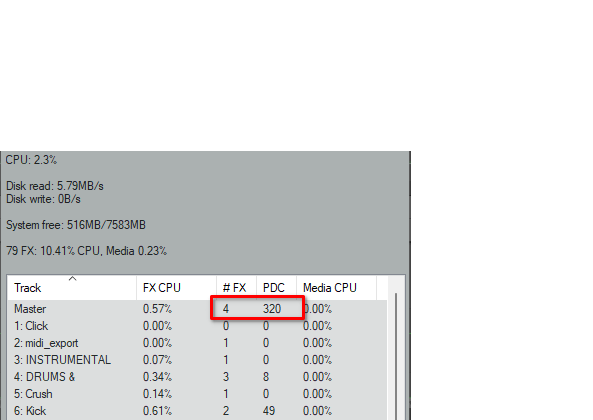
Here you will see on the bottom left, the delay compensation of the whole chain, the plugins that require it will show the PDC value as Plugin PDC / FX Chain PDC.

This means that the limiter is introducing 320 spls of latency and REAPER is compensating the whole FX chain with 512 spls
Knowing this, you can bypass the plug-ins that show any value higher than your buffer size, REAPER will update the FX chain PDC to the same value as your Audio driver buffer size or to 0 spls in the Performance meter.
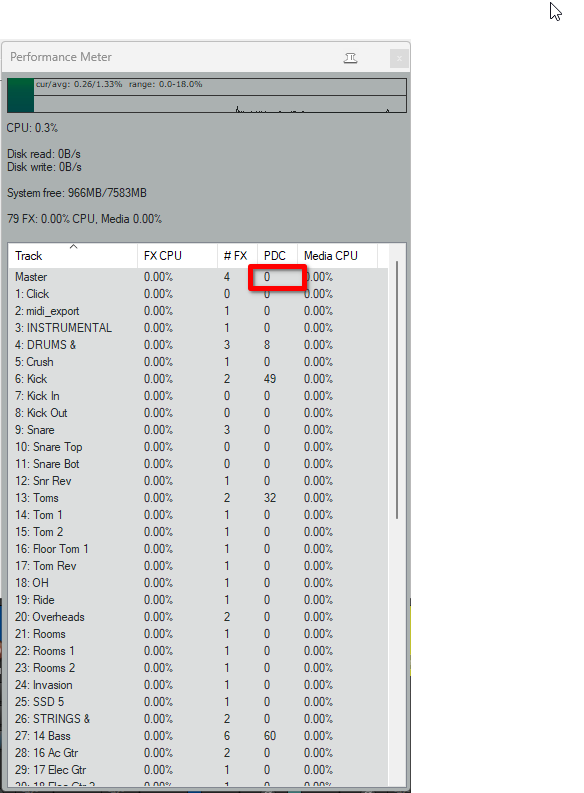
This will make it so that your system only has the latency that your Audio driver reports, which I showed in the previous section of this article.
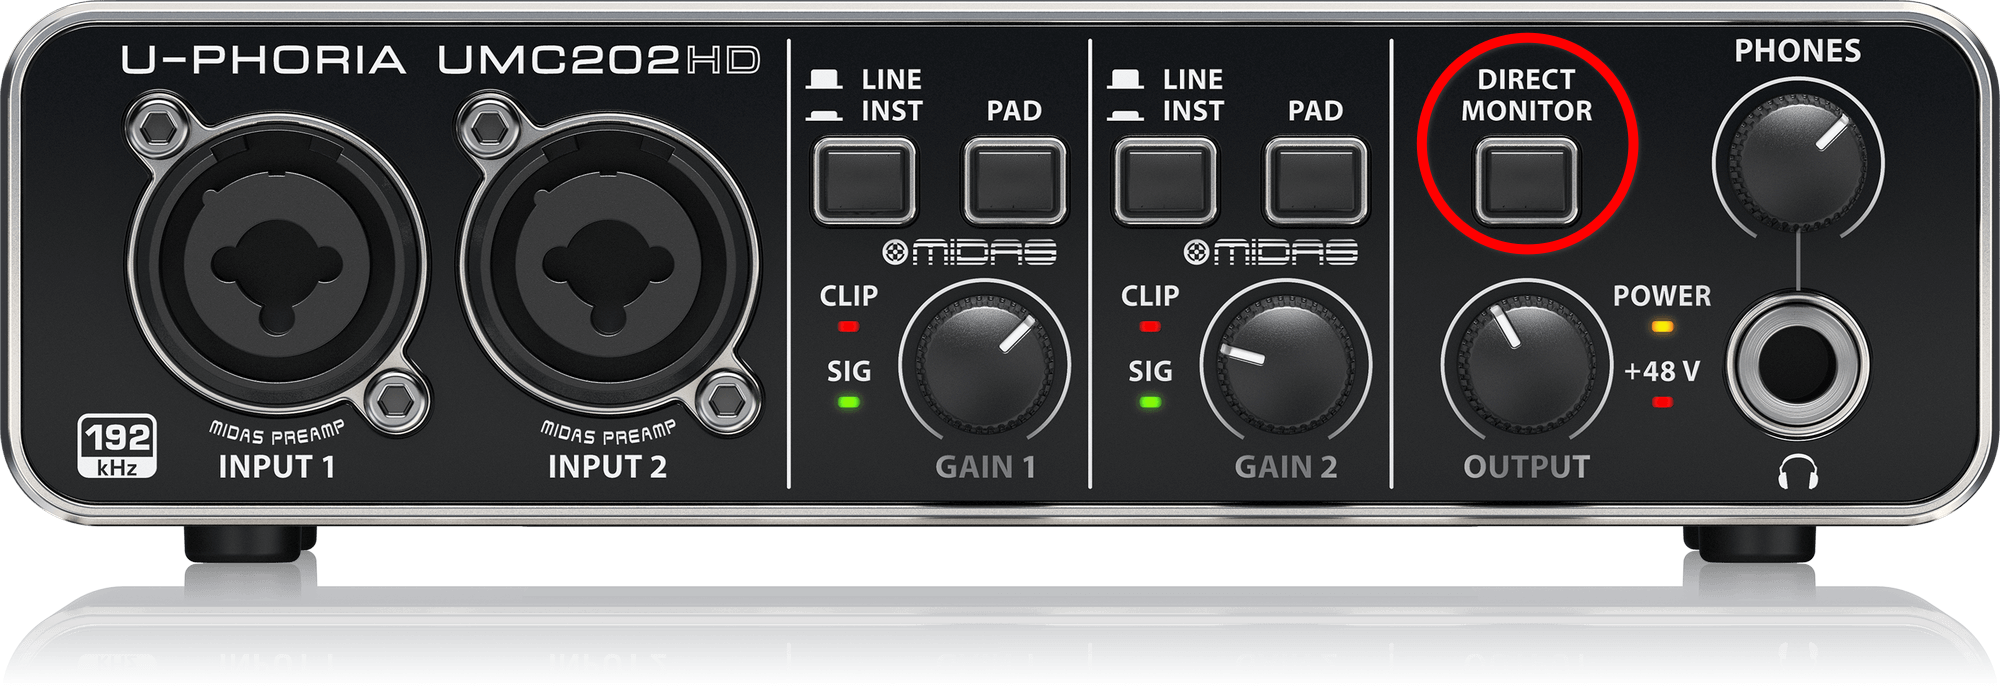
Use Direct Monitoring
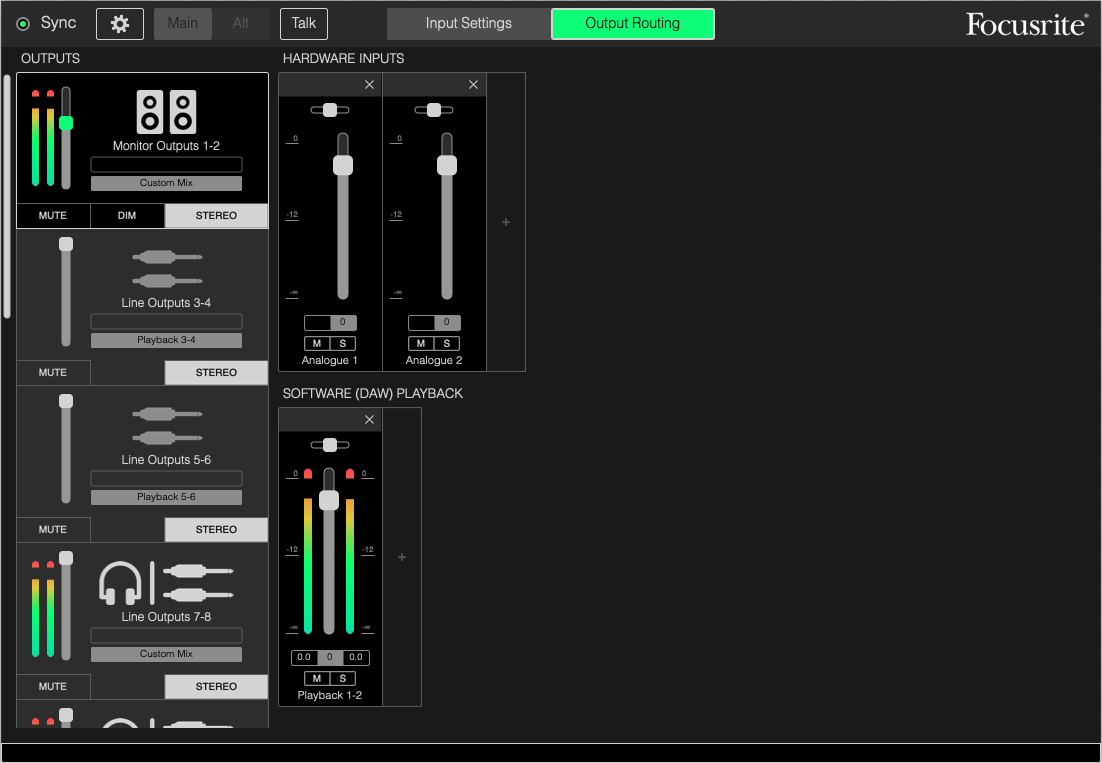
Most modern interfaces have something called Direct monitoring or, if they have more than two inputs and outputs, they come with a control software.
This allows you to bypass completely the digital path of the signal and hear through your monitor device exactly what’s coming into the interface. This effectively makes your latency 0 spls, but it also means that you will not be able to hear any processing you apply to the element you’re recording, at least until you’re playing it back. In this case you will have to check the manual of your interface to learn how to activate it and properly use it, and it may not be the best experience or the most adequate for all recording situations.
For example, if you’re recording electric distorted guitars through amp-sims, you may want to hear the distorted guitar, but with this method you will hear the raw guitar, which can be quite disorienting. EQ, compression, or reverb on vocals while recording is also out of the picture. I’d basically only use this method if any of the methods described above don’t work.
Conclusion
Latency can be a pain, but in the end it’s really not that hard to troubleshoot once you know what to look for. If you’ve ever found yourself in a situation where you don’t know why you’re hearing yourself “late” while recording, I hope this helped you understand and troubleshoot the most relevant parts of it and get on with your recording. If these steps don’t help, do not be afraid of asking in the REAPER facebook groups, I’m sure you will find someone that can help you. Keep this article in your favorites just in case, and happy recording!

- Mixing in REAPER [ULTIMATE Guide!] - September 18, 2023
- How to Record in REAPER (Guitar & Vocals) - August 2, 2023
- Writing MIDI Drums in REAPER - July 3, 2023

![Is REAPER a Good DAW? [Honest Opinion]](https://ProRec.com/wp-content/uploads/2022/09/image-271-180x180.png "Is REAPER a Good DAW? [Honest Opinion]")
