When working with mixing engineers and music producers, it is not uncommon to find them using the terms stems and trackouts interchangeably. There is, however, a difference between these two terms.
Stems refer to a group of sound elements, whether in a song or post-production project, that are exported as a stereo file. For example, grouping all the drum tracks in a song and exporting them as a single stereo file. Whereas the term Trackouts refers to mono files of each sound in a project. Sticking with the example of drums, an engineer exporting trackouts for drums would export the kick as its own track, the snare as a single track etc.
Recommended Read: Using Pro Tools Beat Detective [Full Tutorial]
Given the above distinction, it is considered a good practice to ask people to specify what they mean when they ask you to “send stems”.
In this article, I am going to detail how to export stems as well as trackouts.
How to Export Stems
As mentioned above, stems refer to stereo exports of groups of sounds that exist in a project. In order to export stems, engineers need to make use of Pro Tools Group function.
Placing sounds in groups allows engineers to solo these sounds all at the same time. Doing this enables us to quickly and easily export stems by bouncing the soloed groups.
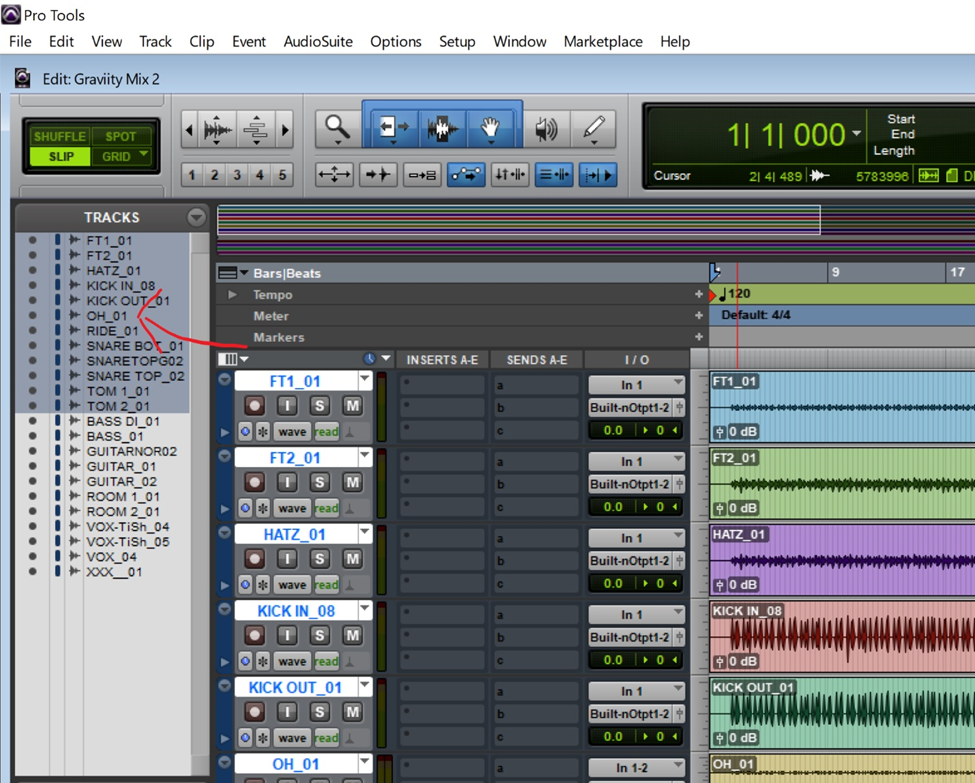
To group tracks, first select all the tracks that are supposed to be in that group. Holding shift + Control/command and clicking on the names of the tracks allows us to select multiple tracks at once.
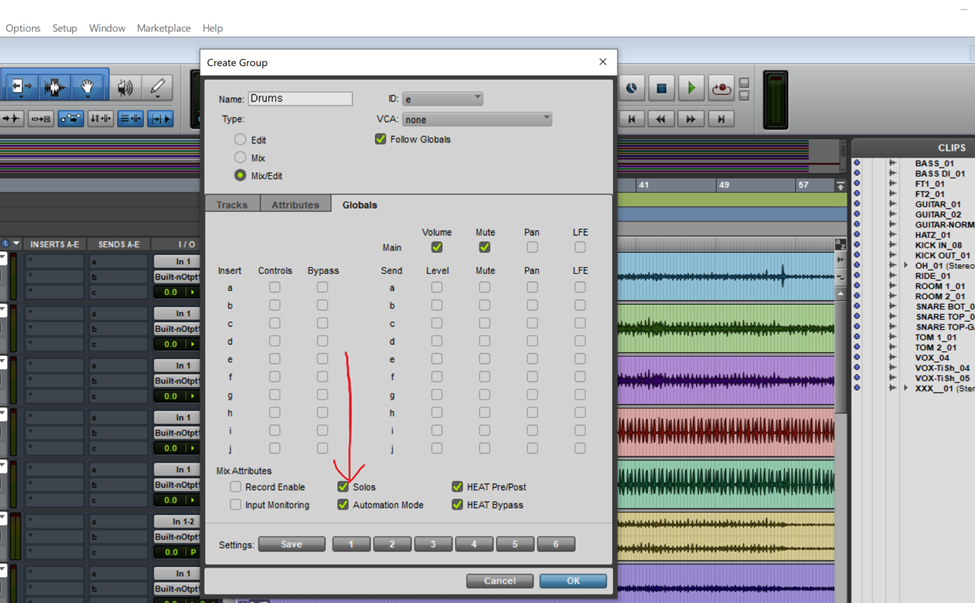
Next press Control/command + G to group the selected tracks. In the window that appears, scroll to the global tab and ensure that solo is selected. This will ensure that when the solo button is clicked on one of the tracks, the solo is applied to all the tracks in that group.
Recommended Read: How to Nudge in Pro Tools
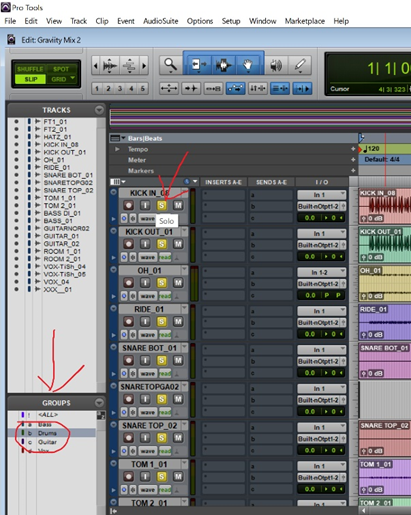
To export the stem of the desired group, select the group in the groups section in the playlist and press the solo button on one of the tracks.
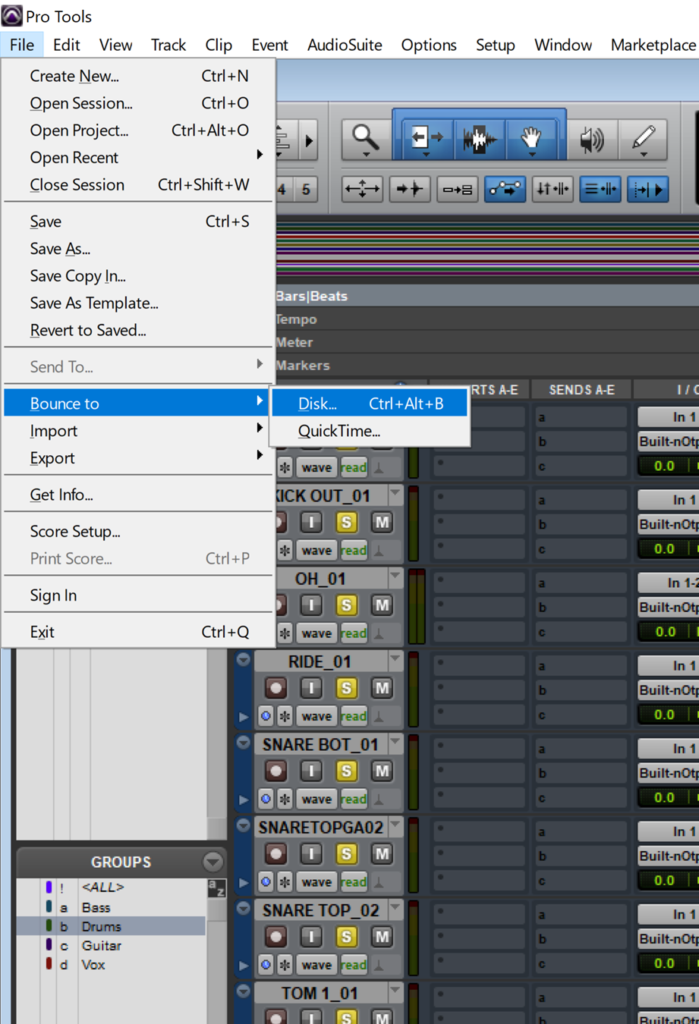
With the tracks in solo mode, open the File menu and scroll down to Bounce To. Select the Disk option.
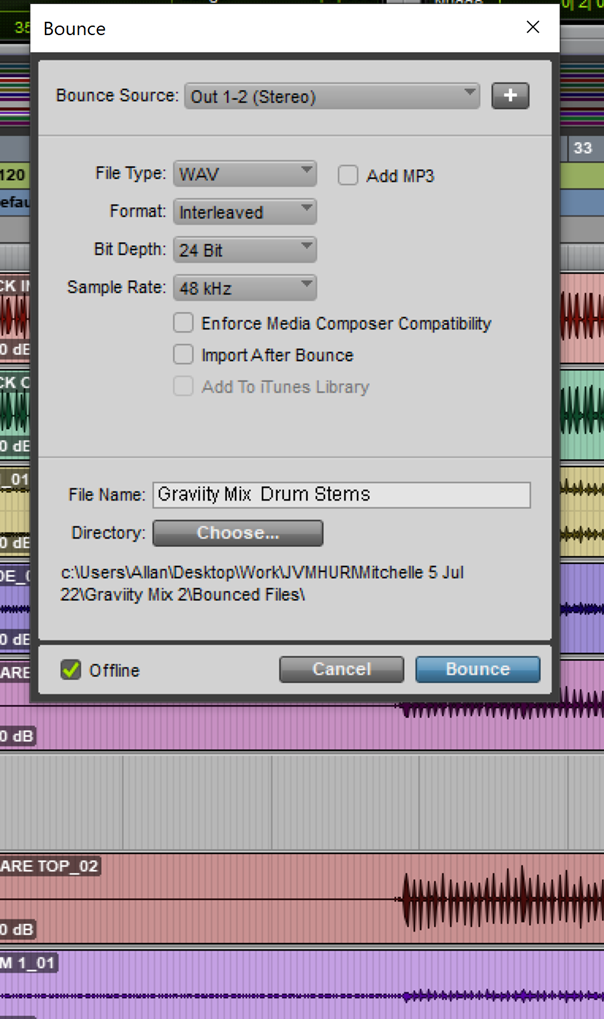
In the dialogue box that appears, appropriately title your file and ensure that:
- The File Type is set to WAV.
- Format is set to Interleaved
- Bit Depth and Sample Rate are set to 24 Bit and 48kHz respectively.
- Choose a directory where the bounced wav file will appear. By default, this will be set to the Bounced Files folder that is in your project folder.
How to Export Trackouts
A lot of the time when someone says to “send stems” what they are really asking for is the project Trackouts. This has come as a result of many people colloquially calling trackouts “stems”.
It is therefore advisable to ask for clarification whenever engineers are asked to send stems.
Before exporting trackouts, it is important to ensure two things:
- That the tracks are properly labelled. It is considered unprofessional to send trackouts labelled “Audio 1”, “Audio 2” etc. to an engineer. In fact, in many cases they will ask you to send them properly labelled files OR charge extra for “Session management”.
- The trackouts are sent as “Zero Point Files”. These are audio files that are all of the same length; having the same start and end points. To get files of this type simply consolidate the clips in your session.
Recommended Read: How to Normalize in Pro Tools
To export Trackouts
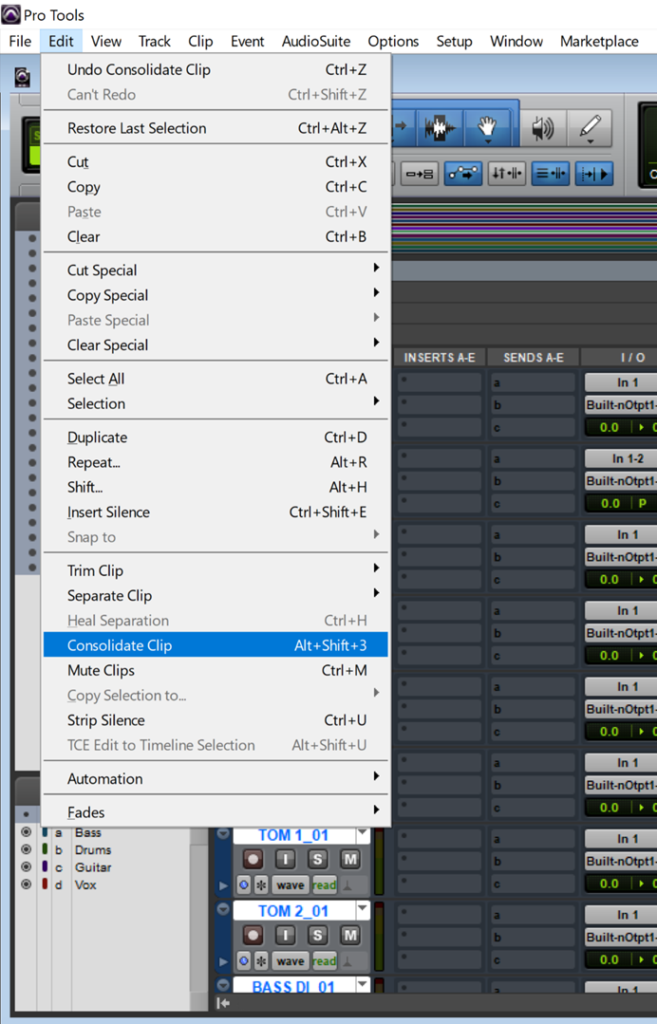
- Consolidate clips by first selecting the start and end points on the timeline ruler to determine the length of the tracks. Next select the “Consolidate clips” option under the Edit menu.
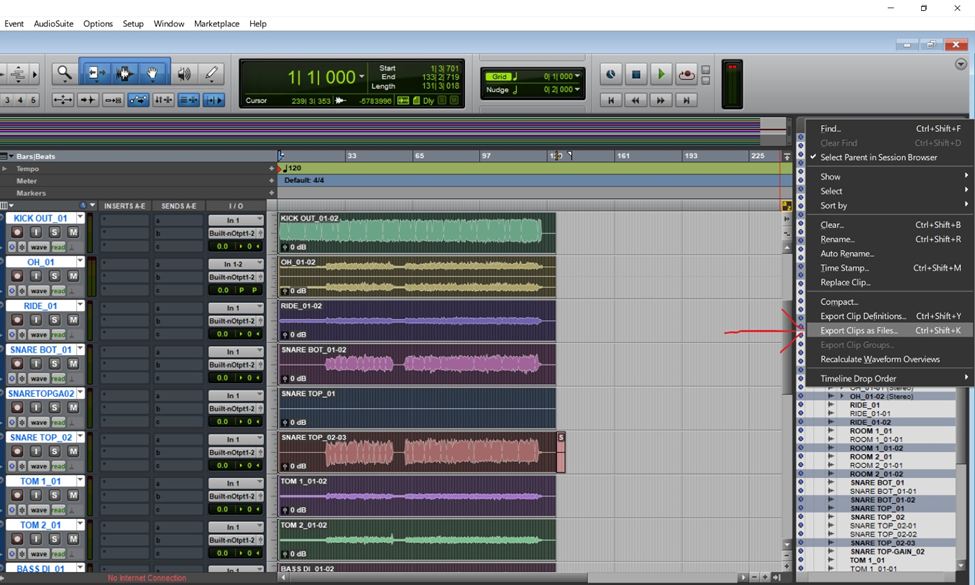
- With the clips selected in the clip list, use the keyboard shortcut Ctrl/command + Shift + K to export the clips as files. Alternatively, you can use the “Export Clips as files” option from the drop-down menu on the Clip list.
Best Practices When Sending Stems or Trackouts
The following are a few things to always remember when sending stems or trackouts
- Always label the tracks appropriately.
- Always ask whether to send the tracks dry or with effects and automations applied. Many engineers will ask for both “dry” and “wet” versions of the tracks.
- For music projects, always include the tempo of the track either in the folder name or in the mixing notes.
- Always label the folder appropriately. I use the naming convention {song title} {tempo} {genre}. For example, “Sinister 140bpm dark trap instrumental”.
- Always include a text or word document that contains mixing notes. These will serve as a list of guidelines for the engineer to follow.
Conclusion
In conclusion, we can see that there is a difference between stems and trackouts. It is always important to seek clarification when asked to send stems. It is also very important to properly label tracks and folders before sending them to other engineers or people you are collaborating with or when uploading them to websites.

- Pro Tools Won’t Play [No Playback FIXED] - April 16, 2023
- No Sound in Pro Tools [FIXED] - April 16, 2023
- Pro Tools Not Recognizing Audio Interface [FIXED] - February 4, 2023

")
![No Sound in Pro Tools [FIXED]](https://ProRec.com/wp-content/uploads/2022/06/Pro-Tools-180x180.png "No Sound in Pro Tools [FIXED]")
