Trimming audio is a common practice when editing audio files of all types. The procedure involves removing parts of the track where there are obvious errors or removing parts of the audio that you deem unnecessary in the final recording. You can also trim the audio so that it fits a particular desired time limit.
Trimming is one of the first exercises and lessons in editing audio files as an audio engineer. Having edited a number of audio files made me understand the essence of having been trained on it earlier on. It is a recurrent procedure that you will use time and again across most of your editing work.
Recommended Read: Convert Stereo to Mono, Mono to Stereo, and M4A to MP3 & Wav
If you’re trimming a song for example, then you should know that a beat is made up of groups of four to eight measures. You want to find places within your track where these cuts make sense in your song selection. For example, if you’re going to cut on the first beat of a chorus at the beginning of the song, then you can go ahead and cut it at the first beat of the chorus towards the end of the song. You need to keep the time signatures in mind.
Trimming is also a useful skill that is used in other complex edit acts such as rearranging a dialogue. For a podcast editor, it is a prerequisite skill used to remove long pauses between speech, repeated phrases, and unnecessary parts of your podcast audio file.
When trimming audio you are aiming for a polished final output that does not have an awkward transition. For instance, if someone cleared their throat in between speeches, you wouldn’t want that included in your final recording. When removing the throat-clearing part you want to have a final edit where the cough was perfectly removed and the words that come before and after are not affected.
General Trimming: The Process
To being the trimming process, go ahead and launch Audacity then import the file that you want to edit.
It’s a fairly simple process File > Import > Audio (then choose the file from your computer)
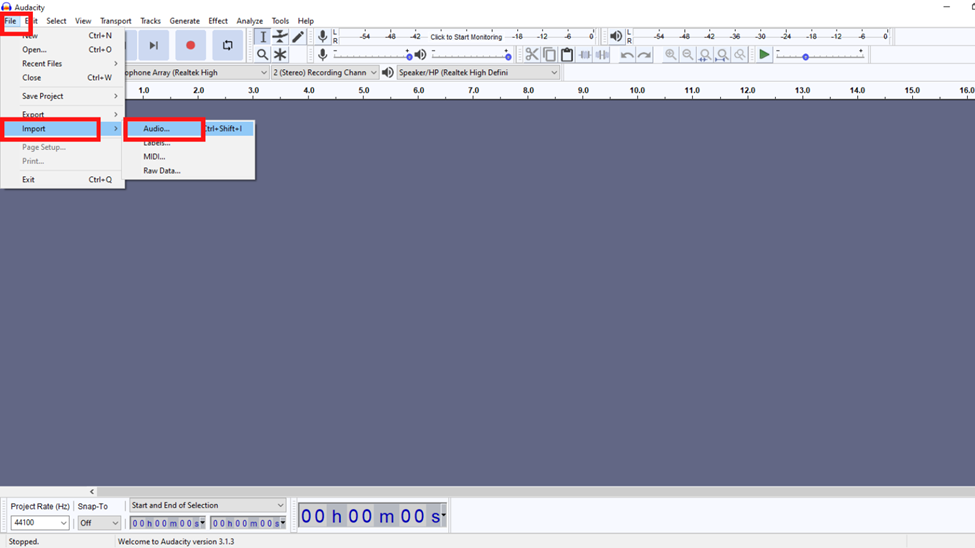
Alternatively, you may also use: Ctrl + Shift + I, to go ahead with the import. All throughout this article, there will be mentions of keyboard shortcuts for actions that will enable you to work faster and become more efficient.
Recommended Read: Audacity Did Not Recognize the Type of this File [SOLVED]
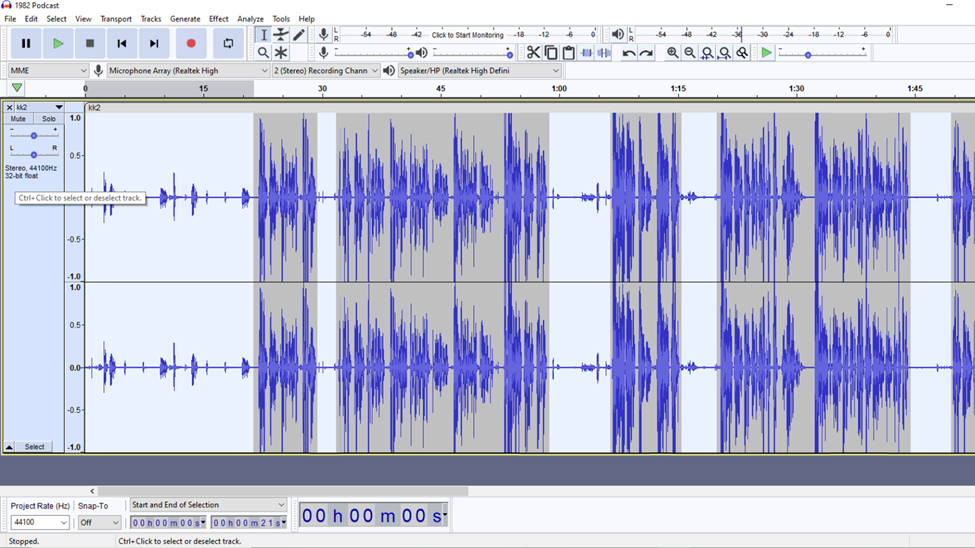
The screenshot below is my audio file.
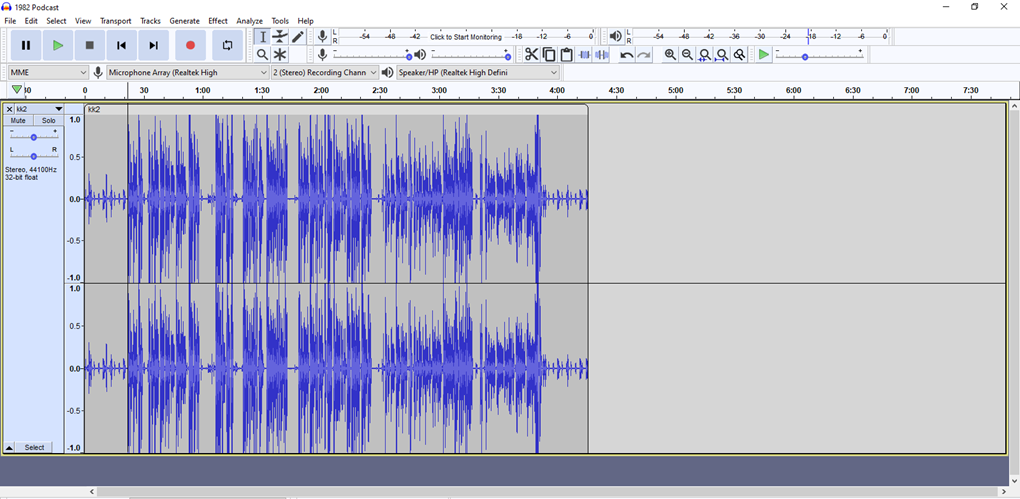
The audio is 4 minutes and 16 seconds long. For my speakers, they did not start talking till the 22nd second and at the end, they stopped recording at 3 minutes and 53 seconds. Therefore the audio parts before the 22nd second and the parts after 3:53 are unnecessary. In addition to these, there are also short pauses throughout the file which the article will highlight later.
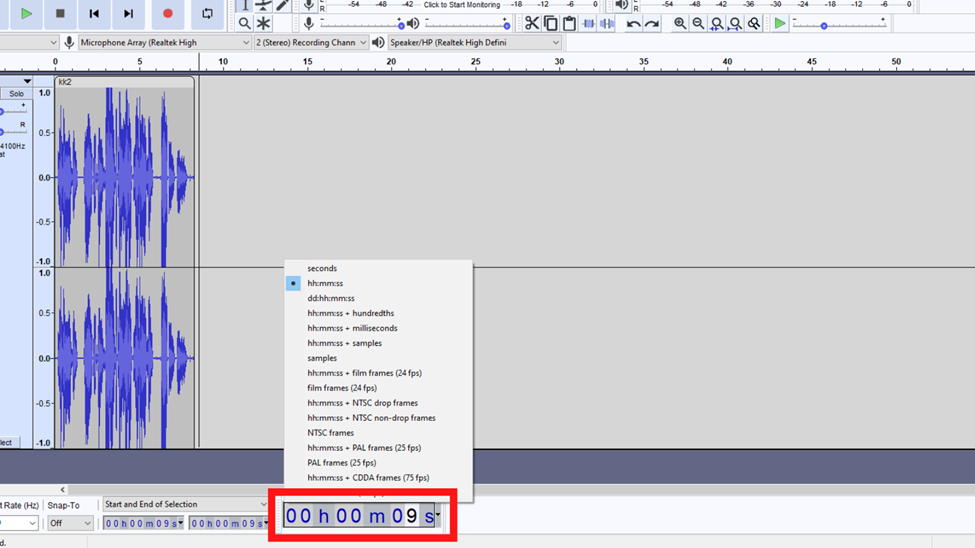
To get the timestamps (Timestamps are tags within a transcription that identify the exact point in an audio or video where the given text was spoken. Note that audacity does not support adding timestamps nor transcripts therefore a notebook will come in handy.), play the audio, and pause at the point the mistake starts and where it ends. You can write it down or take a mental note. Audacity eases this as it has a time indicator panel that shows the time.
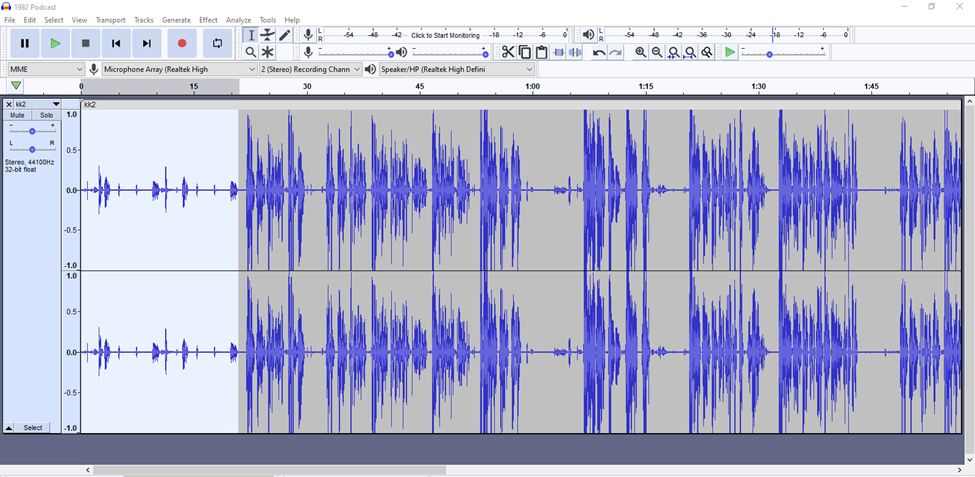
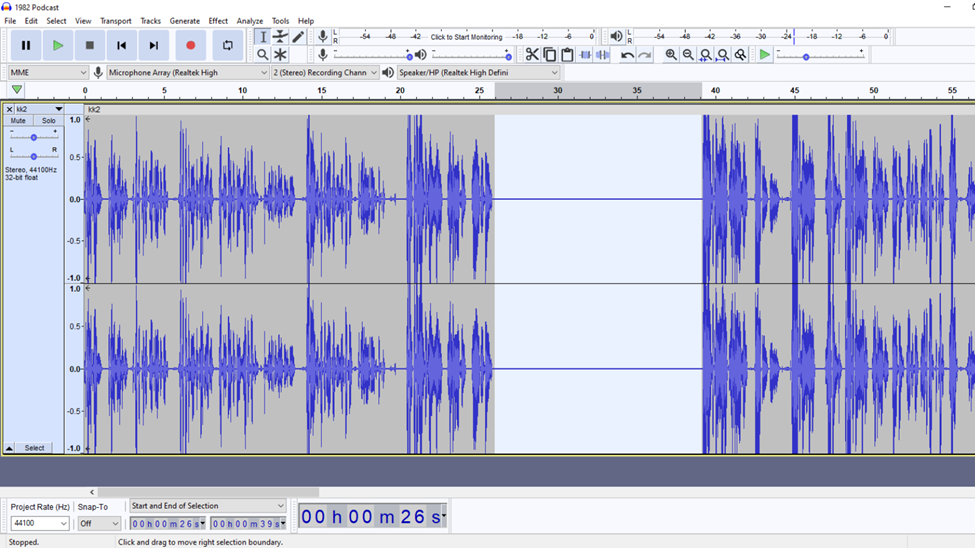
It is essential that you zoom in on the audio to see clearly the parts that you are selecting. Use the zoom tool highlighted in the image below or press Ctrl + 1. For experienced audio editors, it is easier to point out such parts of the audio by just looking at the waveform. With time you will be able to do this. Here is the zoomed-in file.

Right click and drag till you have selected the unwanted part. Here is the selected part.
Once the part has been selected you can remove it by either clicking backspace, delete, or using the shortcut Ctrl + K.
There are times that you will be looking at rearranging a piece of audio. For this file, it means removing the selected part and placing it in another part of the recording or even placing it in another audio file. In that case, go ahead and select the portion and then press Ctrl + X, which will cut the piece of the selected audio, followed by clicking where you want to have this selection fitted in, and then paste it there by pressing Ctrl + V.
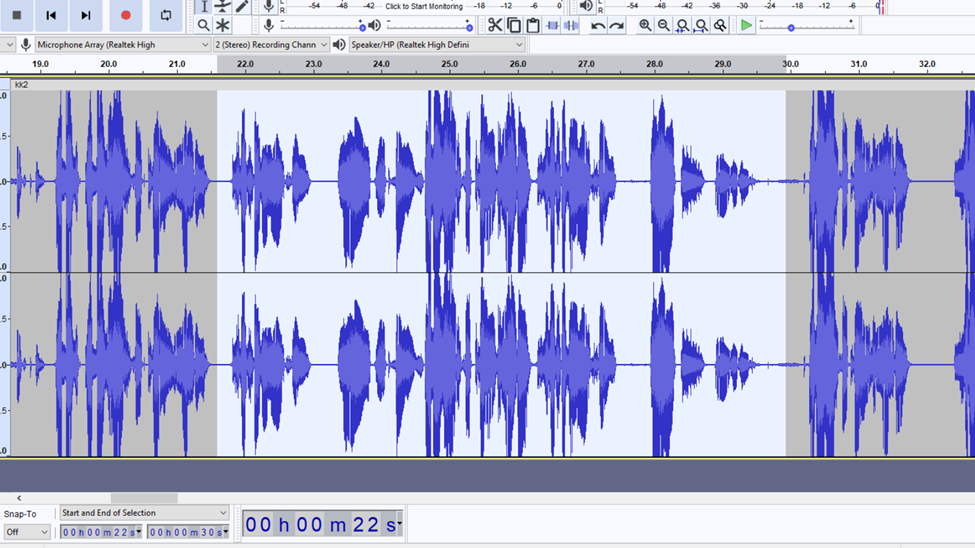
By looking at the images of my audio files you will notice a number of lengthy pauses that need to be trimmed out. Here is a selection of all of them.
Do repeat the process of trimming out in all the areas that you think need to be removed.
Note that it is important that you leave a bit of a “Breathing room” when trimming. This largely applies to pauses and it means leaving a bit of silence and not entirely removing the long pause. Here is an example of a lengthy pause.
Here is a side-to-side comparison of the audio file where A is a wrongly trimmed file and B we have the correctly edited file.
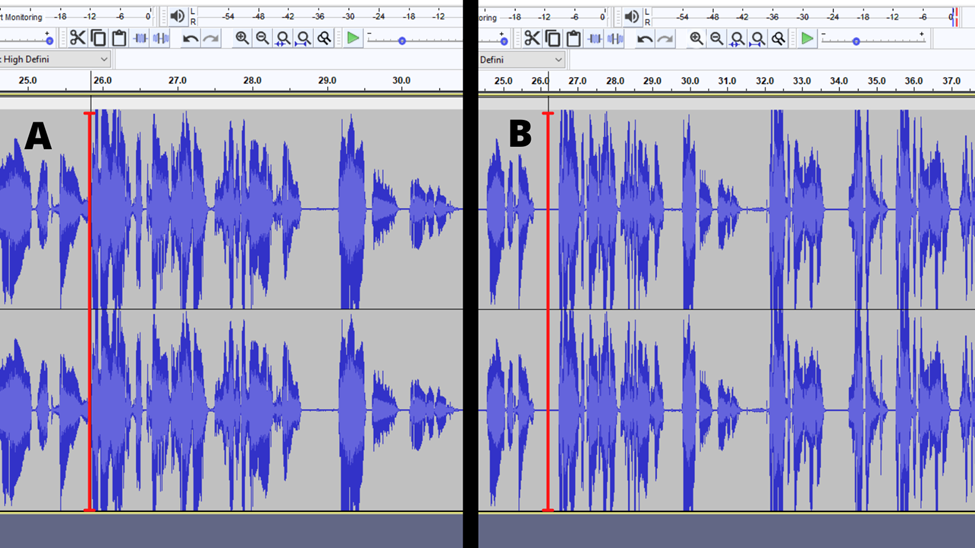
Note that this is not a standard procedure for trimming out as files vary from one to the other. You might be trimming out an unwanted word from a sentence therefore leaving a gap means that the flow of words will have an unnatural pause therefore in that case the “breathing space” ends up being unnecessary. On the other hand, the unnecessary part might fall in between two paragraphs or sentences hence a need for a brief silence.
Therefore when editing it is important to replay and listen to quick transitions otherwise known as tight edits or unnatural pauses once you are done with trimming.
Trimming Function In Audacity
The process described above is a general or a layman’s approach to trimming an audio file. It is common as editors are mostly looking at removing several unnecessary parts.
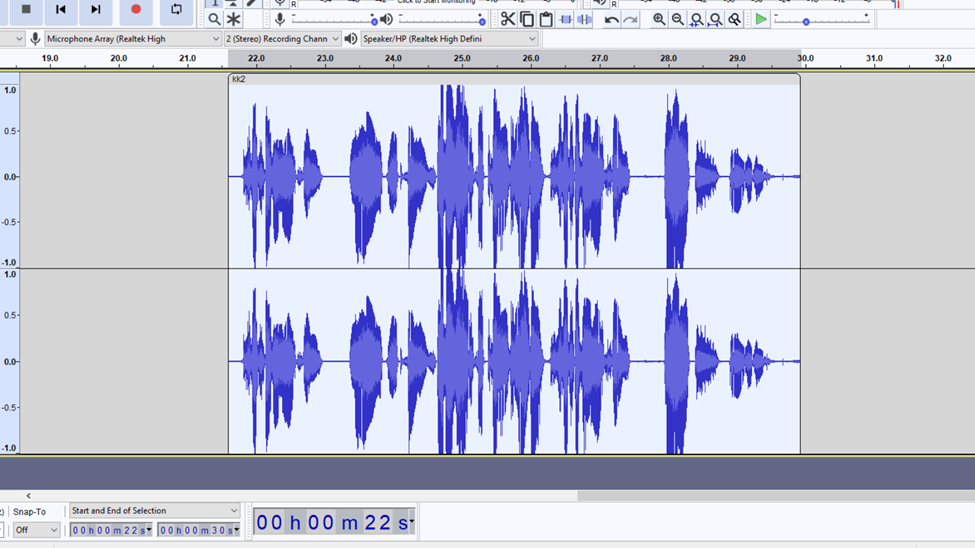
In audacity, there is a function that removes all the audio apart from the piece of the audio selected. This is the trim function. Let’s say you recorded 10 minutes of audio and you realize that the only part that you need is from the 4th minute till the 7th minute.
To trim this select the file from the 4th minute till the 7th minute. The selection will look like this.
Click on edit, then remove special. Under remove special there is a Trim Audio option. Click on that.
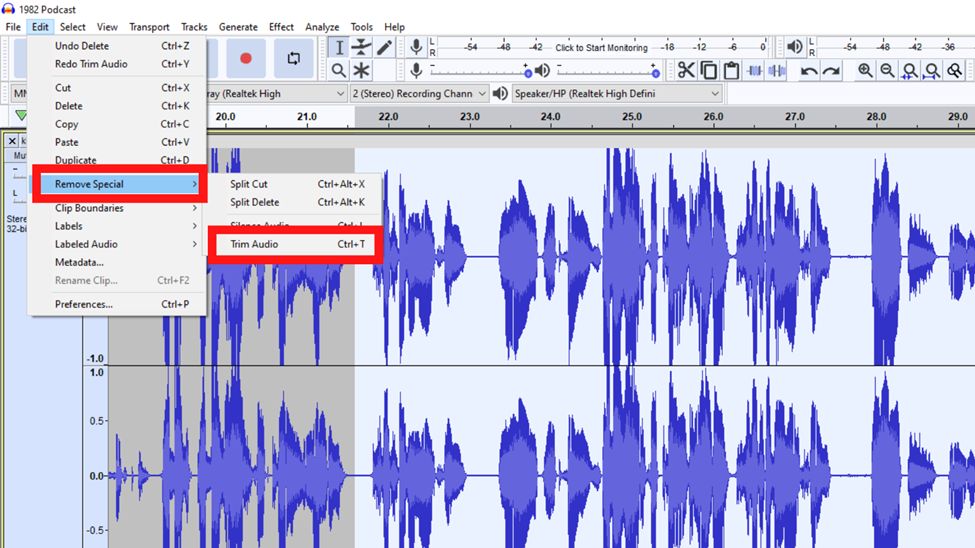
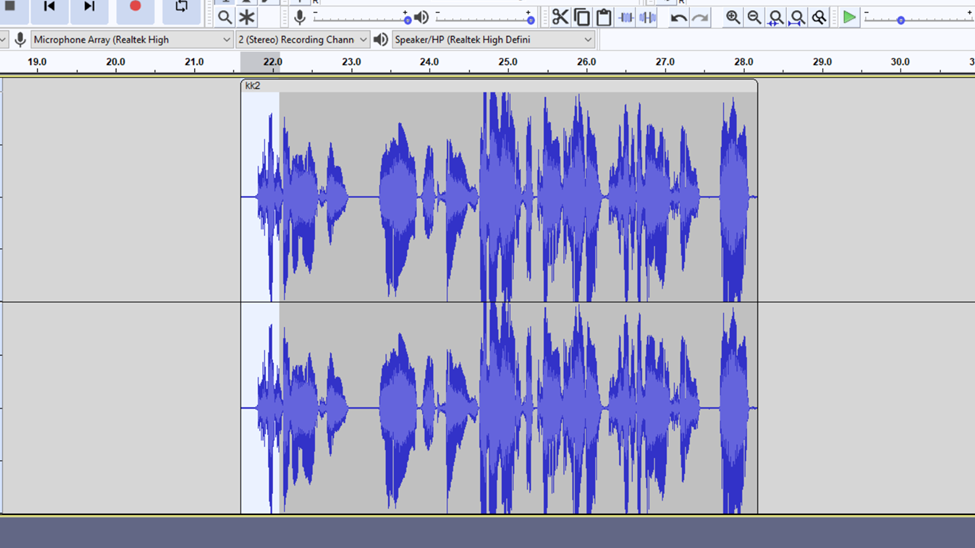
Once you click on trim audio the unselected part of your audio will be removed just like this.
Or once you have selected the audio file click on Ctrl + T. These are the shortcut keys to trimming audio.
After you are done drag the audio file so that it starts playing at 0.
Final touch – Fading in/out Audio
After trimming there is an integral thing to be done. This is fading in and out of the audio file. What this does is ensure your audio has a seamless intro and outro.
Select a part from the start of the audio file.
Click on effects and scroll down and click on the fade-in option from the dropdown menu.
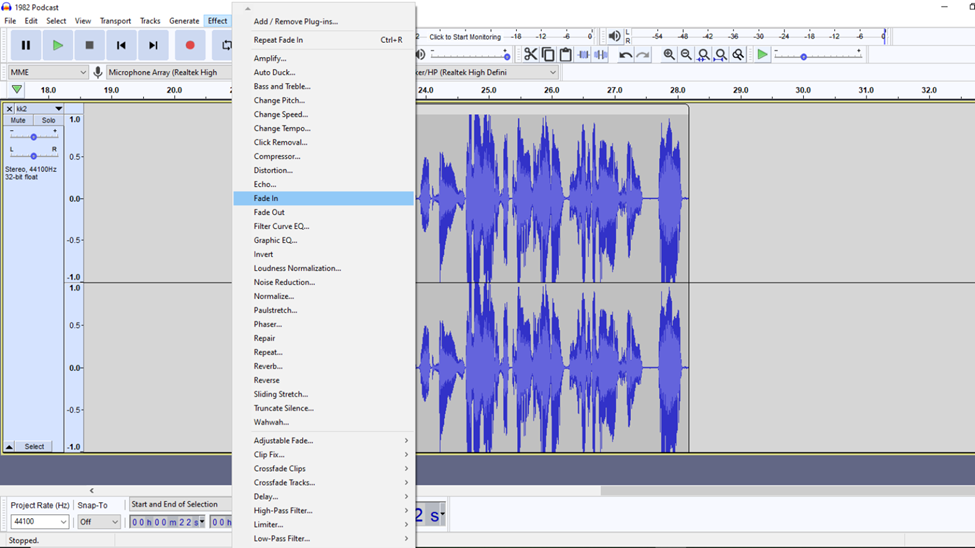
Repeat the process for the ending part and you will have an audio file whose level gradually increases when it starts playing and the level gradually decreases as it ends.
Conclusion
There you have it. A basic skill that you will find useful and recurrent when audio editing. Audacity is a free and open-source digital audio editor hence it is common for those starting audio editing. Hopefully, you have found this tutorial as straightforward as I intended it to be! Be on the look out for a description of the similar process in adobe audition which provides more sophistication and additional tools for audio trimming.


